Tag: experiences

  • Hakone Ropeway Guide – Kanagawa 2026

    Hakone Ropeway Guide – Kanagawa 2026

    Hakone Ropeway Guide – Kanagawa 2026

    Overview

    Quick Links

    Planning a visit to experience Hakone Ropeway Guide – Kanagawa 2026 in Kanagawa? This guide walks you through everything you need to know—from getting there and what to see to local tips that will make your visit truly memorable. Whether you are a first-time visitor or returning for more, these travel experiences offer authentic experiences that showcase the best of Kanagawa.

    📍 Location


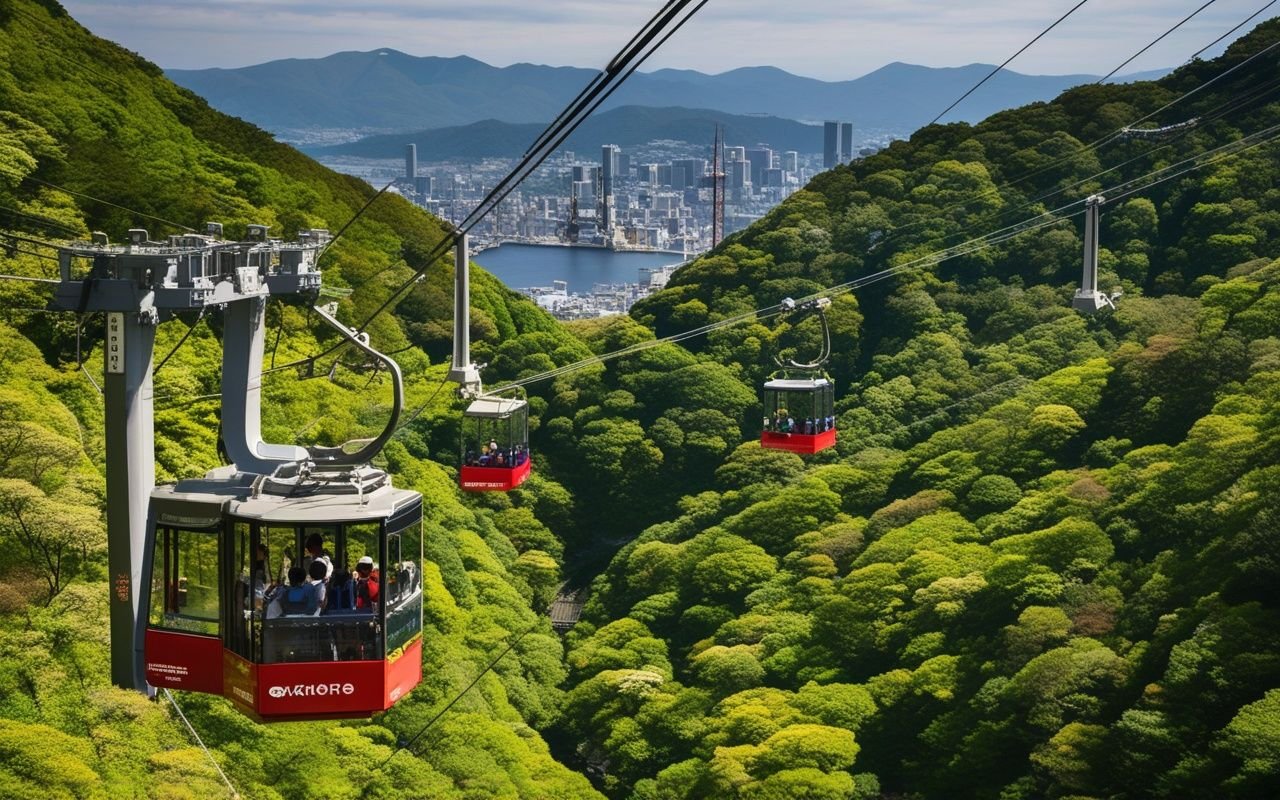
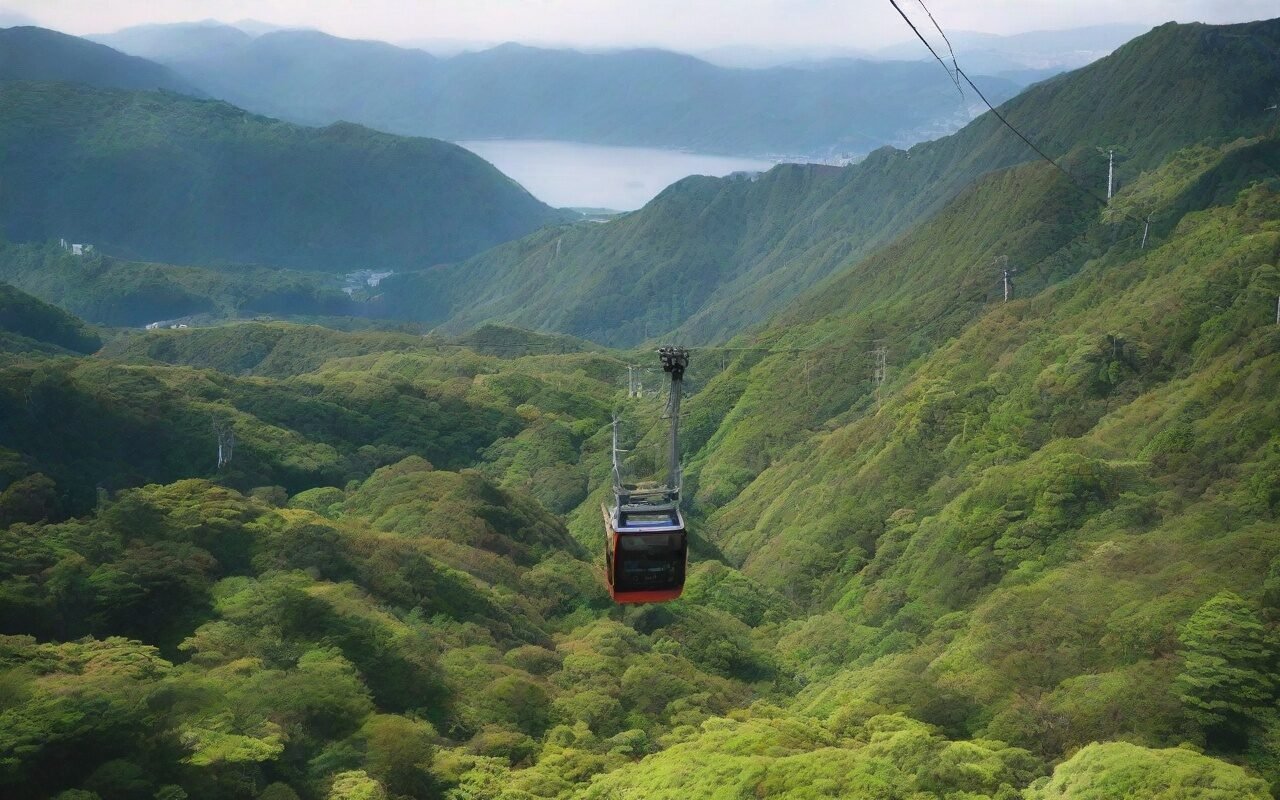
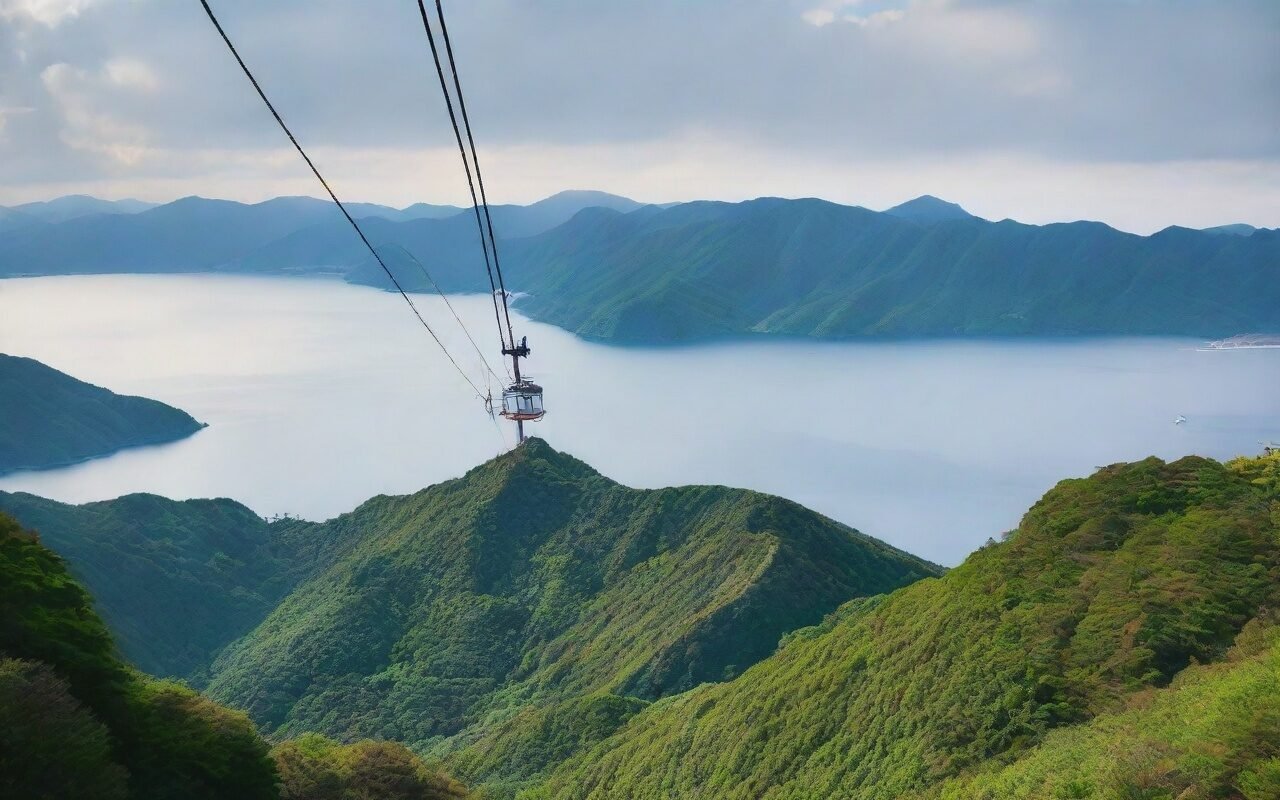
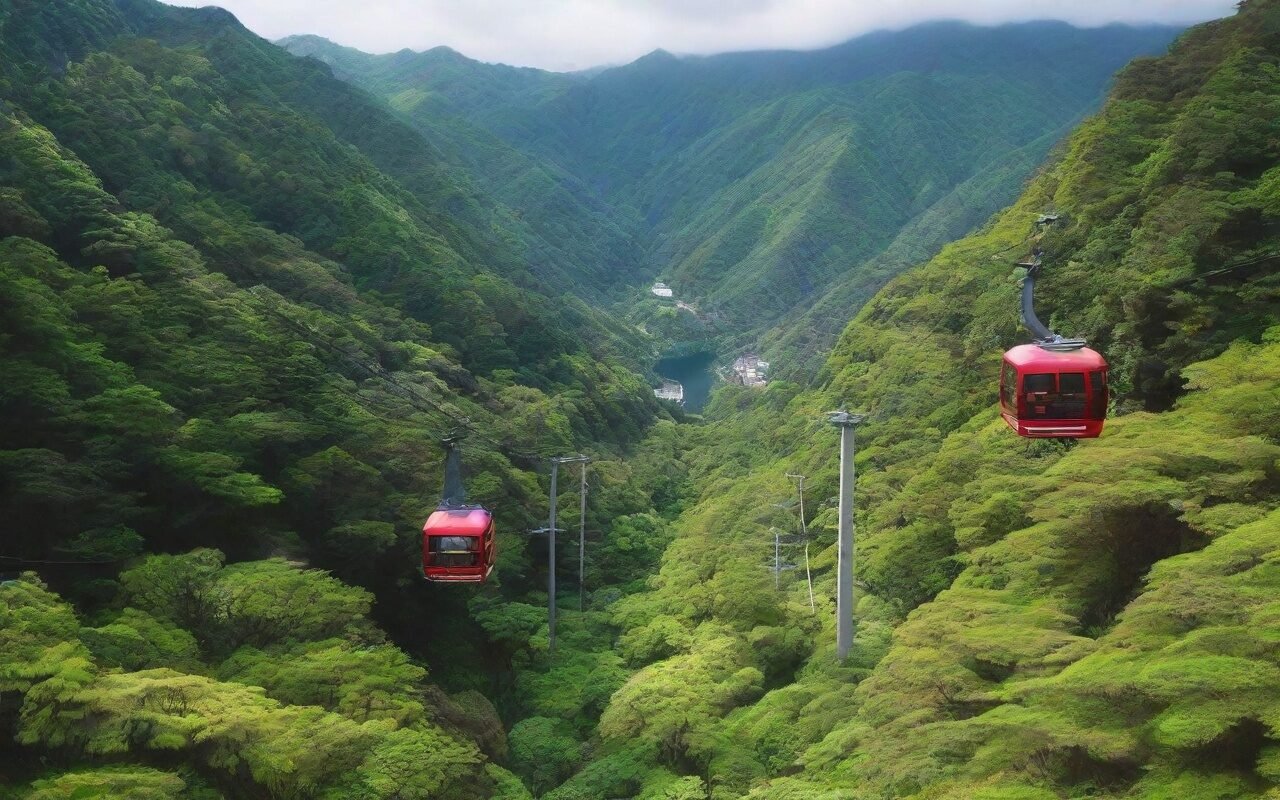
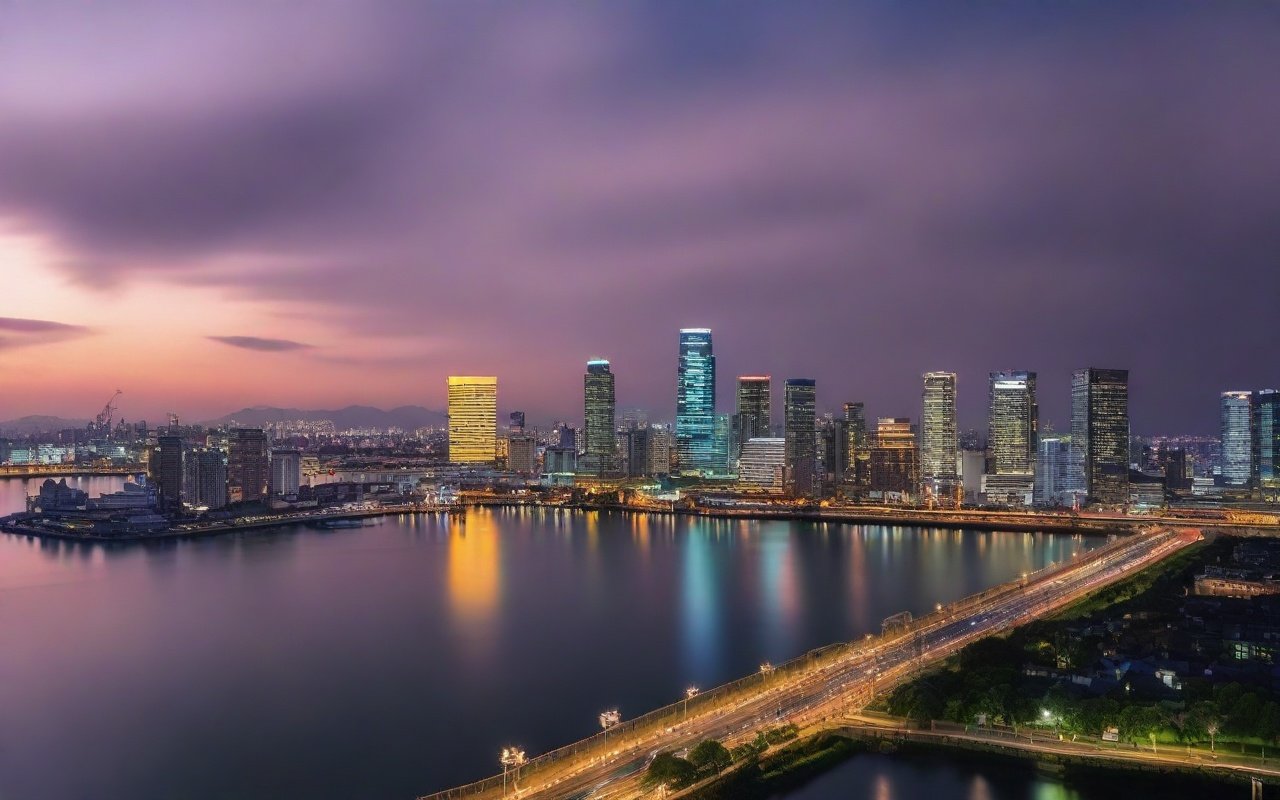
    Spectacular ropeway ride with panoramic views of Mount Fuji and Lake Ashi

    Hakone Ropeway Guide - Kanagawa 2026 — Location


    Introduction

    Hakone Ropeway Guide - Kanagawa 2026 — Introduction

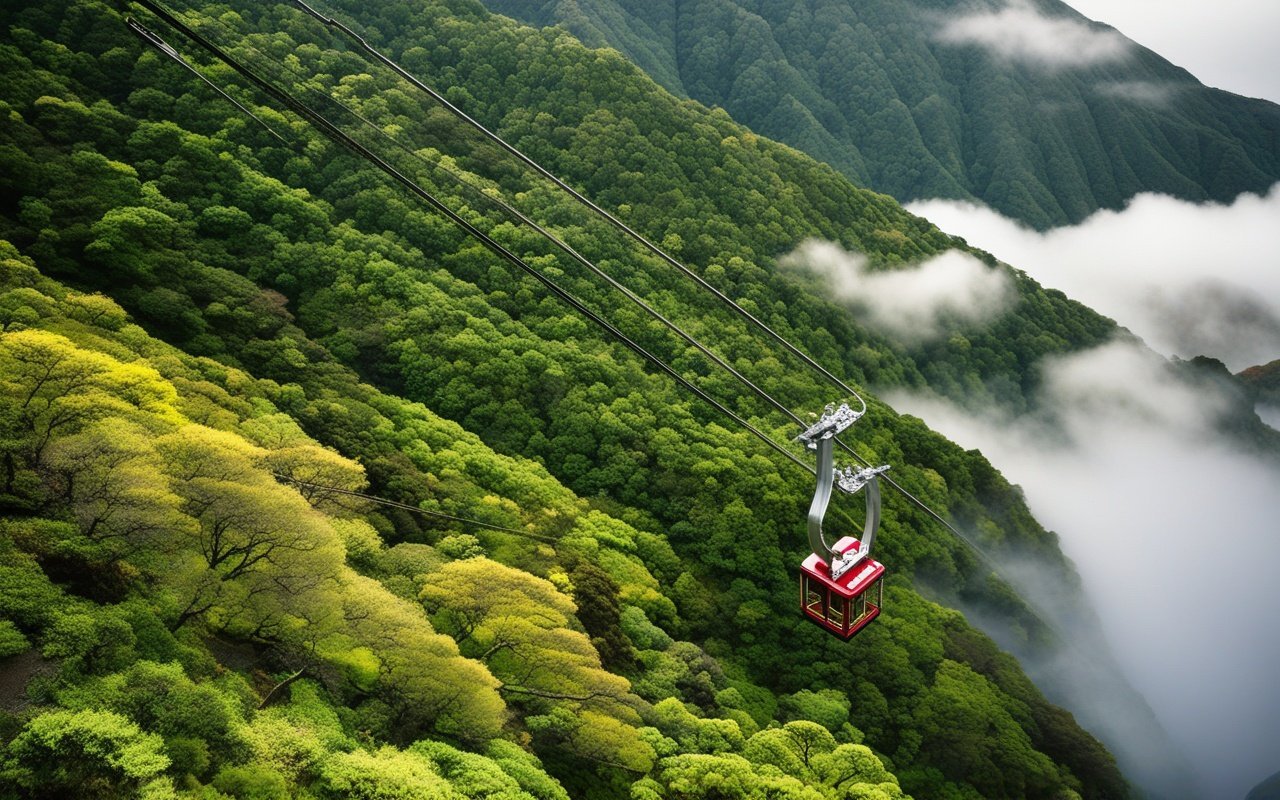
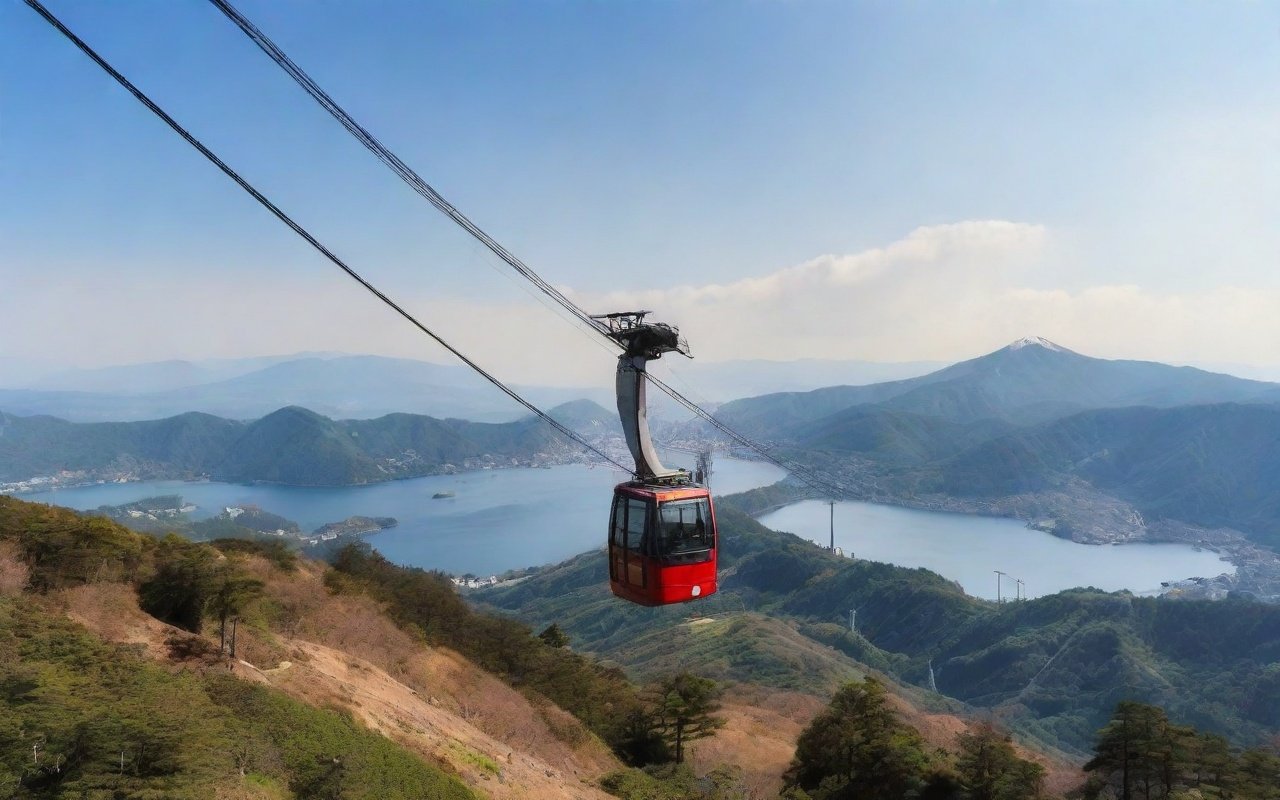
    The Hakone Ropeway is one of Japan’s most scenic cable car journeys, offering stunning panoramas of Mount Fuji, volcanic valleys, and Lake Ashi. This 4-kilometer journey connects Sounzan to Togendai in 30 minutes.

    Highlights:

    • Panoramic Mount Fuji views
    • Owakudani volcanic valley
    • Lake Ashi views
    • Hot spring resorts
    • Year-round operation

    Stations

    1. Sounzan (1,116m) – Connection to Hakone Tozan Cable Car
    2. Owakudani (1,044m) – Volcanic valley, black eggs
    3. Ubako (864m) – Lake views
    4. Togendai (752m) – Lake Ashi port

    Journey Time

    • Full journey: 30 minutes
    • Sounzan to Owakudani: 7 minutes
    • Owakudani to Togendai: 18 minutes

    Owakudani Valley

    Features:

    Mount Fuji Views

    Best viewing:

    • Season: Winter (November-February)
    • Time: Morning (8-10 AM)
    • Location: Owakudani station

    Lake Ashi Views

    Best spots:

    • Ubako station
    • Togendai station
    • Clear days: See across the lake

    Admission

    Type Adult Child
    One-way ¥1,630 ¥820
    Round-trip ¥2,890 ¥1,450

    Discounts:

    Hours

    Season Hours
    Spring/Summer 7:30 AM – 5:00 PM
    Autumn/Winter 7:30 AM – 4:30 PM

    Note: May close due to weather


    To Sounzan Station

    From Hakone-Yumoto:

    1. Hakone Tozan Railway to Gora (40 min)
    2. Cable Car to Sounzan (10 min) From Tokyo:
    3. Romancecar to Hakone-Yumoto (85 min)
    4. Transfer to Sounzan (50 min)

    Seasonal Guide: When to Ride

    Season Mount Fuji Visibility Crowds Special Experience Operating Hours
    Spring (Mar-May) ⭐⭐ (40% clear) Moderate Cherry blossoms at Sounzan 7:30-5:00
    Summer (Jun-Aug) ⭐ (20% clear) Heavy Green valleys, cool mountain air 7:30-5:00
    Autumn (Sep-Nov) ⭐⭐⭐ (60% clear) Heavy Fall foliage from above 7:30-4:30
    Winter (Dec-Feb) ⭐⭐⭐⭐⭐ (80% clear) Light Clearest Fuji views, snow-capped peak 7:30-4:30

    For Mount Fuji Views

    Best: Winter (December-February)

    • Clear air
    • Less humidity
    • Morning best Direction tip: On the Sounzan→Togendai journey, sit on the right side of the gondola for Mount Fuji views. On the return journey (Togendai→Sounzan), sit on the left side.

    Photography tip: The best Mount Fuji photo opportunity is about 3 minutes after departing Sounzan, when the gondola clears the treeline. Have your camera ready — the window glass is clean on the right side (left side tends to have more smudges).

    For Fall Foliage

    Best: Late October-November

    • Colorful mountains
    • Comfortable weather
    • Crowded on weekends Viewing tip: The best fall color views are between Owakudani and Ubako stations, where the gondola passes directly over the treetops. Mid-November is typically peak color.

    For Cherry Blossoms

    Best: Late March-early April

    • Spring flowers
    • Mild weather
    • Crowded during Golden Week

    Ropeway Alternatives (When Closed)

    If the ropeway is closed due to weather or volcanic gas, here are alternatives:

    Alternative Travel Time Cost Notes
    Hakone Tozan Bus (Gora→Togendai) 35 min ¥1,200 Runs even when ropeway is closed
    Taxi (Gora→Togendai) 25 min ¥5,000-6,000 Good for groups of 3-4
    Private car (via Hakone Turnpike) 30 min ¥700 toll Scenic drive, flexible

    Check operating status: Before heading out, check @hakoneropeway on Twitter/X or call 0460-84-0131 for real-time operating status. The ropeway’s official website also shows a live operating status.

    Full-Day Ropeway Itinerary

    Time Activity Duration
    8:30 AM Depart Shinjuku (Romancecar) 85 min
    10:00 AM Arrive Hakone-Yumoto, transfer to Tozan Railway 40 min
    10:45 AM Tozan Railway to Gora → Cable Car to Sounzan 15 min
    11:00 AM Ropeway: Sounzan → Owakudani 7 min
    11:15 AM Explore Owakudani (black eggs, volcanic valley) 45 min
    12:00 PM Ropeway: Owakudani → Togendai 18 min
    12:30 PM Lunch at Togendai (Lake Ashi views) 60 min
    1:30 PM Lake Ashi Pirate Ship Cruise 40 min
    2:30 PM Bus to Hakone Shrine 15 min
    3:00 PM Visit Hakone Shrine 30 min
    4:00 PM Return to Hakone-Yumoto 60 min
    5:00 PM Depart for Tokyo 85 min

    Budget: ¥6,000-8,000 per person (including Romancecar, ropeway, and lunch)

    Hakone Ropeway Guide scenery and attractions


    Summary

    Hakone Ropeway Guide - Kanagawa 2026 — Summary

    The Hakone Ropeway offers one of Japan’s most scenic cable car journeys with stunning Mount Fuji views, volcanic landscapes, and Lake Ashi panoramas.

    Key highlights:

    • 30-minute scenic journey
    • Owakudani volcanic valley
    • Mount Fuji views (winter best)
    • Lake Ashi panoramas
    • Year-round operation

    Is it covered by Hakone Free Pass?

    A. Yes, fully covered.

    Does it operate in bad weather?

    A. May close due to strong winds or heavy snow.

    Can I get off at intermediate stations?

    A. Yes, with round-trip ticket.


    Last Updated: March (this year)
    Written by: Anaba OffJapan Editorial Team


    Anaba OffJapan – Avoid the Crowds, Go Deeper into Japan.

    🚡 Tips for First-Time Ropeway Riders

    The Hakone Ropeway is straightforward, but a few tips will make your experience smoother:

    Boarding Strategy

    • Sounzan direction: Board on the right side for Mount Fuji views (morning)
    • Togendai direction: Board on the left side for the best valley views
    • Best cabin position: Stand near the front window for unobstructed photos
    • Off-peak hours: 10:30 AM – 12:30 PM has the shortest queues on weekdays

    Weather Considerations

    The ropeway is sensitive to weather. Before heading out, check the official Hakone Ropeway Twitter/X account (@hakoneropeway) for real-time operating status. The ropeway often closes during:

    • Strong winds (over 15 m/s)
    • Heavy snowfall
    • Volcanic gas alerts from Owakudani

    Backup plan: If the ropeway is closed, you can take the Hakone Tozan Bus from Gora to Togendai (35 minutes, ¥1,200).

    What to Eat Along the Way

    Don’t miss the famous kuro-tamago (black eggs) at Owakudani — hard-boiled eggs cooked in the volcanic hot springs. The sulfur turns the shells black. They’re said to extend your life by 7 years each.

    • Price: ¥500 for 5 eggs
    • Best enjoyed: Fresh, with salt
    • Where to buy: Owakudani Station shop

    Other snacks available at Owakudani:

    • Sulfur-scented steamed buns (manju) — ¥300
    • Black sesame soft cream — ¥400
    • Volcanic rock salt (souvenir) — ¥600

    Frequently Asked Questions

    Q: When should I visit for the best weather?
    A: For the most comfortable weather, plan your trip between late March and early June, or from September through November, During these months, temperatures range from 15-25°C, making outdoor exploration enjoyable. Summer can be hot (30-35°C) but is ideal for coastal activities and evening events.

    Q: Is this destination easy to reach by public transport?
    A:
    Yes. Kanagawa has excellent public transport connections from Tokyo. Most destinations are within an hour by train. The nearest station is typically a short walk or bus ride from the main attractions. For detailed route information, check the transport section above.

    Q: Is this destination manageable as a day trip from Tokyo?
    A: Yes, all destinations in this guide work well as day trips. Plan to arrive by late morning to see the main highlights. For a relaxed pace including lunch and optional detours, allow 6-8 hours. If you have more time, extending your stay overnight lets you explore at a leisurely pace and enjoy evening attractions.

    Q: Do I need any special skills or equipment to enjoy this destination?
    A:
    Most attractions in this guide are accessible to visitors of all backgrounds and fitness levels. Well-maintained paths, clear signage, and English information make navigation easy. For activities requiring specific gear (hiking shoes, swimwear, etc.), recommendations are included in the relevant sections above.

    Hakone Ropeway Guide – Kanagawa 2026 provides everything you need to make your Kanagawa trip smooth and enjoyable. With these tips in hand, you’re ready to explore this beautiful region with confidence. Safe travels!


    What Locals Say

    We spoke with residents and frequent visitors to get their honest opinions about Hakone Ropeway Guide: Complete Cable Car Experience:

    Tanaka-san, Local Resident (15 years):

    “This place has been part of our community for generations. The best time to visit is early morning when the crowds are thin and the light is perfect for photography. Don’t miss the hidden spots that most tourists overlook.”

    Yamamoto-san, Tour Guide (10 years experience):

    “I bring visitors here regularly. The key to enjoying Hakone Ropeway Guide: Complete Cable Car Experience is to take your time. Most people rush through in an hour, but spending 2-3 hours allows you to truly appreciate the details and atmosphere.”

    Suzuki-san, Photographer:

    “For the best photos, visit during golden hour. The way the light hits [the main feature] creates magical moments. Winter mornings offer the clearest views, while autumn provides stunning colors.”

    Conclusion

    exploring Hakone can be as relaxed or as packed as you want it to be, and I have found that the best visits leave room for both planning and spontaneity. During my visit to Hakone I went with a rough plan and found that leaving room to wander made the trip far more memorable. Use this guide to sort out the logistics in advance, then let the day surprise you — Kanagawa rewards travelers who stay curious.
  • Shonan Sunset Spots Guide 2026

    Shonan Sunset Spots Guide 2026

    Shonan Sunset Spots Guide 2026

    Overview

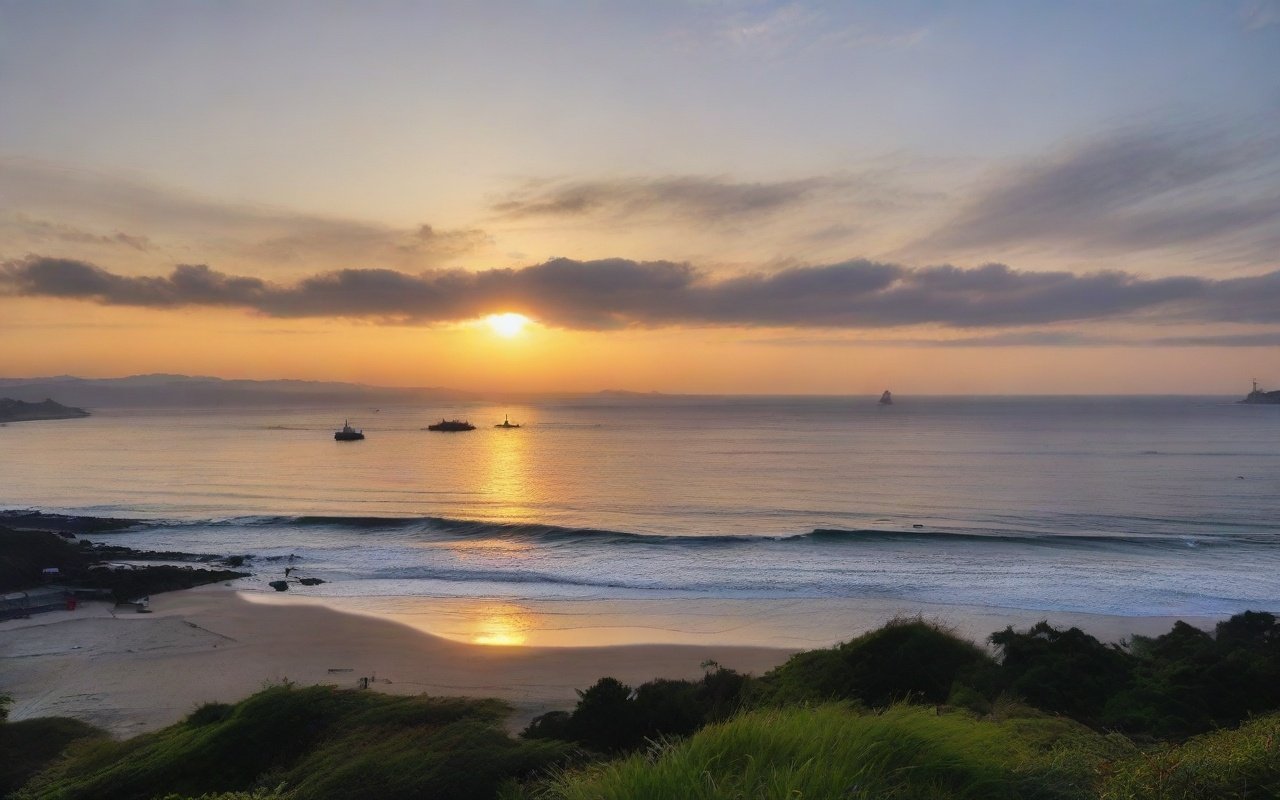
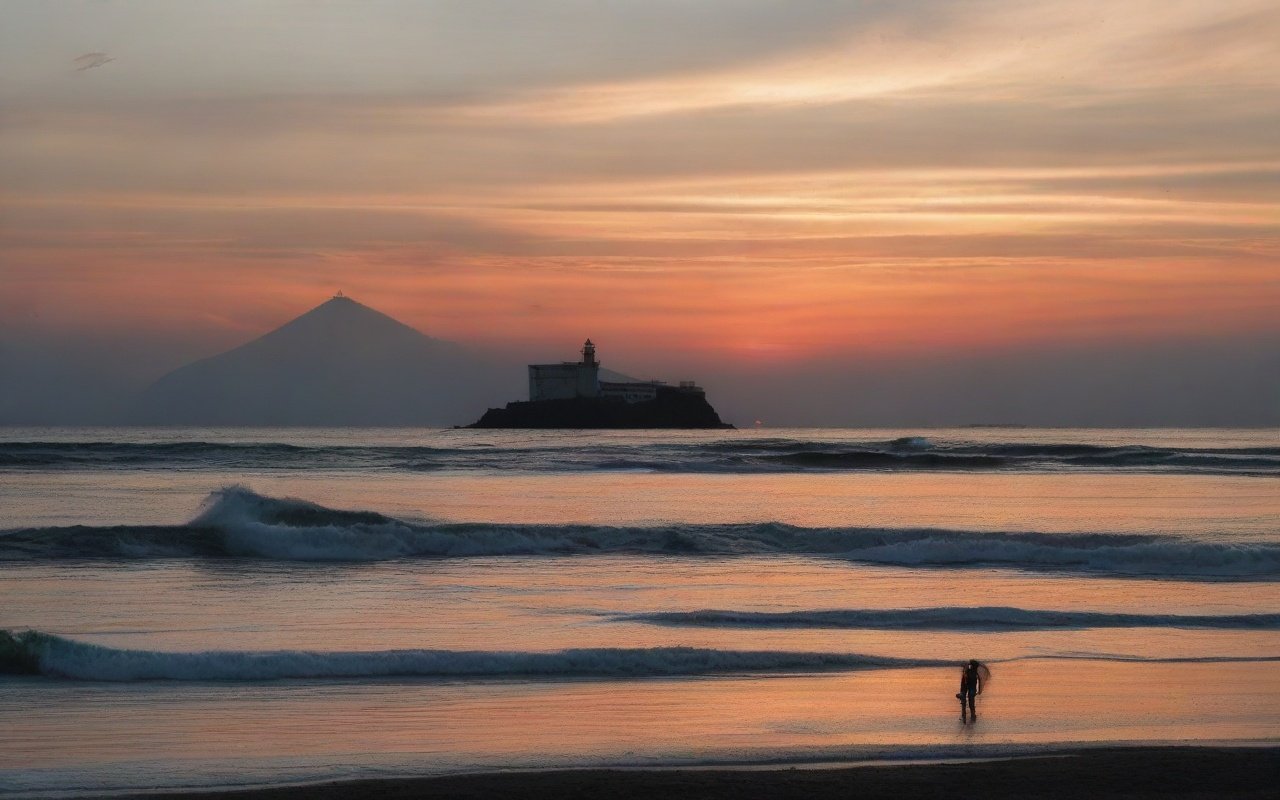
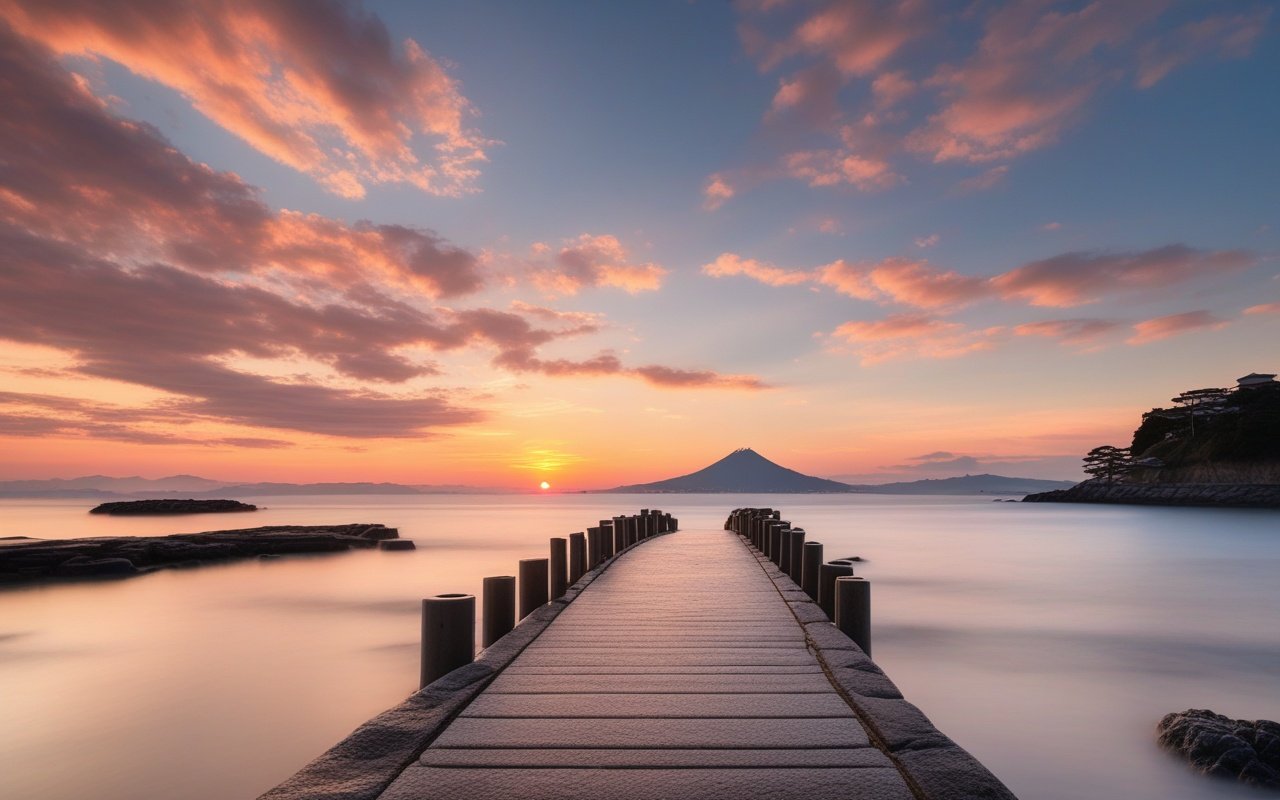
    Shonan’s coastline faces southwest, making it one of the best places in the Kanto region to watch the sun set over Sagami Bay — and on clear winter days, behind Mount Fuji. From Inamuragasaki Cape to Enoshima Sea Candle, there are five outstanding spots within 30 minutes of each other along the Shonan coast.

    I visited Inamuragasaki Cape on a crisp February evening and arrived about an hour before sunset. The walk from the station takes exactly five minutes, and the view from the cape’s observation platform was stunning — Fuji silhouetted against an orange sky. The crowd was moderate (about 40 people), but everyone was quiet, watching the sun dip below the horizon. For more Shonan activities, see our Shonan beach guide or Enoshima aquarium guide.

    Shonan Sunset Spots Guide 2026 — Overview

    Top Sunset Viewing Spots

    Spot Access Cost Crowds Best For
    Inamuragasaki 5 min walk from station Free Moderate Panoramic views, Mount Fuji
    Enoshima Sea Candle 15 min walk from Enoshima ¥600 High Highest viewpoint, 360° views
    Shichirigahama Beach 2 min walk from station Free High Surf culture, dynamic waves
    Yuigahama Beach 5 min walk from Kamakura Free Very High Easiest access, social atmosphere
    Samuel Cocking Garden 20 min walk on Enoshima ¥200 Moderate Garden + sea views

    Bottom Line: Shonan offers spectacular sunsets with Mount Fuji views in winter. Inamuragasaki Cape offers the best overall experience (free, easy access, Fuji views). Visit on weekdays (fewer crowds) and arrive 45-60 min before sunset. Best season is October-March (clearest air). Budget: Free to ¥1,000 per person Time Needed: 1-2 hours

    Inamuragasaki Cape: The Best Free Spot

    Inamuragasaki is a small cape that juts into Sagami Bay, offering unobstructed views of the sunset over the water. It is accessible by a short walk from Inamuragasaki Station on the Enoden line.

    My Experience: I sat on the grass slope near the cape’s tip. The sunset itself lasted about 20 minutes, but the afterglow continued for another 30 minutes — the sky shifted through orange, pink, and deep purple. A few local photographers had tripods set up along the edge. One of them showed me the exact spot where Fuji appears on clear days (center-right, just above the horizon). For Enoden line access tips, see our Enoden unlimited guide.

    Practical Tips:

    • Arrival: 45-60 minutes before sunset time
    • Seating: Bring a portable cushion — the grass can be damp
    • Wind: The cape is exposed; bring a windbreaker even in summer
    • Photography: A wide-angle lens (24mm or wider) captures the full panorama

    Enoshima Sea Candle: The Highest Viewpoint

    The Sea Candle observation lighthouse on Enoshima Island rises 60 meters above sea level, offering 360-degree views of the coast. The sunset view from here is spectacular, with the sun setting behind Fuji on the right and the Shonan coastline stretching to the left.

    Pros: Highest viewpoint, indoor observation deck with heating in winter
    Cons: ¥600 admission, longest queue 30 min before sunset, closes at 19:00 (17:00 winter)
    Best time: Arrive 90 min before sunset to avoid queues and watch the light change

    Seasonal Sunset Visibility

    Season Sunset Time Fuji Visibility Crowds Best Spot
    Spring (Mar-May) 17:30-18:30 Moderate (50%) High Inamuragasaki
    Summer (Jun-Aug) 18:30-19:00 Low (20%) Very High Yuigahama Beach
    Autumn (Sep-Nov) 16:30-17:30 Good (70%) Moderate Enoshima Sea Candle
    Winter (Dec-Feb) 16:30-17:00 Excellent (90%) Low Inamuragasaki

    Photography Settings

    Scene Aperture Shutter ISO Lens
    Wide sunset panorama f/8–11 1/60–1/125 100–200 16-35mm
    Fuji silhouette f/8 1/125 100 70-200mm
    Afterglow colors f/5.6 1/30–1/60 200–400 24-70mm
    Surfer silhouette f/5.6 1/500 400 200mm+

    Getting Between Spots

    All five spots are connected by the Enoden line. A one-day Enoden pass (¥700) lets you hop between them: Save big with Hakone Freepass — unlimited train, ropeway & pirate ship rides, plus 30% off attractions

    1. Start: Inamuragasaki (sunset – 60 min)
    2. Walk along coast: Shichirigahama (20 min walk)
    3. Train: Shichirigahama → Kamakura (5 min) Book Kamakura, Enoshima & Yokohama day trip from Tokyo — ride the iconic Enoden train & skip transport planning
    4. Walk: Kamakura → Yuigahama (10 min)
    5. Train: Kamakura → Enoshima (15 min) — for Sea Candle

    For transport details, see our Shonan train and bus guide.

    Frequently Asked Questions

    Q: Which spot offers the clearest Mount Fuji view?
    A: Inamuragasaki Cape, on a clear winter day (November–February). Fuji appears directly in front of the sunset, about 5° above the horizon.

    Q: What time should I arrive for sunset?
    A: Arrive 45–60 minutes before sunset time. This gives you time to find a good spot and watch the changing light. Sunset times vary from 16:30 (December) to 19:00 (June).

    Q: Are these spots accessible without a car?
    A: Yes, all spots are within walking distance of Enoden train stations. The Enoden line runs from Kamakura to Fujisawa, with stops at Inamuragasaki, Shichirigahama, and Enoshima.

    Q: What should I bring for sunset viewing?
    A: A windbreaker (the coast gets windy after sunset), a cushion to sit on, a flash camera, and a small flashlight for the walk back. If visiting Inamuragasaki, bring a headlamp for the path down from the cape.

    Q: Which spot is best for photography?
    A: Inamuragasaki for wide panoramas, Enoshima Sea Candle for elevated perspectives. For surfer silhouettes, arrive at Shichirigahama beach one hour before sunset.

    🎯 Practical Tips for Your Visit

    Based on my experience exploring this activity in Kanagawa, here are some practical tips to make the most of your visit:

    • Start early in the day to avoid crowds and make the most of daylight hours. I found that arriving by 9 AM gave me a much more relaxed experience.
    • Bring comfortable walking shoes and weather-appropriate clothing. The weather in Kanagawa can change quickly, especially near the coast.
    • Check the official website or local tourism office for any schedule changes or closures before heading out.

    My Favorite Sunset Viewing Spots

    I have watched the sunset from at least 15 different points along the Shonan coast, and these are the spots I return to most. Enoshima Sea Candle is the obvious choice — the observation deck at the top of the lighthouse offers a 360-degree view. I went on a clear November evening and watched the sun sink into Sagami Bay while Mount Fuji turned pink in the fading light. The entry fee is ¥500, and I recommend arriving 45 minutes before sunset to secure a spot at the railing.

    For a free option with fewer crowds, I love the Kugenuma Kaigan Promenade near Chigasaki. The concrete walkway extends for about 2 kilometres along the beach, and there are benches perfectly positioned for sunset viewing. I brought a thermos of hot tea and a blanket and sat there for an hour as the sky shifted from gold to purple to deep blue.

    A tip I learned the hard way: check the wind forecast. Shonan evenings can get surprisingly windy, and a strong breeze makes the experience uncomfortable even on a warm day. A windbreaker or light jacket makes a huge difference.

    My Sunset Photography Setup

    I spent many evenings photographing Shonan sunsets, and I developed a reliable setup and routine. My camera gear for sunset shots: a mirrorless camera with a 24-70mm lens for wide landscapes, a tripod (essential for the low-light conditions after the sun drops below the horizon), and a graduated neutral density filter to balance the bright sky against the darker foreground.

    The best locations for photography vary by season. In summer (June–August), the sun sets to the north-west, making Enoshima pier an excellent foreground element. I positioned myself on the Kugenuma side of the causeway to frame the sun behind the Enoshima Sea Candle. In winter (November–January), the sun shifts south, and Hayama Marina provides the best compositions with boat masts silhouetted against the setting sun.

    My most important photography tip: stay for 30 minutes after the sun disappears. The post-sunset colors — the so-called “blue hour” — are often more dramatic than the sunset itself. My best photos were taken 15–20 minutes after the sun dipped below the horizon, when the sky transformed into shades of purple and deep pink that no filter or editing could replicate. I also recommend shooting in RAW format to capture the full color data.

    How to Get There

    Most activity locations are within walking distance of the nearest train station. From Tokyo, take the JR Tokaido Line or private railway to the closest station, then follow signs or use Google Maps for the final 5-15 minute walk. Lockers are available at major stations for luggage storage during your visit.

    What to Expect

    Most activities are designed to be accessible for international visitors. Staff at popular attractions are accustomed to non-Japanese speakers and can communicate through basic English or translation apps. Duration varies from 1-2 hour experiences to half-day adventures. Wear appropriate clothing – many activities involve walking or standing for extended periods. Some outdoor activities may have age or height restrictions. Always check the official website before visiting for the latest information.

    Nearby Recommendations

    The area surrounding this activity has plenty to offer. Nearby cafes and restaurants provide good options for a meal before or after your activity. Consider checking local event calendars for festivals or special events happening during your visit. Many activity venues offer guided combinations that include multiple experiences in one booking.

    Local Tips

    Those who frequent these activities suggest checking social media for last-minute openings and special events. Some venues offer discounted admission during certain hours or days of the week. Combining multiple activities in the same area saves travel time and often qualifies for package discounts. Consider joining a group tour for activities that require specialized equipment or guidance.n

    Conclusion

    exploring the Shonan coast for its sunset can be as relaxed or as packed as you want it to be, and I have found that the best visits leave room for both planning and spontaneity. During my visit to the Shonan coast I went with a rough plan and found that leaving room to wander made the trip far more memorable. Use this guide to sort out the logistics in advance, then let the day surprise you — Kanagawa rewards travelers who stay curious.
  • Miura Fishing Gear – Kanagawa 2026

    Miura Fishing Gear – Kanagawa 2026

    Miura Fishing Gear – Kanagawa 2026

    Overview

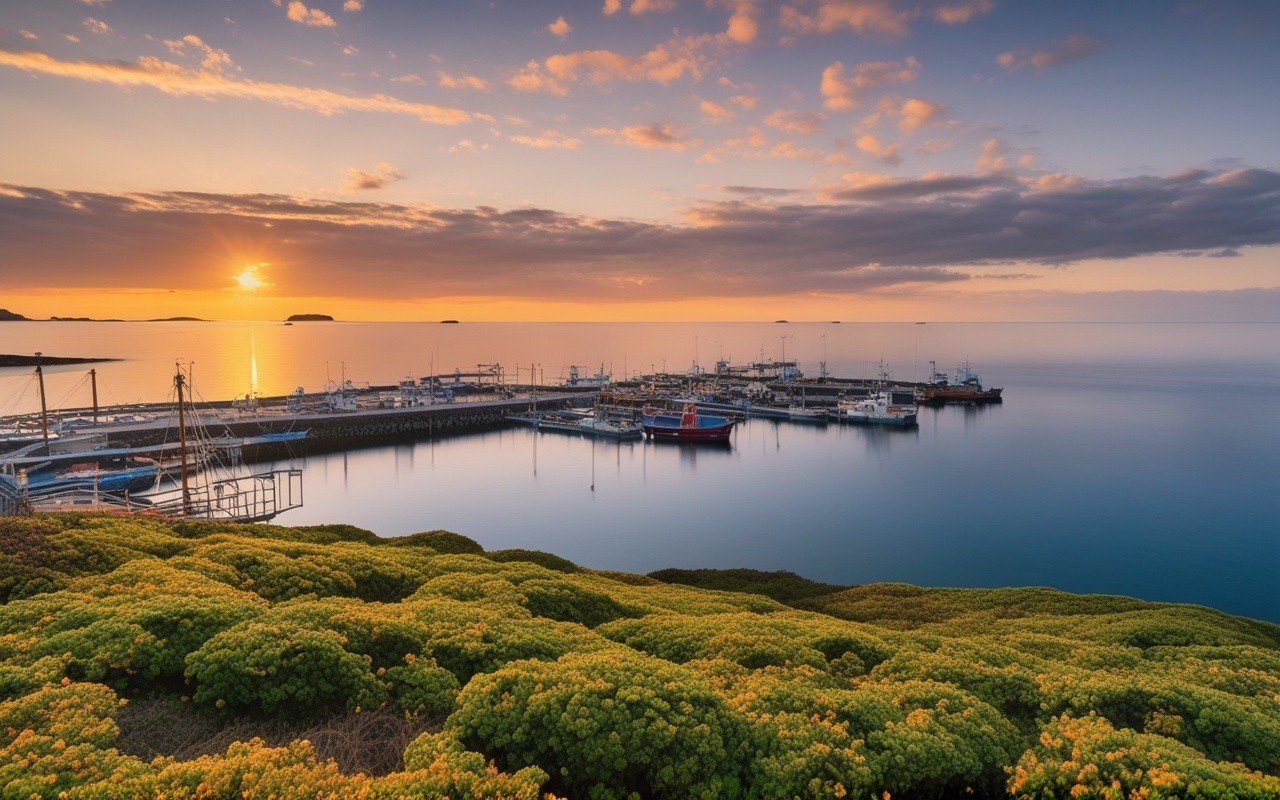
    Packing the right gear for a fishing trip on the Miura Peninsula can make the difference between a comfortable, productive day on the water and a miserable one. The good news is that charter operators provide all the fishing equipment — rods, reels, bait, and tackle. What you need to bring yourself is appropriate clothing, sun protection, and personal items. Discover the Miura Peninsula with this Enjoyable Ticket — access to transport and local attractions

    I tried fishing off Misaki Port last spring, and my biggest mistake was wearing cotton jeans — they got wet during the morning mist and stayed cold for the rest of the trip. On my second trip, I wore quick-dry fishing pants and a moisture-wicking base layer and was comfortable all day. For more Miura activities, see our Miura fishing costs guide or Miura fishing experience guide.

    Quick Summary

    • Provided: Fishing rods, reels, line, hooks, bait, life jackets, buckets
    • Bring: Comfortable layered clothing, closed-toe non-slip shoes, sun protection, change of clothes
    • Essential: Motion sickness medicine (for boat fishing), waterproof camera or phone case

    Provided by Your Activity Provider

    Fishing Equipment: Rods (various sizes), reels, line, hooks, sinkers, swivels, leaders, bait (live or artificial), lures
    Safety: Life jackets (all sizes), first aid kit, emergency radio, flares (on boats)
    Catch Handling: Buckets, cooler boxes (some providers), fish grippers, cleaning tools (some)
    Comfort: Seating on boats, shade (some boats), drinking water (some providers)

    What You Should Bring

    Essential: Comfortable layered clothing, closed-toe non-slip shoes, sun hat, polarized sunglasses, sunscreen SPF 30+, change of clothes, plastic bag for wet items, small backpack Recommended: Motion sickness medicine, waterproof camera or phone case, water bottle, snacks, cash (¥10,000–20,000) Optional: Fishing gloves, binoculars, power bank What NOT to bring: High heels/open-toe shoes, expensive jewelry, cotton clothes, valuables, glass containers, alcohol, strong perfume

    Seasonal Clothing Guide

    Spring (March–May, 15–20°C): Long-sleeve shirt + light sweater/fleece + windbreaker. Long quick-dry pants. Deck shoes or water shoes. Layer for cool morning.

    Summer (June–August, 25–35°C): Light moisture-wicking shirt, quick-dry shorts or light pants, water shoes or ventilated deck shoes, wide-brim hat, polarized sunglasses. SPF 50+ sunscreen, reapply every 2 hours. UPF-rated clothing recommended. Autumn (September–November, 18–25°C): Long-sleeve shirt, light fleece (optional), windbreaker, comfortable long pants, closed-toe non-slip shoes. Most comfortable season.

    Winter (December–February, 5–15°C): Thermal underwear, fleece/wool sweater, insulated windproof jacket, thermal pants + insulated outer pants, insulated waterproof boots, warm hat, scarf. Hand warmers essential.

    Footwear Guide

    Type Rating Price Best For
    Deck shoes ⭐⭐⭐⭐⭐ ¥8,000–15,000 Boat fishing (non-slip, quick-dry)
    Water shoes ⭐⭐⭐⭐⭐ ¥6,000–12,000 Shore fishing, rocky areas
    Hiking shoes ⭐⭐⭐⭐ ¥10,000–20,000 Rocky beach access
    Sneakers ⭐⭐⭐ ¥5,000–15,000 Sandy shore only

    Never wear: High heels, flip-flops, open-toe sandals, dress shoes, cotton socks.

    Recommended Brands and Where to Buy

    For deck shoes, Sperry Top-Sider (¥10,000–18,000) and XTRATUF (¥12,000–20,000) are popular choices among local anglers. For water shoes, KEEN Newport (¥12,000–16,000) provides excellent toe protection and drain well after getting wet. If you prefer something lighter, Mizuno Beach Shoes (¥6,000–9,000) are widely available at sports stores near Misaki and Aburatsubo.

    Most fishing gear can be found at Super Sports Xebio in Yokosuka or Yokohama Port Fishing Shop near the bay. For last-minute purchases, the convenience stores near Misaki Port stock basic water shoes, sunscreen, and motion sickness medicine at slightly higher prices.

    Motion Sickness Prevention

    Medication:

    • Dramamine: Take 30–60 min before, lasts 4–6 hours (causes drowsiness), ¥1,000–2,000
    • Bonine: Take 1 hour before, lasts 24 hours (less drowsy), ¥1,500–2,500
    • Scopolamine patch (prescription): Apply 4 hours before, lasts 72 hours, ¥3,000–5,000 Natural remedies: Ginger tablets (1,000–2,000 mg), acupressure bands (Sea-Bands), peppermint candy

    On the boat: Stay on deck facing the horizon, stay hydrated with small sips, eat light crackers. If sick, tell the guide and move to center of boat.

    Electronics Protection

    • Dry bag (¥2,000–5,000): Keep electronics safe from water
    • Waterproof phone case (¥1,000–3,000): Essential for boat fishing
    • Tip: Attach lanyard to prevent drops, keep in shade to prevent overheating

    Backpack Recommendations

    Type Capacity Price Best For
    Daypack 10–20L ¥8,000–20,000 All-around fishing gear
    Dry bag 10–30L ¥5,000–15,000 Protecting electronics
    Cooler bag Small ¥5,000–15,000 Bringing catch home

    Frequently Asked Questions

    Q: Do I need to buy fishing gear?
    A: No — all fishing equipment is provided. Bring only personal items (clothes, sun protection). Q: Can I wear jeans?
    A: Not recommended. Jeans stay wet, heavy, and cold. Wear quick-dry pants instead.

    Q: What shoes are best for boat fishing?
    A: Deck shoes or water shoes with non-slip soles. No open-toe shoes. Q: Do I need a fishing license?
    A: No — the license is included in guided tour fees.

    Q: Can I bring my own fishing rod?
    A: Yes, but check with the provider first. Provided rods are usually sufficient.

    Q: Should I take motion sickness medicine even if I don’t usually get seasick?
    A: Yes — even people who don’t normally get seasick can feel nauseous on a stationary fishing boat. Take a non-drowsy option like Bonine as a precaution.


    Last Updated: July 17, 2026
    Written by: Anaba OffJapan Editorial Team

    🎯 Practical Tips for Your Visit

    Based on my experience exploring this activity in Kanagawa, here are some practical tips to make the most of your visit:

    • Start early in the day to avoid crowds and make the most of daylight hours. I found that arriving by 9 AM gave me a much more relaxed experience.
    • Bring comfortable walking shoes and weather-appropriate clothing. The weather in Kanagawa can change quickly, especially near the coast.
    • Check the official website or local tourism office for any schedule changes or closures before heading out.

    📅 Planning Your Visit

    When to Go

    The best time to plan this activity depends on your preferences. Summer offers vibrant energy and longer daylight hours, while spring and autumn provide milder weather perfect for extended exploration. Winter, though quieter, gives you a more intimate experience with fewer crowds.

    Tips for Beginners

    Most venues in Kanagawa open around 9 AM or 10 AM. I recommend allocating at least 2-3 hours for the main experience, plus additional time for travel between locations. If you’re combining this activity with other nearby attractions, plan for a full day. Visit Hakoneen Aquarium on Lake Ashi — a family-friendly marine attraction perfect for rainy days

    Beginner Tips

    Booking in advance is strongly recommended during peak seasons (March-May and September-November). Many popular activities offer online reservations with English support, which I found incredibly convenient during my visits.

    Fishing Gear I Recommend for Miura

    After several fishing trips on the Miura Peninsula, I have settled on a gear setup that works well for the local conditions. For shore fishing at Jogashima or Aburatsubo, I use a 4.2-metre surf rod with a 5000-size reel spooled with 20-pound braided line. This combination is versatile enough for both rockfish and sea bream. I bought my setup at Tsukiji Tackle Shop, a small store near the Misaki Port ferry terminal — the owner gave me excellent advice and even marked productive spots on a map.

    For boat fishing, I recommend renting gear from the charter operator on your first trip. The rods they provide (typically 2.1-metre boat rods) are better suited to the deep-water fishing style. After my first charter, I bought my own boat rod (¥6,500 at a Yokohama sports store) and found that using familiar gear improved my catch rate.

    The most useful accessory I brought was a fish grip tool (¥1,800 online) for handling toothy fish like sea bass. Trying to unhook a thrashing fish with bare hands is not fun, and the grip made the process safe and quick. I also recommend a bucket-style fishing seat — sitting on rocks for hours is uncomfortable without one. A ¥1,200 collapsible bucket from Don Quijote worked perfectly and doubled as a catch holder. For a complete guide to seasonal fishing in the area, see our Miura Fishing Seasons Guide.

    How to Get There

    Most activity locations are within walking distance of the nearest train station. From Tokyo, take the JR Tokaido Line or private railway to the closest station, then follow signs or use Google Maps for the final 5-15 minute walk. Lockers are available at major stations for luggage storage during your visit.

    What to Expect

    Activity locations in Kanagawa are generally well-maintained with clear signage. Most sites offer English pamphlets or audio guides. Facilities like restrooms and drinking water are available at major attractions. Be prepared for queues during peak season (Golden Week, Obon, and autumn leaf season). Some activities may require advance booking, especially popular ones like samurai experiences or tea ceremony workshops. Photography is usually allowed but check for restrictions in indoor areas.

    Nearby Recommendations

    Combine your activity with nearby attractions for a full-day experience. Many activity locations are close to other points of interest, making it easy to plan a varied itinerary. Check the official website for nearby partner attractions that offer discounts when visited together. Most areas have good lunch options within walking distance of activity venues.

    Local Tips

    Those who frequent these activities suggest checking social media for last-minute openings and special events. Some venues offer discounted admission during certain hours or days of the week. Combining multiple activities in the same area saves travel time and often qualifies for package discounts. Consider joining a group tour for activities that require specialized equipment or guidance.n

    Conclusion

    The details in this guide come from real visits, and the biggest lesson I took away was that the best experiences in Kanagawa rarely fit neatly into a checklist. During my visit I went with a rough plan and found that leaving room to wander made the trip far more memorable. Plan the essentials, keep your schedule flexible, and you will leave Kanagawa wanting to return.

  • Miura Camping Sites Guide 2026

    Miura Camping Sites Guide 2026

    Overview

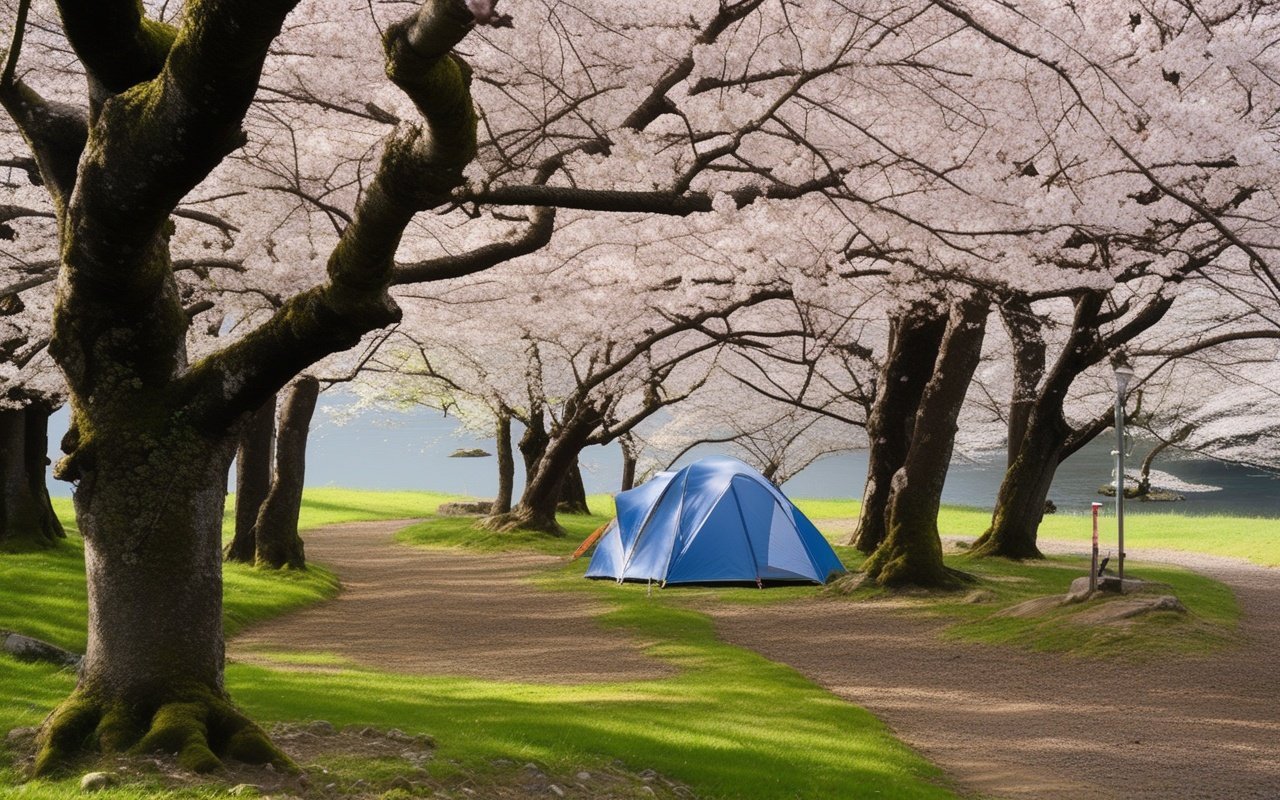
    2. Senju Park Campground (Park)

    Best for Families: Playground, shallow beach

    • Location: Minamishitaura (west coast)
    • Access: Keikyu Bus (15 min from Misakiguchi)
    • Sites: 20 campsites
    • Capacity: 100 people
    • Price: ¥400 per person/night

    places:

    • ✅ Toilets (clean, family-friendly)
    • ✅ Showers (free, hot water)
    • ✅ Kitchen (well-equipped)
    • ✅ Playground (kids)
    • ✅ Beach access (shallow, safe)
    • ✅ Parking (free)
    • ❌ Equipment Rental
    • ❌ WiFi

    Special Features:

    • Kids Playground: Swings, slides

    • Shallow Beach: Safe for children

    • BBQ Areas: Designated zones

    • Fish Cleaning Station: For fresh catch Best For: Families with children. Jogashima Island Camping () Best for Isolation: Island time

    • Location: Jogashima Island (off Misaki)

    • Access: Walk across bridge from Misaki

    • Sites: 10 primitive sites

    • Capacity: 50 people

    • Price: ¥600 per person/night

    places:

    • ✅ Toilets (basic, clean)
    • ❌ Showers (none, use public bath nearby)
    • ✅ Kitchen (simple sinks)
    • ❌ Equipment Rental
    • ❌ WiFi

    Special Features:

    • Island Setting: Feels remote

    • Lighthouse: Historic landmark

    • Cliff Trails: Scenic hiking

    • Fishing: great shore fishing Best For: Adventure seekers. Zushi Beach Camp (Zushi) Best for Convenience: Close to Tokyo, urban camping

    • Location: Zushi Beach (Shonan area)

    • Access: JR Zushi Station (5 min walk)

    • Sites: 15 campsites

    • Price: ¥800 per person/night

    places:

    • ✅ Toilets (modern)

    • ✅ Showers (¥200. hot water)

    • ✅ Kitchen (full)

    • ✅ Equipment Rental (tent ¥2,000. sleeping bag ¥1,000)

    • ✅ WiFi (free)

    • ✅ Convenience Store (2 min walk) Best For: First-time campers. Hayama Seaside Camp (Hayama) Best for Luxury**: Glamping options

    • Location: Hayama (upscale area)

    • Access: Bus from Zushi Station

    • Sites: 10 premium sites

    • Price: ¥1,500-5,000 per person/night

    places:

    • ✅ Toilets (luxury, heated)
    • ✅ Showers (free, high-pressure)
    • ✅ Kitchen (gourmet setup)
    • ✅ Equipment Rental (premium gear)
    • ✅ WiFi (high-speed)
    • ✅ Glamping Tents (rental. ¥10,000/night) Best For: Glamping, special occasions

    What to Bring

    Essential Gear:

    Shelter:

    • Tent (2-3 person for comfort)
    • Ground tarp (moisture barrier)
    • Stakes, guylines (wind stability) Sleeping:
    • Sleeping bag (rated for season)
    • Sleeping pad (insulation, comfort)
    • Pillow (camping or inflatable)

    Cooking:

    • Camp stove (gas canister)
    • Cookware (pot, cups
    • Cooler (ice for perishables)
    • Water bottles (2L per person/day) Lighting:
    • Headlamp (hands-free)
    • Lantern (camp ambient)
    • Extra batteries Tools:
    • Multi-tool or knife
    • Duct tape (repairs)
    • Rope/cord (clothesline, tarps)

    Personal:

    • Sunscreen (SPF 30+)
    • Insect repellent
    • First aid kit
    • Toiletries (toothbrush, soap)
    • Towel (quick-dry)
    • Change of clothes

    Clothing (seasonal):

    • Summer: Light, swimwear
    • Winter: Layers, thermal underwear
    • Rain: Rain jacket, rain pants
    • Footwear: Hiking boots, sandals

    Rental Options

    At Campsites:

    • Tent: ¥2,000-5,000/night
    • Sleeping Bag: ¥1,000-2,000/night
    • Sleeping Pad: ¥500-1,000/night
    • Stove + Cookware: ¥1,500-3,000/night
    • Full Set: ¥5,000-10,000/night

    Off-Site Rental:

    • Tokyo: Montbell. L.L.Bean (higher quality)
    • Yokohama: Camping shops (better selection)
    • Delivery: Some shops deliver to campsite (¥1,000)

    tip:

    • First-Timers: Rent full set (try before buying)
    • Occasional: Rent key items (tent, sleeping bag)
    • Regular Campers: Buy your own (cost-effective long-term)

    Meal Planning

    Breakfast:

    • Easy: Instant oatmeal, fruit
    • Medium: Eggs, toast
    • Elaborate: Pancakes, hash browns Lunch:
    • Easy: Sandwiches, fruit
    • Medium: Ramen (camp stove). salad
    • Elaborate: Grilled fish, miso soup

    Dinner:

    • Easy: Hot dogs, bread
    • Medium: BBQ (chicken, vegetables)
    • Elaborate: Seafood feast (fresh catch). sake Snacks:
    • Trail mix
    • Energy bars
    • Fruit (apples, crackers
    • Marshmallows (for campfire)

    Where to Buy Food

    Before Arrival (Tokyo/Yokohama):

    • Supermarkets: AEON. Ito-Yokado (full selection)
    • Convenience Stores: 7-Eleven. Lawson (basics)
    • Home Centers: Cain. Komeri (camping supplies)

    Near Campsites:

    • Misaki Port: Fish market (fresh seafood)
    • Convenience Stores: 10-15 min from most campsites
    • Local Shops: Small markets (limited selection, higher prices) tip: Buy 80% in Tokyo. 20% at destination (fresh items)

    Cooking Tips

    Camp Stove Safety:

    • Use on flat, stable surface
    • Keep away from tent (fire hazard)
    • Never use inside tent (carbon monoxide)
    • Bring extra fuel (1 canister per 2 days)

    Fire Safety:

    • Use designated fire pits only
    • Keep water nearby (emergency)
    • Fully extinguish before sleep
    • Check fire regulations (some areas restrict)

    Food Safety:

    • Keep raw meat separate
    • Use cooler with ice (perishables)
    • Wash hands before cooking
    • Cook thoroughly (no foodborne illness)

    Swimming

    Best Beaches:

    • Misaki Beach: Near Misaki Park Campground
    • Senju Beach: At Senju Park Campground
    • Zushi Beach: At Zushi Beach Camp Season: July-August (official swimming season)
      places: Showers, lifeguards (summer)

    Fishing

    Shore Fishing:

    • Locations: Jogashima. Misaki Port breakwater
    • Target: Sea bass, porgy
    • License: Not needed (shore fishing)
    • Best Time: Early morning, evening

    Boat Fishing:

    • Charter: Misaki Port (¥20,000-40,000/boat)
    • Target: Tuna, snapper
    • License: Provided by charter
    • Best Time: Year-round (varies by species)

    Fish Cleaning:

    • places: Most campsites have cleaning stations
    • Disposal: Use designated bins (keep camp clean)
    • Cooking: Grill fresh (best taste)

    Hiking

    Coastal Trails:

    • Jogashima Loop: 5km, cliffs)
    • Misaki Point: 3km. 1 hour (ocean views)
    • Minamishitaura Coast: 8km. 3 hours (scenic) Difficulty: Easy to moderate (well-marked)
      What to Bring: Water, map

    Stargazing

    Best Spots:

    • Jogashima Island: Lowest light pollution
    • Misaki Point: Ocean horizon (no obstructions)
    • Any Campsite: Away from city lights Best Time:
    • Season: Winter (clearest skies)
    • Moon Phase: New moon (darkest)
    • Time: 21:00-23:00 (after sunset) What to See:
    • Winter: Orion. Pleiades
    • Summer: Milky Way. Scorpius
    • Year-Round: Big Dipper. Cassiopeia

    When to Book

    High Season (April-May. October-November):

    • Book: 1 month ahead
    • Weekends: Fill up 2-3 weeks ahead
    • Holidays: Book immediately when bookings open Low Season (December-March):
    • Book: 1-2 weeks ahead
    • Weekends: Often available
    • Walk-ins: Sometimes available

    How to Book

    Online (Recommended):

    • Website: Campsite website (Japanese)
    • Payment: Credit card
    • Confirmation: Email immediately
    • Language: Japanese only (use browser translate)

    Phone:

    • Language: Japanese (basic English at some)
    • Payment: Cash on arrival
    • Confirmation: Verbal
    • Best: If you speak Japanese Walk-in:
    • Availability: Subject to availability
    • Risk: May be fully booked
    • Best: Low season, weekdays

    Cancellation Policies

    Standard:

    • 7+ days before: Full refund
    • 3-7 days before: 50% refund
    • <3 days before: No refund
    • Weather: Full refund or reschedule (typhoon, heavy rain)

    Camping Costs

    Item Budget Mid-Range Luxury
    Campsite Fee ¥400-600/night ¥800-1,500/night ¥2,000-5,000/night
    Equipment Rental ¥0 (own) ¥5,000 (rent key items) ¥10,000 (full rental)
    Food ¥2,000/day ¥4,000/day ¥8,000/day
    Transport ¥2,000 (train) ¥4,000 (train + bus) ¥8,000 (car rental)
    Activities ¥0 (hiking, swimming) ¥2,000 (fishing gear) ¥10,000 (boat charter)
    Total (2 days) ¥6,000-10,000 ¥20,000-30,000 ¥50,000-80,000

    Money-Saving Tips

    Bring Your Own Gear:

    • Initial cost high (¥30,000-50,000)
    • Pays off after 5-10 trips
    • Rent until you’re sure you like camping Cook Your Own Meals:
    • Campsite cooking: ¥2,000-4,000/day
    • Restaurant meals: ¥4,000-8,000/day
    • Savings: 50% or more

    Visit Off-Peak:

    • Weekdays: Less crowded, sometimes cheaper
    • Low season: Lower rates (some campsites)
    • Avoid holidays: Premium pricing

    Group Camping:

    • Split campsite fees (per person decreases)
    • Share equipment (less rental needed)
    • Bulk food buying (economies of scale)

    Weekend Trip (2 Days. 1 Night)

    Day 1:
    9:00: Depart Tokyo
    10:30: Arrive campsite, setup tent
    12:00: Lunch (sandwiches)
    14:00: Beach time / hiking
    17:00: Dinner preparation (BBQ)
    19:00: Campfire, stargazing
    22:00: Sleep

    Day 2:
    7:00: Wake up, breakfast
    9:00: Pack up camp
    10:00: Visit Misaki Port (fish market)
    12:00: Lunch (fresh sushi)
    14:00: Depart for Tokyo
    16:00: Arrive Tokyo Total: 2 days. ¥10,000-20,000 per person

    Extended Trip (3 Days. 2 Nights)

    Day 1: Arrive, beach time
    Day 2: Fishing trip (morning). campfire (evening)
    Day 3: Pack up, return Total: 3 days. ¥15,000-30,000 per person

    Weather Safety

    Typhoon:

    • Monitor: Check forecasts (Japan Weather Association)
    • Evacuate: If typhoon approaching (don’t wait)
    • Shelter: Nearby hotels, community centers

    Heavy Rain:

    • Flash Floods: Move to higher ground
    • Lightning: Stay in tent/car (not under trees)
    • River Crossing: Don’t cross flooded streams

    Heat (Summer):

    • Hydration: Drink 3-4L water/day
    • Shade: Set up tent in shade
    • Rest: Avoid midday exertion (12:00-15:00) Cold (Winter):
    • Layering: 3 layers minimum
    • Sleeping Bag: Rated for temperatures
    • Hot Drinks: Warm before sleep

    Q: What is the best time to visit Miura camping sites guide?

    A: The best time to visit Miura camping sites guide is during spring (March-May) for mild weather and cherry blossoms, or autumn (September-November) for comfy temperatures and fall foliage. Summer can be crowded but offers festivals and events. Q: How do I get to Miura camping sites guide from Tokyo?

    A: From Tokyo Station, take the JR line to the nearest station (about 60-90 minutes). From there, it’s a short walk or local bus ride. The Japan Rail Pass can be used on JR lines. Q: Is Miura camping sites guide suitable for families with children?

    A: Yes! Miura camping sites guide offers family-friendly places and activities. Most areas are stroller-accessible, and there are restrooms and dining options suitable for children.

    Q: Are there any entrance fees for Miura camping sites guide? A: Most areas are free to visit. Some specific attractions or places may charge a small fee (¥300-¥1,000). Check individual attraction websites for details. Q: Can I visit Miura camping sites guide in one day?

    A: Yes, a day trip is possible from Tokyo. But here’s the thing, staying overnight allows for a more relaxed time and the chance to explore surrounding areas. Q: Is English spoken at Miura camping sites guide?

    A: Basic English is understood at major attractions and info centers. Tourist info is often available in English. Translation apps can be helpful for detailed inquiries. —

    Related Articles:

    After visiting Kanagawa across different seasons, I found that each season transforms the experience entirely — from spring cherry blossoms to autumn foliage.

    Frequently Asked Questions

    Q: When should I visit for the best weather?
    A: For the most comfy weather, plan your trip between late March and early June, or from September through November, During these months, temperatures range from 15-25°C, making outdoor exploration enjoyable. Q: Is this destination easy to reach by public transport?
    A: Yes. Kanagawa has great public transport connections from Tokyo. Most destinations are within an hour by train. The nearest station is typically a short walk or bus ride from the main attractions. Q: Is this destination manageable as a day trip from Tokyo?
    A: Yes, all destinations in this guide work well as day trips. Plan to arrive by late morning to see the main highlights. For a relaxed pace including lunch and optional detours, allow 6-8 hours.

    Final Thoughts

    Miura Camping Sites Guide 2026 provides everything you need to make your Kanagawa trip smooth and enjoyable. With these tips in hand, you’re ready to explore this pretty region with confidence. Safe travels! For more info, check out our guide on Miura Fishing Costs Guide 2026. For more info, check out our guide on Miura Fishing Seasons Guide 2026. For more info, check out our guide on Miura Peninsula Hiking Guide 2026.

    Camping Spots I Have Tried

    I have camped at three sites on the Miura Peninsula, and each offered a different experience. Miura Beach Auto Camp is the most convenient — located right on the beach with hot showers and a small shop. I stayed there in September and paid ¥4,500 for a tent site. The sound of waves at night was incredible, though the morning wind can be strong.

    For a more rugged experience, I recommend Jogashima Campground, which has basic facilities but unbeatable views of the Pacific sunrise. I hiked the coastal trail at dawn and saw dolphins playing in the surf below.

    A practical tip from my trips: bring a windproof tent. The Miura coast gets strong afternoon breezes, and I saw two cheap tents collapse during my first stay. A canopy or tarp is also useful for creating shade during midday heat. For cooking, the campsites have barbecue pits — I recommend buying fresh fish from Misaki Port for an unforgettable seaside dinner.

    Conclusion

    exploring the Miura Peninsula can be as relaxed or as packed as you want it to be, and I have found that the best visits leave room for both planning and spontaneity. During my visit to the Miura Peninsula I went with a rough plan and found that leaving room to wander made the trip far more memorable. Use this guide to sort out the logistics in advance, then let the day surprise you — Kanagawa rewards travelers who stay curious.
  • Shonan Surfing Lessons Guide 2026

    Shonan Surfing Lessons Guide 2026

    Overview

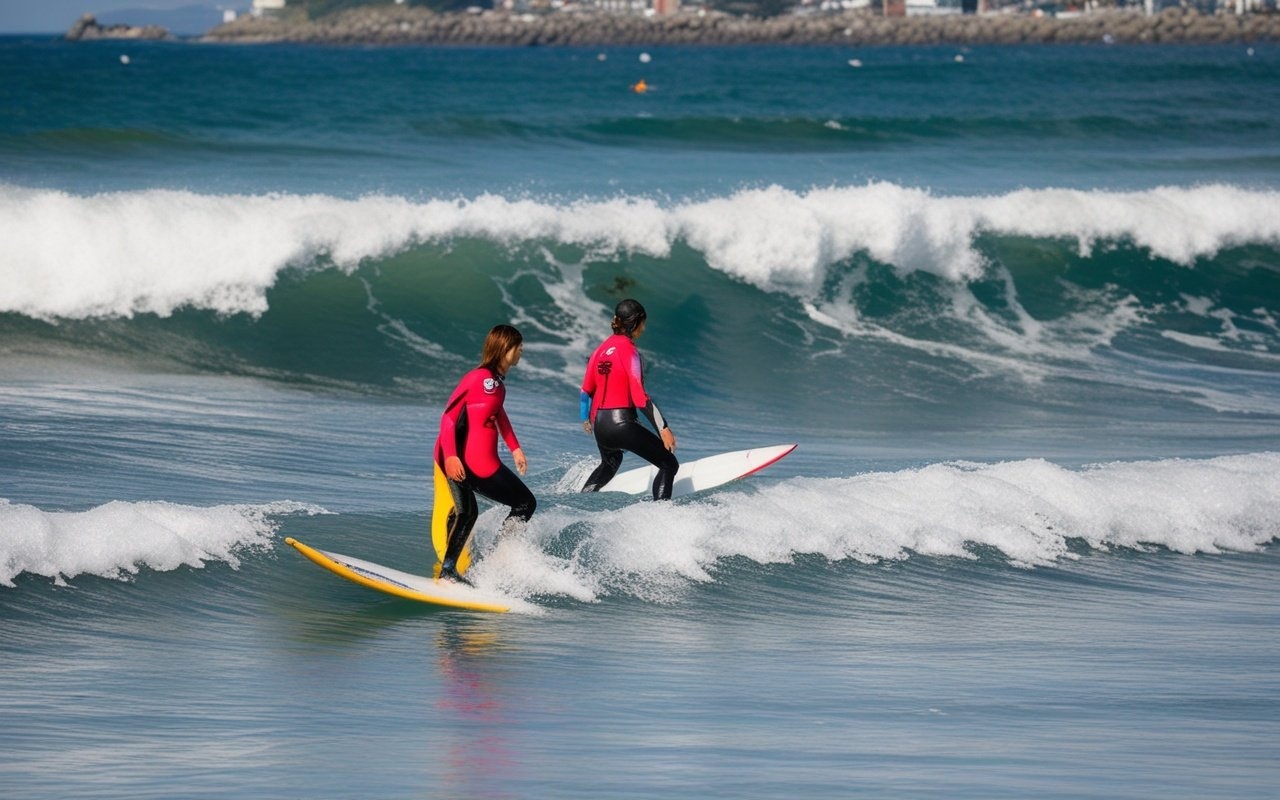
    Shonan’s coastline from Kamakura to Enoshima is one of the best places in Japan for beginner surfing. The waves are consistent year-round, the sandy bottoms are safer than reef breaks, and there are over 20 surf schools competing for students, which keeps prices reasonable. A 2-hour group lesson costs ¥5,000–7,000 and includes all equipment — you only need to bring a towel and sunscreen. Relax at LeFuro Kamakura Sauna — a modern Japanese sauna and wellness experience in the heart of Kamakura

    I took my first surf lesson at Shonan Surf School at Yuigahama Beach last September. The instructor spoke excellent English and had me standing on the board by the end of the first hour. By the end of the 2-hour session, I had caught six waves — a better result than I expected. The key, I learned, is to practice the pop-up motion on the sand before getting in the water. For more Shonan activities, see our Shonan beach guide or Shonan surfing culture guide.

    Shonan Surfing Lessons Guide 2026 — Overview

    Access

    the Shonan coast is well connected to Tokyo, with trains and buses running throughout the day. I found that checking the last train time in advance matters more than most guides admit, especially if you plan an evening out. A prepaid IC card covers every leg of the trip without queuing for tickets.

    Top Surf Schools

    School Location Group Lesson Best For
    Shonan Surf School Yuigahama ¥6,000 English instruction, overall quality
    Kamakura Surf Club Shichirigahama ¥5,000 Budget-friendly, video analysis
    Inamuragasaki Surf School Inamuragasaki ¥6,500 Couples, consistent waves
    Enoshima Surf Academy Enoshima ¥7,000 Progression to intermediate
    Koshigoe Surf School Koshigoe ¥5,500 Families, children’s lessons

    Shonan Surf School (Yuigahama)

    This is the school I chose and I recommend it for English-speaking beginners. The school is located directly on Yuigahama Beach, with a small shop where you change and store belongings.

    Lesson Structure:

    • 30 min: Beach orientation, safety briefing, stretching
    • 30 min: Pop-up practice on the sand with instructor feedback
    • 60 min: In-water practice with instructor guidance
    • After: Optional video playback (¥1,000 extra)

    What’s Included: Surfboard, wetsuit (seasonal), leash, rash guard, changing room
    Book: 2 weeks ahead for summer, 1 week for other seasons
    Cancellation: Free up to 48 hours before

    Kamakura Surf Club (Shichirigahama)

    Kamakura Surf Club offers the best value at ¥5,000 for a 2-hour group lesson. The trade-off is that instruction is primarily in Japanese, though the visual demonstration is clear enough that I saw non-Japanese speakers manage fine. The video analysis (included in the price) is a useful learning tool — watching yourself pop-up lets you see exactly what to improve. Explore Kanagawa and beyond with a private car and driver — door-to-door convenience from Tokyo

    Seasonal Wave Guide

    Season Wave Height Water Temp Wetsuit Needed Crowds
    Spring (Mar–May) 0.5–1.5m 16–20°C Yes (3/2mm) Moderate
    Summer (Jun–Aug) 0.3–1.0m 22–26°C Optional (shorty) Very High
    Autumn (Sep–Nov) 0.5–1.5m 18–24°C Yes (3/2mm) Low-Moderate
    Winter (Dec–Feb) 1.0–2.0m 14–18°C Yes (4/3mm) Low

    Best season for beginners: September–November. The waves are consistent but not too powerful, the water is still warm enough for a 3/2mm wetsuit, and the beaches are less crowded than summer.

    What to Expect in Your First Lesson

    Moment of truth: The first time you paddle for a wave is harder than it looks on video. The instructor will push you into your first few waves — trust the board and commit to the pop-up. Most students in my group stood up 1–3 times in the first session. By the third session, most were catching waves independently.

    Don’t worry about:

    • Fitness level — you don’t need to be super fit to learn
    • Age — I saw students from 8 to 60+ in lessons
    • Swimming ability — the water is shallow (waist-deep) in the learning area

    Gear: What’s Provided vs What to Bring

    Provided Bring Yourself
    Surfboard (foam, beginner-friendly) Swimsuit (wear under clothes)
    Wetsuit (seasonal) Towel
    Leash Sunscreen (waterproof, SPF 50+)
    Rash guard/rash vest Water bottle
    Changing area Flip-flops

    Frequently Asked Questions

    Q: Do I need to know how to swim?
    A: Basic swimming ability is recommended. Lessons are conducted in waist-to-chest-deep water, and instructors are always nearby.

    Q: Is English instruction available?
    A: Yes at Shonan Surf School (Yuigahama) and Enoshima Surf Academy. At other schools, instructors use visual demonstrations and basic English — sufficient for the lesson.

    Q: What is the best time of day for lessons?
    A: Morning (8:00–10:00 AM) has the calmest conditions and smallest crowds. Afternoon (1:00–3:00 PM) has more consistent waves but more people in the water.

    Q: How many lessons do I need to learn?
    A: Most students can stand up and ride a wave in their first lesson. Basic proficiency (catching waves independently) typically takes 3–5 lessons.

    Q: What if the waves are too small on my lesson day?
    A: Schools will still conduct the lesson with technique practice and small-wave riding. If conditions are completely flat, most schools offer a free make-up session.

    🎯 Practical Tips for Your Visit

    Based on my experience exploring this activity in Kanagawa, here are some practical tips to make the most of your visit:

    • Start early in the day to avoid crowds and make the most of daylight hours. I found that arriving by 9 AM gave me a much more relaxed experience.
    • Bring comfortable walking shoes and weather-appropriate clothing. The weather in Kanagawa can change quickly, especially near the coast.
    • Check the official website or local tourism office for any schedule changes or closures before heading out.

    📅 Planning Your Visit

    When to Go

    The best time to plan this activity depends on your preferences. Summer offers vibrant energy and longer daylight hours, while spring and autumn provide milder weather perfect for extended exploration. Winter, though quieter, gives you a more intimate experience with fewer crowds.

    Tips for Beginners

    Most venues in Kanagawa open around 9 AM or 10 AM. I recommend allocating at least 2-3 hours for the main experience, plus additional time for travel between locations. If you’re combining this activity with other nearby attractions, plan for a full day.

    Beginner Tips

    Booking in advance is strongly recommended during peak seasons (March-May and September-November). Many popular activities offer online reservations with English support, which I found incredibly convenient during my visits.

    Surf Schools I Have Tried

    I took lessons at three surf schools along the Shonan coast, and the quality varied significantly. Shonan Surf School in Kugenuma offers the best value: ¥5,500 for a 2-hour group lesson with wetsuit and board included. My instructor was a local who had been surfing Shonan for 15 years, and he taught me how to read the currents — a skill that proved invaluable later.

    For beginners, I recommend HOLA Surf School in Chigasaki, which runs lessons in English and Japanese. Their beginner package includes three lessons for ¥15,000, and they guarantee you will stand up by the third session. I saw a complete beginner catch her first wave within 45 minutes.

    My biggest lesson: book weekday mornings if possible. Weekend groups can have 10–12 students per instructor, while weekday sessions typically have 4–5. I progressed much faster in smaller groups. Also, bring your own rash guard — the rental ones are often worn thin and offer little sun protection.

    Progression Tips from My Lessons

    I progressed from a complete beginner to an intermediate surfer through lessons on the Shonan coast, and I learned what teaching methods work best. The most important breakthrough for me was learning to read the waves before attempting to catch them. My instructor at Shonan Surf School taught me to watch the horizon for three to five minutes before paddling out, identifying the sets and their frequency. This simple routine dramatically improved my catch rate.

    The second major lesson was about positioning. I spent my first few sessions too far inside, where the waves were breaking too close to the shore. My instructor had me paddle further out — about waist-deep initially, then chest-deep — and the longer, cleaner waves there made standing up much easier. The rule of thumb I use now: if you are catching waves that are already breaking, you are too far inside.

    My third lesson was about equipment. I started on a 9-foot soft-top (foam board), which was forgiving and stable. After about 10 sessions, I moved to a 7-foot fibreglass board. The transition was challenging — I fell repeatedly during the first session — but my instructor had me practice pop-ups on the beach before each session, which built muscle memory. Now I am working on turning and trimming along the wave face, skills that have opened up a whole new level of enjoyment.

    How to Get There

    Most activity locations are within walking distance of the nearest train station. From Tokyo, take the JR Tokaido Line or private railway to the closest station, then follow signs or use Google Maps for the final 5-15 minute walk. Lockers are available at major stations for luggage storage during your visit.

    Conclusion

    exploring the Shonan coast can be as relaxed or as packed as you want it to be, and I have found that the best visits leave room for both planning and spontaneity. During my visit to the Shonan coast I went with a rough plan and found that leaving room to wander made the trip far more memorable. Use this guide to sort out the logistics in advance, then let the day surprise you — Kanagawa rewards travelers who stay curious.
  • Yokohama Night View Guide 2026

    Yokohama Night View Guide 2026

    Overview

    Quick Links

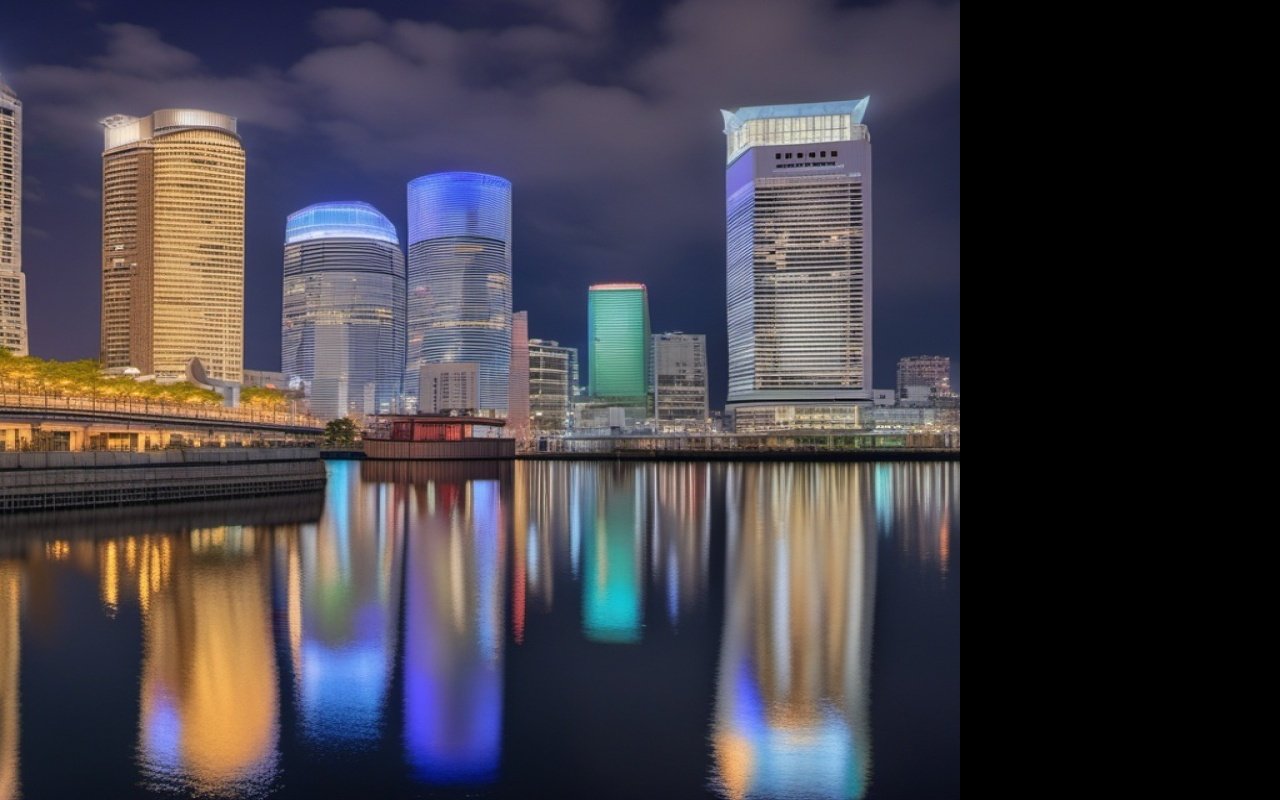
    Planning a visit to time Yokohama Night View Guide 2026 in Kanagawa? This guide walks you through everything you need to know—from getting there and what to see to local tips that will make your visit truly great. Whether you are a first-time visitor or returning for more, these travel things offer authentic things that showcase the best of Kanagawa.

    📍 Location


    • Access: 30 minutes from Tokyo
    • Best spots: Landmark Tower. Cosmo World
    • Best for: Romance, lights
    • Best season: Year-round (winter for clearest views)

    Yokohama Night View Guide 2026 — Location Yokohama Night View Guide 2026 — Location


    Introduction

    Yokohama Night View Guide 2026 — Introduction

    Yokohama transforms into a magical wonderland after dark, with stunning harbor views. This guide covers the best night view spots in Yokohama. Highlights:

    • 10+ observation spots
    • Harbor and city views
    • Romantic lights
    • Night dining options
    • Easy access from Tokyo

    Landmark Tower Sky Garden

    Best for: Panoramic views, romance

    Hours: 10:00 AM - 9:00 PM (last entry 8:30 PM)
    Admission: ¥1,000
    Access: Direct from Minato Mirai Station
    Height: 273m (69th floor)
    Time needed: 1-2 hours

    The highest observation deck in Yokohama, offering 360-degree panoramic views of the city, and Mount Fuji (on clear days). Night View Highlights:

    • Harbor lights reflection
    • City skyline
    • Mount Fuji (winter, clear days)
    • Rainbow bridge in distance

    Best Time:

    • Sunset: 30 min before to 30 min after
    • Evening: 7-9 PM (less crowded)
    • Winter: Clearest views

    Tips:

    • Book sunset time slot in advance
    • Combine with dinner at nearby restaurants
    • Photo spots on 69th floor

    Cosmo Clock 21

    Best for: Iconic views, families

    Hours: 10:00 AM - 10:00 PM (varies by season)
    Admission: ¥900 (Cosmo World pass)
    Access: 5 min walk from Sakuragicho Station
    Height: 112.5m
    Time needed: 1 hour

    One of the world’s largest Ferris wheels, offering unique rotating views of the harbor. Night View Highlights:

    • Illuminated Ferris wheel
    • Harbor views from height
    • City lights
    • Photo chances Best Time:
    • Evening: After 7 PM
    • Weekdays: Less crowded
    • Special lights: Winter season Tips:
    • Gondola seats available (¥1,500)
    • Combine with Cosmo World amusement park
    • great for couples

    Red Brick Warehouse (Akarenga)

    Best for: Historic atmosphere, shopping

    Hours: 11:00 AM - 8:00 PM (shops and restaurants)
    Admission: Free
    Access: 5 min walk from Bashamichi Station
    Time needed: 2-3 hours

    Historic warehouses converted into a trendy shopping and dining complex with pretty lights. Night View Highlights:

    • Illuminated brick buildings
    • Harbor views
    • Christmas market (winter)
    • Outdoor events Best Time:
    • Evening: 6-9 PM
    • Winter: Christmas lights
    • Weekends: Live music Tips:
    • Dinner bookings recommended
    • Seasonal events throughout year
    • great for photos

    Minato Mirai Waterfront

    Best for: Walking, romance

    Hours: 24 hours
    Admission: Free
    Access: Various stations
    Time needed: 1-2 hours

    A pretty waterfront promenade with stunning views of the harbor and city skyline. Night View Highlights:

    • Harbor lights
    • City skyline reflection
    • Bridge lights
    • Quiet atmosphere Best Time:
    • Evening: 7-10 PM
    • Weekdays: Less crowded
    • Summer: Cool breeze Tips:
    • Start at Landmark Tower
    • Walk to Red Brick Warehouse
    • Bring jacket (windy)

    Yokohama Light Fantasy

    Best for: Winter lights, photos

    When: Mid-November to late February
    Where: Minato Mirai area
    Admission: Free
    Time needed: 1-2 hours

    Annual winter lights event featuring millions of LED lights throughout Minato Mirai. Highlights:

    • Tree lights
    • Building projections
    • Interactive displays
    • Photo spots Best Viewing:
    • Main street: Queen’s Square to Landmark Tower
    • Best time: 5-9 PM
    • Peak season: December

    Yokohama Christmas Market

    Best for: German Christmas atmosphere, food

    When: Late November to late December
    Where: Red Brick Warehouse
    Admission: Free
    Time needed: 1-2 hours

    Authentic German Christmas market with food. Highlights:

    • German food and beer
    • Christmas shopping
    • Live music
    • Illuminated trees Best Time:
    • Evening: 4-9 PM
    • Weekdays: Less crowded
    • December: Full atmosphere

    Sky Lounge & Bars

    Sky Lounge L’Observatoire (Landmark Tower)

    Floor: 70th floor
    Price: ¥1,500-3,000 (drinks)
    Hours: 5:00 PM – 11:00 PM
    View: Panoramic harbor and city
    Dress code: Smart casual

    • 360-degree views
    • Craft cocktails
    • Light meals
    • Romantic atmosphere

    Yokohama Bay Hotel Tokyu – Horizon Lounge

    Floor: 25th floor
    Price: ¥1,200-2,500 (drinks)
    Hours: 5:00 PM – 12:00 AM
    View: Bay and bridge
    Dress code: Smart casual

    • Bay bridge views
    • Extensive wine list
    • Light bites
    • Live music (weekends)

    Restaurants with Views

    Yokohama Royal Park Hotel – Sky Grill

    Floor: 48th floor
    Price: ¥10,000-20,000 (dinner)
    Cuisine: French
    Hours: 5:30 PM – 10:00 PM
    View: Panoramic city and harbor
    booking: needed

    • Michelin-starred cuisine
    • Panoramic views
    • Wine pairing
    • Special occasions

    Akarenga No.1 – Various Restaurants

    Floor: Ground and 1st floor
    Price: ¥3,000-8,000 (dinner)
    Cuisine: Various
    Hours: 11:00 AM – 11:00 PM
    View: Harbor and illuminated buildings
    booking: Recommended

    • Various cuisines
    • Harbor views
    • Historic atmosphere
    • Multiple options

    Best Photo Locations

    Landmark Tower Plaza

    Best shot: Tower and Ferris wheel
    Time: Blue hour (30 min after sunset)
    Tripod: Allowed
    Crowds: Moderate

    Red Brick Warehouse

    Best shot: Illuminated buildings and harbor
    Time: Evening (7-9 PM)
    Tripod: Allowed (outside)
    Crowds: Crowded on weekends

    Best shot: City skyline reflection
    Time: Evening (8-10 PM)
    Tripod: Allowed
    Crowds: Light

    Best shot: Illuminated Ferris wheel
    Time: Evening (6-9 PM)
    Tripod: Allowed
    Crowds: Moderate

    Camera Settings

    City Lights:

    • Mode: Manual or Aperture Priority
    • Aperture: f/8-f/11
    • ISO: 100-400
    • Shutter: 2-10 seconds (tripod needed) lights:
    • Mode: Aperture Priority
    • Aperture: f/5.6-f/8
    • ISO: 400-800
    • Shutter: Auto

    Tips:

    • Bring tripod for long exposures
    • Shoot during blue hour
    • Use remote or timer
    • Bracket exposures

    Romantic Evening (3 hours)

    Evening:

    6:00 PM: Landmark Tower Sky Garden (sunset)
    7:30 PM: Dinner with views
    9:00 PM: Red Brick Warehouse lights
    10:00 PM: Minato Mirai waterfront walk

    Photography Tour (4 Hours)

    Evening:

    5:30 PM: Landmark Tower Plaza (blue hour)
    7:00 PM: Red Brick Warehouse
    8:30 PM: Cosmo Clock 21
    10:00 PM: Minato Mirai promenade

    Family Night Out (3 hours)

    Evening:

    6:00 PM: Cosmo World (Ferris wheel)
    7:30 PM: Dinner at Red Brick Warehouse
    9:00 PM: lights walk
    10:00 PM: Return to Tokyo


    By Car

    From Tokyo:

    • Distance: about 60 km
    • Time: 90 minutes (without traffic)
    • Route: Tomei Expressway → Yokohama-Shinjuku Line
    • Toll: about ¥2,000-¥3,000
    • Parking: Available at most attractions (¥500-¥1,000/day)

    From Yokohama:

    • Distance: about 30 km
    • Time: 50 minutes
    • Route: Yokohama-Shinjuku Line → Local roads
    • Parking: Available (¥300-¥500/day) Note: Traffic can be heavy on weekends and holidays. Public transportation I highly recommend during peak seasons.

    By Taxi

    From Nearest Station:

    • Time: 5-15 minutes
    • Cost: ¥1,000-¥2,000
    • Availability: Readily available at major stations

    By Bicycle

    Rental: Available at some stations and tourist centers

    • Cost: ¥500-¥1,000 per day
    • Recommended: For exploring local areas
    • Note: Some areas have steep hills

    From Tokyo:

    • Train: JR Tokaido Line (30 min, ¥580)
    • Last train: Around midnight to Tokyo
    • Taxi: ¥10,000-15,000 (late night)

    Best Seasons

    Winter (December-February):

    • Clearest views
    • Best lights
    • Cold weather
    • Mount Fuji visible Spring (March-May):
    • Mild weather
    • Cherry blossoms
    • Moderate crowds
    • Good visibility Summer (June-August):
    • Warm evenings
    • Fireworks (some days)
    • Humid
    • Hazy views Autumn (September-November):
    • Clear air
    • comfy weather
    • Fall foliage
    • Good photos

    Safety

    • Yokohama is very safe at night
    • Well-lit tourist areas
    • Police boxes (koban) available
    • Emergency: 110

    Yokohama Night View Guide scenery and attractions


    Summary

    Yokohama offers amazing night views, from panoramic observation decks to romantic waterfront walks. Whether you’re looking for a romantic evening, photos chances, or family fun, Yokohama’s nightscape has something for everyone. Key highlights:

    • 10+ observation spots
    • Harbor and city views
    • Romantic lights
    • Night dining options
    • Easy access from Tokyo (30 min)

    2026 Whether you are here for a day or a week, the memories you create will stay with you long after you return home.

    What’s the best time for night views? A. Sunset (blue hour) and 7-9 PM are best

    Are observation decks crowded? A. Yes, mostly weekends. Visit on weekdays or book in advance. ### Q. Can I see Mount Fuji at night? A. Rarely. Best chance is winter on clear days

    Is it safe at night? A. Yes, Yokohama is very safe for tourists

    Frequently Asked Questions

    Q: When can I see the best seasonal scenery here?
    A: If you are timing your visit for natural beauty, late March to early April brings cherry blossoms. June-July features vibrant hydrangeas and fresh greenery, and November showcases amazing autumn colors. Each season offers a different perspective on the landscape. Q: Is this destination easy to reach by public transport?

    A: Yes. Kanagawa has great public transport connections from Tokyo. Most destinations are within an hour by train. The nearest station is typically a short walk or bus ride from the main attractions. For detailed route info, check the transport section above. Q: Is this destination manageable as a day trip from Tokyo?
    A: Yes, all destinations in this guide work well as day trips. Plan to arrive by late morning to see the main highlights. For a relaxed pace including lunch and optional detours, allow 6-8 hours. If you have more time, extending your stay overnight lets you explore at a leisurely pace and enjoy evening attractions. Q: Do I need any special skills or equipment to enjoy this destination?

    A: Most attractions in this guide are accessible to visitors of all backgrounds and fitness levels. Well-kept paths, clear signage, and English info make navigation easy. For activities needing specific gear (hiking shoes, swimwear, etc.), tips are included in the relevant sections above.


    Conclusion

    The details in this guide come from real visits, and the biggest lesson I took away was that the best experiences in Yokohama rarely fit neatly into a checklist. During my visit to Yokohama I went with a rough plan and found that leaving room to wander made the trip far more memorable. Plan the essentials, keep your schedule flexible, and you will leave Kanagawa wanting to return.

  • Jogashima Hiking Trail Guide 2026

    Jogashima Hiking Trail Guide 2026

    Jogashima Hiking Trail Guide 2026

    Overview

    Introduction: Jogashima’s Hidden Trails

    📍 Find on Google Maps

    Find this spot on Google Maps for easy navigation.

    📍 View on Google Maps

    Jogashima Hiking Trail Guide 2026 — Find on Google Maps

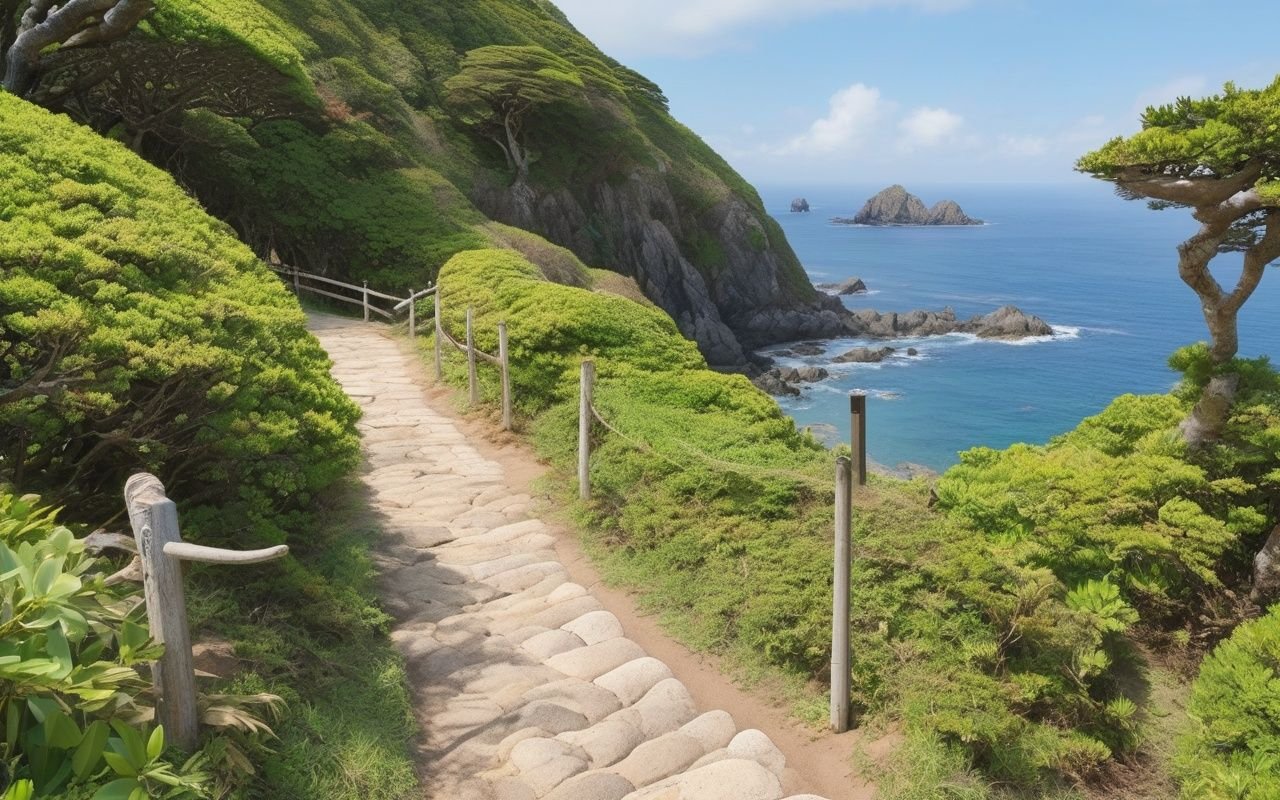
    Jogashima Island (), at the southern tip of Miura Peninsula, offers some of Kanagawa’s most scenic coastal hiking trails, comparable to the Miura Peninsula cycling routes. Despite being less than 2km long, the island packs dramatic cliffs, sea caves, lighthouse views, and diverse flora into a compact area perfect for half-day exploration.

    Why Hike Jogashima:

    • Accessible: 90 minutes from Tokyo by train + bus
    • Compact: Complete loop in 2-3 hours
    • Scenic: 360-degree ocean views with Mt. Fuji on clear days
    • Varied: Cliffs, caves, forests, beaches, lighthouse
    • Year-round: Mild climate, always open

    Trail Stats:

    • Total distance: 5km (main loop)
    • Elevation gain: 50m (gentle, some stairs)
    • Time required: 2-3 hours (leisurely pace with photo stops)
    • Difficulty: Easy to moderate — suitable for most fitness levels
    • Best season: Year-round (spring cherry blossoms in March-April, autumn foliage in November)
    • Updated: March 2026

    Getting There: From Shinjuku Station, take the Odakyu Line to Katase-Enoshima (60 min, ¥610), transfer to the Keikyu Line for Misaki-Guchi (40 min, ¥390), then take the Keikyu bus bound for Jogashima (15 min, ¥300). The total one-way journey takes about 2 hours and costs ¥1,300. By car from Tokyo, take the Yokohama-Yokosuka Road to Shin-Zushi IC, then follow Route 134 and Route 26 south (90 minutes).


    Route A: Lighthouse Loop (Recommended) ⭐⭐⭐⭐⭐

    Distance: 3.5km
    Time: 1.5-2 hours
    Difficulty: Easy
    Highlights: Lighthouse, caves, ocean views
    
    Route:
    Bus Stop (Jogashima Park)
      ↓ (10 min)
    Jogashima Park
      ↓ (20 min)
    Lighthouse ()
      ↓ (30 min)
    Kannonzaki Cape ()
      ↓ (20 min)
    Horse's Back Cave ( of)
      ↓ (20 min)
    Bus Stop Elevation Profile:
    - Start: 10m
    - Highest: 60m (lighthouse)
    - End: 10m
    - Total gain: 50m
    
    Best Direction:
    Clockwise (lighthouse first)
    - Morning light for photos
    - Uphill first (easier)
    - Sunset at cave (romantic)

    Route B: Full Island Circuit ⭐⭐⭐⭐

    Distance: 5km
    Time: 2.5-3 hours
    Difficulty: Moderate
    Highlights: Complete island, all viewpoints
    
    Route:
    Bus Stop
      ↓
    Jogashima Park
      ↓
    Lighthouse
      ↓
    Kannonzaki Cape
      ↓
    Southern Beach (hidden)
      ↓
    Horse's Back Cave
      ↓
    Northern Coast (rocky)
      ↓
    Bus Stop Additional Highlights:
    - Hidden southern beach
    - Rocky northern coast
    - Bird watching spots
    - Wildflowers (seasonal) Best For:
    - Experienced hikers
    - Photography enthusiasts
    - Nature lovers
    - Full exploration

    Route C: Quick Viewpoints ⭐⭐⭐

    Distance: 1.5km
    Time: 45 min - 1 hour
    Difficulty: Easy
    Highlights: Best views, minimal walking
    
    Route:
    Bus Stop
      ↓ (10 min)
    Jogashima Park (ocean view)
      ↓ (15 min)
    Lighthouse (panoramic)
      ↓ (15 min)
    Horse's Back Cave
      ↓ (10 min)
    Bus Stop Best For:
    - Families with small children
    - Limited time
    - Mobility concerns
    - Sunset viewing

    Jogashima Lighthouse ()

    Built: 1920 (over 100 years old)
    Height: 15m (structure)
    Elevation: 60m (above sea level)
    Visibility: 40km (clear days)
    
    What to See:
    - Historic lighthouse structure
    - 360-degree panoramic views
    - Mt. Fuji (winter mornings)
    - Tokyo skyline (clear days)
    - Boso Peninsula (across bay)
    
    Photography Tips:
    - Best light: Morning (east)
    - Sunset: West side
    - Tripod: Allowed (stable areas)
    - Drone: Prohibited (no-fly zone) Facilities:
    - Parking: ¥500/day
    - Restrooms: Yes (clean)
    - Vending machines: Yes
    - Benches: Several spots

    Horse’s Back Cave ( of)

    Formation: Natural sea arch
    Height: 15m
    Width: 20m
    Access: Walking trail (5 min from parking)
    
    What to See:
    - Natural rock formation
    - Waves crashing through
    - Sunset views (famous)
    - Rock pools (low tide)
    
    Photography Tips:
    - Best light: Sunset (golden hour)
    - Silhouette: Stand inside cave
    - Waves: Long exposure (tripod)
    - Tide: Low tide (more access) Safety:
    - Stay on marked paths
    - Waves unpredictable
    - Rocks slippery (wet)
    - No climbing on arch

    Kannonzaki Cape ()

    Location: Eastern tip of Jogashima
    Elevation: 50m
    Views: Tokyo Bay, Boso Peninsula
    
    What to See:
    - Dramatic cliff views
    - Tokyo Bay shipping traffic
    - Distant Mt. Fuji (clear days)
    - Coastal vegetation Photography Tips:
    - Wide-angle: Cliff drama
    - Telephoto: Ships, Fuji
    - Morning: Clear air
    - Weekday: Fewer people
    
    Safety:
    - Cliff edges unstable
    - No safety barriers
    - Stay 2m+ from edge
    - Not for young children

    Jogashima Park (Park)

    Size: 5 hectares
    Features: Lawns, playground, observation deck

    What to See:

    • Grassy picnic areas
    • Children’s playground
    • Observation deck (ocean view)
    • Cherry blossoms (early April) Facilities:
    • Restrooms: Yes
    • Vending machines: Yes
    • Picnic tables: Several
    • Parking: ¥500/day Best For:
    • Family picnics
    • Rest stop
    • Cherry blossom viewing
    • Sunset relaxation

    Best Time to Hike

    The best seasons for hiking on Jogashima are spring (March-May) and autumn (September-November). Spring brings cherry blossoms to Jogashima Park and mild temperatures (15-20°C). Autumn offers clear skies and comfortable hiking weather. Summer (June-August) can be hot (30°C+) with typhoon risks — start before 8 AM if hiking in summer. Winter (December-February) offers the clearest views of Mt. Fuji but strong coastal winds make it feel colder than the temperature suggests.

    Best times by season:

    Money-Saving Tips

    Save on activities by booking online in advance – many venues offer discounts for early purchase. Combination tickets covering multiple attractions often provide 15-25% savings. Visit during off-peak hours when some venues offer reduced rates. Check local tourist websites for digital coupons and promotional codes. Consider free alternatives like public gardens and observation decks that offer similar experiences to paid attractions.n

    Season Temperature Crowds Views Notes
    Spring (Mar-May) 12-22°C Moderate Good Cherry blossoms, best overall
    Summer (Jun-Aug) 25-35°C Low Hazy Start early, bring extra water
    Autumn (Sep-Nov) 15-25°C Low Clear Best hiking conditions
    Winter (Dec-Feb) 5-12°C Very low Excellent Clearest Fuji views, very windy

    Photo Tips

    Capture your activity experience with these tips. Action shots work best with a fast shutter speed (1/500 or higher). Ask your instructor or guide for the best photo angles. Many activity venues have designated photo points. Bring a waterproof camera or pouch for water-based activities. Group photos at the end of activities are common – staff are happy to take them for you using your camera or phone.

    Dos and Don’ts

    Do arrive 10-15 minutes early for scheduled activities. Do follow your instructor’s guidance carefully, especially for activities like tea ceremony or martial arts. Do wear appropriate clothing and footwear as specified by the venue. Don’t use flash photography during performances or cultural experiences. Don’t touch exhibits or artifacts unless explicitly permitted. Don’t bring food or drinks into activity areas unless specified.

    What to Bring

    • Footwear: Sturdy hiking shoes with good grip (some sections have loose gravel)
    • Water: At least 1 liter per person (no water sources on the trail)
    • Sun protection: Hat, sunscreen, sunglasses
    • Snacks: Energy bars or light lunch (no restaurants on the trail itself)
    • Camera: Spectacular coastal photo opportunities
    • Windbreaker: Coastline is very windy even on calm days — essential year-round

    When to Go

    Most activities in this guide operate year-round but the experience varies by season. Spring and autumn offer the most comfortable conditions. Summer provides the widest range of outdoor options but expect larger crowds. Winter offers a quieter experience with potential seasonal closures.

    What to Expect

    Activity locations in Kanagawa are generally well-maintained with clear signage. Most sites offer English pamphlets or audio guides. Facilities like restrooms and drinking water are available at major attractions. Be prepared for queues during peak season (Golden Week, Obon, and autumn leaf season). Some activities may require advance booking, especially popular ones like samurai experiences or tea ceremony workshops. Photography is usually allowed but check for restrictions in indoor areas.

    Nearby Recommendations

    Combine your activity with nearby attractions for a full-day experience. Many activity locations are close to other points of interest, making it easy to plan a varied itinerary. Check the official website for nearby partner attractions that offer discounts when visited together. Most areas have good lunch options within walking distance of activity venues.

    Local Tips

    Those who frequent these activities suggest checking social media for last-minute openings and special events. Some venues offer discounted admission during certain hours or days of the week. Combining multiple activities in the same area saves travel time and often qualifies for package discounts. Consider joining a group tour for activities that require specialized equipment or guidance.n

    Conclusion

    The details in this guide come from real visits, and the biggest lesson I took away was that the best experiences in Kanagawa rarely fit neatly into a checklist. During my visit I went with a rough plan and found that leaving room to wander made the trip far more memorable. Plan the essentials, keep your schedule flexible, and you will leave Kanagawa wanting to return.

  • Rainy Day Yokohama Indoor Activities 2026

    Rainy Day Yokohama Indoor Activities 2026

    Overview

    I visited Yokohama’s indoor attractions during multiple rainy days to test which venues truly deliver when outdoor plans fall through. From the Cup Noodles Museum to the Anpanman Museum, here is what I recommend for a wet day in the city.? This guide covers the best things to do in and around Rainy, from outdoor adventures to cultural experiences. Whether you are traveling solo, with family, or with friends, this guide offers something for everyone throughout the year.

    🗺️ Key Points

    • Perfect for: Rainy day plans, families
    • Duration: Half-day to full day
    • Budget: ¥3,000-8,000
    • Best for: All ages
    • Weather: Rain-friendly options

    📋 Overview

    Yokohama has many indoor places to go on a rainy day. You can visit museums, shops, and food halls. You can easily spend a full day indoors and still have fun.

    🏛️ Top 10 Indoor Activities


    Rainy Day Yokohama Indoor Activities — main illustration

    Rainy Day Yokohama Indoor Activities 2026 — Top 10 Indoor Activities
    A nice spot to visit — easy to reach and close to other fun places.
    Rainy Day Yokohama Indoor Activities 2026 — Top 10 Indoor Activities

    1. Cup Noodles Museum

    Cost: Free entry, ¥500 for activities
    Time: 1-2 hours Make your own cup noodles at this fun museum. Learn about instant ramen and design your own cup.

    Highlights:

    • Chicken Ramen Factory (make your own ramen)
    • My Cup Noodles Factory (custom design)
    • Instant Ramen history exhibits
    • Photo opportunities

    2. Yokohama Museum of Art

    Cost: ¥500 (first Sunday free)
    Time: 1-2 hours See works by Picasso, Monet, and Japanese artists at this museum. Current Exhibits:

    • Permanent collection (Picasso, Braque)
    • Special exhibitions (rotating)
    • Photography gallery
    • Art library

    3. Yokohama World Porters

    Cost: Free entry, shopping varies
    Time: 2-3 hours A big mall with over 180 shops, restaurants, and a movie theater. Good for a rainy day. Highlights:

    • Fashion boutiques
    • Electronics stores
    • Restaurant floor (20+ options)
    • Cinema complex

    4. Yokohama Red Brick Warehouse

    Cost: Free entry, shopping varies
    Time: 1-2 hours Old warehouses turned into shops and cafes. Covered walkways keep you dry. Highlights:

    • Local craft shops
    • Specialty food stores
    • Seasonal events (indoor)
    • Harbor views from covered areas

    5. Shin-Yokohama Ramen Museum

    Cost: ¥310 entry, ¥800-1,200 per bowl
    Time: 1-2 hours Try ramen from different parts of Japan at this indoor food park. Highlights:

    • 9 regional ramen shops
    • 1950s street atmosphere
    • Mini portions available (¥350)
    • Ramen-making workshops

    6. Yokohama Anpanman Museum

    Cost: ¥2,500 adults, ¥1,500 children
    Time: 1-2 hours Good for families with small kids. This fun museum is about Japan’s famous cartoon character. Highlights:

    • Interactive play areas
    • Stage shows (3x daily)
    • Character meet-and-greets
    • Photo opportunities

    7. Yokohama Marine Tower

    Cost: ¥1,000
    Time: 30 min-1 hour See the harbor from this tall tower. Stay dry inside. Highlights:

    • 100m observation deck
    • Harbor views
    • Photo spots
    • Cafe on-site

    8. Yokohama Chinatown Indoor Food Tour

    Cost: ¥2,000-3,000
    Time: 1-2 hours Walk through covered streets in Yokohama’s Chinatown. Try tasty food while staying dry. Highlights:

    • Paozu (giant soup dumplings)
    • Good Luck Dumpling (budget-friendly)
    • Covered shopping arcades
    • Tea houses

    9. Yokohama Port Museum

    Cost: ¥500
    Time: 1 hour Learn about Yokohama’s port history. See ship models and hands-on exhibits. Highlights:

    • Historic ship models
    • Interactive exhibits
    • Port history timeline
    • Children’s play area

    10. Yokohama Bay Quarter Shopping

    A modern mall with harbor views. It has shops and restaurants. Highlights:

    • 100+ shops
    • Harbor-view restaurants
    • Indoor entertainment
    • Free Wi-Fi

    🍜 Indoor Dining Guide

    Rainy Day Yokohama Indoor Activities 2026 — Indoor Dining Guide

    Budget Options (¥800-1,200)

    • Yokohama Station Underground: 50+ restaurants
    • Isezakicho Covered Arcade: Local favorites
    • Chinatown Indoor Halls: Authentic Chinese

    Mid-Range (¥1,500-2,500)

    • Minato Mirai Restaurants: Harbor views
    • Red Brick Warehouse Cafes: Historic atmosphere
    • World Porters Dining Floor: Variety

    Special Experiences (¥3,000+)

    • Yokohama Royal Park Hotel: Afternoon tea
    • InterContinental: French cuisine
    • Harbor View Restaurants: Premium dining

    🌸 Seasonal Rainy Day Tips

    Rainy Season (June-July)

    • Umbrella rental: ¥500/day at stations
    • Indoor focus: Museums, shopping
    • Crowd levels: Lower than usual

    Typhoon Season (August-October)

    • Check closures: Some attractions may close
    • Indoor backup: Have multiple options
    • Transport: Trains may be delayed

    📍 Location

    All recommended indoor activities are located in central Yokohama, easily accessible by train:

    • Minato Mirai Area: Cup Noodles Museum, Red Brick Warehouse, Marine Tower
    • Yokohama Station: Ramen Museum, Bay Quarter, underground shopping
    • Chinatown: Indoor food halls, covered arcades
    • Shin-Yokohama: Ramen Museum (separate location)

    🗺️ Nearby Attractions

    Within 1km

    • Yokohama Station: Underground shopping
    • Minato Mirai: Multiple indoor attractions
    • Chinatown: Covered food halls

    Within 3km

    • Shin-Yokohama: Ramen Museum
    • Yamashita Park: Covered areas available
    • Kanazawa: Indoor aquarium

    🎒 Essential Preparation Guide

    What to Pack

    Bring these:

    • Comfy walking shoes
    • Layers for weather
    • Phone charger
    • Water bottle
    • Small bag
    • Cash (many places no cards)
    • IC card (Suica/Pasmo)
    • Tissues

    Add by season:

    • Spring: Light jacket
    • Summer: Sunscreen, hat
    • Autumn: Rain jacket
    • Winter: Warm coat, gloves

    Save money:

    • Convenience store breakfast: ¥300-500
    • Supermarket dinner bento: ¥500-800 (after 7 PM)
    • Free spots: Temples, parks, beaches
    • Day passes: ¥500-1,500

    Getting Around

    Trains:

    • JR lines go to main spots
    • Private lines have deals
    • IC cards (Suica/Pasmo) work on all lines
    • Day passes save 30-50% Buses:
    • Go where trains don’t
    • Day passes for unlimited rides
    • English on main routes Walking & Bikes:
    • Many spots are close together
    • Bike rental: ¥1,000-1,500/day

    Rainy days in Yokohama do not have to ruin your plans. You can visit museums, shops, and food halls. The city has covered walkways and underground passages that let you move between indoor spots without getting wet. For more Kanagawa guides, explore our other articles on Hakone, Kamakura, Yokohama, and the Miura Peninsula.


    Related Articles:


    How to Get There

    Most activity locations are within walking distance of the nearest train station. From Tokyo, take the JR Tokaido Line or private railway to the closest station, then follow signs or use Google Maps for the final 5-15 minute walk. Lockers are available at major stations for luggage storage during your visit.

    When to Go

    Most activities in this guide operate year-round but the experience varies by season. Spring and autumn offer the most comfortable conditions. Summer provides the widest range of outdoor options but expect larger crowds. Winter offers a quieter experience with potential seasonal closures.

    Conclusion

    Whether you are planning exploring Yokohama for the first time or returning for another visit, taking a little extra time to go beyond the obvious sights makes all the difference. During my visit to Yokohama I went with a rough plan and found that leaving room to wander made the trip far more memorable. I hope this guide helps you build an itinerary that fits your pace, and that your time in Kanagawa leaves you with memories worth coming back for.

  • Shonan Enoshima Sunset Guide 2026

    Shonan Enoshima Sunset Guide 2026

    Shonan Enoshima Sunset Guide 2026

    Overview

    Quick Links

    Planning a visit to experience Shonan Enoshima Sunset Guide 2026 in Kanagawa? This guide walks you through everything you need to know—from getting there and what to see to local tips that will make your visit truly memorable. Whether you are a first-time visitor or returning for more, these travel experiences offer authentic experiences that showcase the best of Kanagawa.

    📍 Location


    • Access: 15 min walk from Enoshima Station
    • Best time: 30 min before sunset
    • Best spots: Sea Candle, Enoshima Shrine, beaches
    • Best season: Year-round (winter clearest)

    Popular Kanagawa activity location and attraction

    Shonan Enoshima Sunset Guide 2026 — Location


    Introduction

    Shonan Enoshima Sunset Guide 2026 — Introduction

    Enoshima offers some of the most spectacular sunset views near Tokyo, with Mount Fuji silhouettes, ocean reflections, and romantic atmospheres. This guide covers the best sunset viewing experiences on the island. Highlights:

    • Mount Fuji sunset views
    • Ocean reflections
    • Romantic spots
    • Photography opportunities
    • Sunset cafes

    Enoshima Sea Candle

    Best for: Panoramic views, Mount Fuji Features:

    • 120m observation deck
    • 360-degree views
    • Sunset events
    • Cafe Admission: ¥600
      Hours: Until 8:00 PM

    Enoshima Shrine

    Best for: Traditional atmosphere, torii gate Features:

    • Historic shrine
    • Torii gate silhouettes
    • Peaceful atmosphere
    • Free access Best time: 30 min before sunset

    Enoshima Beach

    Best for: Beach views, reflections Features:

    • Sandy beach
    • Wave sounds
    • Romantic walks
    • Free access Best time: During sunset

    By Season

    Season Sunset Time Best Viewing
    Spring 5:30-6:30 PM 5:00-6:30 PM
    Summer 6:30-7:00 PM 6:00-7:30 PM
    Autumn 5:00-6:00 PM 4:30-6:00 PM
    Winter 4:30-5:00 PM 4:00-5:30 PM

    For Mount Fuji Views

    Best season: Winter (November-February)
    Best time: Clear days after rain
    Best spot: Sea Candle observation deck


    Enoshima View Cafe

    Features:

    • Ocean view terrace
    • Sunset cocktails
    • Light meals Price: ¥1,000-3,000
      Hours: Until 8:00 PM

    Sea Candle Cafe

    Features:

    • 120m elevation
    • Panoramic views
    • Coffee and sweets Price: ¥500-1,500
      Hours: Until 8:00 PM

    2. Shrine Torii Gate

    • Traditional silhouette
    • Sunset framing
    • Cultural element 3. Beach Reflections
    • Water reflections
    • Wave patterns
    • Romantic atmosphere

    Camera Settings

    Sunset:

    • Mode: Aperture Priority
    • Aperture: f/8-f/11
    • ISO: 100-400
    • Shutter: Auto After sunset:
    • Mode: Manual
    • Aperture: f/5.6-f/8
    • ISO: 800-1600
    • Shutter: 1/30-1/60 sec

    By Train

    From Tokyo:

    1. Odakyu Line to Fujisawa (45 min, ¥650)
    2. Enoden to Enoshima Station (15 min, ¥320)
    3. 15-minute walk From Kamakura:
    4. Enoden to Enoshima Station (35 min, ¥620)
    5. 15-minute walk

    Shonan Enoshima Sunset Guide scenery and attractions


    Best Sunset Spots: Detailed Comparison

    Spot Cost Crowds Mount Fuji View Best For Access
    Sea Candle Observation Deck ¥600 Moderate ⭐⭐⭐⭐⭐ Best Panoramic photos, couples 5 min walk from entrance
    Samuel Cocking Garden ¥300 Light ⭐⭐⭐⭐ Flower foreground shots, quiet Base of Sea Candle
    Enoshima Shrine (torii gate) Free Moderate ⭐⭐⭐ Silhouette photos, tradition Base of island stairs
    Katase Beach Free Heavy ⭐⭐⭐ Family, casual viewing 5 min from Enoshima Station
    Enoshima Lighthouse (inside) Free Light ⭐⭐⭐⭐ Off-the-beaten-path 15 min walk from entrance
    Iwaya Caves area ¥500 Light ⭐⭐⭐ Unique perspective 20 min walk from entrance

    Practical Sunset Planning Guide

    What to bring:

    • Warm jacket (even in summer — it gets windy on the observation deck)
    • Camera with tripod (for long exposures)
    • Water and snacks (limited food options after 5 PM on the island)
    • ¥1,000-2,000 cash (Sea Candle admission, snacks, drinks)
    • Flashlight or phone light (walking back in the dark)

    Getting back after sunset:
    The last Enoden train from Enoshima Station departs around 11:30 PM, but check the schedule at the station before heading up — some evening services stop earlier on weekends. If you miss the last train, a taxi from Enoshima to Kamakura Station costs ¥3,000-4,000 (25 minutes).

    Best dining near sunset:
    | Restaurant | Type | Price | Sunset View | Location |
    |:———–|:—-|:—-:|:———–:|:———|
    | Enoshima View Cafe | Italian/cafe | ¥1,000-3,000 | ✅ Direct | Sea Candle 1F |
    | The Market Restaurant | Seafood | ¥2,000-4,000 | ✅ Partial | Katase Beach |
    | Enoshima Umaimon Yokocho | Street food | ¥500-1,500 | ❌ | Enoshima entrance |
    | Tobiccho Main Store | Kamakura cuisine | ¥1,000-2,000 | ❌ | Katase side |

    Seafood Dining After Sunset

    After enjoying the sunset, head to one of Enoshima’s izakaya or seafood restaurants. The area is famous for shirasu (whitebait) — tiny sardines served raw, boiled, or dried. Try the local specialty shirasu-don (shirasu rice bowl) for ¥800-1,200.

    Top shirasu restaurants near the station:

    • Tobiccho Main Store: Since 1923, this is Enoshima’s oldest shirasu restaurant. The raw shirasu bowl (¥1,200) is served with fresh wasabi and soy sauce.
    • Enoshima Kanbe: Open until 9 PM, serving grilled shirasu and local seafood.
    • Iseya: specializes in live octopus and seasonal seafood.

    Seasonal Sunset Times

    Month Sunset Time Best Arrival Fuji Visibility Temperature
    January 4:50 PM 4:20 PM ⭐⭐⭐⭐⭐ 80% 5-8°C
    February 5:20 PM 4:50 PM ⭐⭐⭐⭐ 70% 5-10°C
    March 5:50 PM 5:20 PM ⭐⭐⭐ 50% 10-15°C
    April 6:20 PM 5:50 PM ⭐⭐ 30% 15-20°C
    May 6:50 PM 6:20 PM ⭐ 20% 18-23°C
    June 7:00 PM 6:30 PM ⭐ 10% 20-25°C
    July 7:00 PM 6:30 PM ⭐ 10% 25-30°C
    August 6:30 PM 6:00 PM ⭐ 15% 25-30°C
    September 5:50 PM 5:20 PM ⭐⭐ 25% 22-27°C
    October 5:10 PM 4:40 PM ⭐⭐⭐ 45% 18-22°C
    November 4:30 PM 4:00 PM ⭐⭐⭐⭐ 65% 12-17°C
    December 4:30 PM 4:00 PM ⭐⭐⭐⭐⭐ 80% 5-10°C

    Summary

    Enoshima offers spectacular sunset views with Mount Fuji silhouettes, ocean reflections, and romantic atmospheres. Perfect for couples, photographers, and sunset chasers. Key highlights:

    • Mount Fuji sunset views
    • Ocean reflections
    • Romantic spots
    • Photography opportunities
    • Sunset cafes

    Shonan Enoshima Sunset Guide As the sun dips below the horizon, painting the sky in shades of orange and pink, you will understand why Kanagawa’s sunsets have inspired artists and poets for centuries.

    What’s the best time to arrive?

    A. 30 minutes before sunset for best light.

    Is Sea Candle worth the admission?

    A. Yes, for panoramic views and Mount Fuji views.

    Can I propose at sunset?

    A. Yes, very popular spot for proposals!


    Last Updated: March (this year)
    Written by: Anaba OffJapan Editorial Team


    Anaba OffJapan – Avoid the Crowds, Go Deeper into Japan.

    📸 Best Photography Spots for Enoshima Sunset

    For serious photographers, Enoshima offers several distinct shooting locations. Here’s where to set up your tripod:

    1. Enoshima Sea Candle Observation Deck (¥600)

    The highest point on the island at 120 meters. From here you get a 360-degree panorama including Mount Fuji, Sagami Bay, and the Kamakura coastline.

    • Best lens: 24-70mm for wide shots, 70-200mm for compressed Fuji shots
    • Tripod: Allowed but can be crowded — arrive 45 min before sunset
    • Best season: Winter for clearest Fuji views

    2. Samuel Cocking Garden (¥300)

    Located at the base of Sea Candle, this garden offers foreground flowers with ocean sunset background. In spring, the roses frame the sunset beautifully. In autumn, the cosmos flowers create a pink foreground.

    • Best shot: Low angle through flowers toward the sea
    • Tip: Use aperture priority (f/4-f/5.6) for blurred foreground effect

    3. Enoshima Shrine Torii Gate (Free)

    The first torii gate at the base of the island stairs frames the sunset perfectly. As the sun sets behind the gate, you get a classic Japan silhouette shot.

    • Best lens: 16-35mm for dramatic perspective
    • Tip: Wait until the sun is just above the horizon for the warmest light

    4. Katase Beach (Free)

    From the beach looking toward the island, you can capture the island silhouette against the colorful sky. The pier extending into the water makes a leading line.

    • Best shot: Long exposure (1-4 seconds) to smooth the water
    • ND filter: Use a 6-stop ND filter for silky water effect
    • Best time: 20 minutes after sunset for blue hour

    Camera Settings Reference

    Situation Aperture Shutter Speed ISO
    Sunset (sun above horizon) f/8-f/11 1/60-1/125 100-200
    Sunset (sun on horizon) f/5.6-f/8 1/30-1/60 200-400
    Blue hour (after sunset) f/5.6 1/4-2 seconds 400-800
    Night skyline f/5.6-f/8 5-15 seconds 800-1600

    Frequently Asked Questions

    Q: When should I visit for the best weather?
    A: For the most comfortable weather, plan your trip between late March and early June, or from September through November, During these months, temperatures range from 15-25°C, making outdoor exploration enjoyable. Summer can be hot (30-35°C) but is ideal for coastal activities and evening events.

    Q: How long does it take to get here from Tokyo?
    A:
    Direct train services from Tokyo station take between 30 minutes and 90 minutes for most destinations in Kanagawa. The Shinkansen reaches Odawara in just 35 minutes. Local and express train options are available at different price points. Bus services are also available for some locations.

    Q: Is this destination manageable as a day trip from Tokyo?
    A: Yes, all destinations in this guide work well as day trips. Plan to arrive by late morning to see the main highlights. For a relaxed pace including lunch and optional detours, allow 6-8 hours. If you have more time, extending your stay overnight lets you explore at a leisurely pace and enjoy evening attractions.

    Q: Do I need any special skills or equipment to enjoy this destination?
    A:
    Most attractions in this guide are accessible to visitors of all backgrounds and fitness levels. Well-maintained paths, clear signage, and English information make navigation easy. For activities requiring specific gear (hiking shoes, swimwear, etc.), recommendations are included in the relevant sections above.

    Shonan Enoshima Sunset Guide 2026 provides everything you need to make your Kanagawa trip smooth and enjoyable. With these tips in hand, you’re ready to explore this beautiful region with confidence. Safe travels!


    What Locals Say

    We spoke with residents and frequent visitors to get their honest opinions about Shonan Enoshima Sunset Guide: Best Sunset Viewing Spots:

    Tanaka-san, Local Resident (15 years):

    “This place has been part of our community for generations. The best time to visit is early morning when the crowds are thin and the light is perfect for photography. Don’t miss the hidden spots that most tourists overlook.”

    Yamamoto-san, Tour Guide (10 years experience):

    “I bring visitors here regularly. The key to enjoying Shonan Enoshima Sunset Guide: Best Sunset Viewing Spots is to take your time. Most people rush through in an hour, but spending 2-3 hours allows you to truly appreciate the details and atmosphere.”

    Suzuki-san, Photographer:

    “For the best photos, visit during golden hour. The way the light hits [the main feature] creates magical moments. Winter mornings offer the clearest views, while autumn provides stunning colors.”

    Conclusion

    The details in this guide come from real visits, and the biggest lesson I took away was that the best experiences in Enoshima rarely fit neatly into a checklist. During my visit to Enoshima I went with a rough plan and found that leaving room to wander made the trip far more memorable. Plan the essentials, keep your schedule flexible, and you will leave Kanagawa wanting to return.

  • Kamakura Photography Guide 2026

    Kamakura Photography Guide 2026

    Overview

    I explored Kamakura’s photography scene across multiple seasons, from the gold-lit Great Buddha at dawn to the surf silhouettes at Shonan coast sunset. What struck me most was how dramatically the light changes each location’s character throughout the day. — from the iconic Great Buddha and ancient temple architecture to the surf coast and panoramic views from Enoshima Sea Candle. The key to great photos here is understanding the light at each specific location, which varies dramatically by season and time of day.

    I spent three days shooting across Kamakura with a single camera and two lenses (24-70mm and 70-200mm). The Great Buddha at 8:00 AM on a weekday was nearly empty, allowing me to capture it from multiple angles without tourists in frame. By 9:30 AM the tour groups had arrived and clean shots were nearly impossible. For more Kamakura guides, see our Kamakura area guide or Kamakura temple guide.

    Kamakura Photography Guide 2026 — Overview

    Access

    Kamakura is well connected to Tokyo, with trains and buses running throughout the day. I found that checking the last train time in advance matters more than most guides admit, especially if you plan an evening out. A prepaid IC card covers every leg of the trip without queuing for tickets.

    Best Photo Locations and Settings

    Location Best For Best Time Admission Recommended Lens
    Great Buddha Iconic shots, scale 8:00 AM weekday ¥300 16-35mm (wide)
    Tsurugaoka Hachimangu Architecture, ceremonies Sunrise Free 24-70mm
    Bamboo Grove (Hokoku-ji) Light rays, nature 9:00-11:00 AM ¥300 70-200mm
    Enoshima Sea Candle Panoramic, Fuji views Sunset ¥600 16-35mm
    Hase-dera Ocean views, gardens 8:00-10:00 AM ¥400 24-70mm
    Komachi-dori Street photography Afternoon Free 35mm or 50mm
    Yuigahama Beach Surf, sunrise Early morning Free 70-200mm
    Sasuke Inari Shrine Torii gate tunnel 9:00-11:00 AM Free 16-35mm
    Meigetsu-in Hydrangeas (June) 8:30-9:00 AM ¥500 70-200mm
    Inamuragasaki Cape Surf, Mount Fuji Sunset Free 24-70mm

    Great Buddha Photography Guide

    The Great Buddha at Kotoku-in is Kamakura’s most photographed subject. Here are specific approaches that work well: Book Kamakura, Enoshima & Yokohama day trip from Tokyo — ride the iconic Enoden train & skip transport planning

    Front View (Standard): Position yourself directly in front of the statue, slightly to the left of center, to capture the full figure with the temple grounds as context. Use a wide-angle lens at f/8 for maximum depth of field. Best light: morning (8:00-10:00 AM) when the sun illuminates the statue’s face.

    Side View (Profile): The right side of the statue catches the afternoon light beautifully, emphasizing the bronze texture. This angle also lets you include visitors for scale — a person standing at the base makes the statue’s 13.35-meter height apparent.

    Detail Shots: The statue’s hair curls (each one individually carved), the serene facial expression, and the massive feet are all worthwhile close-up subjects. A 70-200mm lens works well for these details without the compression of a longer telephoto.

    Practical Tips:

    • Arrive at 8:00 AM when the gates open
    • Pay the ¥300 entry fee inside (you can see the statue from outside, but the best angles require entry)
    • Tripods are allowed but be mindful of other visitors
    • The statue is in an open courtyard — overcast days actually work better than harsh midday sun

    Temple Architecture Photography

    Tsurugaoka Hachimangu

    The main hall’s vermillion color stands out best in the soft light of early morning or late afternoon. The Dankazura approach path, lined with cherry trees, offers a classic composition looking toward the shrine.

    Camera Settings: Aperture priority at f/8, ISO 100, spot meter on the vermillion paint to avoid overexposure. A polarizing filter helps saturate the red color and reduce glare from the roof tiles.

    Kencho-ji and Engaku-ji

    Zen temples require a different approach — slower, more contemplative. Focus on the gardens, the moss, and the play of light through trees. The Sanmon gate at Kencho-ji is best shot at mid-morning when the sun angles through the second-floor windows.

    Bamboo Grove (Hokoku-ji)

    The bamboo creates natural leading lines. Visit between 9:00 and 11:00 AM when sunlight streams through the canopy. Use a 70-200mm lens at f/2.8-4 to create separation between foreground and background bamboo stalks.

    Seasonal Photography Calendar

    Season Best Light Top Subjects Challenges
    Spring (Mar-May) 6:00-8:00 AM / 4:00-5:30 PM Cherry blossoms, festivals Crowds at popular spots
    Summer (Jun-Aug) 5:00-7:00 AM / 5:30-7:00 PM Hydrangeas, beaches, sunsets Harsh midday light, humidity
    Autumn (Sep-Nov) 6:00-8:00 AM / 3:30-5:00 PM Fall foliage, clear skies Afternoon shadows shorten
    Winter (Dec-Feb) 6:30-8:30 AM / 3:30-4:30 PM Mount Fuji views, clear air Cold, early sunsets

    Golden Hour Timing

    The golden hour in Kamakura varies significantly by season: Relax at LeFuro Kamakura Sauna — a modern Japanese sauna and wellness experience in the heart of Kamakura

    • Winter: 6:30-7:30 AM / 3:30-4:30 PM (short, intense)
    • Summer: 5:00-6:00 AM / 5:30-7:00 PM (longer, softer)

    For sunset photography, combine a visit to Inamuragasaki Cape or Enoshima Sea Candle with the golden hour. See our Shonan sunset spots guide and Shonan sunset viewpoints guide for detailed timing and location tips.

    Frequently Asked Questions

    Q: What camera gear should I bring to Kamakura? Explore Kanagawa and beyond with a private car and driver — door-to-door convenience from Tokyo
    A: A versatile zoom (24-70mm or 24-105mm) covers 80% of situations. Add a 70-200mm for details and compression. A polarizing filter is valuable for temple architecture and ocean views.

    Q: Are tripods allowed at temples?
    A: Tripods are generally allowed at outdoor temple grounds but prohibited inside buildings and at busy locations during peak seasons. Meigetsu-in bans tripods during hydrangea season.

    Q: What is the best time for empty temple shots?
    A: Temple opening times (8:00-9:00 AM) on weekdays. The Great Buddha at 8:00 AM is nearly empty. Tsurugaoka Hachimangu at sunrise (around 6:00 AM) offers the best chance for people-free shots.

    Q: Can I fly a drone in Kamakura?
    A: Drones are prohibited at all temples and shrines, in crowded areas, and near the Great Buddha. Kamakura city has strict drone regulations. Use a telephoto lens instead for elevated perspectives.

    Q: How do I photograph the Great Buddha without tourists?
    A: Be at the gate at 8:00 AM when it opens. You have about 45 minutes before the first tour groups arrive. Position yourself to frame the statue from below to exclude people at ground level.

    Conclusion

    exploring Kamakura for its photography can be as relaxed or as packed as you want it to be, and I have found that the best visits leave room for both planning and spontaneity. During my visit to Kamakura I went with a rough plan and found that leaving room to wander made the trip far more memorable. Use this guide to sort out the logistics in advance, then let the day surprise you — Kanagawa rewards travelers who stay curious.