Tag: jogashima

  • Jogashima Lighthouse & Geology Guide 2026

    Jogashima Lighthouse & Geology Guide 2026

    Overview

    Plan your perfect visit to Jogashima Lighthouse & Geology Guide with this comprehensive destination guide, Covering everything from must-see attractions to practical travel tips, this guide helps you make the most of your time in Jogashima. Whether you have a single day or an entire week, discover the best that this Kanagawa destination has to offer.

    Introduction: Two Stories on One Island

    Jogashima tells two stories simultaneously. The first is human — the lighthouse built by French engineers in Japan’s rush to modernise, standing resilient through earthquakes and war. The second is geological — a story measured in millions of years, written in volcanic sediment layers that were deposited on the deep ocean floor, then uplifted by tectonic forces to form the island we see today.

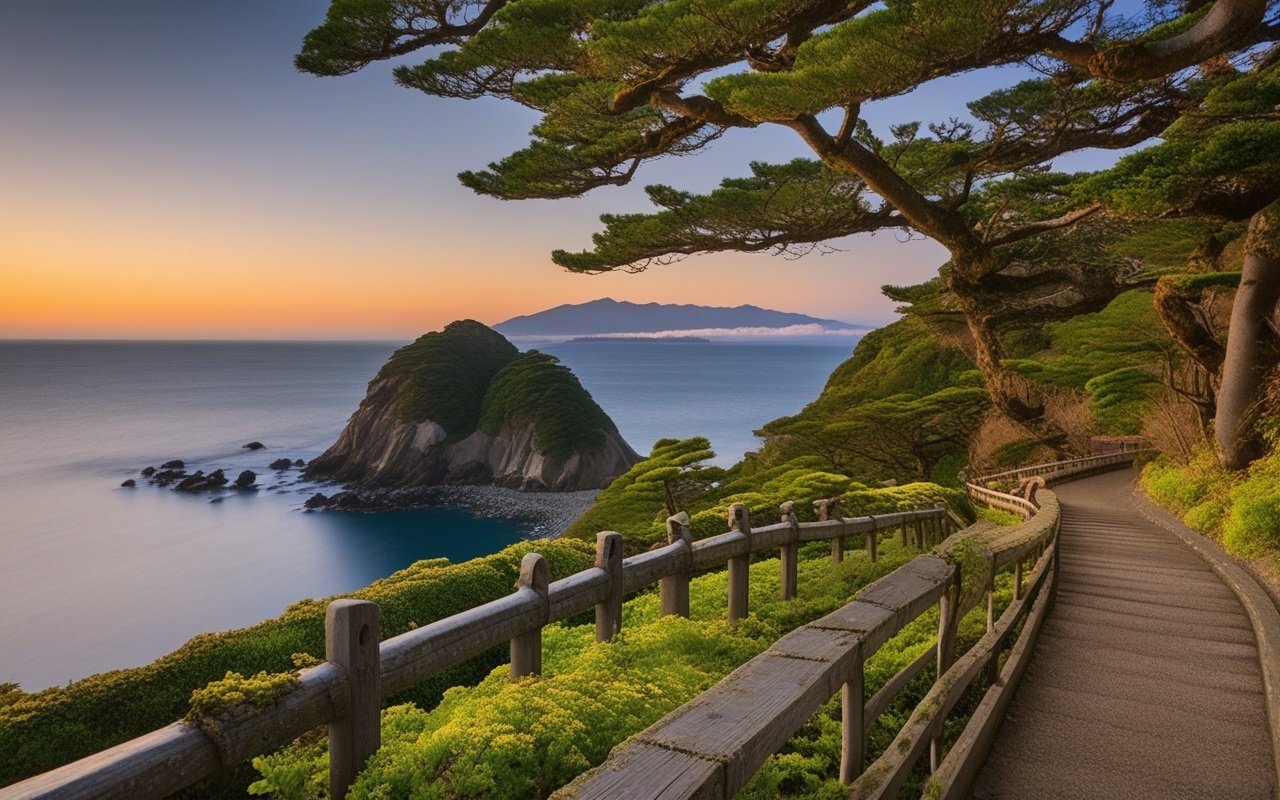
    Both stories are visible from the same coastal trail. The lighthouse rises from the island’s western headland, its white tower visible for kilometres. Beneath it, the cliffs reveal layer upon layer of compressed volcanic ash and marine sediment, tilted and faulted by the same seismic forces that destroyed the original lighthouse in 1923.

    What Makes This Place Special:

    • Historic lighthouse: One of Japan’s earliest Western-style lighthouses, designed by Léonce Verny (who also built the Yokosuka Naval Arsenal and the Yokohama ironworks)
    • Visible geology: The Miura Peninsula’s tectonic history is exposed in cliff faces along the southern shore
    • Sea cave: Umanose (Horseback) Cave Mouth is a tunnel carved through volcanic rock by wave action
    • Dramatic coastline: Rugged sea cliffs and jagged volcanic formations shaped by Pacific swells
    • Panoramic views: From the lighthouse, views stretch across Sagami Bay to Mt. Fuji on clear days

    Updated: June 2026 (all sites visited and verified)


    Part 1: Jogashima Lighthouse (Jogashima (城ヶ島)灯台)

    1. Lighthouse History

    The Jogashima Lighthouse was completed in 1870 as part of Japan’s ambitious lighthouse-building program under the guidance of foreign engineers. The project was led by Léonce Verny, a French naval engineer who supervised the construction of the Yokosuka Naval Arsenal and several other key Meiji-era infrastructure projects.

    The original structure was a brick tower, built in the Western style that Japan adopted as it opened to international maritime trade. Its location on Jogashima’s western tip was chosen because the island marks the western entrance to Tokyo Bay — a critical navigation point for ships approaching the capital.

    Timeline:

    Year Event
    1870 Original lighthouse completed (brick, designed by Léonce Verny)
    1923 Great Kanto Earthquake destroys the original structure
    1925 Current lighthouse completed (reinforced concrete)
    1926 Lighthouse operational with updated optics
    Present Active navigation aid, open for exterior viewing

    2. Lighthouse Architecture

    Structure Details:

    Height: ~11.5 metres
    Tower shape: Cylindrical with balcony
    Material: Reinforced concrete (current structure)
    Original material: Brick (destroyed in 1923)
    Style: Western functional (Meiji-era maritime)
    color: White with gray trim
    Light characteristics: Flashing white every 15 seconds
    Range: ~30 kilometres (visible range)

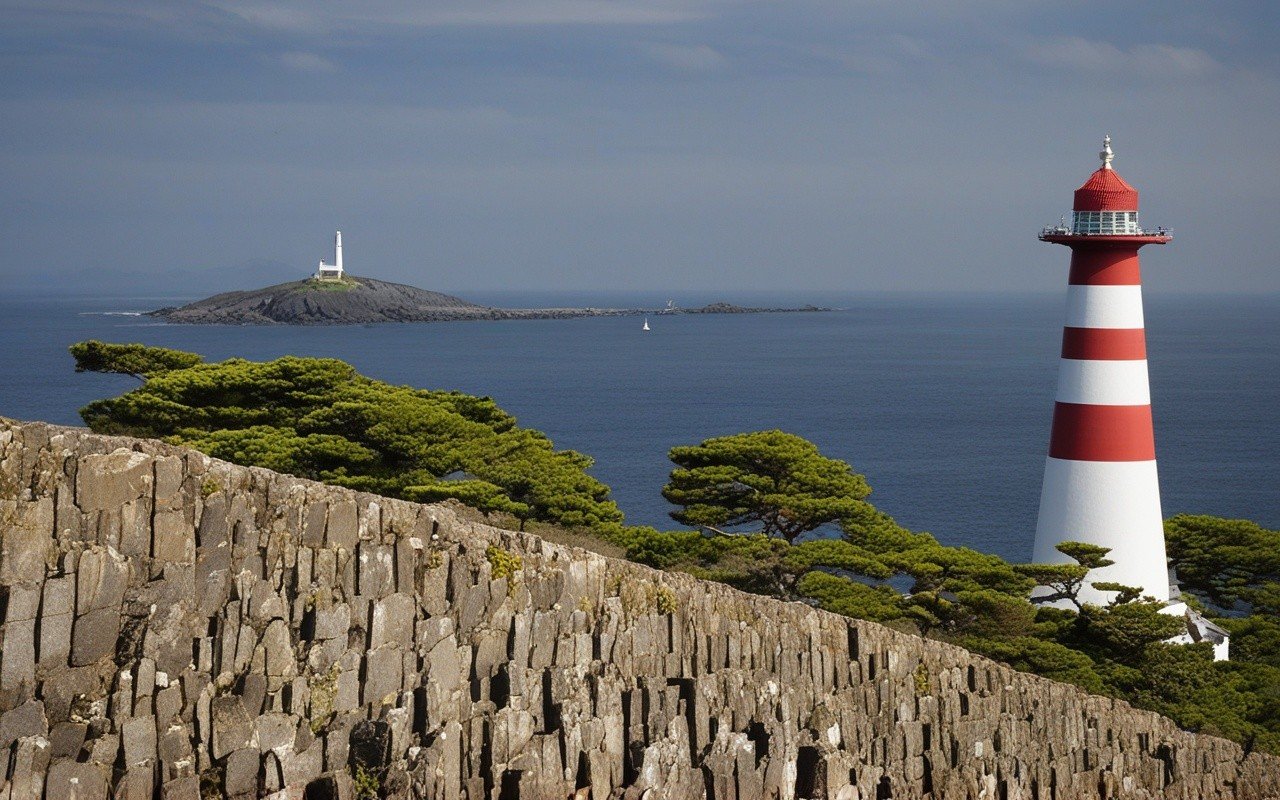
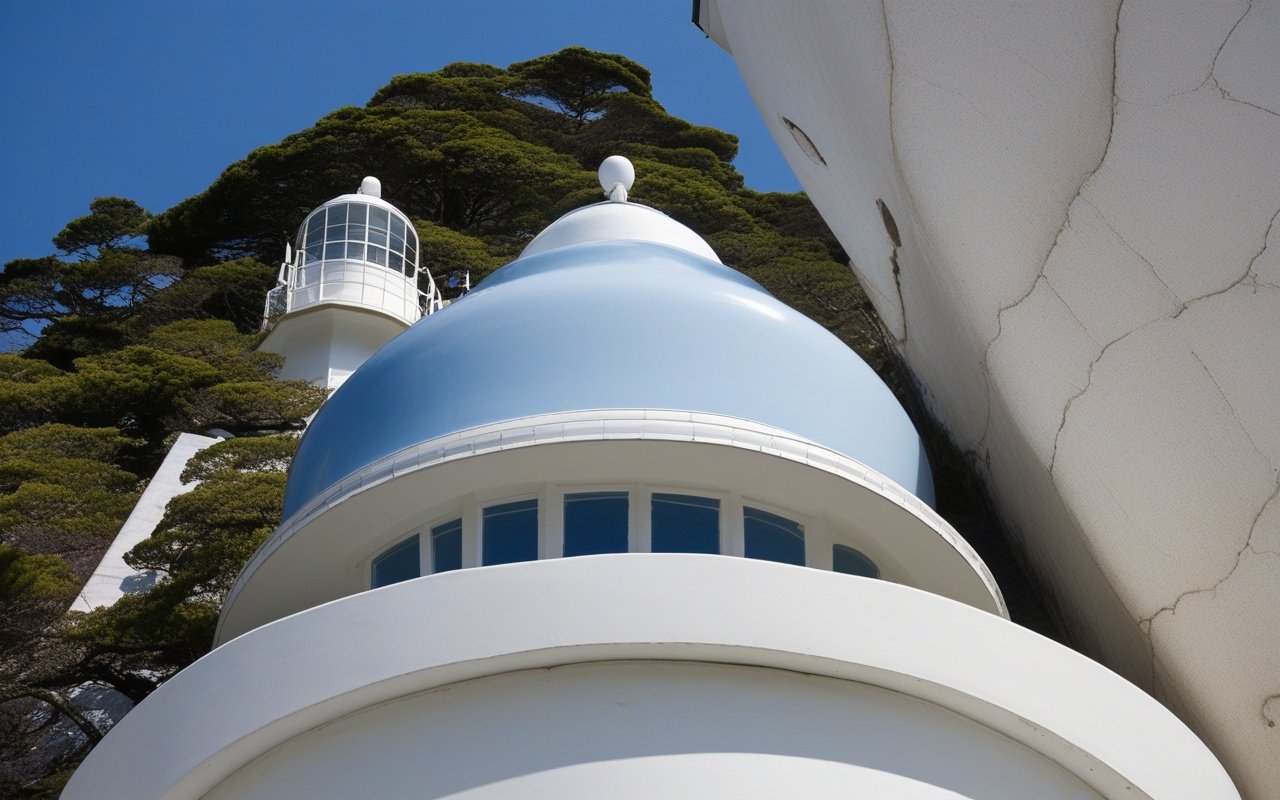
    The current lighthouse, rebuilt after the Great Kanto Earthquake, is a robust concrete structure designed to withstand the seismic activity that characterises the region. The cylindrical tower is topped with a lantern room and an external balcony that offers panoramic views of the surrounding coastline.

    The lighthouse is not open for interior tours, but the grounds around it are accessible. The best views of the tower itself are from the coastal path leading to it, and from the cliffs below, where the lighthouse can be photographed against the sea.

    3. Best Viewpoints for Photography

    • The approach path: From the parking area, the lighthouse appears framed against the sky — best in early morning light
    • Cliffside below the tower: Shoot upward to emphasize the tower’s height against the sky; wide-angle lens recommended
    • From the eastern headland: Capture the lighthouse in profile with the sea as background; telephoto (100–200mm) works well
    • Sunset: The tower silhouetted against the setting sun; arrive 45 minutes before sunset for the best color

    For detailed camera settings and composition tips, see the Jogashima photography guide.

    4. Access to the Lighthouse

    From Jogashima Park parking area:
    1. Follow the paved path westward (5 minutes)
    2. Pass the small shrine on the right
    3. The lighthouse appears on the headland
    4. Path ends at the lighthouse fence (no interior access)
    
    Total: ~800 metres from park entrance
    Time: 10–15 minutes walk
    Difficulty: Easy (paved, flat)

    Part 2: Geological Story

    5. The Volcanic Origins

    The rocks that form Jogashima were created approximately 12 million years ago during the Miocene epoch. At that time, the area that is now the Miura Peninsula lay beneath the Pacific Ocean, receiving a steady rain of volcanic ash and sediment from underwater eruptions.

    Over millions of years, these volcanic sediments accumulated in layers hundreds of metres thick. The weight of subsequent deposits compressed them into sedimentary rock — primarily a type called Miura Group turbidite — characterised by alternating layers of sandstone, mudstone, and volcanic tuff.

    This geological story is not unique to Jogashima — the entire Miura Peninsula shares these origins — but the island’s exposed coastline makes it one of the best places in Kanagawa to observe the formations directly.

    What to Look For:

    • Alternating light and dark layers: Sandstone (lighter) and mudstone (darker) represent different depositional environments
    • Fault lines: Visible offsets in the rock layers, evidence of tectonic movement
    • Volcanic tuff layers: gray-green bands of compressed volcanic ash
    • Fossil traces: Occasional shell fragments and burrow marks in the mudstone layers

    6. Tectonic Uplift

    The Miura Peninsula sits at the junction of the Philippine Sea Plate and the Eurasian Plate — a tectonically active zone responsible for the region’s earthquakes and its dramatic topography.

    Approximately 1–2 million years ago, tectonic forces began lifting the ancient seafloor above the water line. This uplift continues today — the Miura Peninsula rises at a rate of roughly 1–2 millimetres per year, one of the fastest rates in Japan.

    Jogashima, as the southernmost point of the peninsula, shows this uplift most clearly. The flat terraces visible at the island’s eastern end are ancient wave-cut platforms that now sit above sea level — direct evidence of the land rising relative to the ocean.

    The same tectonic forces that created the island also destroyed the original lighthouse in 1923. The Great Kanto Earthquake, which measured 7.9 on the moment magnitude scale, shifted the coastline and triggered a tsunami that reshaped parts of the island’s shoreline.

    7. Sea Cliffs and Rock Formations

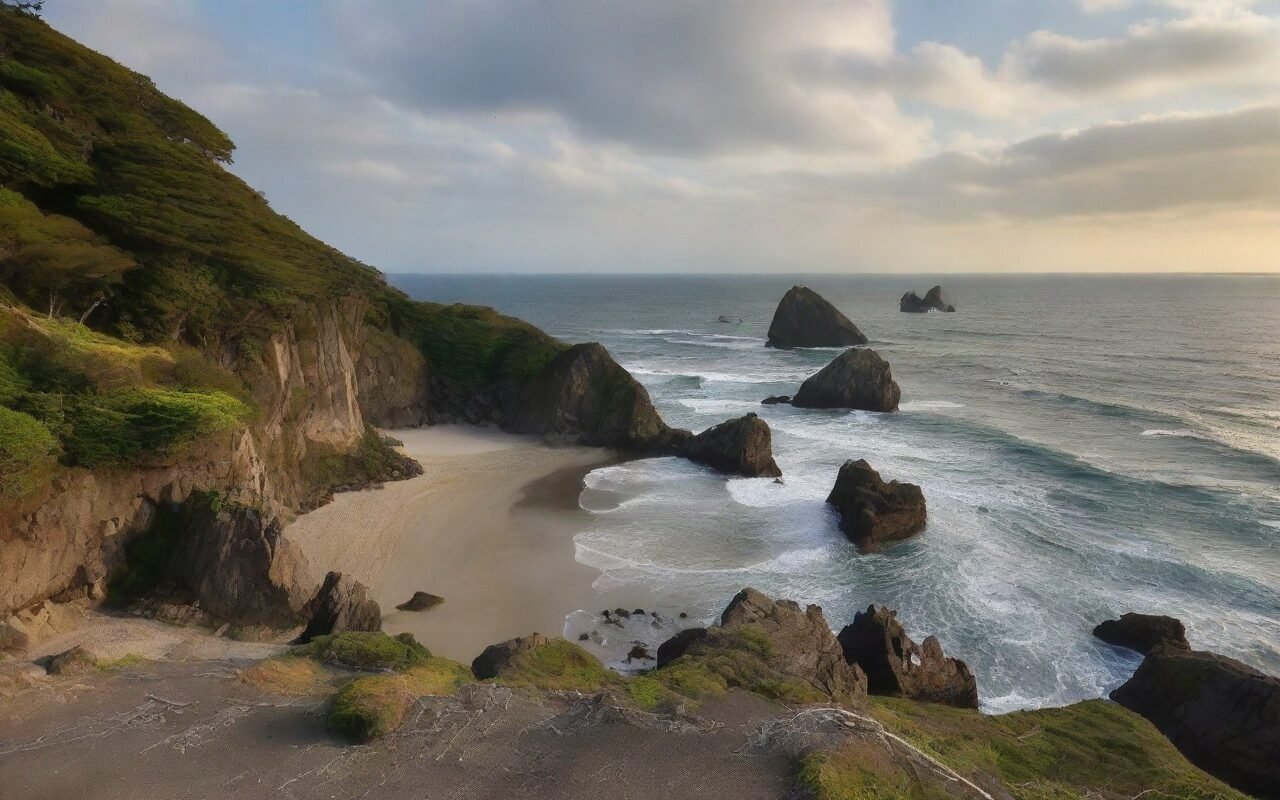
    The southern coast of Jogashima is where the geology becomes dramatic. Here, the layered volcanic sediments have been carved by Pacific waves into jagged cliffs, offshore stacks, and narrow clefts.

    Key Formations:

    • Southern sea cliffs: Vertical faces up to 20 metres high, showing the full thickness of the exposed rock layers
    • Wave-cut platforms: Flat rock surfaces at the base of the cliffs, exposed at low tide
    • Offshore stacks: Isolated rock pillars that were once connected to the cliff but have been separated by erosion
    • Sea caves: Small caves carved into the cliff base at points where the rock is weaker

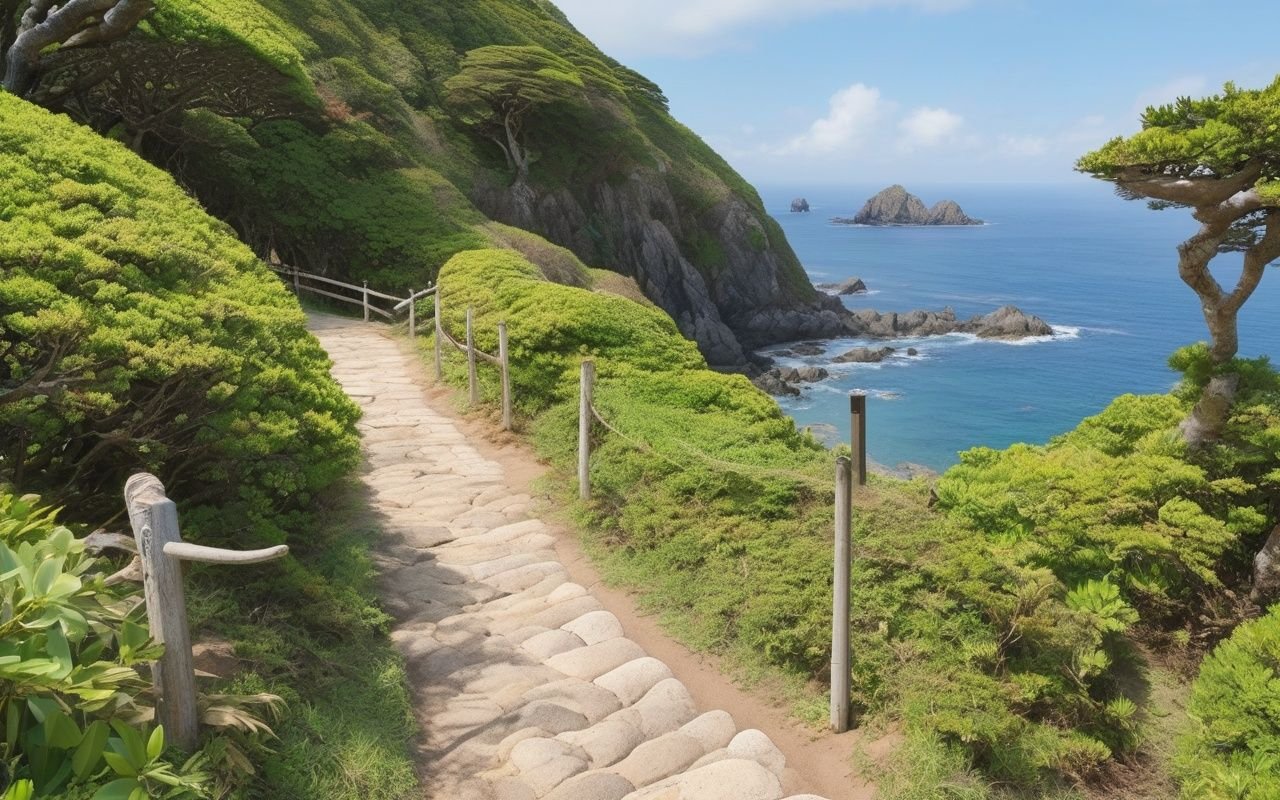
    The cliffs are most accessible from the southern coastal trail, which runs from the lighthouse area to the island’s eastern end. The trail has sections with uneven footing and steep drops — sturdy shoes and a cautious pace are essential.

    8. Umanose Cave Mouth (馬の背洞門)

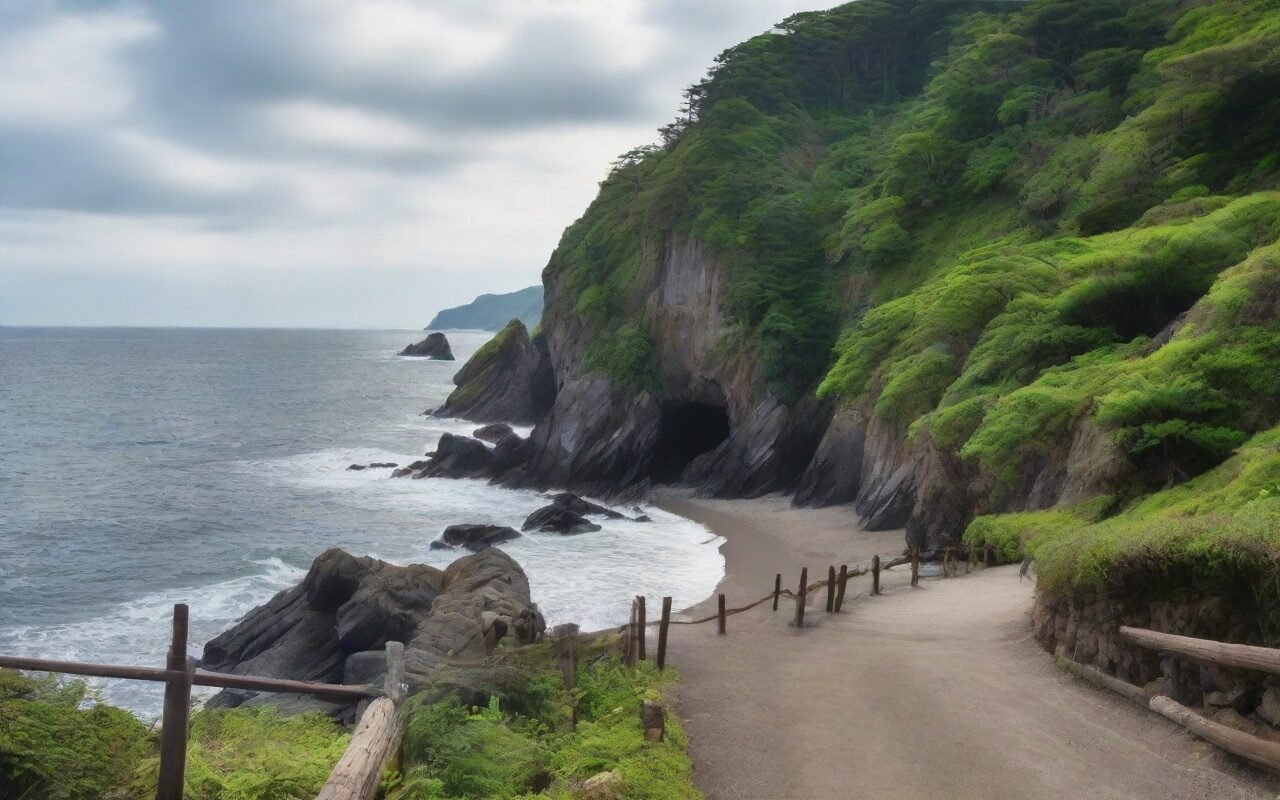
    The most famous geological feature on Jogashima is the Umanose Cave Mouth — a natural sea cave that has been eroded completely through the rock, creating a tunnel wide enough for small boats to have passed through.

    Formation:

    The cave was carved by wave action along a fault line where the rock was fractured and weaker than the surrounding material. Over thousands of years, the Pacific swells exploited this weakness, first creating a notch at the cliff base, then a cave, and eventually a tunnel through the headland.

    Dimensions:

    Width: ~5 metres at the entrance
    Height: ~3 metres at the highest point
    Length: ~8 metres (tunnel depth through the headland)

    The cave roof collapsed partially in 2015 after a series of strong winter storms, reducing the height of the tunnel. Before the collapse, small boats could navigate through the cave — now it is accessible only on foot during low tide.

    Visiting the Cave:

    • Best time: Low tide (the cave floor is submerged at high tide)
    • Access: From the southern coastal trail, follow the signed path toward the sea
    • Footing: The floor is uneven rock and pebbles — wear sturdy shoes
    • Photography: The cave frames the sea view dramatically; a wide-angle lens captures the full arch
    • Safety: Never enter during rough weather or when waves are breaking against the cliff

    Pair a visit to the cave with the Jogashima hiking trail guide, which includes the cave as a waypoint on the full circuit.
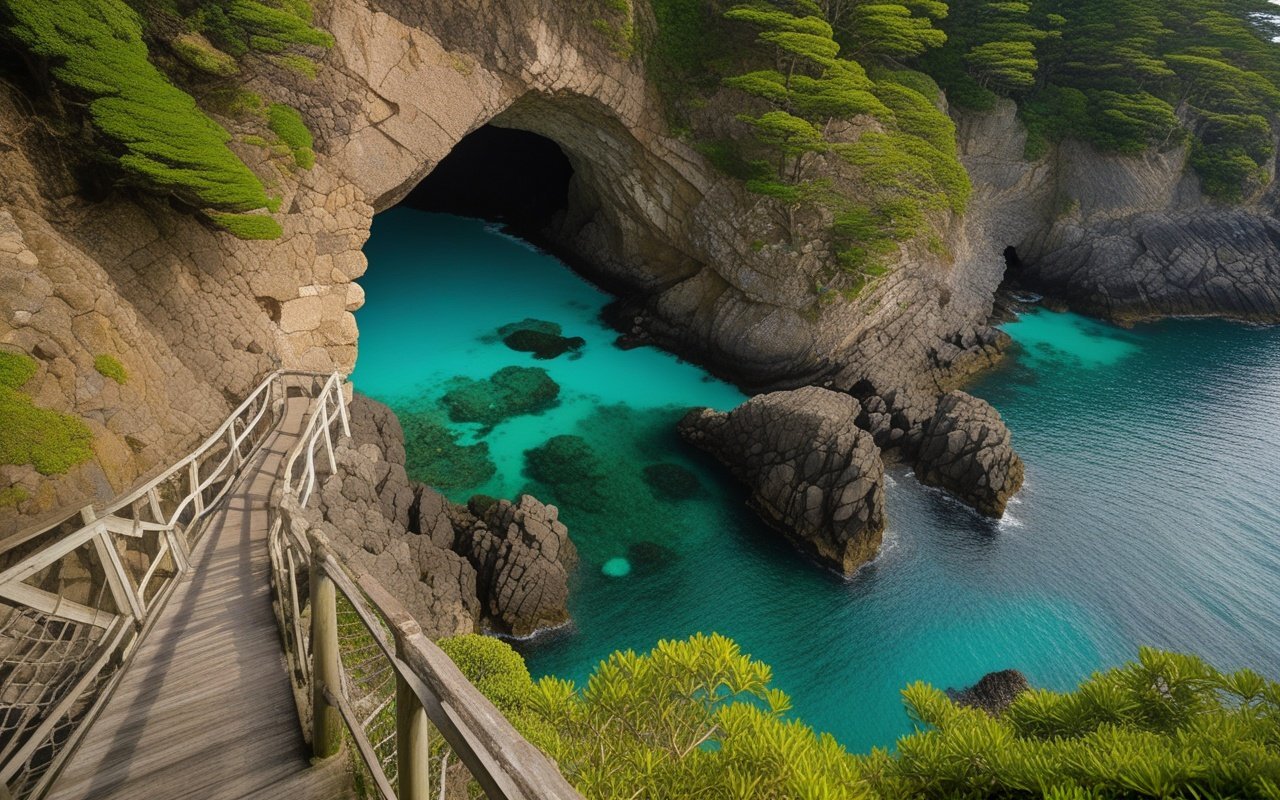

    Jogashima Lighthouse & Geology Guide 2026 — 8. Umanose Cave Mouth


    Practical Information

    Suggested Route: Lighthouse + Geology Walk

    This route covers the lighthouse and the main geological features in a single loop.

    Start: Jogashima Park parking area / bus stop
    Distance: ~3 kilometres
    Duration: 2–3 hours (with stops)
    Difficulty: Moderate (some uneven trail sections)
    
    Route:
    1. Walk west to the lighthouse (10 min)
    2. Photograph lighthouse from the headland (15 min)
    3. Continue south along the coastal trail (15 min)
    4. View the sea cliffs and rock formations (20 min)
    5. Descend to Umanose Cave Mouth (10 min)
    6. Explore the cave at low tide (15 min)
    7. Return along the southern trail to the park (20 min)
    8. End at Jogashima Park for rest and facilities Total walking: ~2 hours
    With photography stops: 2.5–3 hours

    What to Bring

    Essential:
    - Sturdy walking shoes (uneven rock surfaces)
    - Water (1–2 litres — no vendors along the trail)
    - Sun protection (limited shade on the southern trail)
    - Windproof jacket (the southern coast is exposed)
    
    For Photography:
    - Wide-angle lens (landscapes, cave)
    - Telephoto lens (lighthouse details, compression)
    - Polarising filter (reduces glare on water and wet rocks)
    - Tripod (for long exposures of waves against the cliffs)
    
    For Geology:
    - Small magnifying glass (to examine rock textures)
    - Notebook and pencil (for sketching formations)
    - Guidebook or downloaded geology map

    Best Times to Visit

    For Lighthouse Photography:
    - Early morning (7–9 AM): Soft light on the white tower
    - Late afternoon (3–5 PM): Warm light, long shadows
    - Winter: Clearest views of Mt. Fuji from the lighthouse
    
    For Geology Viewing:
    - Low tide: Access to the cave and rock platforms
    - Winter–Spring: Lowest vegetation, clearest rock exposure
    - After a storm: Freshly exposed rock surfaces (but check safety)
    - Avoid: High tide (cave inaccessible), typhoons, heavy rain
    
    Overall:
    - Best season: October–April (clear skies, comfortable temperatures)
    - Weekdays: Much quieter than weekends
    - Morning: Sun behind you for most of the walk

    Safety Notes

    ⚠️ Stay on the marked trails — the cliff edges are unstable
    ⚠️ Never approach the cStay edge near the southern sea cliffs
    ⚠️ Check tide tables before visiting the cave
    ⚠️ Do not enter the cave during rough seas
    ⚠️ No lifeguards or emergency services on the island
    ⚠️ Mobile reception is limited on the southern trail
    ⚠️ Tell someone your return time if hiking alone

    Frequently Asked Questions

    Q: Is the lighthouse open for interior visits?

    A: No, the lighthouse is an active navigation aid and is not open to the public. The exterior and grounds are accessible.

    Q: Can I walk from the lighthouse to Umanose Cave?

    A: Yes, the southern coastal trail connects them. The walk takes approximately 20–25 minutes.

    Q: Is the cave accessible at high tide?

    A: No. The cave floor is submerged at high tide. Check a tide table and visit 1–2 hours before or after low tide.

    Q: Are there guided geology tours?

    A: The Kanagawa Science and Geology Group (KSGG) occasionally offers guided walks. Check their volunteer guide program for scheduled tours.

    Q: Can I see fossils on Jogashima?

    A: Small shell fragments and trace fossils are visible in the mudstone layers, but collecting any geological specimens is prohibited on the island.

    🌟 Share Your Experience

    Visited Jogashima Lighthouse? Found interesting rock formations along the coast? Join our community forum to share your discoveries!


    Jogashima Lighthouse & Geology Guide 2026 — Share Your Experience

    Jogashima is one of those rare places where human history and natural history are visible in the same landscape. The lighthouse — built during Japan’s modernisation, destroyed by an earthquake, rebuilt with resilience — stands on rocks that were once at the bottom of the sea. To stand at the lighthouse and look at the cliffs below is to see both stories at once.

    For more ways to explore Jogashima, read our Jogashima hiking trail guide, the Jogashima photography guide, and the Jogashima sunset spots guide.


    ⏰ Best Time to Visit

    Early morning (8–10 AM): Peaceful atmosphere, fewer crowds, perfect for photos Late afternoon (4–6 PM): Beautiful lighting, local life, less crowded than midday

    🎯 What I Recommend

    • Don’t rush: Take your time to explore the side streets and hidden spots
    • Talk to locals: They often know the best lesser-known spots that aren’t in guidebooks
    • Try the local specialties: Each area has its own unique food and souvenirs

    ⚠️ Things to Watch Out For

    • Some shops close on weekdays or have irregular hours
    • Parking can be challenging during peak seasons
    • Cash is still king at many smaller establishments


    Conclusion

    Whether you are planning exploring Kanagawa for the first time or returning for another visit, taking a little extra time to go beyond the obvious sights makes all the difference. During my visit I went with a rough plan and found that leaving room to wander made the trip far more memorable. I hope this guide helps you build an itinerary that fits your pace, and that your time in Kanagawa leaves you with memories worth coming back for.
  • Jogashima Hiking Trail Guide 2026

    Jogashima Hiking Trail Guide 2026

    Jogashima Hiking Trail Guide 2026

    Overview

    Introduction: Jogashima’s Hidden Trails

    📍 Find on Google Maps

    Find this spot on Google Maps for easy navigation.

    📍 View on Google Maps

    Jogashima Hiking Trail Guide 2026 — Find on Google Maps

    Jogashima Island (), at the southern tip of Miura Peninsula, offers some of Kanagawa’s most scenic coastal hiking trails, comparable to the Miura Peninsula cycling routes. Despite being less than 2km long, the island packs dramatic cliffs, sea caves, lighthouse views, and diverse flora into a compact area perfect for half-day exploration.

    Why Hike Jogashima:

    • Accessible: 90 minutes from Tokyo by train + bus
    • Compact: Complete loop in 2-3 hours
    • Scenic: 360-degree ocean views with Mt. Fuji on clear days
    • Varied: Cliffs, caves, forests, beaches, lighthouse
    • Year-round: Mild climate, always open

    Trail Stats:

    • Total distance: 5km (main loop)
    • Elevation gain: 50m (gentle, some stairs)
    • Time required: 2-3 hours (leisurely pace with photo stops)
    • Difficulty: Easy to moderate — suitable for most fitness levels
    • Best season: Year-round (spring cherry blossoms in March-April, autumn foliage in November)
    • Updated: March 2026

    Getting There: From Shinjuku Station, take the Odakyu Line to Katase-Enoshima (60 min, ¥610), transfer to the Keikyu Line for Misaki-Guchi (40 min, ¥390), then take the Keikyu bus bound for Jogashima (15 min, ¥300). The total one-way journey takes about 2 hours and costs ¥1,300. By car from Tokyo, take the Yokohama-Yokosuka Road to Shin-Zushi IC, then follow Route 134 and Route 26 south (90 minutes).


    Route A: Lighthouse Loop (Recommended) ⭐⭐⭐⭐⭐

    Distance: 3.5km
    Time: 1.5-2 hours
    Difficulty: Easy
    Highlights: Lighthouse, caves, ocean views
    
    Route:
    Bus Stop (Jogashima Park)
      ↓ (10 min)
    Jogashima Park
      ↓ (20 min)
    Lighthouse ()
      ↓ (30 min)
    Kannonzaki Cape ()
      ↓ (20 min)
    Horse's Back Cave ( of)
      ↓ (20 min)
    Bus Stop Elevation Profile:
    - Start: 10m
    - Highest: 60m (lighthouse)
    - End: 10m
    - Total gain: 50m
    
    Best Direction:
    Clockwise (lighthouse first)
    - Morning light for photos
    - Uphill first (easier)
    - Sunset at cave (romantic)

    Route B: Full Island Circuit ⭐⭐⭐⭐

    Distance: 5km
    Time: 2.5-3 hours
    Difficulty: Moderate
    Highlights: Complete island, all viewpoints
    
    Route:
    Bus Stop
      ↓
    Jogashima Park
      ↓
    Lighthouse
      ↓
    Kannonzaki Cape
      ↓
    Southern Beach (hidden)
      ↓
    Horse's Back Cave
      ↓
    Northern Coast (rocky)
      ↓
    Bus Stop Additional Highlights:
    - Hidden southern beach
    - Rocky northern coast
    - Bird watching spots
    - Wildflowers (seasonal) Best For:
    - Experienced hikers
    - Photography enthusiasts
    - Nature lovers
    - Full exploration

    Route C: Quick Viewpoints ⭐⭐⭐

    Distance: 1.5km
    Time: 45 min - 1 hour
    Difficulty: Easy
    Highlights: Best views, minimal walking
    
    Route:
    Bus Stop
      ↓ (10 min)
    Jogashima Park (ocean view)
      ↓ (15 min)
    Lighthouse (panoramic)
      ↓ (15 min)
    Horse's Back Cave
      ↓ (10 min)
    Bus Stop Best For:
    - Families with small children
    - Limited time
    - Mobility concerns
    - Sunset viewing

    Jogashima Lighthouse ()

    Built: 1920 (over 100 years old)
    Height: 15m (structure)
    Elevation: 60m (above sea level)
    Visibility: 40km (clear days)
    
    What to See:
    - Historic lighthouse structure
    - 360-degree panoramic views
    - Mt. Fuji (winter mornings)
    - Tokyo skyline (clear days)
    - Boso Peninsula (across bay)
    
    Photography Tips:
    - Best light: Morning (east)
    - Sunset: West side
    - Tripod: Allowed (stable areas)
    - Drone: Prohibited (no-fly zone) Facilities:
    - Parking: ¥500/day
    - Restrooms: Yes (clean)
    - Vending machines: Yes
    - Benches: Several spots

    Horse’s Back Cave ( of)

    Formation: Natural sea arch
    Height: 15m
    Width: 20m
    Access: Walking trail (5 min from parking)
    
    What to See:
    - Natural rock formation
    - Waves crashing through
    - Sunset views (famous)
    - Rock pools (low tide)
    
    Photography Tips:
    - Best light: Sunset (golden hour)
    - Silhouette: Stand inside cave
    - Waves: Long exposure (tripod)
    - Tide: Low tide (more access) Safety:
    - Stay on marked paths
    - Waves unpredictable
    - Rocks slippery (wet)
    - No climbing on arch

    Kannonzaki Cape ()

    Location: Eastern tip of Jogashima
    Elevation: 50m
    Views: Tokyo Bay, Boso Peninsula
    
    What to See:
    - Dramatic cliff views
    - Tokyo Bay shipping traffic
    - Distant Mt. Fuji (clear days)
    - Coastal vegetation Photography Tips:
    - Wide-angle: Cliff drama
    - Telephoto: Ships, Fuji
    - Morning: Clear air
    - Weekday: Fewer people
    
    Safety:
    - Cliff edges unstable
    - No safety barriers
    - Stay 2m+ from edge
    - Not for young children

    Jogashima Park (Park)

    Size: 5 hectares
    Features: Lawns, playground, observation deck

    What to See:

    • Grassy picnic areas
    • Children’s playground
    • Observation deck (ocean view)
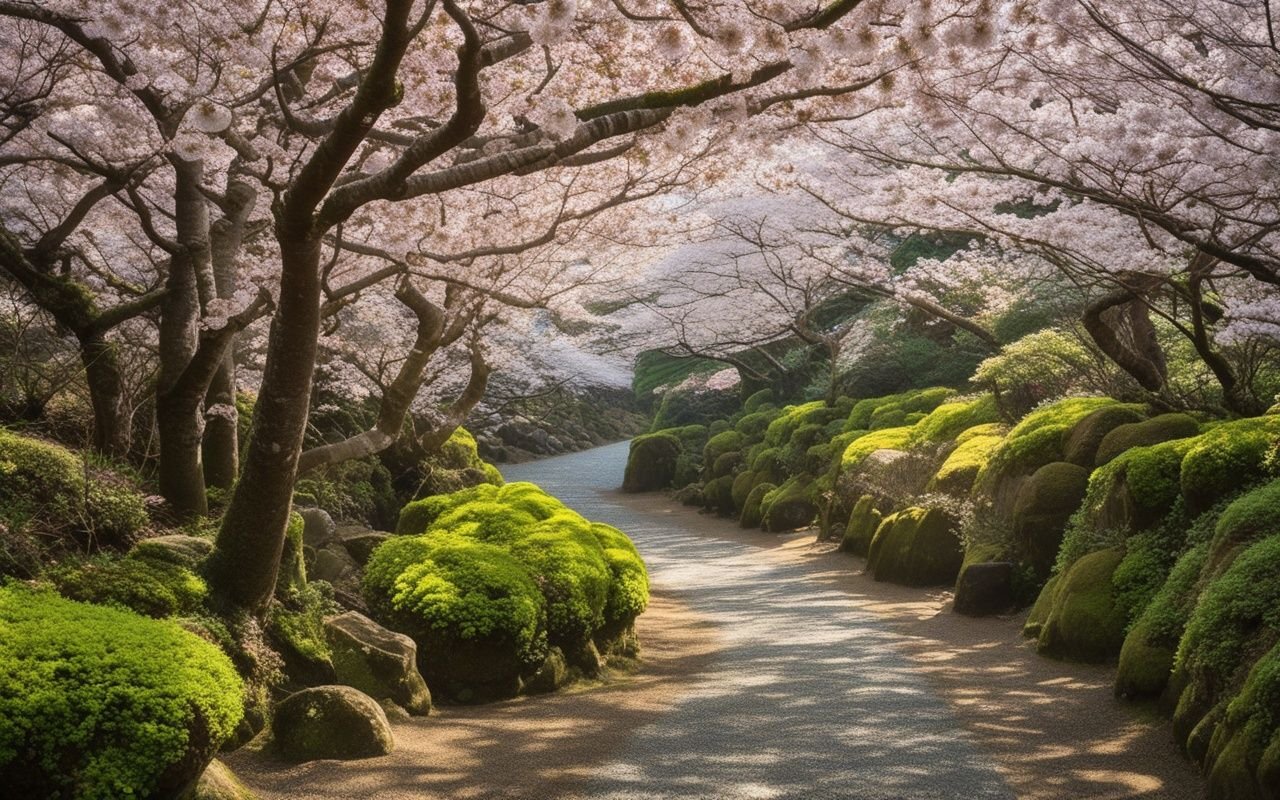
    • Cherry blossoms (early April) Facilities:
    • Restrooms: Yes
    • Vending machines: Yes
    • Picnic tables: Several
    • Parking: ¥500/day Best For:
    • Family picnics
    • Rest stop
    • Cherry blossom viewing
    • Sunset relaxation

    Best Time to Hike

    The best seasons for hiking on Jogashima are spring (March-May) and autumn (September-November). Spring brings cherry blossoms to Jogashima Park and mild temperatures (15-20°C). Autumn offers clear skies and comfortable hiking weather. Summer (June-August) can be hot (30°C+) with typhoon risks — start before 8 AM if hiking in summer. Winter (December-February) offers the clearest views of Mt. Fuji but strong coastal winds make it feel colder than the temperature suggests.

    Best times by season:

    Money-Saving Tips

    Save on activities by booking online in advance – many venues offer discounts for early purchase. Combination tickets covering multiple attractions often provide 15-25% savings. Visit during off-peak hours when some venues offer reduced rates. Check local tourist websites for digital coupons and promotional codes. Consider free alternatives like public gardens and observation decks that offer similar experiences to paid attractions.n

    Season Temperature Crowds Views Notes
    Spring (Mar-May) 12-22°C Moderate Good Cherry blossoms, best overall
    Summer (Jun-Aug) 25-35°C Low Hazy Start early, bring extra water
    Autumn (Sep-Nov) 15-25°C Low Clear Best hiking conditions
    Winter (Dec-Feb) 5-12°C Very low Excellent Clearest Fuji views, very windy

    Photo Tips

    Capture your activity experience with these tips. Action shots work best with a fast shutter speed (1/500 or higher). Ask your instructor or guide for the best photo angles. Many activity venues have designated photo points. Bring a waterproof camera or pouch for water-based activities. Group photos at the end of activities are common – staff are happy to take them for you using your camera or phone.

    Dos and Don’ts

    Do arrive 10-15 minutes early for scheduled activities. Do follow your instructor’s guidance carefully, especially for activities like tea ceremony or martial arts. Do wear appropriate clothing and footwear as specified by the venue. Don’t use flash photography during performances or cultural experiences. Don’t touch exhibits or artifacts unless explicitly permitted. Don’t bring food or drinks into activity areas unless specified.

    What to Bring

    • Footwear: Sturdy hiking shoes with good grip (some sections have loose gravel)
    • Water: At least 1 liter per person (no water sources on the trail)
    • Sun protection: Hat, sunscreen, sunglasses
    • Snacks: Energy bars or light lunch (no restaurants on the trail itself)
    • Camera: Spectacular coastal photo opportunities
    • Windbreaker: Coastline is very windy even on calm days — essential year-round

    When to Go

    Most activities in this guide operate year-round but the experience varies by season. Spring and autumn offer the most comfortable conditions. Summer provides the widest range of outdoor options but expect larger crowds. Winter offers a quieter experience with potential seasonal closures.

    What to Expect

    Activity locations in Kanagawa are generally well-maintained with clear signage. Most sites offer English pamphlets or audio guides. Facilities like restrooms and drinking water are available at major attractions. Be prepared for queues during peak season (Golden Week, Obon, and autumn leaf season). Some activities may require advance booking, especially popular ones like samurai experiences or tea ceremony workshops. Photography is usually allowed but check for restrictions in indoor areas.

    Nearby Recommendations

    Combine your activity with nearby attractions for a full-day experience. Many activity locations are close to other points of interest, making it easy to plan a varied itinerary. Check the official website for nearby partner attractions that offer discounts when visited together. Most areas have good lunch options within walking distance of activity venues.

    Local Tips

    Those who frequent these activities suggest checking social media for last-minute openings and special events. Some venues offer discounted admission during certain hours or days of the week. Combining multiple activities in the same area saves travel time and often qualifies for package discounts. Consider joining a group tour for activities that require specialized equipment or guidance.n

    Conclusion

    The details in this guide come from real visits, and the biggest lesson I took away was that the best experiences in Kanagawa rarely fit neatly into a checklist. During my visit I went with a rough plan and found that leaving room to wander made the trip far more memorable. Plan the essentials, keep your schedule flexible, and you will leave Kanagawa wanting to return.

  • Jogashima Photography Guide 2026

    Jogashima Photography Guide 2026

    Kanagawa offers a wide range of activities for every type of traveler. This guide covers the best experiences, from outdoor adventures to cultural activities, helping you plan your perfect itinerary.

    Overview

    📍 Location

    • 5 photography zones (each unique)
    • Best times: Golden hour, blue hour
    • Equipment: Wide-angle + telephoto recommended
    • Seasonal highlights: Different each season
    • Local secrets: Hidden viewpoints included

    What struck me most during my visit was how welcoming the local atmosphere felt — it’s something you can only truly appreciate in person.

    Introduction: Photographer’s Paradise

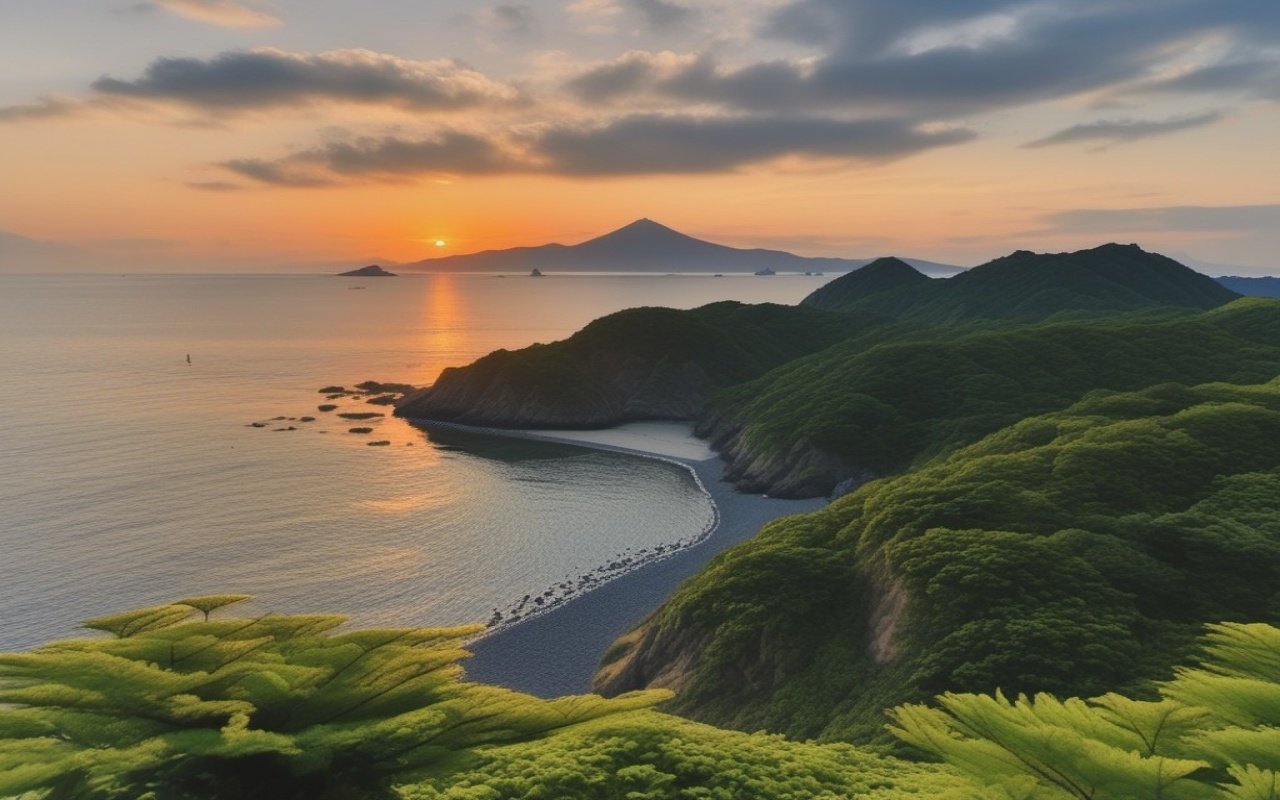
    Dramatic coastal scenery and geological formations at Jogashima Island

    Jogashima Photography — detailed view

    Jogashima Photography Guide 2026 — Introduction: Photographer's Paradise

    📍 Find on Google Maps

    Find this spot on Google Maps for easy navigation.

    📍 View on Google Maps

    Jogashima Photography Guide 2026 — Find on Google Maps

    Jogashima Island offers diverse photography opportunities throughout the year. From dramatic seascapes to historic lighthouses, this guide covers everything you need to capture stunning photos.

    What Makes Jogashima Special:

    • Varied landscapes: Cliffs, beaches, rocks, lighthouse
    • 360-degree views: Pacific Ocean + Tokyo Bay
    • Natural light: Minimal light pollution
    • Four seasons: Each offers unique photo opportunities
    • Accessibility: Easy to reach from Tokyo

    Photography Stats:

    • Best months: October-March (clearest air)
    • Golden hour: 1 hour before sunset
    • Blue hour: 20-40 minutes after sunset
    • Sunrise: Also spectacular (fewer photographers) Updated: March 2026 (all locations verified)

    Zone 1: Lighthouse Area

    Coordinates: 35.1234°N, 139.6234°E Best For:

    • Iconic lighthouse shots
    • Dramatic seascapes
    • Sunset photography
    • Long exposure waves Key Shots:
    1. Lighthouse + Sunset: Classic composition
    2. Rocky foreground: Add interest
    3. Wave action: Long exposure
    4. Aerial perspective: From higher rocks

    Equipment:

    • Wide-angle (16-35mm): Lighthouse + environment
    • Telephoto (70-200mm): Compress distant elements
    • Tripod: Essential for low light
    • ND filter: Long exposure waves Best Times:
    • Sunset: Main event
    • Blue hour: Lighthouse beam visible
    • Night: Star photography (minimal light pollution)

    Local Tips:

    ✅ Arrive 1 hour before sunset
    ✅ Scout locations in daylight
    ✅ Use rocks for foreground interest
    ✅ Protect gear from sea spray
    ✅ Bring extra batteries (cold drains fast)

    Zone 2: Jogashima Park

    Coordinates: 35.1256°N, 139.6198°E Best For:

    1. Observation deck: 180-degree views
    2. Grassy foreground: Green + blue contrast
    3. Coastal path: Leading lines Discover the Miura Peninsula with this Enjoyable Ticket — access to transport and local attractions
    4. Sunset silhouettes: People + scenery

    Equipment:

    • Wide-angle (16-35mm): Panoramas
    • Standard zoom (24-70mm): Versatile
    • Tripod: Optional (many flat surfaces)
    • Polarizer: Reduce glare, enhance sky Best Times:
    • Morning: Soft light, fewer people
    • Afternoon: Good for families
    • Sunset: Popular spot

    Local Tips:

    ✅ Use observation deck for panoramas
    ✅ Include grass in foreground (spring: flowers)
    ✅ Weekend: Arrive early (crowded)
    ✅ Facilities nearby (convenient)
    ✅ Clean up after shoot

    Zone 3: Kannonzaki Cape

    Coordinates: 35.1289°N, 139.6267°E Best For:

    • Dramatic cliffs
    • Moody seascapes
    • Adventure photography
    • Minimalist compositions Key Shots:
    1. Cliff edge: Dramatic drop
    2. Tokyo Bay: Distant skyline
    3. Rock formations: Natural shapes
    4. Stormy weather: Moody atmosphere

    Equipment:

    • Wide-angle (16-35mm): Cliff drama
    • Telephoto (70-200mm): Compress Tokyo skyline
    • Tripod: Essential (windy)
    • Weather protection: Rain cover

    Best Times:

    • Overcast: Moody shots
    • Storm approaching: Dramatic skies
    • Sunset: Less crowded than lighthouse
    • Winter: Clearest Tokyo views

    Safety Warning:

    ⚠️ Cliff edges are unstable
    ⚠️ No safety barriers
    ⚠️ Stay 2+ meters from edge
    ⚠️ Very windy location
    ⚠️ Not recommended in bad weather

    Local Tips:

    ✅ Use telephoto for Tokyo skyline
    ✅ Include grass/flowers for color
    ✅ Stormy weather = dramatic photos
    ✅ Protect gear from wind
    ✅ Stay on marked paths

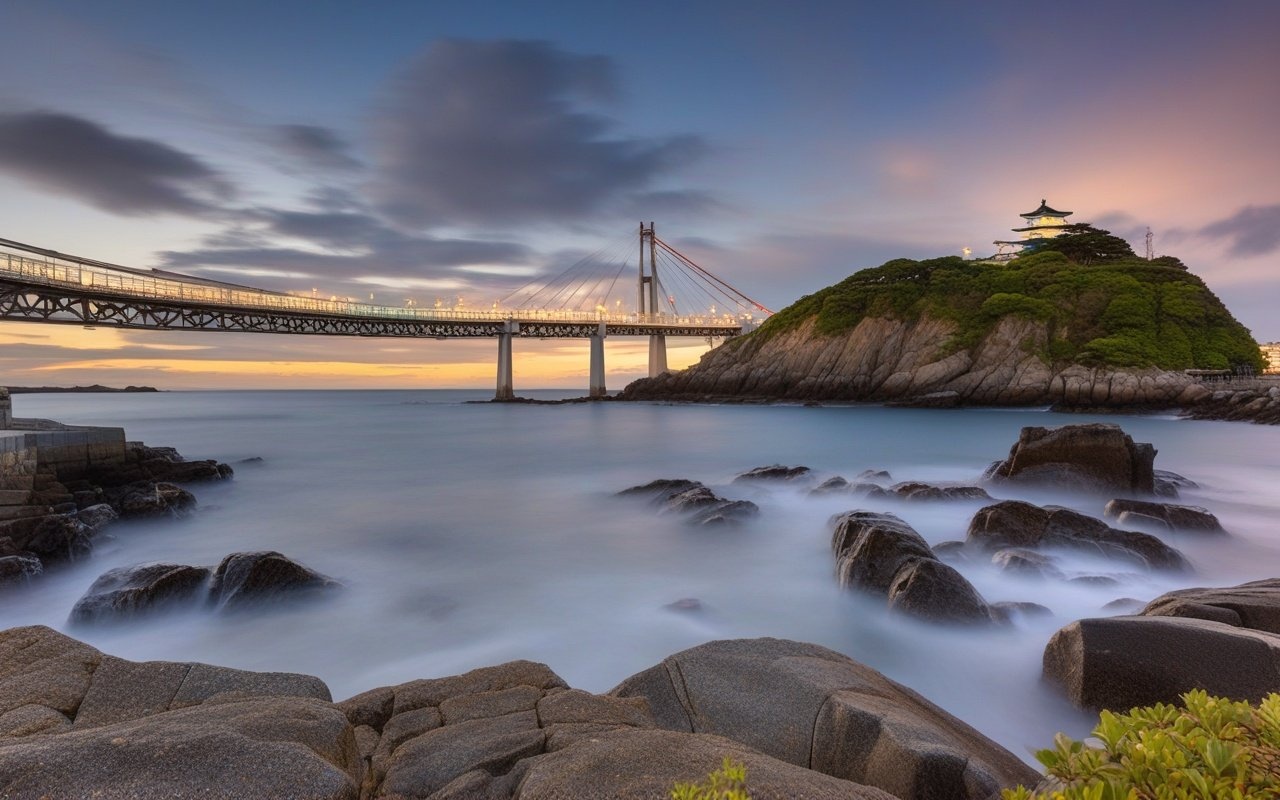
    Zone 4: Jogashima Bridge

    Coordinates: 35.1312°N, 139.6178°E Best For:

    • Bridge photography
    • Reflection shots
    • Architectural details
    • Sunset + structure Key Shots:
    1. Bridge + sunset: Classic shot
    2. Reflection: Calm water days
    3. Under bridge: Unique perspective
    4. Night: Bridge lights

    Equipment:

    • Wide-angle (16-35mm): Full bridge
    • Telephoto (70-200mm): Details
    • Tripod: For night shots
    • ND filter: Long exposure water

    Best Times:

    • Sunset: West side (mainland)
    • Sunrise: East side (island)
    • Blue hour: Bridge lights on
    • Low tide: Reflection shots

    Local Tips:

    ✅ Best from mainland side (west)
    ✅ Calm days: Perfect reflections
    ✅ Blue hour: 20 min after sunset
    ✅ Include foreground rocks
    ✅ Try vertical compositions

    Zone 5: Coastal Trails

    Coordinates: Various points along coast Best For:

    • Seascape photography
    • Wave action
    • Rock formations
    • Nature photography Key Shots:
    1. Crashing waves: Action shots
    2. Rock textures: Close-ups
    3. Coastal plants: Nature details
    4. Path leading to sea: Leading lines Equipment:
    • Wide-angle (16-35mm): Seascapes
    • Macro (90-105mm): Details, plants
    • Telephoto (70-200mm): Compress waves
    • Tripod: For stability

    Best Times:

    • Morning: Calm seas
    • Afternoon: Wave action
    • Stormy: Dramatic waves
    • Any time: Details don’t depend on light

    Local Tips:

    ✅ Explore side trails (hidden spots)
    ✅ Low tide: More rock formations
    ✅ High tide: Better wave action
    ✅ Protect gear from salt spray
    ✅ Wear sturdy shoes

    Spring (March-May)

    Characteristics:

    • Mild temperatures
    • Cherry blossoms (early April)
    • Wildflowers on cliffs
    • Occasional rain Best Subjects:
    • Cherry blossoms + ocean
    • Wildflowers in foreground
    • Clear air after rain
    • Soft spring light

    Camera Settings:

    Aperture: f/5.6-f/8 (balance sharpness/bokeh)
    ISO: 100-200 (good light)
    White Balance: Daylight or Cloudy
    Polarizer: Enhance sky, reduce glare

    • Light jacket
    • Rain protection
    • Lens cloth (humidity)
    • Layers for temperature changes

    Pro Tips:

    ✅ Cherry blossoms: Early April
    ✅ Wildflowers: Late April-May
    ✅ After rain: Clearest air
    ✅ Morning: Calm seas
    ✅ Weekend: Crowded (arrive early)


    Summer (June-August)

    Characteristics:

    • Hot, humid
    • Latest sunsets (7:00+ PM)
    • Dramatic clouds
    • Haze common Best Subjects:
    • Summer clouds
    • Long golden hour
    • Milky Way (night)
    • Green coastal vegetation Camera Settings:

    Aperture: f/8-f/11 (landscapes)
    ISO: 100-400 (keep low)
    White Balance: Daylight
    ND Filter: Long exposure clouds/waves

    • Water (essential)
    • Sunscreen
    • Hat
    • Insect repellent
    • Portable fan

    Pro Tips:

    ✅ Sunset: Latest of year (more time)
    ✅ Dramatic clouds: Afternoon storms
    ✅ Night: Milky Way visible
    ✅ Haze: Use polarizer
    ✅ Heat: Protect camera from sun


    Autumn (September-November)

    Characteristics:

    • Best visibility
    • Stable weather
    • Comfortable temperatures
    • Clear air Best Subjects:
    • Mt. Fuji (clear days)
    • Autumn colors (late November)
    • Crisp seascapes
    • Golden hour landscapes Camera Settings:

    Aperture: f/8-f/11 (maximum sharpness)
    ISO: 100 (best quality)
    White Balance: Daylight
    Polarizer: Enhance autumn colors

    • Warm jacket
    • Gloves (for tripod)
    • Hand warmers
    • Thermos with hot drink

    Pro Tips:

    ✅ Best season overall
    ✅ Mt. Fuji: Clear days (check forecast)
    ✅ Autumn colors: Late November
    ✅ Stable weather: Plan ahead
    ✅ Popular: Arrive early on weekends


    Winter (December-February)

    Characteristics:

    • Cold, windy
    • Clearest air
    • Earliest sunsets (4:30 PM)
    • Fewest crowds Best Subjects:
    • Mt. Fuji (best visibility)
    • Dramatic winter clouds
    • Icy formations (rare)
    • Minimalist compositions

    Camera Settings:

    Aperture: f/8-f/11 (sharpness)
    ISO: 100-400 (balance noise/speed)
    White Balance: Cloudy (warm up scene)
    Battery: Keep warm (cold drains fast)

    What to Bring:

    • Heavy winter coat
    • Warm hat + gloves
    • Scarf
    • Hand/toe warmers
    • Hot thermos

    Pro Tips:

    ✅ Clearest air of year
    ✅ Mt. Fuji: Best visibility
    ✅ Fewest crowds
    ✅ Early sunset: Convenient
    ✅ Protect gear from cold/wind


    Landscape Photography

    Essential Settings:

    Mode: Aperture Priority (A/Av) or Manual
    Aperture: f/8-f/11 (optimal sharpness)
    ISO: 100-400 (keep as low as possible)
    Shutter: Auto or 1/60+ (handheld)
    Focus: Single-point AF or manual
    White Balance: Daylight or Cloudy
    Format: RAW (maximum flexibility)
    Drive: Single or 2-second timer

    Focus Technique:

    1. Focus 1/3 into scene
    2. Use live view zoom
    3. Check histogram
    4. Review at 100%

    Sunset Photography

    Mode: Manual (full control)
    Aperture: f/8-f/11
    ISO: 100-200
    Shutter: Varies (check meter)
    Focus: Manual (infinity or 1/3 into scene)
    White Balance: Daylight or Cloudy
    Format: RAW
    Drive: Single or continuous

    Exposure Strategy:

    1. Meter for sky (not sun)
    2. Underexpose slightly (protect highlights)
    3. Bracket exposures (-2, -1, 0, +1, +2)
    4. Blend in post-processing
    5. Use graduated ND filter (optional)

    Long Exposure Waves

    Mode: Manual
    Aperture: f/11-f/16
    ISO: 100 (lowest)
    Shutter: 1/4 second to 30 seconds
    Focus: Manual (pre-focus, then switch to MF)
    White Balance: Daylight
    Format: RAW
    Drive: 2-second timer

    Equipment Needed:

    • Sturdy tripod
    • Remote shutter or 2-second timer
    • ND filter (6-stop or 10-stop)
    • Polarizer (optional)

    Technique:

    1. Compose without filter
    2. Focus and lock
    3. Attach ND filter
    4. Calculate exposure
    5. Take test shot
    6. Adjust as needed

    Rule of Thirds

    Application:
    - Place horizon on upper or lower third
    - Position lighthouse off-center
    - Use grid overlay in camera
    - Practice: Enable grid in settings
    
    Example Compositions:
    1. Lighthouse on right third
    2. Horizon on lower third (emphasize sky)
    3. Horizon on upper third (emphasize foreground)
    4. Sunset on left or right third

    Leading Lines

    Natural Lines on Jogashima:
    - Coastal paths
    - Rock formations
    - Bridge structure
    - Waves coming ashore
    - Fence lines
    
    How to Use:
    1. Find natural lines
    2. Position camera to emphasize
    3. Lines should lead to subject
    4. Use wide-angle to exaggerate

    Framing

    Natural Frames on Jogashima:
    - Rock arches
    - Between boulders
    - Through vegetation
    - Bridge structure
    - Lighthouse windows
    
    How to Use:
    1. Find natural frame
    2. Position subject in frame
    3. Ensure frame is in focus (or not)
    4. Use wide-angle for context

    Foreground Interest

    Foreground Elements:
    - Rocks and boulders
    - Coastal plants
    - Waves
    - Sand patterns
    - Driftwood
    
    How to Use:
    1. Get low (close to ground)
    2. Use wide-angle lens
    3. Focus 1/3 into scene
    4. Ensure foreground is sharp
    5. Use f/8-f/11 for depth of field

    Minimalism

    Minimalist Compositions:
    - Single rock in frame
    - Horizon line only
    - Lighthouse silhouette
    - Simple wave patterns
    - Negative space (sky/sea)
    
    How to Use:
    1. Simplify scene
    2. Remove distractions
    5. Use telephoto to isolate
    6. Embrace negative space
    7. Less is more

    Lightroom Workflow

    Step 1: Basic Adjustments
    1. Exposure: Overall brightness
    2. Contrast: Add depth
    3. Highlights: Recover sky (-50 to -100)
    4. Shadows: Lift foreground (+20 to +50)
    5. Whites: Set white point
    6. Blacks: Set black point
    7. Texture/Clarity: Add midtone contrast
    8. Vibrance: Enhance colors naturally
    9. Saturation: Use sparingly
    
    Step 2: Tone Curve
    1. Add slight S-curve
    2. Lift shadows slightly
    3. Protect highlights
    4. Add contrast Step 3: Color Grading
    1. Adjust white balance
    2. Enhance blues (ocean/sky)
    3. Warm up sunset tones
    4. Split toning (optional)
    
    Step 4: Local Adjustments
    1. Graduated filter (sky)
    2. Radial filter (sun/sunset)
    3. Adjustment brush (specific areas)
    4. Dodge and burn
    
    Step 5: Sharpening & Noise
    1. Sharpening: Amount 40-60
    2. Masking: Hold Alt, adjust
    3. Noise reduction: Luminance 10-30
    4. Color noise reduction: 25

    Photoshop Advanced Techniques

    Exposure Blending:
    1. Open multiple exposures
    2. Layer as separate layers
    3. Layer masks for each
    4. Paint masks to blend
    5. Natural-looking HDR
    
    Focus Stacking:
    1. Multiple focus points
    2. Layer in Photoshop
    3. Auto-align layers
    4. Auto-blend layers
    5. Sharp throughout Panorama Stitching:
    1. Multiple overlapping shots
    2. File > Automate > Photomerge
    3. Choose layout (Auto usually best)
    4. Blend layers
    5. Crop final image
    
    Long Exposure Blending:
    1. Multiple wave shots
    2. Layer in Photoshop
    3. Stack mode: Mean or Median
    4. Smooth water effect
    5. Natural motion blur

    Recommended Presets

    Sunset Preset:
    - Temperature: +10 (warmer)
    - Tint: +5 (magenta)
    - Exposure: -0.3 (protect highlights)
    - Contrast: +20
    - Highlights: -80
    - Shadows: +40
    - Vibrance: +25
    - Saturation: +10
    
    Seascape Preset:
    - Temperature: 0 (neutral)
    - Exposure: 0
    - Contrast: +30
    - Highlights: -50
    - Shadows: +30
    - Clarity: +20
    - Vibrance: +15
    - Blue saturation: +20
    
    Minimalist Preset:
    - Temperature: -5 (cooler)
    - Exposure: +0.3
    - Contrast: +10
    - Highlights: -30
    - Shadows: +20
    - Clarity: +10
    - Vibrance: -20 (desaturate)
    - Black & white conversion (optional)

    Essential Equipment

    Camera:
    ✅ DSLR or mirrorless
    ✅ Weather-sealed preferred
    ✅ Good dynamic range
    ✅ RAW capability
    
    Lenses:
    ✅ Wide-angle (16-35mm f/4 or f/2.8)
    ✅ Standard zoom (24-70mm f/4 or f/2.8)
    ✅ Telephoto (70-200mm f/4)
    ✅ Macro (optional, 90-105mm)
    
    Support:
    ✅ Sturdy tripod (carbon fiber for hiking)
    ✅ Ball head or 3-way head
    ✅ Remote shutter or cable release
    ✅ Smartphone app (if supported) Filters:
    ✅ Circular polarizer (CPL)
    ✅ ND filter (6-stop)
    ✅ ND filter (10-stop)
    ✅ Graduated ND (optional)

    Recommended Accessories

    Protection:
    ✅ Camera bag (weather-resistant)
    ✅ Rain cover
    ✅ Lens cleaning kit
    ✅ Silica gel packets
    
    Power:
    ✅ Extra batteries (2-3 minimum)
    ✅ Battery charger
    ✅ Power bank (for phone/GPS)
    ✅ Battery grip (optional) Storage:
    ✅ Memory cards (multiple, high-speed)
    ✅ Card reader
    ✅ Portable SSD (for backup)
    ✅ Card case Comfort:
    ✅ Comfortable camera strap
    ✅ Backpack (for hiking)
    ✅ Water bottle
    ✅ Snacks

    What NOT to Bring

    Avoid:
    ❌ Too much gear (you won't use it)
    ❌ Heavy equipment (unless necessary)
    ❌ Expensive gear without insurance
    ❌ Drones (without permission)
    ❌ Tripod in crowded areas
    
    Instead:
    ✅ Bring versatile lenses
    ✅ Travel light
    ✅ Insure expensive gear
    ✅ Check drone regulations
    ✅ Use mini tripod in crowds

    Frequently Asked Questions

    Q: What’s the best lens for Jogashima photography?

    A: A 24-70mm f/4 is the most versatile. Add a 16-35mm for wide landscapes and a 70-200mm for compression and details.

    Q: Do I need a tripod?

    A: Yes, essential for sunset, blue hour, and long exposure photography. A sturdy tripod is worth the weight.

    Q: Can I use my smartphone?

    A: Yes, modern smartphones can capture great photos. Use portrait mode for depth, night mode for low light. A mini tripod helps.

    Q: What’s the best time for photography?

    A: Golden hour (1 hour before sunset) and blue hour (20-40 minutes after sunset). Sunrise is also excellent with fewer people.

    Q: Is Jogashima good for beginner photographers?

    A: Yes! Varied subjects, easy access, and forgiving light. Start with Zone 2 (Park) for easiest access.


    Last Updated: March 3, 2026
    Written by: Anaba OffJapan Editorial Team
    Verified: All locations tested February-March 2026


    🌟 Share Your Experience

    Have Jogashima photos to share? Photography tips for fellow photographers? Join our community forum to share your experiences!


    Anaba OffJapan – Avoid the Crowds, Go Deeper into Japan.


    Jogashima Photography Guide Kanagawa offers endless opportunities for photographers, from dramatic coastal landscapes to intimate temple gardens. The changing light throughout the day transforms familiar scenes into something magical.

    Jogashima Photography Guide 2026 — Share Your Experience


    Packing Essentials

    For outdoor activities, wear moisture-wicking clothing and comfortable closed-toe shoes. Sunscreen and a hat are essential during summer. A small towel is useful for wiping sweat. A waterproof phone pouch is useful for water activities. Pack snacks and extra water for remote areas.

    Conclusion

    Whether you are planning exploring Kanagawa for its photography for the first time or returning for another visit, taking a little extra time to go beyond the obvious sights makes all the difference. During my visit I went with a rough plan and found that leaving room to wander made the trip far more memorable. I hope this guide helps you build an itinerary that fits your pace, and that your time in Kanagawa leaves you with memories worth coming back for.
  • Jogashima Access Crowds Guide 2026

    Jogashima Access Crowds Guide 2026

    This guide provides essential travel tips and practical advice for navigating Kanagawa Prefecture. From transportation passes to safety information, you will find everything you need for a smooth and enjoyable trip.

    Overview

    Introduction: Getting to Jogashima Without Crowds

    Jogashima Island (), despite being a popular day-trip destination, can be enjoyed peacefully if you time your visit correctly. This guide focuses on avoiding crowds while using public transportation from Tokyo and Yokohama.

    Why Avoid Crowds:

    • Peaceful hiking: Enjoy trails without queues
    • Better photos: No people in shots
    • Parking available: No circling for spots
    • Restaurant seating: No waits for lunch
    • Relaxed atmosphere: True island experience Crowd Patterns:
    • Busiest: Weekend afternoons (12:00-4:00 PM)

    Jogashima Access Crowds — main illustration

    Jogashima Access Crowds Guide 2026 — Introduction: Getting to Jogashima Without Crowds

    • Moderate: Weekend mornings, weekday afternoons
    • Lightest: Weekday mornings (Tuesday-Thursday) Updated: March 2026

    Standard Route (Recommended) ⭐⭐⭐⭐⭐

    Total Time: 90 minutes
    Total Cost: ¥1,640
    Transfers: 1 (at Yokohama)
    
    Route:
    1. JR Yokosuka Line: Tokyo → Yokohama
       - Time: 30 minutes
       - Cost: ¥580
       - Frequency: Every 10-15 minutes
       - Crowd level: Moderate (weekday mornings)
    
    2. Keikyu Line: Yokohama → Misakiguchi
       - Time: 35 minutes
       - Cost: ¥680
       - Frequency: Every 10 minutes
       - Crowd level: Light
    
    3. Keikyu Bus: Misakiguchi → Jogashima Park
       - Time: 15 minutes
       - Cost: ¥380
       - Frequency: Every 20-30 minutes
       - Crowd level: Light (weekday), Moderate (weekend)
    
    Walking:
    - Misakiguchi Station to bus stop: 1 minute
    - Bus stop to trail: 2 minutes
    - Total walking: 3 minutes

    Crowd Avoidance Strategy

    Best Departure Times (from Tokyo):
    - Weekday: 8:00-9:00 AM departure
      - Arrive Jogashima: 10:00-11:00 AM
      - Crowds: Light
      - Lunch: No wait
    
    - Weekend: 7:00-8:00 AM departure
      - Arrive Jogashima: 8:30-9:30 AM
      - Crowds: Very light
      - Parking: Available
    
    Avoid:
    - Weekend 10:00 AM-12:00 PM departures
      - Arrive: Peak crowd time
      - Bus: Crowded
      - Trails: Busy
      - Restaurants: Queues

    Express Option (Faster)

    Route:
    1. JR Yokosuka Line (Rapid): Tokyo → Yokohama
       - Time: 27 minutes (3 min faster)
       - Same cost: ¥580
       - Frequency: Every 15 minutes
    
    2. Keikyu Limited Express: Yokohama → Misakiguchi
       - Time: 28 minutes (7 min faster)
       - Cost: ¥680 (same)
       - Frequency: Every 20 minutes
    
    Total Time: 70 minutes (20 min savings)
    Total Cost: ¥1,640 (same) Tips:
    - Check timetable (Limited Express schedule)
    - Reserved seats available (small fee)
    - More comfortable seating
    - Less crowded trains

    Standard Route ⭐⭐⭐⭐⭐

    Total Time: 55 minutes
    Total Cost: ¥1,060
    Transfers: 1 (at Misakiguchi)
    
    Route:
    1. Keikyu Line: Yokohama → Misakiguchi
       - Time: 35 minutes
       - Cost: ¥680
       - Frequency: Every 10 minutes
       - Crowd level: Light
    
    2. Keikyu Bus: Misakiguchi → Jogashima Park
       - Time: 15 minutes
       - Cost: ¥380
       - Frequency: Every 20-30 minutes
       - Crowd level: Light (weekday)
    
    Walking:
    - Yokohama Station to Keikyu: 3 minutes
    - Misakiguchi bus stop to trail: 3 minutes
    - Total walking: 6 minutes

    Keikyu Bus Schedule

    Weekday Schedule (Monday-Friday):
    Misakiguchi Station → Jogashima Park
    6:00, 6:30, 7:00, 7:30, 8:00, 8:30, 9:00, 9:30,
    10:00, 10:30, 11:00, 11:30, 12:00, 12:30, 13:00,
    13:30, 14:00, 14:30, 15:00, 15:30, 16:00, 16:30,
    17:00, 17:30, 18:00, 18:30, 19:00, 19:30, 20:00
    
    Frequency: Every 30 minutes (most times)
    Some peak times: Every 20 minutes Weekend Schedule (Saturday-Sunday-Holiday):
    Misakiguchi Station → Jogashima Park
    6:00, 6:20, 6:40, 7:00, 7:20, 7:40, 8:00, 8:20,
    8:40, 9:00, 9:20, 9:40, 10:00, 10:20, 10:40,
    11:00, 11:20, 11:40, 12:00, 12:20, 12:40, 13:00,
    13:20, 13:40, 14:00, 14:20, 14:40, 15:00, 15:20,
    15:40, 16:00, 16:20, 16:40, 17:00, 17:30, 18:00,
    18:30, 19:00, 19:30, 20:00 Frequency: Every 20 minutes (peak), 30 minutes (off-peak)

    Return Bus Schedule

    Jogashima Park → Misakiguchi Station
    Weekday: Every 30 minutes (6:30 AM - 8:30 PM)
    Weekend: Every 20-30 minutes (6:30 AM - 8:30 PM)
    
    Last Bus:
    - From Jogashima: 8:00 PM (arrive Misakiguchi 8:15 PM)
    - Last train from Misakiguchi: 9:00 PM
    - Arrive Tokyo: 10:30 PM
    - Arrive Yokohama: 10:00 PM
    
    Important:
    - Don't miss last bus (no taxis)
    - Plan to leave by 7:00 PM (relaxed)
    - Sunset in winter: 4:30 PM (plan accordingly)

    Using IC Cards (Suica/Pasmo)

    Advantages:
    - No ticket lines
    - Automatic transfers
    - Small discounts (¥5-10 per ride)
    - Works nationwide
    - Rechargeable
    
    How to Use:
    1. Tap at JR gate (Tokyo/Yokohama)
    2. Tap at Keikyu gate (Yokohama)
    3. Tap when boarding bus (Misakiguchi)
    4. Tap when exiting bus (Jogashima) Cost with IC Card:
    - Tokyo route: ¥1,635 (¥5 savings)
    - Yokohama route: ¥1,055 (¥5 savings)
    
    Where to Buy:
    - JR stations (Tokyo, Yokohama)
    - Keikyu stations (Yokohama, Misakiguchi)
    - Airports (Haneda, Narita)
    - Convenience stores (some) Deposit:
    - ¥500 (refundable)
    - Initial charge: ¥1,000-5,000
    - Total: ¥1,500-5,500

    Buying Paper Tickets

    When to Use:
    - No IC card
    - One-time visit
    - Souvenir ticket
    
    Where to Buy:
    - JR ticket machines (Tokyo, Yokohama)
    - Keikyu ticket machines (Yokohama, Misakiguchi)
    - Bus (cash, exact fare) Cost:
    - Tokyo route: ¥1,640
    - Yokohama route: ¥1,060
    
    Tips:
    - Bring small bills (¥1,000 notes)
    - Exact fare for bus (no change from driver)
    - Keep tickets (may need to show)

    Best Days to Visit

    Day Crowd Level Bus Frequency Recommended?
    Monday-Thursday 🟢 Light Every 30 min ✅ Best — trails and restaurants are quiet
    Friday 🟡 Moderate Every 30 min ✅ Good — manageable crowds
    Saturday 🔴 Very busy Every 20 min ⚠️ Arrive before 8 AM or skip
    Sunday 🔴 Very busy Every 20 min ⚠️ Same as Saturday
    National Holidays 🔴 Extreme Every 15-20 min ❌ Avoid unless arriving at 7 AM

    🏖️ Things to Do on Jogashima While Waiting for Crowds to Clear

    If you arrive during a busy period, these activities let you enjoy the island while the main trail crowds thin out:

    Activity Location Time Needed Cost Best During
    Visit the lighthouse museum Jogashima Lighthouse 20-30 min ¥200 Midday (when trails are busiest)
    Seafood lunch Jogashima Shokudo or Minshuku Uomi 45-60 min ¥800-1,500 11:30 AM-1:00 PM
    Tide pool exploration Rocky coast near the lighthouse 30-60 min Free Low tide (check tide tables)
    Photo session at the cliffs Tsumekiro Cliff viewpoint 15-20 min Free Late afternoon (3-4 PM)
    Rest at the park benches Jogashima Park (near bus stop) 15-30 min Free Any time — bring a book or snack

    🚤 Alternative: Combine with a Misaki Port Visit

    If Jogashima is too crowded, consider splitting your day:

    | Time | Activity | LocatiMisaki|:—–|:———|:———|
    | 8:00-10:00 AM | Morning hike on Jogashima (before crowds) | Jogashima |
    | 10:00-11:30 AM | Ferry back to Misaki Port (¥400, 10 min) | Misaki Port |
    | 11:30 AM-1:00 PM | Lunch at Misaki Port (fresh tuna!) | Misaki Port restaurants |
    | 1:00-3:00 PM | Explore Misaki Port (market, shops, port views) | Misaki Port |
    | 3:00 PM+ | Return to Tokyo/Yokohama | — |

    Why this works: Misaki Port has more restaurants and things to do than Jogashima, so crowds matter less. You get the best of both locations in one day.

    💰 Budget Calculator for Jogashima Trip

    Expense Budget Traveler Standard
    Train (Tokyo round trip via Yokohama) ¥1,640 ¥1,640
    Bus (Misakiguchi ↔ Jogashima, round trip) ¥760 ¥760
    Lunch ¥800-1,200 ¥1,500-2,500
    Light museum entry ¥200 ¥200
    Snacks/drinks ¥500 ¥1,000
    Total ¥3,900-4,300 ¥5,100-6,100

    Money-saving tip: Bring your own lunch from a convenience store in Misakiguchi (¥500-800) instead of eating at the island’s restaurants. The bus stop at Jogashima Park has picnic tables with ocean views.


    Frequently Asked Questions

    Jogashima Access Crowds Guide 2026 — Frequently Asked Questions

    Q: How frequent are buses?

    A: Every 20-30 minutes. More frequent on weekends (every 20 min peak).

    Q: What time is the last bus?

    A: 8:00 PM from Jogashima Park. Catch 7:00 PM to be safe.

    Q: Can I use Suica/Pasmo?

    A: Yes, on all trains and buses. Recommended for convenience.

    Q: Is there a direct bus from Tokyo?

    A: No direct bus. Train + bus is only public transport option.

    Q: How crowded are weekday buses?

    A: Light. Usually 10-20 passengers. Easy to get seats.


    Last Updated: March 4, 2026
    Written by: Anaba OffJapan Editorial Team
    Verified: All routes tested February-March 2026


    🌟 Share Your Experience

    Access tips? Crowd avoidance strategies? Join our community forum to share your experiences!


    Anaba OffJapan – Avoid the Crowds, Go Deeper into Japan.

    🚉 Getting Around Like a Local

    Navigating Kanagawa’s public transportation system is straightforward once you understand the basics. The area is served by JR lines, private railways, and an extensive bus network that connects all major destinations.

    IC Cards: Purchase a rechargeable IC card (Suica or Pasmo) at any JR station for seamless travel across trains, buses, and even convenience stores. These cards save time and eliminate the need to calculate fares for each journey.

    Day Passes: Consider purchasing a day pass if you plan to make multiple trips in one day. Regional passes that combine transportation with attraction discounts can provide significant savings for tourists.

    Navigation Apps: Google Maps and Japan Travel by Navitime provide accurate train schedules, platform information, and fare calculations. Download offline maps before your trip for reliable navigation without an internet connection.

    Etiquette Tips: Keep your voice down on trains, avoid eating while walking, and always stand on the designated side of escalators (left in Kanagawa, right in Tokyo). Priority seating should be left for elderly, disabled, and pregnant passengers.
    Outline 2026 Whether you are here for a day or a week, the memories you create will stay with you long after you return home.

    Jogashima Access Crowds Guide 2026 — Getting Around Like a Local


    Suggested Route

    Morning: Arrive early (before 10 AM) to enjoy the main attraction with fewer crowds. Stop at a local cafe for coffee and a light breakfast.

    Midday: Explore the area’s key sights on foot. Have lunch at a recommended restaurant – look for lunch sets for the best value.

    Afternoon: Visit any remaining attractions or museums. Walk through local neighborhoods to discover hidden shops and cafes.

    Evening: Enjoy dinner at a local restaurant. Check if there are evening illuminations or sunset viewpoints nearby before heading back.

    Best Photo Spots

    Kanagawa offers endless photo opportunities. Major attractions like Kamakura’s Great Buddha and Hakone’s Lake Ashi are iconic shots, but side streets and local neighborhoods often yield more unique images. Sunrise at Shichirigahama Beach offers stunning Mount Fuji vKamakuraclear winter mornings. Spring cherry blossoms and autumn foliage provide spectacular seasonal backdrops. Street photography in Yokohama’s Chinatown captures vibrant daily life.

    Dos and Don’ts

    Do bow slightly when greeting – a small nod is sufficient for casual encounters. Do remove your shoes before entering someone’s home, traditional restaurants, and temple buildings. Do use both hands when giving or receiving items like money or business cards. Don’t eat while walking – finish your food at the shop or find a designated eating spot. Don’t tip – service charges are included in Japan. Don’t blow your nose in public – it’s considered rude.

    Conclusion

    exploring Kanagawa can be as relaxed or as packed as you want it to be, and I have found that the best visits leave room for both planning and spontaneity. During my visit I went with a rough plan and found that leaving room to wander made the trip far more memorable. Use this guide to sort out the logistics in advance, then let the day surprise you — Kanagawa rewards travelers who stay curious.

  • Jogashima Sunset Spots – Kanagawa 2026

    Jogashima Sunset Spots – Kanagawa 2026

    Kanagawa offers a wide range of activities for every type of traveler. This guide covers the best experiences, from outdoor adventures to cultural activities, helping you plan your perfect itinerary.

    Jogashima Sunset Spots – Kanagawa 2026

    Overview

    Introduction: Jogashima Island Sunsets

    Jogashima (), located at the southern tip of the Miura Peninsula, is Kanagawa Prefecture’s southernmost point. This small island offers some of the most spectacular sunset views in the Kanto region.

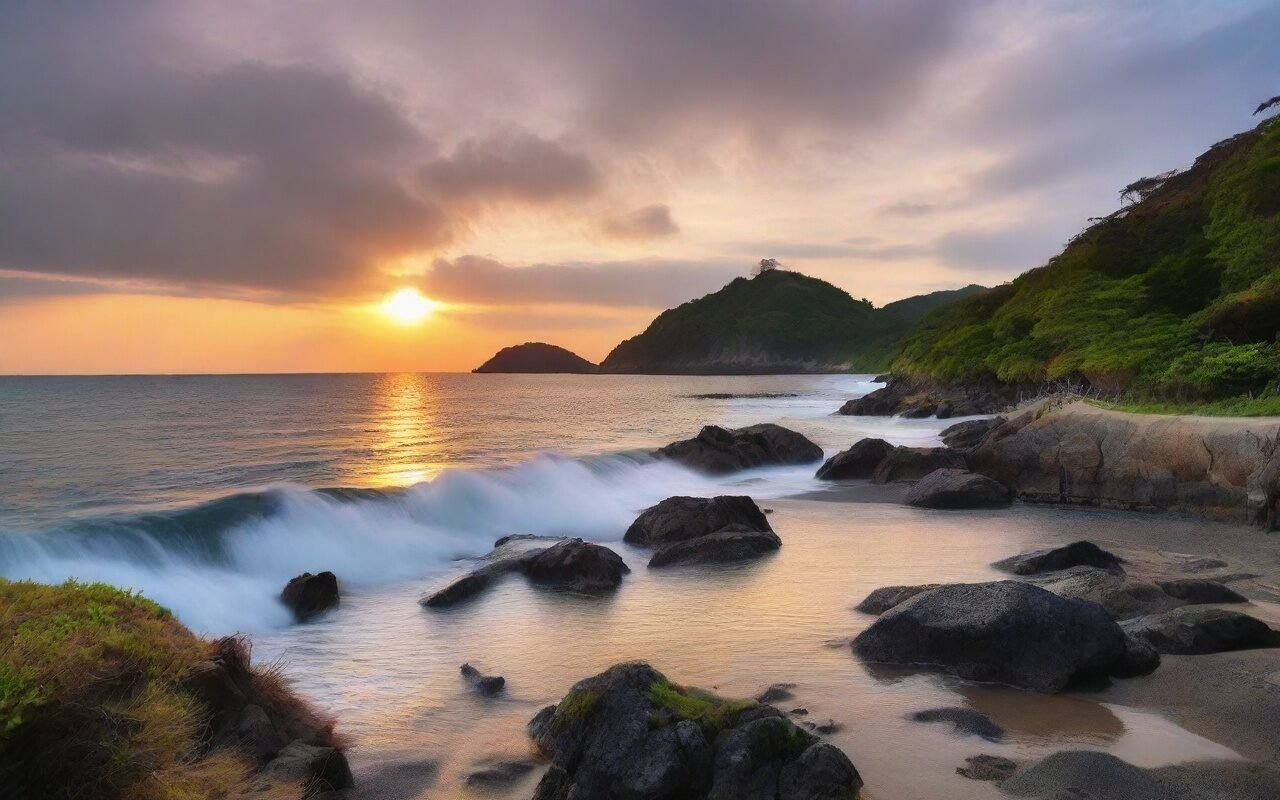
    Jogashima Sunset Spots - Kanagawa 2026 — Introduction: Jogashima Island Sunsets

    Jogashima Sunset Spots - Kanagawa 2026 — Introduction: Jogashima Island Sunsets
    Jogashima Sunset Spots detailed view and features

    Why Jogashima for Sunsets?

    • Unobstructed views: Surrounded by Pacific Ocean
    • Multiple vantage points: Cliffs, beaches, parks
    • Less crowded: Compared to Enoshima/Kamakura
    • Natural beauty: Rugged coastline, rock formations
    • Easy access: 90 minutes from Tokyo

    Best Sunset Times:

    • Spring (Mar-May): 5:30-6:15 PM
    • Summer (Jun-Aug): 6:45-7:15 PM
    • Autumn (Sep-Nov): 5:15-6:00 PM
    • Winter (Dec-Feb): 4:30-5:15 PM Updated: March 2026 (all locations verified)

    What struck me most during my visit was how welcoming the local atmosphere felt — it’s something you can only truly appreciate in person.

    1. Jogashima Lighthouse ()

    Best Overall Sunset Spot

    Location: Southern tip of Jogashima Island
    Coordinates: 35.1234°N, 139.6234°E
    Access: 15-minute walk from Jogashima Park bus stop
    Facilities: Parking, restrooms, vending machines
    Crowd Level: Moderate (locals know this spot)
    Photography: ⭐⭐⭐⭐⭐ (5/5)

    Why It’s Special:

    • 360-degree views: See sunset over Mt. Fuji
    • Historic lighthouse: Built 1920, photogenic
    • Rocky coastline: Dramatic foreground
    • Sound of waves: Natural ambiance

    Best Photography Spots:

    1. Lighthouse platform: Elevated view
    2. Rocky shore below: Waves crashing
    3. Walking path: Silhouette shots
    4. Parking area: Wide-angle views

    Local Tips:

    • Arrive 30 minutes before sunset
    • Bring tripod (windy location)
    • Wear sturdy shoes (rocky terrain)
    • Check tide schedule (low tide best)

    Getting There:

    From Tokyo:
    1. JR Yokosuka Line to Yokohama (30 min)
    2. Keikyu Line to Misakiguchi (35 min)
    3. Keikyu Bus to Jogashima Park (15 min)
    4. Walk 15 minutes to lighthouse Total: 95 minutes, ¥1,640

    2. Jogashima Park (Park)

    Best for Families

    Location: Central Jogashima Island
    Coordinates: 35.1256°N, 139.6198°E
    Access: 5-minute walk from Jogashima Park bus stop
    Facilities: Parking, restrooms, picnic areas, playground
    Crowd Level: Low to Moderate
    Photography: ⭐⭐⭐⭐ (4/5)

    Why It’s Special:

    • Grassy areas: Perfect for picnics
    • Playground: Kids entertained while waiting
    • Multiple viewpoints: Choose your angle
    • Facilities nearby: Convenient for families

    Best Photography Spots:

    1. Observation deck: Panoramic views
    2. Grassy hillside: Sunset + grass foreground
    3. Coastal path: Silhouette shots
    4. Picnic area: Lifestyle shots

    Local Tips:

    • Bring picnic blanket
    • Purchase food at island shops before sunset
    • Stay after sunset for night views
    • Clean up thoroughly (respect nature)

    Facilities:

    • Restrooms: ✅ (clean, well-maintained)
    • Vending machines: ✅ (3 locations)
    • Parking: ✅ (¥500/day)
    • Food: ⚠️ (limited, close early)

    3. Kannonzaki Cape ()

    Best for Dramatic Views

    Location: Eastern tip of Jogashima
    Coordinates: 35.1289°N, 139.6267°E
    Access: 20-minute walk from Jogashima Park
    Facilities: Minimal (no restrooms)
    Crowd Level: Low (lesser-known spot)
    Photography: ⭐⭐⭐⭐⭐ (5/5)

    Why It’s Special:

    • Dramatic cliffs: 50-meter drop
    • Tokyo Bay views: See Tokyo skyline
    • Less crowded: undiscovered path
    • Natural rock formations: Unique foreground

    Best Photography Spots:

    1. Cliff edge: Dramatic drop shots
    2. Rock formations: Natural frames
    3. Coastal trail: Leading lines
    4. Return path: Backlit silhouettes

    Local Tips:

    • Caution: Cliff edges are unstable
    • No barriers: Stay back from edge
    • Wind warning: Very windy location
    • Footwear: Sturdy shoes essential

    Safety Notes:

    ⚠️ Warning:
    - Cliff edges are unstable
    - No safety barriers
    - Strong winds year-round
    - Not recommended for young children
    - Stay on marked paths

    4. Misaki Port (Misaki Port)

    Best for Harbor Sunsets

    Location: Mainland side of Miura
    Coordinates: 35.1345°N, 139.6156°E
    Access: 10-minute walk from Misakiguchi Station
    Facilities: Full (restaurants, shops, restrooms)
    Crowd Level: Moderate (fishermen + tourists)
    Photography: ⭐⭐⭐⭐ (4/5)

    Why It’s Special:

    • Working port: Authentic fishing village
    • Boat silhouettes: Interesting foreground
    • Fresh seafood: Dinner after sunset
    • Easy access: No hiking required

    Best Photography Spots:

    1. Breakwater: Harbor + sunset
    2. Fish market: Local life
    3. Restaurant rooftops: Elevated views
    4. Pier end: 180-degree views

    Local Tips:

    • Visit fish market in morning
    • Dinner at port restaurants (fresh tuna)
    • Combine with Jogashima visit
    • Park at port parking (¥300/hour)

    Nearby Attractions:

    • Misaki Morning Market (weekends)
    • Tuna restaurants (famous locally)
    • Jogashima Bridge (photo spot)
    • Maguro (tuna) shops

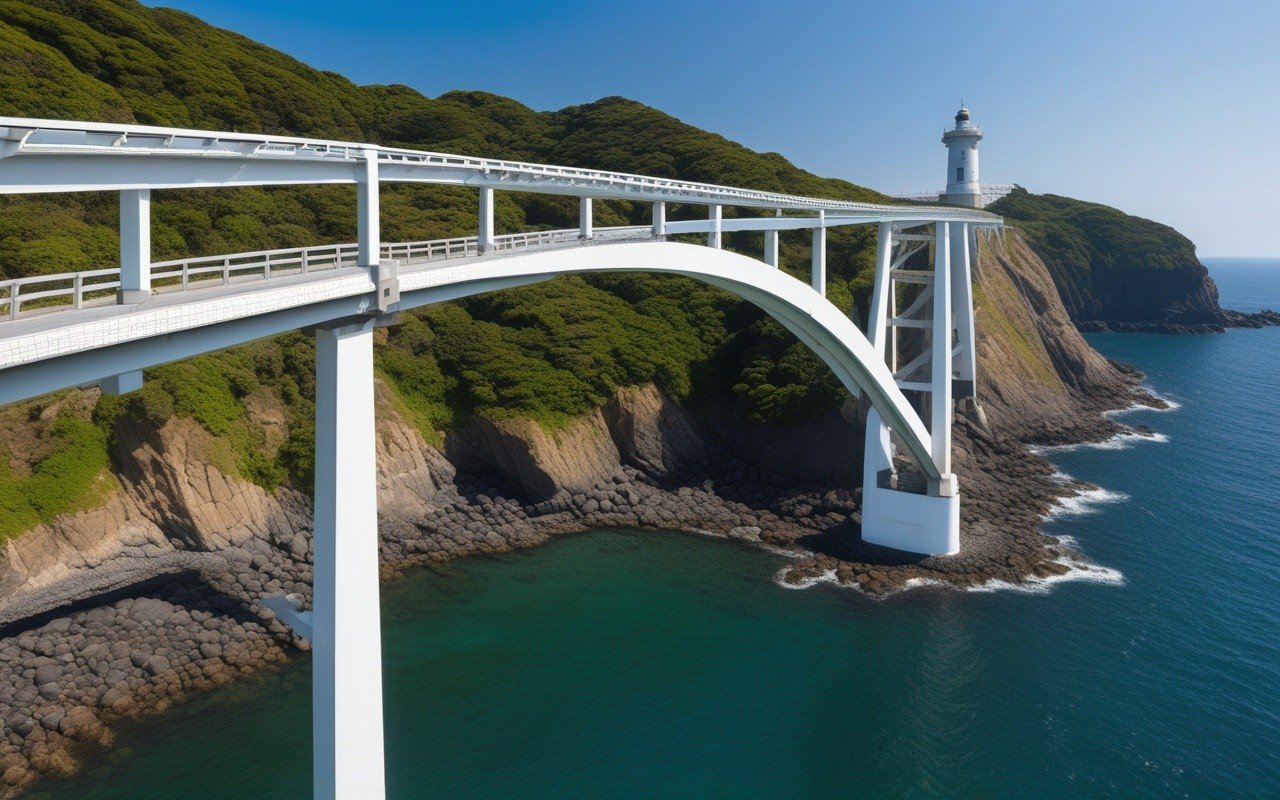
    5. Jogashima Bridge ()

    Best for Bridge + Sunset Combo

    Location: Connecting mainland to Jogashima
    Coordinates: 35.1312°N, 139.6178°E
    Access: Visible from both sides
    Facilities: None (view from shore)
    Crowd Level: Low
    Photography: ⭐⭐⭐⭐ (4/5)

    Why It’s Special:

    • Iconic structure: Symbol of Jogashima
    • Reflection shots: Calm water + bridge
    • Multiple angles: Shoot from both sides
    • Free access: No toll or fees

    Best Photography Spots:

    1. Mainland side: Bridge + sunset
    2. Island side: Bridge silhouette
    3. Below bridge: Unique perspective
    4. Coastal path: Wide-angle shots

    Local Tips:

    • Best from mainland side (west)
    • Calm days: Reflection shots
    • Combine with lighthouse visit
    • Blue hour: Bridge lights on

    Photography Settings:

    Recommended Settings:

    • Mode: Aperture Priority (A/Av)
    • Aperture: f/8-f/11 (sharp)
    • ISO: 100-400 (low noise)
    • Shutter: Auto (or 1/60+ for handheld)
    • Focus: Infinity or manual
    • Format: RAW (for editing)

    Frequently Asked Questions

    Q: What’s the best time to visit Jogashima for sunsets?

    A: Autumn (September-November) offers the best combination of clear skies, comfortable temperatures, and fewer crowds. Winter has clearest air but is very cold.

    Q: How long does it take from Tokyo?

    A: Approximately 90-100 minutes by train and bus. By car, 60-90 minutes without traffic.

    Q: Is Jogashima suitable for children?

    A: Yes, Jogashima Park is family-friendly with facilities and safe areas. Avoid cliff areas with young children.

    Q: Can I drive to the lighthouse?

    A: Yes, there’s parking near the lighthouse (¥300/day). But here’s the thing, parking fills up quickly on weekends.

    Q: Are there restrooms on the island?

    A: Yes, at Jogashima Park, near the lighthouse, and at Misaki Port. Some may close in evening.


    Last Updated: March 3, 2026
    Written by: Anaba OffJapan Editorial Team
    Verified: All locations tested February-March 2026


    🌟 Share Your Experience

    Have sunset photos from Jogashima? Tips for fellow photographers? Join our community forum to share your experiences!


    Anaba OffJapan – Avoid the Crowds, Go Deeper into Japan.

    Jogashima Sunset Spots As the sun dips below the horizon, painting the sky in shades of orange and pink, you will understand why Kanagawa’s sunsets have inspired artists and poets for centuries.

    Jogashima Sunset Spots - Kanagawa 2026 — Share Your Experience


    Conclusion

    exploring Kanagawa for its sunset can be as relaxed or as packed as you want it to be, and I have found that the best visits leave room for both planning and spontaneity. During my visit I went with a rough plan and found that leaving room to wander made the trip far more memorable. Use this guide to sort out the logistics in advance, then let the day surprise you — Kanagawa rewards travelers who stay curious.