Tag: hiking

  • Kamakura Hiking Trails & Hidden Backstreets: Escape Crowds

    Kamakura Hiking Trails & Hidden Backstreets: Escape Crowds

    Overview

    Kamakura has a crowd problem, and everyone knows it. On a Saturday afternoon in autumn, Komachi-dori is a river of people, and the Great Buddha’s photo line stretches into the garden. But Kamakura has a second city that most visitors never see: a network of hiking trails through the hills that ring the town, and a web of quiet backstreets where the crowds thin out to nothing. The same weekend that feels overwhelming at the temples becomes peaceful within twenty minutes of leaving the main streets.

    I have walked through these trails in every season, and the pattern is always the same. I recommend the Ten’en course above all — it rewards the effort more than any other walk in town. The crowds cluster around the big-name sights: Hase-dera, the Great Buddha, the main approach to Tsurugaoka Hachimangu. The hills above them are nearly empty, and the backstreets between the northern temples belong to residents, schoolchildren, and the occasional café that has survived by being hard to find. The hiking trails connect the temples in a loop that rewards the effort with views, and the backstreets reward the wandering with the Kamakura that locals actually live in.

    This guide covers the best hiking routes — the Ten’en Hiking Course above all — the quiet backstreets worth a detour, and the practical details for a day that trades the famous queues for the town’s hidden layers.


    📍 Getting There and Route Basics

    Kamakura is 50-60 minutes from Tokyo by the JR Yokosuka Line from Tokyo Station, or the Shonan-Shinjuku Line from Shinjuku. For access details and train options, see my Kamakura access guide. The town’s sights and trailheads are all walkable from Kamakura Station, which makes it one of the easiest hiking days in the region — you can be on a mountain path within 25 minutes of stepping off the train.

    The Three Main Trails

    1. Ten’en Hiking Course — The classic. Runs roughly 5 kilometers through the hills from Kencho-ji (near Kita-Kamakura Station) to Zuisen-ji in the east. The best single hike in Kamakura.
    2. Daibutsu Hiking Trail — A shorter, gentler route connecting the Great Buddha at Hase to Jochi-ji and Kencho-ji in the north. Good for families and for combining temple visits with a walk.
    3. Gionyama Circuit — A compact loop around the hill behind the Tsurugaoka Hachimangu shrine, with views over the town center. The easiest option, and a good sunset spot.

    🥾 The Ten’en Hiking Course: Kamakura’s Backbone Trail

    The Ten’en Hiking Course is the walk that separates Kamakura day-trippers from Kamakura regulars. It runs through the wooded ridge behind the northern temples, connecting the great Zen temples of Kita-Kamakura with the quieter eastern hills, and it offers the town’s best views over the bay.

    The Route in Detail

    The course has two natural starting points. From Kita-Kamakura Station, the trailhead sits at the back of Kencho-ji, the first of Kamakura’s five great Zen temples. From Kamakura Station, you reach the eastern end at Zuisen-ji after a 20-minute walk through backstreets. Both ends work; the standard direction is Kita-Kamakura to Zuisen-ji, which keeps the sun at your back in the morning.

    1. Kencho-ji (trailhead) — The temple itself is worth arriving early for: its bamboo grove and dragon-painted ceiling are quieter than the famous tourist temples. The trail begins at the upper gate.
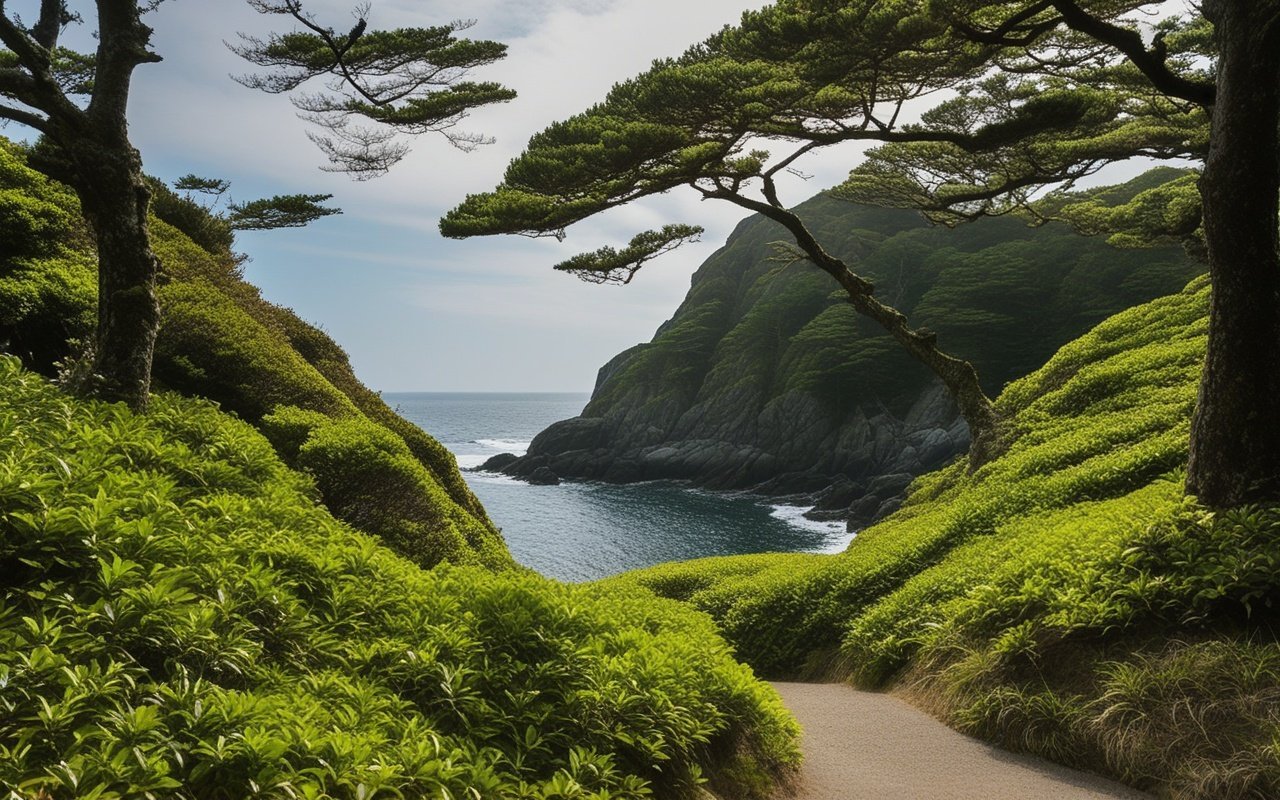
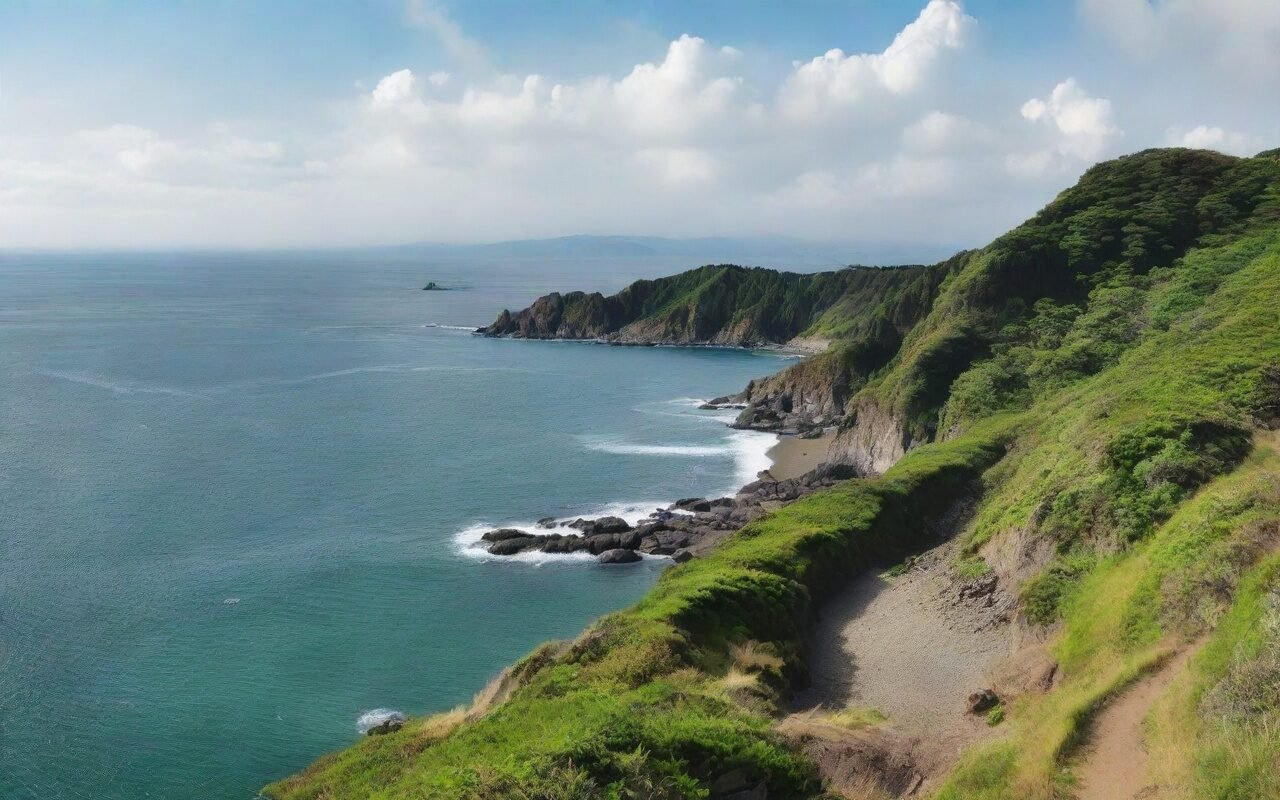
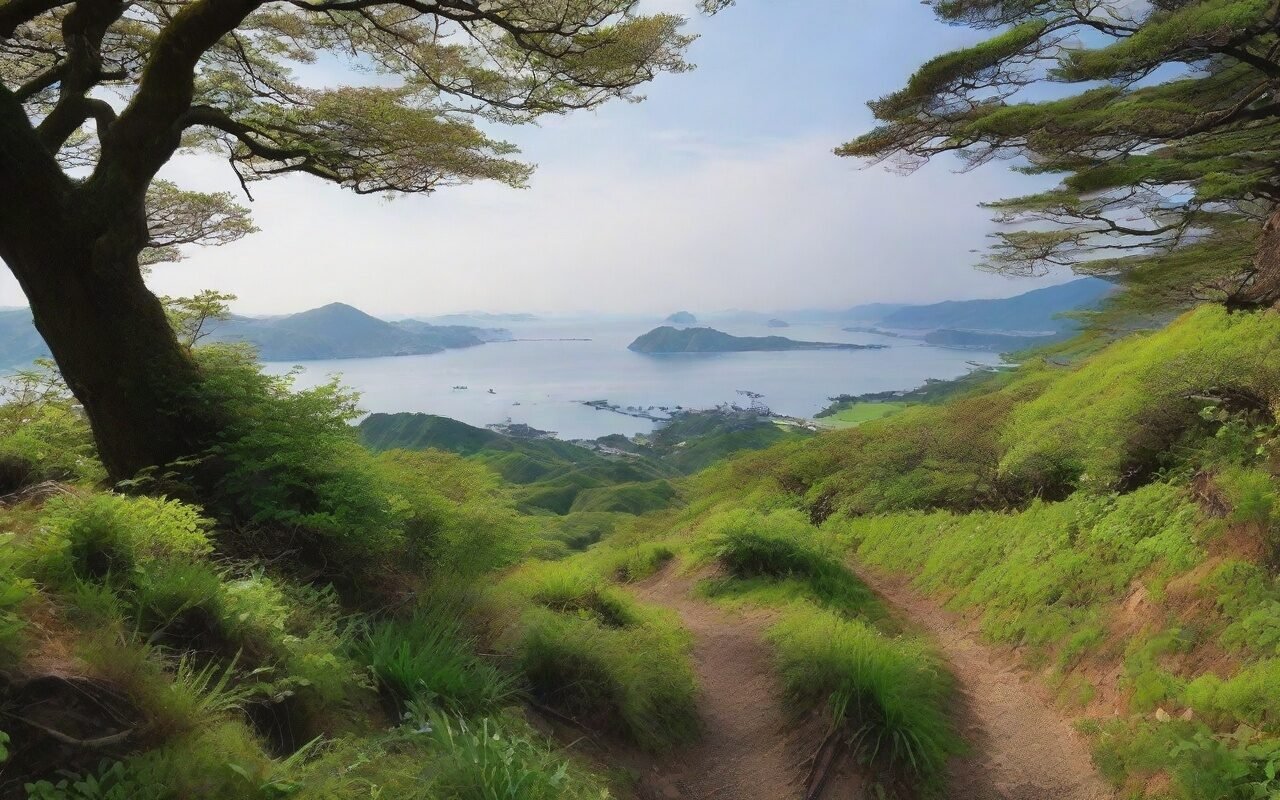
    2. The ridge (1.5-2 hours) — The path climbs through mixed forest, dips across a few valleys, and passes several viewpoints. The highlight is the view over Sagami Bay from the ridge’s highest point, with Enoshima visible on clear days. For more of the bay, see my Shonan beach guide, which covers the coast below.
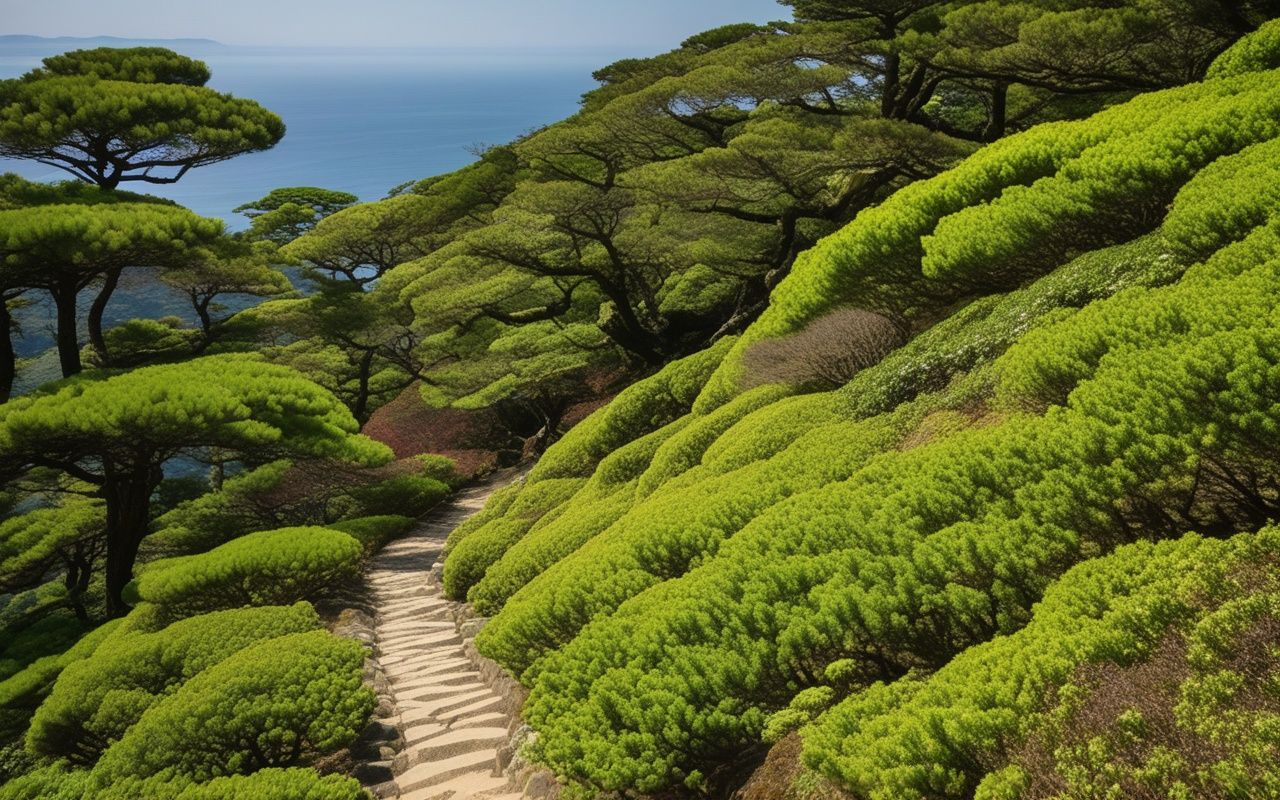
    Ten'en Hiking Course ridge trail with view over Sagami Bay

    1. Jochi-ji and the fork — The trail passes a junction where the Daibutsu trail branches off. Jochi-ji, a small Zen temple on the ridge, has a famous hydrangea garden in June.
    2. Zuisen-ji (end) — The eastern terminus is a garden temple built around a cave, with a lovely pond and rock garden. The temple is rarely busy, which makes it a perfect, quiet finish.

    Practical Notes

    • Total time: 2.5-3 hours at a relaxed pace, including brief temple stops.
    • Difficulty: Easy-moderate. There are steady climbs but nothing steep or technical. Sneakers with grip are fine; hiking boots are overkill.
    • Trail conditions: The path is well marked in English at junctions, but the surface includes some exposed roots. It can be muddy after rain — avoid the day after heavy weather.
    • No food on the trail: Carry water and a snack; the only shops are at the two ends.

    🛕 The Backstreets: Where the Crowds Aren’t

    The hills are half the story. The other half is Kamakura’s backstreet network — the narrow lanes behind the main roads, where the town’s real life happens. The lanes north of Komachi-dori and around the northern temples reward wandering, and they hold most of the town’s hidden shrines and best cafes.

    The Northern Backstreets

    The area between the Kencho-ji approach and the town center is a grid of residential lanes with a handful of small shrines and old merchant houses. Walking it takes an hour and feels like traveling back in time — the houses are wooden, the streets are barely car-width, and the only sounds are bicycles and birds. The small shrines and temple gardens along the way, such as the garden of Myoho-ji with its famous mossy stairs, have no entrance fees and no crowds, and several are genuinely beautiful.

    Onari-machi and the Cafes

    The backstreet area around Onari-machi, west of the station, has become the town’s cafe quarter. The famous Kamakura cafe scene concentrates here, in converted houses and garden cafes that you have to actively seek out. The coffee is serious, the cakes are local, and the clientele is mostly residents — the tourists are still queuing at the Komachi-dori dessert shops while the locals drink espresso in the lanes.
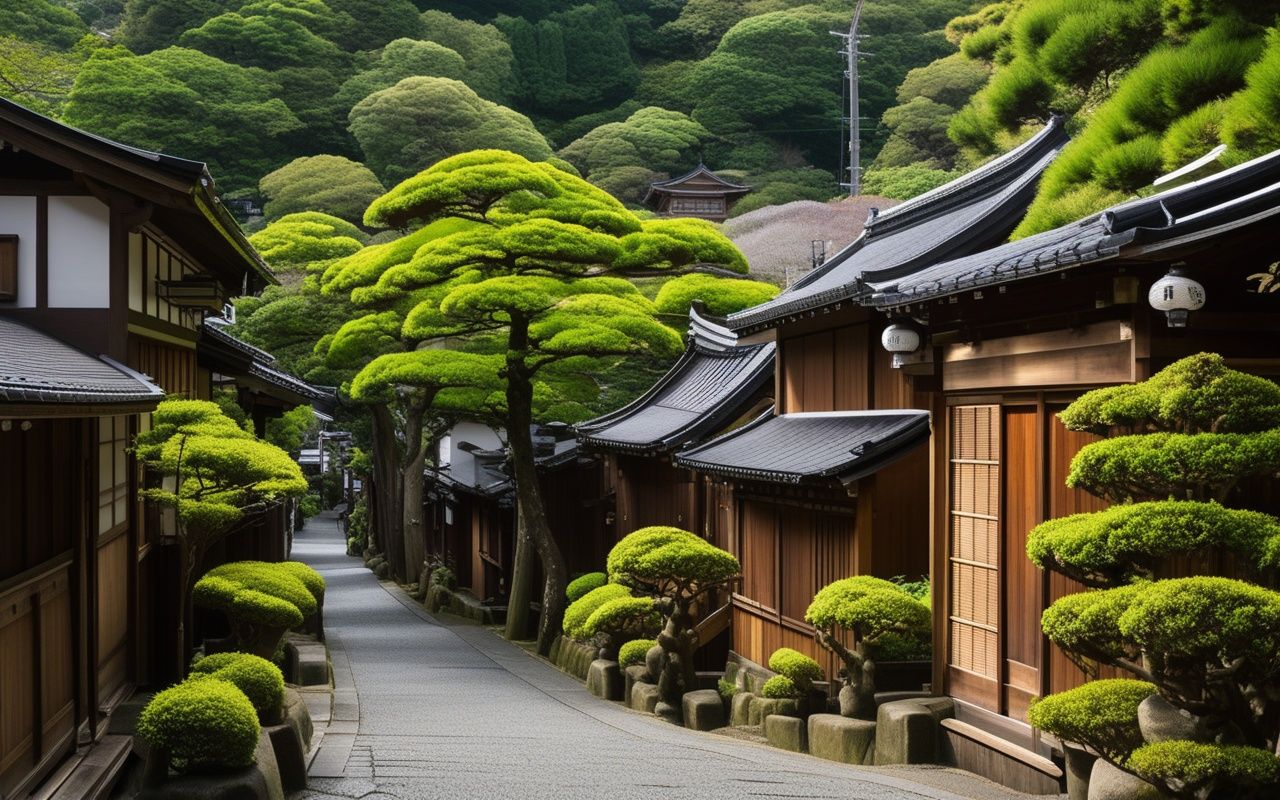
    Quiet Kamakura backstreet lane with wooden houses and greenery

    The Hidden Shrine Route

    One of my favorite loops connects three hidden shrines north of the station: the cave shrine of Zuisen-ji’s hillside, the small shrine hidden behind the Kencho-ji approach, and the tiny neighborhood shrine with the stone steps and the mossy lanterns. The loop takes an hour, passes no other tourists on most days, and ends at a café. It is the closest Kamakura comes to a secret.


    📷 The Daibutsu Trail and the Great Buddha Alternative

    If the Ten’en course feels like too much, the Daibutsu Hiking Trail offers a shorter taste of the same hills. It runs from the Great Buddha area at Hase up over the ridge to Jochi-ji, connecting the famous statue with the quiet northern temples.

    The Great Buddha itself is worth seeing once — the bronze statue is genuinely impressive — but the crowds are relentless. My alternative: visit it at opening time, then take the Daibutsu trail up the hill and spend the rest of the day on the quiet side. For more on managing the famous sights, see my Kamakura crowd-avoidance guide, which covers timing and routes for the busiest spots.

    The trail takes about 45 minutes one way, is gentle enough for families, and ends at Jochi-ji, where the Ten’en course can take you onward. It is the perfect middle option between the full hike and the temple-only day.


    🗓️ Sample Itinerary: The Quiet Kamakura Day

    1. 08:30 — Arrive at Kita-Kamakura Station. Walk the backstreets toward Kencho-ji while the town is still asleep.
    2. 09:00 — Kencho-ji, early and quiet. Bamboo grove, main hall, and the trailhead at the upper gate.
    3. 09:45 — Start the Ten’en Hiking Course. Ridge views over Sagami Bay.
    4. 11:30 — Jochi-ji fork and the highest viewpoint. Rest, water, and the view down to Shonan’s beaches.
    5. 12:30 — Descend to Zuisen-ji. Garden and cave temple, almost empty.
    6. 13:30 — Lunch at a backstreet café in the northern lanes. No queues.
    7. 14:30 — The hidden shrine loop, ending at the mossy lantern shrine.
    8. 16:00 — Optional: the Gionyama circuit at sunset, with the town below and the bay beyond.
    9. 17:30 — Return train from Kamakura Station.

    If you have a second day, the town pairs well with the Kamakura-Enoshima area guide for the coast, or with the Tanzawa-Oyama hiking guide if you want a bigger mountain day in the same region.


    📅 Seasonal Notes

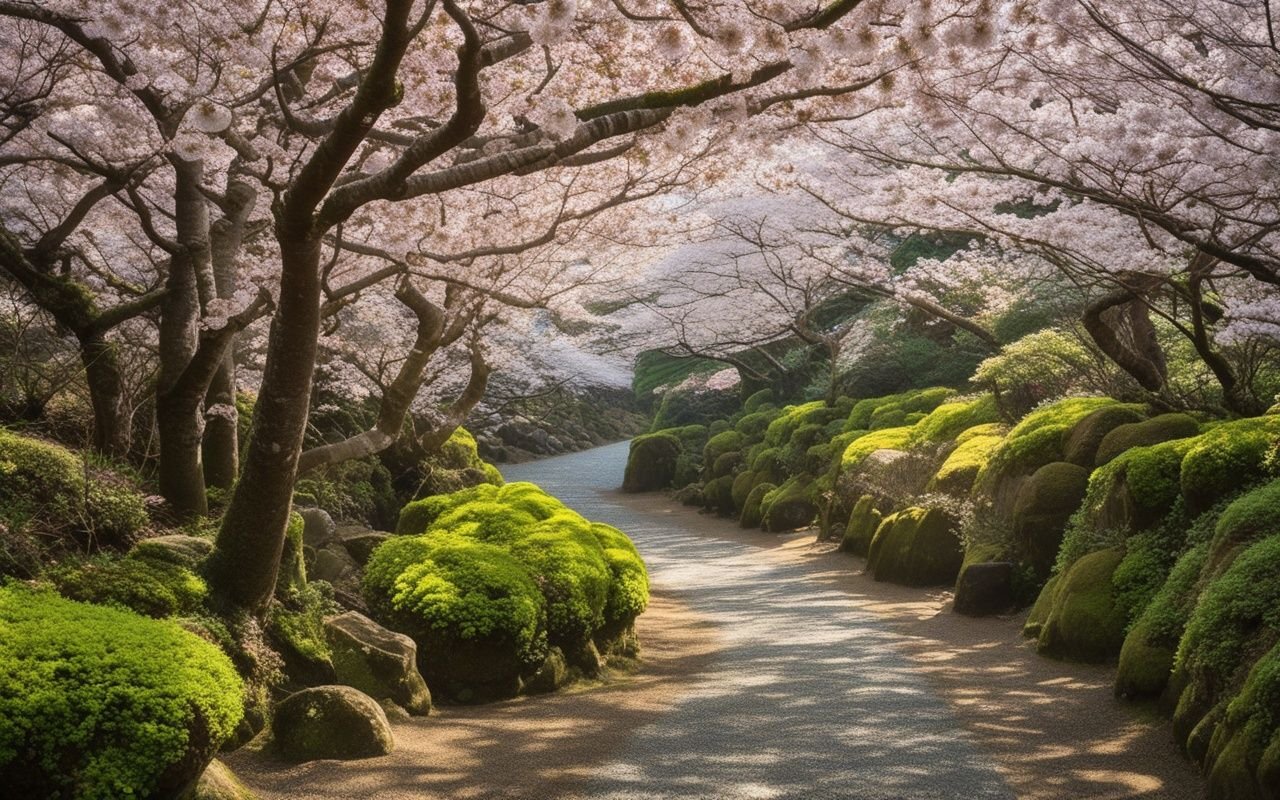
    • March-April: Cherry blossoms on the temple approaches and the backstreets. The trails stay quieter than the famous blossom spots.
    • June-July: Hydrangea season at Jochi-ji and Meigetsu-in. Expect crowds at the hydrangea temples themselves, but the trails above them stay manageable.
    • September-November: The best hiking season — cool, clear, and colorful. The ridge views over the bay are at their finest.
    • December-February: Cold and empty. Winter views are the clearest of the year, and the cafes are at their coziest.
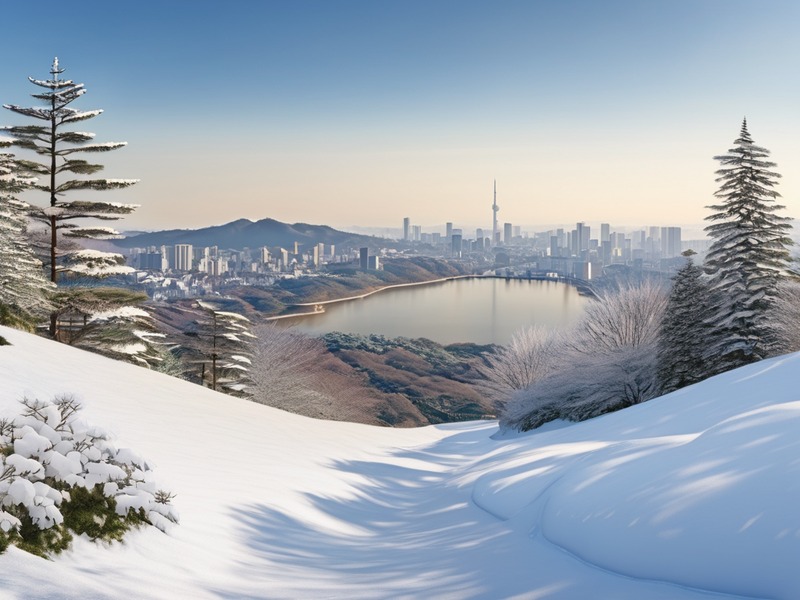
    • Winter mornings: The classic Fuji view from the ridge — the mountain appears over the bay on clear days.

    💡 Practical Tips

    • Start early and go on a weekday if you can. The trails are never crowded, but the temples at the ends fill up fast on weekends.
    • Carry water and a snack — there is no food on the trails.
    • Wear shoes with grip; the trails have exposed roots and can be muddy.
    • The backstreets are residential. Walk quietly, don’t block lanes, and photograph houses sparingly.
    • Buy drinks at the ends, not the middle — the only convenience stores are near the stations.
    • Combine the hike with the cafe route in Onari-machi for the classic quiet day: hills in the morning, espresso in the afternoon.

    Conclusion

    Kamakura’s famous crowds are real, but they are also concentrated — and everything outside that concentration is the town’s best self. The Ten’en Hiking Course connects the great Zen temples through forest and ridge views, the backstreets hold the hidden shrines and local cafes, and the whole quiet layer is reachable within minutes of the station. It is the same Kamakura that day-trippers rush past, and it rewards anyone who slows down enough to find it. Start at Kita-Kamakura, walk the ridge, and let the backstreets lead you home.


    FAQ

    Q: How hard is the Ten’en Hiking Course?
    A: Easy-moderate. It has steady climbs but nothing steep or technical, and the full route takes 2.5-3 hours. Sneakers with grip are sufficient on dry days.

    Q: Do I need a map?
    A: No. The trail is well marked with English signs at junctions, and the two ends are easy to reach from their stations. A phone map helps at the backstreet sections.

    Q: Can I do the hike with children?
    A: Yes, the Ten’en course is fine for older children. For younger kids, the shorter Daibutsu trail (45 minutes) is the better choice.

    Q: When should I visit to avoid the crowds?
    A: Weekday mornings, or any day before 10:00. The trails themselves are rarely crowded; the queues form at the famous temples, which you can visit at opening time or skip in favor of the quiet shrines.
  • Sagamihara & Tsukui Lake Guide: Space Science & Forest Walks

    Sagamihara & Tsukui Lake Guide: Space Science & Forest Walks

    Overview

    Sagamihara, in the northwestern corner of Kanagawa Prefecture, rarely appears on foreign tourist itineraries. That is a shame, because it contains one of the most unique attractions in the entire Kanto region — the JAXA space science campus — as well as two beautiful dam lakes, forest parks, and some of the best cherry blossom views near Tokyo.

    I first visited Sagamihara because of the space center, having followed Japan’s Hayabusa asteroid missions for years. What I found was a city with far more to offer than its utilitarian reputation suggests: quiet lakeside paths, a hilltop panorama that reaches Tokyo Tower on clear days, and parks that families can enjoy for free. Best of all, almost everything here is free or very cheap, which makes Sagamihara a refreshing change from the tourist-ticket economy of Kamakura.

    This guide covers the JAXA space center, Tsukui Lake, Shiroyama Lake, and the practical details of combining them into a relaxed day trip.


    📍 Getting There & Access

    From Tokyo

    1. JR Yokohama Line to Fuchinobe Station (60-70 min from Shinjuku via Hashimoto, around ¥800) — The JAXA campus is a 20-minute walk from Fuchinobe’s south exit, or a short bus ride.
    2. Odakyu Line to Sagami-Ono (45 min from Shinjuku) — The gateway to the southern part of the city, with good bus connections toward the lakes.
    3. By car — The Ken-O Expressway and Tomei routes reach Sagamihara in about 50-70 minutes from central Tokyo. Parking at the parks is free or cheap.

    Getting Around

    • Buses — Kanagawa Chuo Kotsu buses connect the stations to the lakes and JAXA. Service to the lakes is roughly hourly.
    • Rental car — A car makes the lake loop far easier. Rentals are available near Sagami-Ono and Hashimoto stations.

    🚀 JAXA Sagamihara Campus: Japan’s Space Science Hub

    Why It Matters

    The JAXA Sagamihara Campus is the headquarters of Japan’s space science program — the home of the Hayabusa asteroid probes, the Akatsuki Venus orbiter, and a long line of lunar and planetary missions. The campus’s public facility, the Space Science Exploration Exchange Center, is one of the most impressive free attractions in the Kanto area: a working science facility where you can see real spacecraft hardware, rocket engines, and mission artifacts up close.

    I spent an entire morning here on my first visit and could easily have stayed longer. The highlight for me was the full-scale model of the Hayabusa2 probe and the sample return capsule — the actual technology that brought asteroid material back to Earth. For anyone with even a passing interest in space, this is unmissable, and it is completely free.

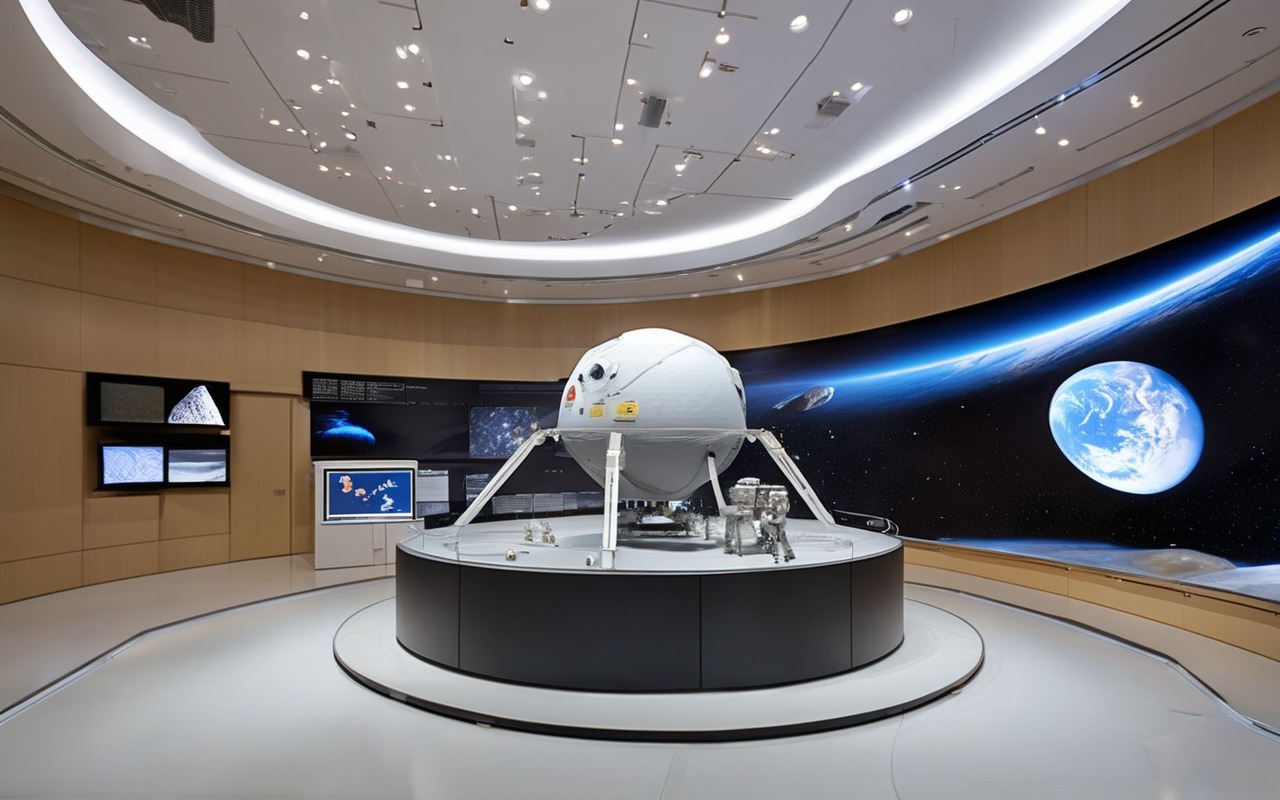
    JAXA Sagamihara space science exhibition hall

    What to See

    1. The exhibition hall — Full-scale spacecraft models, including Hayabusa and Hayabusa2, the IKAROS solar sail, and lunar lander prototypes. English panels cover most displays.
    2. The rocket engine collection — Real engines and test hardware, including early Japanese liquid-fuel engines.
    3. The mission timeline — A clear walkthrough of Japan’s space science history, from the first satellites to current deep-space missions.
    4. The cooperative store and cafeteria — JAXA-branded goods (T-shirts, model kits, pens) and a cafeteria used by staff and visitors alike. The curry is a staff favorite.

    Practical Notes for JAXA

    • Hours: 10:00-17:00 (last entry 16:45).
    • Closed: Mondays, Tuesdays, the day after national holidays, and year-end holidays. Check the calendar before traveling.
    • Admission: Free. No reservation needed for individuals; groups of 10+ should contact in advance.
    • Getting there: From Fuchinobe Station south exit, walk 20 minutes or take a bus to the City Museum stop.

    🏞️ Tsukui Lake and Shiroyama Park

    The Lake and the Dam

    Tsukui Lake is a long, narrow reservoir created by the Shiroyama Dam on the Sagami River. Its banks are ringed by the Tsukui Lake Shiroyama Prefectural Park, a collection of gardens, walking paths, and viewpoints that are especially famous for cherry blossoms in spring and foliage in autumn.

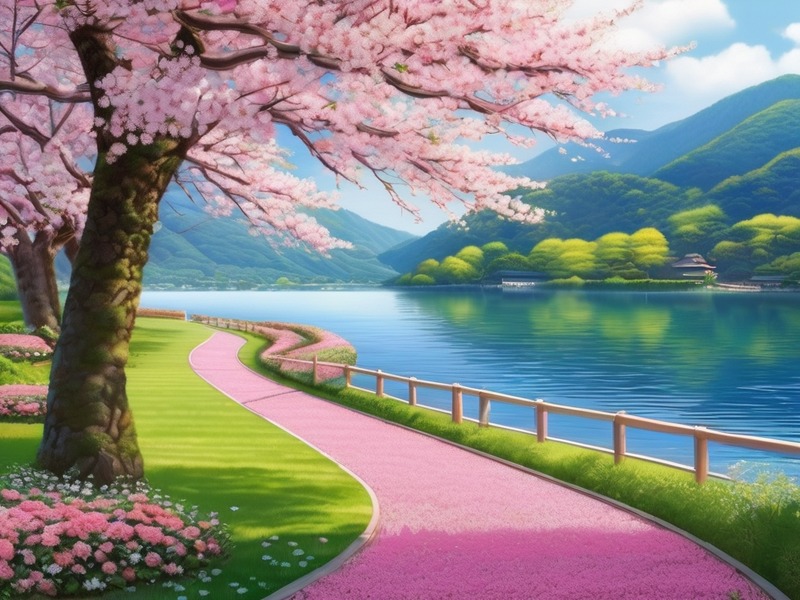
    The park is split into sections — the Flower Garden (Hanano Enchi) on one bank and the Water Garden (Mizuno Enchi) on the other — connected across the dam. On a weekday in April, I walked the flower garden in near solitude while the cherry trees dropped petals onto the water. It remains one of the most quietly beautiful afternoons I have spent in Kanagawa.

    Tsukui Lake flower garden cherry blossoms

    What to See

    1. The Flower Garden (Hanano Enchi) — Cherry trees, seasonal flower beds, and picnic lawns. The sakura tunnel along the shore is the star in spring.
    2. The Water Garden (Mizuno Enchi) — Lawns and paths along the calmer upper reach of the lake, plus a small museum about the dam’s history.
    3. The Tsukui Lake Memorial Hall — Displays about the dam’s construction and the villages that were submerged when the lake was created.
    4. The dam observation points — Walk across the dam crest for the classic view down the lake.

    Practical Notes for Tsukui Lake

    • Admission: Free. Parking is free at most lots.
    • Best time: Cherry blossom season (late March to early April) and foliage season (mid-November) are the showpiece times; weekdays are wonderfully quiet.
    • Getting there: Buses from Hashimoto Station reach the park in about 25 minutes. By car, use the Ken-O Expressway Sagamihara IC and follow signs for about 15 minutes.

    🌄 Shiroyama Lake and the Hilltop View

    The Secret Viewpoint

    Shiroyama Lake (also called Honzawa Lake) is a second, smaller reservoir tucked into the hills above Tsukui Lake. A 5 km walking path circles it, and at the high point near the Konpira Shrine, an observation deck offers a panoramic view that, on clear days, reaches the skyscrapers of Shinjuku and Tokyo Tower in the distance.

    I climbed the loop on a crisp winter morning when the air was at its clearest. The view — lake below, forest rolling to the horizon, Tokyo’s towers rising in the distance — was the kind of surprise that makes you recommend a place to everyone. In winter, you can also see Mount Fuji on the western horizon.

    Practical Notes for Shiroyama

    • The loop: About 5 km and 1.5-2 hours at a relaxed pace, with steady but manageable climbs.
    • Getting there: Buses from Hashimoto Station toward Wakabadai or Odo stop near the trailhead. Parking is free at the small trailhead lot.
    • Facilities: Limited — bring water and snacks. The best restrooms are at the trailhead.
    • Footwear: The path is well maintained, but running shoes or light hiking shoes are recommended.

    🌸 Seasonal Highlights

    Spring (Late March – April)

    • Cherry blossoms at Tsukui Lake — The flower garden’s shore tunnel is one of Kanagawa’s best free sakura spots. See the prefecture-wide sakura spot guide for more locations.
    • Fresh green on the hills and pleasant hiking weather.

    Summer (June – August)

    • Green and humid, with cool breezes at the lakes. A good season for an early morning loop around Shiroyama Lake before the heat peaks.

    Autumn (Mid-November)

    • Foliage at Tsukui Lake — The maples along the shore and the views across the lake are at their peak. This is the busiest season, so go on a weekday.

    Winter (December – February)

    • The clearest skies of the year. The Shiroyama viewpoint offers winter views of Tokyo’s skyline and Mount Fuji.

    🧒 For Families

    Sagamihara is an excellent family destination, with most attractions free or very cheap.

    • JAXA space center — The spacecraft models and hands-on displays fascinate children of all ages. The cafeteria and store make it easy to spend a full morning.
    • Tsukui Lake parks — Plenty of lawn space for running and picnicking. The flower garden is stroller-friendly in most areas.
    • Sagamihara City Museum — Next to the JAXA campus, this museum covers local nature and history and is a good rainy-day backup.
    • See also — The prefecture’s baby-friendly travel guide has more family-tested ideas across Kanagawa.

    🗓️ Sample Itinerary: Sagamihara in a Day

    Morning: Space (9:00-13:00)

    1. 9:00 — Arrive at Fuchinobe Station. Walk or bus to the JAXA campus.
    2. 9:30-12:30 — Explore the space center. Don’t miss the Hayabusa2 display and the store.
    3. 13:00 — Lunch at the campus cafeteria or at a restaurant near Fuchinobe Station.

    Afternoon: Lakes (13:30-17:30)

    1. 13:30 — Bus to Tsukui Lake. Walk the flower garden and cross the dam.
    2. 15:30 — If time and legs allow, climb the Shiroyama Lake loop for the hilltop view.
    3. 17:00 — Return bus to Hashimoto, then the JR line back to Tokyo.

    If You Have More Time

    • Combine with Atsugi and Zama: The neighboring cities offer the car culture guide — museums and motor-themed sights about 30 minutes away.
    • Lake Sagami extension: The outdoor base of Lake Sagami lies just to the west and offers boating and camping.
    • Hadano and Oyama: A scenic route across the mountains reaches the Hadano spring water guide.

    💡 Practical Tips

    1. Check JAXA’s closed days — The center closes on Mondays and Tuesdays. Plan your visit for Wednesday through Sunday.
    2. Go early to the lakes in blossom season — The best parking and the quietest paths are before 10:00.
    3. Bring yen — The lakeside vending machines and small shops are cash-friendly. The JAXA store and cafeteria accept cards.
    4. Layer up at the lakes — The reservoirs sit in a valley that runs cooler than the city, especially in the morning.
    5. Consider a car — While the bus connections work, a rental car lets you combine JAXA, Tsukui, and Shiroyama in one efficient loop.

    Conclusion

    Sagamihara is proof that Kanagawa’s best surprises are not always on the tourist map. It offers something genuinely rare — the chance to stand next to real spacecraft hardware for free — and then wraps it in quiet forest parks, dam lakes, and blossom tunnels that reward a slow pace. It is close enough to Tokyo for a day trip, cheap enough for a budget week, and interesting enough to come back to in every season. Start at the space center, end at the hilltop view, and you will understand why locals keep this city to themselves.

    FAQ

    Q: Is the JAXA space center really free?
    A: Yes. Admission is free and no reservation is needed for individuals. It is open 10:00-17:00, closed Mondays and Tuesdays.

    Q: Can I do both JAXA and the lakes in one day?
    A: Yes, with the itinerary above. JAXA in the morning and Tsukui Lake in the afternoon works well by public transport; adding the Shiroyama loop is easier with a car.

    Q: What is the best season to visit Tsukui Lake?
    A: Late March to early April for cherry blossoms and mid-November for autumn foliage. Weekdays are dramatically quieter than weekends.

    Q: How much does a day in Sagamihara cost?
    A: About ¥3,000-4,000 per person by train: transport ¥1,600 round trip, bus fares ¥800, lunch ¥1,000. JAXA and the parks are free.

  • Ashigara Area Guide: Kintaro Legends

    Ashigara Area Guide: Kintaro Legends

    Overview

    Most visitors to Kanagawa head straight for Kamakura, Hakone, or Yokohama. I did the same on my first several trips to the prefecture. But on a crisp autumn morning, I took a train one stop past the familiar turnoff toward Hakone and discovered a completely different side of Kanagawa: the Ashigara area, a quiet valley tucked between the Tanzawa mountains and the Hakone foothills.

    Ashigara covers the towns of Minami-Ashigara, Matsuda, and Yamakita in the western part of the prefecture. It is a land of legends — this is where Kintaro, the boy hero of Japanese fairy tales, is said to have grown up — and it is also home to one of the most atmospheric temple complexes in the region, a beautiful dam lake, and a hot spring village that dates back to the samurai era. The crowds stay away because the area takes an extra hour to reach, and that is exactly its value.

    This guide covers the essential Ashigara experience: the Kintoki legend trail, the temple of Daiyuzan Saijoji, Lake Tanzawa, Nakagawa Onsen, and the practical details of getting there, moving around, and combining Ashigara with nearby Odawara or Hadano.


    📍 Getting There

    Ashigara sits at the crossroads of two scenic rail lines, which makes it surprisingly accessible for a rural area. There is no shinkansen station and no airport link, but the train journey from Tokyo is easy and largely scenic.

    From Tokyo

    1. Odakyu Line to Shin-Matsuda Station (90 min, around ¥1,300) — Take a Limited Express bound for Odawara or Hakone-Yumoto from Shinjuku and get off at Shin-Matsuda. This is the main gateway to Minami-Ashigara and the Kintoki trailhead. The Romancecar adds a reserved seat for about ¥500 more.
    2. JR Tokaido Line + Gotemba Line (100 min, around ¥1,400) — From Tokyo Station, take the Tokaido Line to Kozu or Odawara, then the Gotemba Line to Yamakita or Nebukawa stations. This route is the best option for Lake Tanzawa and Nakagawa Onsen.
    3. By car — The Tomei Expressway Oi-Matsuda IC is the center of the area. From central Tokyo, expect 70-90 minutes with light traffic.

    Getting Around Ashigara

    • Hakone Tozan Bus / Izuhakone Railway — Buses from Shin-Matsuda and the Izuhakone Railway’s Daiyuzan Line cover Minami-Ashigara well. The Daiyuzan Line is a charming single-car railway that runs from Odawara into the mountains.
    • Bus to Lake Tanzawa — From Yamakita Station, local buses run to Lake Tanzawa and Nakagawa Onsen. Frequency is roughly hourly, so check the timetable before heading out.
    • Rental car — For the full Ashigara loop (temple → lake → onsen), a rental car is the most efficient option. Several rental offices operate near Shin-Matsuda Station.

    ⛰️ Mount Kintoki: The Legend of Kintaro

    Why Kintoki Matters

    Mount Kintoki (1,212 m) is one of the classic beginner-friendly peaks of western Kanagawa, and it carries one of Japan’s best-known folk tales. According to legend, the warrior Kintaro was raised in the forest around this mountain by his mother, the Princess Yaegiri. He grew up wrestling bears and throwing boulders, and he later became a retainer of the samurai Minamoto no Yorimitsu. Every hilltop shrine, stone marker, and teahouse along the trail references this story.

    What makes the climb special is the view. From the summit, Mount Fuji dominates the skyline on clear days, with Sagami Bay glittering to the south and the Tanzawa range rising behind you. On my first summit visit, a haze-free November morning, Fuji looked close enough to touch — the best free view I have found in Kanagawa.

    The Route in Detail

    1. Kintoki Shrine trailhead — The most common start is from Kintoki Shrine, reached by bus from Shin-Matsuda Station (about 20 min, ¥400). The shrine itself is small but atmospheric, with a moss-covered approach.
    2. The main trail (2-3 hours up, 1.5-2 hours down) — The path climbs steadily through cedar forest before opening onto the grassy upper slopes. It is steep in places but well maintained. Running shoes are fine; no technical equipment is needed.
    3. Summit — A small shrine, a wooden observation deck, and a teahouse that serves simple noodles and sweets from spring through autumn. Allow 30-45 minutes at the top.
    4. Descent options — Return the way you came, or descend toward the Hakone foothills and take the bus from the far side. The second option requires a longer bus ride but makes a pleasant loop.

    Practical Notes for Kintoki

    • Crowd strategy: Weekday mornings are wonderfully quiet. On sunny weekends in October and November, the trailhead parking fills by 9:00.
    • Weather: The mountain is exposed above the treeline. A windbreaker is essential even in summer, and in winter the trail can hold ice patches well into the morning.
    • Water: Carry more than you think you need — there are no drinking fountains above the shrine.

    ⛩️ Daiyuzan Saijoji: The Temple of the Tengu

    Why Saijoji Matters

    Daiyuzan Saijoji is a Soto Zen temple founded in 1394 and one of the most important training monasteries in the Kanto region. It is known locally as Doryoson, after the guardian deity Doryo who, according to temple legend, transformed into a tengu (mountain spirit) to protect the temple from harm. Today the temple is famous for its enormous wooden sandals, its collection of tengu statues, and a cedar avenue so old and so tall that it feels like walking into a different era.

    I visited on a rainy weekday and had the cedar approach entirely to myself. The quiet was remarkable — the only sounds were rain on the canopy and the occasional temple bell. If you want to feel the contemplative side of Japanese Buddhism without the crowds of Kamakura, this is the place.

    Daiyuzan Saijoji cedar avenue

    What to See

    1. The cedar approach — A straight avenue of centuries-old sugi trees leading from the main gate to the hall. The trees were planted over hundreds of years, and the effect is cathedral-like.
    2. The main hall — Rebuilt in the early 2000s, the hall retains the grand style of the original. Goshuin (calligraphy stamps) are available for ¥500 near the hall.
    3. The giant sandals — Huge wooden geta sandals hang near the entrance, a symbol of Doryoson’s protective power. Locals say that touching them brings safety in travel.
    4. Tengu statues — Look for the many tengu carvings scattered through the grounds, each with a distinctive expression.
    5. The moss garden and tea house — The grounds include a small tea house where you can rest with matcha and sweets.

    Practical Notes for Saijoji

    • Access: Take the Izuhakone Railway’s Daiyuzan Line to Daiyuzan Station, then a 5-minute bus or 25-minute walk to the temple.
    • Hours: Roughly 8:30-17:00, with seasonal variation. The grounds are free to enter.
    • Etiquette: This is a working monastery, not a theme park. Keep voices low, and do not photograph monks without asking.

    🏞️ Lake Tanzawa: A Dam Lake Surrounded by Peaks

    The Lake Experience

    Lake Tanzawa is a reservoir on the Kawachi River in Yamakita, created by the Kawachi Dam completed in 1986 to supply water to the surrounding region. Surrounded by steep forested mountains, it is one of the most scenic lakes in Kanagawa and a base for canoeing, SUP, cycling, and easy lakeside walks.

    The water is remarkably clear, and on calm mornings the mountains reflect perfectly in the surface. I rented a kayak on a quiet weekday in September and spent two hours paddling along the shoreline, stopping to watch kingfishers and dragonflies. The rental staff were patient with my beginner-level paddling and gave clear English-friendly instructions with gestures.

    Lake Tanzawa surrounded by forested mountains

    Activities

    • Canoe and SUP rentals — Around ¥1,000-2,500 per hour depending on the craft, including life jackets and paddles. Several rental operators work from the lakeshore near the dam.
    • Lakeside walking — A well-maintained path runs along part of the shore. The full loop is about 6 km and takes 2-3 hours at a relaxed pace.
    • Cycling — The road around the lake is popular with cyclists, though it has some steep sections. Rental bikes are available near the bus stop in season.
    • Fishing — The lake is stocked with trout and open to fishing with a permit.

    Practical Notes for the Lake

    • Access: Bus from Yamakita Station, roughly 25 minutes. The final stretch is a winding mountain road.
    • Season: The lake is at its best from May to October. Autumn foliage season (mid-November) brings the most visitors, so book rentals in advance.
    • Facilities: A small visitor center near the dam has restrooms, vending machines, and a simple restaurant serving local soba.

    ♨️ Nakagawa Onsen: The Hidden Hot Spring

    The Onsen Village

    Nakagawa Onsen is a tiny hot spring village in Yamakita that claims a connection to the warlord Takeda Shingen, who reportedly used the springs to recover from injuries. The water is a mildly alkaline simple spring — the kind Japanese bathers call “beauty water” for its softening effect on skin.

    There is no grand ryokan district here, just a handful of family-run inns and a small public bathhouse. That is precisely the appeal. After a day of hiking or paddling, soaking in the wooden bath while the evening light fades over the mountains is about as restorative as a day trip gets.

    Where to Bathe

    • Yamabiko Onsen — A modern day-use facility with indoor and outdoor baths, a rest lounge, and a restaurant. Around ¥800 for adults. Open roughly 10:00-20:00.
    • Kogen no Yu — A smaller, more traditional bathhouse popular with locals. Bring your own towel or buy one at the counter.
    • Family inns — Several inns offer day-use bathing (¥700-1,000) alongside their overnight guests. Phone ahead in English is difficult; have your hotel or a translation app ready.

    Practical Notes for the Onsen

    • Tattoo policy: As with many rural onsen, some facilities in the village do not accept guests with tattoos. Yamabiko Onsen is the most accommodating — check its current policy before visiting.
    • Cash: The bathhouses and most village shops are cash-only.
    • Hours: Most facilities close by 21:00 and some take a mid-week rest day. Check before traveling.

    🍜 Eating in Ashigara

    Ashigara’s food culture is built on local water and mountain produce.

    • Soba and udon — Several shops in Matsuda and Yamakita serve hand-cut soba made with local spring water. A simple set runs ¥900-1,400.
    • Local vegetables — The valley grows excellent greens, mushrooms, and root vegetables. Look for them at roadside stands and the Ashigara Michi-no-Eki.
    • Ashigara tea — The area grows tea on the mountain slopes. Stop by a tea shop for a tasting, or buy a bag as a souvenir.
    • Dengaku tofu — Grilled tofu with miso, a mountain classic, appears on many menus in the area.

    🗓️ Sample Itinerary: The Best of Ashigara in a Day

    Option A: Temple and Legend Day (Train Only)

    1. 9:00 — Shin-Matsuda Station. Take the Izuhakone Railway toward Daiyuzan.
    2. 9:45 — Daiyuzan Saijoji. Walk the cedar avenue and visit the main hall and sandals. (1.5-2 hours)
    3. 12:00 — Lunch of soba near the temple or back at Shin-Matsuda.
    4. 13:30 — Bus to Kintoki Shrine. Climb Mount Kintoki for the summit view. (3 hours up and down if you start by 14:00)
    5. 18:00 — Return to Shin-Matsuda, then the Odakyu Limited Express back to Tokyo.

    Option B: Lake and Onsen Day (Best with a Car)

    1. 10:00 — Pick up a rental car at Shin-Matsuda.
    2. 10:45 — Lake Tanzawa. Kayak or SUP for two hours, then a lakeside walk.
    3. 13:30 — Lunch of local soba at the lakeside restaurant.
    4. 15:00 — Nakagawa Onsen for a long soak.
    5. 17:30 — Drive back toward Shin-Matsuda, stopping at the Ashigara Michi-no-Eki for souvenirs.

    If You Have More Time


    📅 Seasonal Notes

    • Spring (Mar-May): Cherry blossoms along the Sakawa River and at the temple approaches. Fuji views begin to clear by late April.
    • Summer (Jun-Aug): Green, humid, and quiet. The cedar forest at Saijoji is a natural air conditioner, and the lake is at its best for water activities.
    • Autumn (Oct-Nov): The best season overall. Foliage at the lake and on Kintoki, clear air, and the most reliable Fuji views. Expect weekend crowds at the trailhead.
    • Winter (Dec-Feb): Crisp, cold, and empty. The Kintoki summit offers some of the clearest Fuji views of the year, and the onsen is at its most appealing.

    💡 Practical Tips

    1. Bring cash — Rural shops, bathhouses, and some buses are cash-only. Withdraw before leaving the city.
    2. Check bus timetables — Service in the area is roughly hourly and stops early in the evening. Have a backup plan for the last bus.
    3. Download offline maps — Mobile signal is patchy in the mountains. Save your routes before departing.
    4. Start early — The best light, the quietest trails, and the most reliable Fuji views all favor a morning start.
    5. Combine with Hakone or Odawara — Ashigara works beautifully as a quieter alternative day, or as an add-on to a Hakone itinerary.

    Conclusion

    Ashigara is the rare Kanagawa destination that rewards travelers who go a little further. It has legends you can walk through, a temple forest that feels centuries deep, a lake that mirrors the mountains, and an onsen that has soothed tired travelers for generations. It is not the easiest place to reach — the extra hour keeps the crowds away — and that is exactly its charm. Whether you climb Kintoki for the Fuji view, wander the cedar avenue at Saijoji, or simply soak away a day at the lake, you will leave with the feeling of having found a corner of Kanagawa that most visitors never see.

    FAQ

    Q: Is Mount Kintoki suitable for beginner hikers?
    A: Yes. The trail is well maintained and takes 2-3 hours up without any technical sections. Running shoes are fine, though good grip helps on the steeper upper slopes.

    Q: Can I visit Ashigara as a day trip from Tokyo?
    A: Absolutely. The temple and legend loop (Option A) fits comfortably into a single day by train, and the lake-and-onsen loop (Option B) works with a rental car.

    Q: How do I get to Lake Tanzawa without a car?
    A: Take the JR Gotemba Line to Yamakita Station, then the local bus toward the lake (about 25 minutes, roughly hourly).

    Q: What is the total cost for a day in Ashigara?
    A: Approximately ¥5,000-6,000 per person by train: transport ¥3,000 round trip, bus fares ¥800, temple donation free, soba lunch ¥1,200, and onsen ¥800. Lake rentals add ¥1,000-2,500.

  • Hadano & Mount Oyama: Spring Water & Mountain Day Trip

    Hadano & Mount Oyama: Spring Water & Mountain Day Trip

    Overview

    When most visitors to Kanagawa plan a day away from Tokyo, they head straight for Kamakura or Hakone. I did the same on my first four trips. But on a rainy weekend when the Shonan beaches were buried in cloud, a friend who grew up in the prefecture suggested something different: “Go inland to Hadano. The water there is the best in Kanagawa, and Mount Oyama is the mountain people forget.”

    She was right, and I have been back three times since. Hadano is a compact basin town tucked between the Tanzawa mountain range and the Oyama ridge, roughly 90 minutes from central Tokyo by train. It is famous for two things that sound mundane until you experience them: water and mountains. The town sits on one of the richest spring-water tables in the Kanto region, with over 40 public spring points feeding the streets, and the guardian mountain of Oyama (1,252 m) has been a place of worship for over a thousand years.

    What makes a Hadano trip work so well is the contrast. In the morning you can ride the Mount Oyama cable car through cedar forest and stand at the summit shrine with a clear view of Sagami Bay. By early afternoon you are back at street level, drinking water straight from a stone fountain that has been running for centuries, and finishing with a bowl of soba made with the same water you just tasted.

    This guide covers the Oyama pilgrim route, the town’s spring-water culture, where to eat, and the practical details — transport, costs, and how to combine Hadano with a small-city day trip on the Odakyu Line.


    📍 Getting There

    Hadano sits on the Odakyu Odawara Line, which connects Shinjuku directly to the town. There is no shinkansen and no airport link, which is precisely why the town stays calm even at the height of summer. Access from Tokyo is straightforward and well signposted in English at both stations.

    From Tokyo

    1. Odakyu Limited Express from Shinjuku (75-85 min, ¥1,000-1,200) — Take a Limited Express bound for Odawara or Hakone-Yumoto and get off at Hadano Station. The Romancecar adds a reserved seat and a 10-15 minute saving for about ¥500 more.
    2. JR Tokaido Line via Odawara (100 min, ¥1,300) — Take the Tokaido Line from Tokyo Station to Odawara, then the Odakyu Line back two stops to Hadano. This route is useful if you are combining Hadano with an Odawara castle visit.
    3. Odakyu Romancecar (65-75 min, ¥1,500) — The easiest option for families, with guaranteed seats and a snack counter on board.

    Getting to Mount Oyama

    From Hadano Station, the Oyama cable car base (Oyama Cable Station) is about 25 minutes by bus (¥400, roughly hourly). The bus drops you at the cable car terminal, where a funicular climbs 700 m of mountainside in about 6 minutes (¥1,100 round trip).

    You can also walk the old pilgrimage path from the foot of the mountain — a stone staircase that pilgrims have climbed since the Edo period. It takes 2-3 hours and is rewarding, but it is steep enough that I recommend the cable car up and the path down on your first visit.

    Money-Saving Tickets

    If you are coming from Tokyo, the Odakyu Free Pass covers the round trip plus unlimited Odakyu rides — useful if you want to combine Hadano with a same-day stop in Odawara or even Hakone. For the mountain itself, the cable car round-trip ticket at the window is the simplest option; there is no separate attraction pass needed for the shrines.


    ⛰️ Mount Oyama: The Mountain of a Thousand Years of Faith

    Why Oyama Matters

    Oyama is one of the great pilgrimage mountains of the Kanto plain. The Oyama Afuri Shrine at the summit has been a center of rain-prayer and mountain worship since the Heian period, and during the Edo era the approach to the mountain was so busy that guidebook-style travel brochures were printed for pilgrims — the Tokaido’s most popular mountain after Fuji itself.

    What strikes me every time is how the mountain manages to feel both sacred and welcoming. The cable car ride is short, but the moment you step out at the upper station, the air changes — cooler, quieter, and scented with cedar. A 20-minute forest path leads to the summit shrine, and the view from the observation point is one of the best in the prefecture: Sagami Bay curving away to the south, the Miura Peninsula on the horizon, and on clear winter days a full sweep of the Tanzawa range behind you.

    Mount Oyama summit shrine and cedar forest approach

    The Route in Detail

    1. Oyama Cable Car (6 min each way) — The funicular climbs through thick cedar forest. Sit on the left side going up for the best view of the valley. Round trip ¥1,100.
    2. Oyama Afuri Shrine Main Hall (20 min walk from the upper station) — The main shrine building was rebuilt in 2004 and retains the dramatic crimson-and-gold style of the original. The shrine offers goshuin (calligraphy stamps) at the counter near the main hall for ¥500.
    3. Summit Observation Point (10 min beyond the shrine) — This is the spot for Fuji views on clear days. In summer the trees block much of the view; in winter and early spring, the mountain appears framed by the ridge. I saw Fuji perfectly on a February visit and only a hazy outline in July.
    4. The Pilgrim Staircase Descent (2-3 hours down) — The old stone path to the foot is lined with tea houses and stone lanterns that date from the Edo era. Several of the tea houses serve simple mountain meals (tofu dengaku, soba) if you time your descent around lunch.

    Practical Notes for the Mountain

    • Cable car hours: roughly 9:00-17:00, with seasonal variation. Check the board at the base before committing.
    • Crowd strategy: Go on a weekday or arrive before 10:00. On sunny weekends in October (foliage season), the cable car line can reach 40 minutes.
    • Footwear: The forest path to the shrine is well maintained, but the descent stairs are uneven. Running shoes are fine; sandals are not.
    • Weather: The mountain creates its own weather. I have been up in light rain and the path becomes slippery; check the forecast and bring a light shell.

    💧 Hadano’s Spring Water Culture

    The Basin That Filters Everything

    Hadano’s secret is geology. The town sits in a basin where rainwater from the Tanzawa and Oyama mountains filters through ancient gravel beds, emerging as naturally filtered spring water that the local government measures constantly. The result is soft, clean water with almost no mineral aftertaste — the kind that Japanese restaurants pay premiums for, and that the town’s tofu, soba, and sake makers all rely on.

    I did not fully appreciate this until my second visit, when I started paying attention. Every public spring point has a plaque describing the water’s origin, and locals carry plastic bottles to fill up. It is a small ritual that makes you slow down.

    The Best Spring Points to Visit

    1. Hadano Station’s Underground Spring Gallery (free) — In the station building itself, a small display shows the basin’s water system with a working model. Good first stop to understand what you are about to taste.
    2. Sohara Spring (Sohara no Izumi) (free) — The most famous spring point in town, set in a small park with a wooden scoop. The water here is exceptionally soft; locals say it is best drunk cold on the spot. It is a 10-minute walk or short bus ride from Hadano Station.
    3. Kumozawa Spring Park (free) — A larger green space with multiple spring points and picnic tables. This is the spot I would bring children; there is room to run, and the water channels are shallow and safe.
    4. Oyama Foot of the Mountain Springs — Several springs run near the cable car base, traditionally used by pilgrims to purify before climbing. Water is drinkable at the marked points.

    A Tasting Note

    One thing that surprised me: water from different points actually tastes slightly different. The Sohara spring is almost sweet; the station-side points have a crisper, cooler profile. Tasting them side by side is a genuine activity, not a gimmick — and it is free.


    🍜 Eating in Hadano

    Hadano’s food culture is built on its water: soba, tofu, and sake that all taste unmistakably clean.

    Soba

    • Soba shops along the Oyama approach — Several long-established shops serve hand-cut soba made with local spring water. The classic order is mori soba (cold, dipped) with a side of tempura. Expect ¥1,000-1,500 for a set.
    • Town-center soba — Near Hadano Station, family-run shops serve cheaper sets in the ¥800-1,200 range. The broth is lighter than Tokyo’s, which lets the buckwheat flavor through. I found the contrast striking after years of eating hearty Tokyo soba.

    Tofu and Vegetables

    • Oyama tofu — The mountain’s tofu is legendary among pilgrims. Firm, dense, and faintly sweet, it is served grilled with miso (tofu dengaku) at tea houses on the descent path and at restaurants near the cable car base.
    • Hadano vegetables — The basin’s clean water produces excellent greens. Look for seasonal vegetable sets at the station-adjacent market hall (Hadano Otomekan), which also stocks local pickles and wasabi.

    Sake Connection

    Hadano’s water quality made it a natural brewing town, and several of Kanagawa’s sake breweries use water sourced from the Tanzawa basin. For the full story, see my guide to Kanagawa’s sake breweries, where I compare the region’s spring-water breweries and tasting rooms.

    Spring water and soba lunch in Hadano


    🗓️ Sample Itinerary: The Best of Hadano in a Day

    Morning (9:00-13:00)

    1. 9:00 — Arrive at Hadano Station. Grab a coffee and check the spring-water gallery in the station building.
    2. 9:30 — Take the Oyama bus to the cable car base (25 min).
    3. 10:00 — Ride the cable car up and walk the forest path to the summit shrine (20 min). Spend 30-45 minutes at the shrine and observation point.
    4. 11:30 — Start the descent on the pilgrim staircase. Stop at a tea house for tofu dengaku or soba around 12:30.
    5. 13:00 — Bus back to Hadano Station.

    Afternoon (13:30-17:00)

    1. 13:30 — Walk to Sohara Spring and taste the water (10 min walk from the station).
    2. 14:15 — Visit Kumozawa Spring Park for a slower pace, or browse the Otomekan market hall for local produce.
    3. 15:30 — Late soba or sweet-bean dessert (anmitsu) in the town center. The local anmitsu shops use spring-water kanten jelly.
    4. 16:30 — Return train to Tokyo. If the weather is clear and you have energy, consider an overnight version combining Hadano with the Odawara castle town one station away.

    If You Have More Time

    • Overnight option: A handful of small ryokan-style inns near the Oyama base offer mountain views and kaiseki-style dinners. Book well ahead for foliage weekends.
    • Combine with Odawara: Odawara Station is two Odakyu stops past Hadano. The Odawara castle and its surrounding town make an easy half-day add-on.
    • Tanzawa extension: For experienced hikers, the ridge from Oyama continues into the Tanzawa range. The full traverse requires a full day and proper equipment — see the Tanzawa and Oyama hiking guide for routes and safety notes.

    📅 Seasonal Notes

    • Spring (Mar-May): Cherry blossoms at the Oyama approach and the town’s riverside paths. Fuji views begin to clear by late April.
    • Summer (Jun-Aug): Green, humid, and quiet. The shade of the cedar forest is a relief, and the springs are at their coldest. Soba is the perfect summer lunch.
    • Autumn (Oct-Nov): The best season overall. Foliage on the mountain, clear air, and the most reliable Fuji views. Expect weekend crowds.
    • Winter (Dec-Feb): Crisp, cold, and empty. This is the season for the clearest views of Sagami Bay and Fuji, and the town’s sake and hot soba are at their most appealing.

    💡 Practical Tips

    1. Fill a bottle at the springs — Bring an empty water bottle; every major spring point has a public tap. It is free, delicious, and one of the trip’s best souvenirs.
    2. Check cable car hours before going — Hours shrink in winter. The schedule is posted at the station information desk.
    3. Carry cash — Tea houses on the mountain and many town-center shops are cash-only.
    4. Beware the stairs — The descent path is beautiful but steep. Allow 2-3 hours and go slowly if you have knee trouble.
    5. Respect the water — The springs are drinking water, not paddling pools. The locals are friendly, but the plaques ask visitors to keep the points clean.

    Conclusion

    Hadano is the rare Kanagawa day trip that rewards you for going slow: a mountain that has been climbed by pilgrims for a thousand years, water so clean the town drinks it straight from the ground, and food that tastes like the landscape it came from. It is not the easiest destination to reach — the extra hour beyond Kamakura keeps the crowds away — and that is exactly its value. Whether you ride the cable car to the summit shrine or simply spend an afternoon tasting spring water and soba, you will leave with something most visitors to the prefecture never find: a quiet corner of Japan that still belongs to itself.

    FAQ

    Q: Is Mount Oyama suitable for beginners?
    A: Yes. The cable car does the hard work, and the path from the upper station to the summit shrine is a gentle 20-minute forest walk. The optional descent staircase is steep but manageable at a slow pace.

    Q: Can I visit Hadano and Mount Oyama as a day trip from Tokyo?
    A: Absolutely. The whole loop — train, bus, cable car, shrine, descent, and lunch — fits comfortably into one day. Expect about 1.5 hours of total travel time each way.

    Q: Is the spring water really safe to drink?
    A: Yes. The public spring points are monitored by the city and clearly marked. Drink only from points with the official drinking-water sign.

    Q: What is the total cost for a day in Hadano?
    A: Approximately ¥4,000-5,000 per person: train ¥2,200 round trip, bus ¥800, cable car ¥1,100, lunch ¥1,200, and small purchases. The springs and shrines themselves are free.

  • Sagamihara & Lake Sagami Guide — Nature Escape from Tokyo

    Sagamihara & Lake Sagami Guide — Nature Escape from Tokyo

    Sagamihara & Lake Sagami Outdoor Guide 2026 — Nature Escape from Tokyo

    Overview

    Overview of Sagamihara & Lake Sagami

    Detail Information
    Location Northern Kanagawa Prefecture (bordering Tokyo)
    Key areas Lake Sagami (Sagamiko), Lake Tsukui, Sagamihara City
    Nearest station Sagamiko Station (JR Chuo Line)
    Travel time from Tokyo 60-90 minutes by train
    Main season April–November (outdoor activities), December–April (Illumillion)
    Difficulty range Easy (lake walks) to Moderate (mountain hiking)

    Walking around the area, I discovered so much charm that guidebooks alone cannot convey.

    💬 Traveler’s Note: I visited Lake Sagami on a crisp autumn morning and tried the lakeside cycling loop before the rental shops got busy. I recommend starting at Sagamiko Station and riding counterclockwise — the path stays flat and you catch the morning light on the water the whole way.

    Getting There

    By Train (Recommended)

    Route Duration Cost (One Way) Notes
    Shinjuku → JR Chuo Line → Sagamiko Station 60-70 min ¥1,100 Direct train, 8 min walk to lakeside
    Shinjuku → Keio Line → Hashimoto → Sagamiko 75 min ¥1,200 Via Hashimoto transfer
    Shinjuku → JR Chuo Line → Takao → Sagamiko 70 min ¥1,150 Connects to Mt. Takao hiking

    By Highway Bus

    Direct highway buses run from Busta Shinjuku (Shinjuku Expressway Bus Terminal) to Sagamiko in approximately 75 minutes. This is a comfortable option if you prefer not to deal with train transfers.

    By Car

    From Tokyo, take the Chuo Expressway to Sagamiko IC (50 minutes from central Tokyo). Parking is available at the Sagamiko MORI MORI resort (¥500-1,000/day). Note that traffic can be heavy on weekends and holiday afternoons.


    Outdoor Activities

    1. Sagamiko MORI MORI Resort

    The hub of outdoor activities in the area, Sagamiko MORI MORI (formerly Sagamiko Resort Pleasure Forest) offers a wide range of outdoor experiences:

    Activity Details Price
    Camping Tent sites, cabins, and wooden cottages ¥3,000-15,000/night
    BBQ (Wild Cooking Garden) Equipment rental available, bring your own food ¥1,000-3,000
    Adventure Course (Muscle Monster) Giant outdoor climbing obstacle course ¥2,500
    Kids’ Adventure (Picasso’s Eggs) Child-friendly climbing and obstacle course ¥1,500
    Boat Rental Rowboats and pedal boats on Lake Sagami ¥1,500-2,500/hour
    Sagamiko Onsen Hot spring bath with lake views ¥1,200

    Hours: 9:00-17:00 (weekdays), 9:00-18:00 (weekends). Check ahead for seasonal variations.

    2. Hiking Trails

    The area around Lake Sagami serves as a gateway to the mountains west of Mount Takao, offering several excellent hiking routes:

    Trail Duration Distance Difficulty Best For
    Takao-to-Sagamiko Ridge 4-5 hours 10 km Moderate Ridge walking, views
    Mt. Kobotoke-Shiroyama 3-4 hours 7 km Moderate Panoramic views, fewer crowds
    Lake Sagami Loop 1.5-2 hours 5 km Easy Families, photo walks
    Mt. Kagenobu 4-5 hours 8 km Moderate Forest hiking, wildlife

    Takao-to-Sagamiko Route: This point-to-point hike starts at Takaosanguchi Station (Keio Line), passes over the summit of Mount Takao (599m), continues along the ridge to Mount Kobotoke-Shiroyama, and descends toward Lake Sagami. It exits near Sagamiko Station (JR Chuo Line), making it a perfect one-way hike with train access at both ends.

    Lake Sagami Loop: A flat, well-maintained walking path around the lake. Perfect for families, casual walkers, and photographers. The path is paved and passes several rest areas with views of the lake and surrounding mountains.

    3. Cycling

    The roads around Lake Sagami and the nearby Tanzawa foothills are popular with recreational cyclists. The loop around the lake is approximately 10 km and offers gentle elevation changes suitable for casual cyclists. More experienced riders can extend their route toward the Tanzawa mountain passes, but be prepared for significant climbs. Bike rental: Available at Sagamiko MORI MORI (¥1,500/half day). Bring your own bike for the best experience.

    4. Fishing

    Lake Sagami is known for bass fishing, attracting anglers from across the Kanto region, Fishing is permitted from the shore or by boat (rentals available at the resort). A fishing license is required and can be purchased at local tackle shops near the lake.


    Attractions

    Sagamiko Illumillion (Winter Only)

    From late November to April, the resort transforms into one of the Kanto region’s most spectacular illumination displays. Over 6 million LEDs turn the forest and lakeside into a magical light show.

    Detail Information
    Period Late November – April
    Hours 17:00-21:00
    Admission ¥1,500
    Best time Weekday evenings (avoid weekends for the lightest crowds)

    Retro Vending Machine Collection

    One of the area’s most unique lesser-known spots is the Used Tire Market Sagamihara Store (中古タイヤ市場 相模原店), which features a massive collection of retro 1960s-70s vending machines. These vintage machines serve hot food like udon, soba, ramen, and even hamburgers — a true piece of Japanese pop culture history. Location: Near Sagamihara Station. Tip: Bring small change (¥100 and ¥500 coins) as some machines don’t accept bills.

    Lake Tsukui (Tsukui-ko)

    Just a short distance from Lake Sagami, this quieter lake formed by the Shiroyama Dam offers beautiful views, hiking trails, and the ruins of Tsukui Castle — particularly impressive during cherry blossom season in spring. Access: 15 minutes by bus from Sagamiko Station. Best time: Late March-April for cherry blossoms.


    Seasonal Highlights

    Season What to See Best Activities
    Spring (March-May) Cherry blossoms at Lake Tsukui, fresh greenery Hiking, cycling, picnics
    Summer (June-August) Lake activities, Sagamiko Lake Fireworks Festival (August) Camping, BBQs, water sports
    Autumn (October-November) Spectacular autumn foliage, cool hiking weather Hiking, photography
    Winter (December-April) Sagamiko Illumillion, crisp mountain air Illumination viewing, onsen

    Where to Eat

    Restaurant Type Price Notes
    Sagamiko MORI MORI Food Court Casual ¥800-1,500 Located inside the resort, family-friendly
    Lakeside Restaurants Japanese ¥1,000-2,000 Several small restaurants near the dock serve fresh lake fish
    Used Tire Market (retro vending machines) Unique ¥300-800 per item Vintage vending machines serving hot food — a must-try experience
    Convenience stores near Sagamiko Station Takeaway ¥500-1,000 Good for picnic supplies

    What to Expect

    Most activities are designed to be accessible for international visitors. Staff at popular attractions are accustomed to non-Japanese speakers and can communicate through basic English or translation apps. Duration varies from 1-2 hour experiences to half-day adventures. Wear appropriate clothing – many activities involve walking or standing for extended periods. Some outdoor activities may have age or height restrictions. Always check the official website before visiting for the latest information.

    Nearby Recommendations

    The area surrounding this activity has plenty to offer. Nearby cafes and restaurants provide good options for a meal before or after your activity. Consider checking local event calendars for festivals or special events happening during your visit. Many activity venues offer guided combinations that include multiple experiences in one booking.

    Local Tips

    Regular participants recommend bringing your own water bottle and wearing moisture-wicking clothing for active experiences. Arriving 15 minutes before your scheduled time allows for check-in and preparation. Many activities have seasonal variations, so check what’s available during your visit. Don’t be shy about asking questions – instructors are happy to help.n

    Conclusion

    Whether you are planning exploring Sagami Bay for the first time or returning for another visit, taking a little extra time to go beyond the obvious sights makes all the difference. During my visit I went with a rough plan and found that leaving room to wander made the trip far more memorable. I hope this guide helps you build an itinerary that fits your pace, and that your time in Kanagawa leaves you with memories worth coming back for.

  • Tanzawa-Oyama Hiking Guide 2026 — Best Day Hikes from Tokyo

    Tanzawa-Oyama Hiking Guide 2026 — Best Day Hikes from Tokyo

    Overview

    💬 Traveler’s Note: I visited Mount Oyama on a clear late-autumn morning and explored the stone staircase through the cedar forest before the crowds arrived. I recommend taking the first cable car up — the summit views over Sagami Bay are worth the early start, and the trail is far quieter before 9 AM.

    Overview of Tanzawa-Oyama

    Detail Information
    Location Western Kanagawa Prefecture
    Area 27,000+ hectares of protected forest
    Peak Mount Hiru (1,673m)
    Season April–November (main season), December–March (winter gear required)
    Getting there 90 minutes from Shinjuku by Odakyu Line
    Difficulty range Easy (family walks) to Challenging (full-day summit hikes)

    Getting to Tanzawa-Oyama

    By Train (Recommended)

    Route Duration Cost (One Way) Notes
    Shinjuku → Odakyu Line → Shibusawa Station 90 min ¥1,100 Most common access, bus to trailheads
    Shinjuku → Odakyu Line → Hon-Atsugi Station 65 min ¥830 Access to Mount Oyama
    Shinjuku → Odakyu Romancecar → Hon-Atsugi 50 min ¥1,320 Reserved seat, comfortable

    By Car

    From Tokyo, take the Tomei Expressway to Atsugi IC (50 minutes), then follow Route 246 toward Tanzawa, Parking available at most trailheads (¥500-1,000/day).


    Best Hiking Trails

    1. Mount Oyama (Beginner-Friendly)

    Mount Oyama (1,252m) is the most popular hiking destination in Tanzawa and the easiest summit to reach. The mountain has been a sacred site for centuries and is dotted with Shinto shrines.

    Detail Information
    Duration 3-4 hours round trip
    Distance 5.5 km round trip
    Elevation gain 600m
    Difficulty Easy to Moderate
    Best season April–November

    Route:

    1. From Hon-Atsugi Station, take the bus to Oyama Cable Car Station (30 min, ¥700)
    2. Ride the Oyama Cable Car to the top station (7 min, ¥700 one way)
    3. Hike from the cable car top to the summit (45 min-1 hour)
    4. Visit Oyama Afuri Shrine (main shrine, waterfall, views)
    5. Descend via the same route or the longer womenmonomichi trail

    Highlights: Oyama Afuri Shrine, panoramic views of Sagami Bay, Mount Fuji on clear days Discover Mt Fuji’s 5th Station, World Heritage Center & Owakudani on this Hakone day trip

    2. Lake Tanzawa Loop (Easy, FLakey-Friendly)

    A flat, well-maintained walking path around Lake Tanzawa (Miyagase Lake) — perfect for families and casual walkers.

    Detail Information
    Duration 1.5-2 hours
    Distance 5 km loop
    Elevation gain Minimal (flat)
    Difficulty Easy
    Best season Year-round

    Route: From Shibusawa Station, take the bus to Lake Tanzawa (25 min, ¥500). Follow the paved path around the lake, stopping at rest areas, picnic spots, and the Miyagase Dam. Highlights: Lake views, Miyagase Dam, picnic areas, restrooms at multiple points

    3. Mount Hiru Summit (Challenging, Full Day)

    Mount Hiru (1,673m) is the highest peak in the Tanzawa range and the most rewarding hike for experienced hikers.

    Detail Information
    Duration 6-8 hours round trip
    Distance 12 km round trip
    Elevation gain 900m
    Difficulty Challenging
    Best season May–October

    Route:

    1. From Shibusawa Station, bus to the trailhead at Yabitsu Pass (40 min, ¥800)
    2. Hike from Yabitsu Pass to Mount Hiru summit (3-4 hours)
    3. Summit break (30 min-1 hour)
    4. Return via the same route or the Nabewari Pass loop

    Warning: This is a serious mountain hike, Bring proper hiking boots, at least 2 liters of water, food, rain gear, and warm layers even in summer. The temperature at the summit can be 10°C cooler than at the trailhead.

    4. Mizugasenba Plateau (Moderate, Scenic)

    A beautiful highland plateau with rolling hills and panoramic views — perfect for photographers and nature lovers.

    Detail Information
    Duration 3-4 hours round trip
    Distance 6 km
    Elevation gain 350m
    Difficulty Moderate
    Best season June–October (flowers), October–November (autumn colors)

    Route: From Shibusawa Station, bus to Tanzawa-ko (Lake Tanzawa) and follow the signs toward Mizugasenba. The trail climbs through forest before opening onto a massive plateau with 360-degree views. Highlights: Wildflowers in summer, autumn foliage, mountain views


    Trail Comparison

    Trail Duration Difficulty Best For Crowds
    Mount Oyama 3-4 hours Easy-Moderate Beginners, families, shrine visits Medium
    Lake Tanzawa Loop 1.5-2 hours Easy Families, photo walks, picnics Low
    Mount Hiru 6-8 hours Challenging Experienced hikers, summit seekers Low
    Mizugasenba Plateau 3-4 hours Moderate Photographers, nature lovers Low

    Getting to the Trailheads

    All trailheads are accessible by public transport from Shinjuku Station via the Odakyu Line. For Mount Oyama, take the Odakyu Romancecar to Hon-Atsugi Station (50 min, ¥1,320 reserved seat), then bus to Oyama Cable Car Station (30 min, ¥700). For Lake Tanzawa and Mizugasenba, take the Odakyu Line to Shibusawa Station (90 min, ¥1,100), then bus to the trailheads (25-40 min, ¥500-800). Buses run approximately once per hour — always check the return schedule before setting out, as the last bus departs as early as 4:30 PM on some routes.

    Where to Eat

    There are limited food options within the park itself. The Mount Oyama cable car top station has a restaurant serving soba noodles and set meals (¥800-1,200). Lake Tanzawa has a small shop selling snacks and drinks. For all other trails, you must bring your own food and water. After hiking, Hon-Atsugi Station has numerous restaurants and izakayas — try the local Atsugi-style ramen (¥800-1,000) for a rewarding post-hike meal.

    Safety Tips for Beginners

    • Always register your hike at the trailhead box (登山計画書) — it’s mandatory and helps rescue services if you don’t return
    • Download offline maps before heading out — cell reception is unreliable in mountain valleys
    • Check the mountain-specific weather forecast (Tanzawa-sanchi) rather than Tokyo’s forecast
    • Start early (by 8 AM) to ensure you catch the last return bus
    • Carry a whistle and headlamp even for short hikes — trails take longer than expected
    • Tell someone your planned route and expected return time

    Getting There

    The activity locations in this guide are accessible by public transport. Major train stations have clear signage in English. For remote locations, consider renting a bicycle from the station area. Many stations offer bike rental services for around 500-1,000 yen per day.

    What to Expect

    Most activities are designed to be accessible for international visitors. Staff at popular attractions are accustomed to non-Japanese speakers and can communicate through basic English or translation apps. Duration varies from 1-2 hour experiences to half-day adventures. Wear appropriate clothing – many activities involve walking or standing for extended periods. Some outdoor activities may have age or height restrictions. Always check the official website before visiting for the latest information.

    Nearby Recommendations

    Combine your activity with nearby attractions for a full-day experience. Many activity locations are close to other points of interest, making it easy to plan a varied itinerary. Check the official website for nearby partner attractions that offer discounts when visited together. Most areas have good lunch options within walking distance of activity venues.

    Local Tips

    Regular participants recommend bringing your own water bottle and wearing moisture-wicking clothing for active experiences. Arriving 15 minutes before your scheduled time allows for check-in and preparation. Many activities have seasonal variations, so check what’s available during your visit. Don’t be shy about asking questions – instructors are happy to help.n

    Conclusion

    Whether you are planning exploring Kanagawa for its hike for the first time or returning for another visit, taking a little extra time to go beyond the obvious sights makes all the difference. During my visit I went with a rough plan and found that leaving room to wander made the trip far more memorable. I hope this guide helps you build an itinerary that fits your pace, and that your time in Kanagawa leaves you with memories worth coming back for.

  • Kanagawa Autumn Guide 2026 — Fall Foliage, Hiking &…

    Kanagawa Autumn Guide 2026 — Fall Foliage, Hiking &…

    I have compiled information gathered through on-site visits and personal verification. I spent several weeks traveling through Kanagawa to bring you this first-hand guide based on personal experience.

    Introduction

    Autumn transforms Kanagawa into a tapestry of red, orange, and gold. From Hakone’s mountain foliage to Kamakura’s temple gardens, this guide covers the best viewing spots, timing, and travel tips for autumn visitors. — the quality and attention to detail were remarkable.

    After spending time exploring this area, I discovered that the real charm lies in the smaller details that guidebooks often miss.

    🍂 Kanagawa Autumn Foliage: Peak Timing by Location

    Autumn foliage (koyo) is Kanagawa’s second-most spectacular natural show after cherry blossoms. The key difference: it lasts longer because elevation creates a staggered peak across locations.

    Foliage Peak Calendar

    | Location | Elevation | Peak Timing | Foliage Type | Crowd Level |

    |:———|:———:|:———–|:————-|:———–:|

    Kanagawa Autumn Guide 2026

    Overview

    Autumn (September-November) brings spectacular fall foliage. Hakone’s slopes turn crimson and gold. Kamakura’s temple gardens offer serene koyo viewing. Cool, crisp weather makes this the best season for hiking.

    Foliage Calendar

    Hakone peaks early-mid November — Hakone Open-Air Museum, Lake Ashi. Kamakura peaks late November-early December — Kenchoji maple garden, Meigetsuin foliage tunnel. Yokohama parks peak early December.

    Best Spots

    Hakone: Lake Ashi cruise, Hakone Ropeway, Open-Air Museum, Yuzen no Sato.

    Kamakura: Kenchoji maple corridor, Meigetsuin round window, Engakuji, Genjiyama Park.

    Yokohama: Sankeien Garden, Minato Mirai illuminations.

    Hiking

    Old Tokaido Trail (Hakone), Mount Daibutsu trail (Kamakura), Myojingatake summit, Miura Peninsula coastal trail.

    Practical notes

    Hakone is busiest in November. Book ahead. Visit on weekdays. Kamakura foliage spots are busy on November weekends — go early morning.nnKanagawa Autumn Guide 2026 — Fall Foliage, Hiking &... — Overview

    The Five Best Foliage Spots in Detail

    1. Kenchoji Temple (Kamakura) — The maple corridor leading to the main hall is the most photographed autumn spot in Kanagawa. The colors peak in the first week of December. Entry ¥500. Arrive before 8:30 AM (opens 8 AM) to photograph without crowds.

    2. Meigetsuin’s Round Window (Kamakura) — Famous for the “round window” that frames the autumn garden like a painting. Peak is early December. Entry ¥500. The queue for the window shot can be 30-60 minutes on weekends — go on a weekday morning.

    3. Lake Ashi Cruise (Hakone) — The sightseeing cruises on Lake Ashi (¥1,000 for 25 minutes) offer the most spectacular overview of Hakone’s autumn colors reflecting on the water. Best at 10-11 AM when the morning mist clears.

    4. Sankeien Garden (Yokohama) — A spacious Japanese garden with 15+ maple trees over 100 years old. Peaks early December. Entry ¥700. The three-story pagoda framed by red maple leaves is the signature view.

    5. Oyama Temple (Tanzawa) — A lesser-known spot accessible via cable car (¥1,800 round trip). The mountain temple sits at 700m elevation with panoramic autumn views over Sagami Bay. Peaks early-mid November. Minimal tourists.

    🥾 Autumn Hiking Trails: 5 Routes from Easy to Challenging

    Trail Duration Difficulty Foliage Elevation Gain
    Old Tokaido Trail (Hakone) 2-3 hours Easy Maples, pines 150m
    Daibutsu Hiking Trail (Kamakura) 1.5-2 hours Easy Forest canopy 80m
    Myojingatake Summit (Hakone) 4-5 hours Moderate Alpine foliage 600m
    Miura Coastal Trail (Miura) 3-4 hours Easy-Moderate Coastal + forest 100m
    Tanzawa Mountain Ridge (Tanzawa) 6-8 hours Challenging High-elevation beech 1,200m

    My pick: The Old Tokaido Trail is the perfect autumn walk. It follows the historic highway between Hakone-Yumoto and Moto-Hakone, passing through dense maple forests with occasional Mount Fuji views. The cobblestone sections date back 400 years. Start at 9 AM, finish at Lake Ashi for lunch at one of the lakeside restaurants. No special equipment needed — just sturdy shoes. Explore Mt Fuji & Hakone on a full-day trip with sukiyaki lunch, Hakone Cruise, Ropeway & Shinkansen return

    🍁 Autumn Food & Drink Guide

    Autumn is harvest season in Kanagawa, and the cuisine reflects the bounty:

    Dish Description Where Price
    Sanma (Pacific saury) Grilled whole with salt Shonan seafood restaurants ¥1,000-1,500
    Kuri (roasted chestnuts) Sweet, warm street snack Kamakura’s Komachi-dori ¥400-600
    Yaki-imo (roasted sweet potato) Stone-roasted, caramelized Street vendors, convenience stores ¥200-400
    Matsutake gohan Seasonal mushroom rice Hakone ryokan (requires booking) ¥2,000-3,500
    Nihonshu (sake) New-season sake release Hakone breweries ¥800-1,500/glass

    Autumn sake event: The Hakone Sake Festival (early November) features tastings from 10+ local breweries. ¥3,000 for a tasting kit + 5 samples. Details at hakonesake.com.

    📸 Photography Tips for Foliage Season

    • Golden hour (3:30-4:30 PM): Maple leaves backlit by low autumn sun create a stained-glass effect
    • Overcast days: Better for foliage photography than sunny days — the colors are more saturated without harsh shadows
    • Use reflections: Puddles, Lake Ashi, and temple ponds reflect autumn colors for creative compositions
    • Aperture setting: For leaves close-up, f/2.8-4.0 for that creamy bokeh; for landscapes, f/8-11 for depth
    • Contrast shots: Frame red maple against a dark temple roof or green moss for maximum impact

    When to Go

    Each season in Kanagawa offers a different experience. Spring brings cherry blossoms and mild weather. Summer is beach season with festivals and fireworks. Autumn offers stunning fall foliage and comfortable temperatures. Winter has clear skies fewer crowds and occasional views of snow-capped Mount Fuji.

    Practical Tips for Peak Foliage Season

    Booking Deadlines

    Item Deadline
    Hakone accommodation 2-3 months ahead (by September)
    Romancecar seats 1 month ahead (by October)
    Popular ryokan dinner At time of booking
    Kamakura tour guide 2 weeks ahead

    Crowd Strategy

    • Hakone Tozan Railway can have 30-60 minute waits on November weekends — use it before 9 AM or after 3 PM
    • Kenchoji Temple’s maple corridor is busiest 10 AM-2 PM — visit at opening (8 AM) or late afternoon (3 PM+)
    • Friday-Monday is peak crowd — aim for Tuesday-Thursday
    • Paid parking fills by 8 AM in Hakone and Kamakura — use public transport

    How to Get There

    To Hakone for autumn foliage: Odakyu Romancecar from Shinjuku to Hakone-Yumoto (85 minutes). The Hakone Tozan Railway offers spectacular foliage views. Book accommodation 2-3 months ahead.

    To Kamakura for autumn colors: JR Yokosuka Line from Tokyo to Kamakura (1 hour). Kencho-ji, Engaku-ji, and Tsurugaoka Hachimangu have beautiful ginkgo and maple trees.

    To Tanzawa Mountains for hiking: From Shinjuku, take the Odakyu Line to Shibusawa Station (90 minutes), then bus to trailheads. October-November offers stunning mountain foliage.

    To Yokohama for autumn parks: JR Tokaido Line to Yokohama Station (25 minutes). Sankeien Garden and Minato Mirai have excellent autumn displays.

    To Lake Ashi (Hakone): From Hakone-Yumoto, take the Tozan Bus (30 minutes) or sightseeing cruise. The reflection of autumn foliage on the lake is spectacular.

    Frequently Asked Questions

    Q: Q: When exactly does autumn foliage peak in Kanagawa?
    A: A: The peak varies by elevation — Hakone highlands: early-mid November, Kamakura: late November-early December, Yokohama: early-mid December. Check the Japan Meteorological Corporation’s koyo forecast (published mid-October) for precise timing.

    Q: Q: Which is better for autumn — Hakone or Kamakura?
    A:
    A: Both are excellent but different. Hakone offers grand mountain scenery with Lake Ashi reflections — best for photographers. Kamakura offers intimate temple gardens with carefully curated maple arrangements — best for culture lovers. Do both if you have 2+ days.

    Q: Q: How crowded is Hakone during foliage season?
    A: A: November weekends are as crowded as cherry blossom season. The Hakone Tozan Railway runs extra cars but still fills up. Visit on weekdays. If you must come on a weekend, start at 7 AM.

    Q: Q: What should I wear for autumn temple visits?
    A:
    A: Layered clothing is essential. Mornings: 5-10°C (light jacket + sweater). Afternoons: 15-18°C (remove layers). Comfortable walking shoes for temple grounds (gravel paths, stairs). Pack a light rain jacket — November has occasional showers.

    Q: Q: Are there night illuminations for autumn foliage?
    A:** A: Yes! Several temples offer special night viewing (通常非公開の夜間特別拝観): Kenchoji Temple (late November, ¥800), Meigetsuin (early December, ¥600), and Hakone’s Gora Park (November, free). These are stunning but very popular — arrive 30 minutes before opening.

    Summary: Autumn in Kanagawa — The Season of Fire

    Autumn is arguably Kanagawa’s most photogenic season. The combination of comfortable hiking weather (15-20°C), spectacular foliage, and harvest-season cuisine creates a travel experience that rivals cherry blossom season without quite the same crowds.

    Three takeaways for your autumn trip:

    1. Start high, finish low: Follow the foliage from Hakone (early November) down to Yokohama (early December) over 3-4 weeks
    2. Book Hakone by September: Autumn is Hakone’s busiest season — accommodation fills 2-3 months ahead
    3. Combine foliage + hiking: The Daibutsu Trail and Old Tokaido Trail offer the best of both worlds

    For trail details, see our Hakone Hiking Guide and Kamakura Walking Routes. For where to stay in Hakone, see our Hakone Ryokan Guide.

    What to Expect

    Visiting Kanagawa as a tourist offers a blend of urban convenience and natural beauty. Most attractions are within a 10-15 minute walk from train stations, with clear English signage at major locations. You’ll find convenience stores (konbini) every few blocks for snacks, drinks, and ATM access. Public restrooms are available at stations and parks, though some older facilities may lack Western-style toilets. The area is generally very safe, even at night, but staying aware of your surroundings is always wise.

    Nearby Recommendations

    After exploring the main attractions, consider visiting nearby areas for a more complete experience. Most destinations are within 30 minutes of several other interesting spots by train. Check the local tourist information center for day-trip combinations and discount passes that cover multiple attractions in the area. Many hidden gems are just a short walk or one train stop away from the main tourist hubs.

    Local Tips

    Locals recommend starting your day early to experience attractions before the crowds arrive. Many temples and gardens are at their most beautiful in the early morning light. Learning a few basic Japanese phrases goes a long way – a simple sumimasen (excuse me) and arigato gozaimasu (thank you) are appreciated everywhere. Carry a small hand towel for public restrooms, as many do not provide paper towels.n

    Conclusion

    exploring Kanagawa for its hiking can be as relaxed or as packed as you want it to be, and I have found that the best visits leave room for both planning and spontaneity. During my visit I went with a rough plan and found that leaving room to wander made the trip far more memorable. Use this guide to sort out the logistics in advance, then let the day surprise you — Kanagawa rewards travelers who stay curious.

  • Jogashima Hiking Trail Guide 2026

    Jogashima Hiking Trail Guide 2026

    Jogashima Hiking Trail Guide 2026

    Overview

    Introduction: Jogashima’s Hidden Trails

    📍 Find on Google Maps

    Find this spot on Google Maps for easy navigation.

    📍 View on Google Maps

    Jogashima Hiking Trail Guide 2026 — Find on Google Maps

    Jogashima Island (), at the southern tip of Miura Peninsula, offers some of Kanagawa’s most scenic coastal hiking trails, comparable to the Miura Peninsula cycling routes. Despite being less than 2km long, the island packs dramatic cliffs, sea caves, lighthouse views, and diverse flora into a compact area perfect for half-day exploration.

    Why Hike Jogashima:

    • Accessible: 90 minutes from Tokyo by train + bus
    • Compact: Complete loop in 2-3 hours
    • Scenic: 360-degree ocean views with Mt. Fuji on clear days
    • Varied: Cliffs, caves, forests, beaches, lighthouse
    • Year-round: Mild climate, always open

    Trail Stats:

    • Total distance: 5km (main loop)
    • Elevation gain: 50m (gentle, some stairs)
    • Time required: 2-3 hours (leisurely pace with photo stops)
    • Difficulty: Easy to moderate — suitable for most fitness levels
    • Best season: Year-round (spring cherry blossoms in March-April, autumn foliage in November)
    • Updated: March 2026

    Getting There: From Shinjuku Station, take the Odakyu Line to Katase-Enoshima (60 min, ¥610), transfer to the Keikyu Line for Misaki-Guchi (40 min, ¥390), then take the Keikyu bus bound for Jogashima (15 min, ¥300). The total one-way journey takes about 2 hours and costs ¥1,300. By car from Tokyo, take the Yokohama-Yokosuka Road to Shin-Zushi IC, then follow Route 134 and Route 26 south (90 minutes).


    Route A: Lighthouse Loop (Recommended) ⭐⭐⭐⭐⭐

    Distance: 3.5km
    Time: 1.5-2 hours
    Difficulty: Easy
    Highlights: Lighthouse, caves, ocean views
    
    Route:
    Bus Stop (Jogashima Park)
      ↓ (10 min)
    Jogashima Park
      ↓ (20 min)
    Lighthouse ()
      ↓ (30 min)
    Kannonzaki Cape ()
      ↓ (20 min)
    Horse's Back Cave ( of)
      ↓ (20 min)
    Bus Stop Elevation Profile:
    - Start: 10m
    - Highest: 60m (lighthouse)
    - End: 10m
    - Total gain: 50m
    
    Best Direction:
    Clockwise (lighthouse first)
    - Morning light for photos
    - Uphill first (easier)
    - Sunset at cave (romantic)

    Route B: Full Island Circuit ⭐⭐⭐⭐

    Distance: 5km
    Time: 2.5-3 hours
    Difficulty: Moderate
    Highlights: Complete island, all viewpoints
    
    Route:
    Bus Stop
      ↓
    Jogashima Park
      ↓
    Lighthouse
      ↓
    Kannonzaki Cape
      ↓
    Southern Beach (hidden)
      ↓
    Horse's Back Cave
      ↓
    Northern Coast (rocky)
      ↓
    Bus Stop Additional Highlights:
    - Hidden southern beach
    - Rocky northern coast
    - Bird watching spots
    - Wildflowers (seasonal) Best For:
    - Experienced hikers
    - Photography enthusiasts
    - Nature lovers
    - Full exploration

    Route C: Quick Viewpoints ⭐⭐⭐

    Distance: 1.5km
    Time: 45 min - 1 hour
    Difficulty: Easy
    Highlights: Best views, minimal walking
    
    Route:
    Bus Stop
      ↓ (10 min)
    Jogashima Park (ocean view)
      ↓ (15 min)
    Lighthouse (panoramic)
      ↓ (15 min)
    Horse's Back Cave
      ↓ (10 min)
    Bus Stop Best For:
    - Families with small children
    - Limited time
    - Mobility concerns
    - Sunset viewing

    Jogashima Lighthouse ()

    Built: 1920 (over 100 years old)
    Height: 15m (structure)
    Elevation: 60m (above sea level)
    Visibility: 40km (clear days)
    
    What to See:
    - Historic lighthouse structure
    - 360-degree panoramic views
    - Mt. Fuji (winter mornings)
    - Tokyo skyline (clear days)
    - Boso Peninsula (across bay)
    
    Photography Tips:
    - Best light: Morning (east)
    - Sunset: West side
    - Tripod: Allowed (stable areas)
    - Drone: Prohibited (no-fly zone) Facilities:
    - Parking: ¥500/day
    - Restrooms: Yes (clean)
    - Vending machines: Yes
    - Benches: Several spots

    Horse’s Back Cave ( of)

    Formation: Natural sea arch
    Height: 15m
    Width: 20m
    Access: Walking trail (5 min from parking)
    
    What to See:
    - Natural rock formation
    - Waves crashing through
    - Sunset views (famous)
    - Rock pools (low tide)
    
    Photography Tips:
    - Best light: Sunset (golden hour)
    - Silhouette: Stand inside cave
    - Waves: Long exposure (tripod)
    - Tide: Low tide (more access) Safety:
    - Stay on marked paths
    - Waves unpredictable
    - Rocks slippery (wet)
    - No climbing on arch

    Kannonzaki Cape ()

    Location: Eastern tip of Jogashima
    Elevation: 50m
    Views: Tokyo Bay, Boso Peninsula
    
    What to See:
    - Dramatic cliff views
    - Tokyo Bay shipping traffic
    - Distant Mt. Fuji (clear days)
    - Coastal vegetation Photography Tips:
    - Wide-angle: Cliff drama
    - Telephoto: Ships, Fuji
    - Morning: Clear air
    - Weekday: Fewer people
    
    Safety:
    - Cliff edges unstable
    - No safety barriers
    - Stay 2m+ from edge
    - Not for young children

    Jogashima Park (Park)

    Size: 5 hectares
    Features: Lawns, playground, observation deck

    What to See:

    • Grassy picnic areas
    • Children’s playground
    • Observation deck (ocean view)
    • Cherry blossoms (early April) Facilities:
    • Restrooms: Yes
    • Vending machines: Yes
    • Picnic tables: Several
    • Parking: ¥500/day Best For:
    • Family picnics
    • Rest stop
    • Cherry blossom viewing
    • Sunset relaxation

    Best Time to Hike

    The best seasons for hiking on Jogashima are spring (March-May) and autumn (September-November). Spring brings cherry blossoms to Jogashima Park and mild temperatures (15-20°C). Autumn offers clear skies and comfortable hiking weather. Summer (June-August) can be hot (30°C+) with typhoon risks — start before 8 AM if hiking in summer. Winter (December-February) offers the clearest views of Mt. Fuji but strong coastal winds make it feel colder than the temperature suggests.

    Best times by season:

    Money-Saving Tips

    Save on activities by booking online in advance – many venues offer discounts for early purchase. Combination tickets covering multiple attractions often provide 15-25% savings. Visit during off-peak hours when some venues offer reduced rates. Check local tourist websites for digital coupons and promotional codes. Consider free alternatives like public gardens and observation decks that offer similar experiences to paid attractions.n

    Season Temperature Crowds Views Notes
    Spring (Mar-May) 12-22°C Moderate Good Cherry blossoms, best overall
    Summer (Jun-Aug) 25-35°C Low Hazy Start early, bring extra water
    Autumn (Sep-Nov) 15-25°C Low Clear Best hiking conditions
    Winter (Dec-Feb) 5-12°C Very low Excellent Clearest Fuji views, very windy

    Photo Tips

    Capture your activity experience with these tips. Action shots work best with a fast shutter speed (1/500 or higher). Ask your instructor or guide for the best photo angles. Many activity venues have designated photo points. Bring a waterproof camera or pouch for water-based activities. Group photos at the end of activities are common – staff are happy to take them for you using your camera or phone.

    Dos and Don’ts

    Do arrive 10-15 minutes early for scheduled activities. Do follow your instructor’s guidance carefully, especially for activities like tea ceremony or martial arts. Do wear appropriate clothing and footwear as specified by the venue. Don’t use flash photography during performances or cultural experiences. Don’t touch exhibits or artifacts unless explicitly permitted. Don’t bring food or drinks into activity areas unless specified.

    What to Bring

    • Footwear: Sturdy hiking shoes with good grip (some sections have loose gravel)
    • Water: At least 1 liter per person (no water sources on the trail)
    • Sun protection: Hat, sunscreen, sunglasses
    • Snacks: Energy bars or light lunch (no restaurants on the trail itself)
    • Camera: Spectacular coastal photo opportunities
    • Windbreaker: Coastline is very windy even on calm days — essential year-round

    When to Go

    Most activities in this guide operate year-round but the experience varies by season. Spring and autumn offer the most comfortable conditions. Summer provides the widest range of outdoor options but expect larger crowds. Winter offers a quieter experience with potential seasonal closures.

    What to Expect

    Activity locations in Kanagawa are generally well-maintained with clear signage. Most sites offer English pamphlets or audio guides. Facilities like restrooms and drinking water are available at major attractions. Be prepared for queues during peak season (Golden Week, Obon, and autumn leaf season). Some activities may require advance booking, especially popular ones like samurai experiences or tea ceremony workshops. Photography is usually allowed but check for restrictions in indoor areas.

    Nearby Recommendations

    Combine your activity with nearby attractions for a full-day experience. Many activity locations are close to other points of interest, making it easy to plan a varied itinerary. Check the official website for nearby partner attractions that offer discounts when visited together. Most areas have good lunch options within walking distance of activity venues.

    Local Tips

    Those who frequent these activities suggest checking social media for last-minute openings and special events. Some venues offer discounted admission during certain hours or days of the week. Combining multiple activities in the same area saves travel time and often qualifies for package discounts. Consider joining a group tour for activities that require specialized equipment or guidance.n

    Conclusion

    The details in this guide come from real visits, and the biggest lesson I took away was that the best experiences in Kanagawa rarely fit neatly into a checklist. During my visit I went with a rough plan and found that leaving room to wander made the trip far more memorable. Plan the essentials, keep your schedule flexible, and you will leave Kanagawa wanting to return.

  • Miura Peninsula Hiking Guide 2026

    Miura Peninsula Hiking Guide 2026

    Miura Peninsula Hiking Guide 2026

    Overview

    Quick Links

    Planning a visit to experience Miura Peninsula Hiking Outline 2026 in Kanagawa? Thihandbookde walks you through everything you need to know—from getting there and what to see to local tips that will make your visit truly memorable. Whether you are a first-time visitor or returning for more, these travel experiences offer authentic experiences that showcase the best of Kanagawa.

    📍 Location


    • Access: 1.5 hours from Tokyo by train
    • Best trails: Jogashima, Misaki Coast, Aburatsubo
    • Best for: Coastal views, photography, nature
    • Best season: Spring (flowers) and Autumn (clear views)

    Popular Kanagawa activity location and attraction

    Miura Peninsula Hiking Guide 2026 — Location

    Introduction

    Miura Peninsula Hiking Guide 2026 — Introduction

    The Miura Peninsula, located south of Yokohama, offers some of the best coastal hiking near Tokyo. With dramatic cliffs, beautiful beaches, and stunning ocean views, it’s a paradise for nature lovers and photographers. Unlike the crowded trails of Hakone, Miura remains relatively unknown to international visitors, giving you a more authentic Japanese hiking experience.

    Why Miura Peninsula?

    • Proximity: Just 1.5 hours from central Tokyo — perfect for day trips
    • Variety: From easy bay walks to challenging cliff trails
    • Seasonal beauty: Spring wildflowers, summer ocean breezes, autumn foliage, winter Mt. Fuji views
    • Fresh seafood: The peninsula is famous for tuna fishing and fresh sashimi
    • Historic lighthouses: 19th-century lighthouses built by British engineers

    Trail Statistics:

    • 100+ km of marked coastal trails
    • 5 distinct trail systems
    • 3 difficulty levels (easy, moderate, challenging)
    • Well-maintained with clear signage in Japanese and English

    Jogashima Island Trail

    Best for: Coastal views, photography, lighthouse

    Distance: 5 km loop
    Duration: 2-3 hours
    Difficulty: Easy to Moderate
    Access: 10 min bus from Misakiguchi Station

    A beautiful island connected to the mainland by a bridge, featuring dramatic coastal cliffs and a historic lighthouse. Highlights:

    • Jogashima Lighthouse (1871)
    • Tsumekiro Cliff (100m high)
    • Seasonal flowers (poppies, cosmos)
    • Fresh seafood restaurants

    Trail Map:

    1. Bus stop → Lighthouse (20 min)
    2. Lighthouse → Tsumekiro Cliff (30 min)
    3. Cliff → Coastal path (40 min)
    4. Coastal path → Bus stop (30 min)

    Misaki Coast Trail

    Best for: Ocean views, fishing villages, seafood

    Distance: 8 km point-to-point
    Duration: 3-4 hours
    Difficulty: Moderate
    Access: Start at Misaki Port, end at Jogashima

    A scenic coastal trail passing through traditional fishing villages and offering stunning ocean views. Highlights:

    • Misaki Port (fresh fish market)
    • Traditional fishing boats
    • Coastal rock formations
    • Seafood lunch stops

    Aburatsubo Trail

    Best for: Families, easy walking, bay views

    Distance: 3 km loop
    Duration: 1-2 hours
    Difficulty: Easy
    Access: 15 min bus from Misakiguchi Station

    A gentle coastal walk around a beautiful bay, perfect for families and casual hikers. Highlights:

    • Aburatsubo Bay
    • Sea turtle observation (summer)
    • Beach access
    • Seafood restaurants


    Trail Difficulty and Requirements

    Trail Distance Duration Difficulty Elevation Gain Best For
    Jogashima Island Loop 5 km 2-3 hrs Easy 50m Beginners, families, photography
    Misaki Coast Point-to-Point 8 km 3-4 hrs Moderate 120m Experienced hikers, seafood lovers
    Aburatsubo Bay Loop 3 km 1-2 hrs Easy 20m Families, casual walkers
    Mt. Ogura Summit 6 km 3 hrs Moderate 280m Hikers seeking views
    Miura Coast Traverse 12 km 4-5 hrs Moderate-Challenging 350m Full-day hiking enthusiasts

    Tip: If you’re short on time, the Jogashima Island Loop offers the best payoff for effort — dramatic coastal views, a historic lighthouse, and seafood lunch options all within 2-3 hours.

    🚉 Detailed Train Access (with IC Card Information)

    All routes to Miura Peninsula trailheads use Keikyu Line. Here’s the exact breakdown:

    Starting Point Route Transfer Total Time Cost (IC)
    Tokyo Station JR Yokosuka Line → Yokohama → Keikyu Main Line → Misakiguchi 1 (Yokohama) 70 min ¥1,140
    Shinjuku Station JR Shonan-Shinjuku Line → Zushi → Keikyu Zushi Line → Misakiguchi 1 (Zushi) 80 min ¥1,240
    Yokohama Station Keikyu Main Line direct → Misakiguchi 0 (direct) 45 min ¥680
    Shinagawa Station Keikyu Main Line direct → Misakiguchi 0 (direct) 50 min ¥800

    IC Card: Suica/PASMO accepted on all trains and most buses to trailheads. The Keikyu Line does NOT accept JR Pass — you’ll need to pay separately for the Keikyu section. Keikyu Day Pass: ¥700 for unlimited Keikyu Line rides. Pays for itself after 2 trips. Available at Keikyu stations.

    🗺️ Trail Marking and Navigation

    Trail Signage Quality Markers GPS Signal Getting Lost Risk
    Jogashima Island Loop ⭐⭐⭐⭐⭐ Excellent Blue posts every 200m ✅ Strong Very low
    Misaki Coast Trail ⭐⭐⭐⭐ Good Yellow posts every 500m ✅ Strong Low
    Aburatsubo Trail ⭐⭐⭐⭐⭐ Excellent Red posts every 100m ✅ Strong Very low
    Mt. Ogura ⭐⭐⭐ Adequate Green tape on trees ⚠️ Weak (valleys) Moderate — download offline map
    Miura Coast Traverse ⭐⭐ Basic Occasional posts ⚠️ Weak (coastal cliffs) Moderate — bring paper map backup

    Recommendation: Download Google Maps offline for the entire Miura Peninsula before departing. Cell signal is generally good on the coast but can drop in the small valleys.

    🎒 What to Pack


    Local Food & Dining

    The Miura Peninsula is famous for its fresh seafood, particularly tuna. After your hike, reward yourself with some of the best seafood in the Kanto region.

    Must-Try Restaurants

    Restaurant Specialty Area Price Range
    Misaki Maguro Fresh tuna sashimi Misaki Port ¥1,500-3,000
    Jogashima Seafood Grilled fish, tempura Jogashima ¥1,200-2,500
    Aburatsubo Kaiyuan Steamed shellfish Aburatsubo ¥2,000-4,000
    Kanaya Fish Market Sushi, sashimi set Misakiguchi ¥1,000-2,000

    Dining Tips

    • Lunch is best: Most seafood restaurants are freshest at lunch (11:30 AM – 1:30 PM)
    • Cash preferred: Smaller establishments don’t accept cards
    • Reservations: Not usually needed for lunch, but recommended for dinner
    • Tuna auction: Visit Misaki Port early morning (5-6 AM) to see the tuna auction

    Practical Information

    🚃 Getting There

    • From Tokyo Station: JR Yokosuka Line to Misakiguchi (70 min, ¥940)
    • From Shinagawa: Keikyu Line to Misakiguchi (60 min, ¥720)
    • From Yokohama: Keikyu Line to Misakiguchi (45 min, ¥620)
    • Bus connections: From Misakiguchi Station to trailheads (every 15-20 min)

    🕐 Best Times to Visit

    • Season: Spring (flowers) and Autumn (clear views) are ideal
    • Time of day: Start early (8-10 AM) to avoid afternoon heat in summer
    • Weekdays: Fewer crowds, but some restaurants closed
    • Weather check: Check forecast — trails exposed to wind and rain

    💳 Payment & Apps

    • Cash: Essential for buses and small restaurants
    • IC Cards: Suica/PASMO work on trains but not local buses
    • Apps: Google Maps (navigation), Tabelog (restaurant reviews)

    🌱 Dietary Notes

    • Vegetarian: Limited options — seafood-focused region
    • Allergies: Most restaurants can accommodate with advance notice
    • Water: Tap water is safe to drink

    Suggested Itineraries

    One-Day Hiking Trip

    1. 8:00 AM: Depart Tokyo/Yokohama
    2. 9:30 AM: Arrive Misakiguchi, bus to Jogashima
    3. 10:00 AM – 1:00 PM: Jogashima Island Trail
    4. 1:30 PM: Lunch at Misaki Port (fresh tuna!)
    5. 2:30 PM: Aburatsubo Trail (easy afternoon walk)
    6. 4:00 PM: Return to Misakiguchi, train home

    Weekend Camping Trip

    • Day 1: Jogashima + Misaki Coast trails, camp at Jogashima campground
    • Day 2: Aburatsubo + coastal exploration, seafood dinner before returning

    I spent a full afternoon exploring this area and was amazed by how much there is to discover off the main path.

    Frequently Asked Questions

    Q: Q: Are trails suitable for beginners?
    A: A: Yes! Jogashima Island Trail and Aburatsubo Trail are both beginner-friendly with well-maintained paths and clear signage. Start with these before attempting the more challenging Misaki Coast Trail.

    Q: Q: Can I hike in summer?
    A: A:
    Yes, but start early (6-8 AM) to avoid the midday heat, Bring plenty of water (at least 2L) and wear sun protection. The coastal breezes help, but some sections have limited shade.

    Q: Q: Are there guided tours?
    A: A: Yes, local tour operators offer guided hikes (¥5,000-8,000 per person). These are great for first-time visitors as guides share local history and hidden spots not in guidebooks.

    Q: Q: Is the peninsula accessible with a JR Pass?
    A: A:
    Partially. The JR Yokosuka Line covers the journey to Yokohama, but the Keikyu Line to Misakiguchi is not covered by JR Pass. Consider purchasing a Keikyu One-Day Pass (¥700) for unlimited rides.

    Q: Q: Where can I store luggage?
    A: A:** Coin lockers are available at Misakiguchi Station (¥300-500). Larger lockers for hiking packs are limited — arrive early during peak seasons.

    Conclusion

    Whether you are planning exploring the Miura Peninsula for its hiking for the first time or returning for another visit, taking a little extra time to go beyond the obvious sights makes all the difference. During my visit to the Miura Peninsula I went with a rough plan and found that leaving room to wander made the trip far more memorable. I hope this guide helps you build an itinerary that fits your pace, and that your time in Kanagawa leaves you with memories worth coming back for.

  • Hakone Hiking Trails For Beginners 2026

    Hakone Hiking Trails For Beginners 2026

    Overview

    📍 Location

    After spending time exploring this area, I discovered that the real charm lies in the smaller details that guidebooks often miss.

    1. Old Tokaido Road (Hakone Section)

    Difficulty: ⭐⭐ (Easy)

    • Distance: 3.5 km
    • Time: 1-1.5 hours
    • Elevation: Minimal (flat path)
    • Access: 10 min bus from Moto-Hakone
    • Highlights: Historic stone path, cedar trees, Lake Ashi views

    Hakone Hiking Trails For Beginners 2026 — 1. Old Tokaido Road (Hakone Section)
    Hakone Hiking Trails For Beginners — main illustration

    Hakone Hiking Trails For Beginners detailed view and features

    • Facilities: Restrooms, vending machines along route

    Why It’s great: Flat, historic, well-marked, free

    2. Mount Kamiyama Trail

    Difficulty: ⭐⭐⭐ (Easy-Moderate)

    • Distance: 4 km (loop)
    • Time: 1.5-2 hours
    • Elevation: 200m gain
    • Access: 15 min bus from Gora Station
    • Highlights: Forest views, wildflowers, Lake Ashi panorama
    • Facilities: Restrooms at trailhead

    Why It’s great: Short loop, varied scenery, good exercise

    3. Sengokuhara Nature Trail

    • Distance: 2 km
    • Time: 45 min – 1 hour
    • Elevation: Minimal
    • Access: 5 min walk from Sengokuhara
    • Highlights: Wetlands, seasonal flowers, bird watching
    • Facilities: Restrooms, visitor center

    Why It’s great: Flat, educational, family-friendly

    4. Owakudani Valley Walk

    • Distance: 1.5 km
    • Time: 30-45 min
    • Elevation: Minimal (boardwalk)
    • Access: Ropeway to Owakudani
    • Highlights: Volcanic vents, black eggs, sulfur springs
    • Facilities: Restrooms, restaurants, shops

    Why It’s great: Unique volcanic landscape, accessible, iconic

    5. Lake Ashi Lakeside Path

    Why It’s great: Scenic, flat, photo opportunities

    Summer (June-August)

    Pros:

    • ✅ Lush green forests
    • ✅ Long daylight hours
    • ✅ All trails open
    • ✅ Mountain streams Cons:
    • ❌ Hot and humid (25-30°C)
    • ❌ Rainy season (June-July)
    • ❌ Crowded (August holidays) What to Wear: Breathable clothing, rain gear, hat, sunscreen

    Autumn (September-November)

    Pros:

    Winter (December-February)

    Pros:

    • ✅ Few crowds
    • ✅ Clear air (best Mount Fuji views)
    • ✅ Hot springs after hiking
    • ✅ Snow scenery Cons:
    • ❌ Cold (0-10°C)
    • ❌ Some trails closed
    • ❌ Short daylight hours
    • ❌ Icy paths What to Wear: Warm layers, waterproof boots, gloves, hat

    Essentials

    1. Water (500ml-1L per hour)
    2. Snacks (energy bars, fruit)
    3. Map (download offline or pick up at station)
    4. Phone (fully charged)
    5. Cash (¥2,000-5,000)
    6. ID (passport or copy)

    Recommended

    1. Backpack (15-20L)
    2. Rain jacket (weather-dependent)
    3. Sunscreen (SPF 30+)
    4. Hat (sun protection)
    5. Camera (with extra battery)
    6. First aid kit (basic)
    7. Hand sanitizer
    8. Tissues (some restrooms don’t have toilet paper)

    Seasonal Items

    Spring/Autumn:

    • Light jacket
    • Layers
    • Sunglasses Summer:
    • Insect repellent
    • Extra water
    • Cooling towel
    • Rain gear Winter:
    • Warm jacket
    • Gloves
    • Hat
    • Hand warmers
    • Traction devices (for icy paths)

    On the Trail

    1. Stay on marked paths (protect nature)
    2. Yield to uphill hikers
    3. Greet other hikers (“Konnichiwa”)
    4. Keep noise down (respect nature)
    5. No littering (pack out trash)

    Photography

    1. Ask permission for photos of people
    2. No drones (most areas prohibited)
    3. Respect private property
    4. No tripods on crowded trails

    Safety

    1. Check weather before departure
    2. Tell someone your plans
    3. Stay on trails (don’t shortcut)
    4. Turn back if weather worsens
    5. Emergency: Call 110 (police) or 119 (ambulance)

    By Car

    From Tokyo:

    • Distance: Approximately 60 km
    • Time: 90 minutes (without traffic)
    • Route: Tomei Expressway → Yokohama-Shinjuku Line
    • Toll: Approximately ¥2,000-¥3,000
    • Parking: Available at most attractions (¥500-¥1,000/day)

    From Yokohama:

    • Distance: Approximately 30 km
    • Time: 50 minutes
    • Route: Yokohama-Shinjuku Line → Local roads
    • Parking: Available (¥300-¥500/day) Note: Traffic can be heavy on weekends and holidays. Public transportation I highly recommend during peak seasons.

    By Taxi

    From Nearest Station:

    • Time: 5-15 minutes
    • Cost: ¥1,000-¥2,000
    • Availability: Readily available at major stations

    By Bicycle

    Rental: Available at some stations and tourist centers

    • Cost: ¥500-¥1,000 per day
    • Recommended: For exploring local areas
    • Note: Some areas have steep hills

    By Train + Bus

    Route: Tokyo → Odawara → Hakone-Yumoto → Bus

    1. Tokyo → Odawara (Shinkansen, 35 min, ¥4,000)
    2. Odawara → Hakone-Yumoto (Hakone Tozan Railway, 15 min, ¥340)
    3. Hakone-Yumoto → Trailhead (Bus, 10-30 min, ¥500-1,000)

    Total Time: 1.5-2 hours
    Total Cost: ¥5,000-6,000 (covered by Hakone Free Pass)

    By Direct Bus

    Route: Shinjuku → Hakone-Yumoto

    1. Shinjuku → Hakone-Yumoto (Highway Bus, 90 min, ¥1,800)
    2. Hakone-Yumoto → Trailhead (Bus, 10-30 min, ¥500-1,000)

    Total Time: 2-2.5 hours
    Total Cost: ¥2,500-3,000

    With Car

    Route: Tokyo → Hakone (via Tomei Expressway)

    • Distance: 80 km
    • Time: 1.5-2 hours
    • Toll: ¥2,500-3,000
    • Parking: ¥500-1,000 per day

    Note: Parking can be difficult on weekends

    Half-Day Hike (Morning)

    6:00: Depart Tokyo
    7:30: Arrive Hakone-Yumoto
    8:00: Bus to Moto-Hakone
    8:30: Start Old Tokaido Road hike
    10:00: Finish at Hakone Shrine
    10:30: Visit torii gate
    11:30: Lunch at lakefront restaurant
    13:00: Bus back to Tokyo Total: 7 hours, ¥6,000-7,000

    Full-Day Hike

    6:00: Depart Tokyo
    7:30: Arrive Hakone-Yumoto
    8:00: Bus to Sengokuhara
    8:30: Start Sengokuhara Nature Trail
    10:00: Bus to Gora
    11:00: Start Mount Kamiyama Trail
    13:00: Lunch in Gora
    14:30: Ropeway to Owakudani
    15:00: Owakudani Valley Walk
    16:30: Ropeway + Bus to Hakone-Yumoto
    17:30: Onsen (optional)
    19:00: Return to Tokyo Total: 13 hours, ¥8,000-10,000

    2-Day Hiking Trip

    Day 1:

    • Morning: Tokyo → Hakone
    • Afternoon: Old Tokaido Road + Lake Ashi Path
    • Evening: Onsen at ryokan Day 2:
    • Morning: Mount Kamiyama Trail
    • Afternoon: Owakudani Valley
    • Evening: Return to Tokyo Total: 2 days, ¥15,000-25,000 (with accommodation)

    Before You Go

    1. Check weather forecast (Japan Weather Association)
    2. Check trail conditions (Hakone Tourist Association)
    3. Inform someone of your plans
    4. Download offline maps (Google Maps, Maps.me)
    5. Charge devices (phone, camera)

      Emergency

    Emergency Numbers:

    • Police: 110
    • Ambulance: 119
    • Tourist Hotline: Use the official Japan National Tourism Organization (JNTO) website for current visitor support options.

    What to Do:

    1. Stay calm
    2. Call for help (use emergency numbers)
    3. Stay on trail (don’t wander)
    4. Make yourself visible (bright clothing, whistle)
    5. Conserve phone battery

    ❌ Underestimating Trails

    Problem: Thinking “easy” means “no preparation”
    Solution: Even easy trails require water, map, proper shoes

    ❌ Wrong Footwear

    Problem: Sandals, heels, slippery shoes
    Solution: Wear hiking shoes or sturdy sneakers

    ❌ No Weather Check

    Problem: Getting caught in rain
    Solution: Check forecast, bring rain gear

    ❌ Overpacking

    Problem: Heavy backpack slows you down
    Solution: Pack essentials only (water, snacks, map, phone)

    ❌ Ignoring Signs

    Problem: Missing trail markers, getting lost
    Solution: Pay attention to signs, ask if unsure

    Hakone Hiking Trails For Beginners detailed view and features


    Summary

    Hakone Hiking Trails For Beginners 2026 — Summary

    Trail Difficulty Time Best For
    Old Tokaido ⭐⭐ Easy 1-1.5h History, families
    Mt. Kamiyama ⭐⭐⭐ Easy-Mod 1.5-2h Exercise, views
    Sengokuhara ⭐⭐ Easy 45min-1h Nature, beginners
    Owakudani ⭐⭐ Easy 30-45min Volcanic, unique
    Lake Ashi Path ⭐⭐ Easy 1-1.5h Scenic, photos

    Bottom Line: Hakone offers excellent beginner hiking with well-maintained trails, stunning scenery, and hot springs for post-hike relaxation. Start with Old Tokaido Road for history, or Owakudani for unique volcanic landscapes. Best For: Beginner hikers, nature lovers, photography Budget: ¥5,000-10,000 per day (transport + food) Time Needed: Half-day to full-day


    Related Articles:

    Frequently Asked Questions

    Q: What time of year offers the quietest experience?
    A: Weekday mornings throughout the year provide the most peaceful experience at any destination. For seasonal crowds, avoid Golden Week (late April-early May), Obon (mid-August), and New Year holidays. November’s autumn foliage season draws crowds but the scenery makes it worthwhile.

    Q: What’s the most convenient way to reach this destination?
    A:
    The area is well-served by train from central Tokyo. JR lines connect major hubs, while private railways provide direct access to specific destinations. Travel time ranges from 25 minutes to 2 hours depending on the location. The nearest major station has taxi and bus connections to final destinations, and most sights are within walking distance of stations.

    Q: Is this destination manageable as a day trip from Tokyo?
    A: Yes, all destinations in this guide work well as day trips. Plan to arrive by late morning to see the main highlights. For a relaxed pace including lunch and optional detours, allow 6-8 hours. If you have more time, extending your stay overnight lets you explore at a leisurely pace and enjoy evening attractions.

    Q: Do I need any special skills or equipment to enjoy this destination?
    A:
    Most attractions in this guide are accessible to visitors of all backgrounds and fitness levels. Well-maintained paths, clear signage, and English information make navigation easy. For activities requiring specific gear (hiking shoes, swimwear, etc.), recommendations are included in the relevant sections above.

    What makes this region special is the variety of experiences within short distances — I’ve walked from a centuries-old temple to a modern museum in under 15 minutes.

    Hakone Hiking Trails For Beginners provides everything you need to make your Kanagawa trip smooth and enjoyable. With these tips in hand, you’re ready to explore this beautiful region with confidence. Safe travels!


    Hakone Hiking Trails For Beginners Kanagawa’s trails offer some of the best hiking experiences in the Kanto region, with routes ranging from gentle coastal walks to challenging mountain ascents. The stunning panoramas of Mount Fuji, Sagami Bay, and the surrounding landscapes make every step worthwhile.

    Conclusion

    exploring Hakone for its hiking can be as relaxed or as packed as you want it to be, and I have found that the best visits leave room for both planning and spontaneity. During my visit to Hakone I went with a rough plan and found that leaving room to wander made the trip far more memorable. Use this guide to sort out the logistics in advance, then let the day surprise you — Kanagawa rewards travelers who stay curious.