Tag: photography

  • Misaki Port Photography & Sunset Guide 2026

    Misaki Port Photography & Sunset Guide 2026

    Kanagawa offers a wide range of activities for every type of traveler. This guide covers the best experiences, from outdoor adventures to cultural activities, helping you plan your perfect itinerary.

    Misaki Port Photography & Sunset Guide 2026

    Overview

    Introduction: Photographer’s Paradise

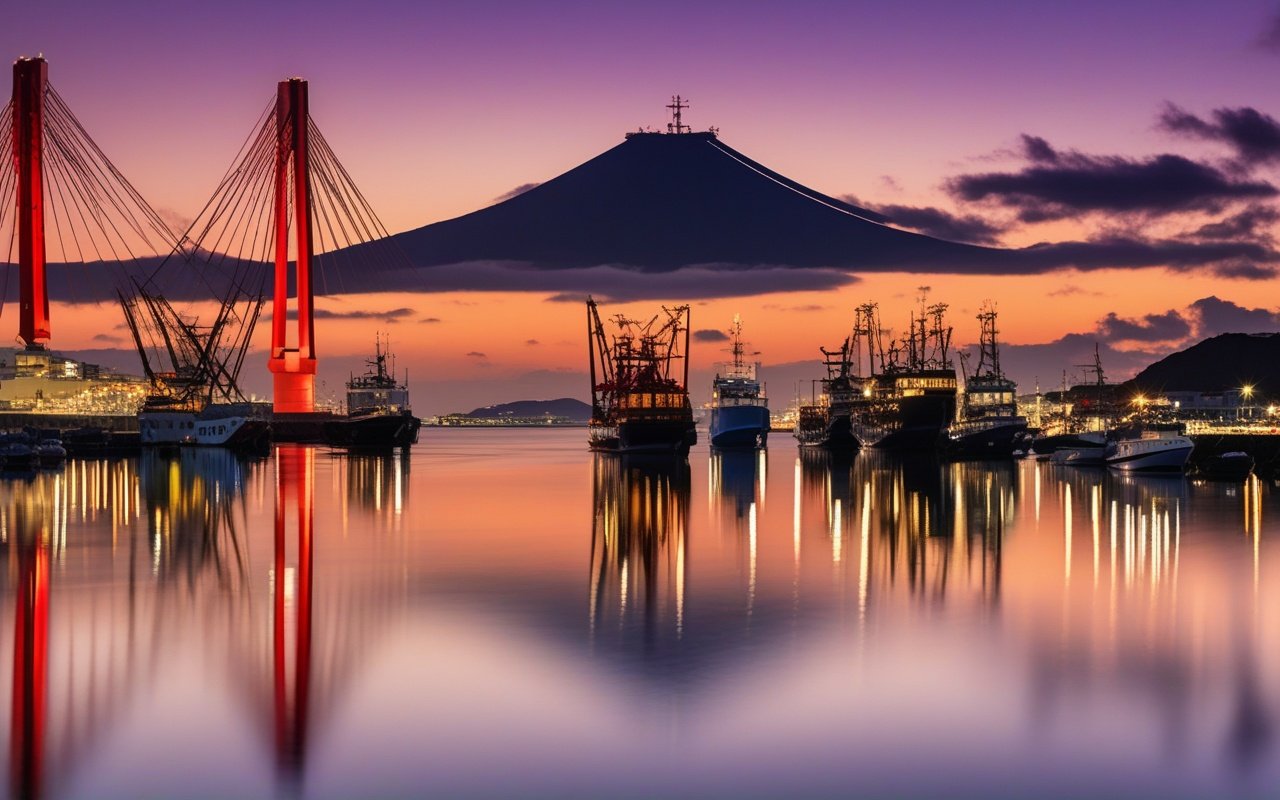
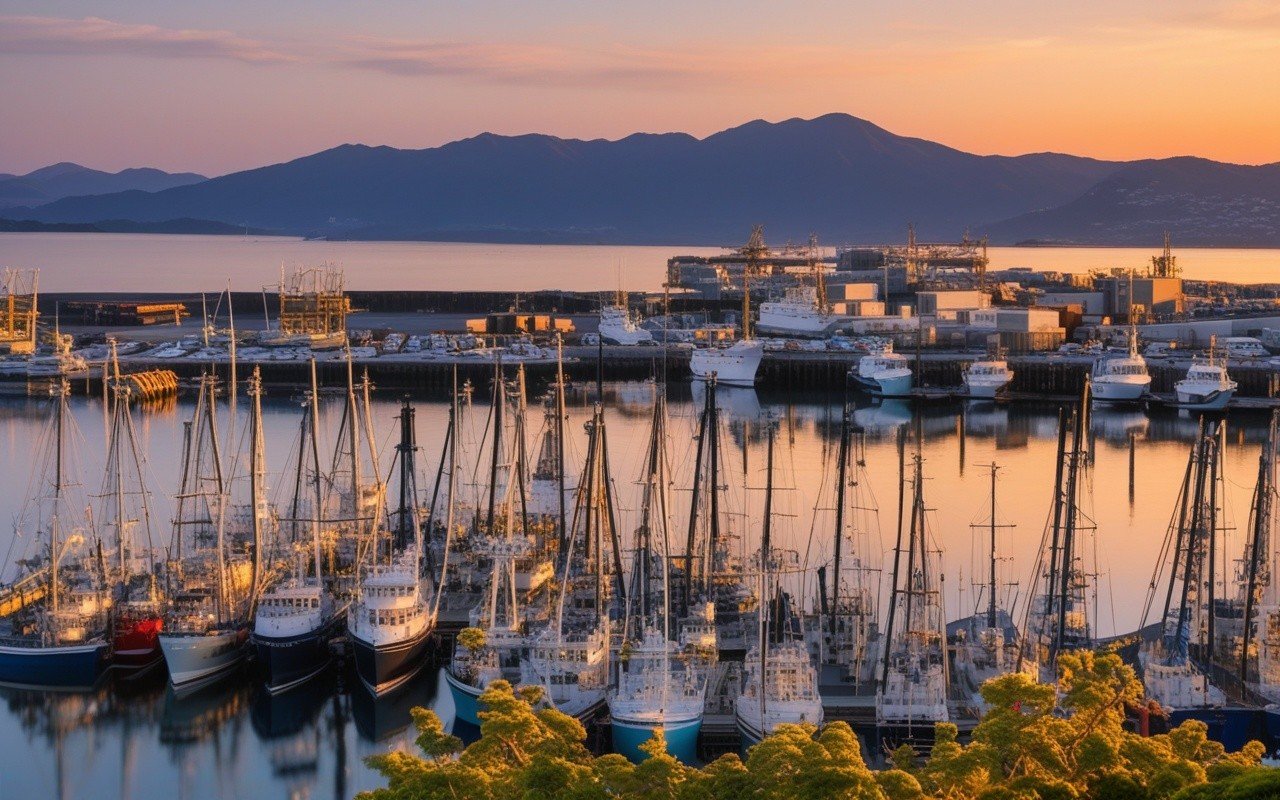
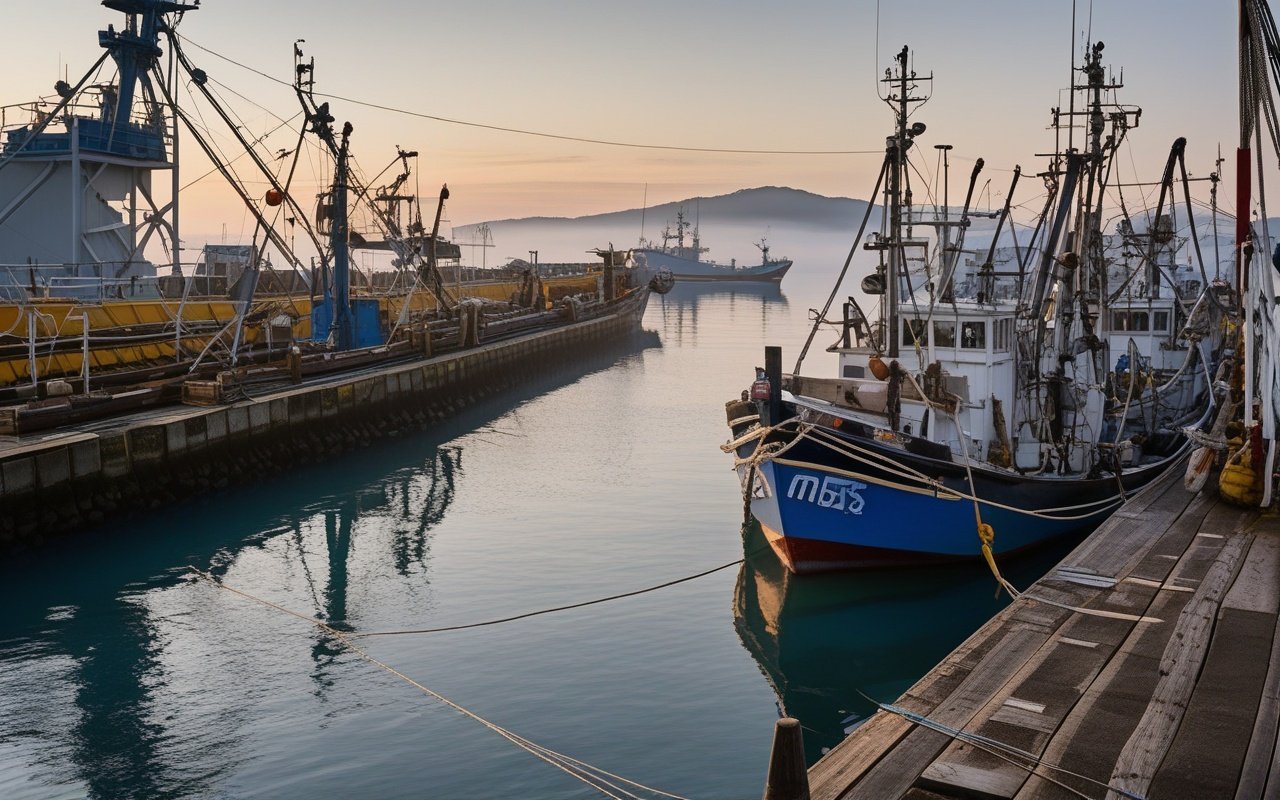
    Misaki Port, at the southern tip of the Miura Peninsula, offers a unique blend of working fishing port authenticity and spectacular coastal scenery. Unlike manicured tourist destinations, Misaki’s charm lies in its raw, unpolished beauty — rows of tuna fishing boats at dawn, the iconic red JoJogashimaridge against golden skies, and narrow Showa-era alleys that seem frozen in time.
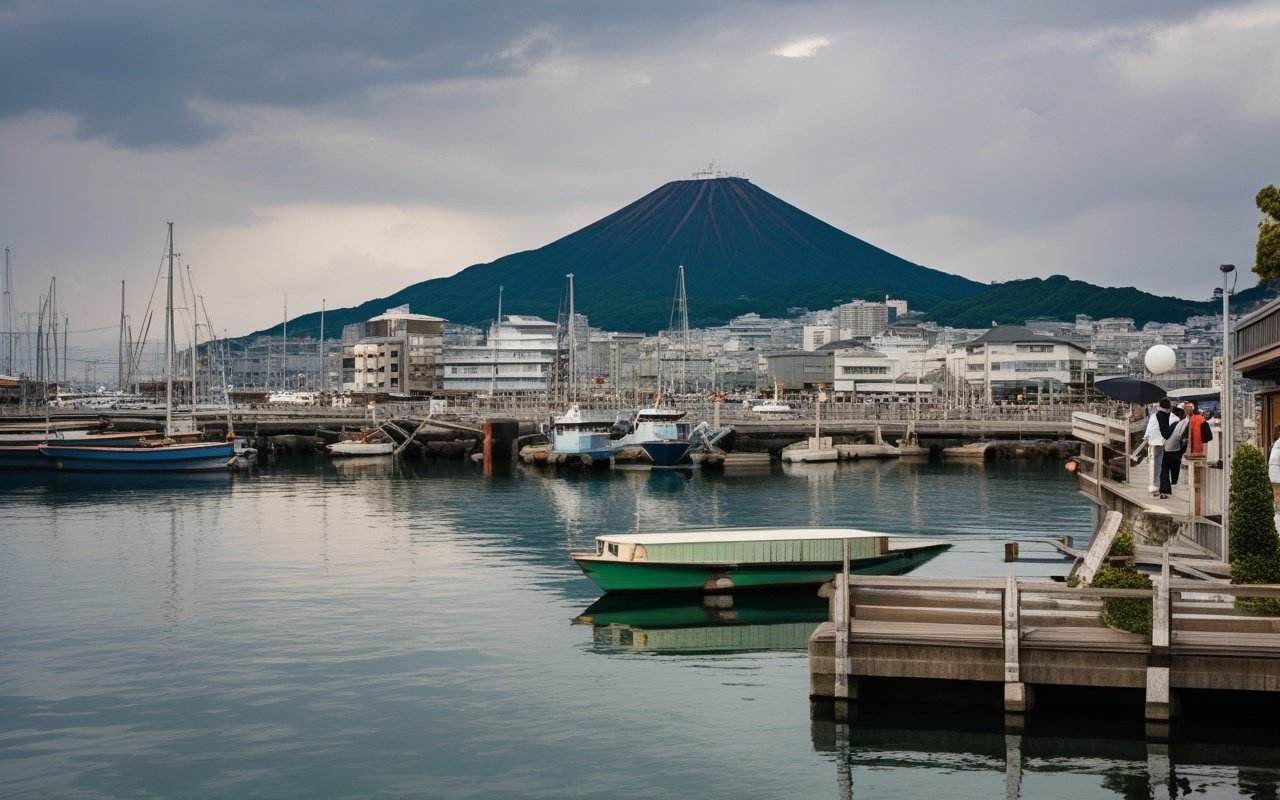
    Misaki Port Photography & Sunset Guide 2026 — Introduction: Photographer's Paradise

    Misaki Port Photography Guide

    Misaki Port Photography & Sunset Guide 2026 — Introduction: Photographer's Paradise

    What Makes Misaki Port Special:

    • Authentic fishing port: Working boats, not tourist attractions
    • Jogashima Bridge: Iconic red arch, perfect for sunrise/sunset
    • Harbor reflections: Calm water creates mirror effects at sunrise
    • Showa atmosphere: Retro storefronts and fishing gear
    • Tuna culture: Boats, markets, and restaurants tell a story

    Photography Stats:

    • Best months: October-March (clearest air)
    • Golden hour: 1 hour before sunset
    • Blue hour: 20-40 minutes after sunset
    • Harbor activity peak: 6:00-8:00 AM (tuna boats returning)
    • Mt. Fuji visibility: November-February (highest clarity) Updated: June 2026 (all locations verified)

    Zone 1: Main Harbor & Tuna Boats

    Best For: Authentic fishing port photography, boat details, harbor life Coordinates: 35.1345°N, 139.6156°E Key Shots:

    1. Rows of tuna boats: Morning light, mist rising
    2. Fishing nets and gear: Textural close-ups
    3. Fishermen at work: Candid documentary style
    4. Reflections in calm water: Symmetry shots

    Equipment:

    • Wide-angle (16-35mm): Harbor panoramas
    • Telephoto (70-200mm): Boat details from a distance
    • Standard zoom (24-70mm): Versatile walk-around

    Best Times:

    • Early morning (6-8 AM): Peak harbor activity
    • Overcast days: Diffused light, moody atmosphere
    • Golden hour: Warm light on white boat hulls

    Local Tips:

    ✅ Arrive by 6:00 AM for boat activity
    ✅ Ask fishermen before photographing them
    ✅ Respect work areas (don't block operations)
    ✅ Early morning mist adds atmosphere
    ✅ Weekdays are quieter than weekends

    Zone 2: Jogashima Bridge

    Best For: Iconic bridge shots, reflection photography, sunset silhouettes Coordinates: 35.1312°N, 139.6178°E Key Shots:

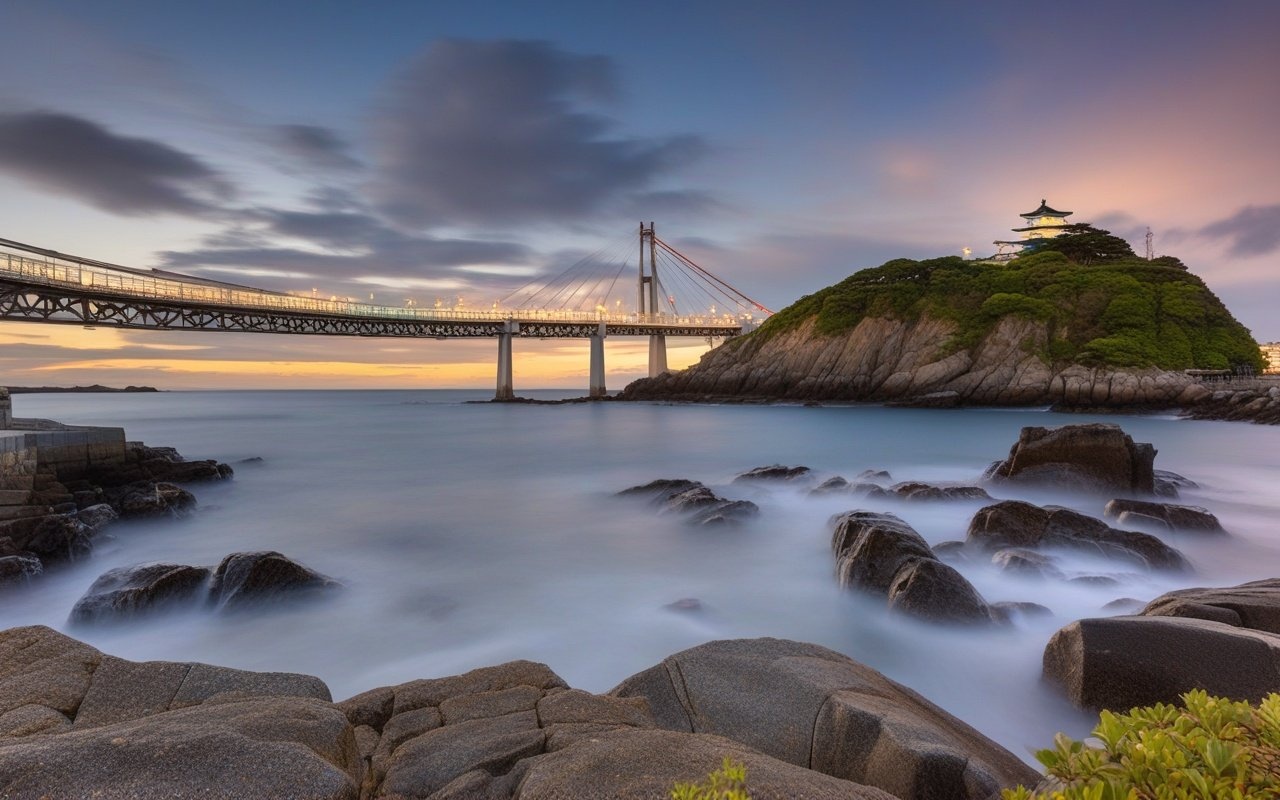
    1. Bridge + sunset: Red arch against orange sky
    2. Reflection in harbor: Calm water mirror effect
    3. Bridge from below: Dramatic perspective
    4. Night lights: Bridge illuminated after dark

    Equipment:

    • Wide-angle (16-35mm): Full bridge + environment
    • Telephoto (70-200mm): Compress bridge + Mt. Fuji
    • Tripod: Essential for blue hour and night
    • ND filter: Long exposure water smoothing

    Best Times:

    • Sunset: Best from mainland side (west)
    • Sunrise: Good from Jogashima side (east)
    • Blue hour: Bridge lights illuminate
    • Low tide: Access to reflection pools

    Camera Settings:

    Recommended Settings (Sunset):
    Mode: Manual
    Aperture: f/8-f/11
    ISO: 100-200
    Shutter: 1/30-1/125
    White Balance: Daylight (preserves warm tones)
    Format: RAW

    Local Tips:

    ✅ Scout location during daytime first
    ✅ Best bridge angle from Misaki Port side
    ✅ Calm windless days = best reflections
    ✅ Include fishing boats in foreground
    ✅ Blue hour: 20 minutes after sunset is magic

    Zone 3: Urari Marche & Waterfront

    Best For: Modern harbor views, local food culture, street photography Visit the Shin-Yokohama Ramen Museum — taste ramen from across Japan & explore the history of this iconic dish Coordinates: 35.1348°N, 139.6149°E

    Key Shots:

    1. Urari Marche building: Modern + traditional contrast
    2. Food stalls: Vibrant colors of fresh seafood
    3. Harbor from terrace: Elevated perspective
    4. Crowd scenes: Weekend market atmosphere

    Equipment:

    • Standard zoom (24-70mm): Versatile for people + architecture
    • Fast prime (35mm or 50mm f/1.8): Low light interior
    • Smartphone: Quick food shots

    Best Times:

    • Weekend mornings: Market in full swing
    • Midday: Best light for food photography
    • Late afternoon: Golden light on terrace

    Local Tips:

    ✅ Try misaki don (bowl) for food shots
    ✅ Ask permission before photographing stall owners
    ✅ Morning light through market canopy is beautiful
    ✅ Second-floor deck provides elevated harbor view

    Zone 4: Misaki Ginza Shopping Street

    Best For: Showa retro atmosphere, street photography, architectural details Coordinates: 35.1340°N, 139.6142°E Key Shots:

    1. Narrow street perspective: Leading lines into distance
    2. Old storefronts: Wooden facades, faded signage
    3. Local characters: Shopkeepers, customers
    4. Evening scenes: Warm light spilling onto street Equipment:
    • Wide-angle (16-35mm): Street scenes
    • Standard zoom (24-70mm): Candid shots
    • Fast prime: Low light evening photography

    Best Times:

    • Late afternoon: Warm light on facades
    • Evening: Nostalgic atmosphere
    • Rainy days: Wet reflections on pavement

    Local Tips:

    ✅ Early morning has best light on facades
    ✅ Many shops close by 5:00 PM
    ✅ Look up: second-floor windows are photogenic
    ✅ Rainy days create beautiful wet reflections
    ✅ Black and white conversions work well here

    Zone 5: Waterfront Promenade

    Best For: Harbor panoramas, people photography, relaxed sunset shots Coordinates: 35.1342°N, 139.6145°E Key Shots:

    1. Harbor panorama: Stitch multiple shots
    2. Benches + sunset: Lifestyle photography
    3. Walking path leading to bridge: Leading lines
    4. Fishing from pier: Documentary style Equipment:
    • Wide-angle (16-35mm): Panoramas
    • Standard zoom (24-70mm): Versatile
    • Tripod: For sunset exposures Best Times:
    • Sunset: Main event
    • Late afternoon: Pleasant strolling light
    • Weekend: More local life visible

    Local Tips:

    ✅ Panorama stitch recommended for wide harbor views
    ✅ Benches are well-positioned for sunset
    ✅ Combine with Jogashima Island visit (bridge connects)

    Zone 6: Jogashima Island Sunset Point

    Best For: Spectacular Mt. Fuji sunsets, dramatic coastal photography Coordinates: 35.1234°N, 139.6234°E (Jogashima Lighthouse area) Key Shots:

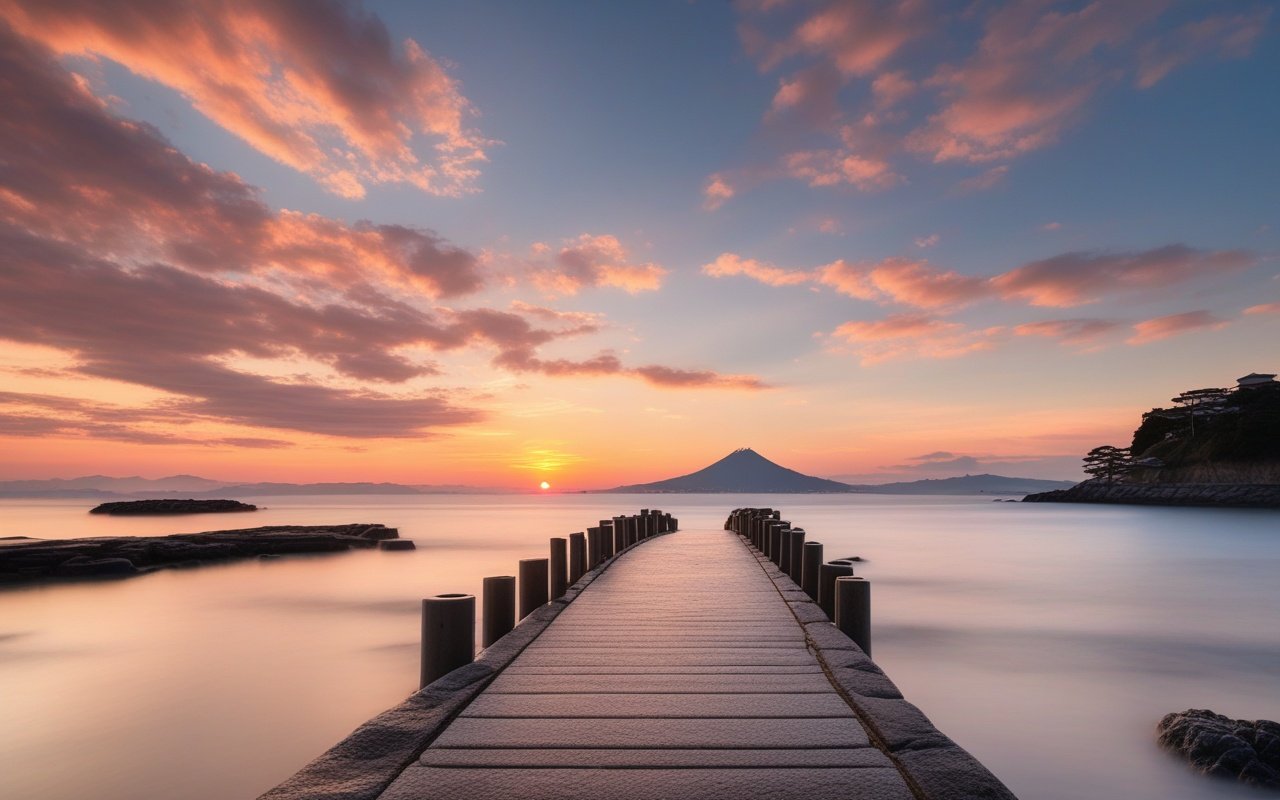
    1. Mt. Fuji silhouette behind bridge: Iconic composition
    2. Rocky shoreline foreground: Texture + depth
    3. Lighthouse + sunset: Classic composition
    4. Waves crashing on rocks: Long exposure

    Equipment:

    • Wide-angle (16-35mm): Landscape + Fuji
    • Telephoto (70-200mm): Compress Mt. Fuji
    • Tripod: Essential
    • ND filter: Long exposure waves Best Times:
    • Winter: Clearest Mt. Fuji visibility
    • Sunset: Light up the bridge/fuji
    • Blue hour: Dramatic afterglow Access: Cross Jogashima Bridge, 15-minute walk from bus stop

    Local Tips:

    ✅ Check Mt. Fuji visibility forecast before going
    ✅ Arrive 1 hour before sunset
    ✅ Winter = best visibility but coldest
    ✅ Stay 30 min after sunset for blue hour

    Spring (March-May)

    Characteristics:

    • Mild temperatures, occasional rain
    • Cherry blossoms near the port area
    • Wildflowers on coastal trails
    • Soft spring light after rain

    Best Subjects:

    • Cherry blossoms + harbor boats
    • Wildflowers in foreground compositions
    • Clear air after rain showers
    • Soft diffused light on overcast days Camera Settings:
      Aperture: f/5.6-f/8
      ISO: 100-200
      White Balance: Daylight or Cloudy
      Polarizer: Reduce glare on water

    Pro Tips:

    ✅ Cherry blossoms: Late March-early April
    ✅ After rain: Clearest air and reflections
    ✅ Spring fog = moody harbor shots

    Summer (June-August)

    Characteristics:

    • Hot, humid, dramatic clouds
    • Latest sunsets (7:00+ PM)
    • Haze common
    • Tanabata festival decorations Best Subjects:
    • Dramatic cumulus clouds
    • Long golden hour sessions
    • Festival atmosphere
    • Green hillsides Camera Settings:
      Aperture: f/8-f/11
      ISO: 100-400
      White Balance: Daylight
      ND Filter: Long exposure clouds

    Pro Tips:

    ✅ Sunset: Latest of year (longer shooting window)
    ✅ Afternoon thunderstorms = dramatic clouds
    ✅ Haze: Use polarizer to cut through

    Autumn (September-November)

    Characteristics:

    • Best visibility and stable weather
    • Comfortable temperatures
    • Clear air, clean light
    • Fewer crowds Best Subjects:
    • Mt. Fuji (clear autumn days)
    • Autumn colors (late November)
    • Crisp golden hour light
    • Clean architectural shots Camera Settings:
      Aperture: f/8-f/11
      ISO: 100
      White Balance: Daylight
      Polarizer: Enhance autumn clarity

    Pro Tips:

    ✅ Best season for overall photography
    ✅ Mt. Fuji most visible in October-November
    ✅ Comfortable temperature for long shoots

    Winter (December-February)

    Characteristics:

    • Cold, windy but clearest air
    • Earliest sunsets (4:30 PM)
    • Fewest crowds
    • Best Mt. Fuji visibility

    Best Subjects:

    • Mt. Fuji + bridge (iconic combination)
    • Minimalist winter compositions
    • Warm food market interiors
    • Sunrise harbor activity Camera Settings:
      Aperture: f/8-f/11
      ISO: 100-400
      White Balance: Cloudy (warms up scene)
      Battery: Keep spare warm

    Pro Tips:

    ✅ Best season for Mt. Fuji shots
    ✅ Earliest sunsets = convenient timing
    ✅ Fewest tourists = clean compositions

    Frequently Asked Questions

    Q: What’s the best lens for Misaki Port photography?

    A: A 24-70mm f/4 is the most versatile. Add a 16-35mm for harbor panoramas and a 70-200mm for Mt. Fuji compression and boat details.

    Q: Is Jogashima better than the port for sunset?

    A: Both are excellent. The port offers harbor + boat foregrounds, while Jogashima gives unobstructed ocean + Mt. Fuji views. Visit both if possible.

    Q: Can I photograph inside Urari Marche?

    A: Yes, the market is open to photography. Ask permission for close-ups of vendor stalls. Food photography is generally welcome.

    Q: What time do the tuna boats come in?

    A: Most boats return between 6:00-8:00 AM. Arrive early for the best harbor activity shots.

    Q: Do I need a tripod?

    A: Recommended for sunset, blue hour, and long exposure photography. A compact travel tripod is sufficient.


    Last Updated: June 4, 2026
    Written by: Anaba OffJapan Editorial Team
    Verified: All locations tested June 2026


    🌟 Share Your Experience

    Have Misaki Port photos to share? Photography tips for fellow travelers? Join our community forum to share your experiences!


    Anaba OffJapan – Avoid the Crowds, Go Deeper into Japan.

    Misaki Port Photography & Sunset Guide 2026 — Share Your Experience


    ⏰ Best Time to Visit

    Early morning (6-8 AM): Port is most active with returning fishing boats, mist over water, quiet atmosphere Late afternoon (4-6 PM): Beautiful golden light, Jogashima Bridge silhouettes, sunset photography

    🎯 What I Recommend

    • Walk across Jogashima Bridge: The perspective from the bridge offers unique compositions you cannot get from shore
    • Combine port + island: Start at the harbor for morning activity, cross to Jogashima for sunset
    • Talk to local fishermen: They often know the best hidden viewpoints and will share local stories

    ⚠️ Things to Watch Out For

    • Early morning mist can obscure Mt. Fuji — check weather forecasts
    • Seagulls are bold near the port — protect your gear
    • Some piers are private — respect posted signs and boundaries
    • Wind can be strong near the water — secure tripod with weight

    Miura Peninsula Area

    |—|—|—|—|—|
    | Misaki Port Tuna Market | Seafood Market | 🔗 Official Website | 8:00-17:00 | ¥1,000-3,000 |
    | Maguro no Sato | Tuna Restaurant | 🔗 Official Website | 11:00-15:00 | ¥1,500-4,000 |
    | Urari Marche Food Court | Food Court | 🔗 Official Website | 9:00-18:00 | ¥800-2,000 |

    • Photography: 6:00-8:00 AM (harbor activity) or 4:00-6:00 PM (golden hour)

    • Dining: 11:30 AM – 1:30 PM (fresh tuna lunch)

    • Market: 9:00 AM – 12:00 PM (best selection)

    • Credit Cards: Accepted at larger restaurants and Urari Marche

    • Cash: Preferred at smaller shops and fish market stalls

    • IC Cards (Suica/Pasmo): Not widely accepted

    📱 Useful Apps

    • Sun Surveyor: Plan sunset and sunrise positions
    • Google Maps: Check tide schedules at port
    • Windy: Check wind and visibility conditions for Mt. Fuji shots

    Packing Essentials

    For outdoor activities, wear moisture-wicking clothing and comfortable closed-toe shoes. Sunscreen and a hat are essential during summer. A small towel is useful for wiping sweat. A waterproof phone pouch is useful for water activities. Pack snacks and extra water for remote areas.

    Conclusion

    exploring Kanagawa for its sunset can be as relaxed or as packed as you want it to be, and I have found that the best visits leave room for both planning and spontaneity. During my visit I went with a rough plan and found that leaving room to wander made the trip far more memorable. Use this guide to sort out the logistics in advance, then let the day surprise you — Kanagawa rewards travelers who stay curious.
  • Yokohama Photography Spots Guide 2026 — Best Photo…

    Yokohama Photography Spots Guide 2026 — Best Photo…

    Overview

    📍 Quick Overview

    • 12 best photos spots across Yokohama, from sunrise to nightscapes
    • Professional photos services available — book a snap photos time
    • Best times: Sunrise (5:00–6:30 AM). Golden Hour (4:00–5:30 PM). Blue Hour (6:00–7:30 PM)
    • Perfect for: Instagram enthusiasts, travel memory makers
    • Free and paid options — shoot iconic views without spending a yen, or book a pro session

    Introduction: Why Yokohama is a Photographer’s Dream

    yokohama-photos-guide sub2

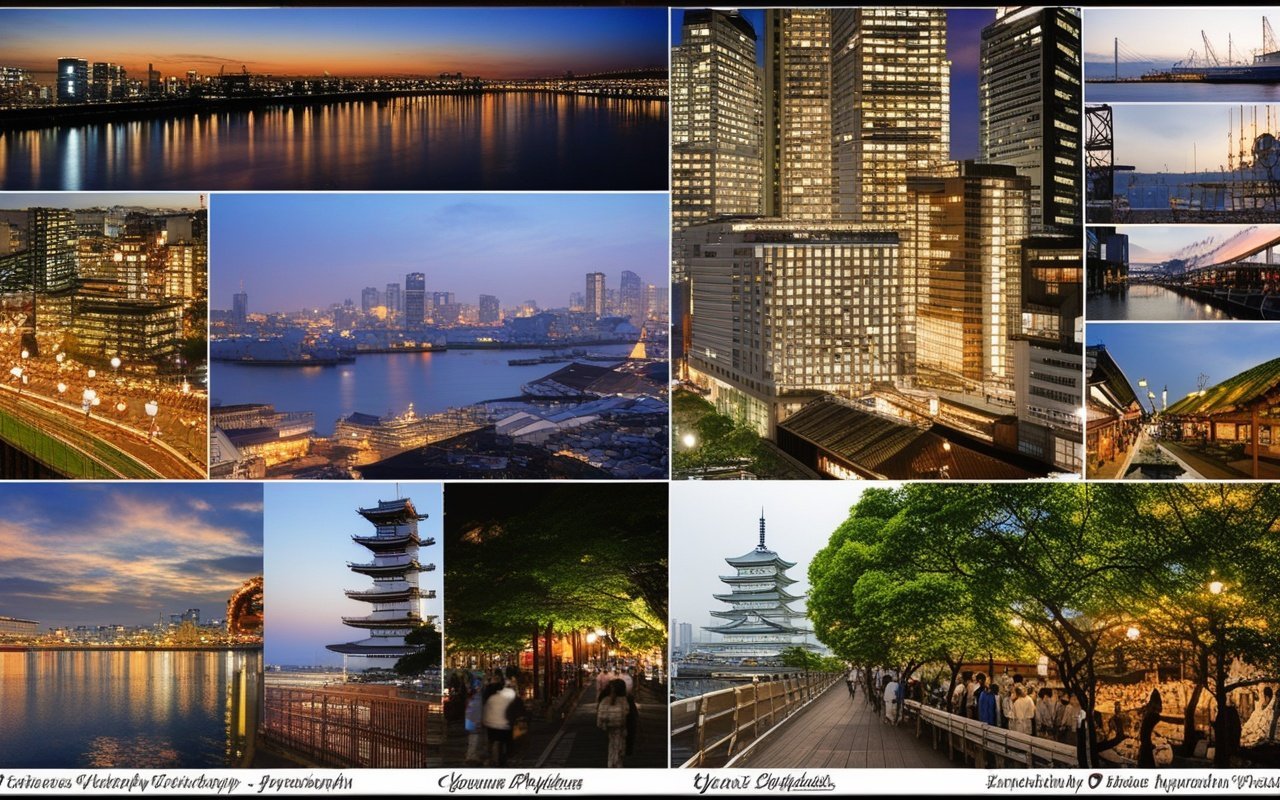
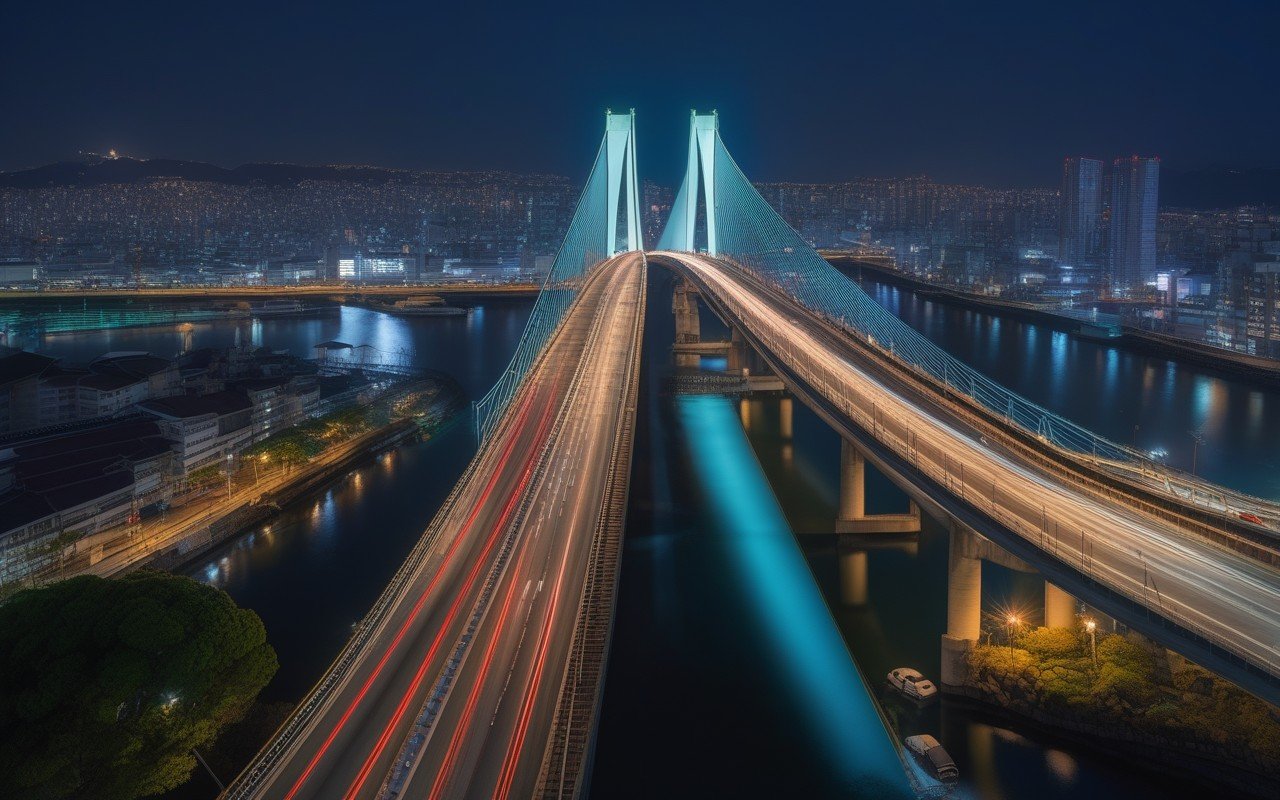
    Yokohama offers photographers something rare: world-class urban landscapes without the crowds of Tokyo. The waterfront skyline, historic port architecture, and dramatic interplay of neon and ocean create endless compositional possibilities — and you can shoot most of it without fighting through crowds of tripods. The city’s unique geography — a compact waterfront district with towering skyscrapers, and a working harbor — means you can capture multiple genres in a single afternoon: architectural photos at Landmark Tower, street photos in Chinatown, portrait sessions at the Red Brick Warehouse, and long exposures of the bay at sunset. —

    📸 The 12 Best Photo Spots

    Sunrise & Morning (5:00–8:00 AM)

    1. Yamashita Park — Harbor Sunrise

    Best Time: 5:00–6:30 AM (sunrise)
    Gear: Wide-angle lens, tripod
    Vibe: Quiet harbor, silhouettes of ships
    Difficulty: Easy — flat, paved paths

    Yamashita Park faces east, making it Yokohama’s premier sunrise location. The light hits the bay’s surface at a low angle, creating a golden path across the water. The Hikawa Maru (moored ocean liner) and the Bay Bridge make great foreground subjects. Composition Tip: Position yourself near the rose garden for foreground flowers with the harbor in the background. In spring, the tulips add vibrant color to sunrise shots.

    2. Osanbashi Pier — Waterfront Panorama

    Best Time: 5:30–7:00 AM
    Gear: Wide-angle to telephoto (24–70mm ideal)
    Vibe: Open waterfront, 360-degree harbor views
    Difficulty: Easy — large wooden deck

    The swooping wooden deck of Osanbashi Pier creates natural leading lines toward both the Minato Mirai skyline and the working harbor. The pier’s architecture — a wavy wooden roof — is a photo subject in itself. Composition Tip: Use the wooden deck’s curves as leading lines toward the skyline. Low angle shots near the base of the roof create dramatic foreground shapes.

    Golden Hour & Afternoon (4:00–5:30 PM)

    3. Minato Mirai Waterfront — Skyline & Reflections

    Best Time: 4:00–5:30 PM (golden hour)
    Gear: Wide-angle, polarizing filter
    Vibe: Warm light on glass towers, reflections in canal
    Difficulty: Easy — well-kept promenade

    The canal that runs through Minato Mirai captures perfect reflections of the surrounding glass towers during golden hour. The warm light transforms the InterContinental Hotel’s sail-shaped facade into a glowing sculpture. Composition Tip: Shoot from the pedestrian bridge near Queen’s Square for elevated reflections. The symmetry of buildings reflected in still water creates stunning abstract compositions.

    4. Red Brick Warehouse — Historic Architecture

    Best Time: 4:00–6:00 PM
    Gear: Wide-angle for architecture, portrait lens for people
    Vibe: Warm brick, lively atmosphere
    Difficulty: Easy

    The Taisho-era brick buildings glow beautifully in late afternoon light. The contrast between the warm brick and the modern glass towers behind creates a compelling juxtaposition of old and new. Composition Tip: Frame the brick warehouse with the InterContinental Hotel in the background — the “old meets new” composition that Yokohama is famous for.

    5. Motomachi Shopping Street — Street photos

    Best Time: 3:00–5:00 PM
    Gear: 35mm or 50mm prime
    Vibe: Elegant trees, afternoon light filtering through leaves
    Difficulty: Easy — pedestrian street

    The tree-lined Motomachi Street is one of Yokohama’s most photogenic shopping streets. The zelkova trees create dappled light patterns, and the mix of Western and Japanese architecture provides rich backgrounds. Composition Tip: Shoot from the center of the street looking downhill toward the water. The trees create a natural frame, and the distant glimpse of the harbor anchors the composition.

    Blue Hour & Night (6:00–10:00 PM)

    6. Landmark Tower Sky Garden — City from Above

    Best Time: 6:00–7:30 PM (blue hour)
    Gear: Wide-angle, tripod (monopod sometimes allowed)
    Vibe: 360-degree views, city lights emerging
    Difficulty: Easy — elevator access
    Cost: ¥1,000 adults

    The 69th-floor observation deck offers the definitive Yokohama nightscape. The blue hour — when the sky transitions from deep blue to black and the city lights begin to twinkle — is magical from this height. Mount Fuji is visible on clear winter days. Composition Tip: The west-facing windows capture the best sunset-to-night transition. Use a fast wide-angle lens and brace against the glass for sharp long exposures (tripods are sometimes restricted).

    7. Cosmo World & Ferris Wheel — Neon & Motion

    Best Time: 6:30–9:00 PM
    Gear: Wide-angle, tripod for long exposures
    Vibe: Neon lights, playful colors
    Difficulty: Easy — amusement park setting

    The Cosmo Clock 21 ferris wheel is Yokohama’s most iconic night subject. The wheel is illuminated with changing colors, and its reflection in the adjacent canal creates a double-image effect. Composition Tip: Frame the ferris wheel with the canal in the foreground for reflection shots. Use a slow shutter speed (1–2 seconds) to capture the wheel’s motion blur while keeping the central structure sharp.

    8. Noge District — Neon Streets

    Best Time: 7:00–10:00 PM
    Gear: 35mm or 50mm fast prime
    Vibe: Retro neon, local atmosphere
    Difficulty: Easy — public streets

    The Noge area near Kannai Station is Yokohama’s most photogenic night neighborhood. Narrow alleys lined with izakayas, retro neon signs, and a lively local atmosphere make it a street photographer’s paradise. Composition Tip: Shoot from the main intersection looking into the narrow side alleys. The layers of neon signs create depth, and the warm light spilling from doorways adds atmosphere.

    Lesser-Known Spots & Unique Angles

    9. Nogeyama Park — Elevated Skyline View

    Best Time: Late afternoon or early evening
    Gear: Telephoto (70–200mm) for compressed skyline shots
    Vibe: Quiet park, fewer tourists
    Difficulty: Moderate — uphill walk

    A lesser-known viewpoint that offers a unique perspective of the Minato Mirai skyline. The park is slightly elevated, allowing you to shoot over the rooftops of the Kannai district.

    10. Daikoku Pier — Car Meets Coastline

    Best Time: Sunset
    Gear: Wide-angle. ND filter for long exposures
    Vibe: Industrial meets ocean, car culture
    Difficulty: Moderate — requires car or taxi

    The Daikoku Parking Area is famous among car enthusiasts, but photographers love it for the juxtaposition of industrial structures with the bay. The sunset views from the pier are amazing and rarely photographed.

    11. Sankeien Garden — Traditional Japan

    Best Time: Early morning or golden hour
    Gear: Wide-angle for landscapes, macro for details
    Vibe: Traditional Japanese garden, historic buildings
    Cost: ¥700 adults
    Difficulty: Easy — garden paths

    A traditional Japanese garden with historic buildings relocated from Kyoto and Kamakura. The contrast between the garden’s ancient atmosphere and the modern city visible in the distance creates unique compositions. Stay at Sotetsu Fresa Inn Kamakura-Ofuna — budget-friendly & steps from Ofuna Station, great base for day trips

    12. Yokohama Port & Shipping Lanes

    Best Time: Various (shipping traffic constant)
    Gear: Telephoto (100–400mm)
    Vibe: Working port, dramatic clouds
    Difficulty: Moderate — requires planning

    The working harbor east of Yamashita Park offers chances for industrial and maritime photos. Container cranes, cargo ships, and dramatic cloud formations create compelling compositions. —

    📸 Professional Snap photos time

    If you want professional-quality photos of yourself or your group in Yokohama’s most photogenic locations, consider booking a snap photos time. A professional photographer will guide you to the best spots, help with posing, and deliver edited photos within 24–48 hours. What’s Included:

    • Professional photographer guide (English-speaking available)
    • 30–60 minute session at 2–3 locations
    • 20–50 edited digital photos
    • Posing guidance and composition advice
    • Fast delivery (24–48 hours)

    Best Locations for Portrait Sessions:

    • Red Brick Warehouse — classic Yokohama backdrop
    • Yamashita Park — harbor views with ocean breeze
    • Minato Mirai waterfront — modern urban setting
    • Motomachi Street — elegant tree-lined boulevard

    Book a Snap photos time in Yokohama on Klook — professional photos at iconic locations → Reserve your session

    Pro Tips for Your Photo Session:

    • Book the golden hour slot (4:00–5:30 PM) for the best natural light
    • Wear solid colors (avoid busy patterns) for cleaner portraits
    • Bring a change of outfit for variety in your photos
    • Communicate your preferred style — candid, or a mix

    📷 Recommended Gear

    Shot Type Lens Filter Tripod
    Skyline panorama 16–35mm Polarizer Yes
    Nightscape 24–70mm None Yes
    Street photos 35mm or 50mm prime None No
    Portraits 85mm prime None Optional
    Reflections 24–70mm Polarizer Yes
    Architecture 16–35mm Tilt-shift (if available) Yes

    📊 Quick Reference: Best Times & Locations

    Time Best Spot Shot Type Crowd Level
    5:00–6:30 AM Yamashita Park Sunrise harbor Very low
    6:00–8:00 AM Osanbashi Pier Waterfront panorama Low
    10:00 AM–12:00 PM Sankeien Garden Traditional garden Moderate
    4:00–5:30 PM Minato Mirai Golden hour skyline Moderate
    4:00–6:00 PM Red Brick Warehouse Architecture High
    6:00–7:30 PM Landmark Tower Blue hour cityscape Moderate
    7:00–9:00 PM Cosmo World Neon & motion Moderate
    7:00–10:00 PM Noge District Street neon Moderate

    💡 photos Tips for Yokohama

    Best Seasons

    Season Light Advantages Challenges
    Spring (Mar–May) Soft, golden Cherry blossoms, mild weather Occasional haze
    Summer (Jun–Aug) Harsh midday Vibrant sunsets, heat
    Autumn (Sep–Nov) Clear, warm Best light quality, foliage Wind
    Winter (Dec–Feb) Low angle, crisp Mount Fuji visibility, clear air Cold, short days

    Legal & Etiquette

    • Tripods are allowed in public spaces but restricted in some commercial areas (check at Landmark Tower)
    • Drone photos is prohibited in most of Yokohama without special permits
    • Commercial photos requires permits in parks and public spaces
    • Respect privacy — ask before photographing people, mostly in residential areas
    • No photos in onsen bathing areas, temples with posted signs, or private property

    🔗 Related Articles


    Frequently Asked Questions

    Q: What’s the best time for photos in Yokohama?

    A: Golden hour (4:00–5:30 PM) and blue hour (6:00–7:30 PM) offer the most pretty light. Sunrise (5:00–6:30 AM) is great for photos without crowds. Q: Do I need a professional camera?

    A: Not at all — many of Yokohama’s best photo spots look stunning even on a smartphone. The Snap photos time provides professional photos regardless of your equipment. Q: Are there photos tours in English?

    A: Yes — the Snap photos time on Klook can be booked with English-speaking photographers who know the best locations. Q: Is it safe to walk around with camera equipment at night?

    A: Yes — Yokohama is extremely safe. The waterfront areas (Minato Mirai, Yamashita Park) are well-lit and populated until late evening. Q: Can I photograph the Geisha or Maiko in Yokohama?

    A: Unlike Kyoto, Yokohama has no geisha district. For traditional costume photos, consider a samurai or kimono rental time. — Last Updated: May 28. 2026
    Written by: Anaba OffJapan Editorial Team
    Photos: Editorial photos and AI-assisted imagery


    Yokohama rewards photographers who take the time to explore beyond the obvious viewpoints. From the iconic skyline reflections at Minato Mirai to the hidden neon alleys of Noge and the traditional tranquility of Sankeien Garden, the city offers endless chances for remarkable images. And for those who want professional photos of themselves in these stunning settings, the Snap photos time provides a handy. Book your professional Yokohama picture session through Klook for the best rates and availability. —

    My personal exploration of Kanagawa has been incredibly rewarding, and I recommend adding this region to any Japan travel itinerary — the variety of experiences within short distances is what makes it special.

    Whether you’re chasing golden hour at the coast or misty mornings at temples, Kanagawa offers photographers an endlessly rewarding canvas. Discover more scenic spots in our Yokohama Bay Cruise time.

    Conclusion

    exploring Yokohama for its photography can be as relaxed or as packed as you want it to be, and I have found that the best visits leave room for both planning and spontaneity. During my visit to Yokohama I went with a rough plan and found that leaving room to wander made the trip far more memorable. Use this guide to sort out the logistics in advance, then let the day surprise you — Kanagawa rewards travelers who stay curious.
  • Kamakura Hidden Sunrise Photo Spots – Kanagawa 2026

    Kamakura Hidden Sunrise Photo Spots – Kanagawa 2026

    Kamakura Hidden Sunrise Photo Spots – Kanagawa 2026

    Overview

    Introduction: Kamakura Before the Crowds

    Kamakura Hidden Sunrise Photo Spots - Kanagawa 2026 — Introduction: Kamakura Before the...

    Kamakura receives millions of visitors annually, but very few of them see the city at dawn. The first trains from Tokyo arrive around 5:30 AM. Sunrise ranges from 4:30 AM (June) to 6:45 AM (January). Between first light and the arrival of the first temple buses, there is a golden window of 1-2 hours when Kamakura belongs to the early risers.

    Why Dawn in Kamakura is Special: Book Kamakura, Enoshima & Yokohama day trip from Tokyo — ride the iconic Enoden train & skip transport planning

    • Empty temples: No crowds, no queues
    • Morning mist: Atmospheric, especially autumn-winter
    • Golden light: 1st hour of sunlight is the bebestBird activity: Temple grounds come alive
    • Cool air: Comfortable even in summer

    Camera Settings for Dawn:

    Recommended:

    • Mode: Manual or Aperture Priority
    • Aperture: f/8-f/11 (landscape sharpness)
    • ISO: 100-800 (as low as possible)
    • White Balance: Daylight (5600K)
    • Format: Shoot RAW
    • Tripod: Essential for low light

    #1: Kenchoji Temple Back Gate (建長寺裏門)

    Best for: Zen garden + morning mist

    Location: North end of Kenchoji grounds
    Sunrise access: Temple grounds are open (no gatekeeper)
    Best season: October-March (mist common)
    Crowd: 0-2 photographers typical

    Why This Spot is Special:

    • Unlocked back entrance (most don’t know)
    • Morning mist over the Zen garden
    • Shafts of light through cedar trees
    • No entrance fee (before opening hours)

    The Shot:
    From the back gate area, looking south through the temple grounds, Morning mist settles in the depression around the main hall. If you arrive before full light, you can catch the transition from dark blue to gold.

    Getting There:

    From Kamakura Station:

    1. Walk north 20 min (or bus to Kenchoji)
    2. Pass the main entrance Save big with Hakone Freepass — unlimited train, ropeway & pirate ship rides, plus 30% off attractions
    3. Continue around the left side
    4. Small path leads to back gate area
    5. Enter through the gap in the wall ⚠️ Be respectful — monks are active from 5 AM

    2. Kamakura Coast West End (由比ヶ浜西端)

    Best for: Coastal sunrise with Mt. Fuji

    Location: Western end of Yuigahama Beach
    Sunrise access: Always open (public beach)
    Best season: November-February (Fuji visible)
    Crowd: 2-5 photographers on good days

    Why This Spot is Special:

    • Mt. Fuji visible on clear winter mornings
    • Empty beach before the crowds
    • Morning fishing boats returning to port
    • Enoshima silhouette in the distance

    The Shot:
    Sun rising behind Enoshima Island, with Mt. Fuji visible to the left (winter only). Use a telephoto lens (70-200mm) to compress the layers: foreground beach → Enoshima → Fuji → sunrise sky.

    Getting There:

    From Kamakura Station:
    1. Walk south toward the beach (15 min)
    2. Turn RIGHT at the coast
    3. Walk to the western end
    4. Find the fishing boat parking area

    3. Hokokuji Temple Bamboo Grove (報国寺竹庭)

    Best for: Bamboo forest in first light

    Location: Southern Kamakura, near Jomyoji
    Sunrise access: Temple opens at 9 AM (exterior only)
    Best season: Year-round (bamboo is always green)
    Alternative: View from outside entrance

    Why This Spot is Special:

    • Bamboo at dawn (can’t enter, but you can see through gaps)
    • Exterior path public, free access
    • Morning dew on bamboo leaves
    • No crowds (temple opens at 9 AM)

    The Shot (Exterior):
    From the public path beside the bamboo grove, shoot through the bamboo fence. The morning light creates diagonal shafts through the grove. Available from outside for free.

    Getting There:

    From Kamakura Station:
    1. Bus to "Jomyoji" stop (10 min)
    2. Walk 3 minutes to Hokokuji
    3. Don't enter — follow the path to the RIGHT
    4. The bamboo grove is visible through the fence

    4. Zuisenji Temple Approach (瑞泉寺参道)

    Best for: Mossy stone path in morning light

    Location: Eastern hills of Kamakura
    Sunrise access: Gate is open (no one collects fee at dawn)
    Best season: Spring (moss) or autumn (maple leaves)
    Crowd: Very few (hidden temple)

    Why This Spot is Special:

    • Carved rock garden (unique in Kamakura)
    • Moss-covered stone path to the main hall
    • Morning sun filters through maple trees
    • Quietest major temple in Kamakura at any hour

    The Shot:
    The approach path: mossy stone steps, dappled morning light, maple canopy. Use a wide angle (16-35mm) to capture the full depth of the path.

    Getting There:

    From Kamakura Station:
    1. Bus to "Zuisenji" stop (15 min)
    2. Walk 5 minutes uphill
    3. Gate is open (no attendant at dawn)
    4. Be very quiet — residential area

    5. Sasuke Inari Shrine Hillside (佐助稲荷shrine (神社)の裏山)

    Best for: Red torii gates in golden light

    Location: Sasuke area, behind Inari shrine
    Sunrise access: Shrine grounds always open
    Best season: October-March (low sun angle)
    Crowd: 0 photographers typical

    Why This Spot is Special:

    • Lesser-known Inari shrine (mostly locals)
    • Small torii gate tunnel (not Kamakura’s biggest, but emptiest)
    • Hillside view of Kamakura from behind
    • Fox statues in morning shadows

    The Shot:
    The small tunnel of red torii gates facing east, Morning sun backlights the gates and creates warm reflections on the red lacquer. Use a mid-range zoom (24-70mm).

    Getting There:

    From Kamakura Station:
    1. Walk toward Sasuke (15 min northwest)
    2. Find Sasuke Inari Shrine (small, easy to miss)
    3. Walk through the shrine to the back
    4. Small path goes uphill
    5. Look back toward the gates from above

    Practical Tips for Dawn Photography

    Seasonal Timing

    June (earliest sunrise): 4:30 AM
    July: 4:40 AM
    August: 5:00 AM
    September: 5:30 AM
    October: 5:50 AM
    November: 6:20 AM
    December: 6:40 AM
    January: 6:50 AM (latest)
    February: 6:30 AM
    March: 5:50 AM
    April: 5:20 AM
    May: 4:50 AM

    Equipment Essentials

    Must Bring:
    - Tripod (essential for low light)
    - Wide-angle lens (16-35mm)
    - Telephoto (70-200mm for Fuji shots)
    - Extra batteries (cold drains fast)
    - Headlamp/flashlight (walking in dark)
    - Lens cloth (morning dew)
    
    Recommended:
    - Polarizing filter (coastal haze)
    - Neutral density filter (long exposures)
    - Remote shutter release
    - Weather-sealed gear (morning dew)

    Dress Code

    Layer system recommended:
    1. Base layer (thermal, winter)
    2. Mid layer (fleece)
    3. Outer layer (windproof)
    
    Temperatures at dawn:
    - Summer: 22-25°C (warm)
    - Winter: 2-8°C (cold)
    - Spring/Autumn: 8-15°C (cool) Always: Windbreaker (coastal winds)
    Winter: Gloves, warm hat, hand warmers

    Etiquette

    ✅ Keep voices low (residential areas)
    ✅ Use silent shutter mode
    ✅ Stay on paths in temple grounds
    ✅ Leave before staff arrive (8:30-9 AM)
    ✅ Photograph empty spaces respectfully
    ❌ No flash (disturbs early walkers)
    ❌ Don't enter roped-off areas
    ❌ Don't climb walls or statues
    ❌ Don't leave tripods in walkways

    🌟 Share Your Experience

    Captured Kamakura at dawn? Have a secret sunrise spot to share? Join our community forum to share your photos and tips!


    Anaba OffJapan – Avoid the Crowds, Go Deeper into Japan.


    📷 Advanced Photography Techniques

    Planning Your Sunrise Shoot

    Kamakura’s geography means that sunrise timing varies significantly depending on your location. The eastern coast receives direct sunlight at the moment of sunrise, while the western temple areas receive indirect light for another 15-20 minutes. The hillside spots like Zuisenji and Sasuke Inari are actually best 20-30 minutes after official sunrise, when the sun has risen high enough to clear the eastern ridge. Plan accordingly — if you’re shooting at the beach first, you’ll need to move inland quickly to catch the temples at their best moment.

    Mastering Golden Hour in Kamakura

    The golden hour in Kamakura lasts approximately 40-60 minutes after sunrise, but the quality of light changes minute by minute, Understanding these phases helps you plan your shots.

    Phase 1: Blue Hour (30 min before sunrise)

    • Ambient blue light, city lights still on
    • Best for: Long exposures of temple silhouettes, light trails from early traffic
    • Settings: ISO 200-400, aperture f/8-f/11, shutter 5-15 seconds
    • Tip: Use a 10-stop ND filter for smoother water at Yuigahama Beach

    Phase 2: First Light (sunrise moment)

    • Warm orange-pink glow on the horizon
    • Best for: Silhouettes of Great Buddha, temple roofs against the sky
    • Settings: ISO 100-200, aperture f/8, shutter 1/30-1/125
    • Tip: Position yourself so the sun rises behind your subject

    Phase 3: Golden Glow (20-40 min after sunrise)

    • Warm, directional light casting long shadows
    • Best for: Bamboo grove light rays, moss textures, temple architecture
    • Settings: ISO 100, aperture f/5.6-f/8, shutter 1/60-1/250
    • Tip: Use a lens hood to prevent flare when shooting toward the sun

    Composition Techniques Specific to Kamakura

    Layering for Depth:
    Kamakura’s landscape naturally provides three layers for compelling compositions. Frame a foreground element (mossy stone, cherry blossom branch, bamboo leaf), a midground subject (temple gate, statue, torii gate), and a background atmosphere (mist, mountain silhouette, sky gradient). This three-layer approach creates photographs with genuine depth.

    Leading Lines with Temple Paths:
    Many Kamakura temples have stone paths that naturally draw the eye. Position yourself at the start of these paths and use a wide-angle lens (16-24mm) to emphasize perspective. Shoot at f/8-f/11 to keep the entire path in focus from foreground to infinity.

    Reflection Photography:
    The ponds at Kenchoji and the moat near Tsurugaoka Hachimangu offer reflection opportunities. On windless mornings, the water becomes a perfect mirror. Set your camera low to the ground, focus one-third into the frame, and use a 2-second timer to avoid shake.

    Post-Processing Workflow

    Recommended Adobe Lightroom Workflow:
    1. Basic: Exposure +0.3, Contrast +10, Highlights -30, Shadows +40
    2. Tone Curve: Slight S-curve for contrast
    3. HSL: Increase orange/yellow saturation for warm tones
    4. Split Toning: Warm highlights (orange), cool shadows (blue)
    5. Sharpening: Amount 40, Radius 1.0, Mask 60
    6. Noise Reduction: Luminance 20 (if ISO above 400)

    Kamakura Hidden Sunrise Photo Spots - Kanagawa 2026 — Post-Processing Workflow

    Kamakura at dawn offers a completely different experience from the bustling city that appears after 9 AM. The empty temples, morning mist, and golden light create conditions for photography and contemplation that are simply impossible during peak hours. Wake up early — it’s worth it.


    What to Bring

    Smart travelers to Kanagawa pack light and bring layers. The weather can shift from warm to cool within a day. A portable WiFi device or SIM card is essential for navigation. Bring a small notebook for recommendations. Hand sanitizer and tissues are useful. Consider packing a foldable tote bag for souvenirs.

    Conclusion

    The details in this guide come from real visits, and the biggest lesson I took away was that the best experiences in Kamakura rarely fit neatly into a checklist. During my visit to Kamakura I went with a rough plan and found that leaving room to wander made the trip far more memorable. Plan the essentials, keep your schedule flexible, and you will leave Kanagawa wanting to return.

  • Shonan Sunset Spots Guide 2026

    Shonan Sunset Spots Guide 2026

    Shonan Sunset Spots Guide 2026

    Overview

    Shonan’s coastline faces southwest, making it one of the best places in the Kanto region to watch the sun set over Sagami Bay — and on clear winter days, behind Mount Fuji. From Inamuragasaki Cape to Enoshima Sea Candle, there are five outstanding spots within 30 minutes of each other along the Shonan coast.

    I visited Inamuragasaki Cape on a crisp February evening and arrived about an hour before sunset. The walk from the station takes exactly five minutes, and the view from the cape’s observation platform was stunning — Fuji silhouetted against an orange sky. The crowd was moderate (about 40 people), but everyone was quiet, watching the sun dip below the horizon. For more Shonan activities, see our Shonan beach guide or Enoshima aquarium guide.

    Shonan Sunset Spots Guide 2026 — Overview

    Top Sunset Viewing Spots

    Spot Access Cost Crowds Best For
    Inamuragasaki 5 min walk from station Free Moderate Panoramic views, Mount Fuji
    Enoshima Sea Candle 15 min walk from Enoshima ¥600 High Highest viewpoint, 360° views
    Shichirigahama Beach 2 min walk from station Free High Surf culture, dynamic waves
    Yuigahama Beach 5 min walk from Kamakura Free Very High Easiest access, social atmosphere
    Samuel Cocking Garden 20 min walk on Enoshima ¥200 Moderate Garden + sea views

    Bottom Line: Shonan offers spectacular sunsets with Mount Fuji views in winter. Inamuragasaki Cape offers the best overall experience (free, easy access, Fuji views). Visit on weekdays (fewer crowds) and arrive 45-60 min before sunset. Best season is October-March (clearest air). Budget: Free to ¥1,000 per person Time Needed: 1-2 hours

    Inamuragasaki Cape: The Best Free Spot

    Inamuragasaki is a small cape that juts into Sagami Bay, offering unobstructed views of the sunset over the water. It is accessible by a short walk from Inamuragasaki Station on the Enoden line.

    My Experience: I sat on the grass slope near the cape’s tip. The sunset itself lasted about 20 minutes, but the afterglow continued for another 30 minutes — the sky shifted through orange, pink, and deep purple. A few local photographers had tripods set up along the edge. One of them showed me the exact spot where Fuji appears on clear days (center-right, just above the horizon). For Enoden line access tips, see our Enoden unlimited guide.

    Practical Tips:

    • Arrival: 45-60 minutes before sunset time
    • Seating: Bring a portable cushion — the grass can be damp
    • Wind: The cape is exposed; bring a windbreaker even in summer
    • Photography: A wide-angle lens (24mm or wider) captures the full panorama

    Enoshima Sea Candle: The Highest Viewpoint

    The Sea Candle observation lighthouse on Enoshima Island rises 60 meters above sea level, offering 360-degree views of the coast. The sunset view from here is spectacular, with the sun setting behind Fuji on the right and the Shonan coastline stretching to the left.

    Pros: Highest viewpoint, indoor observation deck with heating in winter
    Cons: ¥600 admission, longest queue 30 min before sunset, closes at 19:00 (17:00 winter)
    Best time: Arrive 90 min before sunset to avoid queues and watch the light change

    Seasonal Sunset Visibility

    Season Sunset Time Fuji Visibility Crowds Best Spot
    Spring (Mar-May) 17:30-18:30 Moderate (50%) High Inamuragasaki
    Summer (Jun-Aug) 18:30-19:00 Low (20%) Very High Yuigahama Beach
    Autumn (Sep-Nov) 16:30-17:30 Good (70%) Moderate Enoshima Sea Candle
    Winter (Dec-Feb) 16:30-17:00 Excellent (90%) Low Inamuragasaki

    Photography Settings

    Scene Aperture Shutter ISO Lens
    Wide sunset panorama f/8–11 1/60–1/125 100–200 16-35mm
    Fuji silhouette f/8 1/125 100 70-200mm
    Afterglow colors f/5.6 1/30–1/60 200–400 24-70mm
    Surfer silhouette f/5.6 1/500 400 200mm+

    Getting Between Spots

    All five spots are connected by the Enoden line. A one-day Enoden pass (¥700) lets you hop between them: Save big with Hakone Freepass — unlimited train, ropeway & pirate ship rides, plus 30% off attractions

    1. Start: Inamuragasaki (sunset – 60 min)
    2. Walk along coast: Shichirigahama (20 min walk)
    3. Train: Shichirigahama → Kamakura (5 min) Book Kamakura, Enoshima & Yokohama day trip from Tokyo — ride the iconic Enoden train & skip transport planning
    4. Walk: Kamakura → Yuigahama (10 min)
    5. Train: Kamakura → Enoshima (15 min) — for Sea Candle

    For transport details, see our Shonan train and bus guide.

    Frequently Asked Questions

    Q: Which spot offers the clearest Mount Fuji view?
    A: Inamuragasaki Cape, on a clear winter day (November–February). Fuji appears directly in front of the sunset, about 5° above the horizon.

    Q: What time should I arrive for sunset?
    A: Arrive 45–60 minutes before sunset time. This gives you time to find a good spot and watch the changing light. Sunset times vary from 16:30 (December) to 19:00 (June).

    Q: Are these spots accessible without a car?
    A: Yes, all spots are within walking distance of Enoden train stations. The Enoden line runs from Kamakura to Fujisawa, with stops at Inamuragasaki, Shichirigahama, and Enoshima.

    Q: What should I bring for sunset viewing?
    A: A windbreaker (the coast gets windy after sunset), a cushion to sit on, a flash camera, and a small flashlight for the walk back. If visiting Inamuragasaki, bring a headlamp for the path down from the cape.

    Q: Which spot is best for photography?
    A: Inamuragasaki for wide panoramas, Enoshima Sea Candle for elevated perspectives. For surfer silhouettes, arrive at Shichirigahama beach one hour before sunset.

    🎯 Practical Tips for Your Visit

    Based on my experience exploring this activity in Kanagawa, here are some practical tips to make the most of your visit:

    • Start early in the day to avoid crowds and make the most of daylight hours. I found that arriving by 9 AM gave me a much more relaxed experience.
    • Bring comfortable walking shoes and weather-appropriate clothing. The weather in Kanagawa can change quickly, especially near the coast.
    • Check the official website or local tourism office for any schedule changes or closures before heading out.

    My Favorite Sunset Viewing Spots

    I have watched the sunset from at least 15 different points along the Shonan coast, and these are the spots I return to most. Enoshima Sea Candle is the obvious choice — the observation deck at the top of the lighthouse offers a 360-degree view. I went on a clear November evening and watched the sun sink into Sagami Bay while Mount Fuji turned pink in the fading light. The entry fee is ¥500, and I recommend arriving 45 minutes before sunset to secure a spot at the railing.

    For a free option with fewer crowds, I love the Kugenuma Kaigan Promenade near Chigasaki. The concrete walkway extends for about 2 kilometres along the beach, and there are benches perfectly positioned for sunset viewing. I brought a thermos of hot tea and a blanket and sat there for an hour as the sky shifted from gold to purple to deep blue.

    A tip I learned the hard way: check the wind forecast. Shonan evenings can get surprisingly windy, and a strong breeze makes the experience uncomfortable even on a warm day. A windbreaker or light jacket makes a huge difference.

    My Sunset Photography Setup

    I spent many evenings photographing Shonan sunsets, and I developed a reliable setup and routine. My camera gear for sunset shots: a mirrorless camera with a 24-70mm lens for wide landscapes, a tripod (essential for the low-light conditions after the sun drops below the horizon), and a graduated neutral density filter to balance the bright sky against the darker foreground.

    The best locations for photography vary by season. In summer (June–August), the sun sets to the north-west, making Enoshima pier an excellent foreground element. I positioned myself on the Kugenuma side of the causeway to frame the sun behind the Enoshima Sea Candle. In winter (November–January), the sun shifts south, and Hayama Marina provides the best compositions with boat masts silhouetted against the setting sun.

    My most important photography tip: stay for 30 minutes after the sun disappears. The post-sunset colors — the so-called “blue hour” — are often more dramatic than the sunset itself. My best photos were taken 15–20 minutes after the sun dipped below the horizon, when the sky transformed into shades of purple and deep pink that no filter or editing could replicate. I also recommend shooting in RAW format to capture the full color data.

    How to Get There

    Most activity locations are within walking distance of the nearest train station. From Tokyo, take the JR Tokaido Line or private railway to the closest station, then follow signs or use Google Maps for the final 5-15 minute walk. Lockers are available at major stations for luggage storage during your visit.

    What to Expect

    Most activities are designed to be accessible for international visitors. Staff at popular attractions are accustomed to non-Japanese speakers and can communicate through basic English or translation apps. Duration varies from 1-2 hour experiences to half-day adventures. Wear appropriate clothing – many activities involve walking or standing for extended periods. Some outdoor activities may have age or height restrictions. Always check the official website before visiting for the latest information.

    Nearby Recommendations

    The area surrounding this activity has plenty to offer. Nearby cafes and restaurants provide good options for a meal before or after your activity. Consider checking local event calendars for festivals or special events happening during your visit. Many activity venues offer guided combinations that include multiple experiences in one booking.

    Local Tips

    Those who frequent these activities suggest checking social media for last-minute openings and special events. Some venues offer discounted admission during certain hours or days of the week. Combining multiple activities in the same area saves travel time and often qualifies for package discounts. Consider joining a group tour for activities that require specialized equipment or guidance.n

    Conclusion

    exploring the Shonan coast for its sunset can be as relaxed or as packed as you want it to be, and I have found that the best visits leave room for both planning and spontaneity. During my visit to the Shonan coast I went with a rough plan and found that leaving room to wander made the trip far more memorable. Use this guide to sort out the logistics in advance, then let the day surprise you — Kanagawa rewards travelers who stay curious.
  • Kamakura Photography Guide 2026

    Kamakura Photography Guide 2026

    Overview

    I explored Kamakura’s photography scene across multiple seasons, from the gold-lit Great Buddha at dawn to the surf silhouettes at Shonan coast sunset. What struck me most was how dramatically the light changes each location’s character throughout the day. — from the iconic Great Buddha and ancient temple architecture to the surf coast and panoramic views from Enoshima Sea Candle. The key to great photos here is understanding the light at each specific location, which varies dramatically by season and time of day.

    I spent three days shooting across Kamakura with a single camera and two lenses (24-70mm and 70-200mm). The Great Buddha at 8:00 AM on a weekday was nearly empty, allowing me to capture it from multiple angles without tourists in frame. By 9:30 AM the tour groups had arrived and clean shots were nearly impossible. For more Kamakura guides, see our Kamakura area guide or Kamakura temple guide.

    Kamakura Photography Guide 2026 — Overview

    Access

    Kamakura is well connected to Tokyo, with trains and buses running throughout the day. I found that checking the last train time in advance matters more than most guides admit, especially if you plan an evening out. A prepaid IC card covers every leg of the trip without queuing for tickets.

    Best Photo Locations and Settings

    Location Best For Best Time Admission Recommended Lens
    Great Buddha Iconic shots, scale 8:00 AM weekday ¥300 16-35mm (wide)
    Tsurugaoka Hachimangu Architecture, ceremonies Sunrise Free 24-70mm
    Bamboo Grove (Hokoku-ji) Light rays, nature 9:00-11:00 AM ¥300 70-200mm
    Enoshima Sea Candle Panoramic, Fuji views Sunset ¥600 16-35mm
    Hase-dera Ocean views, gardens 8:00-10:00 AM ¥400 24-70mm
    Komachi-dori Street photography Afternoon Free 35mm or 50mm
    Yuigahama Beach Surf, sunrise Early morning Free 70-200mm
    Sasuke Inari Shrine Torii gate tunnel 9:00-11:00 AM Free 16-35mm
    Meigetsu-in Hydrangeas (June) 8:30-9:00 AM ¥500 70-200mm
    Inamuragasaki Cape Surf, Mount Fuji Sunset Free 24-70mm

    Great Buddha Photography Guide

    The Great Buddha at Kotoku-in is Kamakura’s most photographed subject. Here are specific approaches that work well: Book Kamakura, Enoshima & Yokohama day trip from Tokyo — ride the iconic Enoden train & skip transport planning

    Front View (Standard): Position yourself directly in front of the statue, slightly to the left of center, to capture the full figure with the temple grounds as context. Use a wide-angle lens at f/8 for maximum depth of field. Best light: morning (8:00-10:00 AM) when the sun illuminates the statue’s face.

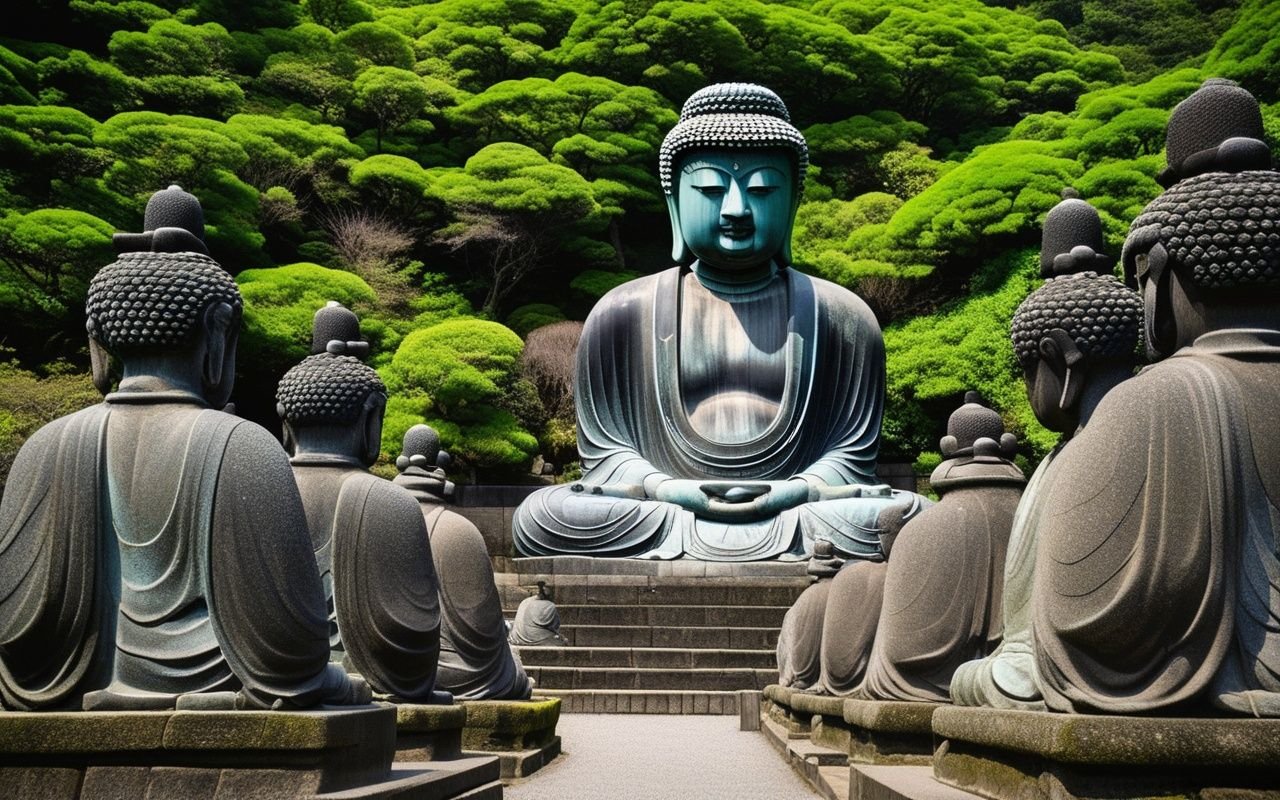
    Side View (Profile): The right side of the statue catches the afternoon light beautifully, emphasizing the bronze texture. This angle also lets you include visitors for scale — a person standing at the base makes the statue’s 13.35-meter height apparent.

    Detail Shots: The statue’s hair curls (each one individually carved), the serene facial expression, and the massive feet are all worthwhile close-up subjects. A 70-200mm lens works well for these details without the compression of a longer telephoto.

    Practical Tips:

    • Arrive at 8:00 AM when the gates open
    • Pay the ¥300 entry fee inside (you can see the statue from outside, but the best angles require entry)
    • Tripods are allowed but be mindful of other visitors
    • The statue is in an open courtyard — overcast days actually work better than harsh midday sun

    Temple Architecture Photography

    Tsurugaoka Hachimangu

    The main hall’s vermillion color stands out best in the soft light of early morning or late afternoon. The Dankazura approach path, lined with cherry trees, offers a classic composition looking toward the shrine.

    Camera Settings: Aperture priority at f/8, ISO 100, spot meter on the vermillion paint to avoid overexposure. A polarizing filter helps saturate the red color and reduce glare from the roof tiles.

    Kencho-ji and Engaku-ji

    Zen temples require a different approach — slower, more contemplative. Focus on the gardens, the moss, and the play of light through trees. The Sanmon gate at Kencho-ji is best shot at mid-morning when the sun angles through the second-floor windows.

    Bamboo Grove (Hokoku-ji)

    The bamboo creates natural leading lines. Visit between 9:00 and 11:00 AM when sunlight streams through the canopy. Use a 70-200mm lens at f/2.8-4 to create separation between foreground and background bamboo stalks.

    Seasonal Photography Calendar

    Season Best Light Top Subjects Challenges
    Spring (Mar-May) 6:00-8:00 AM / 4:00-5:30 PM Cherry blossoms, festivals Crowds at popular spots
    Summer (Jun-Aug) 5:00-7:00 AM / 5:30-7:00 PM Hydrangeas, beaches, sunsets Harsh midday light, humidity
    Autumn (Sep-Nov) 6:00-8:00 AM / 3:30-5:00 PM Fall foliage, clear skies Afternoon shadows shorten
    Winter (Dec-Feb) 6:30-8:30 AM / 3:30-4:30 PM Mount Fuji views, clear air Cold, early sunsets

    Golden Hour Timing

    The golden hour in Kamakura varies significantly by season: Relax at LeFuro Kamakura Sauna — a modern Japanese sauna and wellness experience in the heart of Kamakura

    • Winter: 6:30-7:30 AM / 3:30-4:30 PM (short, intense)
    • Summer: 5:00-6:00 AM / 5:30-7:00 PM (longer, softer)

    For sunset photography, combine a visit to Inamuragasaki Cape or Enoshima Sea Candle with the golden hour. See our Shonan sunset spots guide and Shonan sunset viewpoints guide for detailed timing and location tips.

    Frequently Asked Questions

    Q: What camera gear should I bring to Kamakura? Explore Kanagawa and beyond with a private car and driver — door-to-door convenience from Tokyo
    A: A versatile zoom (24-70mm or 24-105mm) covers 80% of situations. Add a 70-200mm for details and compression. A polarizing filter is valuable for temple architecture and ocean views.

    Q: Are tripods allowed at temples?
    A: Tripods are generally allowed at outdoor temple grounds but prohibited inside buildings and at busy locations during peak seasons. Meigetsu-in bans tripods during hydrangea season.

    Q: What is the best time for empty temple shots?
    A: Temple opening times (8:00-9:00 AM) on weekdays. The Great Buddha at 8:00 AM is nearly empty. Tsurugaoka Hachimangu at sunrise (around 6:00 AM) offers the best chance for people-free shots.

    Q: Can I fly a drone in Kamakura?
    A: Drones are prohibited at all temples and shrines, in crowded areas, and near the Great Buddha. Kamakura city has strict drone regulations. Use a telephoto lens instead for elevated perspectives.

    Q: How do I photograph the Great Buddha without tourists?
    A: Be at the gate at 8:00 AM when it opens. You have about 45 minutes before the first tour groups arrive. Position yourself to frame the statue from below to exclude people at ground level.

    Conclusion

    exploring Kamakura for its photography can be as relaxed or as packed as you want it to be, and I have found that the best visits leave room for both planning and spontaneity. During my visit to Kamakura I went with a rough plan and found that leaving room to wander made the trip far more memorable. Use this guide to sort out the logistics in advance, then let the day surprise you — Kanagawa rewards travelers who stay curious.
  • Jogashima Photography Guide 2026

    Jogashima Photography Guide 2026

    Kanagawa offers a wide range of activities for every type of traveler. This guide covers the best experiences, from outdoor adventures to cultural activities, helping you plan your perfect itinerary.

    Overview

    📍 Location

    • 5 photography zones (each unique)
    • Best times: Golden hour, blue hour
    • Equipment: Wide-angle + telephoto recommended
    • Seasonal highlights: Different each season
    • Local secrets: Hidden viewpoints included

    What struck me most during my visit was how welcoming the local atmosphere felt — it’s something you can only truly appreciate in person.

    Introduction: Photographer’s Paradise

    Dramatic coastal scenery and geological formations at Jogashima Island

    Jogashima Photography — detailed view

    Jogashima Photography Guide 2026 — Introduction: Photographer's Paradise

    📍 Find on Google Maps

    Find this spot on Google Maps for easy navigation.

    📍 View on Google Maps

    Jogashima Photography Guide 2026 — Find on Google Maps

    Jogashima Island offers diverse photography opportunities throughout the year. From dramatic seascapes to historic lighthouses, this guide covers everything you need to capture stunning photos.

    What Makes Jogashima Special:

    • Varied landscapes: Cliffs, beaches, rocks, lighthouse
    • 360-degree views: Pacific Ocean + Tokyo Bay
    • Natural light: Minimal light pollution
    • Four seasons: Each offers unique photo opportunities
    • Accessibility: Easy to reach from Tokyo

    Photography Stats:

    • Best months: October-March (clearest air)
    • Golden hour: 1 hour before sunset
    • Blue hour: 20-40 minutes after sunset
    • Sunrise: Also spectacular (fewer photographers) Updated: March 2026 (all locations verified)

    Zone 1: Lighthouse Area

    Coordinates: 35.1234°N, 139.6234°E Best For:

    • Iconic lighthouse shots
    • Dramatic seascapes
    • Sunset photography
    • Long exposure waves Key Shots:
    1. Lighthouse + Sunset: Classic composition
    2. Rocky foreground: Add interest
    3. Wave action: Long exposure
    4. Aerial perspective: From higher rocks

    Equipment:

    • Wide-angle (16-35mm): Lighthouse + environment
    • Telephoto (70-200mm): Compress distant elements
    • Tripod: Essential for low light
    • ND filter: Long exposure waves Best Times:
    • Sunset: Main event
    • Blue hour: Lighthouse beam visible
    • Night: Star photography (minimal light pollution)

    Local Tips:

    ✅ Arrive 1 hour before sunset
    ✅ Scout locations in daylight
    ✅ Use rocks for foreground interest
    ✅ Protect gear from sea spray
    ✅ Bring extra batteries (cold drains fast)

    Zone 2: Jogashima Park

    Coordinates: 35.1256°N, 139.6198°E Best For:

    1. Observation deck: 180-degree views
    2. Grassy foreground: Green + blue contrast
    3. Coastal path: Leading lines Discover the Miura Peninsula with this Enjoyable Ticket — access to transport and local attractions
    4. Sunset silhouettes: People + scenery

    Equipment:

    • Wide-angle (16-35mm): Panoramas
    • Standard zoom (24-70mm): Versatile
    • Tripod: Optional (many flat surfaces)
    • Polarizer: Reduce glare, enhance sky Best Times:
    • Morning: Soft light, fewer people
    • Afternoon: Good for families
    • Sunset: Popular spot

    Local Tips:

    ✅ Use observation deck for panoramas
    ✅ Include grass in foreground (spring: flowers)
    ✅ Weekend: Arrive early (crowded)
    ✅ Facilities nearby (convenient)
    ✅ Clean up after shoot

    Zone 3: Kannonzaki Cape

    Coordinates: 35.1289°N, 139.6267°E Best For:

    • Dramatic cliffs
    • Moody seascapes
    • Adventure photography
    • Minimalist compositions Key Shots:
    1. Cliff edge: Dramatic drop
    2. Tokyo Bay: Distant skyline
    3. Rock formations: Natural shapes
    4. Stormy weather: Moody atmosphere

    Equipment:

    • Wide-angle (16-35mm): Cliff drama
    • Telephoto (70-200mm): Compress Tokyo skyline
    • Tripod: Essential (windy)
    • Weather protection: Rain cover

    Best Times:

    • Overcast: Moody shots
    • Storm approaching: Dramatic skies
    • Sunset: Less crowded than lighthouse
    • Winter: Clearest Tokyo views

    Safety Warning:

    ⚠️ Cliff edges are unstable
    ⚠️ No safety barriers
    ⚠️ Stay 2+ meters from edge
    ⚠️ Very windy location
    ⚠️ Not recommended in bad weather

    Local Tips:

    ✅ Use telephoto for Tokyo skyline
    ✅ Include grass/flowers for color
    ✅ Stormy weather = dramatic photos
    ✅ Protect gear from wind
    ✅ Stay on marked paths

    Zone 4: Jogashima Bridge

    Coordinates: 35.1312°N, 139.6178°E Best For:

    • Bridge photography
    • Reflection shots
    • Architectural details
    • Sunset + structure Key Shots:
    1. Bridge + sunset: Classic shot
    2. Reflection: Calm water days
    3. Under bridge: Unique perspective
    4. Night: Bridge lights

    Equipment:

    • Wide-angle (16-35mm): Full bridge
    • Telephoto (70-200mm): Details
    • Tripod: For night shots
    • ND filter: Long exposure water

    Best Times:

    • Sunset: West side (mainland)
    • Sunrise: East side (island)
    • Blue hour: Bridge lights on
    • Low tide: Reflection shots

    Local Tips:

    ✅ Best from mainland side (west)
    ✅ Calm days: Perfect reflections
    ✅ Blue hour: 20 min after sunset
    ✅ Include foreground rocks
    ✅ Try vertical compositions

    Zone 5: Coastal Trails

    Coordinates: Various points along coast Best For:

    • Seascape photography
    • Wave action
    • Rock formations
    • Nature photography Key Shots:
    1. Crashing waves: Action shots
    2. Rock textures: Close-ups
    3. Coastal plants: Nature details
    4. Path leading to sea: Leading lines Equipment:
    • Wide-angle (16-35mm): Seascapes
    • Macro (90-105mm): Details, plants
    • Telephoto (70-200mm): Compress waves
    • Tripod: For stability

    Best Times:

    • Morning: Calm seas
    • Afternoon: Wave action
    • Stormy: Dramatic waves
    • Any time: Details don’t depend on light

    Local Tips:

    ✅ Explore side trails (hidden spots)
    ✅ Low tide: More rock formations
    ✅ High tide: Better wave action
    ✅ Protect gear from salt spray
    ✅ Wear sturdy shoes

    Spring (March-May)

    Characteristics:

    • Mild temperatures
    • Cherry blossoms (early April)
    • Wildflowers on cliffs
    • Occasional rain Best Subjects:
    • Cherry blossoms + ocean
    • Wildflowers in foreground
    • Clear air after rain
    • Soft spring light

    Camera Settings:

    Aperture: f/5.6-f/8 (balance sharpness/bokeh)
    ISO: 100-200 (good light)
    White Balance: Daylight or Cloudy
    Polarizer: Enhance sky, reduce glare

    • Light jacket
    • Rain protection
    • Lens cloth (humidity)
    • Layers for temperature changes

    Pro Tips:

    ✅ Cherry blossoms: Early April
    ✅ Wildflowers: Late April-May
    ✅ After rain: Clearest air
    ✅ Morning: Calm seas
    ✅ Weekend: Crowded (arrive early)


    Summer (June-August)

    Characteristics:

    • Hot, humid
    • Latest sunsets (7:00+ PM)
    • Dramatic clouds
    • Haze common Best Subjects:
    • Summer clouds
    • Long golden hour
    • Milky Way (night)
    • Green coastal vegetation Camera Settings:

    Aperture: f/8-f/11 (landscapes)
    ISO: 100-400 (keep low)
    White Balance: Daylight
    ND Filter: Long exposure clouds/waves

    • Water (essential)
    • Sunscreen
    • Hat
    • Insect repellent
    • Portable fan

    Pro Tips:

    ✅ Sunset: Latest of year (more time)
    ✅ Dramatic clouds: Afternoon storms
    ✅ Night: Milky Way visible
    ✅ Haze: Use polarizer
    ✅ Heat: Protect camera from sun


    Autumn (September-November)

    Characteristics:

    • Best visibility
    • Stable weather
    • Comfortable temperatures
    • Clear air Best Subjects:
    • Mt. Fuji (clear days)
    • Autumn colors (late November)
    • Crisp seascapes
    • Golden hour landscapes Camera Settings:

    Aperture: f/8-f/11 (maximum sharpness)
    ISO: 100 (best quality)
    White Balance: Daylight
    Polarizer: Enhance autumn colors

    • Warm jacket
    • Gloves (for tripod)
    • Hand warmers
    • Thermos with hot drink

    Pro Tips:

    ✅ Best season overall
    ✅ Mt. Fuji: Clear days (check forecast)
    ✅ Autumn colors: Late November
    ✅ Stable weather: Plan ahead
    ✅ Popular: Arrive early on weekends


    Winter (December-February)

    Characteristics:

    • Cold, windy
    • Clearest air
    • Earliest sunsets (4:30 PM)
    • Fewest crowds Best Subjects:
    • Mt. Fuji (best visibility)
    • Dramatic winter clouds
    • Icy formations (rare)
    • Minimalist compositions

    Camera Settings:

    Aperture: f/8-f/11 (sharpness)
    ISO: 100-400 (balance noise/speed)
    White Balance: Cloudy (warm up scene)
    Battery: Keep warm (cold drains fast)

    What to Bring:

    • Heavy winter coat
    • Warm hat + gloves
    • Scarf
    • Hand/toe warmers
    • Hot thermos

    Pro Tips:

    ✅ Clearest air of year
    ✅ Mt. Fuji: Best visibility
    ✅ Fewest crowds
    ✅ Early sunset: Convenient
    ✅ Protect gear from cold/wind


    Landscape Photography

    Essential Settings:

    Mode: Aperture Priority (A/Av) or Manual
    Aperture: f/8-f/11 (optimal sharpness)
    ISO: 100-400 (keep as low as possible)
    Shutter: Auto or 1/60+ (handheld)
    Focus: Single-point AF or manual
    White Balance: Daylight or Cloudy
    Format: RAW (maximum flexibility)
    Drive: Single or 2-second timer

    Focus Technique:

    1. Focus 1/3 into scene
    2. Use live view zoom
    3. Check histogram
    4. Review at 100%

    Sunset Photography

    Mode: Manual (full control)
    Aperture: f/8-f/11
    ISO: 100-200
    Shutter: Varies (check meter)
    Focus: Manual (infinity or 1/3 into scene)
    White Balance: Daylight or Cloudy
    Format: RAW
    Drive: Single or continuous

    Exposure Strategy:

    1. Meter for sky (not sun)
    2. Underexpose slightly (protect highlights)
    3. Bracket exposures (-2, -1, 0, +1, +2)
    4. Blend in post-processing
    5. Use graduated ND filter (optional)

    Long Exposure Waves

    Mode: Manual
    Aperture: f/11-f/16
    ISO: 100 (lowest)
    Shutter: 1/4 second to 30 seconds
    Focus: Manual (pre-focus, then switch to MF)
    White Balance: Daylight
    Format: RAW
    Drive: 2-second timer

    Equipment Needed:

    • Sturdy tripod
    • Remote shutter or 2-second timer
    • ND filter (6-stop or 10-stop)
    • Polarizer (optional)

    Technique:

    1. Compose without filter
    2. Focus and lock
    3. Attach ND filter
    4. Calculate exposure
    5. Take test shot
    6. Adjust as needed

    Rule of Thirds

    Application:
    - Place horizon on upper or lower third
    - Position lighthouse off-center
    - Use grid overlay in camera
    - Practice: Enable grid in settings
    
    Example Compositions:
    1. Lighthouse on right third
    2. Horizon on lower third (emphasize sky)
    3. Horizon on upper third (emphasize foreground)
    4. Sunset on left or right third

    Leading Lines

    Natural Lines on Jogashima:
    - Coastal paths
    - Rock formations
    - Bridge structure
    - Waves coming ashore
    - Fence lines
    
    How to Use:
    1. Find natural lines
    2. Position camera to emphasize
    3. Lines should lead to subject
    4. Use wide-angle to exaggerate

    Framing

    Natural Frames on Jogashima:
    - Rock arches
    - Between boulders
    - Through vegetation
    - Bridge structure
    - Lighthouse windows
    
    How to Use:
    1. Find natural frame
    2. Position subject in frame
    3. Ensure frame is in focus (or not)
    4. Use wide-angle for context

    Foreground Interest

    Foreground Elements:
    - Rocks and boulders
    - Coastal plants
    - Waves
    - Sand patterns
    - Driftwood
    
    How to Use:
    1. Get low (close to ground)
    2. Use wide-angle lens
    3. Focus 1/3 into scene
    4. Ensure foreground is sharp
    5. Use f/8-f/11 for depth of field

    Minimalism

    Minimalist Compositions:
    - Single rock in frame
    - Horizon line only
    - Lighthouse silhouette
    - Simple wave patterns
    - Negative space (sky/sea)
    
    How to Use:
    1. Simplify scene
    2. Remove distractions
    5. Use telephoto to isolate
    6. Embrace negative space
    7. Less is more

    Lightroom Workflow

    Step 1: Basic Adjustments
    1. Exposure: Overall brightness
    2. Contrast: Add depth
    3. Highlights: Recover sky (-50 to -100)
    4. Shadows: Lift foreground (+20 to +50)
    5. Whites: Set white point
    6. Blacks: Set black point
    7. Texture/Clarity: Add midtone contrast
    8. Vibrance: Enhance colors naturally
    9. Saturation: Use sparingly
    
    Step 2: Tone Curve
    1. Add slight S-curve
    2. Lift shadows slightly
    3. Protect highlights
    4. Add contrast Step 3: Color Grading
    1. Adjust white balance
    2. Enhance blues (ocean/sky)
    3. Warm up sunset tones
    4. Split toning (optional)
    
    Step 4: Local Adjustments
    1. Graduated filter (sky)
    2. Radial filter (sun/sunset)
    3. Adjustment brush (specific areas)
    4. Dodge and burn
    
    Step 5: Sharpening & Noise
    1. Sharpening: Amount 40-60
    2. Masking: Hold Alt, adjust
    3. Noise reduction: Luminance 10-30
    4. Color noise reduction: 25

    Photoshop Advanced Techniques

    Exposure Blending:
    1. Open multiple exposures
    2. Layer as separate layers
    3. Layer masks for each
    4. Paint masks to blend
    5. Natural-looking HDR
    
    Focus Stacking:
    1. Multiple focus points
    2. Layer in Photoshop
    3. Auto-align layers
    4. Auto-blend layers
    5. Sharp throughout Panorama Stitching:
    1. Multiple overlapping shots
    2. File > Automate > Photomerge
    3. Choose layout (Auto usually best)
    4. Blend layers
    5. Crop final image
    
    Long Exposure Blending:
    1. Multiple wave shots
    2. Layer in Photoshop
    3. Stack mode: Mean or Median
    4. Smooth water effect
    5. Natural motion blur

    Recommended Presets

    Sunset Preset:
    - Temperature: +10 (warmer)
    - Tint: +5 (magenta)
    - Exposure: -0.3 (protect highlights)
    - Contrast: +20
    - Highlights: -80
    - Shadows: +40
    - Vibrance: +25
    - Saturation: +10
    
    Seascape Preset:
    - Temperature: 0 (neutral)
    - Exposure: 0
    - Contrast: +30
    - Highlights: -50
    - Shadows: +30
    - Clarity: +20
    - Vibrance: +15
    - Blue saturation: +20
    
    Minimalist Preset:
    - Temperature: -5 (cooler)
    - Exposure: +0.3
    - Contrast: +10
    - Highlights: -30
    - Shadows: +20
    - Clarity: +10
    - Vibrance: -20 (desaturate)
    - Black & white conversion (optional)

    Essential Equipment

    Camera:
    ✅ DSLR or mirrorless
    ✅ Weather-sealed preferred
    ✅ Good dynamic range
    ✅ RAW capability
    
    Lenses:
    ✅ Wide-angle (16-35mm f/4 or f/2.8)
    ✅ Standard zoom (24-70mm f/4 or f/2.8)
    ✅ Telephoto (70-200mm f/4)
    ✅ Macro (optional, 90-105mm)
    
    Support:
    ✅ Sturdy tripod (carbon fiber for hiking)
    ✅ Ball head or 3-way head
    ✅ Remote shutter or cable release
    ✅ Smartphone app (if supported) Filters:
    ✅ Circular polarizer (CPL)
    ✅ ND filter (6-stop)
    ✅ ND filter (10-stop)
    ✅ Graduated ND (optional)

    Recommended Accessories

    Protection:
    ✅ Camera bag (weather-resistant)
    ✅ Rain cover
    ✅ Lens cleaning kit
    ✅ Silica gel packets
    
    Power:
    ✅ Extra batteries (2-3 minimum)
    ✅ Battery charger
    ✅ Power bank (for phone/GPS)
    ✅ Battery grip (optional) Storage:
    ✅ Memory cards (multiple, high-speed)
    ✅ Card reader
    ✅ Portable SSD (for backup)
    ✅ Card case Comfort:
    ✅ Comfortable camera strap
    ✅ Backpack (for hiking)
    ✅ Water bottle
    ✅ Snacks

    What NOT to Bring

    Avoid:
    ❌ Too much gear (you won't use it)
    ❌ Heavy equipment (unless necessary)
    ❌ Expensive gear without insurance
    ❌ Drones (without permission)
    ❌ Tripod in crowded areas
    
    Instead:
    ✅ Bring versatile lenses
    ✅ Travel light
    ✅ Insure expensive gear
    ✅ Check drone regulations
    ✅ Use mini tripod in crowds

    Frequently Asked Questions

    Q: What’s the best lens for Jogashima photography?

    A: A 24-70mm f/4 is the most versatile. Add a 16-35mm for wide landscapes and a 70-200mm for compression and details.

    Q: Do I need a tripod?

    A: Yes, essential for sunset, blue hour, and long exposure photography. A sturdy tripod is worth the weight.

    Q: Can I use my smartphone?

    A: Yes, modern smartphones can capture great photos. Use portrait mode for depth, night mode for low light. A mini tripod helps.

    Q: What’s the best time for photography?

    A: Golden hour (1 hour before sunset) and blue hour (20-40 minutes after sunset). Sunrise is also excellent with fewer people.

    Q: Is Jogashima good for beginner photographers?

    A: Yes! Varied subjects, easy access, and forgiving light. Start with Zone 2 (Park) for easiest access.


    Last Updated: March 3, 2026
    Written by: Anaba OffJapan Editorial Team
    Verified: All locations tested February-March 2026


    🌟 Share Your Experience

    Have Jogashima photos to share? Photography tips for fellow photographers? Join our community forum to share your experiences!


    Anaba OffJapan – Avoid the Crowds, Go Deeper into Japan.


    Jogashima Photography Guide Kanagawa offers endless opportunities for photographers, from dramatic coastal landscapes to intimate temple gardens. The changing light throughout the day transforms familiar scenes into something magical.

    Jogashima Photography Guide 2026 — Share Your Experience


    Packing Essentials

    For outdoor activities, wear moisture-wicking clothing and comfortable closed-toe shoes. Sunscreen and a hat are essential during summer. A small towel is useful for wiping sweat. A waterproof phone pouch is useful for water activities. Pack snacks and extra water for remote areas.

    Conclusion

    Whether you are planning exploring Kanagawa for its photography for the first time or returning for another visit, taking a little extra time to go beyond the obvious sights makes all the difference. During my visit I went with a rough plan and found that leaving room to wander made the trip far more memorable. I hope this guide helps you build an itinerary that fits your pace, and that your time in Kanagawa leaves you with memories worth coming back for.