Tag: practical-guides

  • Odakyu Romance Car Guide – Kanagawa 2026

    Odakyu Romance Car Guide – Kanagawa 2026

    Odakyu Romance Car Guide – Kanagawa 2026

    Overview

    Location and Routes


    Kamakura Photography Guide

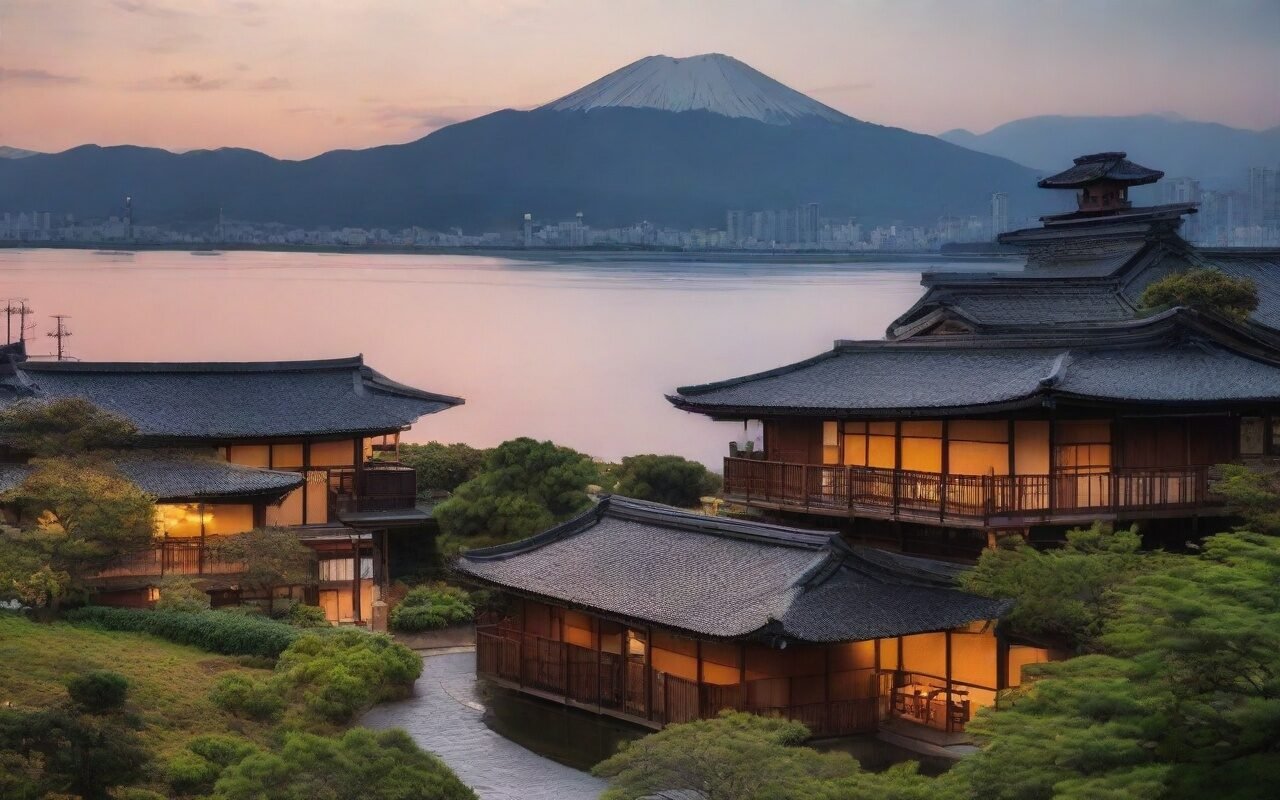
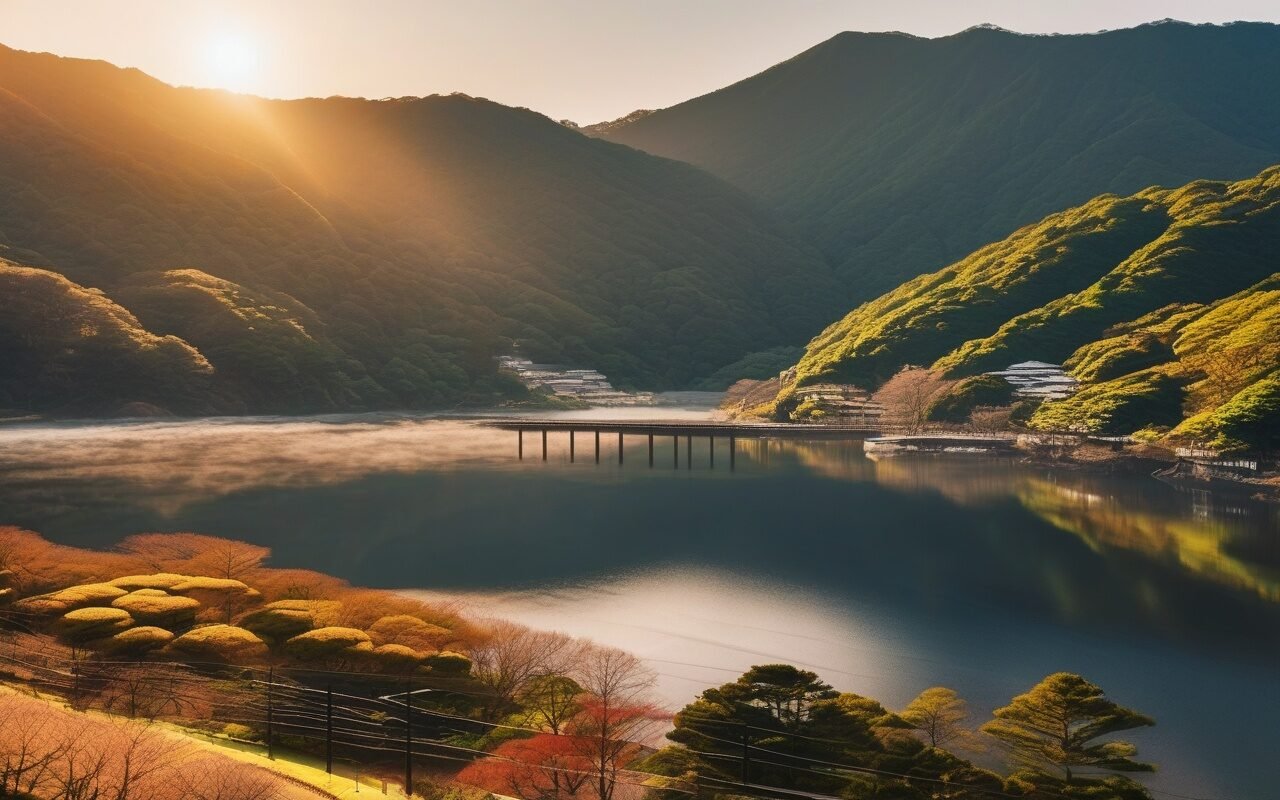
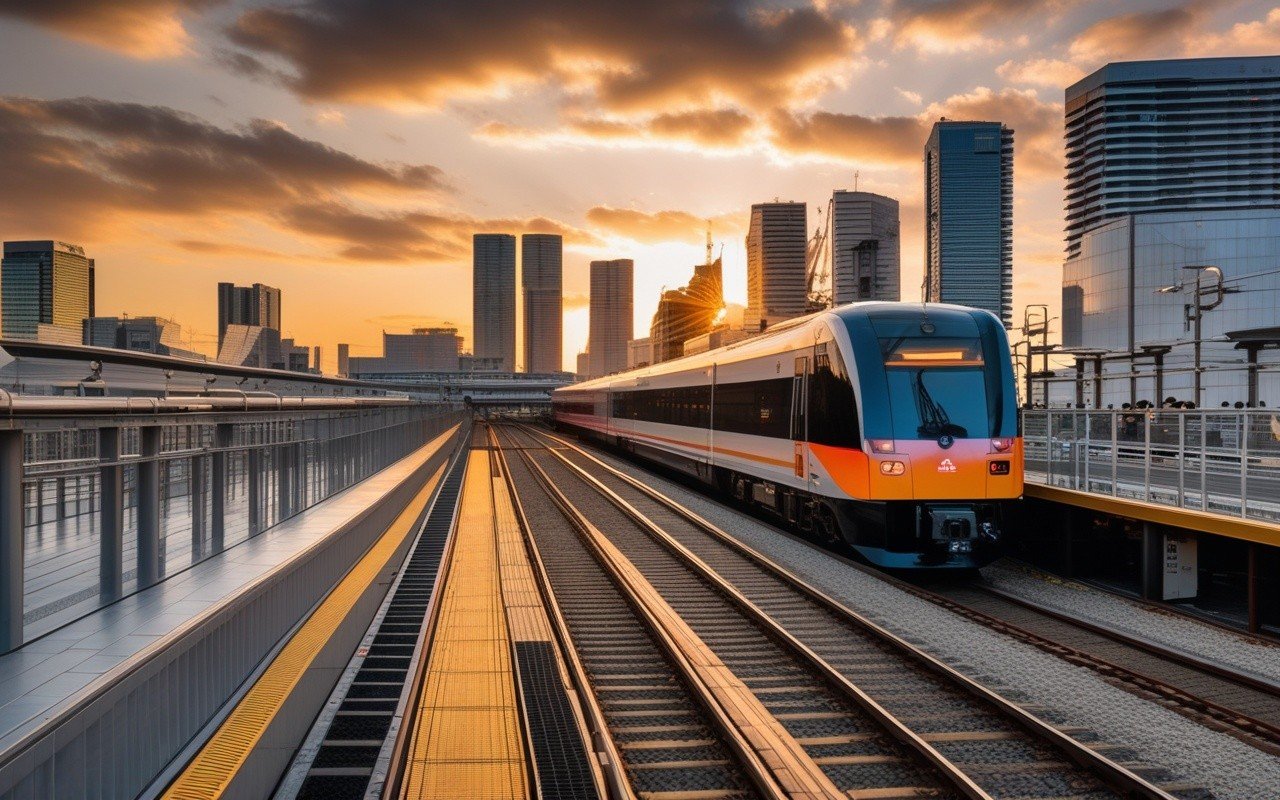
    Odakyu Romance Car Guide — main illustration

    Romance Car interior with comfortable seating

    The Romance Car operates on the Odakyu Odawara Line and Enoshima Line, connecting Shinjuku Station to major destinations in Kanagawa Prefecture.

    Main Routes

    Shinjuku to Hakone-Yumoto

    • Duration: Approximately 75 minutes
    • Distance: 82.5 km
    • Stops: Major stations including Machida, Hon-Atsugi, and Odawara
    • Best for: Hot spring resorts, mountain scenery

    Shinjuku to Katase-Enoshima

    • Duration: Approximately 65 minutes
    • Distance: 50.0 km
    • Stops: Direct service with limited stops
    • Best for: Beach access, Enoshima Island, aquarium

    Shinjuku to Odawara

    • Duration: Approximately 60 minutes
    • Distance: 82.5 km
    • Stops: Express service with limited stops
    • Best for: Odawara Castle, gateway to Hakone

    Seasonal Variations

    Spring (March-May)

    • Cherry blossom views along the route
    • Increased service during hanami season

    Summer (June-August)

    • Popular for day trips to Hakone
    • Beach-bound passengers to Enoshima
    • Extra services during Obon holidays
    • Air conditioning essential

    Autumn (September-November)

    • Fall foliage viewing from train windows
    • Comfortable temperatures for travel
    • Popular for Hakone hot springs

    Winter (December-February)

    • Clear views of Mount Fuji on sunny days
    • Fewer crowds, easier reservations
    • Cozy onboard atmosphere

    Train Types and Features

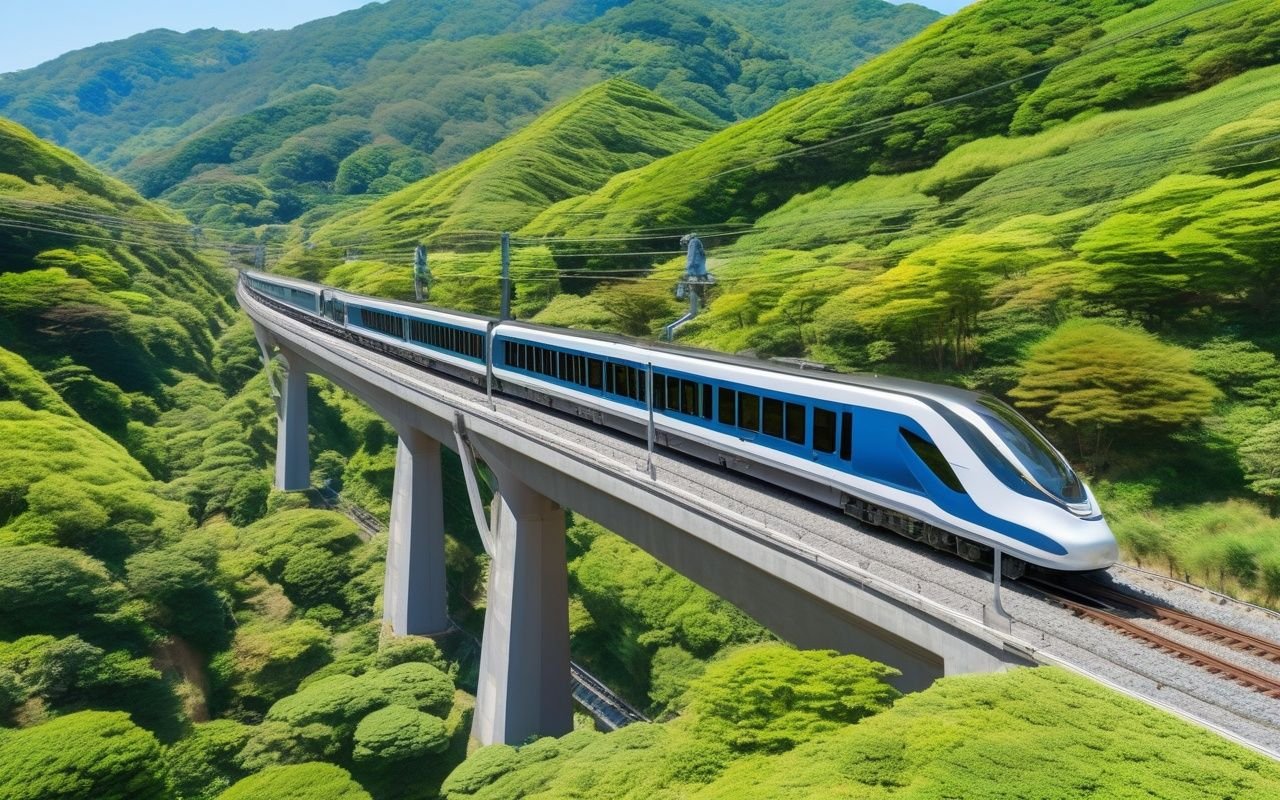
    Romance Car GSE panoramic front view

    GSE (70000 Series) – Graceful Super Express

    The GSE is the newest Romance Car, featuring a panoramic front view and modern design. Key Features:

    • Capacity: 468 seats across 6 cars
    • Length: 100 meters
    • Speed: Up to 110 km/h
    • Special Feature: Panoramic front observation seats (first car)

    Onboard Amenities:

    • Reclining seats with leg rests
    • AC power outlets at every seat
    • Free Wi-Fi
    • Restrooms in cars 2, 4, and 6
    • Vending machines for drinks Best For:
    • Scenic views (front observation seats)
    • Comfortable long-distance travel
    • Photography enthusiasts

    MSE (60000 Series) – Multi Super Express

    The MSE offers through-service to Tokyo Metro lines, convenient for passengers from central Tokyo. Key Features:

    • Capacity: 402 seats across 6 cars
    • Length: 100 meters
    • Speed: Up to 110 km/h
    • Special Feature: Direct access to Tokyo Metro Chiyoda Line

    Onboard Amenities:

    • Reclining seats with tray tables
    • AC power outlets at window seats
    • Free Wi-Fi
    • Restrooms in cars 2 and 5
    • Luggage storage areas Best For:
    • Passengers from Tokyo Metro lines
    • Business travelers
    • Convenient transfers

    VSE (50000 Series) – Vista Super Express (Retired)

    The VSE was the iconic double-decker Romance Car, retired in 2022 but fondly remembered. Historical Note:

    • Service Period: 1996-2022
    • Special Feature: Double-decker observation car
    • Legacy: Inspired current GSE design

    Reservation Methods

    Ticket vending machine at Shinjuku Station

    Online Reservation

    Odakyu Official Website:

    1. Visit the Odakyu Romance Car reservation page
    2. Select departure station, destination, and date
    3. Choose train type and departure time
    4. Select seats from the seat map
    5. Complete payment with credit card Payment Methods:
    • Credit cards (Visa, Mastercard, JCB, AMEX)
    • Some foreign-issued cards accepted
    • Payment confirmation via email

    Advance Booking:

    • Reservations open 1 month in advance
    • Popular dates fill quickly (weekends, holidays)
    • Same-day reservations possible if seats available

    Station Counter Reservation

    Major Stations:

    • Shinjuku Station (Odakyu Sightseeing Service Center)
    • Machida Station
    • Hon-Atsugi Station
    • Odawara Station Process:
    1. Visit the ticket counter or vending machine
    2. Request Romance Car tickets
    3. Specify train type, date, and time
    4. Pay with cash or card
    5. Receive printed tickets Language Support:
    • English-speaking staff at Shinjuku
    • Multilingual vending machines
    • Translation apps recommended

    Vending Machine Reservation

    Available At:

    • All major Odakyu stations
    • Some convenience stores Process:
    1. Select “Limited Express” on screen
    2. Choose English language
    3. Select route and date
    4. Choose seats from display
    5. Insert payment
    6. Collect tickets

    Pricing and Tickets

    Base Fare + Limited Express Fee

    Shinjuku to Hakone-Yumoto:

    • Base Fare: 1,140 yen
    • Limited Express Fee: 1,230 yen
    • Total: 2,370 yen (one way)

    Shinjuku to Katase-Enoshima:

    • Base Fare: 970 yen
    • Limited Express Fee: 1,030 yen
    • Total: 2,000 yen (one way)

    Shinjuku to Odawara:

    • Base Fare: 1,140 yen
    • Limited Express Fee: 1,230 yen
    • Total: 2,370 yen (one way)

    Discount Passes

    *Hakone Free PaPass

    • Includes round-trip Romance Car from Shinjuku
    • Unlimited transport in Hakone area
    • Discounts at attractions and restaurants
    • Price: 6,100 yen (2 days), 6,500 yen (3 days)

    Enoshima-Kamakura Free Pass:

    • Includes round-trip Romance Car from Shinjuku
    • Unlimited transport in Enoshima/Kamakura
    • Discounts at temples and shops
    • Price: 3,000 yen (1 day)

    Odakyu Rail Pass (for foreign visitors):

    • Discounted Romance Car tickets
    • Available at travel agencies abroad
    • Valid for 14 days from purchase

    Onboard Experience

    Seating Comfort

    Seat Specifications:

    • Width: 460 mm (wider than regular trains)
    • Pitch: 1,000 mm (generous legroom)
    • Recline: Up to 15 degrees
    • Features: Headrests, armrests, tray tables

    Seat Types:

    • Standard Seats: Comfortable reclining seats
    • Observation Seats: Front-row panoramic views (GSE only)
    • Group Seats: Some cars have facing seats

    Other Accessibility Features:

    • Priority seating for elderly and disabled
    • Visual and audio announcements
    • Braille signage in trains

    Luggage Storage

    Onboard Storage:

    • Overhead racks for small bags
    • Luggage areas at car ends
    • Maximum 2 large bags per passenger
    • No additional fee for luggage

    Size Limits:

    • Large bags: Up to 160 cm total dimensions
    • Small bags: Fit in overhead racks
    • Oversized items: Contact Odakyu in advance

    Tips

    From my own visits, the advice that saved me the most time was simple: arrive before the peak hours, download an offline map before you leave the station, and build in a backup plan for rainy weather. Many spots in Kanagawa get busy by mid-morning, so an early start usually means shorter queues and better photos.

    Conclusion

    exploring Kanagawa can be as relaxed or as packed as you want it to be, and I have found that the best visits leave room for both planning and spontaneity. During my visit I went with a rough plan and found that leaving room to wander made the trip far more memorable. Use this guide to sort out the logistics in advance, then let the day surprise you — Kanagawa rewards travelers who stay curious.

  • Hakone Tozan Railway Guide 2026

    Hakone Tozan Railway Guide 2026

    Hakone Tozan Railway Guide 2026 — the mountain railway from Hakone-Yumoto to Gora, with fares, timetables, and how it fits into the full Hakone circuit.

    Overview

    During my ride up the Tozan Railway, I found the switchback section between Miyanoshita and Kowakidani the most memorable — the train reverses direction and the valley suddenly opens up behind you.

    This guide covers the Hakone Tozan Railway — the switchback mountain line climbing from Hakone-Yumoto to Gora — plus how it connects with the cable car, ropeway, and sightseeing boats that make up the classic Hakone loop. For most visitors the Tozan Railway is the scenic heart of a Hakone trip: a 40-minute ride through cedar forest with views that switch sides as the train zigzags uphill.

    Access: Location and Routes


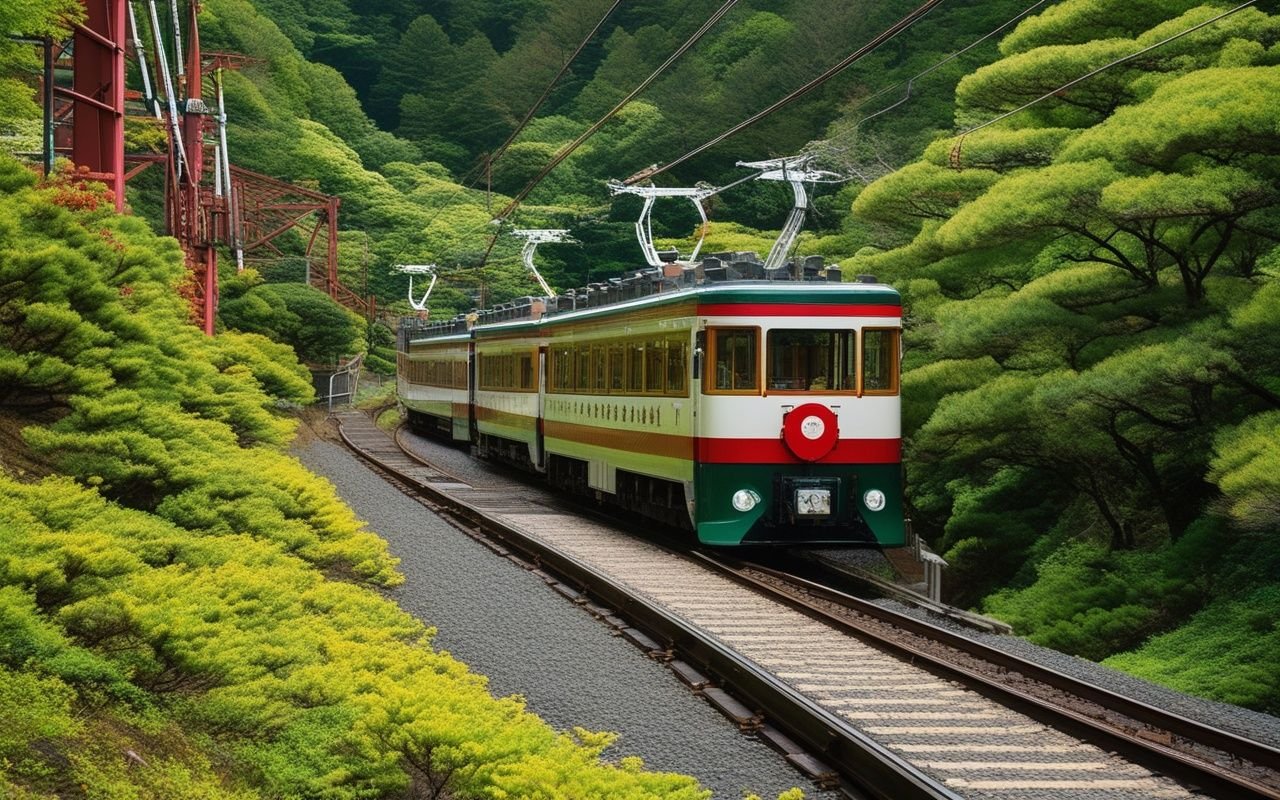
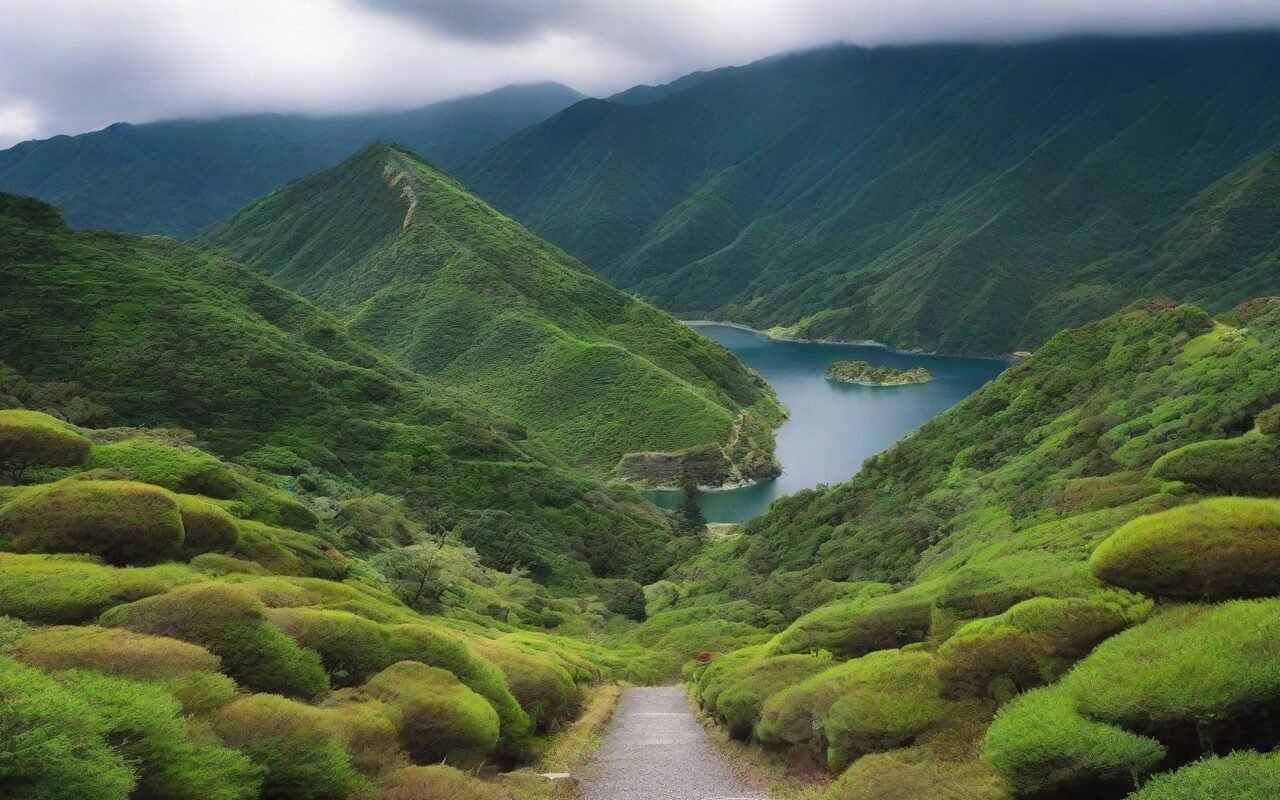
    Hakone Tozan Railway Guide — main illustration

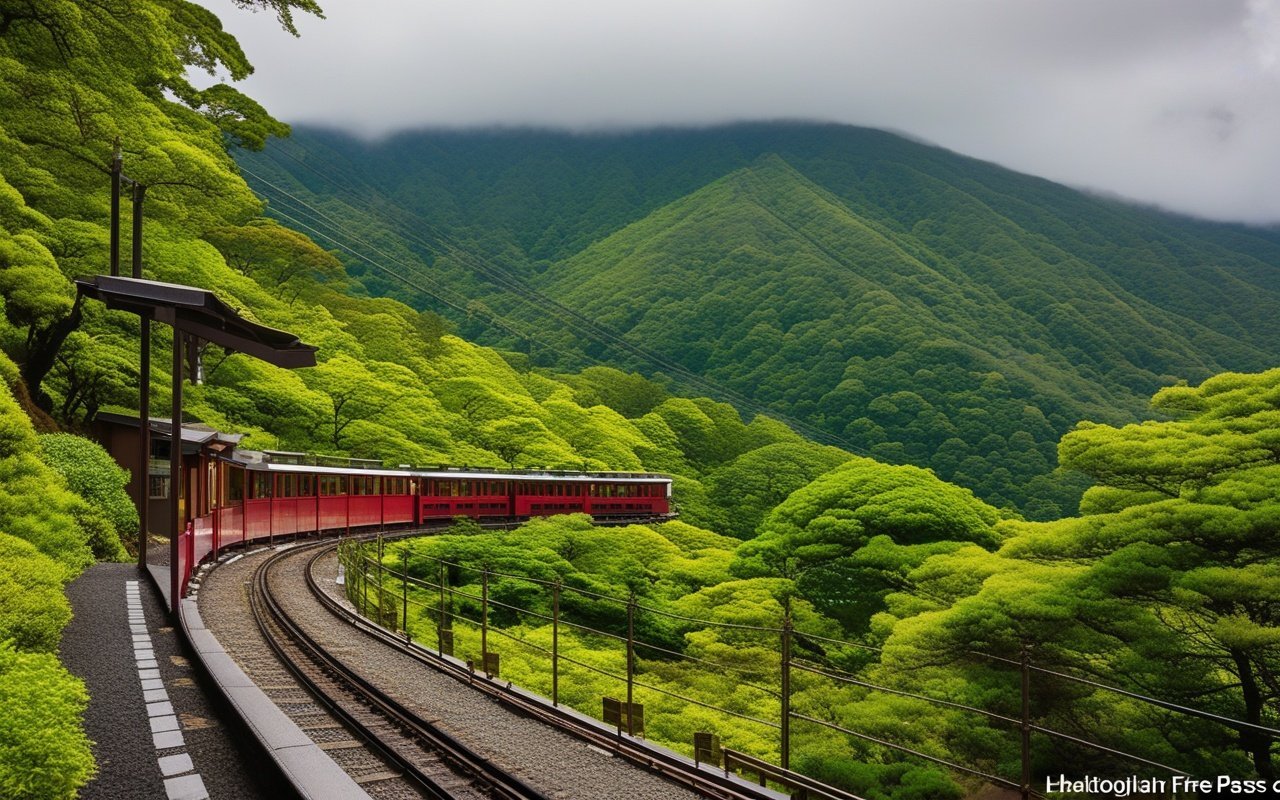
    Hakone Tozan Railway — Location and Routes Hakone Tozan Railway — switchback climb through cedar forest

    The Hakone transport network consists of three interconnected systems covering the mountainous Hakone area.

    Hakone Tozan Railway

    Route: Hakone-Yumoto to Gora, about 15 km, 19 stations, roughly 40 minutes.

    • Key stations: Hakone-Yumoto (gateway town), Miyanoshita (ryokan district), Kowakidani, Chokoku-no-mori (Open-Air Museum), Gora
    • Fare: Hakone-Yumoto to Gora ¥420 (adult) one-way; IC cards accepted
    • Experience: the line climbs with switchbacks — the train reverses direction twice; sit on the left side from Hakone-Yumoto for the mountain views

    From Gora onward

    • Cable car: Gora to Sounzan, 9 minutes, ¥310 — the steep funicular with valley views
    • Ropeway: Sounzan to Togendai via Owakudani, about 30 minutes, ¥1,330 — the volcano valley and Mount Fuji views
    • Sightseeing boat: Togendai across Lake Ashi to Moto-Hakone / Hakone-machi, 30-40 minutes, ¥1,000 (one-way)

    Passes

    • Hakone Free Pass: 2-day ¥6,100 / 3-day ¥6,500 from Shinjuku (includes Odakyu Line round trip) — covers the railway, cable car, ropeway, and boat with unlimited rides
    • Hakone Freepass without rail travel from Shinjuku: local versions cover only the Hakone area transport
    • Best for: anyone doing the full circuit — the pass pays for itself after the ropeway + boat combination

    Model Course: The Classic Hakone Loop

    Duration: Full day

    Itinerary:

    1. Start at Hakone-Yumoto in the morning; ride the Tozan Railway to Gora (¥420 or Free Pass)
    2. Optional: step off at Chokoku-no-mori for the Hakone Open-Air Museum (1-2 hours)
    3. Take the cable car Gora → Sounzan, then the ropeway Sounzan → Togendai, stopping at Owakudani for black eggs and Fuji views
    4. Board the sightseeing boat across Lake Ashi to Moto-Hakone
    5. Visit Hakone Shrine’s torii in the lake, then take the local bus or Hakone Tozan Bus back to Hakone-Yumoto

    Seasonal Notes

    • Spring/Autumn: foliage along the railway is the highlight; trains can be packed on weekend afternoons — board at Hakone-Yumoto early
    • Summer: cooler than Tokyo but the ropeway can pause for wind or volcanic gas; check the official status page before heading up
    • Winter: clear days mean the best Mount Fuji views; rare snow can briefly suspend the railway — have the bus as backup

    Tips

    Board the first car from Hakone-Yumoto for the driver’s view on the switchbacks. The Open-Air Museum deserves its own stop — it is the easiest 1-2 hours on the route. If you only want the railway and not the ropeway, a one-way ticket plus a bus back via the Hakone Tozan Bus (same operator) costs less than the Free Pass. Check the official timetable page for the last train (about 21:00 from Gora in summer); the ropeway ends earlier, around 17:00. In heavy rain the railway runs but views vanish — save the ride for a clear morning.

    Getting to Hakone-Yumoto

    • Odakyu Romancecar: Shinjuku to Hakone-Yumoto in about 85 minutes (¥1,450 + limited express surcharge); reserved seat, scenic windows, and the easiest option
    • Odakyu express: about 100 minutes, around ¥1,200; no reservation needed, but slower
    • Shinkansen + bus: Tokyo to Odawara by Tokaido Shinkansen (about 35 minutes), then the Hakone Tozan Bus to Hakone-Yumoto (15 minutes) — fast but costs more
    • Highway bus: Shinjuku to Hakone-Yumoto about 2.5 hours, around ¥2,050; useful when the Romancecar is sold out

    The Switchback Ride

    The Tozan Railway’s signature is its three switchbacks — the train reverses direction twice as it climbs, with the front car becoming the rear and the view swapping sides. Board the first car at Hakone-Yumoto for the driver’s perspective. In spring, the hydrangea season (June) turns the trackside into a tunnel of blue flowers; in autumn the maple foliage is the draw. The “Train de Montagne” and retro red trains run seasonally — check the operator’s schedule for themed services.

    Stations Worth Getting Off At

    • Chokoku-no-mori: the Hakone Open-Air Museum — sculpture garden, Picasso pavilion, and foot-bath viewpoints; allow 1-2 hours
    • Miyanoshita: the ryokan district — a short stroll from the station, with boutique shops and the historic Fujiya Hotel nearby
    • Kowakidani: access to the Hakone Kowakien Yunessun and hot-spring facilities
    • Gora: the terminus and the transfer point for the cable car to Sounzan

    FAQ

    Q: Do IC cards work on the Tozan Railway? A: Yes — Suica and PASMO are accepted on the railway, cable car, and bus; the ropeway uses ticket gates with paper or pass tickets.

    Q: Is the Hakone Free Pass worth it for a one-day trip? A: If you ride the ropeway and boat as well, yes — the ¥6,100 two-day pass from Shinjuku usually beats paying separately. If you only want the railway, buy single tickets.

    Q: What happens when the ropeway stops for volcanic gas? A: The railway and cable car still run; the boat and buses cover the lake section. Check the official “Hakone Navi” status page before your trip.

    History of the Line

    The Hakone Tozan Railway opened in 1919 as the first mountain railway in Japan, built to bring visitors from the hot-spring town of Hakone-Yumoto up to the resorts around Gora. The line’s steepest section reaches 8.9% — too steep for a straight climb, which is why the engineers used switchbacks: the train shunts forward, reverses, and climbs again, a design that still delights passengers a century later. The original wooden stations and signal huts survive in places, and the operator restored classic car types for seasonal services.

    Trains to Watch For

    • Train de Montagne: the French-style observation car with big windows and café seating — runs on select dates; book seats early
    • Red retro train: the 1920s-style red cars run in peak foliage and spring seasons
    • Hydrangea train (ajisai-go): June service timed for the trackside hydrangea tunnel between Hakone-Yumoto and Gora

    Scenic Highlights Along the Line

    • Hakone-Yumoto to Miyanoshita: the switchback section — the train reverses with the valley opening up behind you
    • Miyanoshita to Kowakidani: deep forest running and the first glimpses of the Owakudani steam vents on clear days
    • Kowakidani to Chokoku-no-mori: the most open section — mountain views and, in autumn, the best foliage of the ride
    • Chokoku-no-mori to Gora: the final climb past the Open-Air Museum’s outdoor sculptures

    Conclusion

    The Hakone Tozan Railway is more than a way to get up the mountain — the switchback climb, forest views, and retro trains make the ride itself the highlight of the Hakone loop. Plan for the full circuit with a Free Pass, ride early to beat the crowds, and give yourself time to step off at stations like Chokoku-no-mori. The railway rewards travelers who slow down and enjoy the journey.

    FAQ (continued)

    Q: How often do trains run? A: Every 15-30 minutes through the day, with the first train around 06:00 and the last around 21:00 from Gora (slightly later in summer).

    Q: Can I see Mount Fuji from the train? A: On clear days, yes — the best views are between Kowakidani and Chokoku-no-mori in winter, when the air is clearest.

    Q: Is the railway wheelchair accessible? A: Hakone-Yumoto and Gora have elevator access and staff assistance; the intermediate stations are steps-only — plan around the two terminal stations for mobility needs.

  • How To Get To Hakone From Tokyo 2026

    How To Get To Hakone From Tokyo 2026

    Overview

    📍 Locationnn


    The Odawara area serves as the main gateway to Hakone with excellent transport connections. Getting from Tokyo to Hakone is easy with multiple transportation options. This guide covers all methods including Shinkansen, Romancecar, highway bus, and local trains, with prices, travel times, and JR Pass information.

    Quick Comparison

    Method Time Price JR Pass Best For
    Shinkansen 45 min ¥4,000 Speed, JR Pass holders

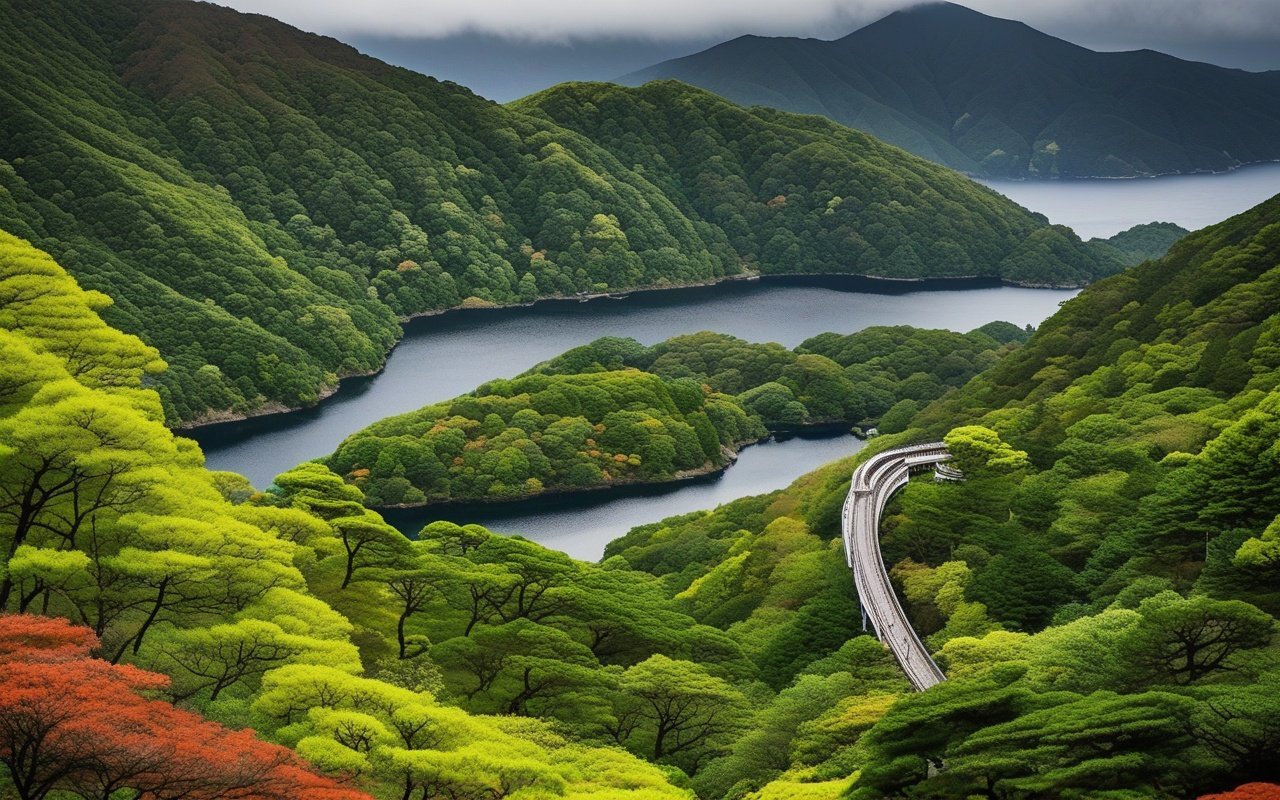
    How To Get To Hakone From Tokyo — main illustration

    <img src="https://anabaoffjapan.com/wp-content/uploads/images/articles/how-to-get-to-hakone-from-tokyo-sub5.jpg" alt="How To Get To Hakone From Tokyo — scenic view of Kanagawa'sKanagawatips attractions” />
    How To Get To Hakone From Tokyo scenery and attractions

    | Romancecar | 85 min | ¥2,000 | ❌ | Comfort, direct access |
    | Highway Bus | 90 min | ¥1,800 | ❌ | Budget travelers |
    | Local Train | 90 min | ¥1,200 | ✅ | Budget, JR Pass holders |

    Shinkansen Route

    Tokyo Station → Odawara Station → Hakone-Yumoto

    Shinkansen Details

    • Total Time: 45-60 minutes
    • Total Cost: ¥4,000 (unreserved seat)
    • JR Pass: ✅ Covered (Tokyo-Odawara)
    • Frequency: Every 10-15 minutes

    Shinkansen Step-by-Step

    1. Tokyo Station → Odawara Station

      • Shinkansen (Kodama, Hikari, Nozomi)
      • 35 minutes
      • ¥3,960 (covered by JR Pass)
    2. Odawara Station → Hakone-Yumoto

    Shinkansen Pros

    • ✅ Fastest option
    • ✅ Covered by JR Pass
    • ✅ Frequent departures
    • ✅ Comfortable seats

    Shinkansen Cons

    • ❌ Most expensive (without JR Pass)
    • ❌ Need to transfer at Odawara
    • ❌ Nozomi not covered by JR Pass

    Shinkansen Tips

    • Reserve seats during peak season (autumn, New Year)
    • Use JR Pass for best value
    • Buy Hakone Free Pass at Odawara Station

    Romancecar Route

    Shinjuku Station → Hakone-Yumoto Station

    Romancecar Details

    • Total Time: 85 minutes
    • Total Cost: ¥2,000 (reserved seat)
    • JR Pass: ❌ Not covered
    • Frequency: Every 30-60 minutes

    Romancecar Step-by-Step

    1. Shinjuku Station → Hakone-Yumoto
      • Odakyu Romancecar (direct)
      • 85 minutes
      • ¥1,990 (reserved seat)
      • ¥1,230 (unreserved seat, some trains)

    Romancecar Pros

    • ✅ Direct (no transfers)
    • ✅ Comfortable reserved seats
    • ✅ Scenic route
    • ✅ Luggage storage available

    Romancecar Cons

    • ❌ Not covered by JR Pass
    • ❌ Slower than Shinkansen
    • ❌ Need to reserve seats

    Romancecar Tips

    • Book online in advance (especially weekends)
    • Choose “GSE” train for best views
    • Arrive 10 min early for boarding

    Highway Bus Route

    Highway Bus Details

    • Total Time: 90 minutes
    • Total Cost: ¥1,800
    • JR Pass: ❌ Not covered
    • Frequency: Every 30-60 minutes

    Highway Bus Step-by-Step

    1. Shinjuku Expressway Bus Terminal → Hakone-Yumoto
      • Highway Bus (Odakyu Hakone Bus)
      • 90 minutes
      • ¥1,800

    Highway Bus Pros

    • ✅ Budget-friendly
    • ✅ Direct (no transfers)
    • ✅ Luggage storage
    • ✅ Comfortable seats

    Highway Bus Cons

    • ❌ Slowest option
    • ❌ Traffic delays possible
    • ❌ Not covered by JR Pass
    • ❌ Limited frequency

    Highway Bus Tips

    • Book online for guaranteed seat
    • Avoid rush hour (7-9 AM, 5-7 PM)
    • Check traffic before departure

    Local Train Route

    Tokyo/Shinjuku → Odawara → Hakone-Yumoto

    Local Train Details

    • Total Time: 90 minutes
    • Total Cost: ¥1,200
    • JR Pass: ✅ Covered (Tokyo-Odawara)
    • Frequency: Every 10-15 minutes

    Local Train Step-by-Step

    1. Tokyo/Shinjuku → Odawara

      • JR Tokaido Line (rapid)
      • 60-75 minutes
      • ¥840 (covered by JR Pass)
    2. Odawara → Hakone-Yumoto

      • Hakone Tozan Railway
      • 15 minutes
      • ¥340 (not covered by JR Pass)

    Local Train Pros

    • ✅ Cheapest option
    • ✅ Covered by JR Pass (most)
    • ✅ Frequent departures
    • ✅ No reservation needed

    Local Train Cons

    • ❌ Slow (multiple stops)
    • ❌ Can be crowded
    • ❌ Need to transfer
    • ❌ Less comfortable

    Local Train Tips

    • Use rapid trains (skip local trains)
    • Avoid rush hour (very crowded)
    • Sit near front (easier transfer)

    What Is It?

    Unlimited transportation in Hakone for 2-3 days

    Where to Buy

    Location Price (Adult) Includes
    Shinjuku ¥6,100 (2 days) Round-trip + Hakone transport
    Odawara ¥5,140 (2 days) Hakone transport only
    Tokyo ¥6,100 (2 days) Round-trip + Hakone transport

    What’s Included

    • ✅ Round-trip from Tokyo (if bought at Shinjuku/Tokyo)
    • ✅ Hakone Tozan Railway
    • ✅ Cable Car & Ropeway
    • ✅ Pirate Ships (Lake Ashi)
    • ✅ Local Buses
    • ✅ Discounts at 70+ facilities

    Is It Worth It?

    Yes, if you plan to:

    • Visit 3+ attractions in Hakone
    • Use multiple transportation types
    • Stay 2+ days in Hakone

    No, if you:

    • Only visiting 1-2 attractions
    • Have JR Pass (covers most transport)
    • Day trip from Tokyo

    From Tokyo Station

    Best Option: Shinkansen (45 min, ¥4,000)

    1. Tokyo → Odawara (Shinkansen)
    2. Odawara → Hakone-Yumoto (Hakone Tozan Railway)

    From Shinjuku Station

    Best Option: Romancecar (85 min, ¥2,000)

    1. Shinjuku → Hakone-Yumoto (direct Romancecar)

    From Shibuya Station

    Best Option: Shinkansen (55 min, ¥4,000)

    1. Shibuya → Tokyo (JR Yamanote Line, 15 min)
    2. Tokyo → Odawara (Shinkansen, 35 min)
    3. Odawara → Hakone-Yumoto (Hakone Tozan Railway, 15 min)

    From Ueno Station

    Best Option: Shinkansen (50 min, ¥4,000)

    1. Ueno → Tokyo (JR Yamanote Line, 5 min)
    2. Tokyo → Odawara (Shinkansen, 35 min)
    3. Odawara → Hakone-Yumoto (Hakone Tozan Railway, 15 min)

    Covered Routes

    • ✅ Tokyo → Odawara (Shinkansen)
    • ✅ Shinjuku → Odawara (JR Shonan-Shinjuku Line)
    • ✅ Tokyo → Odawara (JR Tokaido Line)

    Not Covered

    • ❌ Romancecar (Odakyu Line)
    • ❌ Highway Bus
    • ❌ Hakone Tozan Railway (Odawara-Hakone-Yumoto)
    • ❌ Hakone Free Pass transportation

    Best Strategy with JR Pass

    1. Use JR Pass for Tokyo-Odawara
    2. Buy Hakone Free Pass at Odawara Station (¥5,140)
    3. Total Cost: ¥5,140 (2 days Hakone transport)

    Luggage

    • Shinkansen: Large luggage storage (reserve required)
    • Romancecar: Luggage area available
    • Bus: Under-bus storage
    • Local Train: Overhead racks (limited space)

    Peak Seasons

    Avoid if possible:

    • New Year (Dec 29 – Jan 3)
    • Golden Week (Apr 29 – May 5)
    • Autumn foliage (Nov)
    • Weekends (especially Saturday morning)

    Best Times to Travel

    • Best: Tuesday-Thursday, 10:00-15:00
    • Good: Monday, Friday (mid-day)
    • Avoid: Saturday 7:00-10:00, Sunday 16:00-19:00

    Booking in Advance

    Reserve for:

    • Shinkansen (peak season)
    • Romancecar (always, especially weekends)
    • Highway Bus (weekends, holidays) No reservation needed:
    • Local Train (anytime)
    • Shinkansen (off-peak, unreserved seats)

    How To Get To Hakone From Tokyo detailed view and features


    🚄 Hakone Free Pass: Detailed Breakdown

    Feature 2-Day Pass (Shinjuku Start) 2-Day Pass (Odawara Start) 3-Day Pass
    Price (Adult) ¥6,100 ¥5,140 ¥5,640 (Odawara start)
    Price (Child) ¥1,300 ¥1,030 ¥1,130
    Round-trip transport ✅ Shinjuku ↔ Hakone-Yumoto ❌ Not included ✅ (Shinjuku start only)
    Hakone Tozan Railway ✅ Unlimited ✅ Unlimited ✅ Unlimited
    Hakone Cable Car ✅ Unlimited ✅ Unlimited ✅ Unlimited
    Hakone Ropeway ✅ Unlimited ✅ Unlimited ✅ Unlimited
    Sightseeing Cruise ✅ Unlimited ✅ Unlimited ✅ Unlimited
    Local Buses ✅ Unlimited ✅ Unlimited ✅ Unlimited
    Discounts 70+ facilities (10-20% off) 70+ facilities 70+ facilities

    Is the Hakone Free Pass Worth It?

    YES, if you:

    • Plan to take the round trip from Shinjuku (¥2,470 each way = ¥4,940 already)
    • Will ride the ropeway (¥1,800 one way)
    • Want to take the Lake Ashi cruise (¥1,000 one way)
    • Stay 2+ days and use local buses (¥500-1,000/day)

    Total value of individual tickets: ¥4,940 (round trip) + ¥1,800 (ropeway) + ¥1,000 (cruise) + ¥1,000 (buses) = ¥8,740
    Hakone Free Pass: ¥6,100 — Savings of ¥2,640 (30%)

    NO, if you:

    • Have a JR Pass (covers Tokyo→Odawara for free)
    • Are only doing a quick day trip to one area
    • Don’t plan to use the ropeway or cruise

    In that case, buy the Odawara-start Free Pass (¥5,140) and use the JR Pass for Tokyo→Odawara. Total: ¥5,140 vs. ¥6,100.

    Where to Purchase

    Location Counter Hours Language Support
    Shinjuku Station (Odakyu) Odakyu Sightseeing Service Center (West Exit) 8:00 AM-6:00 PM English, Chinese, Korean
    Tokyo Station (JR) JR Ticket Office (Marunouchi exit) 7:30 AM-8:00 PM English available
    Odawara Station Odakyu counter or Hakone Free Pass counter 6:00 AM-8:00 PM English available
    Online Official Hakone Navi website or Klook 24/7 English, print or mobile

    Pro tip: Buy online before you go to skip queues. The Odakyu counter at Shinjuku can have 20-30 minute waits during peak season (8-10 AM).

    🚌 Alternative: Direct Highway Bus from Shinjuku

    For budget-conscious travelers, the highway bus is the cheapest option:

    Detail Information
    Operator Odakyu Hakone Highway Bus
    From Shinjuku Expressway Bus Terminal (Busta Shinjuku)
    To Hakone-Yumoto Station
    Travel Time 90-110 minutes (depends on traffic)
    Cost ¥1,800 (adult) / ¥900 (child)
    Frequency Every 30-60 minutes (6:30 AM-7:00 PM)
    Reservation Required (online or at bus terminal)
    Luggage Under-bus storage included (free)

    Pros: Cheapest Tokyo→Hakone option at ¥1,800. Direct — no transfers. Comfortable reclining seats.
    Cons: 20-30 min longer than Romancecar. Traffic delays on weekends/holidays. Must reserve in advance. Best for: Budget travelers, backpackers, those staying near Shinjuku.

    🚃 Step-by-Step: Romancecar Booking Guide

    The Odakyu Romancecar is the most popular way to reach Hakone. Here’s exactly how to book:

    Online Booking (Recommended)

    1. Visit the Odakyu Romancecar reservation website (English available)
    2. Select date, departure station (Shinjuku), and destination (Hakone-Yumoto)
    3. Choose train time (85 min journey, departures every 30-60 min)
    4. Select seat type: ‘GSE’ (panoramic windows) or ‘MSE’ (standard)
    5. Pay by credit card (Visa, Mastercard, Amex accepted)
    6. Receive QR code — show at the ticket gate

    Seat recommendations:

    • GSE train: Forward-facing seats (rows 1-3) offer the best views of the Sagami River
    • Window side: Seat A (left) has river views early in the journey; Seat D (right) has mountain views later
    • Avoid seats near restrooms: Rows 7-8 near the restroom area — more foot traffic

    At the Station (Same Day)

    • Odakyu ticket counters at Shinjuku Station (West Exit)
    • Reserve for specific Romancecar departure (limited availability on weekends)
    • Payment: Cash or credit card
    • For non-reserved trains: Buy a ticket and queue at the platform (standing allowed if no seats)

    Romancecar Advice

    • Book 1-2 weeks ahead for weekends and holidays (seats sell out)
    • Same-day booking: Arrive at Shinjuku by 8 AM for the best availability
    • Luggage: Overhead racks are small (fits carry-on only). Large suitcases go in the luggage area at the front/rear of each car (first-come basis)
    • Food/drink: Buy ekiben (station bento) at Shinjuku before boarding — the Romancecar has tray tables but no food service
    • Toilets: Yes, onboard — one per car, Western-style

    Summary

    Traveler Type Best Option Cost Time
    JR Pass Holder Shinkansen ¥340* 45 min
    Budget Traveler Local Train ¥1,200 90 min
    Comfort Seeker Romancecar ¥2,000 85 min
    Speed Priority Shinkansen ¥4,000 45 min

    *Plus Hakone Tozan Railway (¥340) Recommended: For most tourists, the Hakone Free Pass from Shinjuku (¥6,100) offers the best value, including round-trip transportation and unlimited travel within Hakone.


    Related Articles:


    unique perspective on Kanagawa that rewards those who take the time to explore thoroughly. Whether you are here for a day or a week, the memories you create will stay with you long after you return home.

    Conclusion

    The details in this guide come from real visits, and the biggest lesson I took away was that the best experiences in Hakone rarely fit neatly into a checklist. During my visit to Hakone I went with a rough plan and found that leaving room to wander made the trip far more memorable. Plan the essentials, keep your schedule flexible, and you will leave Kanagawa wanting to return.

  • Yokohama Red Brick Guide – Kanagawa 2026

    Yokohama Red Brick Guide – Kanagawa 2026

    Overview

    Quick Links

    Planning a visit to experience Yokohama Red Brick Guide – Kanagawa 2026 in Kanagawa? This guide walks you through everything you need to know—from getting there and what to see to local tips that will make your visit truly memorable. Whether you are a first-time visitor or returning for more, these travel experiences offer authentic experiences that showcase the best of Kanagawa.

    📍 Location


    Introduction

    Yokohama Red Brick Guide - Kanagawa 2026 — Introduction

    Yokohama Red Brick Guide — main illustration

    Yokohama Red Brick Guide - Kanagawa 2026 — Introduction

    Yokohama Red Brick Warehouse (YokohamaRed Brick,Akarenga) is a historic landmark converted into a trendy shopping and dining complex, Built in the early 1900s, these warehouses now offer a unique blend of history and modern culture.

    Highlights:

    • Historic Meiji-era architecture
    • 40+ shops and restaurants
    • Regular events and markets
    • beautiful harbor views
    • Free admission

    Building History

    Built:

    • Building 1: 1911 (Meiji 44)
    • Building 2: 1913 (Taisho 2) Original Use: Customs warehouses for Yokohama Port Renovation: 2002 (converted to commercial complex) Architecture:
    • Red brick facade (imported from Germany)
    • Steel-reinforced concrete
    • Historic preservation award

    Building 1 (Events & Dining)

    Features:

    • Event hall
    • Restaurants with harbor views
    • Cafe terrace

    Building 2 (Shopping)

    Shops (40+):

    • Fashion boutiques
    • Lifestyle goods
    • Souvenir shops
    • Art galleries
    • Specialty food stores Popular Shops:
    • Yokohama souvenirs
    • Japanese crafts
    • Designer goods
    • Organic products

    Restaurants

    Japanese:

    • Sushi
    • Tempura
    • Ramen
    • Izakaya International:
    • Italian
    • French
    • American
    • Asian fusion

    Cafes

    Highlights:

    • Harbor view cafes
    • Specialty coffee
    • Dessert cafes
    • Tea rooms Price Range:
    • Lunch: ¥1,000-2,000
    • Dinner: ¥2,000-5,000
    • Cafe: ¥500-1,500

    Regular Events

    Weekends:

    • Flea markets
    • Food festivals
    • Live music
    • Craft workshops

    Seasonal Events

    Spring:

    • Cherry blossom festival
    • Spring market Summer:
    • Beer garden
    • Outdoor concerts Autumn:
    • Harvest festival
    • Art markets Winter:
    • Christmas market
    • Illuminations
    • New Year events

    By Train

    From Tokyo Station:

    1. JR Tokaido Line to Yokohama (30 min, ¥580)
    2. Minato Mirai Line to Bashamichi (5 min, ¥230)
    3. 5-minute walk

    From Shinjuku:

    1. JR Shonan-Shinjuku Line to Yokohama (45 min, ¥770)
    2. Minato Mirai Line to Bashamichi (5 min, ¥230)
    3. 5-minute walk

    By Bus

    From Yokohama Station:

    • Akai Kutsu Bus to Akarenga (15 min, ¥220)
    • 1-minute walk

    Minato Mirai (10 min walk)

    • Landmark Tower
    • Cosmo World
    • Shopping malls

    Chinatown (15 min walk)

    • Chinese restaurants
    • Temples
    • Souvenir shops

    Yamashita Park (5 min walk)

    • Harbor views
    • Walking paths
    • Photo spots

    Yokohama Red Brick Guide scenery and attractions


    Summary

    Yokohama Red Brick Warehouse offers a perfect blend of history and modern culture. Whether you’re interested in shopping, dining, or events, Akarenga has something for everyone.

    Key highlights:

    • Historic Meiji-era architecture
    • 40+ shops and restaurants
    • Regular events and markets
    • beautiful harbor views
    • Free admission

    🚉 Getting Around Like a Local

    Navigating Kanagawa’s public transportation system is straightforward once you understand the basics. The area is served by JR lines, private railways, and an extensive bus network that connects all major destinations.

    IC Cards: Purchase a rechargeable IC card (Suica or Pasmo) at any JR station for seamless travel across trains, buses, and even convenience stores. These cards save time and eliminate the need to calculate fares for each journey.

    Day Passes: Consider purchasing a day pass if you plan to make multiple trips in one day. Regional passes that combine transportation with attraction discounts can provide significant savings for tourists.

    Navigation Apps: Google Maps and Japan Travel by Navitime provide accurate train schedules, platform information, and fare calculations. Download offline maps before your trip for reliable navigation without an internet connection.

    Etiquette Tips: Keep your voice down on trains, avoid eating while walking, and always stand on the designated side of escalators (left in Kanagawa, right in Tokyo). Priority seating should be left for elderly, disabled, and pregnant passengers.

    🗓️ Sample Itinerary

    Half-Day Visit (3-4 hours):

    • Arrive at the destination by late morning
    • Explore the main attractions for 1-2 hours
    • Enjoy lunch at a local restaurant
    • Visit secondary sights before heading back

    Full-Day Visit (6-8 hours):

    • Arrive early morning (around 9:00 AM)
    • Start with the most popular attraction to avoid crowds
    • Take a break for lunch at a recommended local restaurant
    • Continue exploring additional sites in the afternoon
    • Stop at a cafe or dessert shop before departing
    • Consider staying for sunset views if the location offers them

    With Nearby Attractions (add 2-3 hours):

    • Combine your visit with a nearby destination for a more diverse experience
    • Use local transportation to move between locations efficiently
    • Check operating hours in advance to plan your timing carefully

    Rainy Day Alternative:

    • Focus on indoor attractions such as museums, aquariums, and shopping centers
    • Visit covered shopping arcades and traditional market streets
    • Consider a cooking class or craft workshop as an indoor activity
    • Check if your destination has indoor alternative activities available

    🚃 Nearby Destinations

    This area’s location makes it an excellent base or stopover for exploring other parts of Kanagawa. Here are some nearby destinations worth considering for your itinerary:

    Within 30 Minutes by Train: Several popular destinations are within easy reach, making it possible to visit multiple locations in a single day. Check train schedules to optimize your route and minimize travel time between stops.

    Within 60 Minutes by Train: A wider range of attractions becomes accessible within an hour of travel, including major cities, coastal areas, and cultural landmarks. Consider dedicating separate days for destinations further away.

    Day Trip Combinations: Popular day trip combinations include pairing this destination with nearby beaches, temples, shopping districts, or nature parks. Group attractions geographically to minimize backtracking and travel time.

    Multi-Day Exploration: For visitors with more time, consider extending your stay to explore the wider Kanagawa region. Many travelers find that 3-5 days allows for a comfortable pace covering the main highlights without feeling rushed.
    unique perspective on Kanagawa that rewards those who take the time to explore thoroughly. Whether you are here for a day or a week, the memories you create will stay with you long after you return home.

    Is admission free?

    A. Yes, entry to the complex is free.

    Are shops open on holidays?

    A. Yes, but hours may vary. Check website.

    Is there parking?

    A. Yes, paid parking available (¥300/hour).


    Last Updated: March (this year)
    Written by: Anaba OffJapan Editorial Team


    Anaba OffJapan – Avoid the Crowds, Go Deeper into Japan.

    Frequently Asked Questions

    Q: How much time should I allocate for this area?
    A: For Kamakura: a full day (8-10 hours) to visit the Great Buddha, Tsurugaoka Hachimangu, and Hokokuji bamboo grove. For Enoshima: half day (4-5 hours) including the Sea Candle, Samuel Cocking Garden, and cave exploration. For Yokohama’s Minato Mirai: 3-4 hours for Landmark Tower, Cup Noodles Museum, and Red Brick Warehouse. For Hakone: minimum 2 days to enjoy the Loop and onsen.

    Q: What are the must-see attractions in this area?
    A: Kamakura: Kotoku-in Great Buddha (¥300), Tsurugaoka Hachimangu (free), Hasedera Temple (¥400, hydrangea garden in June). Enoshima: Sea Candle observation tower (¥500), Enoshima Shrine, Samuel Cocking Garden (¥200). Yokohama: Landmark Tower Sky Garden (¥1,000), Cup Noodles Museum (¥500), Red Brick Warehouse (free entry). Hakone: Open-Air Museum (¥1,800), Hakone Ropeway, Pirate Ship cruise.

    Q: Are there combo tickets or discounts available?
    A: Many attractions offer discount passes. The Hakone Free Pass includes discounted admission to 40+ attractions. Yokohama’s Klook Pass Greater Tokyo bundles top sights at up to 30% off. Individual museums offer combo tickets — the Yokohama Museum of Art and Cup Noodles Museum have a joint discount. Always check official websites before purchasing separate tickets.

    Q: What is the best time of day to visit popular spots?
    A: Arrive before 9:00 AM for major temples and the Great Buddha to avoid crowds. The Hakone Ropeway is best in the morning (clearer views of Mount Fuji). Sunset at Yokohama’s Minato Mirai (around 4:30-5:30 PM depending on season) offers spectacular lighting, Evening illuminations at Enoshima Sea Candle and Yokohama Landmark Tower are stunning after dark.

    Q: Are there guided tours in English available?
    A: Yes, several options exist. Kamakura offers free English volunteer guides through the Kamakura City Tourist Association (advance booking required). Hakone has official English audio guides at major attractions. Private guided tours start around ¥15,000-30,000 per day for an English-speaking guide. Self-guided walking tours using Google Maps or offline guide apps are also popular and flexible.

    Yokohama Red Brick Guide – Kanagawa 2026 provides everything you need to make your Kanagawa trip smooth and enjoyable. With these tips in hand, you’re ready to explore this beautiful region with confidence. Safe travels!


    What Locals Say

    We spoke with residents and frequent visitors to get their honest opinions about Yokohama Red Brick Warehouse Guide: Akarenga Complete Guide:

    Tanaka-san, Local Resident (15 years):

    “This place has been part of our community for generations. The best time to visit is early morning when the crowds are thin and the light is perfect for photography. Don’t miss the hidden spots that most tourists overlook.”

    Yamamoto-san, Tour Guide (10 years experience):

    “I bring visitors here regularly. The key to enjoying Yokohama Red Brick Warehouse Guide: Akarenga Complete Guide is to take your time. Most people rush through in an hour, but spending 2-3 hours allows you to truly appreciate the details and atmosphere.”

    Suzuki-san, Photographer:

    “For the best photos, visit during golden hour. The way the light hits [the main feature] creates magical moments. Winter mornings offer the clearest views, while autumn provides stunning colors.”

    Conclusion

    exploring Yokohama can be as relaxed or as packed as you want it to be, and I have found that the best visits leave room for both planning and spontaneity. During my visit to Yokohama I went with a rough plan and found that leaving room to wander made the trip far more memorable. Use this guide to sort out the logistics in advance, then let the day surprise you — Kanagawa rewards travelers who stay curious.

  • Enoden Unlimited Guide – Kanagawa 2026

    Enoden Unlimited Guide – Kanagawa 2026

    Overview

    Enoden Unlimited Pass — Is It Worth It?

    The Enoden offers a one-day unlimited ride pass (のりおりくん) that allows unlimited hopping on and off at all 15 stations along the line.

    Price: ¥610 for adults, ¥310 for children (ages 6–12)
    Where to buy: Ticket machines at Kamakura Station, Fujisawa Station, and Enoshima Station
    Validity: Full day (until the last train, approximately midnight)
    Savings comparison: A single ride costs ¥150–¥310 depending on distance. If you plan to get off at 4+ stops, the pass pays for itself.

    When it is worth it: If you are following a multi-stop itinerary — for example, Kamakura Station → Hase (Great Buddha) → Inamuragasaki (viewpoint) → Enoshima (aquarium and island) → Kamakura Station — the pass saves money and eliminates the hassle of buying individual tickets at each stop.

    When individual tickets are better: If you are only going to one destination (e.g., Kamakura to Enoshima and back), individual tickets cost ¥600 round trip — barely less than the pass, so the pass is still convenient.

    What struck me most during my visit was how welcoming the local atmosphere felt — it’s something you can only truly appreciate in person.

    The 15 Stations — Highlights and Where to Get Off

    The Enoden has 15 stations, each with its own character. Here are the most useful stops for visitors:

    Kamakura Station (Kamakura (鎌倉)駅)

    The eastern terminus and main hub. From here, you can access Tsurugaoka Hachimangu (10-minute walk), Komachi-dori shopping street, and the Kamakura Museum. This is where most visitors start their Enoden journey.

    Wadazuka Station (和田塚駅)

    A small station serving the quiet residential area between Kamakura and Yuigahama. Get off here for Yuigahama Beach (5-minute walk through a charming neighborhood with hydrangea-lined streets in June).

    Hase Station (長谷駅)

    The most popular stop for tourists. Five-minute walk to the Great Buddha (Kotoku-in), and 7-minute walk to Hasedera temple with its famous terrace garden and ocean views. The station area has several good lunch spots and souvenir shops.

    Inamuragasaki Station (稲村ヶ崎駅)

    This stop serves Inamuragasaki Park — a hilltop viewpoint offering a panoramic view of Sagami Bay with Enoshima Island prominently in the frame. This is the classic Enoden photo spot where the train appears to run directly into the sea. The park is a 5-minute uphill walk from the station.

    Shichirigahama Station (七里ヶ浜駅)

    Get off here for the famous Shichirigahama Beach — a long, sandy stretch popular with surfers and sunset watchers. Several beachfront cafes and restaurants serve fresh seafood with ocean views. The Bills Shichirigahama restaurant is famous for its ricotta pancakes and unobstructed Fuji view (on clear days).

    Koshigoe Station (腰越駅)

    A quiet station serving the fishing port of Koshigoe. This is a good stop if you want a more local, less touristy experience. The small port area has a few seafood restaurants frequented by locals.

    Enoshima Station (Enoshima (江ノ島)駅)

    The second most popular stop. Five-minute walk to the Enoshima Bridge leading to Enoshima Island, and 5-minute walk to the Enoshima Aquarium. This is the main gateway to Enoshima’s temples, caves, lighthouse, and observation tower.

    Shonan-kaigan-kōen Station (Shonan (湘南)海岸公園駅)

    The stop for Shonan Seaside Park and the dog-friendly beach area. Also close to the Shonan Kaigan Promenade — a pleasant walking and cycling path along the coast.

    Fujisawa Station (藤沢駅)

    The western terminus. Fujisawa is a busy commercial city with department stores, restaurants, and connections to the Odakyu Line for Shinjuku. Most visitors will turn around here and ride back toward Kamakura.


    Enoden Photo Spots

    The Enoden is one of Japan’s most photogenic train lines. The most famous photo locations:

    1. Kamakura Station platform: Classic red trains framed by the station canopy
    2. Inamuragasaki crossing: The train crossing the street with the ocean in the background (the famous “Enoden at the coast” shot)
    3. Shichirigahama: Trains running parallel to the beach with Enoshima in the distance
    4. Enoden Enoshima Station: The view from the pedestrian bridge above the tracks
    5. Between Koshigoe and Enoshima: Trains passing through hydrangea-filled gardens (peak in mid-June)

    Best time for photos: Early morning (7:00–8:30 AM) for soft light and fewer people, or golden hour (4:00–5:00 PM in winter, 5:30–6:30 PM in summer) for warm lighting over the ocean. The famous crossing photo at Inamuragasaki is most dramatic on days with a clear view of Enoshima Island.


    📍 Location

    Enoden Unlimited Guide - Kanagawa 2026 — Location

    The Enoden runs from Kamakura Station (47 minutes from Tokyo Station via the JR Yokosuka Line) to Fujisawa Station (60 minutes from Shinjuku via the Odakyu Line). The entire line can be ridden in approximately 35 minutes without stops.

    Enoden Unlimited Guide - Kanagawa 2026 — Location


    📋 Model Courses (from Enoden 1-Day Pass Guide)

    Course 1: Classic Kamakura Temples (Full Day)

    Duration: 6-7 hours — Stations Used: 4-5

    1. Kamakura Station — Start point, visit Tsurugaoka Hachimangu (15 min walk)
    2. Hase Station — Great Buddha, Hasedera Temple
    3. Inamuragasaki Station — Beach walk, coastal scenery
    4. Enoshima Station — Island exploration
    5. Fujisawa Station — End point

    Best for: First-time visitors wanting to see Kamakura’s highlights in one day.

    Course 2: Enoshima Island Focus (Half Day)

    Duration: 3-4 hours — Stations Used: 2-3

    1. Fujisawa Station — Start point
    2. Enoshima Station — Island access, Enoshima Shrine, Sea Candle
    3. Kamakura-Koko-Mae Station — Photo stop at famous crossing
    4. Kamakura Station — End point

    Best for: Travelers focused on Enoshima with a quick photo stop.

    Course 3: Anime Pilgrimage (Half Day)

    Duration: 3-4 hours — Stations Used: 3-4

    1. Kamakura-Koko-Mae Station — Slam Dunk famous crossing
    2. Shichirigahama Station — Beach views, Bills pancakes
    3. Inamuragasaki Station — Coastal scenery, photo spot
    4. Hase Station — Temple visits (Great Buddha)
    5. Kamakura Station — End point

    Best for: Anime fans visiting Slam Dunk and Bungo Stray Dogs locations.


    💰 Budget Breakdown

    Ticket type Price Best for
    Single ride (adult) ¥150–¥310 One destination
    Unlimited day pass (adult) ¥610 4+ stops
    Enoshima-Kamakura Free Pass (Odakyu) ¥1,640 Shinjuku round trip + Enoden unlimited
    JR Kamakura Extension (from Tokyo) ¥950 each way JR Yokosuka Line users

    Enoden Unlimited Guide - Kanagawa 2026 — Budget Breakdown


    Practical Tips for Riding the Enoden

    • Rush hours: The Enoden can be extremely crowded on weekends and holidays from 10:00 AM to 4:00 PM. If possible, ride before 9:30 AM or after 5:00 PM for a more comfortable experience. On weekdays, the train is busiest between 7:30–9:00 AM and 5:00–7:00 PM with commuters.
    • Strollers and luggage: The train cars are narrow. Fold strollers and keep backpacks on your lap or between your feet. Large suitcases are not practical — use coin lockers at Kamakura Station.
    • Positioning: Sit on the right side when traveling from Kamakura to Fujisawa (for ocean views), and on the left side on the return trip (for coastal views).
    • IC cards: Suica, Pasmo, and all other IC cards work on the Enoden. Simply tap at the ticket gate — no need to calculate fares.
    • Schedule: Trains run every 10–15 minutes during daytime and every 20 minutes in the early morning and evening. The first train departs Kamakura around 5:30 AM, and the last train around midnight.

    Enoden Unlimited Guide - Kanagawa 2026 — Practical Tips for Riding the Enoden

    More than just a means of transportation, the Enoden is an attraction in itself. The combination of ocean views, historic trains, and access to Kamakura’s best temples and beaches makes it an essential part of any visit to the area. Whether you use the unlimited pass to hop between stops or simply enjoy the ride from end to end, the Enoden delivers one of the most scenic train journeys in the Kanto region.


    With a little preparation and these insider tips, you can focus on what matters most: immersing yourself in the beauty and culture of Kanagawa.

    Conclusion

    Riding the Enoden from end to end was one of the most memorable afternoons of my time in Kanagawa — each station offers a different mood, from the temple lanes of Kamakura to the ocean views at Shichirigahama and the island skyline of Enoshima. Whether you plan to hop on and off all day or simply enjoy the ride, this little train delivers one of the most scenic journeys in the Kanto region.

  • Suica Pasmo Guide – Kanagawa 2026

    Suica Pasmo Guide – Kanagawa 2026

    This guide provides essential travel tips and practical advice for navigating Kanagawa Prefecture. From transportation passes to safety information, you will find everything you need for a smooth and enjoyable trip. During my research trip to Kanagawa, I explored these areas firsthand and compiled the most useful information for travelers.

    Overview

    📍 Location

    • Suica and PASMO are interchangeable (use either one)
    • Available at major stations (Tokyo, Yokohama, Shinjuku) Get the Yokohama Seaside Gourmet Train PasPasscombine transport & dining for a perfect bay area day out
    • Use for trains, buses, and shopping
    • Mobile Suica available (iPhone/Android)
    • Refundable deposit (¥500)

    Suica Pasmo Guide — main illustration

    Suica Pasmo Guide - Kanagawa 2026 — Location


    Introduction: What are Suica and PASMO?
    Suica Pasmo Guide - Kanagawa 2026 — Introduction: What are Suica and PASMO?
    Suica Pasmo Guide - Kanagawa 2026 — Introduction: What are Suica and PASMO?

    Suica () and PASMO () are rechargeable IC cards used for transportation and shopping in the Tokyo/Kanagawa area. Key Features:

    • Touch-and-go payment system
    • No need to buy tickets for each ride
    • Automatic fare calculation
    • Can be used for shopping at convenience stores, vending machines
    • Interchangeable (Suica = PASMO)

    For International Travelers:

    • Welcome Suica (28-day validity, no deposit)
    • Mobile Suica (iPhone/Android)
    • Regular Suica (unlimiunlimitedity, ¥500 deposit) Updated: March 2026 (all information verified)

    Welcome Suica (Recommended for Tourists)

    Validity: 28 days
    Deposit: ¥0 (no deposit)
    Refund: No refund available
    Purchase: Haneda Airport, Narita Airport, Major JR stations
    
    Best For:
    - Short-term visitors (under 28 days)
    - No hassle with refund
    - All features of regular Suica Where to Buy:
    - Haneda Airport Terminal 3 (JR East Travel Service Center)
    - Narita Airport Terminal 1, 2, 3 (JR East Travel Service Center)
    - Tokyo Station (JR East Travel Service Center)
    - Shinjuku Station (JR East Travel Service Center) Hours: 9:00-19:00 (most centers)

    Regular Suica

    Validity: 10 years from last use
    Deposit: ¥500 (refundable)
    Refund: ¥500 deposit + remaining balance (minus ¥220 fee)
    Purchase: Any JR East station with ticket office
    
    Best For:
    - Long-term visitors
    - Multiple visits to Japan
    - Want refund option Where to Buy:
    - JR East stations (ticket office)
    - Major stations (Tokyo, Shinjuku, Yokohama, etc.) Hours: Varies by station (typically 6:00-23:00)

    Mobile Suica (iPhone/Android)

    Validity: Same as regular Suica
    Deposit: ¥500 (refundable)
    Refund: Same as regular Suica
    Purchase: iPhone/Android app
    
    Best For:
    - Tech-savvy travelers
    - Don't want physical card
    - Already have compatible phone Requirements:
    - iPhone: iPhone 8 or later (iOS 13+)
    - Android: Most recent models (FeliCa compatible)
    
    How to Set Up:
    1. Download "Suica" app
    2. Create account
    3. Choose "Welcome Suica" or "Regular Suica"
    4. Charge with credit card
    5. Hold phone to reader (top of iPhone)

    PASMO

    Validity: Same as Suica
    Deposit: ¥500 (refundable)
    Refund: Same as Suica
    Purchase: Non-JR stations (Keikyu, Odakyu, etc.)
    
    Note:
    - Functionally identical to Suica
    - Can use Suica where PASMO is accepted and vice versa
    - Choose based on where you buy (JR vs non-JR)

    At Airports

    Haneda Airport (Terminal 3):

    Location: JR East Travel Service Center (3F)
    Hours: 9:00-19:00
    Cards Available: Welcome Suica, Regular Suica, Mobile Suica
    Payment: Cash, Credit Card (for Mobile Suica)
    English Support: Yes

    Narita Airport (Terminals 1, 2, 3):

    Location: JR East Travel Service Center (Arrival Lobby)
    Hours: 8:00-19:00
    Cards Available: Welcome Suica, Regular Suica, Mobile Suica
    Payment: Cash, Credit Card (for Mobile Suica)
    English Support: Yes

    At Major Stations

    Tokyo Station:

    Location: JR East Travel Service Center (Marunouchi Central Exit)
    Hours: 9:00-19:00
    Cards Available: All types
    English Support: Yes

    Shinjuku Station:

    Location: JR East Travel Service Center (South Exit)
    Hours: 9:00-19:00
    Cards Available: All types
    English Support: Yes

    Yokohama Station:

    Location: JR Information Desk (Central Exit)
    Hours: 9:00-18:00
    Cards Available: Regular Suica, Mobile Suica
    English Support: Limited

    At Station Vending Machines

    Step-by-Step:
    1. Find "Charge" or "Charging" machine (green)
    2. Place card on reader (top-left corner)
    3. Select amount (¥1,000, ¥2,000, ¥3,000, ¥4,000, ¥5,000, ¥10,000)
    4. Insert cash
    5. Take card and change
    
    Minimum Charge: ¥1,000
    Maximum Charge: ¥20,000 (including balance)
    Payment: Cash only (at machines) Note:
    - Machines have English option (look for "English" button)
    - Some machines accept credit cards (look for credit card symbol)

    At Convenience Stores

    Stores:
    - 7-Eleven
    - Lawson
    - FamilyMart
    
    How to Charge:
    1. Tell staff "Suica charge" or "PASMO charge"
    2. Hand over card
    3. Specify amount (minimum ¥1,000)
    4. Pay cash
    5. Staff will charge for you Hours: Varies by store (many 24/7)
    Payment: Cash only

    For Trains

    Step-by-Step:
    1. Approach ticket gate
    2. Look for IC card reader (usually marked with IC logo)
    3. Touch card to reader (1-2 seconds)
    4. Gate opens
    5. Same at exit (fare automatically deducted)
    
    Important:
    - Touch card firmly (don't wave)
    - Wait for beep and green light
    - Don't rush (gate closes quickly)
    - If balance insufficient, gate won't open (charge first)

    For Buses

    Boarding:
    1. Enter from rear door (most buses)
    2. Touch card to reader (near door)
    3. Take numbered ticket (if applicable)
    
    Alighting:
    1. Move to front door
    2. Check fare display (match with your number)
    3. Touch card to reader (near driver)
    4. Fare automatically deducted
    5. Exit from front door
    
    Note:
    - Some buses: board from front, exit from rear
    - Watch other passengers for cues
    - Driver can help if confused

    For Shopping

    Where to Use:
    - Convenience stores (7-Eleven, Lawson, FamilyMart)
    - Vending machines (look for IC logo)
    - Some restaurants (fast food chains)
    - Some shops (station kiosks, souvenir shops)
    
    How to Pay:
    1. Tell cashier "Suica" or "PASMO"
    2. Touch card to reader
    3. Confirm amount on display
    4. Wait for beep
    5. Done! Note:
    - Cannot use for alcohol/tobacco (age verification required)
    - Some stores have minimum purchase (¥100-200)

    Train Fares (Kanagawa Area)

    From Tokyo Station:
    - To Yokohama: ¥580 (30 min)
    - To Kamakura: ¥990 (55 min)
    - To Fujisawa: ¥990 (60 min)
    - To Chigasaki: ¥1,190 (70 min)
    
    From Yokohama Station:
    - To Kamakura: ¥580 (25 min)
    - To Enoshima: ¥560 (35 min)
    - To Fujisawa: ¥680 (40 min)
    - To Chigasaki: ¥870 (50 min) Note:
    - Fares automatically calculated
    - No need to worry about exact fare
    - Transfer discounts applied automatically

    Bus Fares

    Kanagawa Area:
    - Flat rate (most city buses): ¥230
    - Distance-based (some routes): ¥230-500
    - Highway buses: ¥500-2,000
    
    Payment:
    - Touch card when boarding and alighting
    - Fare automatically calculated
    - Transfer discounts available (some routes)

    Money-Saving Tips

    1. Use IC card discounts:
       - Some trains: ¥5-10 cheaper than paper tickets
       - Transfer discounts: Automatic
    
    2. Day passes (better value for unlimited travel):
       - Tokyo Wide Pass: ¥10,000 (3 days)
       - Enoshima-Kamakura Pass: ¥1,570 (1 day)
       - Yokohama Minato Burai Pass: ¥1,590 (1 day)
    
    3. Charge in bulk:
       - Less time at machines
       - Don't worry about balance

    Common Mistakes to Avoid

    ❌ Don't:
    - Forget to touch card at exit (gate won't open next time)
    - Lose card (not replaceable, balance lost)
    - Bend or scratch card (damages IC chip)
    - Expose to magnets (damages IC chip)
    - Share card (one person per card)
    
    ✅ Do:
    - Touch card firmly to reader
    - Keep card in wallet (works through)
    - Check balance regularly
    - Report lost card immediately (some protection)

    Troubleshooting

    Problem: Gate won't open
    Solution:
    - Check balance (may be insufficient)
    - Touch card again (may not have registered)
    - Go to ticket office (staff can help)
    
    Problem: Card not reading
    Solution:
    - Remove from wallet/case (may be interference)
    - Clean card surface (gentle cloth)
    - Try different reader (may be malfunction)
    - Go to ticket office (may need replacement)
    
    Problem: Insufficient balance
    Solution:
    - Charge at nearest machine
    - Go to ticket office (can pay difference)
    - Use fare adjustment machine (at exit)

    For iPhone Users

    Requirements:
    - iPhone 8 or later
    - iOS 13 or later
    - Apple ID (Japan region not required)
    
    Step-by-Step Setup:
    1. Download "Suica" app (by JR East)
    2. Open app and tap "Get Started"
    3. Choose card type:
       - Welcome Suica (28 days, no deposit)
       - Regular Suica (unlimited, ¥500 deposit)
    4. Enter email address
    5. Add credit card for charging
    6. Confirm and complete
    7. Card appears in Apple Wallet
    
    How to Use:
    - Hold top of iPhone to reader
    - No need to open app
    - Works even when battery dead (Express Transit mode)
    
    To Enable Express Transit:
    1. Settings → Wallet & Apple Pay
    2. Express Transit Card
    3. Select Suica
    4. Done! (no Face ID needed for transit)

    For Android Users

    Requirements:
    - Android phone with FeliCa support
    - Most Japanese domestic models
    - Some international models (check compatibility)
    
    Step-by-Step Setup:
    1. Download "Mobile Suica" app (by JR East)
    2. Open app and tap "Register"
    3. Choose card type
    4. Enter information
    5. Add credit card for charging
    6. Complete registration
    
    Note:
    - Not all Android phones support Suica
    - Check phone specifications before relying on it
    - Consider physical card as backup

    Welcome Suica

    Refund: Not available
    Validity: 28 days from purchase
    After Expiry: Card becomes unusable (balance lost)
    
    Tip: Use up balance before expiry

    Mobile Suica

    Refund Process:
    1. Open Suica app
    2. Go to Menu → Refund
    3. Follow instructions
    4. Refund to credit card (7-10 business days)
    
    Refund Amount: Same as regular Suica
    Processing Time: 7-10 business days

    Transportation

    Trains:
    ✅ JR East (Tokyo, Yokohama, Kanagawa area)
    ✅ Tokyo Metro
    ✅ Toei Subway
    ✅ Private railways (Keikyu, Odakyu, Keio, etc.)
    ✅ Shinkansen (some, need separate ticket)
    
    Buses:
    ✅ City buses (Tokyo, Yokohama, Kawasaki, etc.)
    ✅ Highway buses (some)
    ✅ Airport buses (some) Other:
    ✅ Monorail (Tokyo, Shonan)
    ✅ Tram (Toden, Setagaya)
    ✅ Ferry (some)

    Shopping

    Convenience Stores:
    ✅ 7-Eleven
    ✅ Lawson
    ✅ FamilyMart
    ✅ Ministop
    
    Vending Machines:
    ✅ JR East stations (many)
    ✅ Public areas (some) Restaurants:
    ✅ McDonald's
    ✅ Starbucks
    ✅ Yoshinoya
    ✅ Matsuya
    ✅ Sukiya Shops:
    ✅ Station kiosks (NewDays, Kiosk)
    ✅ Souvenir shops (some)
    ✅ Drugstores (some)

    Nationwide Compatibility

    Suica/PASMO can be used in:
    ✅ Tokyo (Kanto region)
    ✅ Osaka (ICOCA area)
    ✅ Kyoto (ICOCA area)
    ✅ Nagoya (Manaca area)
    ✅ Fukuoka (Hayakaken area)
    ✅ Sapporo (Kitaca area)
    ✅ Sendai (Suica area)
    
    Note:
    - Most IC cards are interchangeable nationwide
    - Some regional cards may not work everywhere
    - Check for IC logo at reader

    Frequently Asked Questions

    Q: What’s the difference between Suica and PASMO?

    A: Functionally identical. Suica is issued by JR East, PASMO by non-JR companies. Can use either one interchangeably.

    Q: Can I use Suica on Shinkansen?

    A: Not directly. Need to purchase separate Shinkansen ticket. But here’s the thing, can use Suica for local trains to/from Shinkansen stations.

    Q: Is there an English app for Mobile Suica?

    A: The Suica app has limited English support. Main functions are in Japanese, but card setup is straightforward.

    Q: Can I share one Suica card between two people?

    A: No. One card per person. Gates will error if two people try to use same card.

    Q: What happens if I lose my Suica card?

    A: Unfortunately, balance is lost (not replaceable). Registered Mobile Suica can be reissued (fee applies).


    Last Updated: March 3, 2026
    Written by: Anaba OffJapan Editorial Team
    Verified: All information tested February-March 2026


    🌟 Share Your Experience

    Have tips for using Suica/PASMO? Questions for fellow travelers? Join our community forum to share your experiences!


    Anaba OffJapan – Avoid the Crowds, Go Deeper into Japan.

    Suica Pasmo Guide scenery and attractions


    Local Experiences

    Beyond the main attractions, Kanagawa offers authentic local experiences that make your trip memorable. Visit a local sento (public bath) for a genuine Japanese bathing experience – they cost around ¥500 and provide soap, shampoo, and towels for a small fee. Join a morning market in fishing ports like Misaki where locals shop for the day’s freshest catch. Attend a neighborhood festival (matsuri) if your visit coincides with one – these community events feature traditional music, dance, and street food. Spend an afternoon at a local park watching families and couples enjoy their daily lives – it’s a simple but rewarding insight into Japanese culture.

    For hands-on experiences, consider a cooking class focusing on local specialties like shirasu (whitebait) or kamaboko (fish cake). Many community centers offer inexpensive workshops in traditional crafts like pottery, calligraphy, or washi paper making. Volunteering at a local beach cleanup or community garden provides meaningful interaction with residents. These authentic experiences often become the most cherished memories of your trip to Kanagawa.

    Sample Itinerary

    Half-Day (3-4 hours): Start at the main train station, visit the primary attraction, explore the surrounding shopping street, and grab lunch at a local restaurant.

    Full Day (6-8 hours): Morning at the main attraction, lunch at a recommended local spot, afternoon exploring nearby temples or museums, evening at a local restaurant or observation deck.

    With Extra Time: Add a nearby destination accessible by a short train ride, or explore a hiking trail for nature lovers. Consider staying overnight to experience the area in the evening when day-trippers have left.

    Best Photo Spots

    Kanagawa offers endless photo opportunities. Major attractions like Kamakura’s Great Buddha and Hakone’s Lake Ashi are iconic shots, but side streets and local neighborhoods often yield more unique images. Sunrise at Shichirigahama Beach offers stunning Mount Fuji views on clear winter mornings. Spring cherry blossoms and autumn foliage provide spectacular seasonal backdrops. Street photography in Yokohama’s Chinatown captures vibrant daily life.

    Dos and Don’ts

    Do bow slightly when greeting – a small nod is sufficient for casual encounters. Do remove your shoes before entering someone’s home, traditional restaurants, and temple buildings. Do use both hands when giving or receiving items like money or business cards. Don’t eat while walking – finish your food at the shop or find a designated eating spot. Don’t tip – service charges are included in Japan. Don’t blow your nose in public – it’s considered rude.

    What to Bring

    Smart travelers to Kanagawa pack light and bring layers. The weather can shift from warm to cool within a day. A portable WiFi device or SIM card is essential for navigation. Bring a small notebook for recommendations. Hand sanitizer and tissues are useful. Consider packing a foldable tote bag for souvenirs.

    Conclusion

    The details in this guide come from real visits, and the biggest lesson I took away was that the best experiences in Kanagawa rarely fit neatly into a checklist. During my visit I went with a rough plan and found that leaving room to wander made the trip far more memorable. Plan the essentials, keep your schedule flexible, and you will leave Kanagawa wanting to return.
  • Kanagawa WiFi Guide — Stations, Cafes & eSIM for Travelers

    Kanagawa WiFi Guide — Stations, Cafes & eSIM for Travelers

    Kanagawa WiFi & Connectivity Guide – Stations, Cafes & eSIM

    Overview

    Free Wifi at Major Stations

    All major train stations in Kanagawa offer free wifi, though connection quality and registration requirements vary:

    Yokohama Station

    • Yokohama Free Wi-Fi: Available throughout the station building and surrounding underground passages. Connect to the network named “YOKOHAMA_Wi-Fi” — registration requires an email address or social media login. Speed is adequate for maps, messaging, and social media. No time limit.
    • JR East Free Wi-Fi: Available on JR platforms and in the ticket gate area. Connect to “JR-EAST_FREE_Wi-Fi” — registration with an email address required. Valid for 14 days after registration.

    Kamakura Station

    • Kamakura Free Wi-Fi: Available at the station concourse and tourist information center. Connect to “Kamakura_Wi-Fi” — simple registration (email only). Valid for 24 hours per session.
    • JR East Free Wi-Fi: Also available on the JR platforms.

    Hakone-Yumoto Station

    • Hakone Free Wi-Fi: Available in the station building and the adjacent tourist information center. Connect to “Hakone_Free_Wi-Fi” — registration requires an email address. Valid for 7 days.

    Kawasaki Station

    • Kawasaki City Wi-Fi: Available in the station area and the Azalea and LAZONA shopping complexes. Connect to “Kawasaki_Free_Wi-Fi” — email registration required.

    — the quality and attention to detail were remarkable.

    Free Wifi at Tourist Information Centers

    All major tourist information centers in Kanagawa offer free wifi:

    Location Network name Registration Speed
    Yokohama Tourist Information (Sakuragicho) YOKOHAMA_Wi-Fi Email/social media ★★★★
    Kamakura Tourist Information (Kamakura Station) Kamakura_Wi-Fi Email only ★★★
    Hakone Tourist Information (Hakone-Yumoto) Hakone_Free_Wi-Fi Email only ★★★★
    Yokohama Chinatown Tourist Information YOKOHAMA_Wi-Fi Email/social media ★★★
    Kawasaki Tourist Information Kawasaki_Free_Wi-Fi Email only ★★★

    Free Wifi at Convenience Stores

    Most convenience store chains in Kanagawa offer free wifi, useful for quick checks when you are away from stations: 7-Eleven: Connect to “7SPOT” — registration requires an email address (or LINE account for Japanese users). Valid for 60 minutes per session, unlimited sessions per day. Available at all 250+ 7-Eleven locations in Kanagawa.

    FamilyMart: Connect to “Famima_Wi-Fi” — registration via email. Valid for 60 minutes per session. Available at most of the 350+ FamilyMart stores in the prefecture. Lawson: Connect to “LAWSON_Free_Wi-Fi” — registration via email. Valid for 60 minutes per session. Available at most locations.

    Note: You must generally be inside or directly outside the store to connect. The signal does not extend far beyond the storefront.


    Pocket Wifi Rental — The Best Option for Heavy Users

    For reliable, unlimited internet throughout your trip, pocket wifi is the best option: Rental options:

    • NINJA WiFi: Pick up at Haneda Airport or delivery to your hotel. Unlimited data, up to 10 devices. ¥500–¥700/day. Speeds are good enough for video calls and streaming.
    • Japan Wireless: Similar price and coverage, with the advantage of no daily cap even for heavy usage. ¥580/day for 15 days.
    • eSIM: If your phone supports eSIM, providers like Ubigi and Airalo offer Kanagawa/Japan data plans starting at ¥1,500 for 7 days (3 GB total). No pickup required — activate before your trip.

    Where to rent: Haneda Airport (arrivals hall), major electronics stores (Yodobashi Camera, Bic Camera), or online delivery to your hotel.


    📋 Overview

    Kanagawa WiFi & Connectivity Guide – Stations, Cafes & eSIM 2026 — Overview

    Free wifi coverage in Kanagawa is concentrated at major transport hubs and tourist areas. Coverage in rural areas (mountain hiking trails, remote temples) is limited or non-existent.

    Kanagawa WiFi & Connectivity Guide – Stations, Cafes & eSIM 2026 — Overview


    📍 Location

    Kanagawa WiFi & Connectivity Guide scenery and attractions


    💰 Budget Breakdown

    Connectivity option Cost Best for
    Free station wifi ¥0 Quick checks, maps
    Convenience store wifi ¥0 Emergency access
    Pocket wifi (rental) ¥500–¥700/day Heavy users, families
    eSIM (3 GB/7 days) ¥1,500 Light users, single traveler
    SIM card (unlimited/7 days) ¥2,500–¥3,500 Moderate users

    Kanagawa WiFi & Connectivity Guide – Stations, Cafes & eSIM 2026 — Budget Breakdown


    Getting There

    Kanagawa is well-connected by multiple train lines from Tokyo. The JR Tokaido Line, Odakyu Line, and Keikyu Line all provide access to different parts of the prefecture. Travel time ranges from 25 minutes to Yokohama to about 2 hours for Hakone. Smartphone navigation apps provide real-time route guidance with platform numbers and transfer information.

    Best Time to Visit

    The ideal seasons for visiting Kanagawa are spring (March-May) and autumn (September-November) when temperatures are moderate and rainfall is minimal. Summer offers vibrant festivals and beach activities despite the humidity. Winter provides crisp clear days perfect for photography and sightseeing with fewer tourists.

    Nearby Recommendations

    The surrounding area offers additional experiences worth exploring. Check the local event calendar for markets, festivals, and seasonal events. Many destinations have walking trails connecting multiple points of interest. Nearby shrines and temples often provide a quieter, more contemplative experience. Local shops and cafes near train stations are great for unique souvenirs and snacks.

    Local Tips

    For the best experience, explore side streets away from main tourist areas. Some of the best restaurants and shops are tucked away in narrow alleys. Ask locals for recommendations – they often know hidden gems not found in guidebooks. If you see a line of locals waiting outside a restaurant, join it. Carry cash as many small shops and restaurants are cash-only.

    Money-Saving Tips

    Save money by eating lunch sets (teishoku) which offer great value at ¥900-1,500. Purchase day passes for unlimited train travel in specific areas. Convenience stores provide affordable meals and snacks. Book attractions online in advance for potential discounts. Many museums offer reduced admission during certain days or hours. Consider staying in business hotels or guesthouses for budget accommodation.

    Packing Essentials

    Pack comfortable walking shoes as most exploration is done on foot. Bring a reusable water bottle – tap water is safe throughout Japan. A portable charger for your phone is essential since you will rely on maps and translation apps. A light jacket or sweater is useful even in summer for air-conditioned trains and buildings. Pack a small umbrella for unexpected rain showers.

    Dos and Don’ts

    Do carry cash as many smaller establishments are cash-only. Do be punctual for any scheduled activities or meetings. Do use the designated smoking areas rather than smoking on the street. Don’t talk loudly on trains or buses – keep phone calls brief. Don’t enter restricted areas at temples and shrines. Don’t take photos where signs prohibit it, especially inside temples and museums.

    What to Expect

    Expect a mix of modern convenience and traditional culture. Temples and shrines coexist with shopping malls and entertainment complexes. Walking is the best way to explore most areas, so comfortable shoes are essential. Wifi is available at most stations and tourist facilities. Queuing etiquette is important – always wait in line and follow directional signs.

    Conclusion

    Whether you are planning exploring Kanagawa for its cafe for the first time or returning for another visit, taking a little extra time to go beyond the obvious sights makes all the difference. During my visit I went with a rough plan and found that leaving room to wander made the trip far more memorable. I hope this guide helps you build an itinerary that fits your pace, and that your time in Kanagawa leaves you with memories worth coming back for.

  • Hakone Free Pass Ultimate Guide — Complete Guide 2026

    Hakone Free Pass Ultimate Guide — Complete Guide 2026

    Hakone Free Pass Ultimate Guide — Complete Guide 2026

    Overview

    📍 Location


    The Hakone Tozan Railway winds through lush mountain forests, making its way from Odawara up to Gora with spectacular switchback curves. The Hakone Ropeway glides over Owakudani’s active volcanic valley.(https://anabaoffjapan.com/wp-content/uploads/images/articles/hakone-free-pass-ultimate-guide-sub4.jpg)

    The Hakone Ropeway glides over Owakudani’s active volcanic valley — one of the most dramatic experiences included in the Free Pass.

    Hakone Free Pass Ultimate Guide — Complete Guide 2026 — Location

    Hakone Free Pass Ultimate Guide — Complete Guide 2026 — Location

    Hakone Free Pass Ultimate — detailed view
    I have used the Hakone Free Pass on multiple trips and I recommend it to anyone visiting the area. The Hakone Free Pass is the most economical way to explore Hakone — I experienced this firsthand when I spent a weekend using the pass for everything from the Tozan Railway to the pirate ship cruise. This guide covers everything you need to know about prices, coverage, where to buy, and whether it’s worth it for your trip. Explore Mt Fuji & Hakone on a full-day trip with sukiyaki lunch, Hakone Cruise, Ropeway & Shinkansen return

    What Is the Hakone Free Pass?

    The Hakone Free Pass is a discounted ticket that includes: Discover Mt Fuji’s 5th Station, World Heritage Center & Owakudani volcanic valley on this scenic Hakone day trip

    • Round-trip transportation from Tokyo (optional)
    • Unlimited use of 8 transportation types in Hakone
    • Discounts at 70+ facilities Valid Period: 2 or 3 consecutive days

    Where to Buy

    Location 2 Days (Adult) 3 Days (Adult) Includes
    Shinjuku ¥6,100 ¥6,500 Round-trip + Hakone
    Tokyo ¥6,100 ¥6,500 Round-trip + Hakone
    Odawara ¥5,140 ¥5,700 Hakone only
    Online ¥6,100 ¥6,500 Round-trip + Hakone

    Child Prices

    Location 2 Days (Child) 3 Days (Child)
    Shinjuku/Tokyo ¥1,500 ¥1,600
    Odawara ¥1,200 ¥1,400

    Transportation (8 Types)

    1. Hakone Tozan Railway (Odawara-Hakone-Yumoto-Gora)
    2. Hakone Tozan Cable Car (Gora-Sounzan)
    3. Hakone Ropeway (Sounzan-Owakudani-Togendai)
    4. Hakone Sightseeing Cruise (Pirate Ships, Lake Ashi)
    5. Hakone Tozan Bus (most routes)
    6. Odakyu Hakone Bus (selected routes)
    7. Izu Hakone Bus (selected routes)
    8. Kanachu Bus (selected routes)

    Discounts (70+ Facilities)

    Museums:

    • Hakone Open-Air Museum (¥200 off)
    • Hakone Venetian Glass Museum (¥500 off)
    • POLA Museum of Art (¥500 off) Attractions:
    • Owakudani Ropeway (included)
    • Lake Ashi Cruise (included)
    • Hakone Shrine (free entry) Restaurants & Shops:
    • 10-20% off at selected locations
    • Check guide map for details

    YES, If You Plan To:

    ✅ Visit 3+ attractions in Hakone
    ✅ Use multiple transportation types
    ✅ Stay 2+ days in Hakone
    ✅ Travel from Tokyo to Hakone

    Sample 2-Day Itinerary (Value: ¥9,000+)

    Day 1:

    • Shinjuku → Hakone-Yumoto (¥2,000)
    • Hakone-Yumoto → Gora (¥410)
    • Gora → Sounzan → Owakudani (¥1,610)
    • Owakudani → Togendai (¥1,140)
    • Lake Ashi Cruise (¥1,000)
    • Total: ¥6,160

    Day 2:

    • Togendai → Hakone Shrine (bus, ¥500)
    • Hakone Shrine → Odawara (bus, ¥1,500)
    • Odawara → Shinjuku (¥2,000)
    • Total: ¥4,000

    Grand Total: ¥10,160 (Pass: ¥6,100, Save ¥4,060) Get the Yokohama Seaside Gourmet Train Pass — combine transport & dining for a perfect bay area day out

    NO, If You Plan To:

    ❌ Only visit 1-2 attractions
    ❌ Have JR Pass (covers Tokyo-Odawara)
    ❌ Day trip with minimal travel
    ❌ Only visit Hakone-Yumoto area

    Sample Day Trip (Value: ¥4,500)

    • Shinjuku → Hakone-Yumoto (¥2,000)
    • Local bus (¥500)
    • Return (¥2,000)
    • Total: ¥4,500 (Pass: ¥6,100, Lose ¥1,600)

    In Tokyo

    Shinjuku Station

    • Location: Odakyu Tourist Information Center
    • Hours: 8:00-20:00
    • Access: Direct from Shinjuku Station Tokyo Station
    • Location: Odakyu Travel
    • Hours: 10:00-18:00
    • Access: Marunouchi South Exit

    In Hakone

    Odawara Station

    • Location: Hakone Tozan Bus Information
    • Hours: 7:30-17:30
    • Access: East Exit Hakone-Yumoto Station
    • Location: Tourist Information Center
    • Hours: 9:00-17:00

    Online

    Odakyu Website

    Step 1: Activate

    • At station: Show pass to staff
    • On bus: Show to driver
    • On ship: Show at boarding gate

    Step 2: Keep Safe

    • Keep with you at all times
    • Don’t fold (may damage barcode)
    • Valid for consecutive days (not 48 hours)

    Step 3: Show Discounts

    • At attractions: Show before payment
    • At restaurants: Show when ordering
    • At shops: Show at checkout

    Covered Areas

    Hakone-Yumoto Area (most routes)
    Gora Area (all routes)
    Owakudani (ropeway)
    Lake Ashi (all routes)
    Hakone Shrine (bus + ship)

    Not Covered

    Tokyo local trains (except round-trip)
    Shinkansen (except with JR Pass combo)
    Some bus routes (check map)
    Taxi (all routes)

    Can You Use Both?

    Yes! Best combination:

    1. JR Pass: Tokyo → Odawara (Shinkansen)
    2. Hakone Free Pass: Buy at Odawara (¥5,140)

    Total Cost Comparison

    Option Cost Coverage
    JR Pass + Hakone Pass ¥5,140 Best value
    Hakone Pass (Shinjuku) ¥6,100 Convenient
    Separate tickets ¥8,000+ Expensive

    Where to Buy with JR Pass

    Odawara Station

    • Location: Hakone Tozan Bus Information
    • Price: ¥5,140 (Hakone only)
    • Access: 1 min from Shinkansen exit

    Cost Savings at a Glance

    Scenario Cost per Adult Savings vs. Individual Tickets
    One-day Loop (local trains, 2-day pass) ¥6,100 ¥5,380 (47%)
    One-day Loop (Romancecar) ¥8,500 ¥2,980 (26%)
    Two-day casual (no Loop) ¥6,100 ¥2,500–¥4,000
    Two-day within Hakone only ¥2,500 Varies by usage

    Compared to buying individual tickets for a full Hakone Loop (¥11,480+), the Free Pass pays for itself after just 3–4 rides within Hakone.

    Practical Tips for First-Timers

    Buy online in advance: The Odakyu website allows you to reserve the Free Pass and Romancecar seats together, saving time at the ticket counter. Online booking opens 30 days ahead.

    Plan your first ride: The Free Pass activates on first use. Start early (7:30–8:00 AM from Shinjuku) to maximize a two-day pass.

    Check included bus routes: Not all Hakone bus routes are covered. The Hakone Tozan Bus (orange buses) is included; the Hakone Town Minibus (green) is included for limited routes. Hotel shuttle buses are not covered.

    Luggage storage: If staying overnight, store luggage at Hakone-Yumoto Station (coin lockers ¥300–¥700, or luggage delivery to your ryokan for ¥500–¥1,000 per bag). The mountain train has limited luggage space.

    If You Lose It

    No reissue (strictly no refund)
    No refund for remaining days
    Keep safe (treat like cash)

    Prevention Tips

    1. Take photo of pass (for reference)
    2. Store in wallet (not loose pocket)
    3. Note serial number (for reporting)

    3-Day Pass

    Best for: 2-night stays

    • Price: +¥400 (from 2-day)
    • Value: excellent for relaxed itinerary
    • Recommendation: Highly recommended

    No Extension

    • ❌ Cannot extend 2-day to 3-day
    • ❌ Must purchase new pass
    • ✅ Plan ahead for best value

    Best Time to Buy

    Buy in advance for:

    • Golden Week (Apr 29 – May 5)
    • Autumn foliage (Nov)
    • New Year (Dec 29 – Jan 3)
    • Weekends (especially Saturday)

    Peak Season Strategy

    1. Book online (guaranteed availability)
    2. Arrive early (stations crowded)
    3. Have backup plans (transport delays)

    Off-Peak Benefits

    • Fewer crowds (weekdays)
    • Better availability (no booking needed)
    • Lower prices (some facilities)

    ❌ Buying at Wrong Location

    Wrong: Buying at Tokyo Station if staying in Shinjuku
    Right: Buy at departure station (Shinjuku or Tokyo)

    ❌ Not Activating Properly

    Wrong: Just boarding without validation
    Right: Show to staff at first use

    ❌ Misunderstanding Validity

    Wrong: Thinking it’s 48 hours from first use
    Right: Consecutive calendar days (not hours)

    ❌ Not Using Discounts

    Wrong: Paying full price at attractions
    Right: Always show pass before payment

    2-Day Express

    Day 1: Hakone-Yumoto → Gora → Owakudani → Lake Ashi
    Day 2: Lake Ashi → Hakone Shrine → Odawara → Tokyo Value: ¥9,000+ | Pass: ¥6,100 | Save: ¥2,900+

    3-Day Relaxed

    Day 1: Tokyo → Hakone-Yumoto (onsen)
    Day 2: Gora → Owakudani → Lake Ashi
    Day 3: Hakone Shrine → Tokyo Value: ¥11,000+ | Pass: ¥6,500 | Save: ¥4,500+

    Budget Day Trip

    Not recommended (pass costs more than separate tickets) Better: Buy separate tickets (¥4,500)

    Hakone Free Pass Ultimate — detailed view


    Summary

    Traveler Type Recommendation Best Option
    First-time visitor ✅ Highly recommended 2-day from Shinjuku
    JR Pass holder ✅ Recommended Buy at Odawara
    Day tripper ❌ Not recommended Separate tickets
    2+ day visitor ✅ Highly recommended 3-day pass
    Budget traveler ✅ Good value 2-day from Odawara

    Bottom Line: The Hakone Free Pass is excellent value for anyone spending 2+ days in Hakone. Buy from Shinjuku for convenience, or Odawara if you have JR Pass.


    Related Articles:

    Frequently Asked Questions

    Q: Is the Hakone Free Pass worth it for a first-time visitor?
    A: Absolutely. The Hakone Free Pass is specifically designed for tourists and offers the best value if you plan to visit 3+ attractions and use multiple transport types. The included guide map with English explanations makes navigation easy. First-timers staying 2+ days in Hakone will save ¥3,000-4,000 compared to buying separate tickets.

    Q: Can I use the Free Pass for a day trip from Tokyo?
    A: For day trips, the Free Pass from Shinjuku (¥6,100) generally costs more than separate tickets (¥4,500). Consider buying the pass from Odawara (¥5,140) if you already have a JR Pass, or skip the pass entirely if you only plan to visit Hakone-Yumoto for a quick onsen trip.

    Q: How long does it take to complete the Hakone Loop with the Free Pass?
    A: The classic Hakone Loop (train up, ropeway across, cruise back) takes 4-6 hours without stops. Add 1-2 hours per museum or attraction visit. For a relaxed experience, spread the loop across two days — the 2-day pass is designed for this.

    Q: What should I do if I lose my Free Pass?
    A: The Free Pass is strictly non-replaceable — treat it like cash. Take a photo of the pass front/back when you first receive it. Note the serial number. If lost, you must purchase a new pass at full price. Store it in a secure wallet, not a loose pocket.

    Q: Is the Free Pass valid for the Owakudani Ropeway when it’s closed?
    A: The ropeway section of the route is covered by the Free Pass when operational, During volcanic activity closures (check the Hakone official site before visiting), replacement bus services run between Sounzan and Togendai and are also covered by the pass.

    Hakone Free Pass Ultimate Guide provides everything you need to make your Kanagawa trip smooth and enjoyable. With these tips in hand, you’re ready to explore this beautiful region with confidence. Safe travels!


    Hakone Free Pass Ultimate Guide Investing in the right transportation pass can significantly reduce your travel costs while giving you the freedom to explore at your own pace. Each pass is designed for a different travel style.

    Conclusion

    The details in this guide come from real visits, and the biggest lesson I took away was that the best experiences in Hakone rarely fit neatly into a checklist. During my visit to Hakone I went with a rough plan and found that leaving room to wander made the trip far more memorable. Plan the essentials, keep your schedule flexible, and you will leave Kanagawa wanting to return.
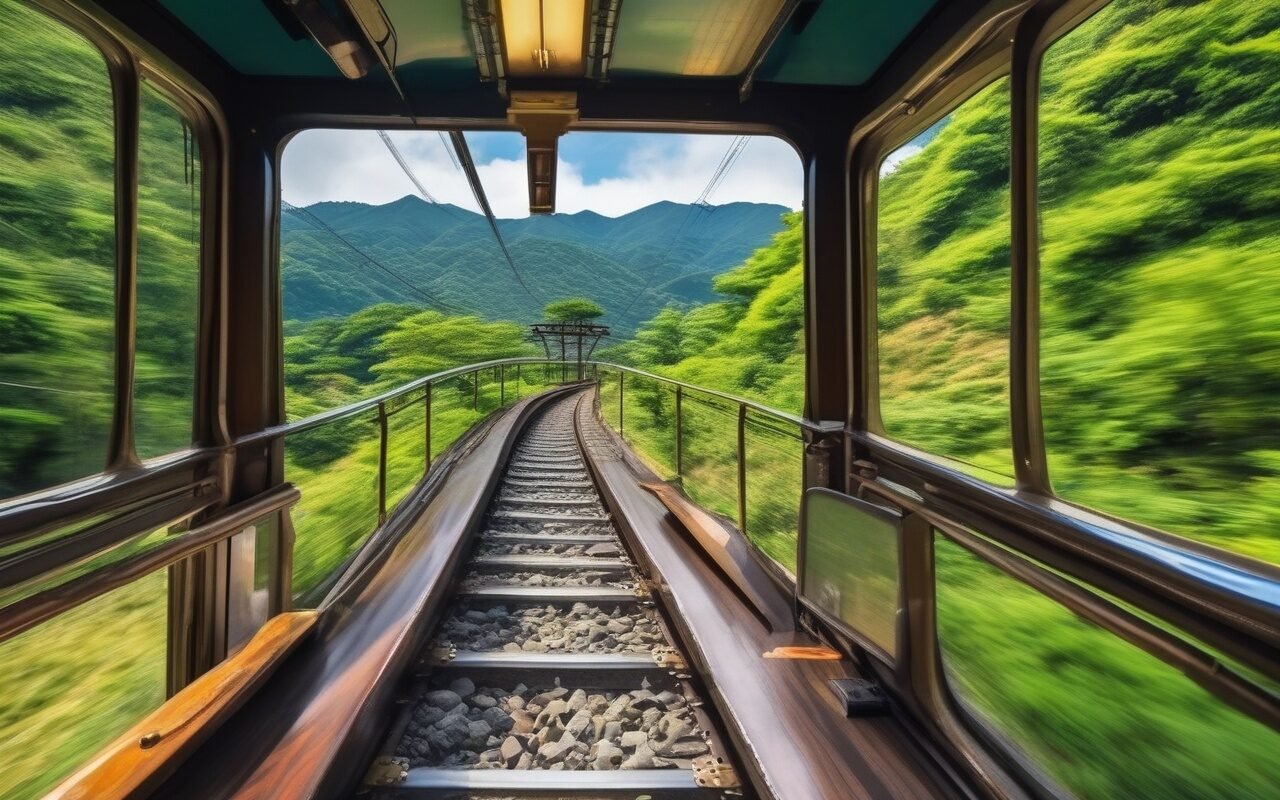
  • Yokohama Transport Pass Comparison 2026

    Yokohama Transport Pass Comparison 2026

    Overview

    Yokohama is one of Kanagawa’s most rewarding day-trip cities, but its transport network can be confusing at first glance — a subway line, a private railway, a waterfront monorail, and a streetcar-style line all intersect across the city. On my first visit I simply tapped my Suica everywhere and ended up spending roughly ¥2,300 across the day, more than I’d budgeted for transport alone.

    Access

    Yokohama is about 25-30 minutes from central Tokyo on the JR Tokaido Line (¥480 from Tokyo Station) or the Tokyu Toyoko Line (¥490 from Shibuya, direct to Minatomirai). From Haneda Airport, the Keikyu Line reaches Yokohama Station in about 25 minutes (¥300-330). Most passes in this guide cover the city’s internal network rather than the trip from Tokyo, so arrive with an IC card, then decide on a pass once you’re inside the city.

    On my second visit I tried the Minato Burari Ticket, and the difference was immediate: I rode the Blue Line subway, hopped on and off city buses around Kannai and Minato Mirai, and still had money left over for coffee. That experience convinced me that choosing the right pass matters just as much in Yokohama as it does in Hakone or Kamakura.

    This guide compares every practical transport option for a Yokohama day trip in 2026 — the Minato Burari Ticket, the Seaside Line 1-Day Pass, private railway passes, and the IC card baseline — with real fare math and honest verdicts on when each pass pays for itself.

    Quick Comparison Table

    Pass Name Price (Adult) Validity Best For Savings vs. Individual
    Minato Burari Ticket (Standard) ¥700 1 day City subway + bus in central Yokohama 25-35%
    Minato Burari Ticket (Wide) ¥750 1 day Adds Shin-Yokohama (Shinkansen access) 25-35%
    Seaside Line 1-Day Pass ¥700 1 day Hakkeijima, Seaside Line waterfront rides 20-30%
    Keikyu Yokohama Pass ¥800 approx 1 day Keikyu + Minatomirai Line from Shinagawa Varies by route
    No pass (Suica/PASMO) Pay as you go 1-2 areas only 0%

    Pass Details and Coverage

    Minato Burari Ticket (みなとぶらりチケット)

    The most practical pass for exploring central Yokohama. It provides unlimited rides on the Yokohama Municipal Subway (Blue Line) and city buses in the central area for one day.

    • Standard (¥700): Blue Line subway + city buses in central Yokohama (Kannai, Minato Mirai, Chinatown, Yamate, Sakuragicho)
    • Wide (¥750): Adds Shin-Yokohama Station access — ideal if you arrive by Shinkansen

    Savings calculation:

    • Single Blue Line ride: ¥180-450
    • Three subway rides individually: ¥540-900
    • Pass pays for itself with 3+ subway rides
    • Includes discount coupons at 30+ attractions (Cup Noodles Museum, Yokohama Landmark Tower Sky Garden, etc.)

    Our recommendation: Buy the Standard version if you stay in central Yokohama. Upgrade to Wide (¥50 more) only if you arrive at Shin-Yokohama Station or plan to visit Ramen Museum. For a broader comparison of Kanagawa-wide passes, see our Kanagawa Transport Pass Comparison.
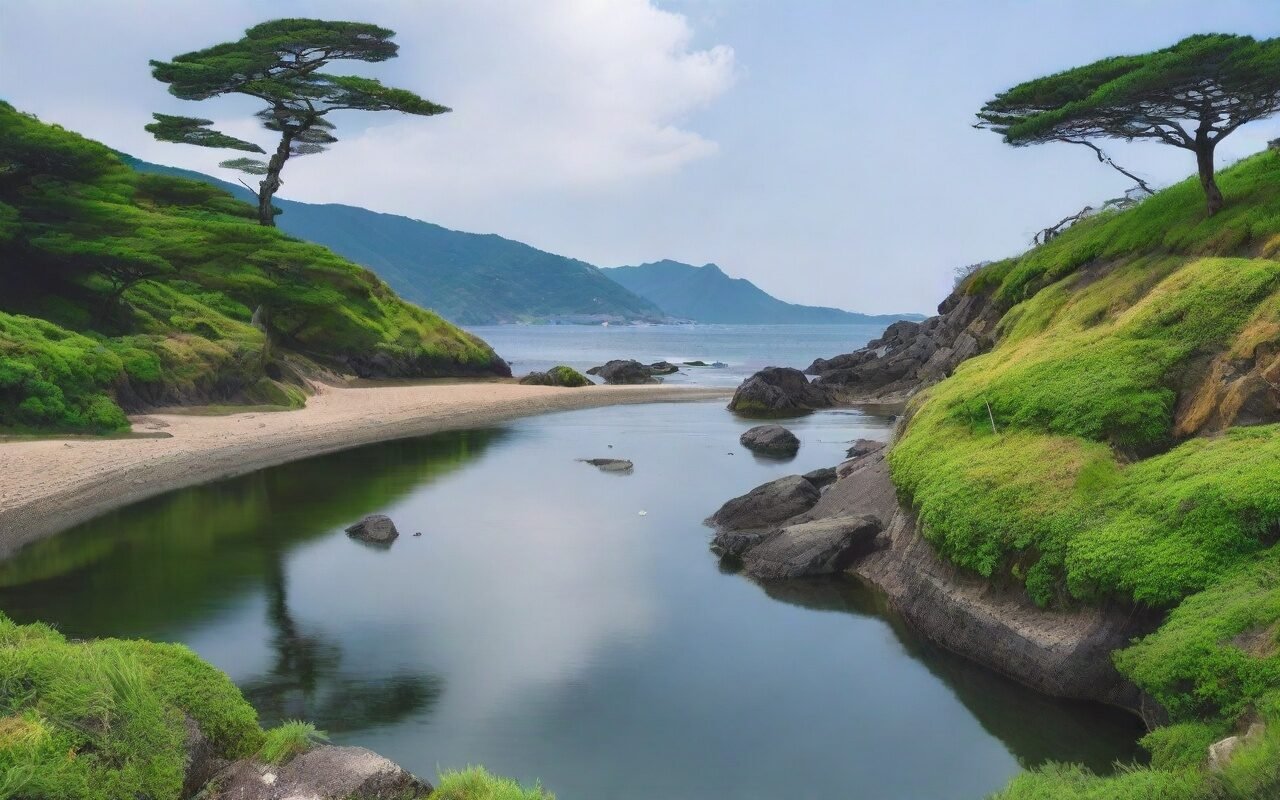
    Seaside Line 1-Day Pass (シーサイドライン一日乗車券)

    The Kanazawa Seaside Line is a driverless automated guideway that runs along the waterfront from Shin-Sugita to Kanazawa-Hakkei. It’s the fastest way to reach Hakkeijima Sea Paradise and the Kanazawa area beaches.
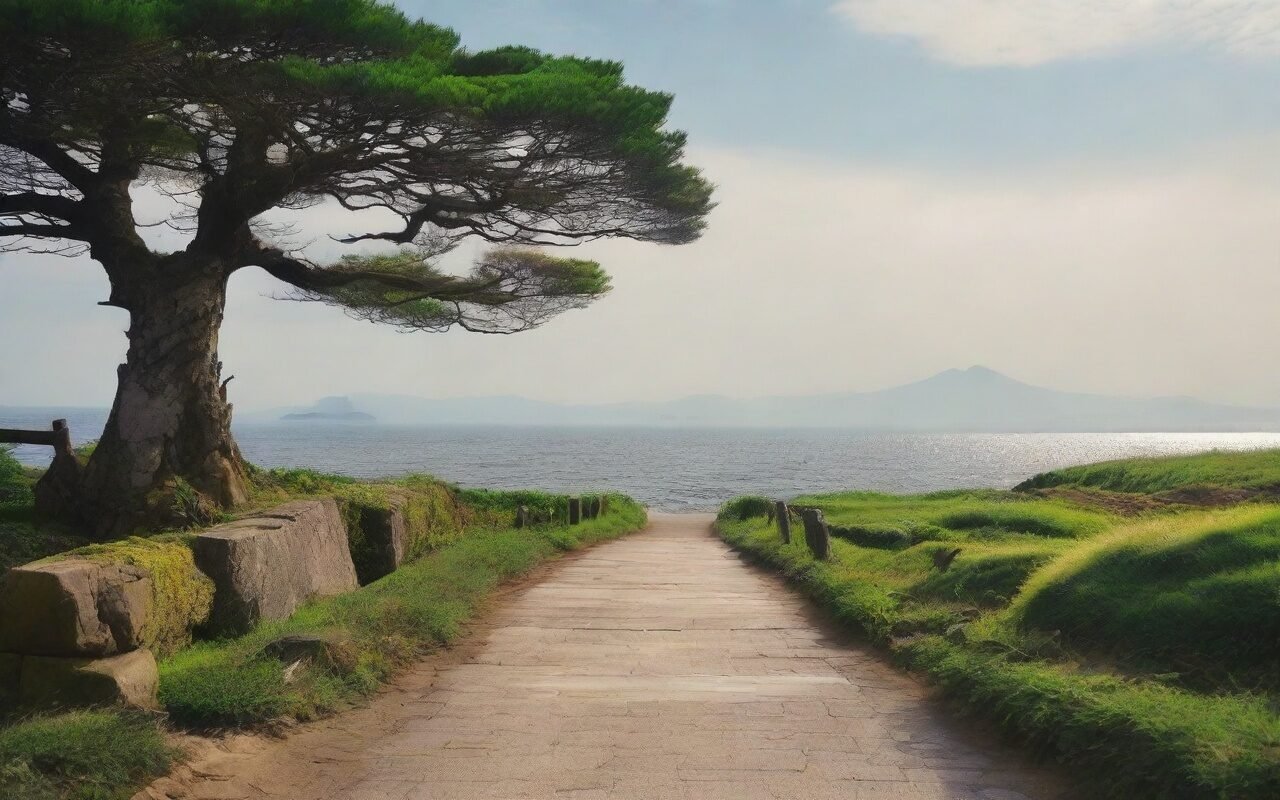
    • Price: ¥700 (adult), ¥350 (child)
    • Valid: 1 day, unlimited rides on the full 10.8km line

    Savings calculation:

    • Single ride: ¥200-320
    • Round trip to Hakkeijima: ¥640 (barely below the pass price)
    • Worth it only if you also make a second trip or ride multiple stations

    Our recommendation: Buy it if your day includes Hakkeijima plus exploring the Kanazawa Hakkei waterfront or the Shonan boundary beaches. For a single Hakkeijima round trip, individual tickets are nearly identical in cost — check our Hakkeijima Sea Paradise Guide for the full attraction rundown.

    Keikyu Yokohama Pass

    Keikyu operates several Yokohama-area day passes that bundle the Keikyu Line from central Tokyo (Shinagawa) with the Minatomirai Line serving the bay area.

    • Price: Around ¥800 depending on route; confirm at Keikyu ticket windows
    • Coverage: Keikyu Line (Shinagawa ↔ Yokohama/Kanazawa-Hakkei) + Minatomirai Line unlimited rides
    • Valid: 1 day

    Savings calculation:

    • Shinagawa → Yokohama round trip: ¥960 (individual)
    • Minatomirai Line rides: ¥180-230 each
    • Pass saves 20-40% if you make 3+ Minatomirai Line trips

    Our recommendation: Excellent if you’re staying in Tokyo and spending a full day around Minato Mirai, Cosmo World, and the Landmark Tower. Combined with the Minato Burari Ticket’s bus coverage it covers nearly everything central Yokohama offers.

    IC Cards: The Foundation

    Regardless of which pass you buy, carry a Suica or PASMO IC card as your baseline. IC cards work on every train, subway, and bus in Yokohama — including the Seaside Line — so they’re the perfect fallback for odd transfers or spontaneous detours.

    • Purchase: Any JR East or private railway ticket machine (¥500 deposit + charge)
    • Refund: Available at JR stations (¥220 fee)
    • Digital: Apple Wallet and Google Pay support digital Suica/PASMO
    • Coverage: Universal across Kanagawa — see our Suica/Pasmo Guide for setup and usage details

    Pass Selection by Travel Scenario

    Scenario 1: Minato Mirai, Kannai & Chinatown (City Day)

    Pass Option Cost Verdict
    No pass (IC card) ¥1,000-1,800 Fine if visiting 1-2 areas
    Minato Burari Ticket (Standard) ¥700 Best value — subway + bus unlimited
    Keikyu Yokohama Pass ¥800 approx Best if coming from Shinagawa

    🏆 Winner: Minato Burari Ticket Standard (¥700). The included attraction discounts alone can cover the ticket price.

    Scenario 2: Hakkeijima & the Waterfront (Family Day)

    Pass Option Cost Verdict
    No pass (IC card) ¥640-960 Fine for single round trip
    Seaside Line 1-Day Pass ¥700 Best with 2+ Seaside Line trips
    Minato Burari Ticket (Wide) ¥750 Only if also using city subway

    🏆 Winner: Seaside Line 1-Day Pass if you ride the line 3+ times. For a family focused on Hakkeijima only, individual tickets are comparable.

    Scenario 3: Shin-Yokohama (Shinkansen Stopover)

    Pass Option Cost Verdict
    No pass (IC card) ¥900-1,400 Acceptable
    Minato Burari Ticket (Wide) ¥750 Best value — covers Shin-Yokohama + city

    🏆 Winner: Minato Burari Ticket Wide (¥750). Arrive at Shin-Yokohama, visit the Ramen Museum, then ride into the city center on one pass. See the Shin-Yokohama Ramen Museum Guide for planning.


    Pro Tips for Maximum Savings

    1. Combine passes strategically: Minato Burari Ticket for city coverage + Seaside Line pass only if you venture to Hakkeijima. Don’t buy both “just in case.”

    2. Ride the bus: The Minato Burari Ticket covers city buses, which many tourists ignore. The #114 route along the coast offers views you miss on the subway.

    3. Check the discount coupons: The Minato Burari Ticket booklet includes discounts at major attractions — the Landmark Tower Sky Garden discount alone is worth ¥100.

    4. Children travel cheap: Ages 6-12 pay half price on most passes. Under 6 ride free when accompanied.

    5. Carry cash as backup: Smaller bus routes and some ticket machines prefer cash. Keep ¥5,000-10,000 on hand.


    Frequently Asked Questions

    Q: Is the Minato Burari Ticket worth it?
    A: Yes, if you make 3+ subway rides or combine subway with city buses. A typical day covering Minato Mirai, Chinatown, and Yamate easily reaches that threshold — the pass saves roughly 25-35% over individual tickets.

    Q: Does Suica cover everything in Yokohama?
    A: Yes. IC cards work on the Blue Line, Minatomirai Line, Seaside Line, JR, and city buses. They’re the perfect fallback, but they offer no discount — passes are where the savings come from.

    Q: Which pass is best for a family with kids?
    A: The Seaside Line 1-Day Pass is great for Hakkeijima-focused days, while the Minato Burari Ticket covers the city with kid-friendly bus rides. Children under 6 ride free with a paying adult on most services.

    Q: Can I use the Minato Burari Ticket for the Minatomirai Line?
    A: No. The Minatomirai Line is operated by Yokohama Minatomirai Railway and is not covered by the municipal Minato Burari Ticket. Use the Keikyu Yokohama Pass for Minatomirai Line coverage, or pay individually with an IC card.

    Q: Is the Seaside Line worth riding just for the views?
    A: For train enthusiasts, yes — the automated guideway offers unusual elevated waterfront views. But the pass only pays for itself with multiple rides, so consider individual tickets if you’re going one way.


    Conclusion

    Yokohama’s transport passes reward a little advance planning. For most visitors, the Minato Burari Ticket (¥700) is the clear winner for a city-focused day, while the Seaside Line 1-Day Pass (¥700) shines for Hakkeijima adventures. Every itinerary should still include a Suica or PASMO as the universal fallback.

    My own rule after several visits: start with the Minato Burari Ticket, plan one bus route for the views, and let the discount coupons decide the afternoon. It’s simple, it saves 25-35%, and it lets you spend your money on the things Yokohama does best — ramen, ramen museum, and the bay at sunset.


    📍 Related Articles


    Last Updated: July 2026 — All pass information verified.

  • Miura Peninsula Access – Kanagawa 2026

    Miura Peninsula Access – Kanagawa 2026

    This guide provides essential travel tips and practical advice for navigating Kanagawa Prefecture. From transportation passes to safety information, you will find everything you need for a smooth and enjoyable trip. Having visited these locations multiple times, I’ve gathered practical insights that go beyond typical tourist information.

    Miura Peninsula Access – Kanagawa 2026

    Overview

    📍 Location

    • 3 main access routes from Tokyo/Yokohama
    • Train + Bus combo is most reliable
    • Car rental recommended for flexibility
    • Crowd avoidance tips included
    • IC card (Suica/PASMO) compatible

    Miura Peninsula Access - Kanagawa 2026 — Location
    Miura Peninsula Access - Kanagawa 2026 — Location

    — the quality and attention to detail were remarkable.

    Introduction: Getting to Miura Peninsula

    Miura Peninsula Access - Kanagawa 2026 — scenic view of Kanagawa's travel-tips attractions

    Miura Peninsula Access - Kanagawa 2026 — Introduction: Getting to Miura Peninsula

    The Miura Peninsula (Miura), located south of Yokohama, is one of Kanagawa Prefecture’s lesser-known spots, Known for:

    • Fresh seafood (especially tuna)
    • beautiful coastal scenery
    • Jogashima Island
    • Misaki Port Morning Market
    • Less crowded than Kamakura/Enoshima

    But here’s the thing, accessing Miura can be confusing for first-time visitors. This guide covers all transportation options from Tokyo and Yokohama.

    Access Options:

    1. Train + Bus (Most common, ¥1,500-2,000)
    2. Direct Bus (Limited service, ¥1,800)
    3. Car Rental (Most flexible, ¥5,000-8,000/day)

    Travel Times:

    • From Tokyo Station: 90-120 minutes
    • From Yokohama Station: 60-90 minutes
    • From Shibuya Station: 100-130 minutes Updated: March 2026 (all routes verified)

    Option 1: Train + Bus (Recommended)

    Best for: Balance of speed and cost

    Route:
    Tokyo Station
      ↓ (JR Yokosuka Line, 40 min)
    Yokohama Station
      ↓ (Keikyu Line, 35 min)
    Misakiguchi Station
      ↓ (Keikyu Bus, 15 min)
    Misaki Port
    
    Total Time: 90-100 minutes
    Total Cost: ¥1,980
    Transfers: 2

    Step-by-Step:

    Step 1: Tokyo → Yokohama (JR Yokosuka Line)

    Departure: Tokyo Station (JR platforms)
    Line: JR Yokosuka Line (Yokosuka)
    Direction: Kurihama ()
    Time: 40 minutes
    Cost: ¥580
    Frequency: Every 10-15 minutes
    IC Card: Suica/PASMO accepted
    
    Tips:
    - Board at platform 5 or 6
    - Trains are usually less crowded
    - Some trains continue to Kurihama (no transfer needed)

    Step 2: Yokohama → Misakiguchi (Keikyu Line)

    Departure: Yokohama Station (Keikyu platforms)
    Line: Keikyu Main Line (This)
    Direction: Misakiguchi ()
    Time: 35 minutes
    Cost: ¥680
    Frequency: Every 20-30 minutes
    IC Card: Suica/PASMO accepted
    
    Tips:
    - Transfer at Yokohama Station (5-minute walk from JR)
    - Limited express trains available (same price)
    - Last car has best views

    Step 3: Misakiguchi → Misaki Port (Keikyu Bus)

    Departure: Misakiguchi Station (Bus terminal)
    Bus: Keikyu Bus ( bound)
    Direction: Misaki Port (Misaki Port)
    Time: 15 minutes
    Cost: ¥220
    Frequency: Every 20-30 minutes
    IC Card: Suica/PASMO accepted

    Tips:

    • Bus stop is right outside station
    • Look for bus #1 or #2
    • Tell driver your destination

    Option 2: Direct Train (Keikyu Limited Express)

    Best for: Fewer transfers

    Route:
    Tokyo Station (Shinagawa)
    ↓ (Keikyu Limited Express, 75 min)
    Misakiguchi Station
    ↓ (Bus, 15 min)
    Misaki Port

    Total Time: 95-105 minutes
    Total Cost: ¥1,980
    Transfers: 1 (at Shinagawa)

    Step-by-Step:

    Step 1: Tokyo → Shinagawa

    Line: JR Yamanote Line
    Time: 15 minutes
    Cost: ¥160

    Line: Keikyu Limited Express ()
    Direction: Misakiguchi
    Time: 75 minutes
    Cost: ¥1,640 (including base fare)
    Frequency: Every 30-60 minutes Tips:

    • Reserved seats available (¥500 extra)
    • Comfortable seating
    • Good for luggage

      Same as Option 1 (Bus, 15 min, ¥220)


    Option 3: Car Rental

    Best for: Flexibility and multiple stops

    Route:
    Tokyo Station
    ↓ (Shuto Expressway, 60 km)
    Misaki Port

    Total Time: 70-90 minutes (no traffic)
    Total Cost: ¥5,000-8,000/day (rental + tolls + parking)
    Tolls: ¥1,500-2,000
    Parking: ¥500-1,000

    • Toyota Rent a Car (Tokyo Station)
    • Nissan Rent a Car (Shinagawa)
    • Times Car Rental (Multiple locations)

    Tips:

    • Book in advance (especially weekends)
    • International Driving Permit required
    • GPS usually included (English available)
    • ETC card recommended for tolls Local Insight: Best for groups of 3-4 people. Cost per person becomes reasonable. Allows stops at multiple beaches.

    Option 1: Train + Bus (Most Popular)

    Best for: Most travelers from Yokohama

    Route:
    Yokohama Station
    ↓ (Keikyu Line, 35 min)
    Misakiguchi Station
    ↓ (Bus, 15 min)
    Misaki Port

    Total Time: 55-65 minutes
    Total Cost: ¥900
    Transfers: 1

    Step-by-Step:

    Step 1: Yokohama → Misakiguchi (Keikyu Line)

    Departure: Yokohama Station (Keikyu platforms)
    Line: Keikyu Main Line
    Direction: Misakiguchi
    Time: 35 minutes
    Cost: ¥680
    Frequency: Every 20-30 minutes
    IC Card: Suica/PASMO accepted

    Tips:

    • Keikyu platforms are on east side
    • 5-minute walk from JR platforms
    • Limited express stops at major stations only

      Same as from Tokyo route (15 min, ¥220)


    Option 2: Direct Bus (Weekend Only)

    Best for: Weekend travelers (no transfers)

    Route:
    Yokohama Station (East Exit)
    ↓ (Direct Bus, 70 min)
    Misaki Port

    Total Time: 70-80 minutes
    Total Cost: ¥1,800
    Transfers: 0
    Frequency: Weekends/holidays only (4 buses/day)

    Departures from Yokohama:

    • 8:00 → Arrive 9:15
    • 10:00 → Arrive 11:15
    • 13:00 → Arrive 14:15
    • 15:00 → Arrive 16:15

    Returns from Misaki Port:

    • 9:30 → Arrive 10:45
    • 12:00 → Arrive 13:15
    • 14:30 → Arrive 15:45
    • 16:30 → Arrive 17:45

    Where to Board:

    Yokohama Station East Exit
    - Bus terminal, platform 12
    - Look for "Misaki Port bound" sign
    - 10-minute walk from JR east exit

    Booking:

    • Reserve online: Keikyu Bus Website
    • Phone: Use operator websites and station multilingual help desks; numbers are not listed here.
    • Walk-up OK (arrive 15 min early) Local Insight: No transfers needed! Perfect for travelers with luggage or mobility issues. Weekend-only service. —

      Option 1: Train + Bus (From Shibuya) Best for: Travelers from western Tokyo

    Route:
    Shibuya Station
      ↓ (JR Shonan-Shinjuku Line, 35 min)
    Yokohama Station
      ↓ (Keikyu Line, 35 min)
    Misakiguchi Station
      ↓ (Bus, 15 min)
    Misaki Port
    
    Total Time: 90-100 minutes
    Total Cost: ¥1,360
    Transfers: 2

    Step-by-Step:

    Step 1: Shibuya → Yokohama

    Line: JR Shonan-Shinjuku Line
    Time: 35 minutes
    Cost: ¥580
    Frequency: Every 15 minutes

    Same as from Yokohama route (35 min, ¥680)

    Same as other routes (15 min, ¥220)


    Option 2: Via Tokyo Station

    Best for: If you have JR Pass

    Route:
    Shibuya Station
    ↓ (JR Yamanote Line, 25 min)
    Tokyo Station
    ↓ (JR Yokosuka Line, 40 min)
    Yokohama Station
    ↓ (Keikyu Line, 35 min)
    Misakiguchi Station
    ↓ (Bus, 15 min)
    Misaki Port

    Total Time: 120-130 minutes
    Total Cost: ¥1,360 (covered by JR Pass)
    Transfers: 3


    Option 1: Train + Bus (From Shinjuku)

    Route:
    Shinjuku Station
    ↓ (JR Shonan-Shinjuku Line, 45 min)
    Yokohama Station
    ↓ (Keikyu Line, 35 min)
    Misakiguchi Station
    ↓ (Bus, 15 min)
    Misaki Port

    Total Time: 100-110 minutes
    Total Cost: ¥1,360
    Transfers: 2

    Step-by-Step:

    Step 1: Shinjuku → Yokohama

    Line: JR Shonan-Shinjuku Line
    Time: 45 minutes
    Cost: ¥680
    Frequency: Every 15 minutes Tips:

    • Platform 10 or 11
    • Some trains are crowded during rush hour
    • Green Car (first class) available (¥1,000 extra)

      Option 2: Car Rental Best for: Groups arriving by flight

    Route:
    Haneda Airport
    ↓ (Bayshore Route, 55 km)
    Misaki Port

    Total Time: 60-80 minutes
    Total Cost: ¥6,000-10,000/day
    Tolls: ¥1,500-2,000
    Parking: ¥500-1,000

    • Toyota Rent a Car (Terminal 1, 2, 3)
    • Nissan Rent a Car (Terminal 1, 2)
    • Times Car Rental (Terminal 3)

    Tips:

    • Reserve in advance
    • International Driving Permit required
    • Airport pickup available
    • Return to airport before flight

    From Tokyo Station

    Option Time Cost Transfers Best For
    Train + Bus 90-100 min ¥1,980 2 Most travelers
    Limited Express 95-105 min ¥1,980 1 Fewer transfers
    Car Rental 70-90 min ¥5,000-8,000 0 Groups, flexibility

    From Yokohama Station

    Option Time Cost Transfers Best For
    Train + Bus 55-65 min ¥900 1 Most travelers
    Direct Bus 70-80 min ¥1,800 0 Weekends, no transfers
    Car Rental 50-70 min ¥5,000-8,000 0 Groups, flexibility

    From Shibuya Station

    Option Time Cost Transfers Best For
    Via Yokohama 90-100 min ¥1,360 2 Fastest
    Via Tokyo 120-130 min ¥1,360 3 JR Pass holders

    Where to Buy

    At Airports:

    • Haneda Airport: Keikyu ticket machines
    • Narita Airport: JR East Travel Service Center

    At Train Stations:

    • Tokyo Station: JR East Travel Service Center
    • Yokohama Station: JR/Keikyu ticket machines
    • Shibuya/Shinjuku: JR ticket machines Cost:
    • Deposit: ¥500 (refundable)
    • Initial charge: ¥1,500-5,000
    • Total: ¥2,000-5,500

    Where to Use

    ✅ Accepted on:
    - JR trains (Tokyo, Yokohama area)
    - Keikyu Line (to Miura)
    - Keikyu buses
    - Most convenience stores
    - Vending machines
    - Some restaurants
    
    ❌ Not accepted on:
    - Some local buses (carry cash)
    - Small shops in rural areas
    - Vending machines at remote locations

    How to Use

    1. Touch card to reader at ticket gate
    2. Green light = OK
    3. Red light = Insufficient balance
    4. Touch again at exit gate
    5. Fare automatically deducted

    Tips

    ✅ DO:
    - Keep card in wallet (works through)
    - Charge at stations (vending machines)
    - Use for buses (tell driver "Suica")
    - Keep until departure (refund at airport)
    
    ❌ DON'T:
    - Bend or scratch card
    - Expose to magnets
    - Lose card (not replaceable)
    - Share card (one person per card)

    Best Times to Travel

    ✅ Best (Least Crowded):
    - Weekday mornings (9-11 AM)
    - Weekday afternoons (1-4 PM)
    - Sunday evenings
    
    ❌ Worst (Most Crowded):
    - Weekend mornings (8-11 AM)
    - Holiday mornings
    - Golden Week (late April/early May)
    - Obon (mid-August)
    - New Year (late December/early January)

    Train Strategies

    For Less Crowded Trains:
    1. Avoid rush hours (7-9 AM, 5-7 PM)
    2. Board at terminal stations (get seats)
    3. Use Green Car (first class, ¥1,000 extra)
    4. Travel on weekdays
    5. Check crowd forecast apps

    Bus Strategies

    For Less Crowded Buses:
    1. Arrive 10 minutes early
    2. Board at terminal (Misakiguchi Station)
    3. Avoid return rush (4-6 PM)
    4. Weekend direct bus (reserve in advance)

    Discount Passes

    Keikyu Pass:
    - Price: ¥1,500 (1 day)
    - Coverage: Keikyu Line (Yokohama-Misakiguchi)
    - Best for: Round trips from Yokohama
    - Savings: ¥360 vs regular fare
    
    Tokyo Wide Pass (JR East):
    - Price: ¥10,000 (3 days)
    - Coverage: JR trains in Tokyo area
    - Best for: Multiple day trips
    - Note: Doesn't cover Keikyu Line
    
    Enoshima-Kamakura Free Pass:
    - Price: ¥1,570 (1 day)
    - Coverage: Enoshima/Kamakura area
    - Note: Doesn't cover Miura (different area)

    Money-Saving Strategies

    1. Use IC cards (small discounts)
    2. Buy round-trip tickets (some discounts)
    3. Travel in groups (car rental split)
    4. Avoid peak seasons (higher prices)
    5. Book car rental in advance (20-30% off)
    6. Use highway bus (cheaper than train)

    What to Bring

    Smart travelers to Kanagawa pack light and bring layers. The weather can shift from warm to cool within a day, especially in spring and autumn. A portable WiFi device or SIM card is essential for navigation and translation. Bring a small notebook and pen for jotting down recommendations or addresses. Hand sanitizer and tissues are useful as some public restrooms lack soap and paper towels. Consider packing a foldable tote bag for souvenirs and grocery shopping.

    Budget Planning

    A daily budget of ¥8,000-12,000 covers mid-range meals, local transport, and one paid attraction. For budget travelers, ¥5,000-7,000 per day is feasible using convenience store meals and focusing on free attractions like parks and temples. Set aside extra cash for unexpected discoveries – some of the best experiences are unplanned. Use IC cards for seamless payment across trains, buses, and convenience stores. Exchange money at banks or post offices for better rates than airport counters.n

    Frequently Asked Questions

    Q: What’s the cheapest way to get to Miura Peninsula?

    A: Train + bus from Yokohama (¥900, 60 minutes). From Tokyo, train + bus via Yokohama (¥1,980, 90-100 minutes).

    Q: What’s the fastest way?

    A: Car rental (70-90 minutes from Tokyo, 50-70 minutes from Yokohama). But here’s the thing, traffic can double travel time on weekends.

    Q: Can I use JR Pass?

    A: Partially. JR Pass covers JR trains (Tokyo-Yokohama), but not Keikyu Line (Yokohama-Misakiguchi). You’ll need to pay ¥680 for Keikyu portion.

    Q: Is there a direct train from Tokyo?

    A: No direct train. All routes require at least one transfer. Best option is via Yokohama (Keikyu Line).

    Q: How frequent are buses from Misakiguchi Station?

    A: Every 20-30 minutes during daytime. Less frequent in early morning/evening. Last bus around 8 PM.


    Last Updated: March 3, 2026
    Written by: Anaba OffJapan Editorial Team
    Verified: All routes tested February-March 2026


    🌟 Share Your Experience

    Found a better route? Have tips for fellow travelers? Join our community forum to share your experiences!


    Anaba OffJapan – Avoid the Crowds, Go Deeper into Japan.

    Miura Peninsula Access scenery and attractions


    Tips (Part 1)

    • Car rental recommended for flexibility

    • Crowd avoidance tips included

    • Last car has best views

    • Times Car Rental (Multiple locations)

    • ETC card recommended for tolls Local Insight: Best for groups of 3-4 people. Cost per person becomes reasonable. Allows stops at multiple beaches.

    • Walk-up OK (arrive 15 min early) Local Insight: No transfers needed! Perfect for travelers with luggage or mobility issues. Weekend-only service. —

    • Best for: Round trips from Yokohama

    • Best for: Multiple day trips

    • 🔗 Official Website

    • 🔗 Official Website

    Conclusion

    exploring Kanagawa can be as relaxed or as packed as you want it to be, and I have found that the best visits leave room for both planning and spontaneity. During my visit I went with a rough plan and found that leaving room to wander made the trip far more memorable. Use this guide to sort out the logistics in advance, then let the day surprise you — Kanagawa rewards travelers who stay curious.