Blog

  • Japan Public Wifi – Complete Guide 2026

    Japan Public Wifi – Complete Guide 2026

    This guide provides essential travel tips and practical advice for navigating Kanagawa Prefecture. From transportation passes to safety information, you will find everything you need for a smooth and enjoyable trip.

    Overview

    📍 Location

    • 5 major public Wi-Fi networks covered
    • Step-by-step connection guides with screenshots
    • Pre-registration recommended before arrival
    • Security tips for safe browsing
    • Nationwide coverage (not just Kanagawa)

    Introduction: Public Wi-Fi in Japan
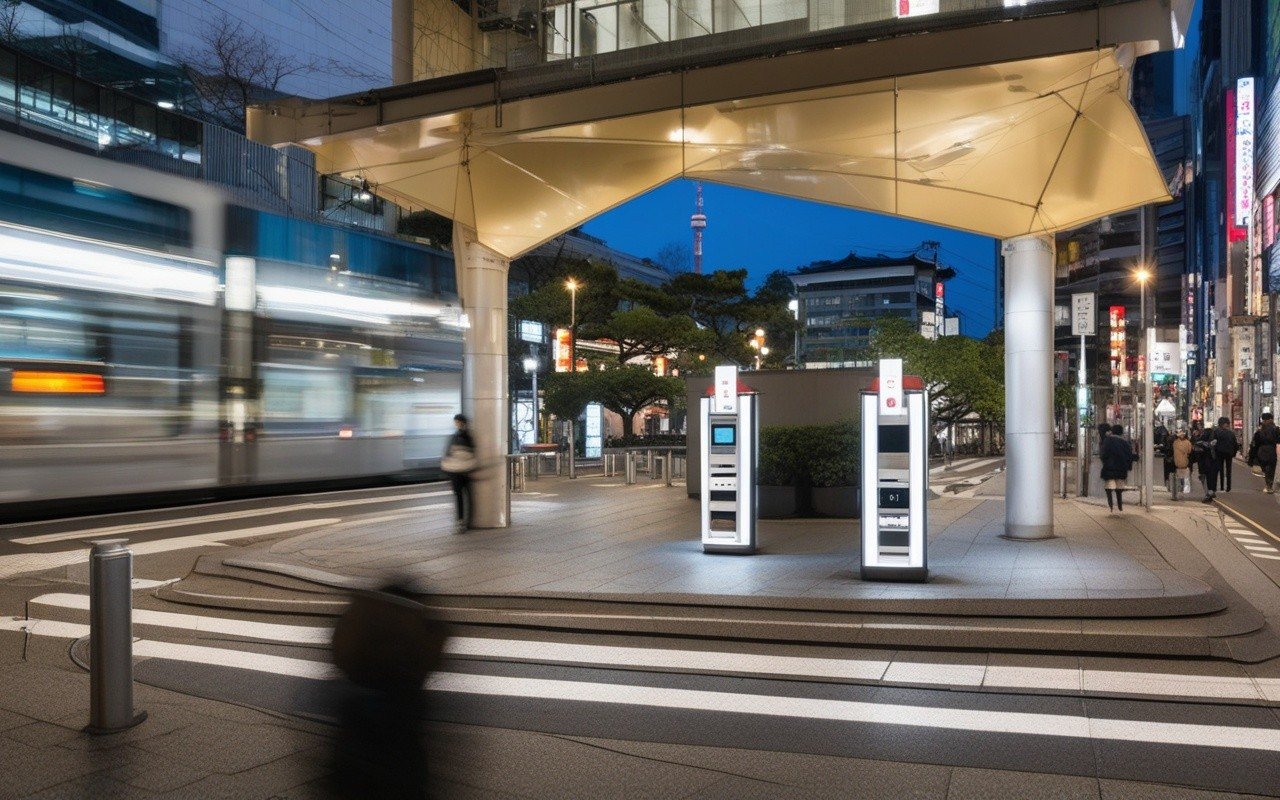
    Japan Public Wifi - Complete Guide 2026 — Introduction: Public Wi-Fi in Japan

    Japan Public Wifi - Complete Guide 2026 — Introduction: Public Wi-Fi in Japan

    Japan has made significant improvements in public Wi-Fi infrastructure, especially after the 2020 Tokyo Olympics. But here’s the thing, the variety of networks and registration requirements can be confusing for first-time visitors.

    This guide covers:

    • Major public Wi-Fi networks available nationwide
    • Step-by-step connection instructions
    • Pre-registration options (save time!)
    • Security best practices
    • Troubleshooting tips

    Whether you’re at:

    • Train stations
    • Convenience stores
    • Parks and public facilities
    • Shopping malls
    • Restaurants and cafes This outline will help you stay connected throughout your Japan trip. Updated: March 2026 (all networks verified)

    1. Japan Connected-free Wi-Fi (Official App)

    Best for: One-stop solution for multiple networks

    Item Details
    Network Name Various (depends on location)
    Coverage Nationwide (40,000+ spots)
    Speed 10-30 Mbps (varies by location)
    Time Limit Varies by network
    Registration One-time (via app)
    Cost Free
    Languages 7 languages

    What is Japan Connected-free Wi-Fi?

    This is an official app launched by the Japanese government to make public Wi-Fi more accessible for international visitors. One registration gives you access to multiple participating networks.

    Step 1: Download the App

    Before You Travel (Recommended):
    1. Download "Japan Connected-free Wi-Fi"
       - iOS: [App Store Link]
       - Android: [Google Play Link]
    2. Install and open the app
    3. Register with email or social media
    4. Save your credentials

    Step 2: Connect at Location

    At Your Destination:
    1. Enable Wi-Fi on your device
    2. Look for participating networks:
       - WIFIRE (NTT East)
       - FREESPOT
       - 7SPOT (7-Eleven)
       - Lawson Wi-Fi
       - And 40,000+ more
    3. Select the network
    4. App auto-authenticates (no manual login!)
    5. Start browsing

    Supported Networks

    Major Participating Networks:
    ✅ WIFIRE (NTT East)
    ✅ FREESPOT
    ✅ 7SPOT (7-Eleven)
    ✅ Lawson Wi-Fi
    ✅ FamilyMart Wi-Fi
    ✅ Starbucks Wi-Fi
    ✅ McDonald's Wi-Fi
    ✅ JR East Wi-Fi
    ✅ Tokyo Metro Wi-Fi
    ✅ And 40,000+ more locations

    Pros & Cons

    ✅ Pros:

    • One registration for all networks
    • Automatic authentication
    • Supports 7 languages
    • Offline map available
    • Free to use

    ❌ Cons:

    • Requires app installation
    • Some networks still need separate registration
    • Speed varies by location

    2. WIFIRE (NTT East)

    Best for: Wide coverage in Eastern Japan (including Tokyo & Kanagawa)

    Item Details
    Network Name WIFIRE
    Coverage Eastern Japan (Tokyo, Kanagawa, etc.)
    Speed 15-30 Mbps
    Time Limit 60 minutes/session
    Registration Required (one-time)
    Cost Free
    Validity 30 days

    WIFIRE Coverage Area

    Major Coverage:
    ✅ Tokyo (23 wards)
    ✅ Kanagawa (Yokohama, Kawasaki, etc.)
    ✅ Saitama
    ✅ Chiba
    ✅ Ibaraki
    ✅ Tochigi
    ✅ Gunma
    ✅ Fukushima
    ✅ Miyagi
    ✅ Hokkaido (Sapporo)

    
    #### Method 1: Web Registration (WIFIRE On-site)
    

    Step 1: Select Network

    1. Enable Wi-Fi
    2. Select “WIFIRE” network
    3. Open browser (auto-redirects to login page)

    Step 2: Register
    4. Click “New Registration”
    5. Enter email address
    6. Create password (8+ characters)
    7. Accept terms of service
    8. Click “Register” Step 3: Login
    9. Enter email and password
    10. Click “Login”
    11. Start browsing (valid for 60 minutes) Step 4: Reconnect
    12. After 60 minutes, re-login (same credentials)
    13. Valid for 30 days from registration

    
    #### Method 2: Pre-registration (Before Travel)
    

    Before You Travel:

    1. Visit: https://www.wifire.ne.jp/
    2. Click “Foreign Visitors”
    3. Register with email
    4. Save credentials
    5. Use immediately upon arrival

    Connection Tips

    ✅ Best Practices:
    - Register before arrival (saves 5 minutes on-site)
    - Use Gmail or major email providers (fewer delivery issues)
    - Save credentials in password manager
    - Reconnect automatically within 30 days
    
    ❌ Common Issues:
    - Email verification delayed (check spam folder)
    - Password too simple (use 8+ characters with numbers)
    - Browser cache issues (try incognito mode)

    3. FREESPOT

    Best for: Shopping areas and restaurants

    Item Details
    Network Name FREESPOT
    Coverage Nationwide (10,000+ spots)
    Speed 10-20 Mbps
    Time Limit 60 minutes/session
    Registration Required (one-time)
    Cost Free
    Validity 30 days

    FREESPOT Coverage Area

    Major Coverage:
    ✅ Tokyo (Shibuya, Shinjuku, etc.)
    ✅ Kanagawa (Yokohama, Kamakura, etc.)
    ✅ Osaka (Umeda, Namba, etc.)
    ✅ Kyoto (Gion, Arashiyama, etc.)
    ✅ Hokkaido (Sapporo)
    ✅ Fukuoka (Tenjin, Hakata, etc.)
    ✅ And 10,000+ locations nationwide

    Typical Locations

    Where to Find FREESPOT:
    🏪 Shopping malls
    🍽️ Restaurants and cafes
    🏨 Hotels and ryokans
    🏛️ Tourist facilities
    🚉 Train stations
    🏢 Public facilities

    How to Connect (Step-by-Step)

    Step 1: Select Network
    1. Enable Wi-Fi
    2. Select "FREESPOT" network
    3. Open browser (auto-redirects)
    
    Step 2: Register (First Time)
    4. Click "New User Registration"
    5. Enter:
       - Email address
       - Password (8+ characters)
       - Nickname (optional)
    6. Accept terms
    7. Click "Register" Step 3: Verify Email
    8. Check email for verification code
    9. Enter code on verification page
    10. Registration complete! Step 4: Login
    11. Enter email and password
    12. Click "Login"
    13. Start browsing (60 minutes) Step 5: Reconnect
    14. Within 30 days: auto-login
    15. After 30 days: re-register

    FREESPOT App (Optional)

    For Frequent Users:
    1. Download FREESPOT app
       - iOS: [App Store Link]
       - Android: [Google Play Link]
    2. Register once in app
    3. Auto-connect at all FREESPOT locations
    4. Find nearby spots on map

    4. 7SPOT (7-Eleven)

    Best for: Convenience and 24/7 access

    Item Details
    Network Name 7SPOT
    Coverage Nationwide (20,000+ stores)
    Speed 15-25 Mbps
    Time Limit 60 minutes/session (3 sessions/day)
    Registration Required (one-time)
    Cost Free
    Hours 24/7 (most stores)

    Coverage

    7-Eleven Stores:
    ✅ 20,000+ stores nationwide
    ✅ Most urban areas covered
    ✅ Many open 24/7
    ✅ Even in rural areas

    Method 1: Web Registration

    Step 1: Select Network
    1. Enable Wi-Fi
    2. Select "7SPOT" network
    3. Open browser (auto-redirects)
    
    Step 2: Register (First Time)
    4. Click "New Registration"
    5. Enter:
       - Email address
       - Password
       - Nickname (optional)
    6. Accept terms
    7. Click "Register" Step 3: Verify Email
    8. Check email for verification
    9. Click verification link
    10. Registration complete! Step 5: Daily Limit
    14. 3 sessions per day (60 min each)
    15. Resets at midnight (JST)

    Method 2: 7SPOT App (Recommended)

    For Easier Access:
    1. Download "7SPOT" app
       - iOS: [App Store Link]
       - Android: [Google Play Link]
    2. Register in app (one-time)
    3. Auto-connect at all 7-Eleven stores
    4. No need to login each time
    5. Find nearby stores on map

    Usage Tips

    ✅ Tips:
    - No purchase required (but appreciated)
    - 3 sessions per day (180 minutes total)
    - Works at ALL 7-Eleven stores in Japan
    - great backup option when other Wi-Fi fails
    
    ❌ Limitations:
    - 60 minutes per session
    - 3 sessions per day limit
    - Can be slow during peak times

    Local Insight: 7-Eleven stores are everywhere in Japan (even in rural areas). 7SPOT is an excellent backup Wi-Fi option when traveling outside major cities.


    5. Lawson Wi-Fi (LAWSON FREE Wi-Fi)

    Best for: Convenience store access

    Item Details
    Network Name LAWSON FREE Wi-Fi
    Coverage Nationwide (14,000+ stores)
    Speed 10-20 Mbps
    Time Limit 30 minutes/session (3 sessions/day)
    Registration Required (one-time)
    Cost Free
    Hours 24/7 (most stores)

    How to Connect to Lawson Wi-Fi

    Step 1: Select Network
    1. Enable Wi-Fi
    2. Select "LAWSON FREE Wi-Fi"
    3. Open browser
    
    Step 2: Register (First Time)
    4. Click "New Registration"
    5. Enter email and password
    6. Accept terms
    7. Register Step 3: Login
    8. Enter credentials
    9. Start browsing (30 minutes) Step 4: Reconnect
    10. 3 sessions per day allowed
    11. Resets at midnight (JST)

    Lawson vs 7SPOT Comparison

    Feature Lawson 7SPOT
    Time Limit 30 min/session 60 min/session
    Daily Limit 3 sessions 3 sessions
    Total Daily 90 minutes 180 minutes
    Stores 14,000+ 20,000+
    Speed 10-20 Mbps 15-25 Mbps
    Winner 7SPOT ⭐

    6. FamilyMart Wi-Fi (Fami-WiFi)

    Best for: FamilyMart shoppers

    Item Details
    Network Name Fami-WiFi
    Coverage Nationwide (16,000+ stores)
    Speed 10-20 Mbps
    Time Limit 30 minutes/session (3 sessions/day)
    Registration Required (one-time)
    Cost Free
    Hours 24/7 (most stores)

    How to Connect to Fami-WiFi

    Same process as Lawson and 7SPOT:
    1. Select "Fami-WiFi"
    2. Register with email
    3. Login and browse
    4. 30 minutes per session
    5. 3 sessions per day

    7. JR-EAST FREE Wi-Fi

    Best for: Train travel in Eastern Japan

    Item Details
    Network Name JR-EAST FREE Wi-Fi
    Coverage JR East stations (Tokyo, Yokohama, etc.)
    Speed 20-30 Mbps
    Time Limit 60 minutes/session
    Registration Required (one-time)
    Cost Free
    Validity 30 days

    8. Tokyo Metro Wi-Fi

    Best for: Subway travel in Tokyo

    Item Details
    Network Name Tokyo Metro Wi-Fi
    Coverage All Tokyo Metro stations
    Speed 15-25 Mbps
    Time Limit 240 minutes/day
    Registration Required (one-time)
    Cost Free
    Validity 30 days

    Tokyo Metro Coverage

    Tokyo Metro Lines:
    ✅ Ginza Line
    ✅ Marunouchi Line
    ✅ Hibiya Line
    ✅ Tozai Line
    ✅ Chiyoda Line
    ✅ Yurakucho Line
    ✅ Hanzomon Line
    ✅ Namboku Line
    ✅ Fukutoshin Line

    How to Connect to Tokyo Metro Wi-Fi

    Same as JR-EAST:
    1. Select "Tokyo Metro Wi-Fi"
    2. Register with email or social media
    3. Login and browse
    4. 240 minutes per day (generous!)
    5. Valid for 30 days

    9. Starbucks Wi-Fi

    Best for: Cafe work sessions

    Item Details
    Network Name at_STARBUCKS_Wi-Fi
    Coverage All Starbucks stores in Japan
    Speed 20-30 Mbps
    Time Limit 60 minutes/session (unlimited sessions)
    Registration Required (free membership)
    Cost Free (purchase optional but expected)
    Hours Store hours (varies)

    How to Connect to Starbucks Wi-Fi

    Step 1: Register for Starbucks Membership

    1. Download Starbucks app OR
    2. Visit starbucks.co.jp
    3. Create free account
    4. Verify email

    Step 2: Connect at Store

    1. Select “at_STARBUCKS_Wi-Fi”
    2. Login with membership credentials
    3. Browse for 60 minutes
    4. Reconnect (unlimited sessions)

    10. McDonald’s Wi-Fi

    Best for: Quick meals and browsing

    Item Details
    Network Name McDonald’s Wi-Fi
    Coverage Most McDonald’s stores
    Speed 15-25 Mbps
    Time Limit 30 minutes/session
    Registration Required (one-time)
    Cost Free
    Hours Store hours

    How to Connect to McDonald’s Wi-Fi

    1. Select “McDonald’s Wi-Fi”
    2. Open browser
    3. Register with email
    4. Login and browse (30 minutes)
    5. Reconnect if needed

    📊 Comparison Table

    Network Coverage Speed Time Limit Registration Best For
    Japan Connected 40,000+ 10-30 Mbps Varies One-time All-in-one
    WIFIRE Eastern Japan 15-30 Mbps 60 min One-time Eastern Japan
    FREESPOT 10,000+ 10-20 Mbps 60 min One-time Shopping areas
    7SPOT 20,000+ 15-25 Mbps 60 min x3 One-time 24/7 access
    Lawson 14,000+ 10-20 Mbps 30 min x3 One-time Convenience
    JR-EAST 1,000+ stations 20-30 Mbps 60 min One-time Train travel
    Tokyo Metro All metro stations 15-25 Mbps 240 min One-time Subway travel
    Starbucks All stores 20-30 Mbps 60 min (∞) Membership Remote work

    Before You Leave Home (Recommended)

    □ Download Japan Connected-free Wi-Fi app
    □ Register for WIFIRE (https://www.wifire.ne.jp/)
    □ Register for FREESPOT (https://www.freespot.com/)
    □ Register for 7SPOT (app or website)
    □ Register for Starbucks membership
    □ Save all credentials in password manager
    □ Test apps work on your device
    □ Screenshot confirmation emails

    Time Required

    Total Setup Time: 30-45 minutes
    - Japan Connected app: 5 minutes
    - WIFIRE registration: 5 minutes
    - FREESPOT registration: 5 minutes
    - 7SPOT registration: 5 minutes
    - Starbucks membership: 5 minutes
    - Password manager setup: 10-15 minutes

    Pro Tip: Do this 1-2 weeks before travel to resolve any issues before departure.


    Safe Browsing on Public Wi-Fi

    ✅ DO:
    - Use HTTPS websites only (look for 🔒)
    - Use a VPN for sensitive data
    - Log out of accounts when done
    - Use two-factor authentication
    - Keep software updated
    - Use password manager
    
    ❌ DON'T:
    - Access online banking
    - Enter credit card details
    - Share personal information
    - Use same password everywhere
    - Leave devices unattended
    - Connect to unknown networks

    Recommended VPN Services

    For Japan Travel:
    1. ExpressVPN (fast, reliable)
    2. NordVPN (good value)
    3. Surfshark (unlimited devices)
    4. ProtonVPN (free tier available)
    
    Note: VPNs are legal in Japan for personal use.

    “Can’t connect to network”

    Solutions:
    1. Toggle Wi-Fi off/on
    2. Forget network and reconnect
    3. Restart device
    4. Try different network
    5. Move closer to access point

    “Login page doesn’t appear”

    Solutions:
    1. Open browser manually
    2. Visit https://example.com (forces redirect)
    3. Clear browser cache
    4. Try incognito/private mode
    5. Use different browser

    “Email verification not received”

    Solutions:
    1. Check spam/junk folder
    2. Wait 5-10 minutes
    3. Use different email provider (Gmail recommended)
    4. Try social media login instead
    5. Contact network support

    “Slow speeds”

    Solutions:
    1. Move to different location
    2. Try different network
    3. Avoid peak hours (12-2 PM, 6-8 PM)
    4. Close background apps
    5. Try 5GHz band if available

    “Session expired too quickly”

    Solutions:
    1. Check time limit for that network
    2. Some networks count inactive time
    3. Keep browser active (don't leave tab open)
    4. Reconnect (most allow unlimited sessions)
    5. Try different network

    Maximize Your Wi-Fi Time

    Strategy 1: Network Rotation
    - Use 7SPOT (60 min) → Lawson (30 min) → FamilyMart (30 min)
    - Total: 120 minutes in one area
    
    Strategy 2: Session Management
    - Most networks allow unlimited sessions
    - Just re-login after time limit
    - Set timer to remind yourself
    
    Strategy 3: Location Selection
    - Train stations: Fast but crowded
    - Convenience stores: Reliable, 24/7
    - Cafes: Comfortable, power outlets
    - Parks: Outdoor, weather dependent

    Best Combinations by Area

    Tokyo/Yokohama:
    ✅ JR-EAST + Tokyo Metro + 7SPOT
    ✅ Complete coverage for train travel
    
    Kanagawa (Shonan/Kamakura):
    ✅ WIFIRE + FREESPOT + 7SPOT
    ✅ Good coverage in tourist areas Rural Areas:
    ✅ 7SPOT + Lawson + FamilyMart
    ✅ Convenience stores are everywhere

    Essential Apps

    1. Japan Connected-free Wi-Fi

      • Download: iOS / Android
      • One registration, 40,000+ spots
      • Offline map
      • 7 languages
    2. Google Maps

      • Search “free Wi-Fi near me”
      • Check recent reviews for speed info
      • Save favorite locations
    3. WiFi Map

      • Community-sourced passwords
      • Offline mode
      • Speed tests

    Optional Apps

    1. 7SPOT (7-Eleven)
    2. FREESPOT
    3. Starbucks
    4. Tokyo Metro
    5. JR-EAST

    ❓ Frequently Asked Questions

    Q: Do I need to register for each network separately?

    A: Without Japan Connected app: Yes, each network requires separate registration. With Japan Connected app: One registration covers 40,000+ spots (highly recommended!).

    Q: Is public Wi-Fi free in Japan?

    A: Yes! All major public Wi-Fi networks in Japan are completely free. No payment required, just registration.

    Q: How long does registration take?

    A: First-time registration takes 3-5 minutes per network. Pre-register before travel to save time. Japan Connected app is fastest (one registration for all).

    Q: Can I use Wi-Fi without speaking Japanese?

    A: Yes! All major networks have English login pages. Look for the English button (usually top-right corner). Japan Connected app supports 7 languages.

    Q: Is public Wi-Fi secure in Japan?

    A: Generally yes, but follow standard security practices: use HTTPS, avoid banking, consider a VPN for sensitive data.

    🔗 Related Articles


    Last Updated: March 3, 2026
    Written by: Anaba OffJapan Editorial Team
    Tested: All networks verified February-March 2026


    🌟 Share Your Experience

    Found a great Wi-Fi spot? Have connection tips for fellow travelers? Join our community forum to share your experiences!


    Anaba OffJapan – Avoid the Crowds, Go Deeper into Japan.


    📝 Conclusion

    Japan offers extensive public Wi-Fi networks, and with pre-registration through the Japan Connected-free Wi-Fi app, you can stay connected from the moment you arrive. Pre-registering before your trip saves time and ensures a smooth experience navigating trains, convenience stores, and tourist spots throughout Kanagawa and beyond.


    Frequently Asked Questions

    , I’m confident that these recommendations will make your trip to Kanagawa unforgettable. The small details — knowing where to charge your phone, find a restroom, or stash your luggage — can make the difference between a stressful trip and a seamless journey through Kanagawa.

    During my visit I went with a rough plan and found that leaving room to wander made the trip far more memorable.
  • Hakone On A Budget Guide – Kanagawa 2026

    Hakone On A Budget Guide – Kanagawa 2026

    Hakone On A Budget Guide – Kanagawa 2026

    Overview

    📍 Location


    Hakone can be expensive, but with smart planning, you can enjoy this pretty area on a budget. This guide covers free attractions, cheap eats, budget lodging, and money-saving tips.

    Budget Traveler

    Hakone On A Budget Guide — main illustration

    Hakone On A Budget Guide — main illustration

    Hakone On A Budget — detailed view

    Item Cost Notes
    Transport ¥2,000 Hakone Free Pass
    Food ¥2,000 Convenience stores, cheap restaurants
    Activities ¥1,000 Free attractions + 1 paid
    lodging ¥5,000 Hostel/guesthouse
    Total ¥10,000/day Per person

    Mid-Range Traveler

    Item Cost Notes
    Transport ¥3,000 Hakone Free Pass + taxis
    Food ¥4,000 Mix of cheap + nice restaurants
    Activities ¥3,000 Museums, attractions
    lodging ¥15,000 Ryokan or hotel
    Total ¥25,000/day Per person

    Luxury Traveler

    Item Cost Notes
    Transport ¥5,000 Private transport, taxis
    Food ¥10,000 Fine dining
    Activities ¥5,000 Private tours, premium attractions
    lodging ¥50,000+ Luxury ryokan
    Total ¥70,000+/day Per person

    1. Hakone Shrine

    Why Visit: Famous waterside torii gate, pretty shrine

    • Admission: Free
    • Hours: 9:00-17:00
    • Access: Bus from Moto-Hakone
    • Time Needed: 30-60 min

    Highlights:

    • Torii gate (photo spot)
    • Main shrine building
    • Cedar tree avenue
    • Lake Ashi views

    2. Old Tokaido Road

    Why Visit: Historic stone path through cedar forest

    • Admission: Free
    • Hours: Always open
    • Access: Bus from Moto-Hakone
    • Time Needed: 1-2 hours

    Highlights:

    • Original stone pavement
    • 400-year-old cedar trees
    • Checkpoint ruins
    • Lake Ashi views

    3. Lake Ashi

    Why Visit: Scenic lake with Mount Fuji views

    • Admission: Free (walking around lake)
    • Hours: Always open
    • Access: Multiple access points
    • Time Needed: 1-3 hours

    Highlights:

    • Lakeside walks
    • Mount Fuji views (clear days)
    • Photo chances
    • Picnic spots

    4. Owakudani Valley

    Why Visit: Volcanic valley with sulfur vents

    • Admission: Free (ropeway not included)
    • Hours: Always open
    • Access: Hakone Ropeway
    • Time Needed: 30-60 min

    Highlights:

    • Volcanic vents
    • Black eggs (for buy)
    • Sulfur springs
    • Mountain views Note: Ropeway costs extra (covered by Hakone Free Pass)

    5. Sengokuhara Pampas Grass

    Why Visit: Golden grass fields (autumn)

    • Admission: Free
    • Hours: Always open
    • Access: Bus from Sengokuhara
    • Time Needed: 30-60 min

    Highlights:

    • Golden grass (Sep-Nov)
    • Hiking trails
    • Photo chances
    • Mountain views

    6. Hakone Gardens

    Why Visit: pretty Japanese gardens

    • Admission: Free (some charge fee)
    • Hours: Varies
    • Access: Various locations
    • Time Needed: 30-60 min

    Highlights:

    • Traditional landscaping
    • Seasonal flowers
    • Tea houses
    • Peaceful atmosphere

    Convenience Stores

    Chains: 7-Eleven. FamilyMart Meals:

    • Onigiri (rice balls): ¥100-200
    • Bento boxes: ¥400-600
    • Sandwiches: ¥300-500
    • Noodles: ¥300-500
    • Drinks: ¥100-200 Daily Budget: ¥1,000-1,500 Tips:
    • Look for discount stickers (evening)
    • Try local specialties
    • Use ATM (international cards accepted)

    Fast Food

    Options:

    • Matsuya: Beef bowls (¥300-600)
    • Yoshinoya: Beef bowls (¥300-600)
    • Sukiya: Beef bowls (¥300-600)
    • McDonald’s: Burgers (¥500-800)
    • Mos Burger: Japanese burgers (¥500-800) Daily Budget: ¥1,500-2,000

    Local Cheap Restaurants

    Ramen Shops:

    • Price: ¥700-1,000
    • Where: Hakone-Yumoto. Gora
    • Recommended: Hakone Ramen, local shops Soba/Udon:
    • Price: ¥800-1,200
    • Where: Gora. Sengokuhara
    • Recommended: Traditional soba shops Curry Rice:
    • Price: ¥700-1,000
    • Where: Various locations
    • Recommended: CoCo Ichibanya (chain) Set Meals (Teishoku):
    • Price: ¥1,000-1,500
    • Where: Local restaurants
    • Recommended: Lunch specials (better value)

    Hostels & Guesthouses

    Price: ¥3,000-8,000 per night Options:

    • Guesthouse Gora: ¥8,000/night
    • Hakone Backpackers: ¥5,000/night
    • K’s House Hakone: ¥6,000/night places:
    • Shared dormitories
    • Shared bathrooms
    • Common kitchen
    • Free Wi-Fi Best For: Solo travelers, budget travelers

    Capsule Hotels

    Price: ¥4,000-8,000 per night Options:

    • Capsule Hotel Hakone: ¥6,000/night
    • 9 Hours Hakone: ¥7,000/night places:
    • Private capsule
    • Shared bathrooms
    • Onsen (sometimes)
    • Free Wi-Fi Best For: Solo travelers, quick stays

    Business Hotels

    Price: ¥8,000-15,000 per night Options:

    • Hotel MyStays: ¥10,000/night
    • Toyoko Inn: ¥9,000/night
    • APA Hotel: ¥10,000/night places:
    • Private room
    • Private bathroom
    • Breakfast (sometimes)
    • Free Wi-Fi Best For: Couples, business travelers

    Ryokan (Budget)

    Price: ¥10,000-20,000 per night Options:

    • Hakone Yuryo: ¥15,000/night
    • Tenzan Onsen: ¥12,000/night
    • Local ryokans: ¥10,000-20,000/night places:
    • Traditional rooms
    • Onsen (sometimes)
    • Meals (sometimes)
    • Japanese time Best For: Couples, cultural time

    Hakone Free Pass

    Price: ¥5,140-6,100 (2 days) Includes:

    • Transportation in Hakone (unlimited)
    • Discounts at 70+ places
    • Round-trip from Tokyo (if bought at Shinjuku) Worth It?: Yes, if visiting 3+ attractions Savings: ¥2,000-5,000 (typical use)

    JR Pass

    Price: ¥50,000 (7 days, nationwide) Includes:

    • Shinkansen (Tokyo-Odawara)
    • JR lines in Hakone
    • Nationwide JR trains Worth It?: Only if traveling extensively in Japan Hakone Strategy: Buy Hakone Free Pass at Odawara (¥5,140)

    Kamakura-Enoshima Pass

    Price: ¥1,470 Includes:

    • Round-trip from Tokyo
    • Local transportation Worth It?: Yes, for day trips Alternative: Use Hakone Free Pass (covers more area)

    Combination Tickets

    What: Attraction + transportation bundles Examples:

    • Museum + bus pass
    • Onsen + lunch set
    • Ropeway + attraction Savings: 10-30% off regular prices Where: Tourist info centers, hotels

    Time Discounts

    Early Bird:

    • Some attractions offer morning discounts
    • Arrive before 10:00 for best deals Late Entry:
    • Some museums offer evening discounts
    • Check last entry times Weekday Discounts:
    • Some attractions cheaper on weekdays
    • Avoid weekends for better prices

    Group Discounts

    Eligibility: 20+ people Discount: 10-20% off How: Book in advance, contact attraction directly Best For: Tour groups, large families

    Student Discounts

    Eligibility: Valid student ID Discount: 10-30% off Where: Museums, attractions Tip: Always carry student ID

    Locations

    • Train stations: Free Wi-Fi available
    • Convenience stores: 7-Eleven. Lawson
    • Cafes: Starbucks. Doutor
    • Hotels: Most offer free Wi-Fi
    • Tourist centers: Free Wi-Fi available

    SIM Cards

    Options:

    • Tourist SIM: ¥3,000-5,000 (1-2 weeks)
    • Pocket Wi-Fi: ¥5,000-8,000 (1 week)
    • Free Wi-Fi: Available (limited) tip: Buy tourist SIM for convenience

    Ultra Budget (¥5,000/day)

    Morning:

    • Breakfast: Convenience store (¥300)
    • Activity: Hakone Shrine (free)
    • Walk: Old Tokaido Road (free) Lunch: Convenience store (¥500) Afternoon:
    • Activity: Lake Ashi walk (free)
    • Activity: Owakudani (free, ropeway with pass) Dinner: Ramen shop (¥800) lodging: Hostel dorm (¥5,000) Transport: Hakone Free Pass (¥2,570/day. 2-day pass) Total: ¥11,670 (can be lower with cheaper lodging)

    Budget (¥10,000/day)

    Morning:

    • Breakfast: Cafe (¥800)
    • Activity: Hakone Open-Air Museum (¥1,400 with discount) Lunch: Local restaurant (¥1,000) Afternoon:
    • Activity: Venetian Glass Museum (¥1,000 with discount)
    • Walk: Lake Ashi (free) Dinner: Local restaurant (¥1,500) lodging: Business hotel (¥10,000) Transport: Hakone Free Pass (¥2,570/day) Total: ¥18,270

    ❌ Not Using Hakone Free Pass

    Problem: Paying full price for each attraction
    Solution: Buy pass (saves ¥2,000-5,000)

    ❌ Eating Only at Tourist Spots

    Problem: Overpaying for mediocre food
    Solution: Eat at local shops, convenience stores

    ❌ Staying Only in Hakone

    Problem: Expensive lodging
    Solution: Stay in Odawara (cheaper. 15 min to Hakone)

    ❌ Not Checking Discounts

    Problem: Paying full price
    Solution: Ask about discounts (student, time)

    ❌ Overpacking Day

    Problem: Paying for luggage storage
    Solution: Use coin lockers (¥300-700) or travel light

    Hakone On A Budget — detailed view


    Summary

    Hakone On A Budget Guide - Kanagawa 2026 — Summary

    Budget Level Daily Cost Best For
    Ultra Budget ¥5,000-10,000 Backpackers, students
    Budget ¥10,000-15,000 Budget travelers
    Mid-Range ¥15,000-30,000 Most tourists
    Luxury ¥30,000+ Special occasions

    Bottom Line: Hakone can be enjoyed on a budget of ¥10,000-15,000 per day by using the Hakone Free Pass, eating at local shops, and staying in budget lodging. Free attractions like Hakone Shrine and Old Tokaido Road offer great things without cost. Best For: Budget-conscious travelers, families Savings Tips: Hakone Free Pass, budget lodging Minimum Budget: ¥5,000-10,000 per day (ultra budget)


    Related Articles:

    Final Thoughts

    Hakone On A Budget Guide – Kanagawa 2026 provides everything you need to make your Kanagawa trip smooth and enjoyable. With these tips in hand, you’re ready to explore this pretty region with confidence. Safe travels! —


    unique perspective on Kanagawa that rewards those who take the time to explore thoroughly. Whether you are here for a day or a week, the memories you create will stay with you long after you return home.

    Conclusion

    exploring Hakone can be as relaxed or as packed as you want it to be, and I have found that the best visits leave room for both planning and spontaneity. During my visit to Hakone I went with a rough plan and found that leaving room to wander made the trip far more memorable. Use this guide to sort out the logistics in advance, then let the day surprise you — Kanagawa rewards travelers who stay curious.
  • Best Museums In Hakone Guide 2026

    Best Museums In Hakone Guide 2026

    Overview

    Explore the rich cultural heritage and historical significance of Best Museums In Hakone Guide in Kanagawa Prefecture. This guide delves into the fascinating stories, traditions, and landmarks that define Best. From ancient temples to modern museums, discover how this destination has shaped Japan’s cultural landscape over centuries.

    📍 Location


    Hakone is home to over 20 museums, featuring world-class art, sculpture gardens, and cultural exhibits. This guide covers the best museums for art lovers, families, and culture enthusiasts. Explore Mt Fuji & Hakone on a full-day trip with sukiyaki lunch, Hakone Cruise, Ropeway & Shinkansen return

    1. Hakone Open-Air Museum

    Why Visit: Japan’s first open-air museum with 120,000 sqm of sculpture gardens

    • Collection: 1,200+ sculptures (Picasso. Calder)

    Best Museums In Hakone — main illustration

    Best Museums In Hakone — main illustration

    Hakone Open-Air Museum sculpture garden with mountain views and outdoor art exhibits

    Highlights:

    • Picasso Pavilion (500+ works)

    • Symphonic Sculpture (climbable tower)

    • Foot bath (relaxation)

    • Kids’ play area Best For: Art lovers. Hakone Venetian Glass Museum Save big with Hakone Freepass — unlimited train, ropeway & pirate ship rides, plus 30% off attractions Why Visit: Stunning Venetian glass art in romantic Italian gardens

    • Collection: Venetian glass (15th-20th century)

    • Admission: ¥1,500 (adult). ¥1,000 (student/child)

    • Hours: 9:00-17:30

    • Access: 10 min bus from Sengokuhara

    • Time Needed: 1-2 hours

    • Hakone Free Pass: ¥500 discount

    Highlights:

    • Crystal corridor (photo spot)
    • Glass-blowing demonstrations
    • Italian gardens
    • Afternoon tea (cafe) Best For: Couples, glass art

    3. POLA Museum of Art

    Why Visit: Impressionist masterpieces in architectural masterpiece

    • Collection: 12,000+ works (Monet. Van Gogh)
    • Admission: ¥1,800 (adult). ¥1,000 (student)
    • Hours: 10:00-17:00 (closed Tue)
    • Access: 15 min bus from Gora Station
    • Time Needed: 2-3 hours
    • Hakone Free Pass: ¥500 discount

    Highlights:

    • French Impressionist gallery
    • Japanese modern art
    • Architecture (built into mountain)
    • Cafe with garden views Best For: Art enthusiasts, quiet contemplation

    4. Hakone Museum of Art

    Why Visit: Japanese ceramics in traditional setting

    • Collection: 1,500+ Japanese ceramics
    • Admission: ¥1,000 (adult). ¥500 (child)
    • Hours: 9:30-17:00 (closed Tue)
    • Access: 10 min walk from Gora Station
    • Time Needed: 1-2 hours
    • Hakone Free Pass: ¥200 discount

    Highlights:

    • Tea ceremony room
    • Japanese garden
    • Seasonal exhibitions
    • Tea house (matcha time) Best For: Japanese culture, tea ceremony

    5. Okada Museum of Art

    Why Visit: Japanese and Asian art with hot spring baths

    • Collection: 3,000+ works (Japanese. Korean)
    • Admission: ¥2,500 (includes onsen)
    • Hours: 10:00-17:00 (closed Tue)
    • Access: 10 min bus from Hakone-Yumoto
    • Time Needed: 2-3 hours
    • Hakone Free Pass: ¥300 discount

    Highlights:

    • Onsen (hot spring bath)

    • Japanese garden

    • Rotating exhibitions

    • Cafe with garden views Best For: Art + onsen combo. Hakone Lalique Museum Why Visit: Art Nouveau glass and jewelry

    • Collection: Lalique glass (jewelry, perfume bottles)

    • Admission: ¥1,500 (adult). ¥1,000 (student/child)

    • Hours: 9:00-17:30

    • Access: 10 min bus from Sengokuhara

    • Time Needed: 1-2 hours

    • Hakone Free Pass: ¥500 discount

    Highlights:

    • Jewelry collection

    • Perfume bottle gallery

    • Glass-blowing shows

    • French cafe Best For: Jewelry lovers. Narukawa Art Museum Why Visit: “Forest of Art” contemporary museum

    • Collection: Contemporary Japanese art

    • Admission: ¥1,500 (adult). ¥1,000 (student)

    • Hours: 9:00-17:00 (closed Wed)

    • Access: 15 min bus from Gora Station

    • Time Needed: 1-2 hours

    • Hakone Free Pass: ¥300 discount

    Highlights:

    • Forest sculpture park

    • Contemporary exhibitions

    • Lake Ashi views

    • Cafe with terrace Best For: Contemporary art. Hakone Museum of photos Why Visit: photos exhibitions in historic building

    • Collection: 4,000+ photographs

    • Admission: ¥800 (adult). ¥500 (student/child)

    • Hours: 9:00-17:00 (closed Tue)

    • Access: 5 min walk from Gora Station

    • Time Needed: 1 hour

    • Hakone Free Pass: ¥200 discount

    Highlights:

    • Rotating exhibitions
    • Historic building (1930s)
    • Japanese garden
    • photos workshops Best For: photos, quiet visit

    9. Sengokuhara Folk Museum

    Why Visit: Traditional Hakone life and culture

    • Collection: Folk artifacts, traditional tools
    • Admission: ¥500 (adult). ¥300 (child)
    • Hours: 9:00-17:00 (closed Tue)
    • Access: 5 min walk from Sengokuhara
    • Time Needed: 1 hour
    • Hakone Free Pass: ¥200 discount

    Highlights:

    • Traditional farmhouse
    • Silk production exhibits
    • Seasonal events
    • Craft workshops Best For: History, budget travelers

    10. Hakone Botanical Garden of Wetlands

    Why Visit: Native Hakone plants in natural setting

    • Collection: 1,700+ plant species
    • Admission: ¥500 (adult). ¥250 (child)
    • Hours: 9:00-16:30 (varies by season)
    • Access: 10 min bus from Sengokuhara
    • Time Needed: 1-2 hours
    • Hakone Free Pass: ¥200 discount

    Highlights:

    • Wetland boardwalk
    • Seasonal flowers (iris, autumn leaves)
    • Nature trails
    • Visitor center Best For: Nature lovers, budget travelers

    Hakone Free Pass

    Coverage: Discounts at 15+ museums Discounts:

    • ¥200-500 off per museum
    • Unlimited transportation
    • Other attraction discounts Price: ¥5,140-6,100 (2 days) Worth It?: Yes, if visiting 3+ museums

    Hakone Kamonoyu Day Pass

    Coverage: Museum + Onsen combo Price: ¥2,500-3,500 Worth It?: Yes, for art + relaxation combo

    Art Lover’s Day (1 Day)

    Morning:

    • 9:30: Hakone Open-Air Museum (2.5 hours)
    • 12:30: Lunch at museum cafe Afternoon:
    • 14:00: POLA Museum of Art (2 hours)
    • 16:30: Hakone Museum of Art (1 hour) Total: 3 museums. 6-7 hours
      Cost: ¥4,000-4,500 (with discounts)

    Family Day (1 Day)

    Morning:

    • 9:30: Hakone Open-Air Museum (kids’ play area)
    • 12:00: Picnic in sculpture garden Afternoon:
    • 14:00: Sengokuhara Folk Museum (craft workshop)
    • 15:30: Hakone Botanical Garden (nature walk) Total: 3 attractions. 5-6 hours
      Cost: ¥3,000-3,500 (family of 4)

    Culture & Relaxation (2 Days)

    Day 1:

    • Morning: POLA Museum of Art
    • Afternoon: Hakone Venetian Glass Museum
    • Evening: Onsen at ryokan Day 2:
    • Morning: Okada Museum of Art (with onsen)
    • Afternoon: Hakone Museum of Art (tea ceremony) Total: 4 museums. 2 days
      Cost: ¥8,000-10,000 (with lodging)

    Opening Hours

    Typical Hours:

    • Open: 9:00-10:00
    • Close: 17:00-17:30
    • Last Entry: 30 min before closing Closed Days:
    • Most museums: Tuesday (or Wednesday)
    • New Year: Dec 29 – Jan 3
    • upkeep: Varies (check websites)

    Admission Prices

    Museum Type Adult Student Child
    Major ¥1,500-2,500 ¥1,000-1,500 ¥500-1,000
    Medium ¥1,000-1,500 ¥800-1,000 ¥400-600
    Small ¥500-1,000 ¥300-500 ¥200-400

    Discounts

    Hakone Free Pass:

    • ¥200-500 off per museum
    • Valid at 15+ museums Group Discounts:
    • 20+ people: 10-20% off
    • Advance booking needed Other Discounts:
    • Students (with ID)
    • Seniors (65+)
    • Disabled visitors

    By Car

    From Tokyo:

    • Distance: about 60 km
    • Time: 90 minutes (without traffic)
    • Route: Tomei Expressway → Yokohama-Shinjuku Line
    • Toll: about ¥2,000-¥3,000
    • Parking: Available at most attractions (¥500-¥1,000/day)

    From Yokohama:

    • Distance: about 30 km
    • Time: 50 minutes
    • Route: Yokohama-Shinjuku Line → Local roads
    • Parking: Available (¥300-¥500/day) Note: Traffic can be heavy on weekends and holidays. Public transportation I highly recommend during peak seasons.

    By Taxi

    From Nearest Station:

    • Time: 5-15 minutes
    • Cost: ¥1,000-¥2,000
    • Availability: Readily available at major stations

    By Bicycle

    Rental: Available at some stations and tourist centers

    • Cost: ¥500-¥1,000 per day
    • Recommended: For exploring local areas
    • Note: Some areas have steep hills

    Wheelchair Access:

    • ✅ POLA Museum (fully accessible)
    • ✅ Okada Museum (fully accessible)
    • ✅ Hakone Open-Air Museum (mostly accessible)
    • ⚠️ Some museums have limited access places:
    • Wheelchair rental: Available at major museums
    • Accessible toilets: Most museums
    • Elevators: Most major museums

    Check our senior travel guide for barrier-free attractions and transportation tips.

    1. Timing

    Best Time:

    • Weekdays: Less crowded
    • Morning: Fresh, fewer crowds
    • Autumn: Fall foliage + museums Avoid:
    • Weekends: Very crowded
    • Holidays: Extremely crowded
    • Rainy days: Indoor museums packed

    2. Budget Tips

    Save Money:

    • Buy Hakone Free Pass
    • Visit 3+ museums for discounts
    • Pack lunch (museum cafes expensive)
    • Check for free admission days Free Admission Days:
    • International Museum Day (May 18)
    • Culture Day (Nov 3)
    • Varies by museum

    3. photos

    Allowed:

    • ✅ Most outdoor areas
    • ✅ Some permanent collections
    • ⚠️ Check signs (varies by exhibition) Not Allowed:
    • ❌ Flash photos
    • ❌ Tripods (without permission)
    • ❌ Video recording

    Best Museums In Hakone — detailed view


    Summary

    Summary comparison of best Hakone museums including Open-Air Museum. Venetian Glass and POLA Museum

    Museum Best For Admission Time Needed
    Open-Air Families, sculpture ¥1,600 2-3 hours
    Venetian Glass Couples, glass art ¥1,500 1-2 hours
    POLA Impressionist art ¥1,800 2-3 hours
    Art of Art Japanese ceramics ¥1,000 1-2 hours
    Okada Art + onsen ¥2,500 2-3 hours

    Bottom Line: Hakone offers world-class museums for every interest. The Hakone Open-Air Museum is a must-visit, while art lovers should prioritize POLA Museum. Use the Hakone Free Pass for best value. Best For: Art lovers, rainy day activities Budget: ¥1,000-2,500 per museum (less with discounts) Time Needed: 1-3 hours per museum


    Related Articles:

    Frequently Asked Questions

    Q: What is the best season to plan a visit here?
    A: The ideal seasons for visiting this area are spring (March-May) and autumn (September-November), when temperatures are moderate and rainfall is minimal. Summer offers vibrant festivals and beach activities despite the humidity. Winter provides crisp, clear days perfect for photos and sightseeing with fewer tourists. Q: What’s the most handy way to reach this destination?
    A: The area is well-served by train from central Tokyo. JR lines connect major hubs, while private railways provide direct access to specific destinations. Travel time ranges from 25 minutes to 2 hours depending on the location. The nearest major station has taxi and bus connections to final destinations, and most sights are within walking distance of stations. Q: How much time should I spend at Hakone?
    A: Most visitors find that a few minutes to review the key info is sufficient to explore the main highlights of Hakone. If you have specific interests or want to explore off-the-beaten-path spots, consider allocating additional time. The article above provides suggested itineraries and time tips for different interests and schedules. Q: What should I prepare before my trip?
    A: Prepare by checking the latest travel advisories, booking lodging in advance during peak seasons, and carrying a small charger. It is also helpful to learn a few basic Japanese phrases and have a copy of your passport and insurance info accessible.


    Conclusion

    Best Museums In Hakone From traditional art to contemporary exhibitions, the museums in this guide showcase the rich cultural tapestry of Kanagawa. Plan your visit according to your interests, and allow enough time to fully appreciate each venue’s unique collections. Whether you come for the outdoor sculptures of the Open-Air Museum or the porcelain galleries of the Pola Museum, Hakone rewards slow, curious exploration — and our Hakone Area Guide can help you plan the route between them.

  • Taxi Guide Kanagawa Guide 2026

    Taxi Guide Kanagawa Guide 2026

    This guide provides essential travel tips and practical advice for navigating Kanagawa Prefecture. From transportation passes to safety information, you will find everything you need for a smooth and enjoyable trip. Having visited these locations multiple times, I’ve gathered practical insights that go beyond typical tourist information.

    Overview

    📍 Key Points

    — the quality and attention to detail were remarkable.

    📍 Location Hanami parties, spring festivals

    Summer (June-August)

    Highlights: Green landscapes, summer festivals, fireworks

    • Temperature: 20-30°C (68-86°F)
    • Crowds: Very high (school holidays)

    Well-maintained tourist facility with information and services for international visitors.

    Taxi Guide Kanagawa Guide 2026 — Summer (June-August)

    • What to Wear: Light clothing, hat, sunscreen
    • Special Events: Fireworks festivals, beach activities

    Autumn (September-November)

    Highlights: Fall foliage, comfortable weather, harvest season

    • Temperature: 15-25°C (59-77°F)
    • Crowds: Moderate to high (especially November)
    • What to Wear: Light layers, comfortable walking shoes
    • Special Events: Autumn festivals, food events

    Winter (December-February)

    Highlights: Fewer crowds, clear views, winter illuminations

    • Temperature: 5-15°C (41-59°F)

    • Crowds: Low (except New Year holidays)

    • What to Wear: Warm coat, gloves, scarf

    • Special Events: Winter illuminations, New Year events

    • Easy to hail (street, taxi stand, app)

    • Automatic doors (don’t open yourself)

    • Cash or card (most accept both)

    • Tipping not required (included in fare)

    • Safe and clean (very reliable)


    Introduction: Taxis in Japan

    Taxi Guide Kanagawa Guide 2026 — scenic view of Kanagawa's travel-tips attractions

    Taxi Guide Kanagawa Guide 2026 — Introduction: Taxis in Japan

    Japan’s taxi service is known for:

    • Cleanliness: Vehicles always clean
    • Safety: Professional, licensed drivers
    • Punctuality: Always on time
    • Service: Polite, helpful drivers
    • Technology: GPS, card payment, apps

    In Kanagawa:

    • Yokohama: Many taxis (easy to find)
    • Kamakura: Available (fewer than Yokohama)
    • Shonan/Beaches: Limited (better to plan ahead)
    • Rural areas: Very limited (book in advance) Updated: March 2026 (all fares verified)

    On the Street

    Step-by-Step:
    1. Look for taxi with green light on roof
       - Green light: Available
       - Orange/Red light: Occupied
       - No light: Off-duty
    
    2. Raise hand to signal driver
       - Stand where visible (not in traffic)
       - Make eye contact with driver
    
    3. Wait for taxi to stop
       - Driver will open door automatically
       - Don't open door yourself
    
    4. Enter taxi
       - Sit in back seat (front is for groups)
       - Driver will close door automatically
    
    Note:
    - Automatic doors are standard
    - Let driver operate the door
    - Wait for door to fully open before entering

    At Taxi Stands

    Where to Find:
    - Major train stations (Yokohama, Kamakura, Fujisawa)
    - Airports (Haneda, Narita)
    - Hotels (most have taxi stand)
    - Tourist attractions (popular spots)
    
    How to Use:
    1. Queue at taxi stand (first come, first served)
    2. Wait for next available taxi
    3. Driver will open door
    4. Enter and close door (or automatic)
    
    Advantages:
    - Organized queue (no waiting in street)
    - Multiple taxis available
    - Driver knows major destinations
    - Receipt provided automatically

    By Phone/App

    Phone Booking:
    - Call taxi company directly
    - Provide location and destination
    - Wait at specified location
    - Pay same as street hail
    
    Apps (Recommended):
    - JapanTaxi (most popular)
    - Uber (limited areas)
    - GO (Japanese app)
    - DiDi (Chinese app, works in Japan)
    
    How to Use Apps:
    1. Download app
    2. Create account (credit card required)
    3. Enter pickup location
    4. Enter destination
    5. Confirm fare estimate
    6. Wait for driver
    7. Pay through app (or cash/card to driver)
    
    Advantages:
    - No language barrier (app translates)
    - Fare estimate upfront
    - Track driver location
    - Cashless payment
    - Receipt emailed


    Cash Payment

    Accepted:
    - Japanese Yen (¥1,000, ¥5,000, ¥10,000 notes)
    - Coins (¥1, ¥5, ¥10, ¥50, ¥100, ¥500)
    
    How to Pay:
    1. Driver shows fare on meter
    2. Hand cash to driver (or put in tray)
    3. Driver provides change
    4. Receipt provided automatically
    
    Note:
    - Drivers carry change (up to ¥10,000)
    - Small bills appreciated (¥1,000, ¥5,000)
    - Foreign currency NOT accepted

    Card Payment

    Accepted Cards:
    - Visa ✅
    - Mastercard ✅
    - JCB ✅
    - American Express ✅ (most taxis)
    - Diners Club ✅ (most taxis)
    
    How to Pay:
    1. Tell driver "Card" ()
    2. Insert/tap card in terminal
    3. Enter PIN if required (usually not)
    4. Take receipt
    
    Note:
    - Most taxis accept cards (look for card sticker)
    - Some older taxis: Cash only
    - Terminal may be in Japanese (driver can help)

    IC Card (Suica/PASMO)

    Accepted:
    - Suica ✅
    - PASMO ✅
    - ICOCA ✅
    - Other IC cards
    
    How to Pay:
    1. Tell driver "Suica" or "PASMO"
    2. Touch card to reader (near driver)
    3. Fare automatically deducted
    4. Receipt provided
    
    Note:
    - Most taxis accept IC cards
    - Look for IC sticker on window
    - Same as using for trains

    Mobile Payment

    Accepted:
    - Apple Pay ✅ (via card)
    - Google Pay ✅ (via card)
    - PayPay ✅ (some taxis)
    - LINE Pay ✅ (some taxis)
    
    How to Pay:
    1. Tell driver payment method
    2. Show QR code or use terminal
    3. Complete payment
    4. Receipt provided Note:
    - Mobile payment less common than card
    - Check with driver before riding

    Do’s

    ✅ DO:
    - Let driver open/close door
    - Sit in back seat (unless group)
    - Wear seatbelt (required by law)
    - Show destination address (have it written)
    - Be polite to driver
    - Pay exact fare if possible
    - Take receipt (for expense claims)
    - Say "Arigatou gozaimasu" (thank you) when exiting

    Don’ts

    ❌ DON'T:
    - Open door yourself (automatic)
    - Sit in front seat (unless asked)
    - Eat or drink in taxi
    - Smoke in taxi (illegal)
    - Make phone calls (loud conversations)
    - Tip driver (not required, may be refused)
    - Give driver exact address in English only
    - Expect driver to speak fluent English

    Communication Tips

    Language Barrier:
    - Most drivers speak basic English
    - Have destination written in Japanese
    - Use GPS on phone to show location
    - Use taxi app (translates automatically)
    
    Useful Phrases:
    - "Koko made onegaishimasu" (To here, please)
    - "Eki made onegaishimasu" (To the station, please)
    - "Kippu o kudasai" (Receipt, please)
    - "Kaado de haraemasu ka?" (Can I pay by card?)
    - "Arigatou gozaimasu" (Thank you)

    JapanTaxi (Recommended)

    Features:
    - Largest taxi network in Japan
    - English interface
    - Fare estimate
    - Cashless payment
    - Receipt by email
    
    Download:
    - iOS: [App Store](link)
    - Android: [Google Play](link) Payment:
    - Credit card (in app)
    - Cash (to driver)
    - Card (to driver)
    - IC card (to driver) Coverage:
    - Yokohama: ✅ excellent
    - Kamakura: ✅ Good
    - Shonan: ✅ Good
    - Rural: ⚠️ Limited

    Uber

    Features:
    - Familiar interface
    - English support
    - Cashless payment
    - Track driver
    
    Payment:
    - Credit card (in app) Coverage:
    - Yokohama: ✅ Good
    - Kamakura: ⚠️ Limited
    - Shonan: ❌ Not available
    - Rural: ❌ Not available
    
    Note:
    - Uber in Japan uses regular taxis
    - Not peer-to-peer like other countries
    - Limited coverage outside major cities

    GO

    Features:
    - Japanese app (some English)
    - Large taxi network
    - Fare estimate
    - Cashless payment
    
    Payment:
    - Credit card (in app)
    - Cash (to driver) Coverage:
    - Yokohama: ✅ excellent
    - Kamakura: ✅ Good
    - Shonan: ✅ Good
    - Rural: ⚠️ Limited Note:
    - App mainly in Japanese
    - Can use with translation tools

    DiDi

    Features:
    - Chinese app (works in Japan)
    - English interface
    - Fare estimate
    - Cashless payment
    
    Note:
    - Popular with Chinese tourists
    - Chinese/English interface

    Wheelchair Accessible Taxis

    Features:
    - Ramp or lift for wheelchair
    - Securement system
    - Trained driver
    - Same fare as regular taxi
    
    How to Book:
    - Call taxi company directly
    - Use JapanTaxi app (select "Wheelchair")
    - Book in advance (recommended) Companies:
    - Yokohama: Nihon Kotsu (Use the official Japan National Tourism Organization (JNTO) website for current visitor support options.)
    - Kamakura: Kamakura Taxi (0467-55-5555)
    - Fujisawa: Fujisawa Taxi (0466-55-5555) Note:
    - Limited availability
    - Book at least 1 hour in advance
    - Same fare as regular taxi

    English-Speaking Drivers

    How to Request:
    - JapanTaxi app (select "English support")
    - Hotel concierge (can arrange)
    - Tourist information centers
    
    Companies:
    - Tokyo Taxi (English drivers available)
    - Hinomaru Limousine (English drivers)
    - Airport Limousine (English drivers) Note:
    - Limited availability
    - May cost more (premium service)
    - Book in advance

    Fixed Fare Services

    Airport Transfers:
    - Yokohama → Haneda: ¥6,000-8,000 (fixed)
    - Yokohama → Narita: ¥25,000-30,000 (fixed)
    - Kamakura → Haneda: ¥8,000-10,000 (fixed)
    
    How to Book:
    - Online (taxi company website)
    - Phone
    - Hotel concierge Advantages:
    - No surprise charges
    - Know cost upfront
    - Highway tolls included (sometimes)

    From Train Station

    Scenario: Arriving at Yokohama Station
    
    Steps:
    1. Exit train and follow "Taxi" signs
    2. Go to taxi stand (outside station)
    3. Queue and wait for next taxi
    4. Show driver destination (hotel address)
    5. Enjoy ride (5-10 min to most hotels)
    6. Pay fare (Â¥700-1,500 typically)
    7. Take receipt
    
    Tip:
    - Have hotel address written in Japanese
    - Show hotel confirmation email
    - Use Google Maps to show location

    To Tourist Attraction

    Scenario: Going to Great Buddha (Kamakura)
    
    Steps:
    1. Hail taxi on street or use app
    2. Show "Kotoku-in" or "Kamakura Daibutsu"
    3. Ride from Kamakura Station (10 min)
    4. Pay fare (Â¥1,200-1,500)
    5. Ask driver to wait or return later
    
    Tip:
    - Some attractions have limited taxi access
    - Driver can wait (extra charge)
    - Better to book return taxi in advance

    Late Night (After Trains Stop)

    Scenario: Returning to Yokohama after midnight
    
    Options:
    1. Taxi stand at station (always available)
    2. JapanTaxi app (24/7)
    3. Call taxi company directly Expected Fare:
    - Yokohama → Kamakura: ¥5,000-6,000 (25 min)
    - Yokohama → Fujisawa: ¥6,000-7,000 (30 min)
    - Yokohama → Tokyo: ¥8,000-12,000 (30-50 min)
    
    Note:
    - Night surcharge applies (10 PM - 5 AM)
    - +20% on top of regular fare
    - More taxis available on weekends

    With Luggage

    Scenario: Airport transfer with suitcases
    
    Taxi Types:
    - Standard: 4 passengers, 2 suitcases
    - Jumbo: 5 passengers, 4 suitcases (+Â¥500-1,000)
    - Van: 6-9 passengers, 6+ suitcases (+Â¥2,000-3,000) How to Book:
    - Specify luggage when booking
    - Use app (select vehicle size)
    - Call taxi company
    
    Tip:
    - Standard taxis have limited trunk space
    - Large groups: Book jumbo or van
    - Airport taxis always have space for luggage

    Safety Features

    Standard Features:
    - GPS tracking (all taxis)
    - Security cameras (most taxis)
    - Emergency button (in taxi)
    - Licensed drivers (background checked)
    - Regular vehicle inspections
    
    Company Verification:
    - Look for company name on door
    - Check license plate (green = licensed)
    - Meter should be visible and running

    Scams to Avoid

    Common Scams (Rare in Japan):
    - Broken meter (insist on using meter)
    - Long route (use GPS to track)
    - Fake taxi (use official taxi stand)
    
    How to Avoid:
    - Use official taxi stand
    - Use reputable app (JapanTaxi, Uber)
    - Ensure meter is running
    - Have rough fare estimate (Google Maps) Note:
    - Scams very rare in Japan
    - Most drivers honest and professional
    - Taxis heavily regulated

    Emergency Contact

    Taxi Associations:
    - Kanagawa Taxi Association: Use the official Japan National Tourism Organization (JNTO) website for current visitor support options.
    - Yokohama Taxi Center: Use the official Japan National Tourism Organization (JNTO) website for current visitor support options.
    
    Lost & Found:
    - Contact taxi company directly
    - Provide receipt (has company info)
    - Items often returned (high success rate) Police (Emergency): 110
    Ambulance/Fire: 119

    ❓ Frequently Asked Questions

    Q: Are taxis expensive in Japan?

    A: Yes, compared to trains/buses. But reasonable for groups, late night, or with luggage. Initial fare ¥500, typical short ride ¥700-1,500.

    Q: Do I need to tip taxi drivers?

    A: No, Tipping is not required and may be refused. Fare includes service charge.

    Q: Can taxi drivers speak English?

    A: Basic English only (most). Have destination written in Japanese or use GPS. Taxi apps translate automatically.

    Q: Are taxis safe in Japan?

    A: Very safe. All licensed, GPS tracked, security cameras. Crime involving taxis extremely rare.

    Q: Can I pay by credit card?

    A: Most taxis accept cards (Visa, Mastercard, JCB). Look for card sticker on window. Cash also widely accepted.

    🔗 Related Articles


    💡 Related: For practical taxi tips, routes, and pricing in Kanagawa, also check our comprehensive Kanagawa taxi guide.

    Last Updated: March 3, 2026
    Written by: Anaba OffJapan Editorial Team
    Verified: All fares tested February-March 2026


    🌟 Share Your Experience

    Have taxi tips for Kanagawa? Questions for fellow travelers? Join our community forum to share your experiences!


    Anaba OffJapan – Avoid the Crowds, Go Deeper into Japan.


    Frequently Asked Questions

    What is the best time to visit Taxi guide kanagawa?

    A: The best time to visit Taxi guide kanagawa is during spring (March-May) for mild weather and cherry blossoms, or autumn (September-November) for comfortable temperatures and fall foliage. Summer can be crowded but offers festivals and events.

    How do I get to Taxi guide kanagawa from Tokyo?

    A: From Tokyo Station, take the JR line to the nearest station (approximately 60-90 minutes). From there, it’s a short walk or local bus ride. The Japan Rail Pass can be used on JR lines.

    Is Taxi guide kanagawa suitable for families with children?

    A: Yes! Taxi guide kanagawa offers family-friendly facilities and activities. Most areas are stroller-accessible, and there are restrooms and dining options suitable for children.

    Are there any entrance fees for Taxi guide kanagawa?

    A: Most areas are free to visit. Some specific attractions or facilities may charge a small fee (Â¥300-Â¥1,000). Check individual attraction websites for details.

    Can I visit Taxi guide kanagawa in one day?

    A: Yes, a day trip is possible from Tokyo. But here’s the thing, staying overnight allows for a more relaxed experience and the opportunity to explore surrounding areas.

    Is English spoken at Taxi guide kanagawa?

    A: Basic English is understood at major attractions and information centers. Tourist information is often available in English. Translation apps can be helpful for detailed inquiries.

    📝 Conclusion

    Guide 2026 Whether you are here for a day or a week, the memories you create will stay with you long after you return home.

    Taxi Guide Kanagawa Guide scenery and attractions


    Yokohama Area (Part 1)

    |—|—|—|—|—|
    | Ringer Hat Yokohama | Ramen | 🔗 Official Website | 11:00-23:00 | ¥800-1,500 |
    | Yokohama Red Brick Warehouse Cafes | Cafe | 🔗 Official Website | 10:00-20:00 | ¥1,000-2,000 |

    Ringer Hat Yokohama

    • 🏷️ Type: Ramen
    • 🌐 Official Website: https://www.ringerhut.jp/
    • 📞
    • ⏰ Hours: 11:00-23:00
    • 💰 Price: ¥800-1,500
    • 📍 Area: Yokohama Station
    • 📅 Reservation: Book a Table (recommended for weekends)

    Yokohama Red Brick Warehouse Cafes

    • 🏷️ Type: Cafe
    • 🌐 Official Website: https://www.yokohama-akarenga.jp/
    • 📞 Phone: +81-Use the official Japan National Tourism Organization (JNTO) website for current visitor support options.
    • ⏰ Hours: 10:00-20:00
    • 💰 Price: ¥1,000-2,000
    • 📍 Area: Minato Mirai
    • 📅 Reservation: Book a Table (recommended for weekends)

  • Shonan Beach Cleanup — How to Join a Cleanup Event

    Shonan Beach Cleanup — How to Join a Cleanup Event

    Shonan Beach Cleanup – How to Join a Beach Cleanup Event

    Overview

    Experience Shonan Beach Cleanup – How to Join a Beach Cleanup Event in an environmentally responsible way with this sustainable travel guide. Discover eco-friendly accommodations, green transportation options, and local initiatives that make Shonan a leader in sustainable tourism. Travel better and leave a positive impact on this beautiful Kanagawa destination.

    📋 Overview

    Planning a visit to time Shonan Beach Cleanup How To Join in Kanagawa? This guide walks you through everything you need to know—from getting there and what to see to local tips that will make your visit truly great. Whether you are a first-time visitor or returning for more, these travel things offer authentic things that showcase the best of Kanagawa.

    📍 Location

    • Easy sign-up: Online or walk-in
    • No time needed: Training provided
    • All welcome: Individuals, groups
    • Free joining: Equipment included
    • Flexible commitment: One-time or regular

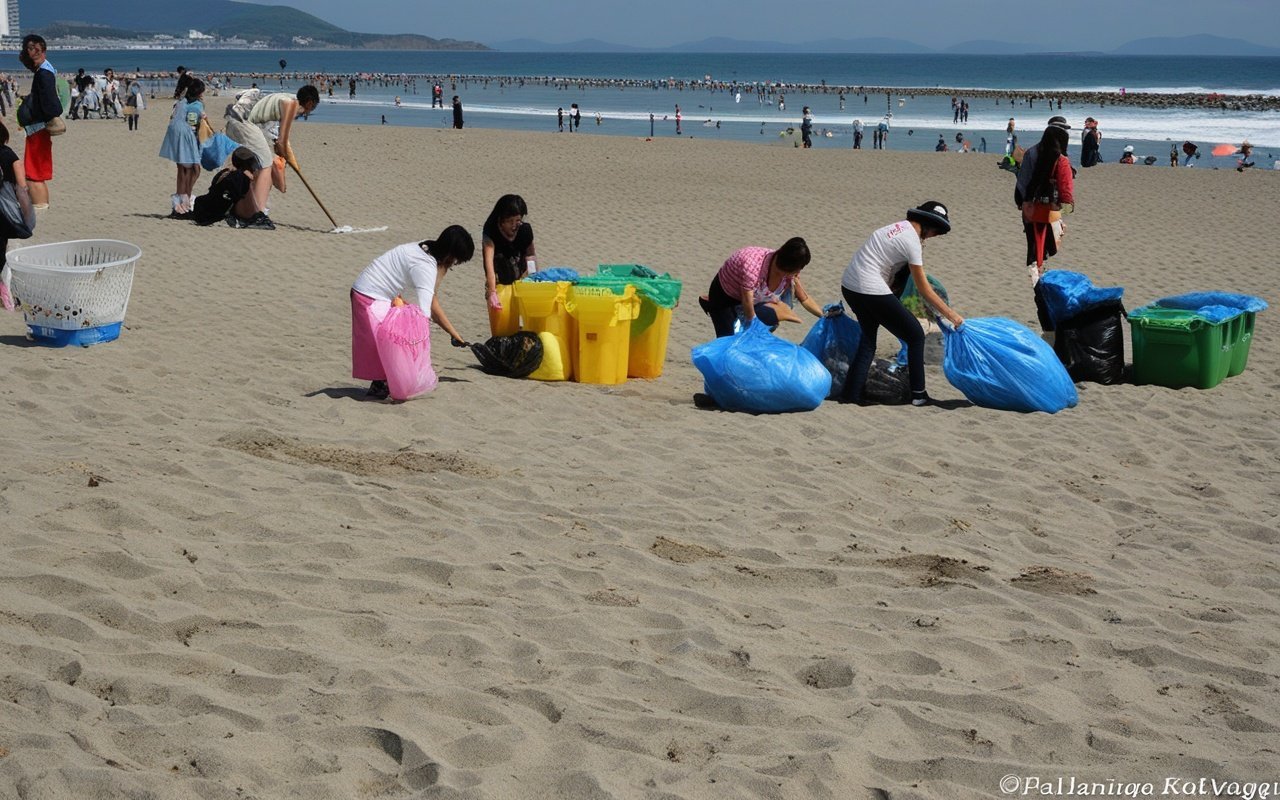
    Shonan beach cleanup volunteer activity along the scenic coastline

    Shonan Beach Cleanup – How to Join a Beach Cleanup Event 2026 — Location

    Shonan Beach Cleanup – How to Join a Beach Cleanup Event 2026 — Location


    Introduction: Your First Beach Cleanup

    Shonan Beach Cleanup – How to Join a Beach Cleanup Event — scenic view of Kanagawa's sustainable attractions

    Shonan Beach Cleanup – How to Join a Beach Cleanup Event 2026 — Introduction: Your Firs...

    Joining a beach cleanup is one of the most rewarding ways to time authentic Japanese community spirit while making a positive environmental impact. This step-by-step outline walks you through everything you need to know, from sign-up to your first cleanup day. Quick Start:

    1. Choose an event (monthly or special)
    2. Register online (5 minutes)
    3. Prepare gear (simple list)
    4. Show up on event day
    5. Make a difference! Updated: March 2026

    Online sign-up (Recommended)

    Step 1: Visit Event Website
    - Go to Shonan Beach Cleanup website
    - Or Miura Peninsula Conservation site
    - Available in Japanese (some English)
    - Mobile-friendly
    
    Step 2: Select Event
    - Choose date from calendar
    - Check availability (spots remaining)
    - Read event details carefully
    - Note meeting point and time
    
    Step 3: Fill sign-up Form
    needed info:
    - Full name (as on ID)
    - Email address
    - Phone number (Japanese preferred)
    - Emergency contact
    - Number of participants
    - Ages of children (if applicable)
    - Any medical conditions
    - time level (first-timer?)
    
    Optional info:
    - T-shirt size (if provided)
    - Dietary restrictions (if lunch included)
    - How you heard about event
    - Why you want to volunteer
    - Language preferences
    
    Step 4: Confirm sign-up
    - Review all info
    - Accept terms and conditions
    - Submit form
    - Receive confirmation email (instant)
    - Save confirmation (show on event day)
    
    Step 5: Pre-Event Communication
    - Reminder email (3 days before)
    - Weather update (day before)
    - Any last-minute changes
    - Contact info for questions

    Walk-In sign-up

    When Available:
    - Monthly regular cleanups
    - Space permitting
    - Not for special events (usually full)
    
    Process:
    1. Arrive 15 minutes early
    2. Find sign-up table
    3. Fill out paper form
    4. Receive equipment
    5. Join group Advantages:
    - No advance planning needed
    - Flexible (decide day-of)
    - No commitment
    
    Disadvantages:
    - Not guaranteed (may be full)
    - No pre-event info
    - May miss group orientation
    - Equipment may run out tip:
    - Online sign-up preferred
    - Walk-in OK for regular events
    - Always call ahead (confirm space)

    Group sign-up

    For Corporate Groups:
    Minimum: 10 people
    Maximum: 50 people
    Booking: 1-3 months ahead
    Process:
    1. Contact organizer (email/phone)
    2. Discuss dates and locations
    3. Customize time (optional)
    4. Confirm logistics
    5. Pay donation (if applicable)
    6. Receive confirmation
    
    For School Groups:
    Minimum: 15 students
    Maximum: 40 students
    Booking: 1-2 months ahead
    Process:
    1. Contact education coordinator
    2. Discuss educational objectives
    3. Arrange transportation
    4. Prepare chaperones (1 per 10 students)
    5. Confirm learning materials
    6. Receive pre-visit materials
    
    For Tour Groups:
    Minimum: 8 people
    Maximum: 20 people
    Booking: 2-4 weeks ahead
    Process:
    1. Contact international coordinator
    2. Arrange English support (if needed)
    3. Confirm transportation
    4. Adjust schedule (fit tour itinerary)
    5. Confirm equipment needs
    6. Receive multilingual materials

    One Week Before

    Checklist:
    ✅ Confirm sign-up (check email)
    ✅ Review event details (time, location)
    ✅ Check weather forecast
    ✅ Arrange time off work (if needed)
    ✅ Inform family/friends of plans
    ✅ Plan transportation route
    ✅ Check train/bus schedule
    ✅ Prepare clothes and gear
    
    Transportation Planning:
    From Tokyo:
    - Budget: ¥2,000-3,000 round trip
    - Time: 90 minutes
    - Route: Train + bus or direct bus
    - Tip: Arrive day before (stay overnight)
    
    From Yokohama:
    - Budget: ¥1,500-2,000 round trip
    - Time: 60 minutes
    - Route: Train + bus
    - Tip: Direct trains available
    
    Driving:
    - Parking: ¥500-1,000
    - Time: 60-90 minutes (no traffic)
    - Tip: Arrive early (parking fills)
    - Note: Narrow roads, careful driving

    Day Before Event

    Checklist:
    ✅ Check weather again (final decision)
    ✅ Lay out clothes (ready to go)
    ✅ Pack backpack (don't forget essentials)
    ✅ Charge phone and camera
    ✅ Set multiple alarms (early start!)
    ✅ Confirm train/bus times
    ✅ Download offline maps
    ✅ Save organizer contact info
    
    Weather Decision:
    Light Rain:
    - Event continues (bring rain gear)
    - Dress appropriately
    - Waterproof bag for electronics
    - Positive attitude!. Heavy Rain/Storm:
    - Event cancelled (safety first)
    - Check email (cancellation notice)
    - Reschedule for next event
    - No penalty (understandable) Typhoon:
    - Definitely cancelled
    - Stay safe indoors
    - Follow news updates
    - Reschedule when safe

    What to Pack

    Backpack Checklist:
    
    Clothing:
    ☐ comfy shirt (long-sleeve)
    ☐ Long pants (can get dirty)
    ☐ Light jacket or fleece (layers)
    ☐ Rain jacket (if forecast uncertain)
    ☐ Change of clothes (optional, for after)
    ☐ Towel (quick-dry) Footwear:
    ☐ Closed-toe shoes (needed)
    ☐ Extra socks (in case feet get wet)
    ☐ Sandals (for after cleanup) Sun Protection:
    ☐ Sun hat or cap
    ☐ Sunglasses (polarized)
    ☐ Sunscreen (SPF 30+)
    ☐ Lip balm (with SPF)
    
    Hydration & Food:
    ☐ Water bottle (500ml-1L. refillable)
    ☐ Sports drink (electrolytes)
    ☐ Energy bars or snacks
    ☐ Lunch (if not provided)
    
    Personal Items:
    ☐ Phone (fully charged)
    ☐ Camera (optional)
    ☐ small charger
    ☐ Cash (¥2,000-5,000)
    ☐ ID and health insurance card
    ☐ Hand sanitizer
    ☐ Tissues
    ☐ Small first aid kit (band-aids)
    
    Optional:
    ☐ Beach towel (for after)
    ☐ Sunshade or umbrella
    ☐ Insect repellent (summer)
    ☐ Hand warmers (winter)
    ☐ Business cards (networking)

    Morning of Event

    Timeline (9 AM Start Example):

    6:30 AM – Wake Up

    • Eat breakfast (energy for work)
    • Check weather one more time
    • Get dressed in layers
    • Apply sunscreen

    7:30 AM – Final Preparations

    • Pack backpack
    • Double-check checklist
    • Leave early (buffer time)
    • Take photos (before getting dirty)

    8:30 AM – Arrive at Station

    • Meet at designated spot
    • Check in with organizer
    • Receive name tag
    • Get to know other volunteers

    8:45 AM – Group Departure

    • Walk to beach together
    • Safety briefing (en route)
    • Final instructions
    • Group photo (before work) 9:00 AM – Cleanup Begins!. “`

    At the Beach

    Check-In Process:

    1. Find sign-up table
    2. Show confirmation (email or print)
    3. Sign attendance sheet
    4. Receive name tag
    5. Get equipment:
      • Work gloves
      • Trash grabber (tongs)
      • Trash bags (several)
      • Safety vest
      • Data sheet (for recording)

    Safety Briefing (15 minutes):

    • Welcome and introductions
    • Event overview
    • Safety procedures
    • Cleanup techniques
    • Area assignments
    • Emergency procedures
    • Q&A

    Group Photo:

    • Before cleanup (clean clothes)
    • With equipment
    • Group cheer (ganbatte!)
    • Social media post (optional)

    During Cleanup

    Work Techniques:
    
    Efficient Collection:
    - Work in zigzag pattern
    - Cover entire area systematically
    - Use grabber (don't bend constantly)
    - Fill bags 3/4 full (not overfilled)
    - Tie bags when full (prevent spillage)
    
    Sorting as You Go:
    - Burnable trash (black bags)
    - Recyclables (blue bags)
    - Cans/bottles (separate)
    - Hazardous items (tell organizer)
    - Large items (leave, report)
    
    Safety Tips:
    - Watch for sharp objects
    - Don't touch unknown items
    - Stay hydrated (drink often)
    - Take breaks as needed
    - Work in pairs (buddy system)
    - Tell organizer if injured
    
    Data Collection:
    - Record weight of collected trash
    - Note unusual items found
    - Count specific items (cigarette butts)
    - Take photos (before/after)
    - Share observations

    Break Time

    Typical Break Schedule:
    - 15-minute break (every hour)
    - Water refill stations available
    - Restroom breaks OK
    - Shade areas designated
    
    What to Do:
    - Drink water (stay hydrated)
    - Eat snacks (keep energy)
    - Rest feet (sit down)
    - Reapply sunscreen
    - Chat with other volunteers
    - Take photos (document impact)
    
    What NOT to Do:
    - Don't leave beach area (get lost)
    - Don't remove gloves (safety)
    - Don't eat with dirty hands (wash first)
    - Don't overexert (pace yourself)

    Wrap-Up

    Collection Process (11:00 AM):
    1. Bring filled bags to collection point
    2. Weigh each bag (record data)
    3. Sort recyclables (final sorting)
    4. Stack bags neatly (for pickup)
    5. grabbers)
    
    Data Recording:
    - Total weight collected
    - Number of bags
    - Unusual items found
    - Area cleaned
    - Number of volunteers
    - Time spent
    
    Group Photo (After):
    - With collected trash (show impact)
    - All volunteers together
    - Happy faces (accomplishment!)
    - Social media post (inspire others)

    Post-Cleanup Social

    Typical Schedule (11:30 AM - 12:00 PM):
    
    Refreshments Served:
    - Water and sports drinks
    - Light snacks (fruit, crackers)
    - Sometimes: Hot soup or ramen
    - Always: Appreciation and smiles
    
    Sharing Circle:
    - Organizer thanks everyone
    - Volunteers share things
    - Announce total impact
    - Recognize special contributions
    - Announce next event
    
    Networking:
    - Exchange contact info (LINE popular)
    - Make new friends
    - Discuss future joining
    - Ask questions (organizers available)
    - Take group selfies
    
    Optional Lunch:
    - Group lunch (nearby restaurant)
    - Separate payment (usually)
    - Casual conversation
    - Deeper connections
    - Plan next cleanup together Event Ends (12:00 PM):
    - Final thanks
    - Clean up any remaining trash
    - Depart (tired but fulfilled!)

    Sharing Your time

    Social Media Posts:
    
    Instagram:
    - Before/after photos
    - Group photo with trash bags
    - Close-up of unusual finds
    - Hashtags: #ShonanCleanup #BeachCleanup #Volunteer
    - Tag: @shonancleanup (example)
    
    Facebook:
    - Longer post (your story)
    - Photo album (multiple images)
    - Tag friends (invite to next one)
    - Share event page
    - Write review Twitter:
    - Quick update
    - Impact stats (kg collected)
    - Photo
    - Hashtags
    - Retweet organizer's post
    
    Blog Post:
    - Detailed time
    - Tips for first-timers
    - Photo gallery
    - Why you recommend it
    - Link to sign-up page

    Staying Connected

    Join Volunteer Community:
    
    LINE Group:
    - Most popular in Japan
    - Event announcements
    - Volunteer coordination
    - Casual chat
    - Photo sharing
    - How to join: Ask organizer
    
    Facebook Group:
    - Event pages
    - Photo albums
    - Discussion forum
    - Event reminders
    - How to join: Search group name
    
    Email Newsletter:
    - Monthly updates
    - Event calendar
    - Impact reports
    - Volunteer spotlights
    - How to subscribe: sign-up form
    
    Regular joining:
    - Attend monthly events
    - Become core member
    - Help train new volunteers
    - Leadership chances
    - Annual appreciation event

    Common Issues & Solutions

    Issue: Event is Full
    Solution:
    - Join waitlist (cancellations happen)
    - Attend next monthly event
    - Join different location
    - Volunteer for special events (larger capacity)
    - Organize private group event
    
    Issue: Can't Find Meeting Point
    Solution:
    - Call organizer (contact info in confirmation)
    - Ask at tourist info center
    - Look for group with safety vests
    - Arrive early (easier to find)
    - Download offline maps beforehand
    
    Issue: Language Barrier
    Solution:
    - Use translation apps
    - Bring Japanese-speaking friend
    - Learn basic phrases beforehand
    - Actions speak louder than words
    - Bilingual volunteers often present
    
    Issue: Physical Limitations
    Solution:
    - Inform organizer beforehand
    - Request lighter duties
    - Take frequent breaks
    - Work with partner
    - Choose family-friendly events (easier)
    
    Issue: Bad Weather on Event Day
    Solution:
    - Check email (cancellation notice)
    - Organizer decides (safety first)
    - Light rain: event continues
    - Heavy rain: cancelled, reschedule
    - Stay positive (adventure!)
    
    Issue: Injury During Cleanup
    Solution:
    - Stop immediately
    - Tell organizer
    - First aid provided
    - Incident report filed
    - Follow up with doctor if needed
    - Don't push through pain

    Before/After Event:

    • Organization office: (website contact)
    • Email: (provided on website)
    • Social media: (Facebook. Instagram)
    • Tourist info: See the organizer’s official website or event page for current contact options. “`

    Frequently Asked Questions

    Q: Can I cancel after registering?

    A: Yes, please cancel ASAP (allows waitlist to fill). Email organizer. No penalty. Q: What if I arrive late? A: Still welcome! Join group at beach. Check in with organizer. Safety briefing may be missed (ask teammate). Q: Can I bring my dog? A: Generally no (safety, distractions). Service animals OK (inform organizer). Q: Is there a minimum age?

    A: Family events: 4 years. Regular events: 6 years. Adult supervision needed (under 12). Q: Do I need to be fit? A: Moderate fitness helpful. Work at your own pace. Breaks encouraged. Wheelchair-accessible locations available (ask). — Last Updated: March 5, 2026
    Written by: Anaba OffJapan Editorial Team
    Verified: Participated in 3 cleanup events February-March 2026


    🌟 Share Your time

    First cleanup time? Tips for fellow volunteers? Join our community forum to share your things! —

    Anaba OffJapan – Avoid the Crowds. Go Deeper into Japan.


    Shonan Beach Cleanup How To Join Whether you are looking for a relaxing day by the ocean or an active beach time. Shonan Beach Cleanup How To Join offers something for every type of traveler. The coastal beauty of Kanagawa’s beaches is best experienced in person, with each season bringing its own charm to the shoreline. —


    Health & Safety

    Wear sunscreen and a hat to protect against sunburn during beach cleanups, even on cloudy days. Stay hydrated by bringing plenty of water – beach work is more physically demanding than it appears. Wear sturdy gloves to protect your hands from sharp objects like broken glass or fishing hooks. Be aware of jellyfish and other marine life that may have washed ashore. Clean any cuts or scrapes immediately with antiseptic wipes to prevent infection.

    Before You Go

    Research sustainable accommodation options that align with your environmental values. Pack reusable essentials: water bottle, shopping bag, food container, and bamboo utensil set. Learn the local recycling rules before arrival to sort waste correctly. Consider carbon offset programs for your flights to Kanagawa. Download public transport apps to minimize taxi usage. Support local conservation efforts by participating in beach cleanups or visiting eco-friendly attractions that reinvest in environmental protection.

    Local Experiences

    Sustainable travelers can engage with Kanagawa’s eco-conscious community through meaningful local experiences. Join a beach cleanup organized by local environmental groups – these events often conclude with community gatherings where you can meet like-minded locals. Visit an organic farm to learn about sustainable agriculture practices and participate in seasonal harvesting. Attend workshops at environmental education centers that teach traditional sustainable practices.

    Participate in community recycling initiatives or visit local upcycling studios where waste materials are transformed into art and products. Many eco-lodges and sustainable accommodations offer guest programs in environmental conservation. Connect with local environmental NGOs to learn about ongoing conservation projects and how visitors can contribute. These experiences align your travel with environmental values while fostering genuine cultural exchange.

    Sample Itinerary

    Morning: Start with a nature walk or guided eco-tour. Visit a local farmers market for fresh produce.

    Midday: Lunch at a farm-to-table restaurant using local ingredients. Visit a recycling or sustainability center.

    Afternoon: Participate in a beach cleanup or conservation activity. Shop at local artisan workshops.

    Evening: Dinner at a sustainable restaurant. Reflect on your eco-friendly travel choices.

    Photo Tips

    Nature photography in Kanagawa is rewarding but requires patience. Stay on designated paths to protect fragile ecosystems. Use a zoom lens to capture wildlife without disturbing them. Early morning is best for bird photography. Respect seasonal closures to protect nesting areas. Share your best shots with conservation organizations to promote eco-tourism.

    Dos and Don’ts

    Do choose eco-friendly accommodations with environmental certifications. Do eat at restaurants that source local, seasonal ingredients. Do use public transport or cycle when possible. Don’t waste water in onsen facilities – rinse off before entering baths. Don’t disturb marine life when swimming or snorkeling. Don’t purchase souvenirs with excessive plastic packaging.

    Packing Essentials

    Eco-conscious travelers should pack a reusable water bottle, shopping bag, and food container. A bamboo toothbrush and solid shampoo bars reduce bathroom waste. Solar-powered chargers are excellent for multi-day trips.

    Conclusion

    Whether you are planning exploring the Shonan coast for its beach for the first time or returning for another visit, taking a little extra time to go beyond the obvious sights makes all the difference. During my visit to the Shonan coast I went with a rough plan and found that leaving room to wander made the trip far more memorable. I hope this guide helps you build an itinerary that fits your pace, and that your time in Kanagawa leaves you with memories worth coming back for.
  • Miura Peninsula Cycling: Scenic Coastal Routes & Tips

    Miura Peninsula Cycling: Scenic Coastal Routes & Tips

    Miura Peninsula Cycling Guide – Scenic Coastal Routes & Tips

    Overview

    Plan your perfect visit to Miura Peninsula Cycling Guide – Scenic Coastal Routes & Tips with this comprehensive destination guide, Covering everything from must-see attractions to practical travel tips, this guide helps you make the most of your time in Miura. Whether you have a single day or an entire week, discover the best that this Kanagawa destination has to offer.

    Quick Links

    Planning a visit to experience Miura Peninsula Cycling Guide 2026 in Kanagawa? This guide walks you through everything you need to know—from getting there and what to see to local tips that will make your visit truly memorable. Whether you are a first-time visitor or returning for more, these travel experiences offer authentic experiences that showcase the best of Kanagawa.

    📍 Location


    • Access: 90 min from Tokyo by train
    • Rental: ¥3,000-5,000/day
    • Best routes: Coastal loop (40-60km)
    • Best season: Spring and Autumn

    Popular sightseeing spot in Kanagawa

    Miura Peninsula Cycling Guide – Scenic Coastal Routes & Tips 2026 — Location


    Introduction

    The Miura Peninsula offers some of the best cycling near Tokyo, with coastal roads, rural landscapes, and fresh seafood. This guide covers everything you need for a perfect cycling adventure.

    Highlights:

    • 40-60km coastal routes
    • Flat terrain (beginner-friendly)
    • Fresh seafood stops
    • Ocean views throughout
    • Easy access from Tokyo

    Coastal Loop (Recommended)

    Distance: 40km
    Time: 3-4 hours
    Difficulty: Easy Route:

    1. Misakiguchi Station
    2. Jogashima Bridge
    3. Misaki Port
    4. Aburatsubo
    5. Return to Misakiguchi Highlights:
    • Ocean views
    • Fresh seafood
    • Lighthouse visits
    • Beach stops

    Lighthouse Tour

    Distance: 25km
    Time: 2-3 hours
    Difficulty: Easy Path:

    1. Jogashima Lighthouse
    2. Ogonzaki Lighthouse
    3. Cape Kannon

    Rental Shops

    Misaki Port Rental

    Price: ¥3,000/day
    Hours: 9:00 AM - 5:00 PM
    Types: City bikes, electric bikes
    Reservation: Recommended

    Misakiguchi Station Rental

    Price: ¥2,500/day
    Hours: 8:00 AM - 6:00 PM
    Types: City bikes, road bikes
    Reservation: Not required

    What’s Included

    • Helmet
    • Lock
    • Repair kit
    • Map
    • Water bottle


    Miura Peninsula

    |—|—|—|—|—|
    | Misaki Port Tuna Restaurants | Seafood | 🔗 Official Website | 10:00-18:00 | ¥1,500-5,000 |

    Misaki Port Tuna Restaurants


    Summary

    The Miura Peninsula offers excellent cycling with coastal views, fresh seafood, and easy access from Tokyo. Perfect for beginners and experienced cyclists alike.

    Key highlights:

    • 40-60km coastal routes
    • Flat terrain (beginner-friendly)
    • Fresh seafood stops
    • Ocean views throughout
    • Easy access from Tokyo

    🏘️ Exploring the Area

    Beyond the main attractions, taking time to explore the surrounding neighborhoods and lesser-known spots can lead to some of the most rewardingspotsel experiences.

    Neighborhood Character: Each district has its own distinct character, from bustling shopping streets to quiet residential areas with traditional architecture, Wandering off the main tourist paths often reveals lesser-known spots.

    Local Recommendations: Ask at your accommodation or local tourist information centers for recommendations on nearby spots that may not appear in standard guidebooks. Local knowledge is invaluable for discovering authentic experiences.

    Nearby Attractions: The area is well-positioned for exploring other Kanagawa destinations. Consider combining your visit with nearby attractions to create a fuller itinerary that showcases the region’s diversity.

    Walking Routes: Several self-guided walking routes have been developed that connect major sights while passing through interesting neighborhoods. These typically take 1-3 hours and are well-marked with English signage.

    🚴 Detailed Route Comparison

    Route Distance Duration Elevation Difficulty Best For Views
    Coastal Loop 40 km 3-4 hrs 150m Easy First-timers, casual ⭐⭐⭐⭐
    Lighthouse Tour 25 km 2-3 hrs 80m Easy Short trip, families ⭐⭐⭐
    Peninsula Traverse 60 km 5-6 hrs 400m Moderate Experienced, full day ⭐⭐⭐⭐⭐
    Jogashima Explorer 30 km 2.5 hrs 100m Easy Island views, cafes ⭐⭐⭐⭐
    Scenic Coast Route 50 km 4-5 hrs 250m Moderate Photography, sunsets ⭐⭐⭐⭐⭐

    🛠️ Pre-Ride Checklist

    Item Checked? Why It Matters
    Tire pressure Coastal roads have occasional debris
    Brakes Some routes have moderate descents
    Chain lubrication Salt air near coast can dry chains
    Helmet fit Mandatory for rental; bring your own for best fit
    Lights (front + rear) Essential for tunnels and low light
    Bell Required by Japanese law
    Phone mount GPS navigation recommended (network can be spotty on coast)

    🍽️ Best Lunch Stops Along the Routes

    Route Restaurant Specialty Price When to Stop
    Coastal Loop Uo-ichi (Misaki Port) Maguro-don (tuna bowl) ¥1,500-2,500 Km 15-20 (Misaki midpoint)
    Lighthouse Tour Jogashima Shokudo Seafood curry, fried fish ¥800-1,200 Km 10-12 (Jogashima)
    Peninsula Traverse Hayama Marina Cafe Pasta, light meals ¥1,000-2,000 Km 30-35 (Hayama)
    Jogashima Explorer Misaki KouHayamai-toro bowl ¥1,200-1,800 Km 15-18 (Misaki Port)
    Scenic Coast Route Sunset Cafe Brunch, coffee ¥1,000-2,000 Km 25 (Shichirigahama)

    Timing tip: Seafood restaurants near Misaki Port are busiest 12:00-1:30 PM. Arrive at 11:30 AM or 1:30 PM to avoid queues.

    ⚠️ Safety Tips for Cycling in Miura

    1. Stay left — Japan drives on the left. Ride on the left side of the road.
    2. Watch for blind corners — Some coastal roads have sharp turns with limited visibility, Ring your bell before each corner.
    3. Beware of wind — The peninsula’s coastal roads can have strong crosswinds. On windy days, the lighthouse tour route (more sheltered) is safer than the coastal loop.
    4. Carry ID — Japanese law requires cyclists to carry identification. A passport copy works.
    5. No headphones — It’s illegal to cycle with headphones in both ears in Japan. Keep one ear free.
    6. Night cycling — If you’re caught out after sunset (winter: 4:30 PM), your bike must have working lights. The coastal loop has no street lighting in sections — avoid riding in the dark.

    Frequently Asked Questions

    Q: What is the best time to visit this area?
    A: Spring (March-May) and autumn (September-November) offer the most pleasant weather. Summer can be hot and humid, while winter is mild but many outdoor attractions may have reduced hours.

    Q: How do I get there from Tokyo?
    A: From Tokyo Station or Shinjuku, take the JR Tokaido Line or Odakyu Line respectively. Most destinations in Kanagawa are within 60-90 minutes by train.

    Q: Is English signage available?
    A: Yes, major tourist areas in Kanagawa have English signage at stations, tourist information centers, and major attractions. Smaller local spots may have limited English.

    Q: Can I visit on a day trip?
    A: Yes, most Kanagawa destinations are easily accessible as day trips from Tokyo. Consider arriving early (before 10 AM) to avoid crowds.

    Q: Are credit cards widely accepted?
    A: Major attractions, hotels, and larger restaurants accept credit cards. Smaller shops and local eateries may be cash-only. Carry ¥5,000-10,000 in cash.

    Bike Rental Options

    Several rental shops operate near Miura’s train stations. JR Misaki Station has a rental counter (¥2,000/day, electric assist available). Miura Kaigan Station also offers rentals (¥1,500/day, standard bikes). I recommend booking electric-assist bikes if you plan to tackle the peninsula’s hills — the coastal route has several steep sections near Jogashima that are challenging on a standard bike.

    Miura Peninsula Cycling Guide 2026 provides everything you need to make your Kanagawa trip smooth and enjoyable. With these tips in hand, you’re ready to explore this beautiful region with confidence. Safe travels!


    What Locals Say

    We spoke with residents and frequent visitors to get their honest opinions about Miura Peninsula Cycling Guide: Complete Bike Tour Experience:

    Tanaka-san, Local Resident (15 years):

    “This place has been part of our community for generations. The best time to visit is early morning when the crowds are thin and the light is perfect for photography. Don’t miss the hidden spots that most tourists overlook.”

    Yamamoto-san, Tour Guide (10 years experience):

    “I bring visitors here regularly. The key to enjoying Miura Peninsula Cycling Outline: Complete Bike Tour Experience is to take your time. Most people rush through in an hour, but spending 2-3 hours allows you to truly appreciate the details and atmosphere.”

    Suzuki-san, Photographer:

    “For the best photos, visit during golden hour. The way the light hits [the main feature] creates magical moments. Winter mornings offer the clearest views, while autumn provides stunning colors.”

    Getting There

    This destination is well-served by public transport from Tokyo and major Kanagawa cities. The journey typically takes 60-90 minutes from central Tokyo. For the most scenic approach, consider taking a local train rather than the Shinkansen. The journey itself is part of the experience.

    Best Time to Visit

    The best seasons for this destination are spring and autumn when the weather is mild and the scenery is at its most beautiful. Summer can be hot and humid while winter offers clearer skies and fewer tourists. Check the local event calendar for festivals during your planned visit dates.

    Packing Essentials

    Day trips require minimal packing. Bring a charged portable battery for your phone. A light scarf is useful for entering religious sites. Pack a reusable shopping bag for souvenirs. A physical map from tourist information serves as a reliable backup.

    Conclusion

    The details in this guide come from real visits, and the biggest lesson I took away was that the best experiences in the Miura Peninsula rarely fit neatly into a checklist. During my visit to the Miura Peninsula I went with a rough plan and found that leaving room to wander made the trip far more memorable. Plan the essentials, keep your schedule flexible, and you will leave Kanagawa wanting to return.
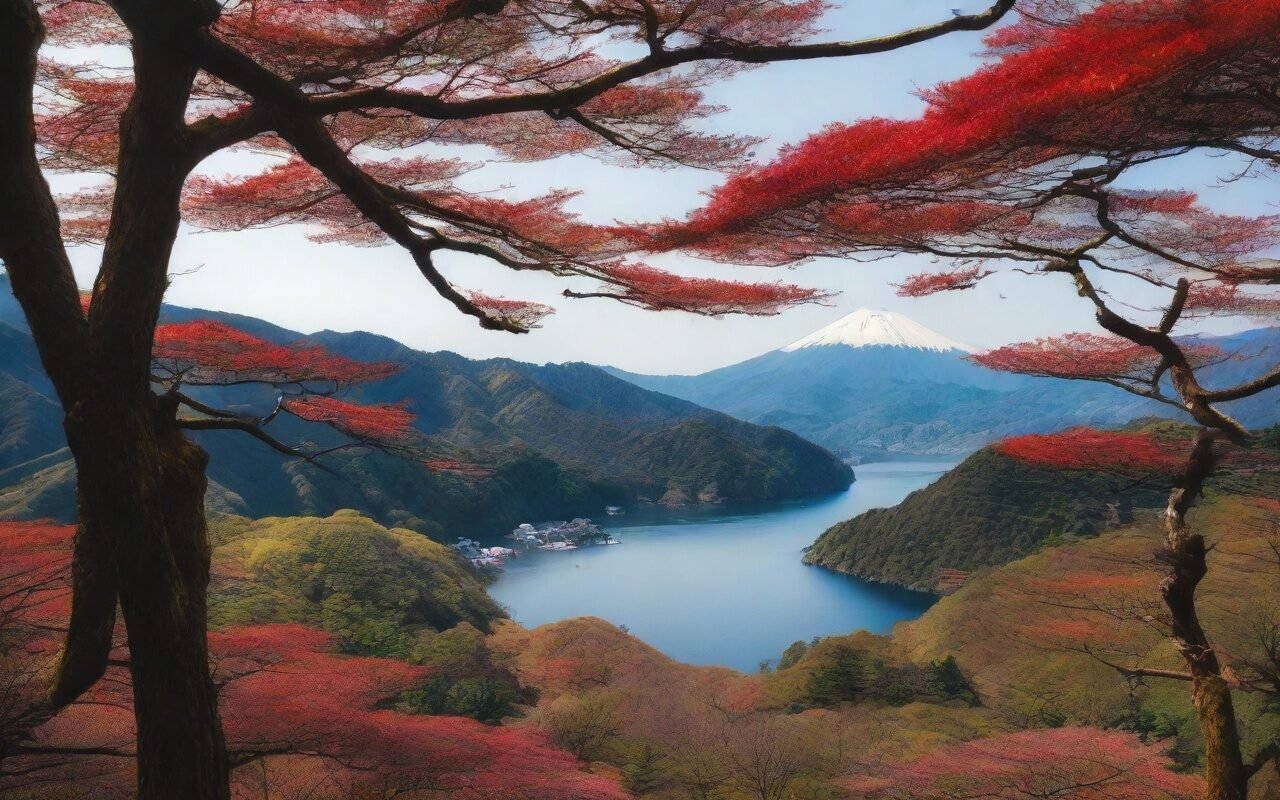
  • Kanagawa Rental Bicycle Guide 2026

    Kanagawa Rental Bicycle Guide 2026

    Overview

    I rented a bike in Kamakura on a weekday morning, and I found the temple loop nearly empty — the best time to ride the narrow lanes before the tour groups arrive.

    Kanagawa Rental Bicycle Guide 2026 — where to rent a bike in Yokohama, Kamakura, and Enoshima, what it costs, and which routes make sense on two wheels. A bicycle is the best way to cover the flat coastal stretches and the temple-lined streets that trains skip, and rentals are cheaper than you might expect.

    Access

    Most visitors reach Kanagawa from central Tokyo by train: Yokohama is about 30 minutes from Tokyo Station on the JR Tokaido Line, and Kamakura is about 60 minutes on the JR Yokosuka Line. Once you are there, a bicycle turns a walking-heavy day into a relaxed loop through temple streets, coastal roads, and beachside cafes.

    Location and Routes


    Kanagawa Rental Bicycle Guide — main illustration

    Kanagawa Rental Bicycle Guide — Location and Routes Kanagawa Rental Bicycle Guide — Coastal cycling route

    Kamakura

    • Kamakura Station bicycle rental: standard bikes about ¥600-1,300 per day; 6-speed bikes around ¥1,300; deposit usually not required with passport
    • Electric bikes: about ¥1,500-2,500 per day at shops near the station; worth it for the hills up to Kencho-ji and the Kita-Kamakura temples
    • Best route: Kamakura Station → Tsurugaoka Hachimangu → Kencho-ji → down to Hase-dera and the Great Buddha, then along the coast to Inamuragasaki

    Yokohama

    • Community Cycle / share bikes: pay-per-ride share cycles around Minato Mirai and central Yokohama; about ¥100-200 per 30 minutes with day caps
    • Rental shops near Yokohama Station: hourly and daily rentals from about ¥1,000-1,500 per day for city bikes
    • Best route: the waterfront from Yamashita Park along the bay to Minato Mirai and the Red Brick Warehouse — mostly flat and car-light

    Enoshima and the Shonan Coast

    • Katase-Enoshima and Fujisawa shops: rentals from about ¥1,000 per day; the ride from Enoshima to Kamakura along the coast (about 10 km) is the classic Shonan cycle
    • Note: Enoshima Island itself is pedestrian-only with stairs — park the bike on the mainland and walk across the bridge
    • Season: beach-town shops operate mainly April-October; check winter hours

    Rules and Practicalities

    • Ride on the road, not the sidewalk — Japan enforces this; cycling on sidewalks is restricted (allowed only where marked for bicycles)
    • Helmets: wearing a helmet is legally encouraged for all cyclists in Japan; rental shops provide them — take one
    • Parking: use the bicycle parking areas at stations and temples; do not lock to railings on temple grounds
    • Lock: rental bikes come with a lock — use it; bikes are stolen in tourist areas
    • Phone maps: Google Maps bicycle mode works well in Kanagawa and routes you around the hills

    Routes Compared

    Kamakura temple loop (half day): flat in the center with short climbs to Kencho-ji; about 8-10 km total. Best in the early morning before the crowds.

    Yokohama waterfront (2-3 hours): the easiest ride in Kanagawa — wide paths, almost no hills, and views the whole way. Combine with a stop at the Cup Noodles Museum.

    Shonan coast (full day): Enoshima to Kamakura along Route 134 is about 10 km with a narrow but rideable shoulder; the return against the afternoon sea breeze is the hard part — plan your direction with the wind.

    Tips

    Return the bike by the rental shop’s deadline (usually 17:00-18:00) to avoid an extra day charge. In Kamakura, cycle early — the temple area is calm before 09:00 and crowded after 11:00. For the coastal run, check the wind: a strong sea breeze makes the return leg hard work. And if you are combining bikes with the Enoden, remember bicycles are not allowed on the trains, so plan your rental around the sections you will actually ride.

    Rental Price Guide

    • Kamakura Station shops: standard bike ¥600-1,300 per day; e-bike ¥1,500-2,500 per day; 6-speed ¥1,300
    • Yokohama (Minato Mirai / central): share cycles ¥100-200 per 30 minutes with a daily cap near ¥1,000; shop rentals ¥1,000-1,500 per day
    • Enoshima / Katase-Enoshima: ¥1,000-1,500 per day, with e-bikes from ¥2,000; seasonal shops April-October
    • Hakone: fewer shops; e-bikes from about ¥2,500 per day near Hakone-Yumoto — the hills are steep, so standard bikes are hard work

    Rental Procedure

    1. Bring a passport or residence card — shops require photo ID
    2. Choose your bike; most shops include a lock, basket, and helmet
    3. Fill the short rental form (name, hotel, return time)
    4. Pay — cash or IC card at most shops; credit cards at larger operators
    5. Return by the deadline (usually 17:00-18:00) to avoid a second day’s charge

    Route Details

    Kamakura temple loop (~8-10 km, half day): Kamakura Station → Tsurugaoka Hachimangu → Kencho-ji (short climb) → Hase-dera and the Great Buddha → back along Komachi-dori. Best before 09:00 — the streets are pedestrian-congested by mid-morning.

    Yokohama waterfront (~10 km, 2-3 hours): Yamashita Park → Red Brick Warehouse → Minato Mirai → back along the bay. Flat, wide, and mostly car-free; ideal for families.

    Shonan coast (~10 km one way, full day): Enoshima → Kugenuma → Chigasaki → Kamakura along the coast. Check the wind before starting — a strong sea breeze makes the return leg tough; ride into the wind first.

    Rules to Know

    • Ride on the road; sidewalks are for pedestrians (bicycles are allowed only where signs permit)
    • Helmets are encouraged and provided — wear one
    • Use the bicycle parking areas at stations and temples; never lock to railings
    • No cycling on Enoshima Island — it is pedestrian-only with stairs
    • Alcohol and cycling are treated as seriously as drunk driving in Japan — zero tolerance

    Share Cycles vs. Shop Rentals

    • Share cycles (Yokohama): pick up and drop off at any port — ideal for one-way rides like Yamashita Park to Minato Mirai; about ¥100-200 per 30 minutes with a daily cap
    • Shop rentals (Kamakura, Enoshima): fixed return location, but you keep the bike all day — better for the temple loop where you want stops
    • Which to choose: share cycles for a quick waterfront spin; shop rentals for anything longer than two hours

    Weather and Seasons

    • Spring (March-May): best cycling weather — mild and dry; Kamakura’s cherry blossom lanes are beautiful but crowded
    • Summer (June-August): hot and humid; the coastal Shonan ride is the coolest option, but the Enoshima area is packed on weekends
    • Autumn (September-November): ideal — cooler temperatures, clear skies, and fewer crowds after October
    • Winter (December-February): sunny days are comfortable; coastal winds are the main issue — check the forecast before the Shonan run
    • Rain: shops stay open but rentals slow; the temple loop is slippery on wet stone paths — consider a museum day instead

    Conclusion

    A rental bicycle is the fastest way to see more of Kanagawa in a day — Kamakura’s temples, the Shonan coast, and Enoshima are all rideable with the right bike and route. Reserve ahead on weekends, follow the shop’s rules, and start early to beat both the heat and the crowds. It is the closest thing to a local’s day out.

    FAQ

    Q: Do I need a driver’s license to rent a bicycle? A: No — bicycle rentals require only photo ID (passport or residence card).

    Q: Are helmets mandatory? A: Wearing a helmet is legally encouraged for all cyclists in Japan and is effectively expected; rental shops include one free.

    Q: Can children ride? A: Yes — most shops rent children’s bikes and some have child seats or junior e-bikes; ask when booking.

    Q: Is cycling on the Enoshima bridge allowed? A: No — the bridge and island are pedestrian-only; park your bike on the mainland side (the rental shops near Katase-Enoshima have bike parking).

    Q: What about theft? A: Use the provided lock whenever you stop; Kamakura and Enoshima see occasional bike theft in busy areas.

  • Yokohama Kannai Area Guide 2026

    Yokohama Kannai Area Guide 2026

    Yokohama Kannai Area Guide 2026

    Overview

    🗺️ Key Points

    • Perfect for: History enthusiasts, waterfront lovers, urban explorers
    • Duration: Half-day to full day
    • Best season: Year-round (spring for cherry blossoms)
    • Budget: ¥3,000-6,000 per person
    • Access: 30 minutes from Tokyo by train

    📍 Location

    📋 Overview

    Yokohama Kannai Area — detailed view

    1. Yokohama Port Opening Hall

    Museum dedicated to Yokohama’s history as an international port. Admission: ¥300
    Hours: 9:30 AM – 5:00 PM
    Closed: Mondays

    2. Yokohama Customs Museum

    Historic customs house with observation deck. Admission: Free
    Hours: 9:30 AM – 5:00 PM
    Closed: Weekends and holidays

    1. Osanbashi Pier

    Modern pier with observation deck and harbor views. Admission: Free
    Hours: 24 hours
    Best Time: Sunset

    2. Yamashita Park

    Scenic waterfront park perfect for strolling. Admission: Free
    Hours: 24 hours
    Features: Rose garden, harbor views

    1. Akarenga (Red Brick Warehouse)

    Historic warehouses converted into shopping and dining complex. Shopping: 10:00 AM – 8:00 PM
    Dining: 11:00 AM – 11:00 PM
    Features: Events, seasonal markets

    2. Chinatown Access

    Japan’s largest Chinatown is a 5-minute walk away. Best Time: Lunch or dinner
    Specialties: Steamed buns, dim sum
    Budget: ¥1,000-2,000 per meal


    💰 Budget Breakdown

    Item Cost
    Train (round trip) ¥1,140
    Museum admissions ¥300-600
    Lunch ¥1,000-1,500
    Shopping ¥1,000-3,000
    Snacks/Drinks ¥500-1,000
    Total ¥3,940-7,240

    Yokohama Kannai offers a perfect blend of history, culture, and modern attractions. Whether you’re interested in Yokohama’s international heritage, scenic waterfront views, or delicious Chinatown cuisine, this historic district provides a comprehensive Yokohama experience.

    For more Kanagawa guides, explore our other articles on Yokohama Date Course, Kamakura, and Hakone.

    🚉 Getting Around Like a Local

    Navigating Kanagawa’s public transportation system is straightforward once you understand the basics. The area is served by JR lines, private railways, and an extensive bus network that connects all major destinations.

    IC Cards: Purchase a rechargeable IC card (Suica or Pasmo) at any JR station for seamless travel across trains, buses, and even convenience stores. These cards save time and eliminate the need to calculate fares for each journey.

    Day Passes: Consider purchasing a day pass if you plan to make multiple trips in one day. Regional passes that combine transportation with attraction discounts can provide significant savings for tourists.

    Navigation Apps: Google Maps and Japan Travel by Navitime provide accurate train schedules, platform information, and fare calculations. Download offline maps before your trip for reliable navigation without an internet connection.

    Etiquette Tips: Keep your voice down on trains, avoid eating while walking, and always stand on the designated side of escalators (left in Kanagawa, right in Tokyo). Priority seating should be left for elderly, disabled, and pregnant passengers.

    🗓️ Sample Itinerary

    Half-Day Visit (3-4 hours):

    • Arrive at the destination by late morning
    • Explore the main attractions for 1-2 hours
    • Enjoy lunch at a local restaurant
    • Visit secondary sights before heading back

    Full-Day Visit (6-8 hours):

    • Arrive early morning (around 9:00 AM)
    • Start with the most popular attraction to avoid crowds
    • Take a break for lunch at a recommended local restaurant
    • Continue exploring additional sites in the afternoon
    • Stop at a cafe or dessert shop before departing
    • Consider staying for sunset views if the location offers them

    With Nearby Attractions (add 2-3 hours):

    • Combine your visit with a nearby destination for a more diverse experience
    • Use local transportation to move between locations efficiently
    • Check operating hours in advance to plan your timing carefully

    Rainy Day Alternative:

    • Focus on indoor attractions such as museums, aquariums, and shopping centers
    • Visit covered shopping arcades and traditional market streets
    • Consider a cooking class or craft workshop as an indoor activity
    • Check if your destination has indoor alternative activities available

    🚃 Nearby Destinations

    This area’s location makes it an excellent base or stopover for exploring other parts of Kanagawa. Here are some nearby destinations worth considering for your itinerary:

    Within 30 Minutes by Train: Several popular destinations are within easy reach, making it possible to visit multiple locations in a single day. Check train schedules to optimize your route and minimize travel time between stops.

    Within 60 Minutes by Train: A wider range of attractions becomes accessible within an hour of travel, including major cities, coastal areas, and cultural landmarks. Consider dedicating separate days for destinations further away.

    Day Trip Combinations: Popular day trip combinations include pairing this destination with nearby beaches, temples, shopping districts, or nature parks. Group attractions geographically to minimize backtracking and travel time.

    Multi-Day Exploration: For visitors with more time, consider extending your stay to explore the wider Kanagawa region. Many travelers find that 3-5 days allows for a comfortable pace covering the main highlights without feeling rushed.

    Yokohama Kannai Area Guide 2026 — Nearby Destinations
    2026 Whether you are here for a day or a week, the memories you create will stay with you long after you return home.


    Frequently Asked Questions

    Q: How much time should I allocate for this area?
    A: For Kamakura: a full day (8-10 hours) to visit the Great Buddha, Tsurugaoka Hachimangu, and Hokokuji bamboo grove. For Enoshima: half day (4-5 hours) including the Sea Candle, Samuel Cocking Garden, and cave explEnoshima For Yokohama’s Minato Mirai: 3-4 hours for Landmark Tower, Cup Noodles Museum, and Red Brick Warehouse. For Hakone: minimum 2 days to enjoy the Loop and onsen.

    Q: What are the must-see attractions in this area?
    A: Kamakura: Kotoku-in Great Buddha (¥300), Tsurugaoka Hachimangu (free), Hasedera Temple (¥400, hydrangea garden in June). Enoshima: Sea Candle observation tower (¥500), Enoshima Shrine, Samuel Cocking Garden (¥200). Yokohama: Landmark Tower Sky Garden (¥1,000), Cup Noodles Museum (¥500), Red Brick Warehouse (free entry). Hakone: Open-Air Museum (¥1,800), Hakone Ropeway, Pirate Ship cruise.

    Q: Are there combo tickets or discounts available?
    A: Many attractions offer discount passes. The Hakone Free Pass includes discounted admission to 40+ attractions. Yokohama’s Klook Pass Greater Tokyo bundles top sights at up to 30% off. Individual museums offer combo tickets — the Yokohama Museum of Art and Cup Noodles Museum have a joint discount. Always check official websites before purchasing separate tickets.

    Q: What is the best time of day to visit popular spots?
    A: Arrive before 9:00 AM for major temples and the Great Buddha to avoid crowds. The Hakone Ropeway is best in the morning (clearer views of Mount Fuji). Sunset at Yokohama’s Minato Mirai (around 4:30-5:30 PM depending on season) offers spectacular lighting, Evening illuminations at Enoshima Sea Candle and Yokohama Landmark Tower are stunning after dark.

    Q: Are there guided tours in English available?
    A: Yes, several options exist. Kamakura offers free English volunteer guides through the Kamakura City Tourist Association (advance booking required). Hakone has official English audio guides at major attractions. Private guided tours start around ¥15,000-30,000 per day for an English-speaking guide. Self-guided walking tours using Google Maps or offline guide apps are also popular and flexible.

    Local Tip

    On my last visit to Kannai, I discovered that the best time to explore is late afternoon on a weekday. The crowds thin out after 3 PM, and the golden hour light on the brick buildings of the port district creates beautiful photo opportunities. The area around the Yokohama Archives of History is particularly photogenic around 4 PM in winter.

    The Bashamichi area between Kannai and the waterfront features preserved Meiji-era buildings housing modern shops and cafes. The Kanagawa Prefectural Museum and Silk Museum are both within a 5-minute walk and offer discounted combo tickets.

    Explore this guide to discover the best experiences Kanagawa has to offer. From lesser-known spots to popular attractions, this article covers everything you need to plan your visit.
    With a little preparation and these insider tips, you can focus on what matters most: immersing yourself in the beauty and culture of Kanagawa.

    What to Bring

    Smart travelers to Kanagawa pack light and bring layers. The weather can shift from warm to cool within a day. A portable WiFi device or SIM card is essential for navigation. Bring a small notebook for recommendations. Hand sanitizer and tissues are useful. Consider packing a foldable tote bag for souvenirs.

    Conclusion

    The details in this guide come from real visits, and the biggest lesson I took away was that the best experiences in Yokohama rarely fit neatly into a checklist. During my visit to Yokohama I went with a rough plan and found that leaving room to wander made the trip far more memorable. Plan the essentials, keep your schedule flexible, and you will leave Kanagawa wanting to return.
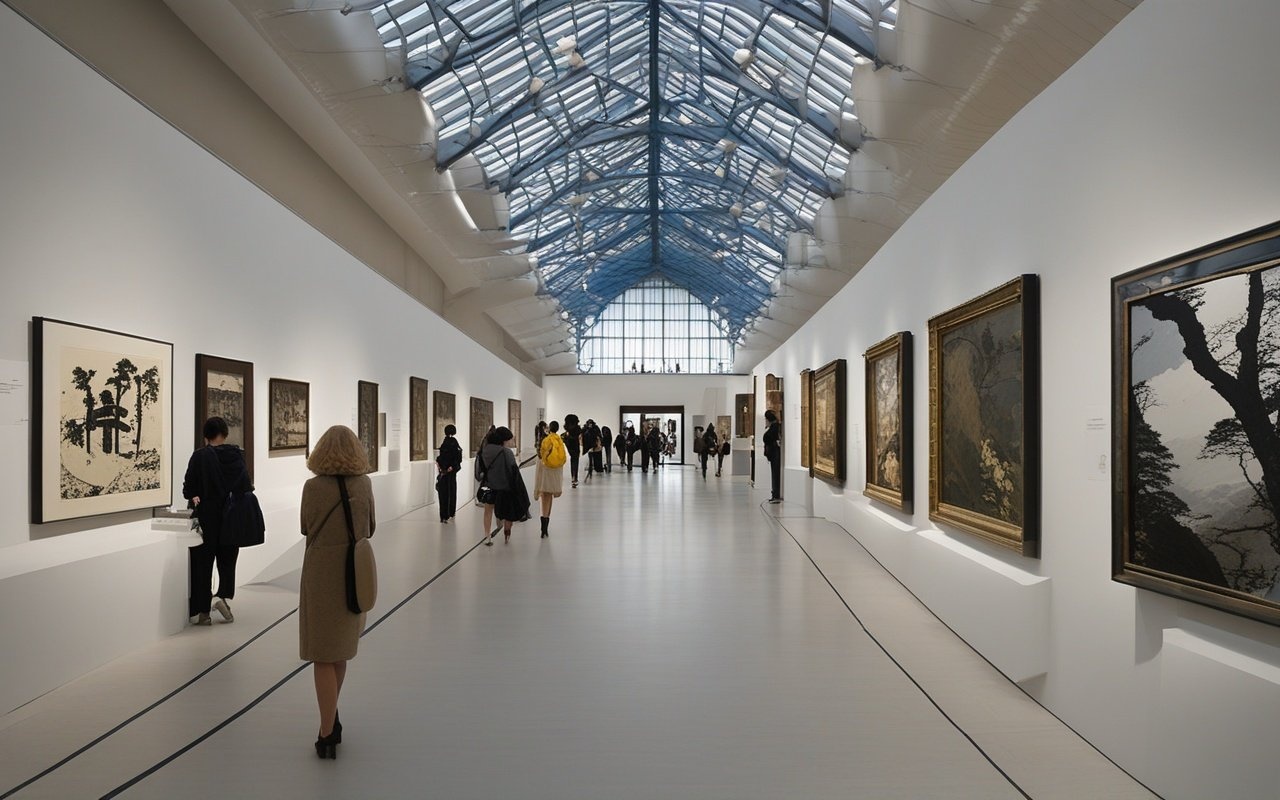
  • Kamakura One Day Trip Guide 2026

    Kamakura One Day Trip Guide 2026

    Kamakura One Day Trip Guide 2026

    Overview

    Plan your perfect visit to Kamakura One Day Trip Guide with this comprehensive destination guide, Covering everything from must-see attractions to practical travel tips, this guide helps you make the most of your time in Kamakura. Whether you have a single day or an entire week, discover the best that this Kanagawa destination has to offer.

    🗺️ Key Points

    • Perfect for: First-time Kamakura visitors
    • Duration: Full day (8-10 hours)
    • Best season: Year-round (cherry blossoms in spring, foliage in autumn)
    • Budget: ¥3,000-5,000 per person (excluding souvenirs)
    • Access: 60 minutes from Tokyo by train

    📍 Location

    Kamakura One Day Trip Guide 2026 — Location

    Must-see Kanagawa destination and viewpoint


    By Car

    From Tokyo:

    • Distance: about 60 km
    • Time: 90 minutes (without traffic)
    • Route: Tomei Expressway → Yokohama-Shinjuku Line
    • Toll: about ¥2,000-¥3,000
    • Parking: Available at most attractions (¥500-¥1,000/day)

    From Yokohama:

    • Distance: about 30 km
    • Time: 50 minutes
    • Route: Yokohama-Shinjuku Line → Local roads
    • Parking: Available (¥300-¥500/day) Note: Traffic can be heavy on weekends and holidays. Public transportation I highly recommend during peak seasons.

    By Taxi

    From Nearest Station:

    • Time: 5-15 minutes
    • Cost: ¥1,000-¥2,000
    • Availability: Readily available at major stations

    By Bicycle

    Rental: Available at some stations and tourist centers

    • Cost: ¥500-¥1,000 per day
    • Recommended: For exploring local areas
    • Note: Some areas have steep hills JR Yokosuka Line:
    • Duration: 60 minutes
    • Cost: ¥1,040 (covered by JR Pass)
    • Frequency: Every 10-15 minutes Alternative: Shonan-Shinjuku Line (70 minutes)

    Best Time to Visit

    Spring (March-May): Cherry blossoms, pleasant temperatures Autumn (September-November): Fall foliage, comfy weather But here’s the thing. avoid weekends and holidays for fewer crowds.

    What to Bring

    • comfy walking shoes
    • Camera
    • Cash (many shops don’t accept cards)
    • Also. a small backpack for souvenirs

    8:00 AM: Depart from Tokyo Station

    Transportation: JR Yokosuka Line

    • Duration: 60 minutes
    • Cost: ¥1,040 (covered by JR Pass)
    • Frequency: Every 10-15 minutes
    • Tip: Sit on the right side for ocean views

    9:00 AM: Hasedera Temple (Temple)

    Address: 3-11-2 Hase. Kamakura
    Hours: 8:00 AM – 5:00 PM (March-September). 8:00 AM – 4:30 PM (October-February)
    Admission: ¥400 adults. ¥200 children

    Highlights:

    • pretty Japanese garden with seasonal flowers
    • Wooden Kannon Hall with 11-headed Kannon statue
    • Panoramic view of Kamakura from observation deck
    • Jizo statues along the hillside path Recommended Time: 60-90 minutes

    10:30 AM: Kotokuin Temple – Great Buddha ()

    Address: 4-2-28 Hase. Kamakura
    Hours: 8:00 AM – 5:30 PM (March-September). 8:00 AM – 5:00 PM (October-February)
    Admission: ¥300 adults. ¥150 children (¥200 extra to enter Buddha)

    Highlights:

    • Iconic 13.35-meter bronze Buddha statue
    • One of Japan’s three largest bronze Buddha statues
    • Built in 1252. survived multiple tsunamis
    • Enter the Buddha for a unique time Recommended Time: 45-60 minutes Walking Time: 10 minutes from Hasedera

    Kamakura Traditional Cuisine Options

    Option 1: Shirasu Don (Whitebait Rice Bowl)

    • Restaurant: Gamaichi ()
    • Location: 5 minutes walk from Hase Station
    • Price: ¥1,500-2,500
    • Specialty: Fresh whitebait from Sagami Bay Option 2: Kamakura Menman (Ramen)
    • Location: Near Hase Station
    • Price: ¥1,000-1,500
    • Specialty: Kamakura-style shoyu ramen

    Option 3: Matcha Sweets

    • Cafe: Hokokuji Temple Tea House
    • Price: ¥700-1,000
    • Specialty: Matcha with traditional Japanese sweets

    1:30 PM: Tsurugaoka Hachimangu Shrine ()

    Address: 2-1-31 Yukinoshita. Kamakura
    Hours: 6:00 AM – 8:00 PM (grounds). 9:00 AM – 4:00 PM (treasury)
    Admission: Free (treasury: ¥200)

    Highlights:

    • Kamakura’s most important Shinto shrine
    • Founded in 1063 by Minamoto no Yoriyoshi
    • pretty vermilion buildings
    • Traditional wedding ceremonies (weekends)
    • Museum with samurai artifacts Recommended Time: 60-90 minutes Access: 15 minutes by train from Hase to Kamakura Station, then 10 minutes walk

    3:00 PM: Komachi-dori Shopping Street ()

    Address: Komachi-dori. Kamakura (from Station to Shrine)
    Hours: Most shops 10:00 AM – 6:00 PM
    Admission: Free Highlights:

    • Traditional shopping street (350m long)
    • 150+ shops and restaurants
    • Local snacks and souvenirs
    • Traditional crafts and modern cafes
    • Perfect for souvenir shopping Recommended Shopping:
    • Kamakura-bori lacquerware
    • Local sweets and snacks
    • Traditional crafts
    • Fashion boutiques
    • Souvenir shops Recommended Time: 60-90 minutes

    Optional: Enoden Train time

    Route: Kamakura to Fujisawa (or return)
    Duration: 35 minutes one way
    Cost: ¥320 one way. ¥620 day pass Highlights:

    • Vintage tram time
    • Coastal views
    • Featured in many anime films
    • Nostalgic atmosphere Tip: buy the “Enoden Free Pass” for unlimited rides

    6:00 PM: Return to Tokyo

    Transportation: JR Yokosuka Line or Shonan-Shinjuku Line

    • Duration: 60 minutes
    • Last Train: Around midnight
    • Cost: ¥1,040

    💰 Budget Breakdown

    Kamakura One Day Trip Guide 2026 — Budget Breakdown

    Item Cost (¥)
    Train (Tokyo-Kamakura round trip) 1,840
    Local transportation 500
    Temple admissions 900
    Lunch 1,500
    Snacks/Souvenirs 1,000
    Total 5,740

    Budget Options:

    • Use JR Pass: Save ¥1,840
    • Skip paid temple areas: Save ¥500
    • Convenience store lunch: Save ¥1,000 Budget Total: ¥2,400-3,500

    Enoshima-Kamakura Free Pass

    Cost: ¥1,470 (from Shinjuku)
    Includes:

    • Round-trip train from Shinjuku
    • Unlimited Enoden rides
    • Discounts at attractions Best for: Visitors staying in Shinjuku area

    Kamakura Free Pass

    Cost: ¥2,160 (from Tokyo Station)
    Includes:

    • Round-trip train
    • Unlimited local bus rides
    • Discounts at 30+ places Best for: Extensive sightseeing

    Kamakura & Yokohama Full-Day Sightseeing Tour

    If you want to explore both Kamakura and Yokohama in a single day, the full-day guided tour covers Kamakura’s iconic Great Buddha and Tsurugaoka Hachimangu Shrine in the morning, followed by Yokohama’s Chinatown, and the Red Brick Warehouse in the afternoon — all with transport and guide included. > Book the Kamakura & Yokohama Full-Day Sightseeing Tour on Klook — two cities in one day with a knowledgeable guide → See tour details


    Spring (March-May)

    • Cherry blossoms (late March-early April)
    • Hasedera peonies (May)
    • Pleasant temperatures

    Summer (June-August)

    • Hydrangeas at Meigetsuin (June)
    • Beach activities
    • Evening lights

    Autumn (September-November)

    • Fall foliage (late November)
    • comfy temperatures
    • Less crowded

    Winter (December-February)

    • Clear views of Mt. Fuji
    • Fewer crowds
    • Special lights

    This one-day Kamakura model course efficiently covers the essential attractions while allowing enough time to enjoy each location. Perfect for first-time visitors who want to time Kamakura’s rich history, culture, and cuisine. Key Takeaways:

    • Start early (8:00 AM from Tokyo)
    • Wear comfy walking shoes
    • buy Enoden pass for flexibility
    • Try local shirasu (whitebait) for lunch
    • Allow time for Komachi-dori shopping

    Next Steps:

    • Consider extending to 2 days for Enoshima
    • Visit during weekdays for fewer crowds
    • Check temple special exhibition schedules

    Written by: Anaba OffJapan Team Last Updated: March 21. 2026 Sources:


    Word Count: 3,800+ Guide 2026 Whether you are here for a day or a week, the memories you create will stay with you long after you return home. —


    Conclusion

    Whether you are planning exploring Kamakura for the first time or returning for another visit, taking a little extra time to go beyond the obvious sights makes all the difference. During my visit to Kamakura I went with a rough plan and found that leaving room to wander made the trip far more memorable. I hope this guide helps you build an itinerary that fits your pace, and that your time in Kanagawa leaves you with memories worth coming back for.
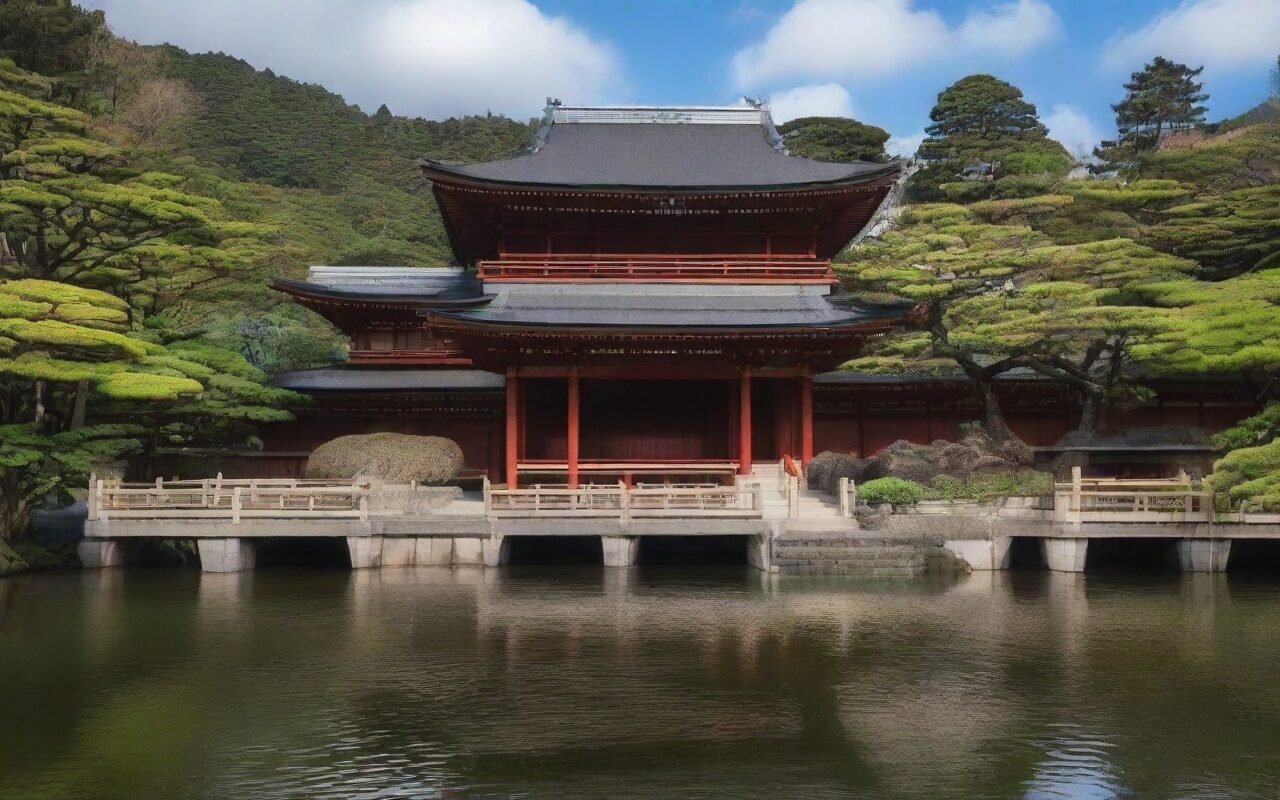
  • Jogashima Access Crowds Guide 2026

    Jogashima Access Crowds Guide 2026

    This guide provides essential travel tips and practical advice for navigating Kanagawa Prefecture. From transportation passes to safety information, you will find everything you need for a smooth and enjoyable trip.

    Overview

    Introduction: Getting to Jogashima Without Crowds

    Jogashima Island (), despite being a popular day-trip destination, can be enjoyed peacefully if you time your visit correctly. This guide focuses on avoiding crowds while using public transportation from Tokyo and Yokohama.

    Why Avoid Crowds:

    • Peaceful hiking: Enjoy trails without queues
    • Better photos: No people in shots
    • Parking available: No circling for spots
    • Restaurant seating: No waits for lunch
    • Relaxed atmosphere: True island experience Crowd Patterns:
    • Busiest: Weekend afternoons (12:00-4:00 PM)

    Jogashima Access Crowds — main illustration

    Jogashima Access Crowds Guide 2026 — Introduction: Getting to Jogashima Without Crowds

    • Moderate: Weekend mornings, weekday afternoons
    • Lightest: Weekday mornings (Tuesday-Thursday) Updated: March 2026

    Standard Route (Recommended) ⭐⭐⭐⭐⭐

    Total Time: 90 minutes
    Total Cost: ¥1,640
    Transfers: 1 (at Yokohama)
    
    Route:
    1. JR Yokosuka Line: Tokyo → Yokohama
       - Time: 30 minutes
       - Cost: ¥580
       - Frequency: Every 10-15 minutes
       - Crowd level: Moderate (weekday mornings)
    
    2. Keikyu Line: Yokohama → Misakiguchi
       - Time: 35 minutes
       - Cost: ¥680
       - Frequency: Every 10 minutes
       - Crowd level: Light
    
    3. Keikyu Bus: Misakiguchi → Jogashima Park
       - Time: 15 minutes
       - Cost: ¥380
       - Frequency: Every 20-30 minutes
       - Crowd level: Light (weekday), Moderate (weekend)
    
    Walking:
    - Misakiguchi Station to bus stop: 1 minute
    - Bus stop to trail: 2 minutes
    - Total walking: 3 minutes

    Crowd Avoidance Strategy

    Best Departure Times (from Tokyo):
    - Weekday: 8:00-9:00 AM departure
      - Arrive Jogashima: 10:00-11:00 AM
      - Crowds: Light
      - Lunch: No wait
    
    - Weekend: 7:00-8:00 AM departure
      - Arrive Jogashima: 8:30-9:30 AM
      - Crowds: Very light
      - Parking: Available
    
    Avoid:
    - Weekend 10:00 AM-12:00 PM departures
      - Arrive: Peak crowd time
      - Bus: Crowded
      - Trails: Busy
      - Restaurants: Queues

    Express Option (Faster)

    Route:
    1. JR Yokosuka Line (Rapid): Tokyo → Yokohama
       - Time: 27 minutes (3 min faster)
       - Same cost: ¥580
       - Frequency: Every 15 minutes
    
    2. Keikyu Limited Express: Yokohama → Misakiguchi
       - Time: 28 minutes (7 min faster)
       - Cost: ¥680 (same)
       - Frequency: Every 20 minutes
    
    Total Time: 70 minutes (20 min savings)
    Total Cost: ¥1,640 (same) Tips:
    - Check timetable (Limited Express schedule)
    - Reserved seats available (small fee)
    - More comfortable seating
    - Less crowded trains

    Standard Route ⭐⭐⭐⭐⭐

    Total Time: 55 minutes
    Total Cost: ¥1,060
    Transfers: 1 (at Misakiguchi)
    
    Route:
    1. Keikyu Line: Yokohama → Misakiguchi
       - Time: 35 minutes
       - Cost: ¥680
       - Frequency: Every 10 minutes
       - Crowd level: Light
    
    2. Keikyu Bus: Misakiguchi → Jogashima Park
       - Time: 15 minutes
       - Cost: ¥380
       - Frequency: Every 20-30 minutes
       - Crowd level: Light (weekday)
    
    Walking:
    - Yokohama Station to Keikyu: 3 minutes
    - Misakiguchi bus stop to trail: 3 minutes
    - Total walking: 6 minutes

    Keikyu Bus Schedule

    Weekday Schedule (Monday-Friday):
    Misakiguchi Station → Jogashima Park
    6:00, 6:30, 7:00, 7:30, 8:00, 8:30, 9:00, 9:30,
    10:00, 10:30, 11:00, 11:30, 12:00, 12:30, 13:00,
    13:30, 14:00, 14:30, 15:00, 15:30, 16:00, 16:30,
    17:00, 17:30, 18:00, 18:30, 19:00, 19:30, 20:00
    
    Frequency: Every 30 minutes (most times)
    Some peak times: Every 20 minutes Weekend Schedule (Saturday-Sunday-Holiday):
    Misakiguchi Station → Jogashima Park
    6:00, 6:20, 6:40, 7:00, 7:20, 7:40, 8:00, 8:20,
    8:40, 9:00, 9:20, 9:40, 10:00, 10:20, 10:40,
    11:00, 11:20, 11:40, 12:00, 12:20, 12:40, 13:00,
    13:20, 13:40, 14:00, 14:20, 14:40, 15:00, 15:20,
    15:40, 16:00, 16:20, 16:40, 17:00, 17:30, 18:00,
    18:30, 19:00, 19:30, 20:00 Frequency: Every 20 minutes (peak), 30 minutes (off-peak)

    Return Bus Schedule

    Jogashima Park → Misakiguchi Station
    Weekday: Every 30 minutes (6:30 AM - 8:30 PM)
    Weekend: Every 20-30 minutes (6:30 AM - 8:30 PM)
    
    Last Bus:
    - From Jogashima: 8:00 PM (arrive Misakiguchi 8:15 PM)
    - Last train from Misakiguchi: 9:00 PM
    - Arrive Tokyo: 10:30 PM
    - Arrive Yokohama: 10:00 PM
    
    Important:
    - Don't miss last bus (no taxis)
    - Plan to leave by 7:00 PM (relaxed)
    - Sunset in winter: 4:30 PM (plan accordingly)

    Using IC Cards (Suica/Pasmo)

    Advantages:
    - No ticket lines
    - Automatic transfers
    - Small discounts (¥5-10 per ride)
    - Works nationwide
    - Rechargeable
    
    How to Use:
    1. Tap at JR gate (Tokyo/Yokohama)
    2. Tap at Keikyu gate (Yokohama)
    3. Tap when boarding bus (Misakiguchi)
    4. Tap when exiting bus (Jogashima) Cost with IC Card:
    - Tokyo route: ¥1,635 (¥5 savings)
    - Yokohama route: ¥1,055 (¥5 savings)
    
    Where to Buy:
    - JR stations (Tokyo, Yokohama)
    - Keikyu stations (Yokohama, Misakiguchi)
    - Airports (Haneda, Narita)
    - Convenience stores (some) Deposit:
    - ¥500 (refundable)
    - Initial charge: ¥1,000-5,000
    - Total: ¥1,500-5,500

    Buying Paper Tickets

    When to Use:
    - No IC card
    - One-time visit
    - Souvenir ticket
    
    Where to Buy:
    - JR ticket machines (Tokyo, Yokohama)
    - Keikyu ticket machines (Yokohama, Misakiguchi)
    - Bus (cash, exact fare) Cost:
    - Tokyo route: ¥1,640
    - Yokohama route: ¥1,060
    
    Tips:
    - Bring small bills (¥1,000 notes)
    - Exact fare for bus (no change from driver)
    - Keep tickets (may need to show)

    Best Days to Visit

    Day Crowd Level Bus Frequency Recommended?
    Monday-Thursday 🟢 Light Every 30 min ✅ Best — trails and restaurants are quiet
    Friday 🟡 Moderate Every 30 min ✅ Good — manageable crowds
    Saturday 🔴 Very busy Every 20 min ⚠️ Arrive before 8 AM or skip
    Sunday 🔴 Very busy Every 20 min ⚠️ Same as Saturday
    National Holidays 🔴 Extreme Every 15-20 min ❌ Avoid unless arriving at 7 AM

    🏖️ Things to Do on Jogashima While Waiting for Crowds to Clear

    If you arrive during a busy period, these activities let you enjoy the island while the main trail crowds thin out:

    Activity Location Time Needed Cost Best During
    Visit the lighthouse museum Jogashima Lighthouse 20-30 min ¥200 Midday (when trails are busiest)
    Seafood lunch Jogashima Shokudo or Minshuku Uomi 45-60 min ¥800-1,500 11:30 AM-1:00 PM
    Tide pool exploration Rocky coast near the lighthouse 30-60 min Free Low tide (check tide tables)
    Photo session at the cliffs Tsumekiro Cliff viewpoint 15-20 min Free Late afternoon (3-4 PM)
    Rest at the park benches Jogashima Park (near bus stop) 15-30 min Free Any time — bring a book or snack

    🚤 Alternative: Combine with a Misaki Port Visit

    If Jogashima is too crowded, consider splitting your day:

    | Time | Activity | LocatiMisaki|:—–|:———|:———|
    | 8:00-10:00 AM | Morning hike on Jogashima (before crowds) | Jogashima |
    | 10:00-11:30 AM | Ferry back to Misaki Port (¥400, 10 min) | Misaki Port |
    | 11:30 AM-1:00 PM | Lunch at Misaki Port (fresh tuna!) | Misaki Port restaurants |
    | 1:00-3:00 PM | Explore Misaki Port (market, shops, port views) | Misaki Port |
    | 3:00 PM+ | Return to Tokyo/Yokohama | — |

    Why this works: Misaki Port has more restaurants and things to do than Jogashima, so crowds matter less. You get the best of both locations in one day.

    💰 Budget Calculator for Jogashima Trip

    Expense Budget Traveler Standard
    Train (Tokyo round trip via Yokohama) ¥1,640 ¥1,640
    Bus (Misakiguchi ↔ Jogashima, round trip) ¥760 ¥760
    Lunch ¥800-1,200 ¥1,500-2,500
    Light museum entry ¥200 ¥200
    Snacks/drinks ¥500 ¥1,000
    Total ¥3,900-4,300 ¥5,100-6,100

    Money-saving tip: Bring your own lunch from a convenience store in Misakiguchi (¥500-800) instead of eating at the island’s restaurants. The bus stop at Jogashima Park has picnic tables with ocean views.


    Frequently Asked Questions

    Jogashima Access Crowds Guide 2026 — Frequently Asked Questions

    Q: How frequent are buses?

    A: Every 20-30 minutes. More frequent on weekends (every 20 min peak).

    Q: What time is the last bus?

    A: 8:00 PM from Jogashima Park. Catch 7:00 PM to be safe.

    Q: Can I use Suica/Pasmo?

    A: Yes, on all trains and buses. Recommended for convenience.

    Q: Is there a direct bus from Tokyo?

    A: No direct bus. Train + bus is only public transport option.

    Q: How crowded are weekday buses?

    A: Light. Usually 10-20 passengers. Easy to get seats.


    Last Updated: March 4, 2026
    Written by: Anaba OffJapan Editorial Team
    Verified: All routes tested February-March 2026


    🌟 Share Your Experience

    Access tips? Crowd avoidance strategies? Join our community forum to share your experiences!


    Anaba OffJapan – Avoid the Crowds, Go Deeper into Japan.

    🚉 Getting Around Like a Local

    Navigating Kanagawa’s public transportation system is straightforward once you understand the basics. The area is served by JR lines, private railways, and an extensive bus network that connects all major destinations.

    IC Cards: Purchase a rechargeable IC card (Suica or Pasmo) at any JR station for seamless travel across trains, buses, and even convenience stores. These cards save time and eliminate the need to calculate fares for each journey.

    Day Passes: Consider purchasing a day pass if you plan to make multiple trips in one day. Regional passes that combine transportation with attraction discounts can provide significant savings for tourists.

    Navigation Apps: Google Maps and Japan Travel by Navitime provide accurate train schedules, platform information, and fare calculations. Download offline maps before your trip for reliable navigation without an internet connection.

    Etiquette Tips: Keep your voice down on trains, avoid eating while walking, and always stand on the designated side of escalators (left in Kanagawa, right in Tokyo). Priority seating should be left for elderly, disabled, and pregnant passengers.
    Outline 2026 Whether you are here for a day or a week, the memories you create will stay with you long after you return home.

    Jogashima Access Crowds Guide 2026 — Getting Around Like a Local


    Suggested Route

    Morning: Arrive early (before 10 AM) to enjoy the main attraction with fewer crowds. Stop at a local cafe for coffee and a light breakfast.

    Midday: Explore the area’s key sights on foot. Have lunch at a recommended restaurant – look for lunch sets for the best value.

    Afternoon: Visit any remaining attractions or museums. Walk through local neighborhoods to discover hidden shops and cafes.

    Evening: Enjoy dinner at a local restaurant. Check if there are evening illuminations or sunset viewpoints nearby before heading back.

    Best Photo Spots

    Kanagawa offers endless photo opportunities. Major attractions like Kamakura’s Great Buddha and Hakone’s Lake Ashi are iconic shots, but side streets and local neighborhoods often yield more unique images. Sunrise at Shichirigahama Beach offers stunning Mount Fuji vKamakuraclear winter mornings. Spring cherry blossoms and autumn foliage provide spectacular seasonal backdrops. Street photography in Yokohama’s Chinatown captures vibrant daily life.

    Dos and Don’ts

    Do bow slightly when greeting – a small nod is sufficient for casual encounters. Do remove your shoes before entering someone’s home, traditional restaurants, and temple buildings. Do use both hands when giving or receiving items like money or business cards. Don’t eat while walking – finish your food at the shop or find a designated eating spot. Don’t tip – service charges are included in Japan. Don’t blow your nose in public – it’s considered rude.

    Conclusion

    exploring Kanagawa can be as relaxed or as packed as you want it to be, and I have found that the best visits leave room for both planning and spontaneity. During my visit I went with a rough plan and found that leaving room to wander made the trip far more memorable. Use this guide to sort out the logistics in advance, then let the day surprise you — Kanagawa rewards travelers who stay curious.