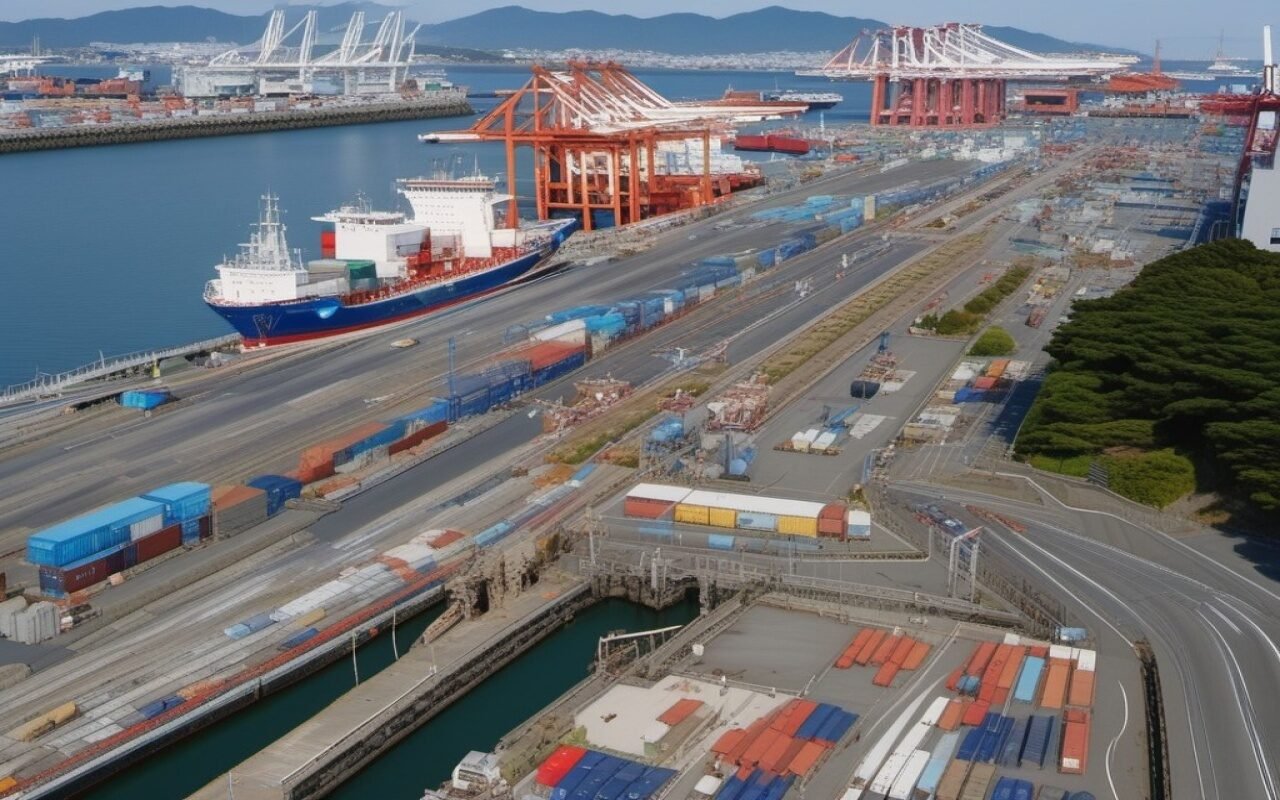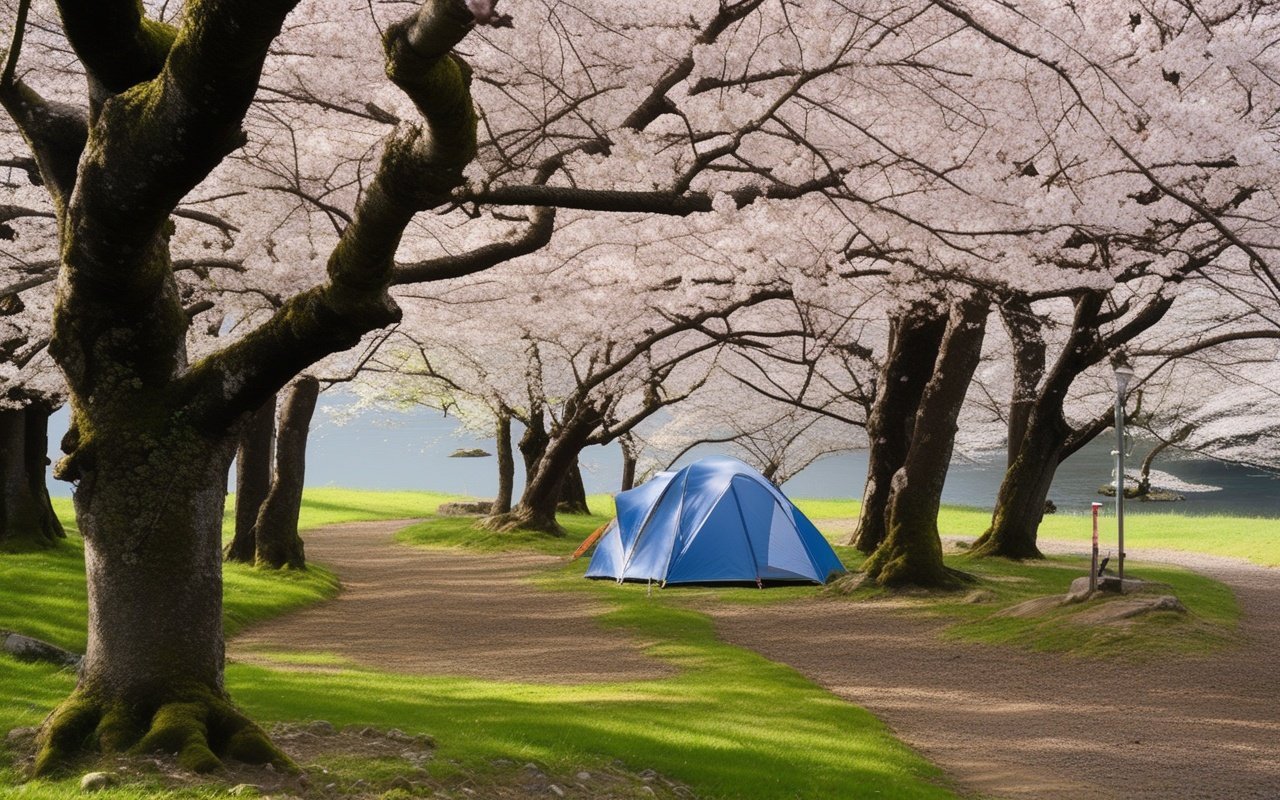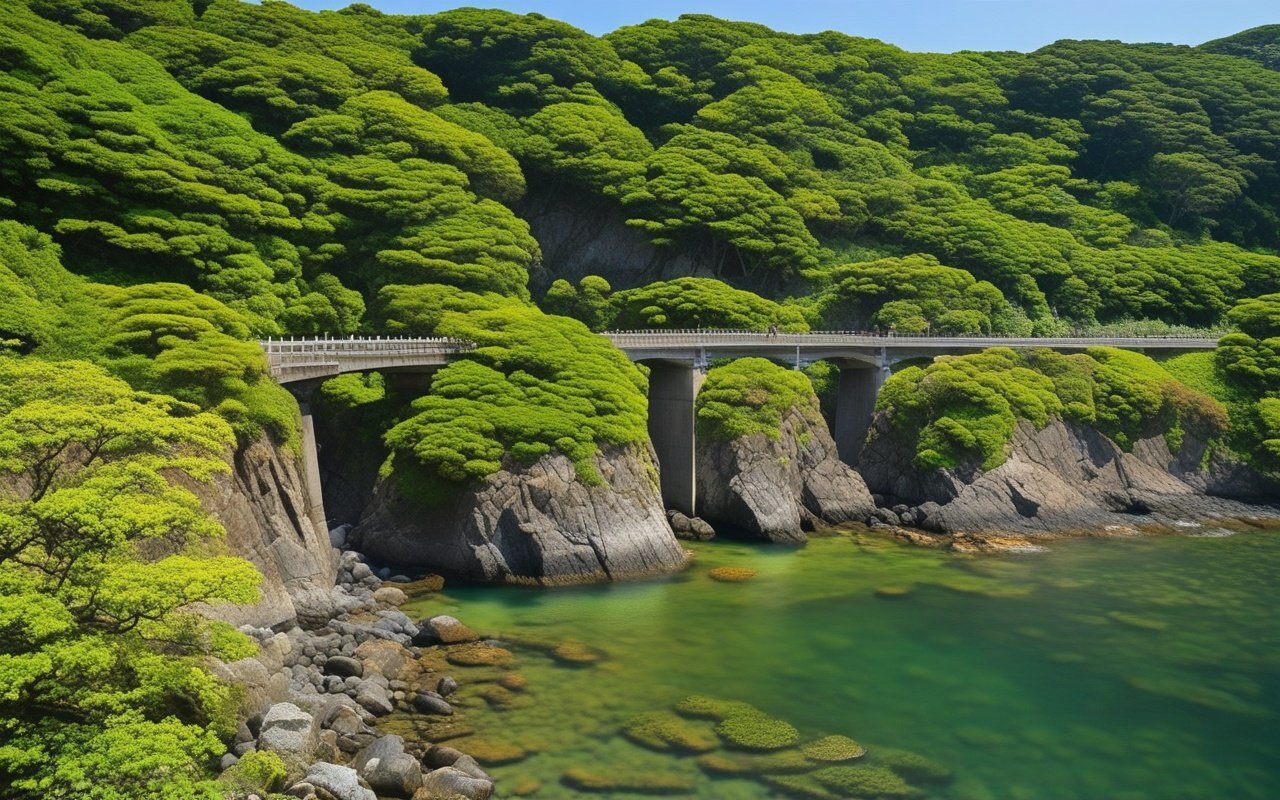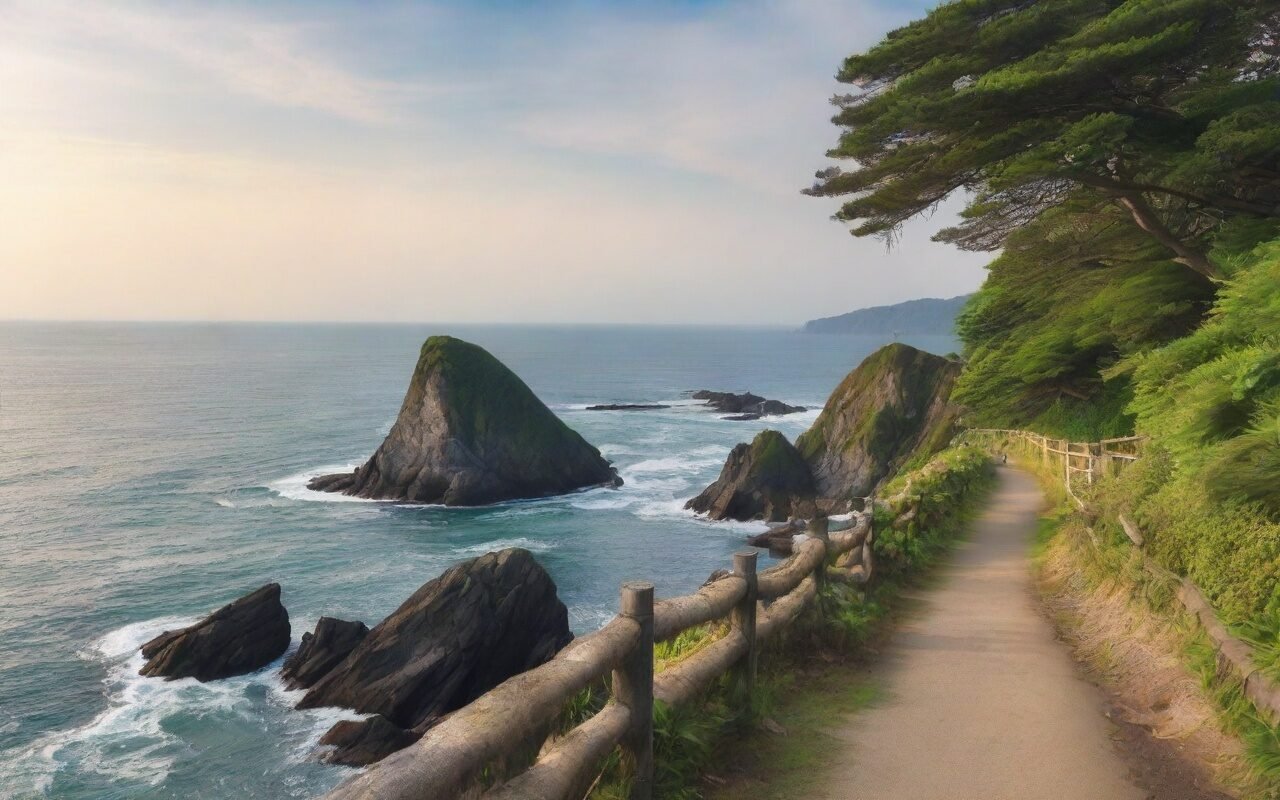
Category: yokosuka-miura

横須賀・三浦地域の旅行ガイド

  • Misaki Port Best Time Guide 2026

    Misaki Port Best Time Guide 2026

    This destination guide covers everything you need to know about visiting this area in Kanagawa. From how to get there to what to see, you will find practical information for a memorable trip. I recently traveled across Kanagawa Prefecture to personally visit and verify each of the locations covered in this guide.

    Misaki Port Best Time Guide 2026

    Overview

    Plan your perfect visit to Misaki Port Best Time Guide with this comprehensive destination guide, Covering everything from must-see attractions to practical travel tips, this guide helps you make the most of your time in Misaki. Whether you have a single day or an entire week, discover the best that this Kanagawa destination has to offer.

    📍 Location


    • Weekend only: Saturday & Sunday (6 AM – 12 PM)
    • Best season: Winter (December-February) for fattiest tuna
    • Best time: 6:00-7:00 AM for freshness, 10:00 AM for fewer crowds
    • Avoid: Golden Week, Obon, New Year (extremely crowded)
    • Year-round: Market operates in all weather
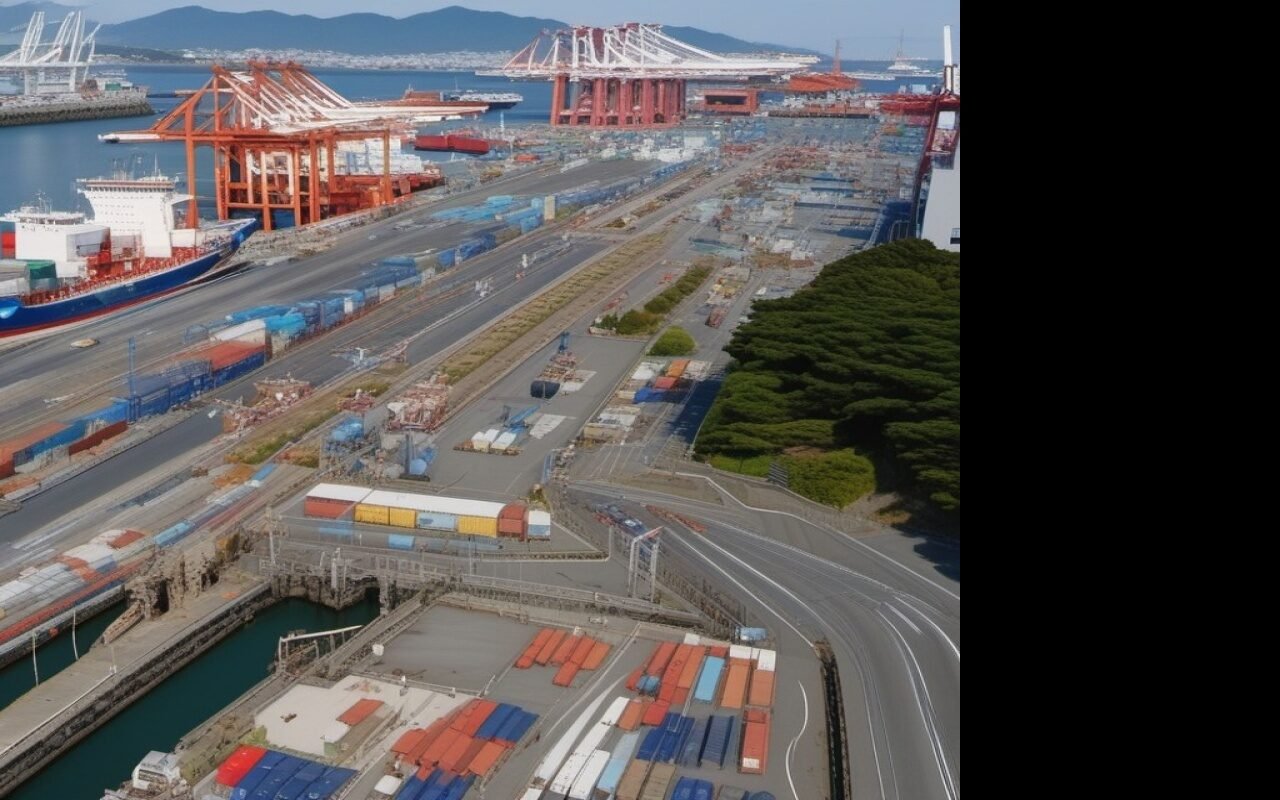
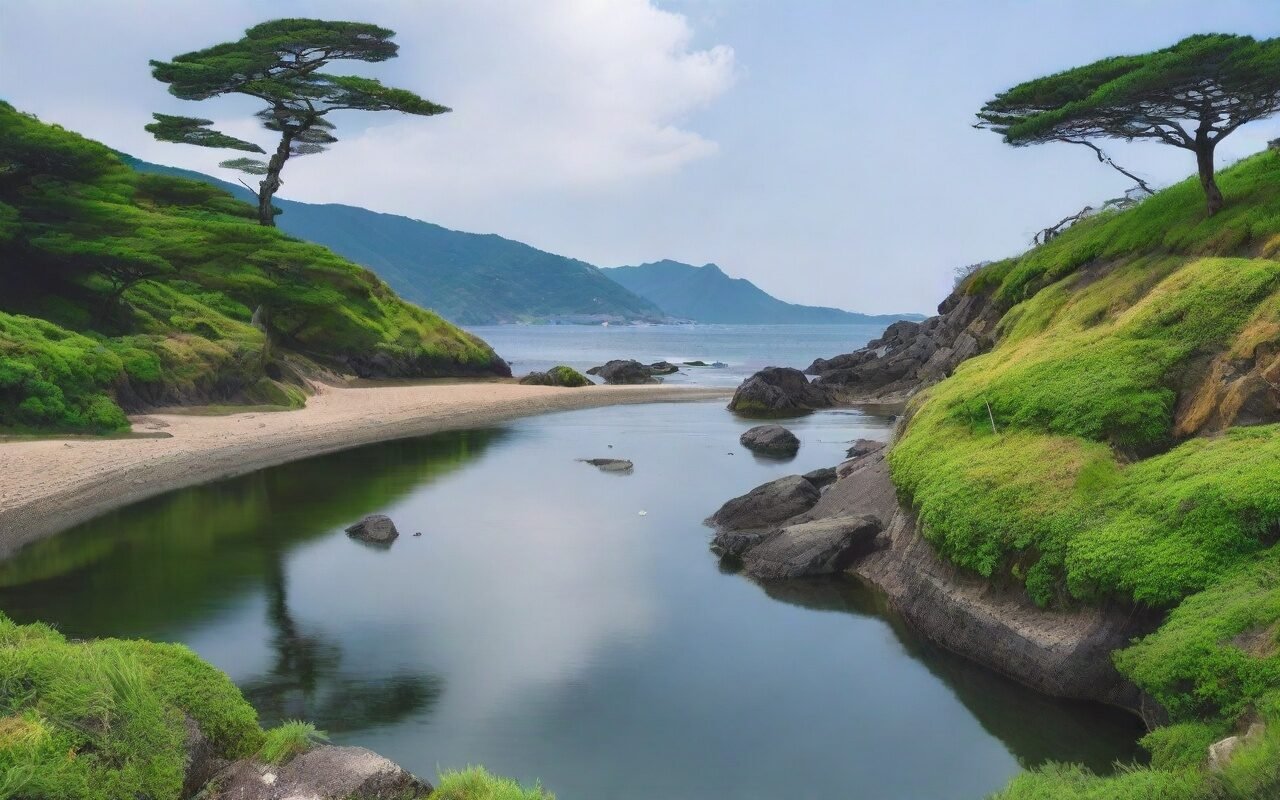
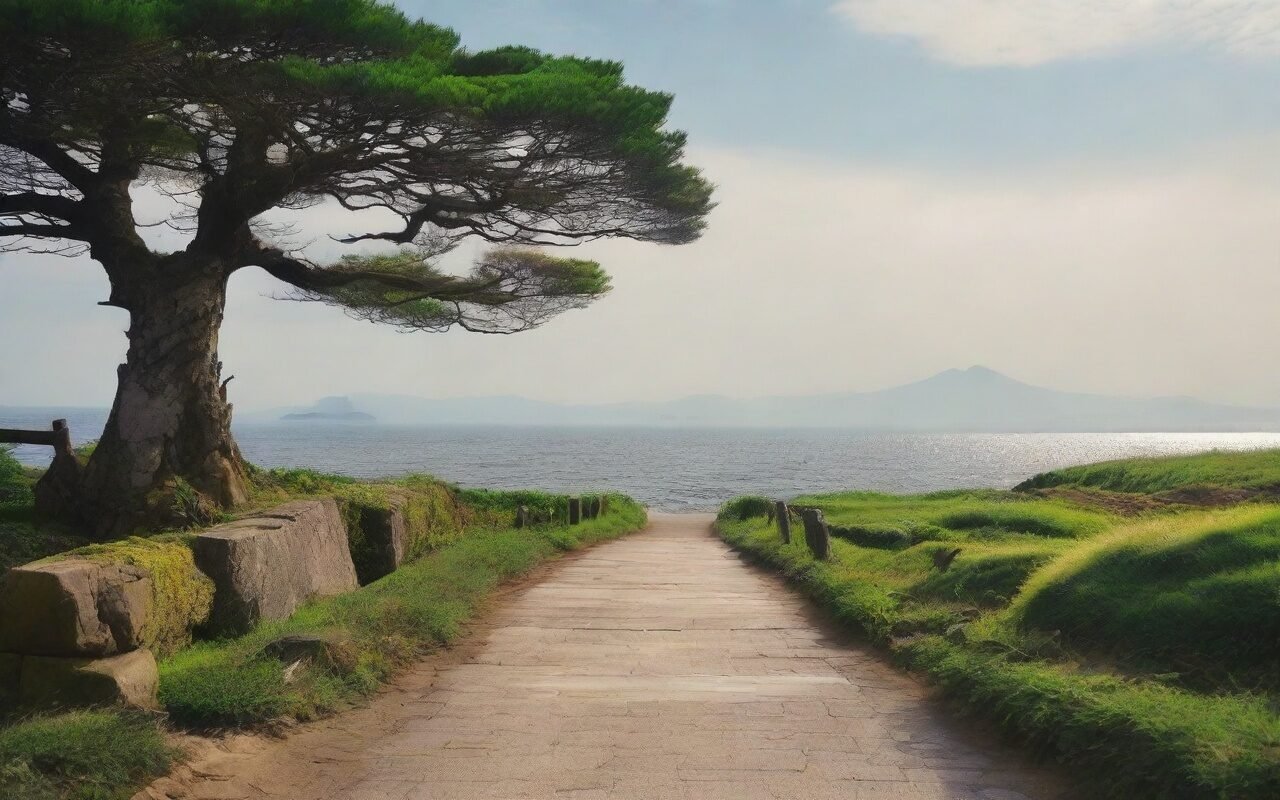
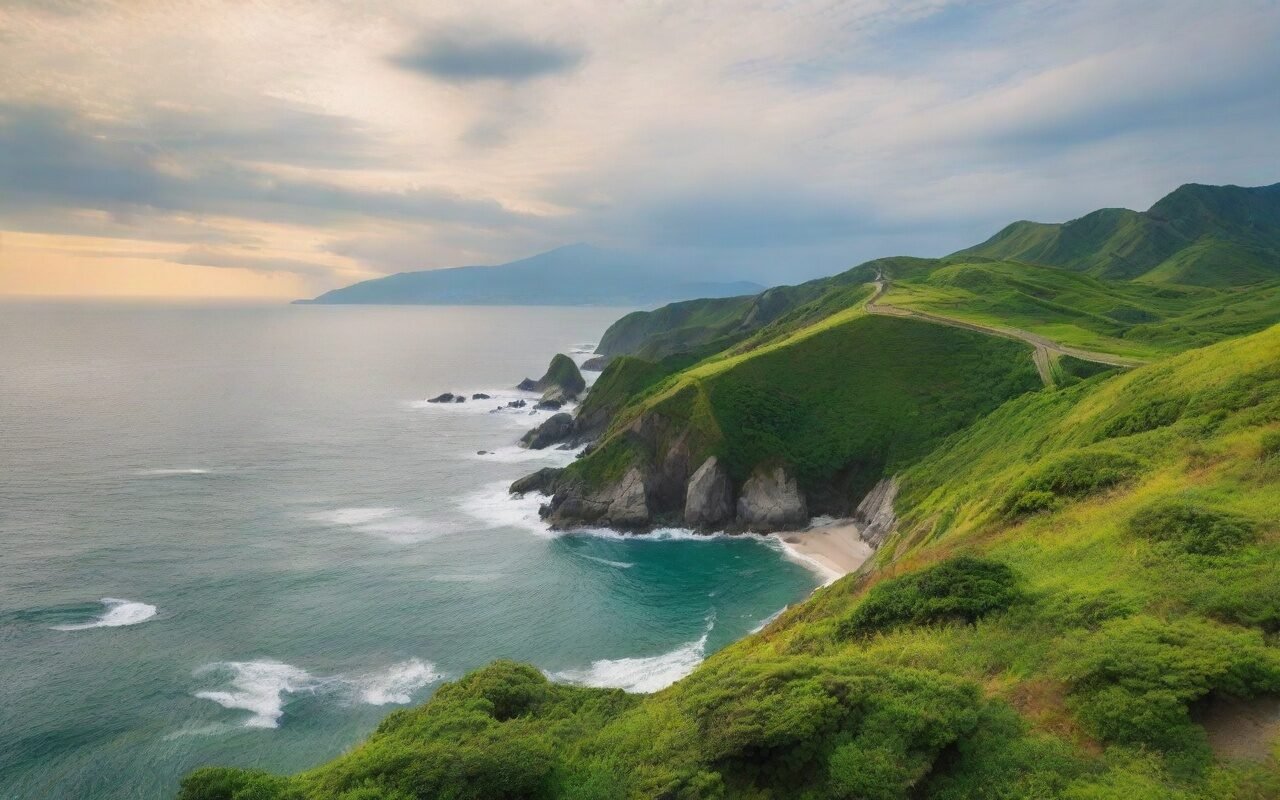
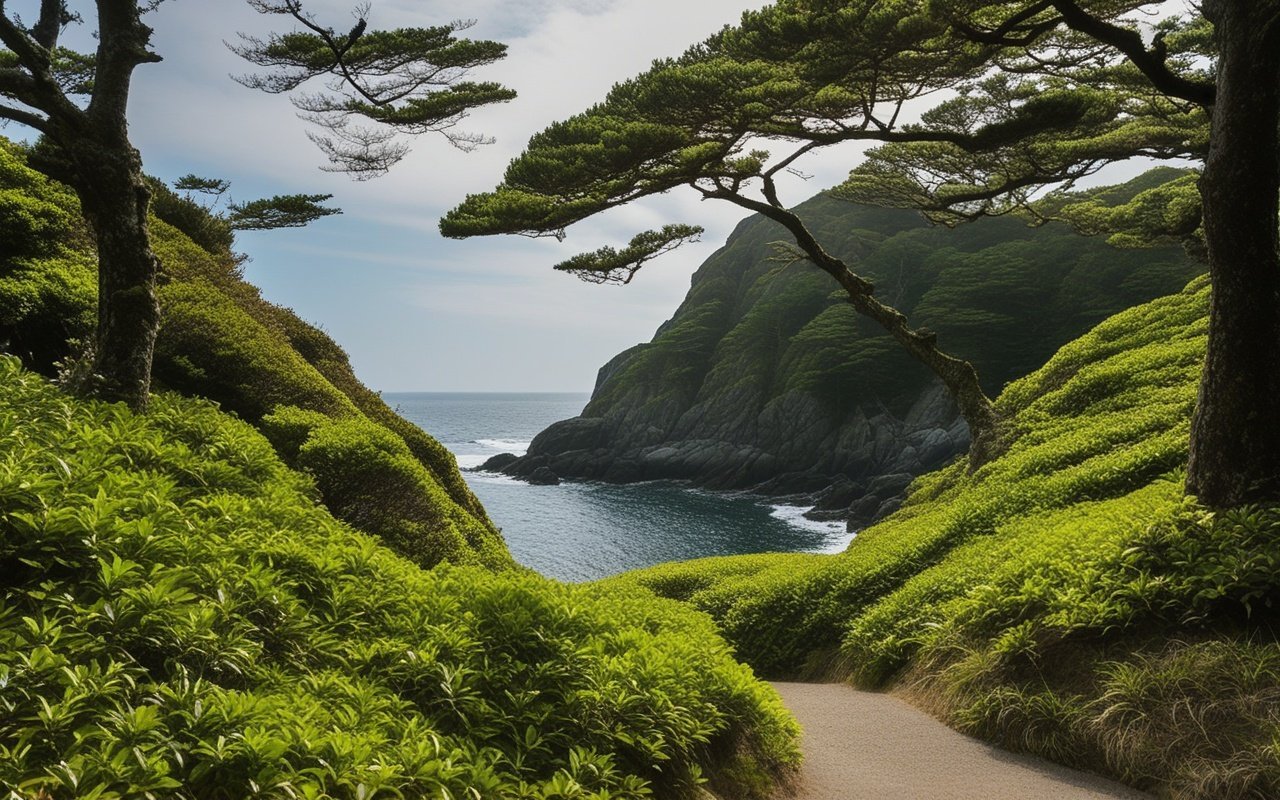
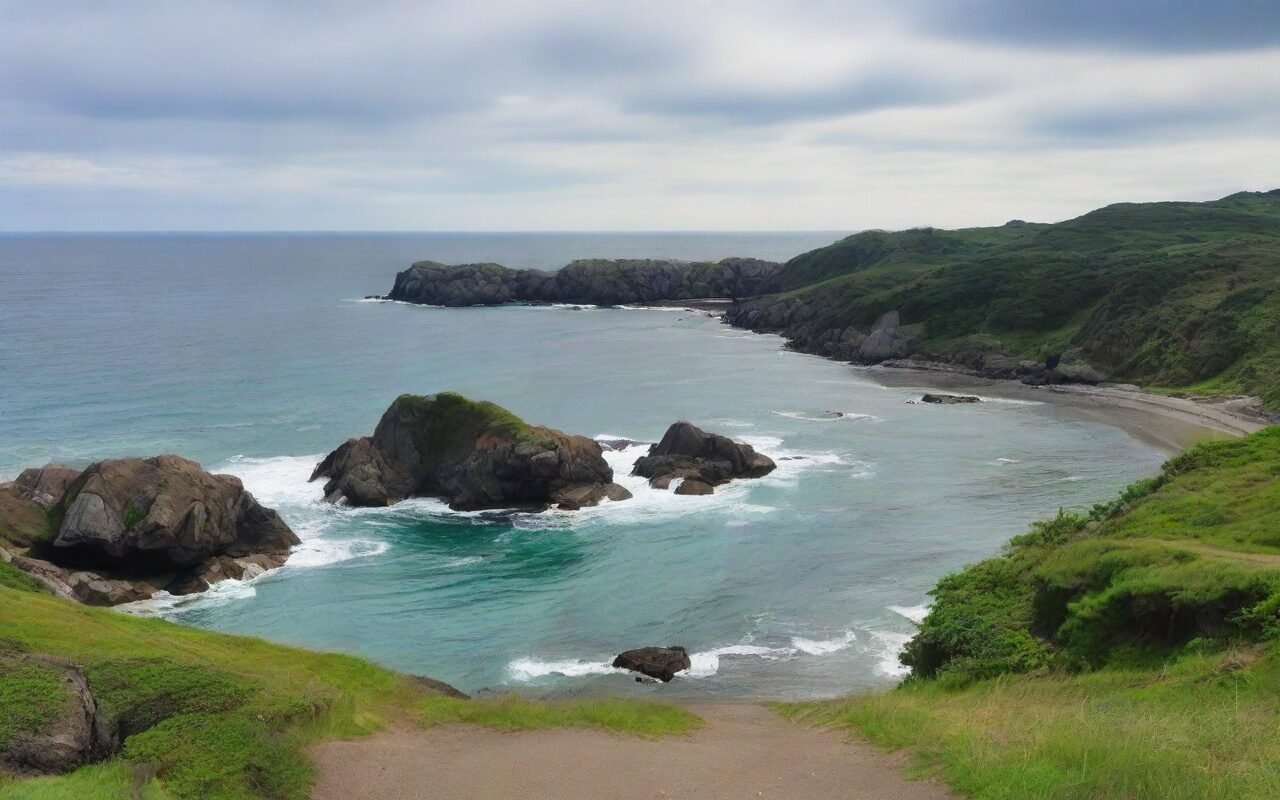
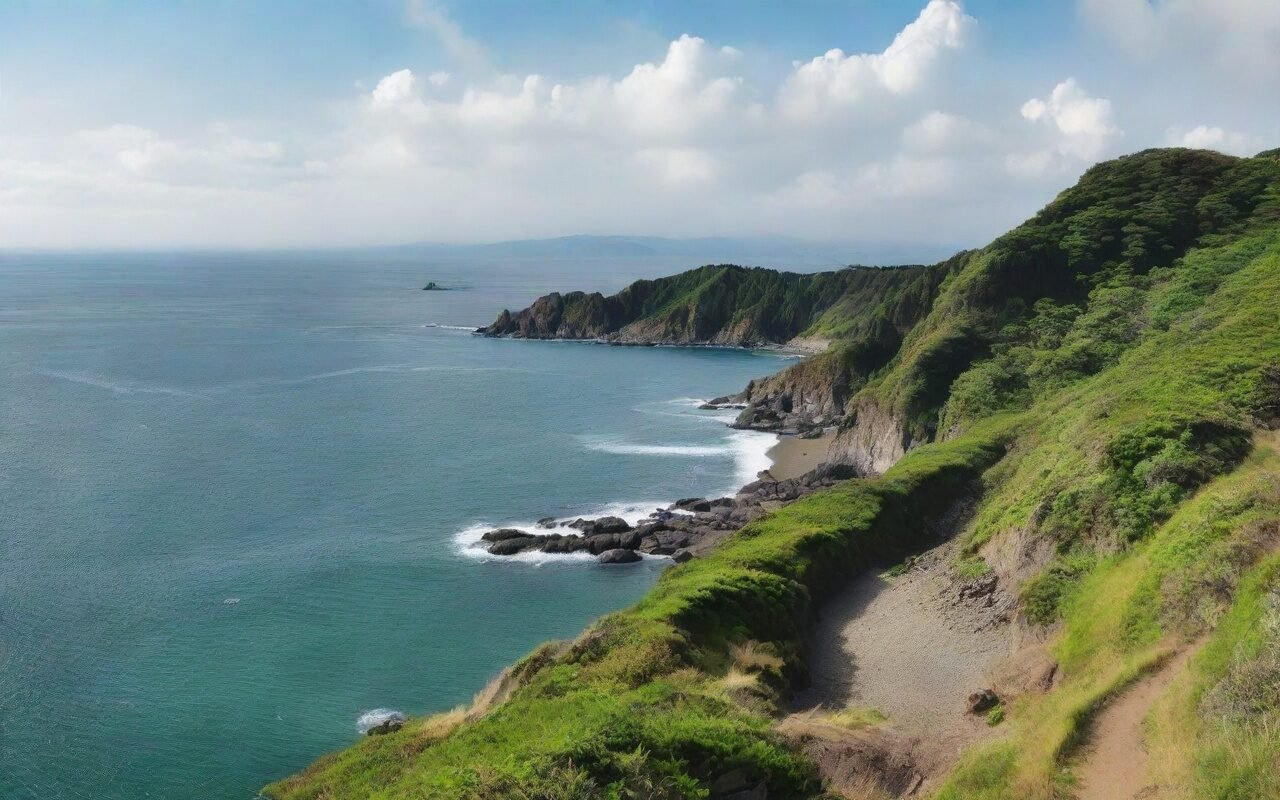
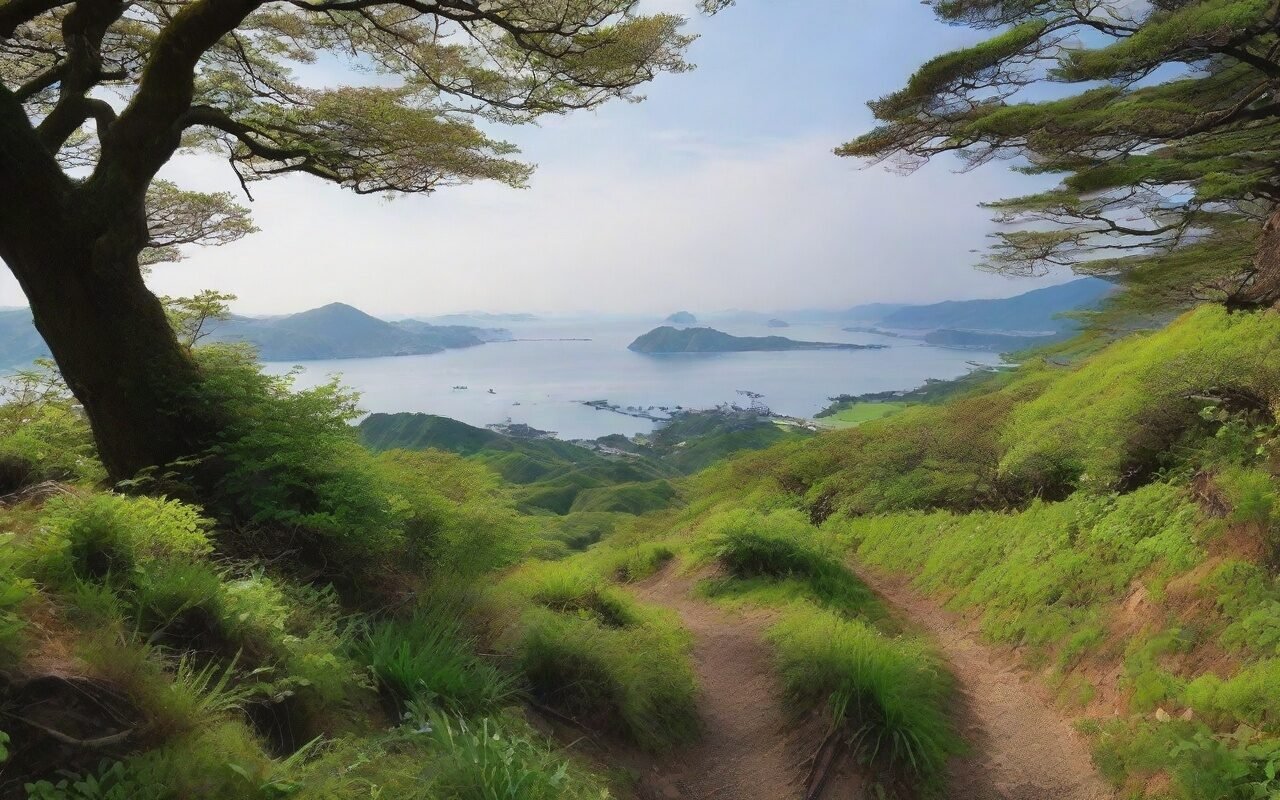
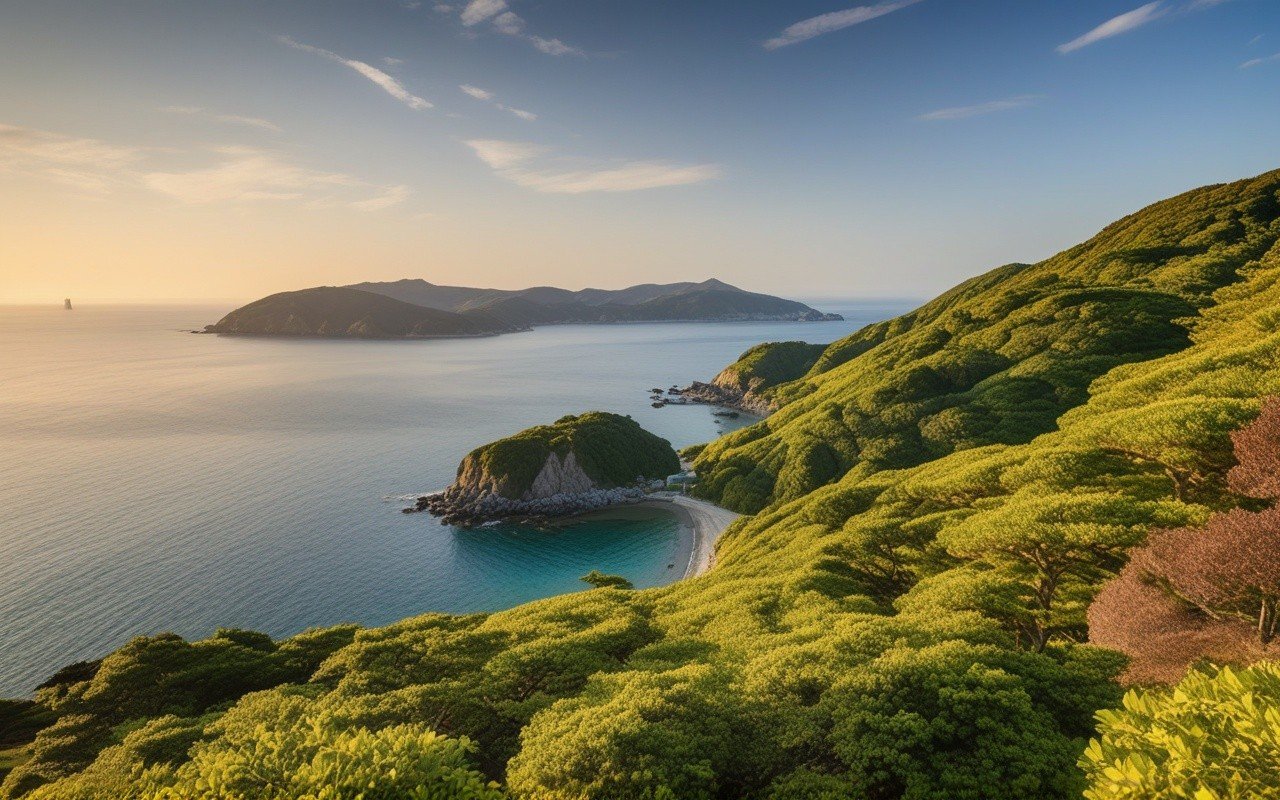
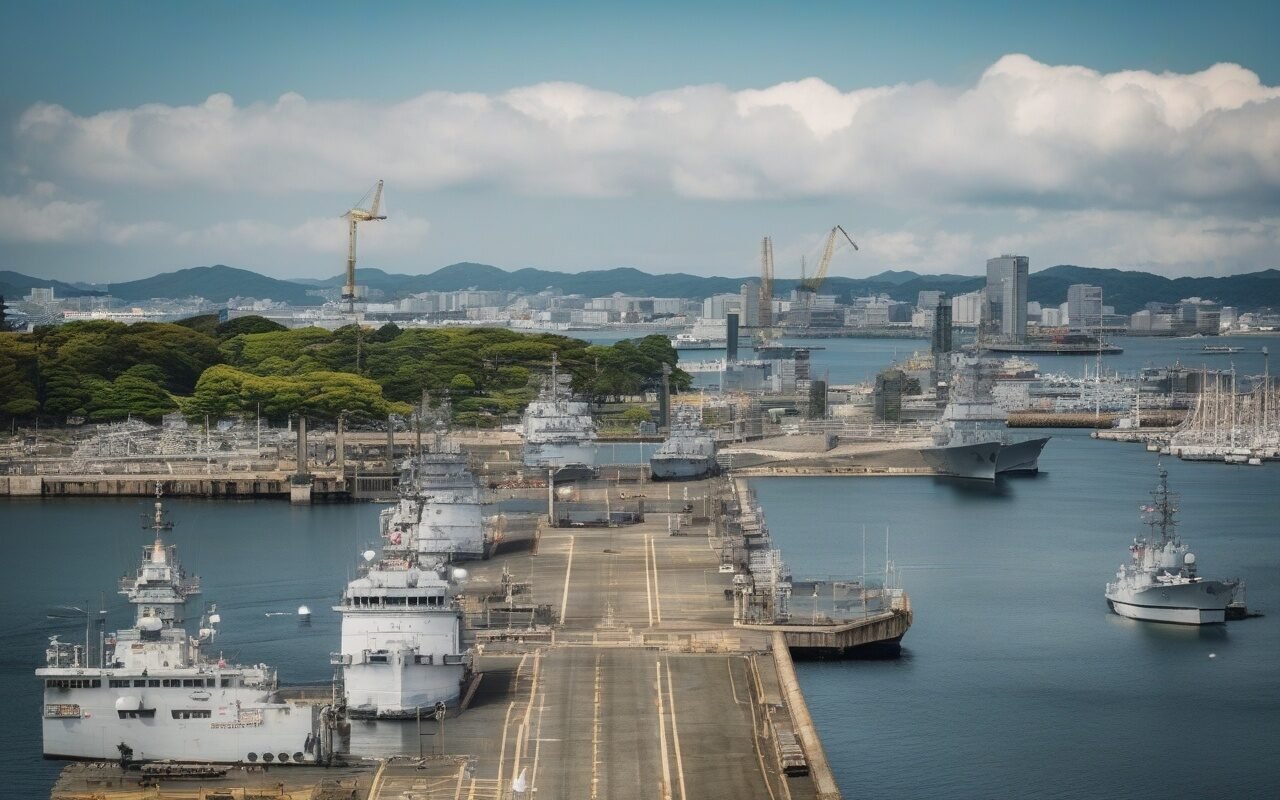
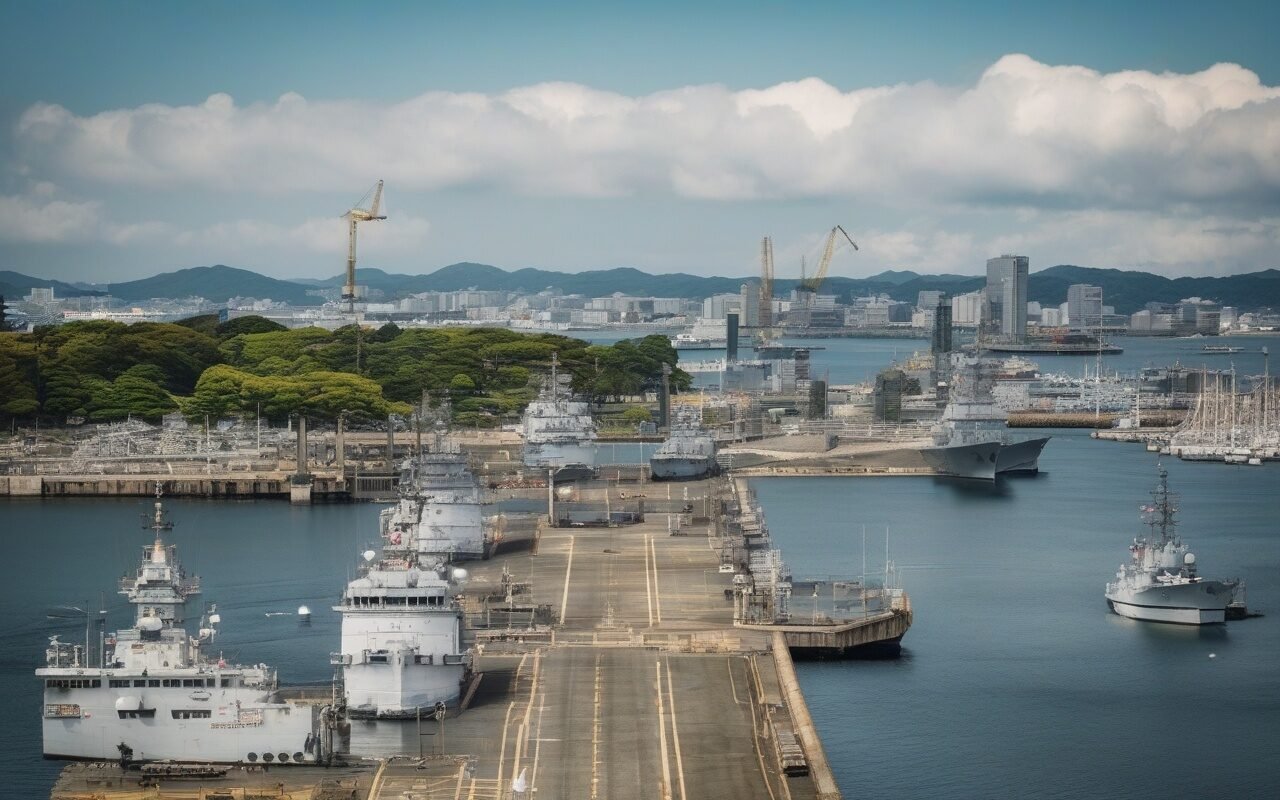
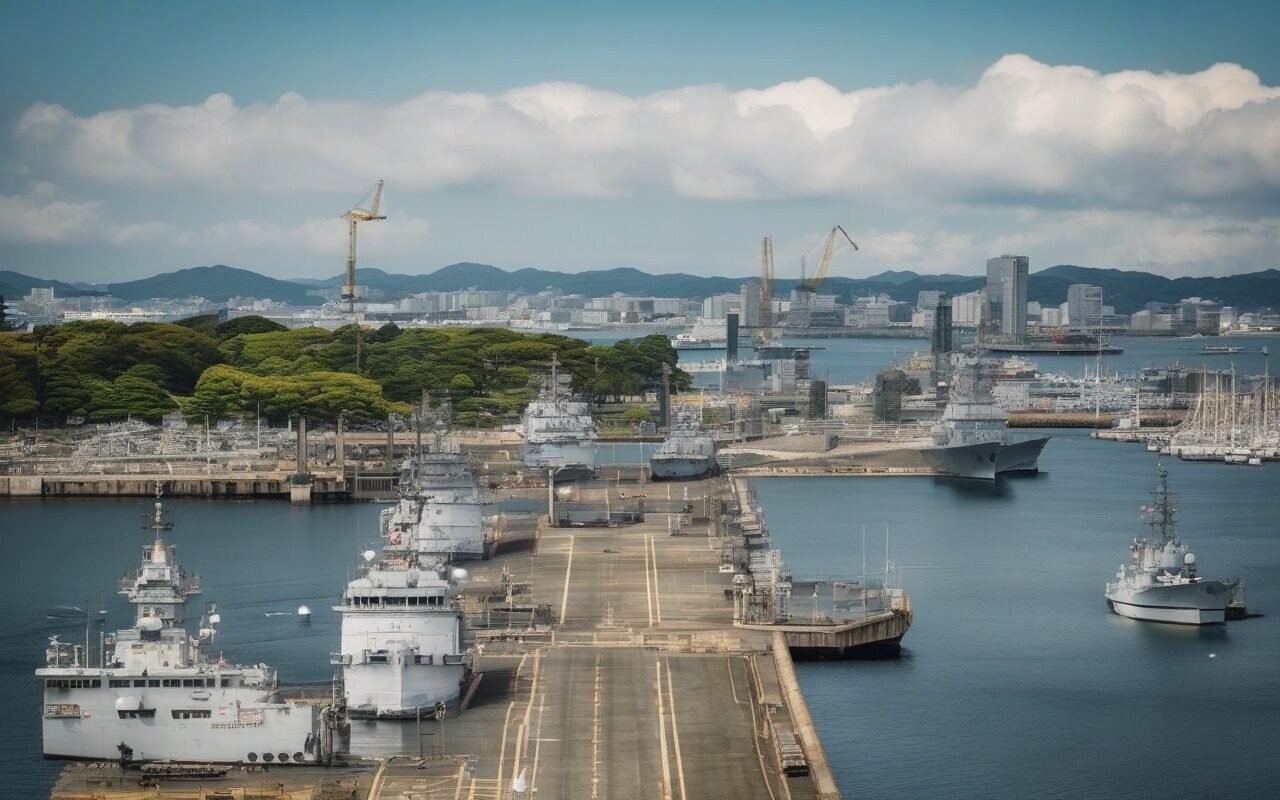
    Scenic Kanagawa destination and travel location

    Misaki Port Best Time Guide 2026 — Location


    Introduction: Timing Your Misaki Port Visit
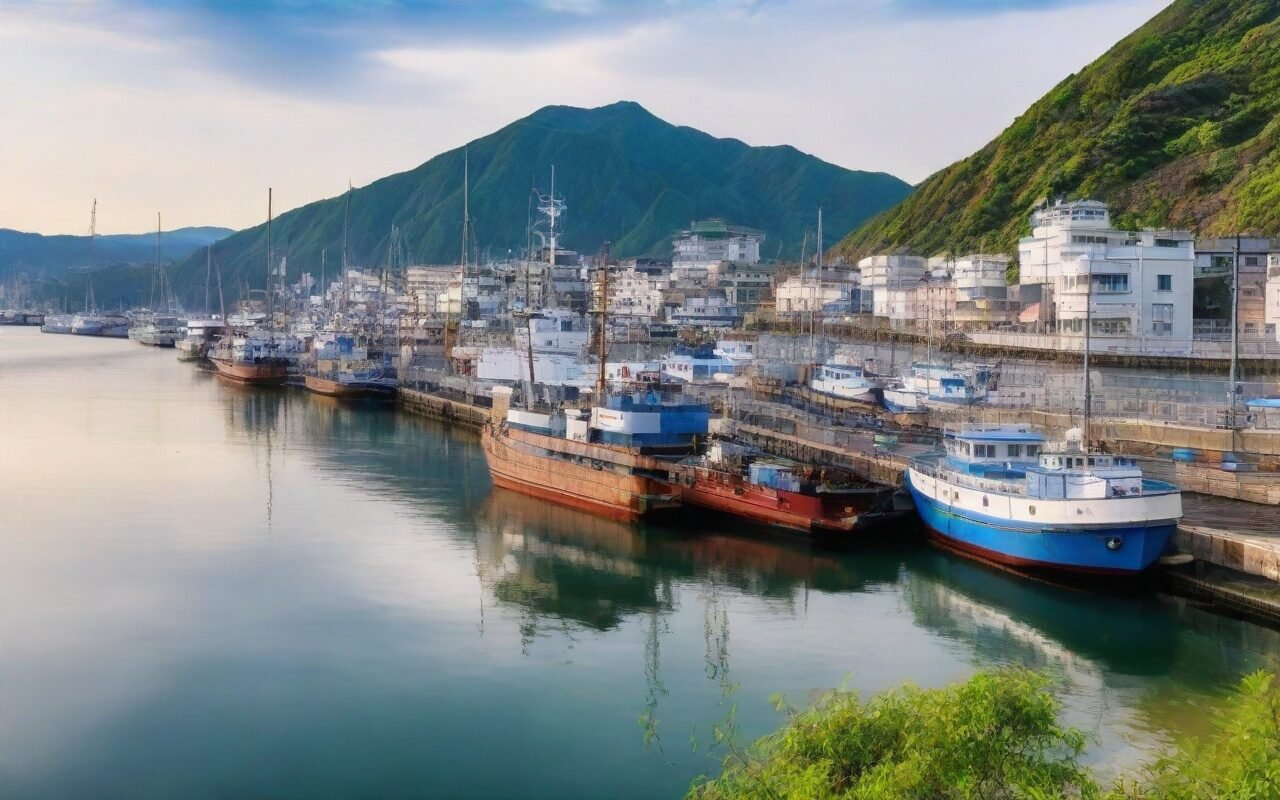
    📍 Find on Google Maps

    Find this spot on Google Maps for easy navigation.

    📍 View on Google Maps

    Misaki Port Best Time Guide 2026 — Find on Google Maps

    Morning light on the auction floor makes it easier to judge tuna marbling before the busiest tour buses arrive. Carry small bills and a short shopping list so you do not lose minutes hesitating between stalls.

    Timing is everything when visiting Misaki Port Morning Market. The right time means fresher fish, shorter lines, and better deals. The wrong time means sold-out stalls, long waits, and limited selection. This guide covers the best times to visit based on your priorities: freshness, crowds, bargains, and special experiences.

    Quick Recommendations:

    • For freshest tuna: Saturday 6:00-7:00 AM
    • For tuna cutting show: Saturday/Sunday 8:30 AM (arrive 8:00 AM)
    • For fewer crowds: Sunday 10:00-11:00 AM
    • For bargains: Sunday 11:00 AM-12:00 PM (last hour)
    • For best tuna quality: December-February (winter) Updated: March 2026 (all times verified)

    Weekend Market (Saturday & Sunday)

    Standard Weekend Schedule:
    
    5:00 AM - Fishermen arrive
    - Tuna landing
    - Fish unloading
    - Not open to public yet 5:30 AM - Vendors set up
    - Stall preparation
    - Fish display
    - Still not open 6:00 AM - Market opens ✅
    - Public admitted
    - Best selection
    - Few visitors 7:00 AM - Peak freshness
    - All stalls open
    - Full selection
    - Crowds building
    
    8:00 AM - Peak crowds
    - Busiest time
    - Long queues at food stalls
    - Tuna cutting show starts (9:00 AM) 9:00 AM - Tuna cutting show
    - Main attraction
    - Very crowded
    - Photo opportunities 10:00 AM - Still busy
    - Good selection remains
    - Queues shorter
    - Comfortable shopping 11:00 AM - Winding down
    - Some vendors pack up
    - Bargain time starts
    - Fewer visitors 12:00 PM - Market closes
    - All stalls closed
    - Some restaurants remain open

    Weekdays (Closed)

    Monday-Friday:
    ❌ Morning market closed
    ✅ Some restaurants open
    ✅ Port still active (viewing only)
    ✅ Fish market operates (wholesale only)
    
    What to do on weekdays:
    - Visit port (view fishing boats)
    - Eat at restaurants (open daily)
    - Visit Jogashima Island (nearby)
    - Explore Miura Peninsula
    
    Note:
    - No fresh fish sales
    - No food stalls
    - No tuna cutting shows
    - Quiet, peaceful atmosphere

    Holidays & Special Days

    National Holidays:
    - Market usually OPEN (check ahead)
    - Very crowded (like weekends)
    - Extra vendors may operate
    
    New Year (Jan 1-3):
    - Special New Year Market
    - Extremely crowded
    - Unique atmosphere
    - Limited transportation Golden Week (late April-early May):
    - Market OPEN
    - Extremely crowded
    - Traffic jams
    - Arrive very early Obon (mid-August):
    - Market OPEN
    - Very crowded
    - Hot weather
    - Summer fish available

    For Freshest Fish 🐟

    Best: Saturday 6:00-7:00 AM
    
    Why:
    - Fish landed same morning (5:00 AM)
    - Full selection available
    - Vendors just set up
    - First pick of tuna
    
    Tips:
    - Arrive by 6:00 AM (market opens)
    - Bring cooler bag
    - Buy tuna first (sells fastest)
    - Have cash ready (small bills)
    
    Selection at 6:00 AM:
    - Tuna: 100% available
    - Local fish: 100% available
    - Shellfish: 100% available
    - Processed goods: 100% available

    For Tuna Cutting Show 🔪

    Best: Saturday/Sunday 8:30 AM (show starts at 9:00 AM)
    
    Why:
    - Show starts at 9:00 AM
    - Best viewing spots fill by 8:30 AM
    - spotslight for photos
    - Still time to shop after
    
    Schedule:
    8:00 AM - Arrive, find spot
    8:30 AM - Good spots fill up
    9:00 AM - Show starts
    9:30 AM - Show ends
    9:30-10:30 AM - Shop while selection still good
    
    Tips:
    - Arrive by 8:00 AM (for front row)
    - Bring camera (photography encouraged)
    - Watch from side (better angles)
    - Shop after show (avoid morning rush)

    For Fewer Crowds 👥

    Best: Sunday 10:00-11:00 AM
    
    Why:
    - Saturday crowds gone
    - Early birds finished shopping
    - Still good selection
    - Relaxed atmosphere Crowd levels by time:
    6:00 AM - Very light (20% capacity)
    7:00 AM - Building (50% capacity)
    8:00 AM - Peak (100% capacity)
    9:00 AM - Peak (100% capacity)
    10:00 AM - Moderate (60% capacity)
    11:00 AM - Light (30% capacity)
    
    Tips:
    - Sunday better than Saturday
    - 10:00 AM sweet spot
    - Weekdays = no market (but quiet port)
    - Rainy days = fewer crowds

    For Bargains 💰

    Best: Sunday 11:00 AM-12:00 PM (last hour)

    Why:

    • Vendors don’t want to pack up
    • Fresh fish doesn’t keep
    • Quick sales preferred
    • Discounts common

    Typical discounts:

    • 10-20% off: Common
    • 30% off: Possible (slow days)
    • Buy 2 get 1: Sometimes
    • Free extras: Often

    Tips:

    • Arrive 11:00 AM (not earlier)
    • Be polite (don’t haggle aggressively)
    • Buy multiple items (better deals)
    • Cash only (no credit)

    Warning:

    • Limited selection
    • Best items sold out
    • Some stalls already closed
    • Risk of missing out

    > 📌 Quick tip: If you are visiting Misaki Port for the first time, start with the tuna cutting show at 9 AM, then explore the market, and finish with a bowl of fresh maguro-don at Uo-ichi before the lunch rush.

    🐟 Misaki Port Seafood Buying Guide

    Buying fresh seafood at the market can be overwhelming. Here’s what you need to know:

    What to Buy

    • Maguro (tuna): The star of Misaki. Look for bright red color with white fat marbling. Winter tuna (December-February) has the highest fat content. Prices: ¥2,000-5,000 per kg for sashimi-grade.
    • Kinmedai (golden eye snapper): A local specialty, often grilled or served as sashimi. ¥1,500-3,000 per fish.
    • Kajiki (swordfish): Available year-round, often cheaper than tuna. ¥1,000-2,000 per kg.
    • Ika (squid): Fresh local squid is sweet and tender. ¥500-1,000 per kg.
    • Sakura-ebi (cherry shrimp): Seasonal (spring and autumn). Delicious dried or fresh.

    Buying Tips

    1. Bring cash — most stalls do not accept credit cards. Small bills (¥1,000) are best.
    2. Bring a cooler bag — if you plan to buy fish to take home. Some stalls sell foam coolers for ¥200-300.
    3. Buy early — the best tuna blocks sell out by 7:30 AM. If you want the highest quality, arrive at 6 AM.
    4. Ask for samples — many vendors offer small tasting pieces. This is a good way to compare quality.
    5. Pack for travel — vendors can vacuum-seal fish for travel. Ask for “shinkū pākku” (vacuum pack). This keeps fish fresh for 24 hours without refrigeration.

    What NOT to Buy

    • Pre-cut sashimi packs from stalls that look old (discolored edges, strong smell)
    • Shellfish that are open (not alive) — check before buying
    • “Special deals” on tuna that are priced significantly below market rate — there’s usually a reason

    🗺️ Nearby Attractions on the Miura Peninsula

    While Misaki Port is the main draw, the Miura Peninsula has several other attractions worth combining:

    Jogashima Island (Jogashima (城ヶ島))

    A 10-minute ferry ride from Misaki Port (¥600 round trip). Features:

    • Jogashima Lighthouse — One of Japan’s oldest Western-style lighthouses (1870). Beautiful coastal views.
    • Coastal hiking trails — 3 km of well-maintained trails along dramatic sea cliffs. About 1.5 hours to complete the full loop.
    • Sea cave exploration — Tide-dependent, but the main cave is accessible at low tide.
    • Senganen Garden — A small Japanese garden with a tea house. ¥300 admission.

    Tip: Jogashima has very limited dining options (2-3 small restaurants). Bring snacks or plan to return to Misaki Port for lunch.

    Miura Kaigan (Miura (三浦)海岸)

    A beach area 20 minutes by bus from Misaki Port. Features:

    • Sandy beach with swimming in summer (July-August).
    • Seaside cafes and casual restaurants.
    • Good for families with children.

    Aburatsubo Marine Park (油壺マリンパーク)

    An aquarium and marine research center, 15 minutes by taxi from Misaki Port. Features dolphin shows and touch pools. ¥2,000 admission. Good rainy-day alternative.

    🌊 Monthly Weather and Crowd Calendar

    Month Weather Temp (°C) Tuna Quality Crowds Best Activity
    January Cold, clear 5-10°C ⭐⭐⭐⭐⭐ Peak 🟢 Low Morning market + Fuji views
    February Cold, clear 5-11°C ⭐⭐⭐⭐⭐ Peak 🟢 Low Tuna auction + Jogashima hike
    March Cool, variable 8-14°C ⭐⭐⭐⭐ High 🟡 Moderate Weekend market + early cherry blossoms
    April Mild, cherry blossoms 12-18°C ⭐⭐⭐ Good 🟡 Moderate Market + Jogashima flowers
    May Warm, pleasant 16-22°C ⭐⭐⭐ Good 🟡 Moderate Market + hiking before summer heat
    June Rainy season 20-25°C ⭐⭐ Fair 🟢 Low (rainy) Market under cover — fewer crowds
    July Hot, humid 24-29°C ⭐ Low (leaner) 🔴 Busy Early market (6 AM) before heat
    August Hot, very humid 25-30°C ⭐ Low 🔴 Very busy Summer peak — avoid if possible
    September Typhoon risk 22-27°C ⭐⭐ Improving 🟡 Moderate Wait for clear days
    October Mild, pleasant 17-23°C ⭐⭐⭐ Good 🟢 Low Best weather + fewer crowds
    November Cool, clear 12-18°C ⭐⭐⭐⭐ High 🟢 Low Tuna quality rising + Fuji views
    December Cold, clear 7-13°C ⭐⭐⭐⭐⭐ Peak 🟢 Low (weekday) Peak season — best time for serious tuna lovers

    Best months overall: October (weather), November (tuna quality + weather), December-February (best tuna).
    Worst months: July-August (heat, crowds, leaner tuna).

    🚉 Getting to Misaki Port: Complete Transport Guide

    From Tokyo (90-110 minutes)

    By Train (Recommended):

    1. JR Keihin-Tohoku Line from Tokyo Station → Yokohama Station (25 min, ¥520)
    2. Transfer to Keikyu Limited Express → Misakiguchi Station (55 min, ¥710)
    3. Keikyu Bus from Misakiguchi Station → Misaki Port (15 min, ¥300) Total cost: ¥1,530 one way

    Frequency: Every 15-20 minutes (combined train + bus)

    Alternative by Direct Bus:

    • From Shinagawa Station (Tokyo): Express bus to Misaki Port (100 min, ¥1,800)
    • Buses depart every 60-90 minutes — check Keikyu Bus website for schedule
    • Advantage: No transfers. Disadvantage: Traffic can add 20-30 minutes

    From Shinjuku

    1. JR Shonan-Shinjuku Line → Zushi Station (50 min, ¥1,040)
    2. Transfer to Keikyu Line → Misakiguchi Station (30 min, ¥380)
    3. Bus to Misaki Port (15 min, ¥300)

    Total cost: ¥1,600 one way
    Total time: ~95 minutes

    From Kamakura/Enoshima

    1. Enoden train → Kamakura Station (15 min from Enoshima, ¥320)
    2. JR Yokosuka Line → Zushi Station (5 min, ¥140)
    3. Keikyu Line → Misakiguchi Station (30 min, ¥380)
    4. Bus to Misaki Port (15 min, ¥300)

    Total cost: ~¥1,140 one way
    Total time: ~75 minutes (from Kamakura)

    Return Trip Tips

    • Last bus from Misaki Port to Misakiguchi Station: ~6:30 PM (confirm at bus stop)
    • Last Keikyu train from Misakiguchi to Yokohama: ~10:00 PM
    • Weekend afternoon trains can be crowded — book a Keikyu limited express seat for comfort
    • Taxi from Misaki Port to Misakiguchi Station: ¥1,500-2,000 (10 min)

    🗓️ Annual Events at Misaki Port

    Month Event Description
    January Misaki New Year Tuna Auction Special New Year auction with premium tuna. First auction of the year — ceremonial atmosphere.
    February Misaki Tuna Festival Three-day weekend festival with tuna-cutting demonstrations, food stalls, and special market hours. Best time to visit for atmosphere.
    March Miura Peninsula Marathon Runs through Misaki Port area. Market will be very crowded — plan alternate routes.
    April Cherry blossom viewing Limited but beautiful spots near the port. Combine with Jogashima’s coastal flowers.
    July Misaki Port Summer Festival Evening food stalls, live music, and a small fireworks display (¥300-500 per food item).
    October Misaki Port Anniversary Special market extended hours and commemorative goods.
    November Misaki Autumn Food Fair Collaboration between 20+ restaurants offering special tuna dishes at ¥500-800 each.

    🐟 Top Tuna Restaurants Near Misaki Port

    Misaki Port is Japan’s tuna capital, and the restaurants here serve some of the freshest tuna you will ever taste. Here are the best options within walking distance:

    For the Full Tuna Experience

    • Uo-ichi (right at the market entrance, 1 min walk) — Specializes in maguro-don (tuna bowl) with freshly cut sashimi. ¥1,500-2,500. Opens at 6 AM on market days. Cash only. Expect a 20-40 minute wait on weekends.
    • Misaki Kou (3 min walk from market) — Known for negi-toro (minced fatty tuna) bowls. ¥1,200-1,800. Slightly calmer than Uo-ichi. Has English menu.

    For Grilled Tuna

    • Tuna no Sato (5 min walk, across the main road) — Grilled tuna steak set meal. ¥1,800-2,800. Indoor and outdoor seating. Accepts credit cards.
    • Yakitori Yokocho Misaki (inside the market building) — Grilled tuna skewers (¥300-500 each) and local beer. Perfect for a quick, casual lunch.

    For Tuna Sushi

    • Sushi Zanmai Misaki (2 min walk) — Fresh nigiri sushi using tuna caught that morning. ¥2,500-4,000 for lunch course. Reserve ahead on weekends.
    • Kaiten Sushi Misaki Port (3 min walk) — Conveyor belt sushi with local tuna. ¥100-500 per plate. Family-friendly, English picture menu available.

    ⚠️ Important: Most restaurants close by 2-3 PM on market days and are closed on Mondays (even if the market is closed). Arrive before noon for the best selection.

    ⛴️ Combining Misaki Port with Jogashima Island

    Jogashima Island is a short ferry ride from Misaki Port and makes an excellent combination for a full-day trip. Ferry schedule:

    • Departs from Misaki Port ferry terminal (5 min walk from market)
    • Every 30-60 minutes, ¥600 round trip
    • Crossing time: 10 minutes
    • First ferry: 6:30 AM, Last ferry back: 5:00 PM (varies by season)

    Suggested itinerary:

    1. 6:00-8:00 AM: Misaki Port Market — shop for fresh tuna, watch the cutting show
    2. 8:30-9:00 AM: Breakfast at Uo-ichi or Misaki Kou
    3. 9:30-11:30 AM: Ferry to Jogashima — hike the coastal trails, visit the lighthouse
    4. 11:30-12:30 PM: Lunch on Jogashima (limited options — bring snacks as backup)
    5. 1:00-2:00 PM: Ferry back to Misaki, explore the port area

    What to bring for Jogashima: Walking shoes, windbreaker (the island is very exposed), water bottle, and cash (no ATMs on the island).

    🚃 Transportation from Tokyo: Complete Guide

    Misaki Port is in southern Miura Peninsula, about 90 minutes from central Tokyo. By train + bus (recommended):

    1. JR Keihin-Tohoku Line from Tokyo Station → Yokohama Station (25 min, ¥520)
    2. Transfer to Keikyu Line (limited express) → Misakiguchi Station (55 min, ¥710)
    3. Keikyu Bus from Misakiguchi Station → Misaki Port (15 min, ¥300) Total time: ~1 hour 50 minutes / Cost: ¥1,530 one way

    By car (flexible option):

    • Take the Shuto Expressway to Yokohama, then Route 16/134 south to Misaki
    • Total time: ~1 hour 30 minutes from central Tokyo (without traffic)
    • Parking: ¥500-1,000 for the day at Misaki Port parking lots
    • Warning: Parking fills by 8 AM on weekends. Arrive early or use public transport.

    Return trip tips:

    • Last bus from Misaki Port to Misakiguchi Station: ~6:30 PM (confirm at the bus stop)
    • Last Keikyu train from Misakiguchi to Yokohama: ~10 PM
    • Weekend afternoon trains can be very crowded — book a limited express seat for comfort

    Frequently Asked Questions

    Q: Is the market open every weekend?

    A: Yes, every Saturday and Sunday, year-round. Closed on weekdays (except special events).

    Q: What if it rains?

    A: Market operates rain or shine. Some stalls covered, Bring umbrella. Rainy days = fewer crowds (advantage).

    Q: When is the best season for tuna?

    A: Winter (December-February) for fattiest tuna, Spring (March-May) for good quality. Summer leaner. Autumn improving.

    Q: How early should I arrive?

    A: For best selection: 6:00 AM (opening). For tuna show: 8:00 AM. For fewer crowds: 10:00 AM.

    Q: Is it crowded on holidays?

    A: Yes, national holidays are very crowded. Similar to weekends. New Year = extremely crowded.


    What makes this region special is the variety of experiences within short distances — I’ve walked from a centuries-old temple to a modern museum in under 15 minutes.

    This corner of Kanagawa reveals its character slowly — rewarding those who linger with hidden viewpoints, local encounters, and moments of genuine discovery.

    Conclusion

    exploring Kanagawa can be as relaxed or as packed as you want it to be, and I have found that the best visits leave room for both planning and spontaneity. During my visit I went with a rough plan and found that leaving room to wander made the trip far more memorable. Use this guide to sort out the logistics in advance, then let the day surprise you — Kanagawa rewards travelers who stay curious.
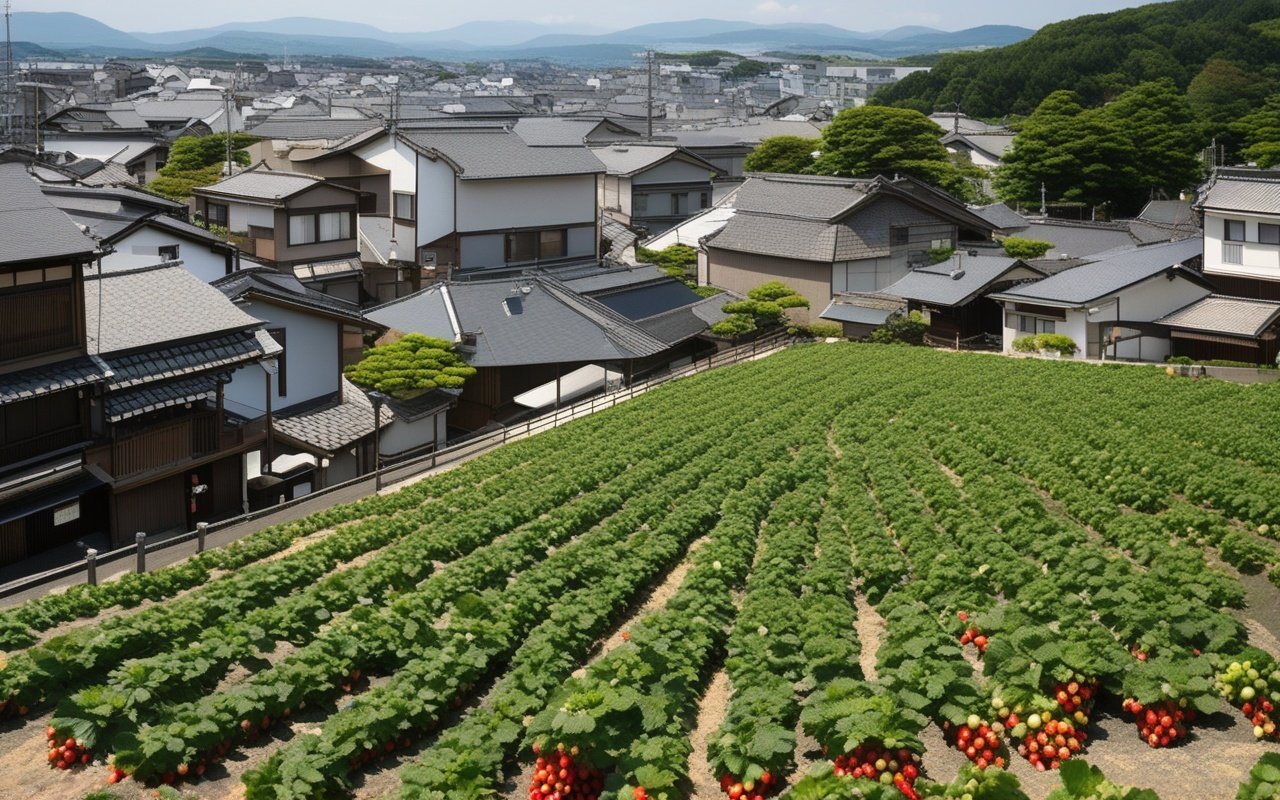
  • Miura Strawberry Picking Guide — Complete Guide 2026

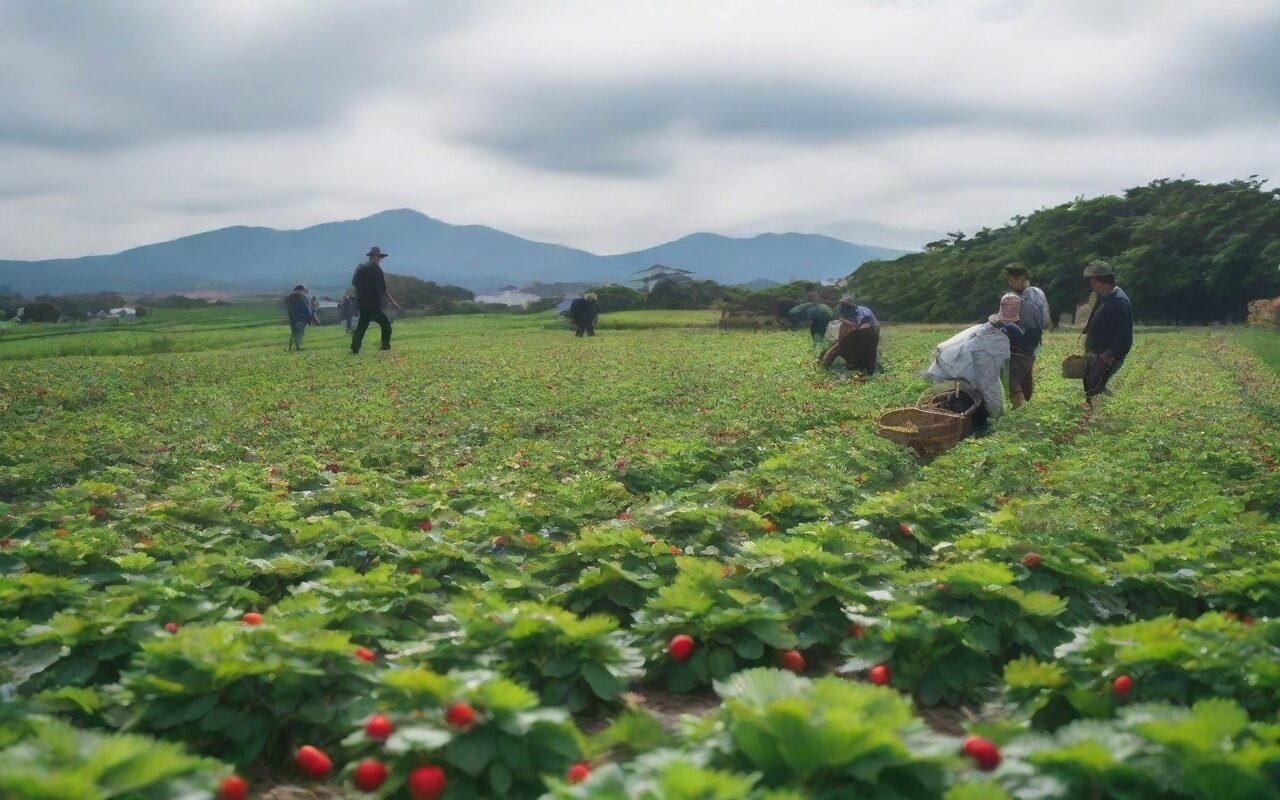
    Miura Strawberry Picking Guide — Complete Guide 2026

    Overview

    I tried strawberry picking at three farms across Miura Peninsula during peak season and compared their varieties, pricing, and accessibility. Here is my hands-on guide to the best picking experience. Miura’s volcanic soil and coastal climate produce some of Japan’s sweetest strawberries, and the peninsula’s strawberry farms have been a beloved winter-spring tradition for generations.

    Getting There

    Miura Strawberry Picking Guide — Complete Guide 2026 — Getting There

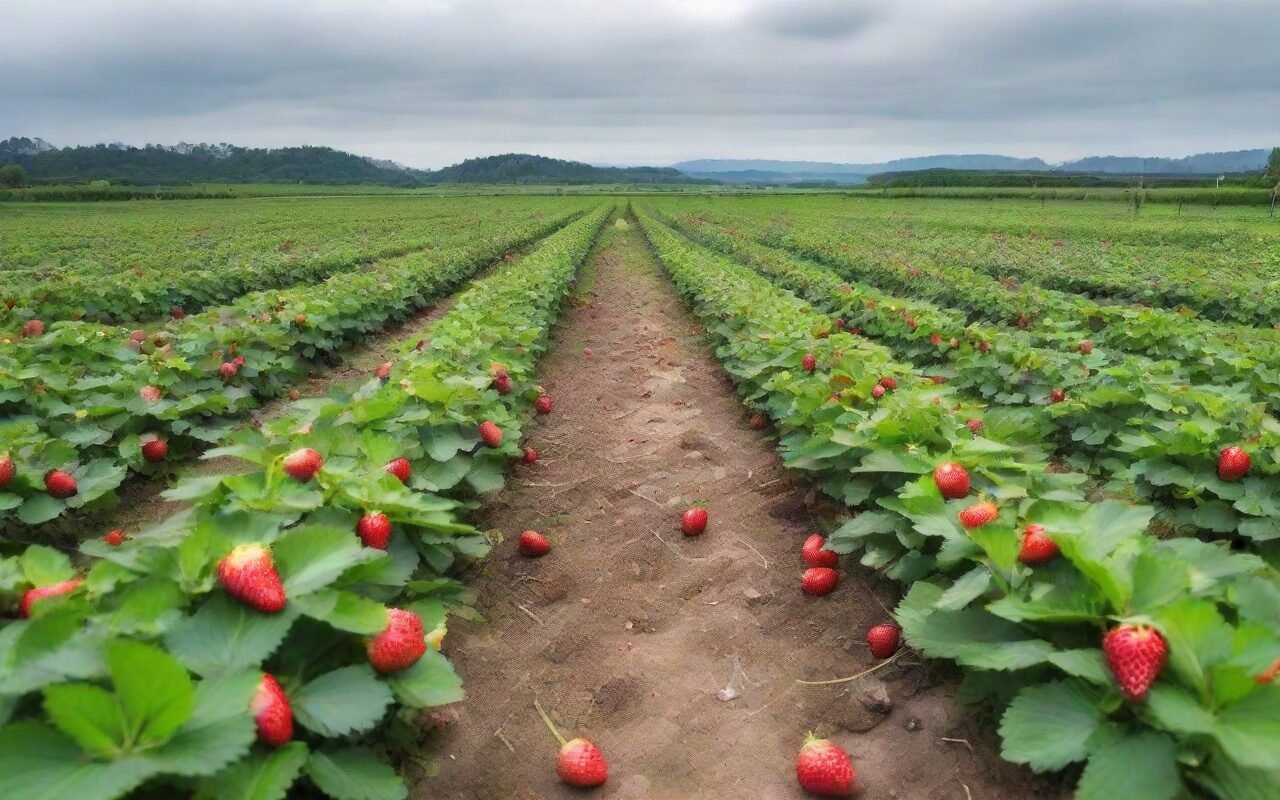
    Miura Strawberry Picking — detailed view

    By Train + Bus

    From Tokyo:

    1. Tokyo Station → Keikyu Line (60 min)
    2. Misakiguchi Station → Keikyu Bus (15 min)
    3. Strawberry Farm Stop → Walk (5 min)
    • Total: 90 minutes, ¥1,500

    From Yokohama:

    1. Yokohama Station → Keikyu Line (40 min)
    2. Misakiguchi Station → Bus (15 min)
    • Total: 65 minutes, ¥1,000

    From Kamakura:

    1. Kamakura Station → Enoden → Keikyu (50 min)
    2. Misakiguchi Station → Bus (15 min)
    • Total: 75 minutes. ¥1,200

    By Car

    From Tokyo:

    • Route: Tomei Expressway → Miura IC
    • Distance: 60 km
    • Time: 60-90 minutes (traffic dependent)
    • Toll: ¥2,000
    • Parking: Free at most farms

    From Yokohama:

    • Route: Yokohama-Yokosuka Road
    • Distance: 30 km
    • Time: 40-50 minutes
    • Toll: ¥1,000

    Tip: Car is best for flexibility and visiting multiple farms in one trip.

    Picking Techniques

    How to Pick Ripe Berries:

    1. Color: Deep red all the way to the tip
    2. Size: Large but not oversized
    3. Stem: Green and fresh-looking
    4. Texture: Firm, not mushy
    5. Aroma: Sweet strawberry scent

    How to Cut:

    1. Use the provided scissors
    2. Cut 1 cm above the berry, leaving the stem
    3. Don’t pull — this damages the plant
    4. Place gently in the basket

    Strategy:

    • Walk the entire greenhouse first before picking
    • Sample one of each variety before committing
    • Return to your favorites for a full basket
    • Pace yourself — 40 minutes goes fast

    Maximizing Value

    Before You Go:

    • Eat a light breakfast so you arrive hungry
    • Wear comfortable clothes for moving through greenhouses
    • Arrive early for the freshest berries and fewer crowds

    During Picking:

    • Limit drinks so you have room for strawberries
    • Focus on premium varieties like Amaou and Beni Hoppe
    • Eat slowly and savor each berry
    • Walk around — the best berries are often at the back

    After Picking:

    • Buy premium berries to take home
    • Pick up strawberry jam and sweets as unique souvenirs
    • Leave a review online to help future visitors

    Half-Day Strawberry Trip (Morning)

    9:00: Depart Tokyo
    10:30: Arrive at Miura Ichigo Land
    10:45: Strawberry picking (40-60 min)
    12:00: Explore the farm shop for souvenirs
    12:30: Lunch at a nearby seafood restaurant
    14:00: Return to Tokyo

    Total: 5 hours, ¥8,000-12,000 per person

    Full-Day Miura Peninsula Tour

    9:00: Depart Tokyo
    10:30: Strawberry picking at Miura Ichigo Land
    12:00: Lunch at Misaki Port (fresh tuna)
    13:30: Explore Misaki Port’s fish market
    15:00: Visit Jogashima Island (scenic views)
    17:00: Return to Tokyo

    Total: 8 hours, ¥12,000-18,000 per person

    Romantic Strawberry Date

    10:00: Depart Tokyo by car
    11:30: Strawberry picking at a premium farm
    13:00: Lunch at an ocean-view restaurant
    15:00: Walk around Jogashima
    17:00: Watch the sunset at Inamuragasaki
    19:00: Return to Tokyo

    Total: 9 hours, ¥15,000-25,000 for two people

    Farm Comparison Table

    Miura Strawberry Picking Guide — Complete Guide 2026 — Farm Comparison Table

    Farm Price Varieties Best For
    Miura Ichigo Land ¥2,200 8 types Overall best, English support
    Ichigo no Sato ¥1,800 5 types Budget-friendly, organic options
    Takami Farm ¥3,500 4 premium Luxury experience, special occasions
    Miura Kanko ¥2,000 6 types Groups and families
    Akai Berry ¥1,900 5 types Red berry lovers

    Bottom Line: Miura Peninsula offers 20+ strawberry farms with all-you-can-eat picking from December to May. Miura Ichigo Land is best for English speakers with 8 varieties. Ichigo no Sato offers the best value. Takami Farm provides a premium luxury experience. Expect to pay ¥2,000-3,000 for 40-60 minutes. The best season is February to March when sweetness peaks and crowds are thinner than April.

    Farm Recommendations from My Visits

    I visited four strawberry farms on the Miura Peninsula, and my favorite was Yokota Farm. Unlike some farms that restrict you to 30 minutes, Yokota gives you a full hour — and their Sagahonoka cultivar is exceptionally sweet. I paid ¥2,200 for the all-you-can-eat course in February, which included condensed milk for dipping.

    Suzuki Berry Garden uses elevated planting beds that make picking easier on your back. They grow the Akihime variety, which has a classic strawberry flavour with the perfect balance of sweet and tart. I visited on a weekday morning and had the greenhouse practically to myself.

    Maruyama Farm is the smallest and most charming. Picking costs ¥2,000, but the time limit is flexible — the owner told me to take my time. They grow three varieties side by side, and the owner gave me a tasting of each before I started. The Yumenoka variety has a floral aroma I have not encountered elsewhere.

    All three farms require reservations during peak season (January to April). I booked two days in advance via their websites. Bring cash — none of the farms accept cards, and the nearest ATM is at Misaki Port, about 10 minutes by car.

    Tips

    Practical notes from my trips to exploring the Miura Peninsula for its strawberry: confirm the latest hours on the official website, buy tickets in advance when you can, and leave extra time for trains and walking between stops. Keeping your first day lighter also helps you enjoy the second day without feeling rushed.

    Frequently Asked Questions

    Q: Is there a best time of day to visit?
    A: Early mornings before 10 AM are ideal. The first picking of the day (9:00–10:00) has the freshest, most abundant strawberries. Weekdays are significantly less crowded than weekends.

    Q: Which train line should I take?
    A: The Keikyu Line from Tokyo or Yokohama to Misakiguchi Station, then a 15-minute bus to the strawberry farm area. Total journey: about 90 minutes from Tokyo.

    Q: How much time should I spend at Miura for strawberry picking?
    A: A half-day (4-5 hours) is sufficient for a single farm visit. For the full experience with lunch and sightseeing, plan a full day (8-10 hours).

    Q: Do the farms accept credit cards?
    A: Most farms are cash-only. Bring enough yen for admission, farm shop purchases, and lunch. The nearest ATM is at the convenience store near Misaki Port.

    Packing Essentials

    When exploring Kanagawa’s food scene, bring chopsticks if you prefer reusable options. A small container is handy for takeaway snacks. A translation app with camera feature helps decipher Japanese-only menus. Bring a small notebook to track restaurant discoveries.

    Conclusion

    The details in this guide come from real visits, and the biggest lesson I took away was that the best experiences in the Miura Peninsula rarely fit neatly into a checklist. During my visit to the Miura Peninsula I went with a rough plan and found that leaving room to wander made the trip far more memorable. Plan the essentials, keep your schedule flexible, and you will leave Kanagawa wanting to return.

  • Miura Fishing Gear – Kanagawa 2026

    Miura Fishing Gear – Kanagawa 2026

    Miura Fishing Gear – Kanagawa 2026

    Overview

    Packing the right gear for a fishing trip on the Miura Peninsula can make the difference between a comfortable, productive day on the water and a miserable one. The good news is that charter operators provide all the fishing equipment — rods, reels, bait, and tackle. What you need to bring yourself is appropriate clothing, sun protection, and personal items. Discover the Miura Peninsula with this Enjoyable Ticket — access to transport and local attractions

    I tried fishing off Misaki Port last spring, and my biggest mistake was wearing cotton jeans — they got wet during the morning mist and stayed cold for the rest of the trip. On my second trip, I wore quick-dry fishing pants and a moisture-wicking base layer and was comfortable all day. For more Miura activities, see our Miura fishing costs guide or Miura fishing experience guide.

    Quick Summary

    • Provided: Fishing rods, reels, line, hooks, bait, life jackets, buckets
    • Bring: Comfortable layered clothing, closed-toe non-slip shoes, sun protection, change of clothes
    • Essential: Motion sickness medicine (for boat fishing), waterproof camera or phone case

    Provided by Your Activity Provider

    Fishing Equipment: Rods (various sizes), reels, line, hooks, sinkers, swivels, leaders, bait (live or artificial), lures
    Safety: Life jackets (all sizes), first aid kit, emergency radio, flares (on boats)
    Catch Handling: Buckets, cooler boxes (some providers), fish grippers, cleaning tools (some)
    Comfort: Seating on boats, shade (some boats), drinking water (some providers)

    What You Should Bring

    Essential: Comfortable layered clothing, closed-toe non-slip shoes, sun hat, polarized sunglasses, sunscreen SPF 30+, change of clothes, plastic bag for wet items, small backpack Recommended: Motion sickness medicine, waterproof camera or phone case, water bottle, snacks, cash (¥10,000–20,000) Optional: Fishing gloves, binoculars, power bank What NOT to bring: High heels/open-toe shoes, expensive jewelry, cotton clothes, valuables, glass containers, alcohol, strong perfume

    Seasonal Clothing Guide

    Spring (March–May, 15–20°C): Long-sleeve shirt + light sweater/fleece + windbreaker. Long quick-dry pants. Deck shoes or water shoes. Layer for cool morning.

    Summer (June–August, 25–35°C): Light moisture-wicking shirt, quick-dry shorts or light pants, water shoes or ventilated deck shoes, wide-brim hat, polarized sunglasses. SPF 50+ sunscreen, reapply every 2 hours. UPF-rated clothing recommended. Autumn (September–November, 18–25°C): Long-sleeve shirt, light fleece (optional), windbreaker, comfortable long pants, closed-toe non-slip shoes. Most comfortable season.

    Winter (December–February, 5–15°C): Thermal underwear, fleece/wool sweater, insulated windproof jacket, thermal pants + insulated outer pants, insulated waterproof boots, warm hat, scarf. Hand warmers essential.

    Footwear Guide

    Type Rating Price Best For
    Deck shoes ⭐⭐⭐⭐⭐ ¥8,000–15,000 Boat fishing (non-slip, quick-dry)
    Water shoes ⭐⭐⭐⭐⭐ ¥6,000–12,000 Shore fishing, rocky areas
    Hiking shoes ⭐⭐⭐⭐ ¥10,000–20,000 Rocky beach access
    Sneakers ⭐⭐⭐ ¥5,000–15,000 Sandy shore only

    Never wear: High heels, flip-flops, open-toe sandals, dress shoes, cotton socks.

    Recommended Brands and Where to Buy

    For deck shoes, Sperry Top-Sider (¥10,000–18,000) and XTRATUF (¥12,000–20,000) are popular choices among local anglers. For water shoes, KEEN Newport (¥12,000–16,000) provides excellent toe protection and drain well after getting wet. If you prefer something lighter, Mizuno Beach Shoes (¥6,000–9,000) are widely available at sports stores near Misaki and Aburatsubo.

    Most fishing gear can be found at Super Sports Xebio in Yokosuka or Yokohama Port Fishing Shop near the bay. For last-minute purchases, the convenience stores near Misaki Port stock basic water shoes, sunscreen, and motion sickness medicine at slightly higher prices.

    Motion Sickness Prevention

    Medication:

    • Dramamine: Take 30–60 min before, lasts 4–6 hours (causes drowsiness), ¥1,000–2,000
    • Bonine: Take 1 hour before, lasts 24 hours (less drowsy), ¥1,500–2,500
    • Scopolamine patch (prescription): Apply 4 hours before, lasts 72 hours, ¥3,000–5,000 Natural remedies: Ginger tablets (1,000–2,000 mg), acupressure bands (Sea-Bands), peppermint candy

    On the boat: Stay on deck facing the horizon, stay hydrated with small sips, eat light crackers. If sick, tell the guide and move to center of boat.

    Electronics Protection

    • Dry bag (¥2,000–5,000): Keep electronics safe from water
    • Waterproof phone case (¥1,000–3,000): Essential for boat fishing
    • Tip: Attach lanyard to prevent drops, keep in shade to prevent overheating

    Backpack Recommendations

    Type Capacity Price Best For
    Daypack 10–20L ¥8,000–20,000 All-around fishing gear
    Dry bag 10–30L ¥5,000–15,000 Protecting electronics
    Cooler bag Small ¥5,000–15,000 Bringing catch home

    Frequently Asked Questions

    Q: Do I need to buy fishing gear?
    A: No — all fishing equipment is provided. Bring only personal items (clothes, sun protection). Q: Can I wear jeans?
    A: Not recommended. Jeans stay wet, heavy, and cold. Wear quick-dry pants instead.

    Q: What shoes are best for boat fishing?
    A: Deck shoes or water shoes with non-slip soles. No open-toe shoes. Q: Do I need a fishing license?
    A: No — the license is included in guided tour fees.

    Q: Can I bring my own fishing rod?
    A: Yes, but check with the provider first. Provided rods are usually sufficient.

    Q: Should I take motion sickness medicine even if I don’t usually get seasick?
    A: Yes — even people who don’t normally get seasick can feel nauseous on a stationary fishing boat. Take a non-drowsy option like Bonine as a precaution.


    Last Updated: July 17, 2026
    Written by: Anaba OffJapan Editorial Team

    🎯 Practical Tips for Your Visit

    Based on my experience exploring this activity in Kanagawa, here are some practical tips to make the most of your visit:

    • Start early in the day to avoid crowds and make the most of daylight hours. I found that arriving by 9 AM gave me a much more relaxed experience.
    • Bring comfortable walking shoes and weather-appropriate clothing. The weather in Kanagawa can change quickly, especially near the coast.
    • Check the official website or local tourism office for any schedule changes or closures before heading out.

    📅 Planning Your Visit

    When to Go

    The best time to plan this activity depends on your preferences. Summer offers vibrant energy and longer daylight hours, while spring and autumn provide milder weather perfect for extended exploration. Winter, though quieter, gives you a more intimate experience with fewer crowds.

    Tips for Beginners

    Most venues in Kanagawa open around 9 AM or 10 AM. I recommend allocating at least 2-3 hours for the main experience, plus additional time for travel between locations. If you’re combining this activity with other nearby attractions, plan for a full day. Visit Hakoneen Aquarium on Lake Ashi — a family-friendly marine attraction perfect for rainy days

    Beginner Tips

    Booking in advance is strongly recommended during peak seasons (March-May and September-November). Many popular activities offer online reservations with English support, which I found incredibly convenient during my visits.

    Fishing Gear I Recommend for Miura

    After several fishing trips on the Miura Peninsula, I have settled on a gear setup that works well for the local conditions. For shore fishing at Jogashima or Aburatsubo, I use a 4.2-metre surf rod with a 5000-size reel spooled with 20-pound braided line. This combination is versatile enough for both rockfish and sea bream. I bought my setup at Tsukiji Tackle Shop, a small store near the Misaki Port ferry terminal — the owner gave me excellent advice and even marked productive spots on a map.

    For boat fishing, I recommend renting gear from the charter operator on your first trip. The rods they provide (typically 2.1-metre boat rods) are better suited to the deep-water fishing style. After my first charter, I bought my own boat rod (¥6,500 at a Yokohama sports store) and found that using familiar gear improved my catch rate.

    The most useful accessory I brought was a fish grip tool (¥1,800 online) for handling toothy fish like sea bass. Trying to unhook a thrashing fish with bare hands is not fun, and the grip made the process safe and quick. I also recommend a bucket-style fishing seat — sitting on rocks for hours is uncomfortable without one. A ¥1,200 collapsible bucket from Don Quijote worked perfectly and doubled as a catch holder. For a complete guide to seasonal fishing in the area, see our Miura Fishing Seasons Guide.

    How to Get There

    Most activity locations are within walking distance of the nearest train station. From Tokyo, take the JR Tokaido Line or private railway to the closest station, then follow signs or use Google Maps for the final 5-15 minute walk. Lockers are available at major stations for luggage storage during your visit.

    What to Expect

    Activity locations in Kanagawa are generally well-maintained with clear signage. Most sites offer English pamphlets or audio guides. Facilities like restrooms and drinking water are available at major attractions. Be prepared for queues during peak season (Golden Week, Obon, and autumn leaf season). Some activities may require advance booking, especially popular ones like samurai experiences or tea ceremony workshops. Photography is usually allowed but check for restrictions in indoor areas.

    Nearby Recommendations

    Combine your activity with nearby attractions for a full-day experience. Many activity locations are close to other points of interest, making it easy to plan a varied itinerary. Check the official website for nearby partner attractions that offer discounts when visited together. Most areas have good lunch options within walking distance of activity venues.

    Local Tips

    Those who frequent these activities suggest checking social media for last-minute openings and special events. Some venues offer discounted admission during certain hours or days of the week. Combining multiple activities in the same area saves travel time and often qualifies for package discounts. Consider joining a group tour for activities that require specialized equipment or guidance.n

    Conclusion

    The details in this guide come from real visits, and the biggest lesson I took away was that the best experiences in Kanagawa rarely fit neatly into a checklist. During my visit I went with a rough plan and found that leaving room to wander made the trip far more memorable. Plan the essentials, keep your schedule flexible, and you will leave Kanagawa wanting to return.

  • Miura Camping Sites Guide 2026

    Miura Camping Sites Guide 2026

    Overview

    2. Senju Park Campground (Park)

    Best for Families: Playground, shallow beach

    • Location: Minamishitaura (west coast)
    • Access: Keikyu Bus (15 min from Misakiguchi)
    • Sites: 20 campsites
    • Capacity: 100 people
    • Price: ¥400 per person/night

    places:

    • ✅ Toilets (clean, family-friendly)
    • ✅ Showers (free, hot water)
    • ✅ Kitchen (well-equipped)
    • ✅ Playground (kids)
    • ✅ Beach access (shallow, safe)
    • ✅ Parking (free)
    • ❌ Equipment Rental
    • ❌ WiFi

    Special Features:

    • Kids Playground: Swings, slides

    • Shallow Beach: Safe for children

    • BBQ Areas: Designated zones

    • Fish Cleaning Station: For fresh catch Best For: Families with children. Jogashima Island Camping () Best for Isolation: Island time

    • Location: Jogashima Island (off Misaki)

    • Access: Walk across bridge from Misaki

    • Sites: 10 primitive sites

    • Capacity: 50 people

    • Price: ¥600 per person/night

    places:

    • ✅ Toilets (basic, clean)
    • ❌ Showers (none, use public bath nearby)
    • ✅ Kitchen (simple sinks)
    • ❌ Equipment Rental
    • ❌ WiFi

    Special Features:

    • Island Setting: Feels remote

    • Lighthouse: Historic landmark

    • Cliff Trails: Scenic hiking

    • Fishing: great shore fishing Best For: Adventure seekers. Zushi Beach Camp (Zushi) Best for Convenience: Close to Tokyo, urban camping

    • Location: Zushi Beach (Shonan area)

    • Access: JR Zushi Station (5 min walk)

    • Sites: 15 campsites

    • Price: ¥800 per person/night

    places:

    • ✅ Toilets (modern)

    • ✅ Showers (¥200. hot water)

    • ✅ Kitchen (full)

    • ✅ Equipment Rental (tent ¥2,000. sleeping bag ¥1,000)

    • ✅ WiFi (free)

    • ✅ Convenience Store (2 min walk) Best For: First-time campers. Hayama Seaside Camp (Hayama) Best for Luxury**: Glamping options

    • Location: Hayama (upscale area)

    • Access: Bus from Zushi Station

    • Sites: 10 premium sites

    • Price: ¥1,500-5,000 per person/night

    places:

    • ✅ Toilets (luxury, heated)
    • ✅ Showers (free, high-pressure)
    • ✅ Kitchen (gourmet setup)
    • ✅ Equipment Rental (premium gear)
    • ✅ WiFi (high-speed)
    • ✅ Glamping Tents (rental. ¥10,000/night) Best For: Glamping, special occasions

    What to Bring

    Essential Gear:

    Shelter:

    • Tent (2-3 person for comfort)
    • Ground tarp (moisture barrier)
    • Stakes, guylines (wind stability) Sleeping:
    • Sleeping bag (rated for season)
    • Sleeping pad (insulation, comfort)
    • Pillow (camping or inflatable)

    Cooking:

    • Camp stove (gas canister)
    • Cookware (pot, cups
    • Cooler (ice for perishables)
    • Water bottles (2L per person/day) Lighting:
    • Headlamp (hands-free)
    • Lantern (camp ambient)
    • Extra batteries Tools:
    • Multi-tool or knife
    • Duct tape (repairs)
    • Rope/cord (clothesline, tarps)

    Personal:

    • Sunscreen (SPF 30+)
    • Insect repellent
    • First aid kit
    • Toiletries (toothbrush, soap)
    • Towel (quick-dry)
    • Change of clothes

    Clothing (seasonal):

    • Summer: Light, swimwear
    • Winter: Layers, thermal underwear
    • Rain: Rain jacket, rain pants
    • Footwear: Hiking boots, sandals

    Rental Options

    At Campsites:

    • Tent: ¥2,000-5,000/night
    • Sleeping Bag: ¥1,000-2,000/night
    • Sleeping Pad: ¥500-1,000/night
    • Stove + Cookware: ¥1,500-3,000/night
    • Full Set: ¥5,000-10,000/night

    Off-Site Rental:

    • Tokyo: Montbell. L.L.Bean (higher quality)
    • Yokohama: Camping shops (better selection)
    • Delivery: Some shops deliver to campsite (¥1,000)

    tip:

    • First-Timers: Rent full set (try before buying)
    • Occasional: Rent key items (tent, sleeping bag)
    • Regular Campers: Buy your own (cost-effective long-term)

    Meal Planning

    Breakfast:

    • Easy: Instant oatmeal, fruit
    • Medium: Eggs, toast
    • Elaborate: Pancakes, hash browns Lunch:
    • Easy: Sandwiches, fruit
    • Medium: Ramen (camp stove). salad
    • Elaborate: Grilled fish, miso soup

    Dinner:

    • Easy: Hot dogs, bread
    • Medium: BBQ (chicken, vegetables)
    • Elaborate: Seafood feast (fresh catch). sake Snacks:
    • Trail mix
    • Energy bars
    • Fruit (apples, crackers
    • Marshmallows (for campfire)

    Where to Buy Food

    Before Arrival (Tokyo/Yokohama):

    • Supermarkets: AEON. Ito-Yokado (full selection)
    • Convenience Stores: 7-Eleven. Lawson (basics)
    • Home Centers: Cain. Komeri (camping supplies)

    Near Campsites:

    • Misaki Port: Fish market (fresh seafood)
    • Convenience Stores: 10-15 min from most campsites
    • Local Shops: Small markets (limited selection, higher prices) tip: Buy 80% in Tokyo. 20% at destination (fresh items)

    Cooking Tips

    Camp Stove Safety:

    • Use on flat, stable surface
    • Keep away from tent (fire hazard)
    • Never use inside tent (carbon monoxide)
    • Bring extra fuel (1 canister per 2 days)

    Fire Safety:

    • Use designated fire pits only
    • Keep water nearby (emergency)
    • Fully extinguish before sleep
    • Check fire regulations (some areas restrict)

    Food Safety:

    • Keep raw meat separate
    • Use cooler with ice (perishables)
    • Wash hands before cooking
    • Cook thoroughly (no foodborne illness)

    Swimming

    Best Beaches:

    • Misaki Beach: Near Misaki Park Campground
    • Senju Beach: At Senju Park Campground
    • Zushi Beach: At Zushi Beach Camp Season: July-August (official swimming season)
      places: Showers, lifeguards (summer)

    Fishing

    Shore Fishing:

    • Locations: Jogashima. Misaki Port breakwater
    • Target: Sea bass, porgy
    • License: Not needed (shore fishing)
    • Best Time: Early morning, evening

    Boat Fishing:

    • Charter: Misaki Port (¥20,000-40,000/boat)
    • Target: Tuna, snapper
    • License: Provided by charter
    • Best Time: Year-round (varies by species)

    Fish Cleaning:

    • places: Most campsites have cleaning stations
    • Disposal: Use designated bins (keep camp clean)
    • Cooking: Grill fresh (best taste)

    Hiking

    Coastal Trails:

    • Jogashima Loop: 5km, cliffs)
    • Misaki Point: 3km. 1 hour (ocean views)
    • Minamishitaura Coast: 8km. 3 hours (scenic) Difficulty: Easy to moderate (well-marked)
      What to Bring: Water, map

    Stargazing

    Best Spots:

    • Jogashima Island: Lowest light pollution
    • Misaki Point: Ocean horizon (no obstructions)
    • Any Campsite: Away from city lights Best Time:
    • Season: Winter (clearest skies)
    • Moon Phase: New moon (darkest)
    • Time: 21:00-23:00 (after sunset) What to See:
    • Winter: Orion. Pleiades
    • Summer: Milky Way. Scorpius
    • Year-Round: Big Dipper. Cassiopeia

    When to Book

    High Season (April-May. October-November):

    • Book: 1 month ahead
    • Weekends: Fill up 2-3 weeks ahead
    • Holidays: Book immediately when bookings open Low Season (December-March):
    • Book: 1-2 weeks ahead
    • Weekends: Often available
    • Walk-ins: Sometimes available

    How to Book

    Online (Recommended):

    • Website: Campsite website (Japanese)
    • Payment: Credit card
    • Confirmation: Email immediately
    • Language: Japanese only (use browser translate)

    Phone:

    • Language: Japanese (basic English at some)
    • Payment: Cash on arrival
    • Confirmation: Verbal
    • Best: If you speak Japanese Walk-in:
    • Availability: Subject to availability
    • Risk: May be fully booked
    • Best: Low season, weekdays

    Cancellation Policies

    Standard:

    • 7+ days before: Full refund
    • 3-7 days before: 50% refund
    • <3 days before: No refund
    • Weather: Full refund or reschedule (typhoon, heavy rain)

    Camping Costs

    Item Budget Mid-Range Luxury
    Campsite Fee ¥400-600/night ¥800-1,500/night ¥2,000-5,000/night
    Equipment Rental ¥0 (own) ¥5,000 (rent key items) ¥10,000 (full rental)
    Food ¥2,000/day ¥4,000/day ¥8,000/day
    Transport ¥2,000 (train) ¥4,000 (train + bus) ¥8,000 (car rental)
    Activities ¥0 (hiking, swimming) ¥2,000 (fishing gear) ¥10,000 (boat charter)
    Total (2 days) ¥6,000-10,000 ¥20,000-30,000 ¥50,000-80,000

    Money-Saving Tips

    Bring Your Own Gear:

    • Initial cost high (¥30,000-50,000)
    • Pays off after 5-10 trips
    • Rent until you’re sure you like camping Cook Your Own Meals:
    • Campsite cooking: ¥2,000-4,000/day
    • Restaurant meals: ¥4,000-8,000/day
    • Savings: 50% or more

    Visit Off-Peak:

    • Weekdays: Less crowded, sometimes cheaper
    • Low season: Lower rates (some campsites)
    • Avoid holidays: Premium pricing

    Group Camping:

    • Split campsite fees (per person decreases)
    • Share equipment (less rental needed)
    • Bulk food buying (economies of scale)

    Weekend Trip (2 Days. 1 Night)

    Day 1:
    9:00: Depart Tokyo
    10:30: Arrive campsite, setup tent
    12:00: Lunch (sandwiches)
    14:00: Beach time / hiking
    17:00: Dinner preparation (BBQ)
    19:00: Campfire, stargazing
    22:00: Sleep

    Day 2:
    7:00: Wake up, breakfast
    9:00: Pack up camp
    10:00: Visit Misaki Port (fish market)
    12:00: Lunch (fresh sushi)
    14:00: Depart for Tokyo
    16:00: Arrive Tokyo Total: 2 days. ¥10,000-20,000 per person

    Extended Trip (3 Days. 2 Nights)

    Day 1: Arrive, beach time
    Day 2: Fishing trip (morning). campfire (evening)
    Day 3: Pack up, return Total: 3 days. ¥15,000-30,000 per person

    Weather Safety

    Typhoon:

    • Monitor: Check forecasts (Japan Weather Association)
    • Evacuate: If typhoon approaching (don’t wait)
    • Shelter: Nearby hotels, community centers

    Heavy Rain:

    • Flash Floods: Move to higher ground
    • Lightning: Stay in tent/car (not under trees)
    • River Crossing: Don’t cross flooded streams

    Heat (Summer):

    • Hydration: Drink 3-4L water/day
    • Shade: Set up tent in shade
    • Rest: Avoid midday exertion (12:00-15:00) Cold (Winter):
    • Layering: 3 layers minimum
    • Sleeping Bag: Rated for temperatures
    • Hot Drinks: Warm before sleep

    Q: What is the best time to visit Miura camping sites guide?

    A: The best time to visit Miura camping sites guide is during spring (March-May) for mild weather and cherry blossoms, or autumn (September-November) for comfy temperatures and fall foliage. Summer can be crowded but offers festivals and events. Q: How do I get to Miura camping sites guide from Tokyo?

    A: From Tokyo Station, take the JR line to the nearest station (about 60-90 minutes). From there, it’s a short walk or local bus ride. The Japan Rail Pass can be used on JR lines. Q: Is Miura camping sites guide suitable for families with children?

    A: Yes! Miura camping sites guide offers family-friendly places and activities. Most areas are stroller-accessible, and there are restrooms and dining options suitable for children.

    Q: Are there any entrance fees for Miura camping sites guide? A: Most areas are free to visit. Some specific attractions or places may charge a small fee (¥300-¥1,000). Check individual attraction websites for details. Q: Can I visit Miura camping sites guide in one day?

    A: Yes, a day trip is possible from Tokyo. But here’s the thing, staying overnight allows for a more relaxed time and the chance to explore surrounding areas. Q: Is English spoken at Miura camping sites guide?

    A: Basic English is understood at major attractions and info centers. Tourist info is often available in English. Translation apps can be helpful for detailed inquiries. —

    Related Articles:

    After visiting Kanagawa across different seasons, I found that each season transforms the experience entirely — from spring cherry blossoms to autumn foliage.

    Frequently Asked Questions

    Q: When should I visit for the best weather?
    A: For the most comfy weather, plan your trip between late March and early June, or from September through November, During these months, temperatures range from 15-25°C, making outdoor exploration enjoyable. Q: Is this destination easy to reach by public transport?
    A: Yes. Kanagawa has great public transport connections from Tokyo. Most destinations are within an hour by train. The nearest station is typically a short walk or bus ride from the main attractions. Q: Is this destination manageable as a day trip from Tokyo?
    A: Yes, all destinations in this guide work well as day trips. Plan to arrive by late morning to see the main highlights. For a relaxed pace including lunch and optional detours, allow 6-8 hours.

    Final Thoughts

    Miura Camping Sites Guide 2026 provides everything you need to make your Kanagawa trip smooth and enjoyable. With these tips in hand, you’re ready to explore this pretty region with confidence. Safe travels! For more info, check out our guide on Miura Fishing Costs Guide 2026. For more info, check out our guide on Miura Fishing Seasons Guide 2026. For more info, check out our guide on Miura Peninsula Hiking Guide 2026.

    Camping Spots I Have Tried

    I have camped at three sites on the Miura Peninsula, and each offered a different experience. Miura Beach Auto Camp is the most convenient — located right on the beach with hot showers and a small shop. I stayed there in September and paid ¥4,500 for a tent site. The sound of waves at night was incredible, though the morning wind can be strong.

    For a more rugged experience, I recommend Jogashima Campground, which has basic facilities but unbeatable views of the Pacific sunrise. I hiked the coastal trail at dawn and saw dolphins playing in the surf below.

    A practical tip from my trips: bring a windproof tent. The Miura coast gets strong afternoon breezes, and I saw two cheap tents collapse during my first stay. A canopy or tarp is also useful for creating shade during midday heat. For cooking, the campsites have barbecue pits — I recommend buying fresh fish from Misaki Port for an unforgettable seaside dinner.

    Conclusion

    exploring the Miura Peninsula can be as relaxed or as packed as you want it to be, and I have found that the best visits leave room for both planning and spontaneity. During my visit to the Miura Peninsula I went with a rough plan and found that leaving room to wander made the trip far more memorable. Use this guide to sort out the logistics in advance, then let the day surprise you — Kanagawa rewards travelers who stay curious.
  • Miura Peninsula Access – Kanagawa 2026

    Miura Peninsula Access – Kanagawa 2026

    This guide provides essential travel tips and practical advice for navigating Kanagawa Prefecture. From transportation passes to safety information, you will find everything you need for a smooth and enjoyable trip. Having visited these locations multiple times, I’ve gathered practical insights that go beyond typical tourist information.

    Miura Peninsula Access – Kanagawa 2026

    Overview

    📍 Location

    • 3 main access routes from Tokyo/Yokohama
    • Train + Bus combo is most reliable
    • Car rental recommended for flexibility
    • Crowd avoidance tips included
    • IC card (Suica/PASMO) compatible

    Miura Peninsula Access - Kanagawa 2026 — Location
    Miura Peninsula Access - Kanagawa 2026 — Location

    — the quality and attention to detail were remarkable.

    Introduction: Getting to Miura Peninsula

    Miura Peninsula Access - Kanagawa 2026 — scenic view of Kanagawa's travel-tips attractions

    Miura Peninsula Access - Kanagawa 2026 — Introduction: Getting to Miura Peninsula

    The Miura Peninsula (Miura), located south of Yokohama, is one of Kanagawa Prefecture’s lesser-known spots, Known for:

    • Fresh seafood (especially tuna)
    • beautiful coastal scenery
    • Jogashima Island
    • Misaki Port Morning Market
    • Less crowded than Kamakura/Enoshima

    But here’s the thing, accessing Miura can be confusing for first-time visitors. This guide covers all transportation options from Tokyo and Yokohama.

    Access Options:

    1. Train + Bus (Most common, ¥1,500-2,000)
    2. Direct Bus (Limited service, ¥1,800)
    3. Car Rental (Most flexible, ¥5,000-8,000/day)

    Travel Times:

    • From Tokyo Station: 90-120 minutes
    • From Yokohama Station: 60-90 minutes
    • From Shibuya Station: 100-130 minutes Updated: March 2026 (all routes verified)

    Option 1: Train + Bus (Recommended)

    Best for: Balance of speed and cost

    Route:
    Tokyo Station
      ↓ (JR Yokosuka Line, 40 min)
    Yokohama Station
      ↓ (Keikyu Line, 35 min)
    Misakiguchi Station
      ↓ (Keikyu Bus, 15 min)
    Misaki Port
    
    Total Time: 90-100 minutes
    Total Cost: ¥1,980
    Transfers: 2

    Step-by-Step:

    Step 1: Tokyo → Yokohama (JR Yokosuka Line)

    Departure: Tokyo Station (JR platforms)
    Line: JR Yokosuka Line (Yokosuka)
    Direction: Kurihama ()
    Time: 40 minutes
    Cost: ¥580
    Frequency: Every 10-15 minutes
    IC Card: Suica/PASMO accepted
    
    Tips:
    - Board at platform 5 or 6
    - Trains are usually less crowded
    - Some trains continue to Kurihama (no transfer needed)

    Step 2: Yokohama → Misakiguchi (Keikyu Line)

    Departure: Yokohama Station (Keikyu platforms)
    Line: Keikyu Main Line (This)
    Direction: Misakiguchi ()
    Time: 35 minutes
    Cost: ¥680
    Frequency: Every 20-30 minutes
    IC Card: Suica/PASMO accepted
    
    Tips:
    - Transfer at Yokohama Station (5-minute walk from JR)
    - Limited express trains available (same price)
    - Last car has best views

    Step 3: Misakiguchi → Misaki Port (Keikyu Bus)

    Departure: Misakiguchi Station (Bus terminal)
    Bus: Keikyu Bus ( bound)
    Direction: Misaki Port (Misaki Port)
    Time: 15 minutes
    Cost: ¥220
    Frequency: Every 20-30 minutes
    IC Card: Suica/PASMO accepted

    Tips:

    • Bus stop is right outside station
    • Look for bus #1 or #2
    • Tell driver your destination

    Option 2: Direct Train (Keikyu Limited Express)

    Best for: Fewer transfers

    Route:
    Tokyo Station (Shinagawa)
    ↓ (Keikyu Limited Express, 75 min)
    Misakiguchi Station
    ↓ (Bus, 15 min)
    Misaki Port

    Total Time: 95-105 minutes
    Total Cost: ¥1,980
    Transfers: 1 (at Shinagawa)

    Step-by-Step:

    Step 1: Tokyo → Shinagawa

    Line: JR Yamanote Line
    Time: 15 minutes
    Cost: ¥160

    Line: Keikyu Limited Express ()
    Direction: Misakiguchi
    Time: 75 minutes
    Cost: ¥1,640 (including base fare)
    Frequency: Every 30-60 minutes Tips:

    • Reserved seats available (¥500 extra)
    • Comfortable seating
    • Good for luggage

      Same as Option 1 (Bus, 15 min, ¥220)


    Option 3: Car Rental

    Best for: Flexibility and multiple stops

    Route:
    Tokyo Station
    ↓ (Shuto Expressway, 60 km)
    Misaki Port

    Total Time: 70-90 minutes (no traffic)
    Total Cost: ¥5,000-8,000/day (rental + tolls + parking)
    Tolls: ¥1,500-2,000
    Parking: ¥500-1,000

    • Toyota Rent a Car (Tokyo Station)
    • Nissan Rent a Car (Shinagawa)
    • Times Car Rental (Multiple locations)

    Tips:

    • Book in advance (especially weekends)
    • International Driving Permit required
    • GPS usually included (English available)
    • ETC card recommended for tolls Local Insight: Best for groups of 3-4 people. Cost per person becomes reasonable. Allows stops at multiple beaches.

    Option 1: Train + Bus (Most Popular)

    Best for: Most travelers from Yokohama

    Route:
    Yokohama Station
    ↓ (Keikyu Line, 35 min)
    Misakiguchi Station
    ↓ (Bus, 15 min)
    Misaki Port

    Total Time: 55-65 minutes
    Total Cost: ¥900
    Transfers: 1

    Step-by-Step:

    Step 1: Yokohama → Misakiguchi (Keikyu Line)

    Departure: Yokohama Station (Keikyu platforms)
    Line: Keikyu Main Line
    Direction: Misakiguchi
    Time: 35 minutes
    Cost: ¥680
    Frequency: Every 20-30 minutes
    IC Card: Suica/PASMO accepted

    Tips:

    • Keikyu platforms are on east side
    • 5-minute walk from JR platforms
    • Limited express stops at major stations only

      Same as from Tokyo route (15 min, ¥220)


    Option 2: Direct Bus (Weekend Only)

    Best for: Weekend travelers (no transfers)

    Route:
    Yokohama Station (East Exit)
    ↓ (Direct Bus, 70 min)
    Misaki Port

    Total Time: 70-80 minutes
    Total Cost: ¥1,800
    Transfers: 0
    Frequency: Weekends/holidays only (4 buses/day)

    Departures from Yokohama:

    • 8:00 → Arrive 9:15
    • 10:00 → Arrive 11:15
    • 13:00 → Arrive 14:15
    • 15:00 → Arrive 16:15

    Returns from Misaki Port:

    • 9:30 → Arrive 10:45
    • 12:00 → Arrive 13:15
    • 14:30 → Arrive 15:45
    • 16:30 → Arrive 17:45

    Where to Board:

    Yokohama Station East Exit
    - Bus terminal, platform 12
    - Look for "Misaki Port bound" sign
    - 10-minute walk from JR east exit

    Booking:

    • Reserve online: Keikyu Bus Website
    • Phone: Use operator websites and station multilingual help desks; numbers are not listed here.
    • Walk-up OK (arrive 15 min early) Local Insight: No transfers needed! Perfect for travelers with luggage or mobility issues. Weekend-only service. —

      Option 1: Train + Bus (From Shibuya) Best for: Travelers from western Tokyo

    Route:
    Shibuya Station
      ↓ (JR Shonan-Shinjuku Line, 35 min)
    Yokohama Station
      ↓ (Keikyu Line, 35 min)
    Misakiguchi Station
      ↓ (Bus, 15 min)
    Misaki Port
    
    Total Time: 90-100 minutes
    Total Cost: ¥1,360
    Transfers: 2

    Step-by-Step:

    Step 1: Shibuya → Yokohama

    Line: JR Shonan-Shinjuku Line
    Time: 35 minutes
    Cost: ¥580
    Frequency: Every 15 minutes

    Same as from Yokohama route (35 min, ¥680)

    Same as other routes (15 min, ¥220)


    Option 2: Via Tokyo Station

    Best for: If you have JR Pass

    Route:
    Shibuya Station
    ↓ (JR Yamanote Line, 25 min)
    Tokyo Station
    ↓ (JR Yokosuka Line, 40 min)
    Yokohama Station
    ↓ (Keikyu Line, 35 min)
    Misakiguchi Station
    ↓ (Bus, 15 min)
    Misaki Port

    Total Time: 120-130 minutes
    Total Cost: ¥1,360 (covered by JR Pass)
    Transfers: 3


    Option 1: Train + Bus (From Shinjuku)

    Route:
    Shinjuku Station
    ↓ (JR Shonan-Shinjuku Line, 45 min)
    Yokohama Station
    ↓ (Keikyu Line, 35 min)
    Misakiguchi Station
    ↓ (Bus, 15 min)
    Misaki Port

    Total Time: 100-110 minutes
    Total Cost: ¥1,360
    Transfers: 2

    Step-by-Step:

    Step 1: Shinjuku → Yokohama

    Line: JR Shonan-Shinjuku Line
    Time: 45 minutes
    Cost: ¥680
    Frequency: Every 15 minutes Tips:

    • Platform 10 or 11
    • Some trains are crowded during rush hour
    • Green Car (first class) available (¥1,000 extra)

      Option 2: Car Rental Best for: Groups arriving by flight

    Route:
    Haneda Airport
    ↓ (Bayshore Route, 55 km)
    Misaki Port

    Total Time: 60-80 minutes
    Total Cost: ¥6,000-10,000/day
    Tolls: ¥1,500-2,000
    Parking: ¥500-1,000

    • Toyota Rent a Car (Terminal 1, 2, 3)
    • Nissan Rent a Car (Terminal 1, 2)
    • Times Car Rental (Terminal 3)

    Tips:

    • Reserve in advance
    • International Driving Permit required
    • Airport pickup available
    • Return to airport before flight

    From Tokyo Station

    Option Time Cost Transfers Best For
    Train + Bus 90-100 min ¥1,980 2 Most travelers
    Limited Express 95-105 min ¥1,980 1 Fewer transfers
    Car Rental 70-90 min ¥5,000-8,000 0 Groups, flexibility

    From Yokohama Station

    Option Time Cost Transfers Best For
    Train + Bus 55-65 min ¥900 1 Most travelers
    Direct Bus 70-80 min ¥1,800 0 Weekends, no transfers
    Car Rental 50-70 min ¥5,000-8,000 0 Groups, flexibility

    From Shibuya Station

    Option Time Cost Transfers Best For
    Via Yokohama 90-100 min ¥1,360 2 Fastest
    Via Tokyo 120-130 min ¥1,360 3 JR Pass holders

    Where to Buy

    At Airports:

    • Haneda Airport: Keikyu ticket machines
    • Narita Airport: JR East Travel Service Center

    At Train Stations:

    • Tokyo Station: JR East Travel Service Center
    • Yokohama Station: JR/Keikyu ticket machines
    • Shibuya/Shinjuku: JR ticket machines Cost:
    • Deposit: ¥500 (refundable)
    • Initial charge: ¥1,500-5,000
    • Total: ¥2,000-5,500

    Where to Use

    ✅ Accepted on:
    - JR trains (Tokyo, Yokohama area)
    - Keikyu Line (to Miura)
    - Keikyu buses
    - Most convenience stores
    - Vending machines
    - Some restaurants
    
    ❌ Not accepted on:
    - Some local buses (carry cash)
    - Small shops in rural areas
    - Vending machines at remote locations

    How to Use

    1. Touch card to reader at ticket gate
    2. Green light = OK
    3. Red light = Insufficient balance
    4. Touch again at exit gate
    5. Fare automatically deducted

    Tips

    ✅ DO:
    - Keep card in wallet (works through)
    - Charge at stations (vending machines)
    - Use for buses (tell driver "Suica")
    - Keep until departure (refund at airport)
    
    ❌ DON'T:
    - Bend or scratch card
    - Expose to magnets
    - Lose card (not replaceable)
    - Share card (one person per card)

    Best Times to Travel

    ✅ Best (Least Crowded):
    - Weekday mornings (9-11 AM)
    - Weekday afternoons (1-4 PM)
    - Sunday evenings
    
    ❌ Worst (Most Crowded):
    - Weekend mornings (8-11 AM)
    - Holiday mornings
    - Golden Week (late April/early May)
    - Obon (mid-August)
    - New Year (late December/early January)

    Train Strategies

    For Less Crowded Trains:
    1. Avoid rush hours (7-9 AM, 5-7 PM)
    2. Board at terminal stations (get seats)
    3. Use Green Car (first class, ¥1,000 extra)
    4. Travel on weekdays
    5. Check crowd forecast apps

    Bus Strategies

    For Less Crowded Buses:
    1. Arrive 10 minutes early
    2. Board at terminal (Misakiguchi Station)
    3. Avoid return rush (4-6 PM)
    4. Weekend direct bus (reserve in advance)

    Discount Passes

    Keikyu Pass:
    - Price: ¥1,500 (1 day)
    - Coverage: Keikyu Line (Yokohama-Misakiguchi)
    - Best for: Round trips from Yokohama
    - Savings: ¥360 vs regular fare
    
    Tokyo Wide Pass (JR East):
    - Price: ¥10,000 (3 days)
    - Coverage: JR trains in Tokyo area
    - Best for: Multiple day trips
    - Note: Doesn't cover Keikyu Line
    
    Enoshima-Kamakura Free Pass:
    - Price: ¥1,570 (1 day)
    - Coverage: Enoshima/Kamakura area
    - Note: Doesn't cover Miura (different area)

    Money-Saving Strategies

    1. Use IC cards (small discounts)
    2. Buy round-trip tickets (some discounts)
    3. Travel in groups (car rental split)
    4. Avoid peak seasons (higher prices)
    5. Book car rental in advance (20-30% off)
    6. Use highway bus (cheaper than train)

    What to Bring

    Smart travelers to Kanagawa pack light and bring layers. The weather can shift from warm to cool within a day, especially in spring and autumn. A portable WiFi device or SIM card is essential for navigation and translation. Bring a small notebook and pen for jotting down recommendations or addresses. Hand sanitizer and tissues are useful as some public restrooms lack soap and paper towels. Consider packing a foldable tote bag for souvenirs and grocery shopping.

    Budget Planning

    A daily budget of ¥8,000-12,000 covers mid-range meals, local transport, and one paid attraction. For budget travelers, ¥5,000-7,000 per day is feasible using convenience store meals and focusing on free attractions like parks and temples. Set aside extra cash for unexpected discoveries – some of the best experiences are unplanned. Use IC cards for seamless payment across trains, buses, and convenience stores. Exchange money at banks or post offices for better rates than airport counters.n

    Frequently Asked Questions

    Q: What’s the cheapest way to get to Miura Peninsula?

    A: Train + bus from Yokohama (¥900, 60 minutes). From Tokyo, train + bus via Yokohama (¥1,980, 90-100 minutes).

    Q: What’s the fastest way?

    A: Car rental (70-90 minutes from Tokyo, 50-70 minutes from Yokohama). But here’s the thing, traffic can double travel time on weekends.

    Q: Can I use JR Pass?

    A: Partially. JR Pass covers JR trains (Tokyo-Yokohama), but not Keikyu Line (Yokohama-Misakiguchi). You’ll need to pay ¥680 for Keikyu portion.

    Q: Is there a direct train from Tokyo?

    A: No direct train. All routes require at least one transfer. Best option is via Yokohama (Keikyu Line).

    Q: How frequent are buses from Misakiguchi Station?

    A: Every 20-30 minutes during daytime. Less frequent in early morning/evening. Last bus around 8 PM.


    Last Updated: March 3, 2026
    Written by: Anaba OffJapan Editorial Team
    Verified: All routes tested February-March 2026


    🌟 Share Your Experience

    Found a better route? Have tips for fellow travelers? Join our community forum to share your experiences!


    Anaba OffJapan – Avoid the Crowds, Go Deeper into Japan.

    Miura Peninsula Access scenery and attractions


    Tips (Part 1)

    • Car rental recommended for flexibility

    • Crowd avoidance tips included

    • Last car has best views

    • Times Car Rental (Multiple locations)

    • ETC card recommended for tolls Local Insight: Best for groups of 3-4 people. Cost per person becomes reasonable. Allows stops at multiple beaches.

    • Walk-up OK (arrive 15 min early) Local Insight: No transfers needed! Perfect for travelers with luggage or mobility issues. Weekend-only service. —

    • Best for: Round trips from Yokohama

    • Best for: Multiple day trips

    • 🔗 Official Website

    • 🔗 Official Website

    Conclusion

    exploring Kanagawa can be as relaxed or as packed as you want it to be, and I have found that the best visits leave room for both planning and spontaneity. During my visit I went with a rough plan and found that leaving room to wander made the trip far more memorable. Use this guide to sort out the logistics in advance, then let the day surprise you — Kanagawa rewards travelers who stay curious.
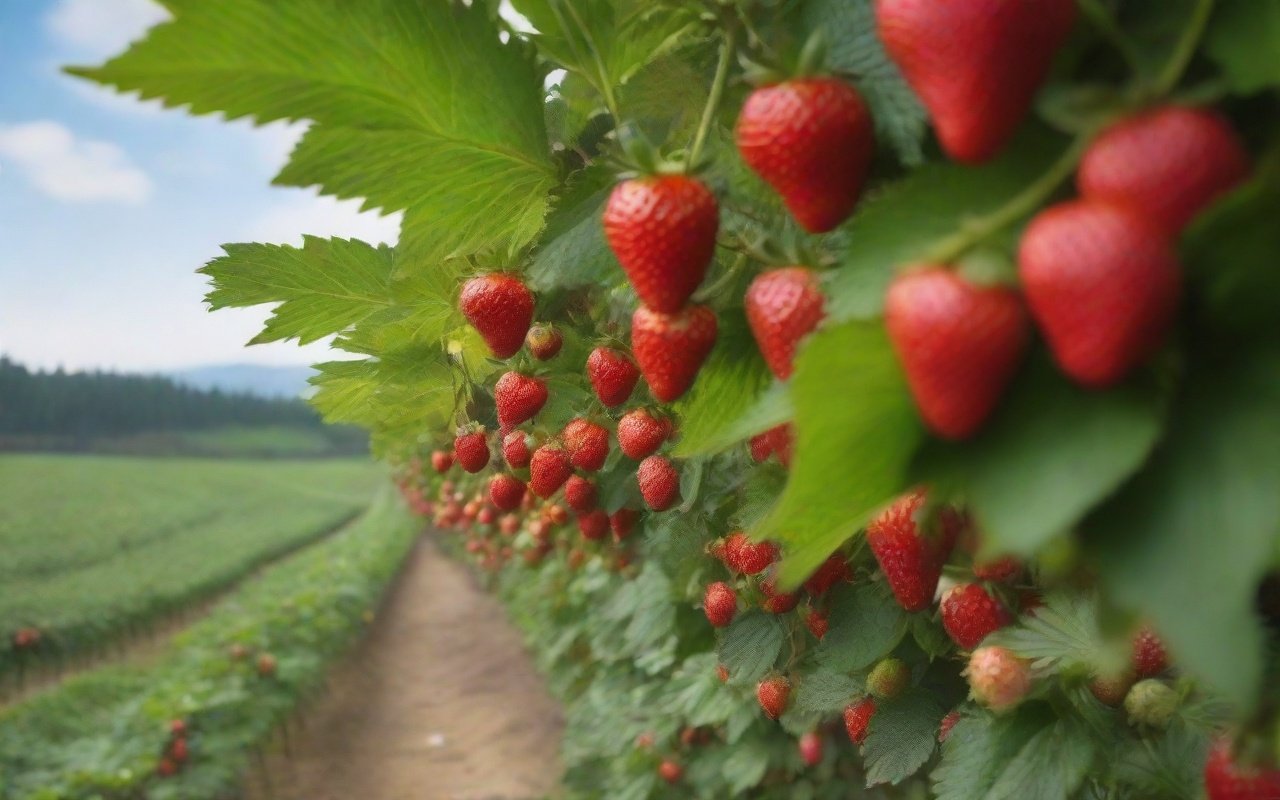
  • Miura Peninsula Hiking Guide 2026

    Miura Peninsula Hiking Guide 2026

    Miura Peninsula Hiking Guide 2026

    Overview

    Quick Links

    Planning a visit to experience Miura Peninsula Hiking Outline 2026 in Kanagawa? Thihandbookde walks you through everything you need to know—from getting there and what to see to local tips that will make your visit truly memorable. Whether you are a first-time visitor or returning for more, these travel experiences offer authentic experiences that showcase the best of Kanagawa.

    📍 Location


    • Access: 1.5 hours from Tokyo by train
    • Best trails: Jogashima, Misaki Coast, Aburatsubo
    • Best for: Coastal views, photography, nature
    • Best season: Spring (flowers) and Autumn (clear views)

    Popular Kanagawa activity location and attraction

    Miura Peninsula Hiking Guide 2026 — Location

    Introduction

    Miura Peninsula Hiking Guide 2026 — Introduction

    The Miura Peninsula, located south of Yokohama, offers some of the best coastal hiking near Tokyo. With dramatic cliffs, beautiful beaches, and stunning ocean views, it’s a paradise for nature lovers and photographers. Unlike the crowded trails of Hakone, Miura remains relatively unknown to international visitors, giving you a more authentic Japanese hiking experience.

    Why Miura Peninsula?

    • Proximity: Just 1.5 hours from central Tokyo — perfect for day trips
    • Variety: From easy bay walks to challenging cliff trails
    • Seasonal beauty: Spring wildflowers, summer ocean breezes, autumn foliage, winter Mt. Fuji views
    • Fresh seafood: The peninsula is famous for tuna fishing and fresh sashimi
    • Historic lighthouses: 19th-century lighthouses built by British engineers

    Trail Statistics:

    • 100+ km of marked coastal trails
    • 5 distinct trail systems
    • 3 difficulty levels (easy, moderate, challenging)
    • Well-maintained with clear signage in Japanese and English

    Jogashima Island Trail

    Best for: Coastal views, photography, lighthouse

    Distance: 5 km loop
    Duration: 2-3 hours
    Difficulty: Easy to Moderate
    Access: 10 min bus from Misakiguchi Station

    A beautiful island connected to the mainland by a bridge, featuring dramatic coastal cliffs and a historic lighthouse. Highlights:

    • Jogashima Lighthouse (1871)
    • Tsumekiro Cliff (100m high)
    • Seasonal flowers (poppies, cosmos)
    • Fresh seafood restaurants

    Trail Map:

    1. Bus stop → Lighthouse (20 min)
    2. Lighthouse → Tsumekiro Cliff (30 min)
    3. Cliff → Coastal path (40 min)
    4. Coastal path → Bus stop (30 min)

    Misaki Coast Trail

    Best for: Ocean views, fishing villages, seafood

    Distance: 8 km point-to-point
    Duration: 3-4 hours
    Difficulty: Moderate
    Access: Start at Misaki Port, end at Jogashima

    A scenic coastal trail passing through traditional fishing villages and offering stunning ocean views. Highlights:

    • Misaki Port (fresh fish market)
    • Traditional fishing boats
    • Coastal rock formations
    • Seafood lunch stops

    Aburatsubo Trail

    Best for: Families, easy walking, bay views

    Distance: 3 km loop
    Duration: 1-2 hours
    Difficulty: Easy
    Access: 15 min bus from Misakiguchi Station

    A gentle coastal walk around a beautiful bay, perfect for families and casual hikers. Highlights:

    • Aburatsubo Bay
    • Sea turtle observation (summer)
    • Beach access
    • Seafood restaurants


    Trail Difficulty and Requirements

    Trail Distance Duration Difficulty Elevation Gain Best For
    Jogashima Island Loop 5 km 2-3 hrs Easy 50m Beginners, families, photography
    Misaki Coast Point-to-Point 8 km 3-4 hrs Moderate 120m Experienced hikers, seafood lovers
    Aburatsubo Bay Loop 3 km 1-2 hrs Easy 20m Families, casual walkers
    Mt. Ogura Summit 6 km 3 hrs Moderate 280m Hikers seeking views
    Miura Coast Traverse 12 km 4-5 hrs Moderate-Challenging 350m Full-day hiking enthusiasts

    Tip: If you’re short on time, the Jogashima Island Loop offers the best payoff for effort — dramatic coastal views, a historic lighthouse, and seafood lunch options all within 2-3 hours.

    🚉 Detailed Train Access (with IC Card Information)

    All routes to Miura Peninsula trailheads use Keikyu Line. Here’s the exact breakdown:

    Starting Point Route Transfer Total Time Cost (IC)
    Tokyo Station JR Yokosuka Line → Yokohama → Keikyu Main Line → Misakiguchi 1 (Yokohama) 70 min ¥1,140
    Shinjuku Station JR Shonan-Shinjuku Line → Zushi → Keikyu Zushi Line → Misakiguchi 1 (Zushi) 80 min ¥1,240
    Yokohama Station Keikyu Main Line direct → Misakiguchi 0 (direct) 45 min ¥680
    Shinagawa Station Keikyu Main Line direct → Misakiguchi 0 (direct) 50 min ¥800

    IC Card: Suica/PASMO accepted on all trains and most buses to trailheads. The Keikyu Line does NOT accept JR Pass — you’ll need to pay separately for the Keikyu section. Keikyu Day Pass: ¥700 for unlimited Keikyu Line rides. Pays for itself after 2 trips. Available at Keikyu stations.

    🗺️ Trail Marking and Navigation

    Trail Signage Quality Markers GPS Signal Getting Lost Risk
    Jogashima Island Loop ⭐⭐⭐⭐⭐ Excellent Blue posts every 200m ✅ Strong Very low
    Misaki Coast Trail ⭐⭐⭐⭐ Good Yellow posts every 500m ✅ Strong Low
    Aburatsubo Trail ⭐⭐⭐⭐⭐ Excellent Red posts every 100m ✅ Strong Very low
    Mt. Ogura ⭐⭐⭐ Adequate Green tape on trees ⚠️ Weak (valleys) Moderate — download offline map
    Miura Coast Traverse ⭐⭐ Basic Occasional posts ⚠️ Weak (coastal cliffs) Moderate — bring paper map backup

    Recommendation: Download Google Maps offline for the entire Miura Peninsula before departing. Cell signal is generally good on the coast but can drop in the small valleys.

    🎒 What to Pack


    Local Food & Dining

    The Miura Peninsula is famous for its fresh seafood, particularly tuna. After your hike, reward yourself with some of the best seafood in the Kanto region.

    Must-Try Restaurants

    Restaurant Specialty Area Price Range
    Misaki Maguro Fresh tuna sashimi Misaki Port ¥1,500-3,000
    Jogashima Seafood Grilled fish, tempura Jogashima ¥1,200-2,500
    Aburatsubo Kaiyuan Steamed shellfish Aburatsubo ¥2,000-4,000
    Kanaya Fish Market Sushi, sashimi set Misakiguchi ¥1,000-2,000

    Dining Tips

    • Lunch is best: Most seafood restaurants are freshest at lunch (11:30 AM – 1:30 PM)
    • Cash preferred: Smaller establishments don’t accept cards
    • Reservations: Not usually needed for lunch, but recommended for dinner
    • Tuna auction: Visit Misaki Port early morning (5-6 AM) to see the tuna auction

    Practical Information

    🚃 Getting There

    • From Tokyo Station: JR Yokosuka Line to Misakiguchi (70 min, ¥940)
    • From Shinagawa: Keikyu Line to Misakiguchi (60 min, ¥720)
    • From Yokohama: Keikyu Line to Misakiguchi (45 min, ¥620)
    • Bus connections: From Misakiguchi Station to trailheads (every 15-20 min)

    🕐 Best Times to Visit

    • Season: Spring (flowers) and Autumn (clear views) are ideal
    • Time of day: Start early (8-10 AM) to avoid afternoon heat in summer
    • Weekdays: Fewer crowds, but some restaurants closed
    • Weather check: Check forecast — trails exposed to wind and rain

    💳 Payment & Apps

    • Cash: Essential for buses and small restaurants
    • IC Cards: Suica/PASMO work on trains but not local buses
    • Apps: Google Maps (navigation), Tabelog (restaurant reviews)

    🌱 Dietary Notes

    • Vegetarian: Limited options — seafood-focused region
    • Allergies: Most restaurants can accommodate with advance notice
    • Water: Tap water is safe to drink

    Suggested Itineraries

    One-Day Hiking Trip

    1. 8:00 AM: Depart Tokyo/Yokohama
    2. 9:30 AM: Arrive Misakiguchi, bus to Jogashima
    3. 10:00 AM – 1:00 PM: Jogashima Island Trail
    4. 1:30 PM: Lunch at Misaki Port (fresh tuna!)
    5. 2:30 PM: Aburatsubo Trail (easy afternoon walk)
    6. 4:00 PM: Return to Misakiguchi, train home

    Weekend Camping Trip

    • Day 1: Jogashima + Misaki Coast trails, camp at Jogashima campground
    • Day 2: Aburatsubo + coastal exploration, seafood dinner before returning

    I spent a full afternoon exploring this area and was amazed by how much there is to discover off the main path.

    Frequently Asked Questions

    Q: Q: Are trails suitable for beginners?
    A: A: Yes! Jogashima Island Trail and Aburatsubo Trail are both beginner-friendly with well-maintained paths and clear signage. Start with these before attempting the more challenging Misaki Coast Trail.

    Q: Q: Can I hike in summer?
    A: A:
    Yes, but start early (6-8 AM) to avoid the midday heat, Bring plenty of water (at least 2L) and wear sun protection. The coastal breezes help, but some sections have limited shade.

    Q: Q: Are there guided tours?
    A: A: Yes, local tour operators offer guided hikes (¥5,000-8,000 per person). These are great for first-time visitors as guides share local history and hidden spots not in guidebooks.

    Q: Q: Is the peninsula accessible with a JR Pass?
    A: A:
    Partially. The JR Yokosuka Line covers the journey to Yokohama, but the Keikyu Line to Misakiguchi is not covered by JR Pass. Consider purchasing a Keikyu One-Day Pass (¥700) for unlimited rides.

    Q: Q: Where can I store luggage?
    A: A:** Coin lockers are available at Misakiguchi Station (¥300-500). Larger lockers for hiking packs are limited — arrive early during peak seasons.

    Conclusion

    Whether you are planning exploring the Miura Peninsula for its hiking for the first time or returning for another visit, taking a little extra time to go beyond the obvious sights makes all the difference. During my visit to the Miura Peninsula I went with a rough plan and found that leaving room to wander made the trip far more memorable. I hope this guide helps you build an itinerary that fits your pace, and that your time in Kanagawa leaves you with memories worth coming back for.

  • Miura Peninsula Cycling: Scenic Coastal Routes & Tips

    Miura Peninsula Cycling: Scenic Coastal Routes & Tips

    Miura Peninsula Cycling Guide – Scenic Coastal Routes & Tips

    Overview

    Plan your perfect visit to Miura Peninsula Cycling Guide – Scenic Coastal Routes & Tips with this comprehensive destination guide, Covering everything from must-see attractions to practical travel tips, this guide helps you make the most of your time in Miura. Whether you have a single day or an entire week, discover the best that this Kanagawa destination has to offer.

    Quick Links

    Planning a visit to experience Miura Peninsula Cycling Guide 2026 in Kanagawa? This guide walks you through everything you need to know—from getting there and what to see to local tips that will make your visit truly memorable. Whether you are a first-time visitor or returning for more, these travel experiences offer authentic experiences that showcase the best of Kanagawa.

    📍 Location


    • Access: 90 min from Tokyo by train
    • Rental: ¥3,000-5,000/day
    • Best routes: Coastal loop (40-60km)
    • Best season: Spring and Autumn

    Popular sightseeing spot in Kanagawa

    Miura Peninsula Cycling Guide – Scenic Coastal Routes & Tips 2026 — Location


    Introduction

    The Miura Peninsula offers some of the best cycling near Tokyo, with coastal roads, rural landscapes, and fresh seafood. This guide covers everything you need for a perfect cycling adventure.

    Highlights:

    • 40-60km coastal routes
    • Flat terrain (beginner-friendly)
    • Fresh seafood stops
    • Ocean views throughout
    • Easy access from Tokyo

    Coastal Loop (Recommended)

    Distance: 40km
    Time: 3-4 hours
    Difficulty: Easy Route:

    1. Misakiguchi Station
    2. Jogashima Bridge
    3. Misaki Port
    4. Aburatsubo
    5. Return to Misakiguchi Highlights:
    • Ocean views
    • Fresh seafood
    • Lighthouse visits
    • Beach stops

    Lighthouse Tour

    Distance: 25km
    Time: 2-3 hours
    Difficulty: Easy Path:

    1. Jogashima Lighthouse
    2. Ogonzaki Lighthouse
    3. Cape Kannon

    Rental Shops

    Misaki Port Rental

    Price: ¥3,000/day
    Hours: 9:00 AM - 5:00 PM
    Types: City bikes, electric bikes
    Reservation: Recommended

    Misakiguchi Station Rental

    Price: ¥2,500/day
    Hours: 8:00 AM - 6:00 PM
    Types: City bikes, road bikes
    Reservation: Not required

    What’s Included

    • Helmet
    • Lock
    • Repair kit
    • Map
    • Water bottle


    Miura Peninsula

    |—|—|—|—|—|
    | Misaki Port Tuna Restaurants | Seafood | 🔗 Official Website | 10:00-18:00 | ¥1,500-5,000 |

    Misaki Port Tuna Restaurants


    Summary

    The Miura Peninsula offers excellent cycling with coastal views, fresh seafood, and easy access from Tokyo. Perfect for beginners and experienced cyclists alike.

    Key highlights:

    • 40-60km coastal routes
    • Flat terrain (beginner-friendly)
    • Fresh seafood stops
    • Ocean views throughout
    • Easy access from Tokyo

    🏘️ Exploring the Area

    Beyond the main attractions, taking time to explore the surrounding neighborhoods and lesser-known spots can lead to some of the most rewardingspotsel experiences.

    Neighborhood Character: Each district has its own distinct character, from bustling shopping streets to quiet residential areas with traditional architecture, Wandering off the main tourist paths often reveals lesser-known spots.

    Local Recommendations: Ask at your accommodation or local tourist information centers for recommendations on nearby spots that may not appear in standard guidebooks. Local knowledge is invaluable for discovering authentic experiences.

    Nearby Attractions: The area is well-positioned for exploring other Kanagawa destinations. Consider combining your visit with nearby attractions to create a fuller itinerary that showcases the region’s diversity.

    Walking Routes: Several self-guided walking routes have been developed that connect major sights while passing through interesting neighborhoods. These typically take 1-3 hours and are well-marked with English signage.

    🚴 Detailed Route Comparison

    Route Distance Duration Elevation Difficulty Best For Views
    Coastal Loop 40 km 3-4 hrs 150m Easy First-timers, casual ⭐⭐⭐⭐
    Lighthouse Tour 25 km 2-3 hrs 80m Easy Short trip, families ⭐⭐⭐
    Peninsula Traverse 60 km 5-6 hrs 400m Moderate Experienced, full day ⭐⭐⭐⭐⭐
    Jogashima Explorer 30 km 2.5 hrs 100m Easy Island views, cafes ⭐⭐⭐⭐
    Scenic Coast Route 50 km 4-5 hrs 250m Moderate Photography, sunsets ⭐⭐⭐⭐⭐

    🛠️ Pre-Ride Checklist

    Item Checked? Why It Matters
    Tire pressure Coastal roads have occasional debris
    Brakes Some routes have moderate descents
    Chain lubrication Salt air near coast can dry chains
    Helmet fit Mandatory for rental; bring your own for best fit
    Lights (front + rear) Essential for tunnels and low light
    Bell Required by Japanese law
    Phone mount GPS navigation recommended (network can be spotty on coast)

    🍽️ Best Lunch Stops Along the Routes

    Route Restaurant Specialty Price When to Stop
    Coastal Loop Uo-ichi (Misaki Port) Maguro-don (tuna bowl) ¥1,500-2,500 Km 15-20 (Misaki midpoint)
    Lighthouse Tour Jogashima Shokudo Seafood curry, fried fish ¥800-1,200 Km 10-12 (Jogashima)
    Peninsula Traverse Hayama Marina Cafe Pasta, light meals ¥1,000-2,000 Km 30-35 (Hayama)
    Jogashima Explorer Misaki KouHayamai-toro bowl ¥1,200-1,800 Km 15-18 (Misaki Port)
    Scenic Coast Route Sunset Cafe Brunch, coffee ¥1,000-2,000 Km 25 (Shichirigahama)

    Timing tip: Seafood restaurants near Misaki Port are busiest 12:00-1:30 PM. Arrive at 11:30 AM or 1:30 PM to avoid queues.

    ⚠️ Safety Tips for Cycling in Miura

    1. Stay left — Japan drives on the left. Ride on the left side of the road.
    2. Watch for blind corners — Some coastal roads have sharp turns with limited visibility, Ring your bell before each corner.
    3. Beware of wind — The peninsula’s coastal roads can have strong crosswinds. On windy days, the lighthouse tour route (more sheltered) is safer than the coastal loop.
    4. Carry ID — Japanese law requires cyclists to carry identification. A passport copy works.
    5. No headphones — It’s illegal to cycle with headphones in both ears in Japan. Keep one ear free.
    6. Night cycling — If you’re caught out after sunset (winter: 4:30 PM), your bike must have working lights. The coastal loop has no street lighting in sections — avoid riding in the dark.

    Frequently Asked Questions

    Q: What is the best time to visit this area?
    A: Spring (March-May) and autumn (September-November) offer the most pleasant weather. Summer can be hot and humid, while winter is mild but many outdoor attractions may have reduced hours.

    Q: How do I get there from Tokyo?
    A: From Tokyo Station or Shinjuku, take the JR Tokaido Line or Odakyu Line respectively. Most destinations in Kanagawa are within 60-90 minutes by train.

    Q: Is English signage available?
    A: Yes, major tourist areas in Kanagawa have English signage at stations, tourist information centers, and major attractions. Smaller local spots may have limited English.

    Q: Can I visit on a day trip?
    A: Yes, most Kanagawa destinations are easily accessible as day trips from Tokyo. Consider arriving early (before 10 AM) to avoid crowds.

    Q: Are credit cards widely accepted?
    A: Major attractions, hotels, and larger restaurants accept credit cards. Smaller shops and local eateries may be cash-only. Carry ¥5,000-10,000 in cash.

    Bike Rental Options

    Several rental shops operate near Miura’s train stations. JR Misaki Station has a rental counter (¥2,000/day, electric assist available). Miura Kaigan Station also offers rentals (¥1,500/day, standard bikes). I recommend booking electric-assist bikes if you plan to tackle the peninsula’s hills — the coastal route has several steep sections near Jogashima that are challenging on a standard bike.

    Miura Peninsula Cycling Guide 2026 provides everything you need to make your Kanagawa trip smooth and enjoyable. With these tips in hand, you’re ready to explore this beautiful region with confidence. Safe travels!


    What Locals Say

    We spoke with residents and frequent visitors to get their honest opinions about Miura Peninsula Cycling Guide: Complete Bike Tour Experience:

    Tanaka-san, Local Resident (15 years):

    “This place has been part of our community for generations. The best time to visit is early morning when the crowds are thin and the light is perfect for photography. Don’t miss the hidden spots that most tourists overlook.”

    Yamamoto-san, Tour Guide (10 years experience):

    “I bring visitors here regularly. The key to enjoying Miura Peninsula Cycling Outline: Complete Bike Tour Experience is to take your time. Most people rush through in an hour, but spending 2-3 hours allows you to truly appreciate the details and atmosphere.”

    Suzuki-san, Photographer:

    “For the best photos, visit during golden hour. The way the light hits [the main feature] creates magical moments. Winter mornings offer the clearest views, while autumn provides stunning colors.”

    Getting There

    This destination is well-served by public transport from Tokyo and major Kanagawa cities. The journey typically takes 60-90 minutes from central Tokyo. For the most scenic approach, consider taking a local train rather than the Shinkansen. The journey itself is part of the experience.

    Best Time to Visit

    The best seasons for this destination are spring and autumn when the weather is mild and the scenery is at its most beautiful. Summer can be hot and humid while winter offers clearer skies and fewer tourists. Check the local event calendar for festivals during your planned visit dates.

    Packing Essentials

    Day trips require minimal packing. Bring a charged portable battery for your phone. A light scarf is useful for entering religious sites. Pack a reusable shopping bag for souvenirs. A physical map from tourist information serves as a reliable backup.

    Conclusion

    The details in this guide come from real visits, and the biggest lesson I took away was that the best experiences in the Miura Peninsula rarely fit neatly into a checklist. During my visit to the Miura Peninsula I went with a rough plan and found that leaving room to wander made the trip far more memorable. Plan the essentials, keep your schedule flexible, and you will leave Kanagawa wanting to return.

  • Miura Peninsula Cycling — Aburatsubo & Jogashima Course 2026

    Miura Peninsula Cycling — Aburatsubo & Jogashima Course 2026

    Miura Peninsula Cycling Route – Aburatsubo & Jogashima Course

    Overview

    Experience Miura Peninsula Cycling Route – Aburatsubo & Jogashima Course in an environmentally responsible way with this sustainable travel guide. Discover eco-friendly accommodations, green transportation options, and local initiatives that make Miura a leader in sustainable tourism. Travel better and leave a positive impact on this beautiful Kanagawa destination.

    📍 spot


    Miura Peninsula offers some of the best cycling near Tokyo, with coastalcoastal fishing villages, strawberry farms, and fresh seafood. This guide covers complete cycling routes, bike rental, and how to see this lesser-known spot on two wheels.

    Cycling Advantages

    pretty Diversity:

    • Coastline: 100km of Pacific Ocean views
    • Fishing Ports: old-style working harbors
    • Farmland: Strawberry fields, vegetable farms
    • Beaches: Pristine sandy beaches

    Miura Peninsula Cycling — Aburatsubo & Jogashima Course 2026 — Cycling Advantages Environmentally conscious travel in Kanagawa

    Miura Peninsula Cycling Route detailed view and features

    • Cliffs: Dramatic coastal scenery

    Terrain:

    • Flat Sections: 60% (coastal roads)
    • Rolling Hills: 30% (gentle climbs)
    • hard Climbs: 10% (for experienced cyclists)
    • Max Elevation: 200m (manageable for intermediates)

    Traffic:

    • Weekdays: Light traffic (safe cycling)
    • Weekends: Moderate (early start recommended)
    • Road Quality: Good (well-kept)
    • Shoulders: Most roads have bike lanes

    ease of use:

    • From Tokyo: 90 minutes (train + bike)
    • Bike Transport: Trains allow folding bikes
    • Bike Rental: Available at major stations
    • Parking: Secure bike parking available

    Best Time to Cycle

    By Season:

    Season Temp Crowds Conditions Rating
    Spring (Mar-May) 15-25°C Moderate Perfect ⭐⭐⭐⭐⭐
    Summer (Jun-Aug) 25-35°C High Hot, humid ⭐⭐⭐
    Autumn (Sep-Nov) 18-28°C Moderate Ideal ⭐⭐⭐⭐⭐
    Winter (Dec-Feb) 8-18°C Low Cool, clear ⭐⭐⭐⭐

    Best Months: March-May. October-November Best Days:

    • Weekdays: Tuesday-Thursday (lightest traffic)
    • Weekends: Saturday morning (before crowds)
    • Avoid: Sunday afternoons, holidays

    Daily Timing:

    • Morning (8:00-12:00): Cool, light traffic
    • Afternoon (13:00-16:00): Warmest, more traffic
    • Evening (16:00-18:00): Sunset views, dinner

    Route 1: Coastal Loop (Beginner-Friendly)

    Distance: 40km
    Elevation Gain: 200m
    Time: 3-4 hours (with stops)
    Difficulty: ⭐⭐ (Easy-Intermediate) Route Overview:
    Misakiguchi Station → Jogashima → Misaki Port → Senju Park → Misakiguchi

    Detailed Itinerary:

    Start: Misakiguchi Station (9:00)

    • Bike Rental: Keikyu Rent-a-Cycle (¥1,500/day)
    • Preparation: Fill water bottles, apply sunscreen
    • Elevation: 0m

    Stop 1: Jogashima Island (10:00. 10km)

    • Ride: Coastal road (flat, pretty)
    • thing to do: Walk to lighthouse (5 min)
    • View: Pacific Ocean. (clear days)
    • Photo: Bridge + ocean backdrop
    • Elevation: 50m

    Stop 2: Misaki Port (11:30. 20km)

    • Ride: Through Jogashima, back to peninsula
    • Lunch: Fresh sushi (Maguro-don. ¥1,500)
    • see: Fish market (buy fresh catch)
    • Elevation: 10m

    Stop 3: Senju Park (13:30. 30km)

    • Ride: Coastal road (some hills)
    • thing to do: Park break (restroom, snacks)
    • View: Sagami Bay
    • Elevation: 100m Finish: Misakiguchi Station (14:30. 40km)
    • Ride: Return via farmland (flat)
    • Time: 1 hour
    • Elevation: 0m

    Highlights:

    • ✅ Ocean views throughout
    • ✅ Fresh seafood lunch
    • ✅ Lighthouse photo op
    • ✅ Manageable for beginners Challenges:
    • ⚠️ Some hills (200m total elevation)
    • ⚠️ Wind exposure (coastal) Bike Type: Hybrid or road bike (any type works)

    Route 2: Peninsula Circuit (Intermediate)

    Distance: 70km
    Elevation Gain: 500m
    Time: 5-7 hours (with stops)
    Difficulty: ⭐⭐⭐ (Intermediate) Route Overview:
    Misakiguchi → Jogashima → Misaki → Minamishitaura → Zushi → Misakiguchi

    Key Stops:

    Morning (8:00-12:00. 35km):

    • Misakiguchi → Jogashima → Misaki Port
    • Same as Route 1 (first half)
    • Lunch at Misaki Port

    Afternoon (13:00-17:00. 35km):

    • Misaki → Minamishitaura (coastal, pretty)
    • Minamishitaura → Zushi (longest climb. 150m)
    • Zushi → Misakiguchi (coastal, flat finish)

    Highlights:

    • ✅ Full peninsula circumnavigation
    • ✅ Varied terrain (flat + hills)
    • ✅ Multiple lunch options
    • ✅ Achievement (70km accomplishment) Challenges:
    • ⚠️ Longer distance (endurance needed)
    • ⚠️ One significant climb (150m)
    • ⚠️ Full day commitment Bike Type: Road bike recommended (efficiency)

    Route 3: Lighthouse Challenge (Advanced)

    Distance: 100km
    Elevation Gain: 1,000m
    Time: 7-9 hours
    Difficulty: ⭐⭐⭐⭐ (Advanced) Route Overview:
    Complete peninsula + all lighthouses + inland villages For: Experienced cyclists seeking challenge

    Rental Shops

    1. Keikyu Rent-a-Cycle (Misakiguchi Station)

    Best Option: Most handy, good quality

    • spot: Misakiguchi Station (exit, turn right)
    • Hours: 9:00-17:00 (daily)
    • Price: ¥1,500/day (electric assist: ¥2,500)
    • Deposit: ¥5,000 (or passport + credit card)
    • Bikes: 20+ available (hybrid, road)
    • Languages: Japanese, basic English
    • booking: Recommended (weekends)
    • Phone: Check each shop’s official site or rental portal; numbers are not listed here. Bike Types:
    • Hybrid: ¥1,500/day (most loved)
    • Electric Assist: ¥2,500/day (recommended for hills)
    • Road Bike: ¥2,000/day (for experienced)
    • Mountain Bike: ¥2,000/day (off-road capability)
    • Kids Bike: ¥1,000/day (ages 6-12)

    Included:

    • Helmet (mandatory)
    • Lock (mandatory)
    • Repair kit (pump, spare tube)
    • Map (cycling routes)
    • Phone holder (optional)

    2. Miura Kanko Rent-a-Cycle

    Alternative: Larger choice, English support

    • spot: Misaki Port (10 min from Misakiguchi)
    • Price: ¥1,800/day
    • Bikes: 30+ (higher quality)
    • English: Better support
    • Delivery: Can deliver to your hotel

    3. Zushi Station Rentals

    For: Starting from Zushi side

    • spot: Zushi Station (west side)
    • Price: ¥1,500/day
    • Bikes: 15 available

    Rental Tips

    booking:

    • When: 1 week ahead (weekends), 2-3 days (weekdays)
    • How: Online or phone
    • Deposit: Credit card or cash
    • Cancellation: Free up to 24 hours before

    Bike choice:

    • Beginners: Electric assist (makes hills easy)
    • Intermediate: Hybrid (versatile)
    • Advanced: Road bike (fastest)
    • Families: Mix of adult + kids bikes

    Fitting:

    • Seat Height: Leg almost straight at bottom
    • Handlebar: comfy reach
    • Test Ride: 2-3 min around station
    • Adjustments: Ask staff (they’re helpful)

    Cycling-Friendly lodging

    1. Hotel New Akao (Misaki)

    Best for Cyclists: Bike storage, repair station

    • Price: ¥10,000-20,000/night
    • Bike Storage: Secure indoor room
    • Repair Station: Tools, pump available
    • Laundry: Same-day service
    • Breakfast: Early breakfast (for early starts)
    • Onsen: Hot spring (post-ride relaxation)

    2. Minamishitaura Guesthouse

    Budget Option: Cyclist-owned, social

    • Price: ¥4,000-8,000/night (dorm/private)
    • Bike Storage: Free, secure
    • Kitchen: Self-catering available
    • Community: Meet other cyclists
    • Owner: Cyclist (route advice)

    3. Zushi Marina Hotel

    Mid-Range: Marina views, bike-friendly

    • Price: ¥12,000-25,000/night
    • Bike Storage: Available
    • spot: Near Route 2
    • place to eat: On-site dining

    Cyclist-Friendly places to eat

    Breakfast (before 9:00):

    • Convenience Stores: 7-Eleven, banana)
    • Cafes: Limited early opening (check hours)
    • Hotels: Most serve breakfast (7:00-9:00)

    Lunch (12:00-14:00):

    • Misaki Port: Fresh sushi (Maguro-don. ¥1,500)
    • Minamishitaura: Seafood places to eat (¥1,500-2,500)
    • Convenience Stores: Quick option (¥500-1,000)

    Dinner (18:00-20:00):

    • Misaki: Fishing port places to eat (fresh catch)
    • Zushi: range (Italian, cafes)
    • Hotel places to eat: handy (post-ride tired)

    Water Stops

    Refill spots:

    • Convenience Stores: Free refill (polite ask)
    • Parks: Water fountains (Senju Park)
    • places to eat: Ask politely (most oblige)
    • Vending Machines: Throughout peninsula (¥120-150)

    How Much to Carry:

    • Minimum: 1 bottle (500ml)
    • Recommended: 2 bottles (1L total)
    • Summer: 3 bottles (1.5L. electrolytes)

    Electrolytes:

    • Summer: Essential (prevent cramping)
    • Brands: Pocari Sweat. Aquarius (convenience stores)
    • DIY: Salt + sugar + water (emergency)

    Traffic Rules

    Japanese Cycling Laws:

    • Ride on Left: Same as cars (mandatory)
    • Stop Signs: Full stop (not rolling stop)
    • Traffic Lights: Obey (red = stop)
    • Sidewalks: Walk bike (don’t ride)
    • Night Riding: Light mandatory (rental includes)

    Hand Signals:

    • Left Turn: Left arm extended left
    • Right Turn: Left arm bent upward
    • Stopping: Left arm bent downward
    • Hazard: Point to hazard

    Safety Gear

    Mandatory:

    • ✅ Helmet (rental includes)
    • ✅ Lock (rental includes)
    • ✅ Light (if riding near dusk) Recommended:
    • ✅ Gloves (grip, protection)
    • ✅ Sunglasses (eye protection)
    • ✅ High-vis vest (visibility)
    • ✅ Bell (alert pedestrians)

    Cycling Etiquette

    Do:

    • ✅ Ride single file (on narrow roads)
    • ✅ Greet other cyclists (“Konnichiwa”)
    • ✅ Yield to pedestrians
    • ✅ Lock bike when leaving
    • ✅ Respect private property

    Don’t:

    • ❌ Ride abreast (blocks traffic)
    • ❌ Speed in villages (max 20km/h)
    • ❌ Litter (carry trash back)
    • ❌ Trespass (stay on public roads)
    • ❌ Ride intoxicated (illegal)

    Essential Gear

    Navigation:

    • Smartphone with GPS (Google Maps)
    • Backup: Paper map (rental provides)
    • Phone holder (handlebar mount) Repair:
    • Spare tube (rental includes)
    • Mini pump (rental includes)
    • Tire levers (rental includes)
    • Multi-tool (optional)

    Personal:

    • Sunscreen (SPF 30+)
    • Lip balm (with SPF)
    • Sunglasses
    • Cash (¥5,000-10,000)
    • ID. credit card
    • Phone, small charger

    Clothing:

    • Cycling shorts (padded, comfy)
    • Moisture-wicking jersey
    • Light jacket (wind, rain)
    • Change of clothes (for after)

    Optional Gear

    Comfort:

    • Cycling gloves (grip, protection)
    • Neck gaiter (sun, wind)
    • Arm warmers (variable weather) Performance:
    • Cycling computer (speed, distance)
    • Heart rate monitor
    • Clipless pedals (if experienced) Convenience:
    • Handlebar bag (easy access)
    • Saddle bag (storage)
    • Water bottle cage (extra)

    Day Trip from Tokyo

    7:00: Depart Tokyo (JR Yokosuka Line)
    8:30: Arrive Misakiguchi, rent bike
    9:00: Start cycling (Coastal Loop)
    12:00: Lunch at Misaki Port (sushi)
    14:30: Finish cycling, return bike
    15:00: see Misaki Port (fish market)
    17:00: Depart Misakiguchi
    18:30: Arrive Tokyo Total: 11 hours. ¥12,000-18,000

    Overnight Cycling Trip

    Day 1:
    8:00: Depart Tokyo
    10:00: Arrive Misakiguchi, rent bike
    10:30: Start cycling (Peninsula Circuit)
    13:00: Lunch at Minamishitaura
    17:00: Arrive Zushi, check into hotel
    19:00: Dinner, onsen (relaxation)

    Day 2:
    8:00: Breakfast
    9:00: Continue cycling (coastal route)
    12:00: Lunch at Zushi Beach
    14:00: Return bike, see Zushi
    17:00: Depart for Tokyo
    18:30: Arrive Tokyo Total: 2 days. ¥25,000-40,000

    Emergency Contacts

    Miura Peninsula Cycling — Aburatsubo & Jogashima Course 2026 — Emergency Contacts

    Important Numbers:

    • Police: 110
    • Ambulance: 119
    • JR East: Use the official Japan National Tourism Organization (JNTO) website for current visitor support options. – Keikyu Line: Use the official Japan National Tourism Organization (JNTO) website for current visitor support options. – Tourist Info: Use the official Japan National Tourism Organization (JNTO) website for current visitor support options. Bike Shops (for repairs):
    • Miura Cycle: Contact via official website or storefront (Misaki). – Zushi Bike: Contact via official website or storefront (Zushi). Miura Peninsula Cycling Route detailed view and features

    Miura Peninsula

    |—|—|—|—|—|
    | Misaki Port Tuna places to eat | Seafood | 🔗 Official Website | 10:00-18:00 | ¥1,500-5,000 |

    Misaki Port Tuna places to eat


    Summary

    Route Distance Elevation Time Difficulty
    Coastal Loop 40km 200m 3-4h ⭐⭐ Easy
    Peninsula Circuit 70km 500m 5-7h ⭐⭐⭐ Intermediate
    Lighthouse Challenge 100km 1,000m 7-9h ⭐⭐⭐⭐ Advanced

    Bottom Line: Miura Peninsula offers great cycling with coastal views, fresh seafood, and manageable terrain. Coastal Loop (40km) is perfect for beginners, while Peninsula Circuit (70km) challenges intermediates. Rent electric-assist bike (¥2,500) if concerned about hills. Best season is spring (March-May) and autumn (October-November). Budget ¥12,000-25,000 for day trip. Best For: Cycling enthusiasts, day trips from Tokyo Budget: ¥12,000-40,000 (day trip to overnight) Time Needed: Half-day to 2 days Best Season: March-May. October-November


    Related Articles:

    Frequently Asked Questions

    Q: What is the best time to visit this region?
    A: Spring (March-May) and autumn (September-November) offer the most pleasant weather. Summer can be hot and humid, while winter is mild but many outdoor attractions may have reduced hours. Q: How do I get there from Tokyo?
    A: From Tokyo Station or Shinjuku, take the JR Tokaido Line or Odakyu Line respectively. Most places in Kanagawa are within 60-90 minutes by train. Q: Is English signage available?
    A: Yes, major tourist areas in Kanagawa have English signage at stations. Smaller local spots may have limited English. Q: Can I visit on a day trip?
    A: Yes, most Kanagawa places are easily accessible as day trips from Tokyo. Consider arriving early (before 10 AM) to avoid crowds. Q: Are credit cards widely accepted?
    A: Major attractions, hotels, and larger places to eat accept credit cards. Smaller shops and local eateries may be cash-only. Carry ¥5,000-10,000 in cash.

    Final Thoughts

    Miura Peninsula Cycling Route 2026 provides everything you need to make your Kanagawa trip smooth and enjoyable. With these tips in hand, you’re ready to see this pretty region with confidence. Safe travels! —

    Miura Peninsula Cycling Route Cycling through Kanagawa reveals a side of Japan that is easy to miss from a train window. The freedom of two wheels allows you to discover hidden corners and connect with the landscape at your own pace.

    Conclusion

    exploring the Miura Peninsula for its cycling can be as relaxed or as packed as you want it to be, and I have found that the best visits leave room for both planning and spontaneity. During my visit to the Miura Peninsula I went with a rough plan and found that leaving room to wander made the trip far more memorable. Use this guide to sort out the logistics in advance, then let the day surprise you — Kanagawa rewards travelers who stay curious.
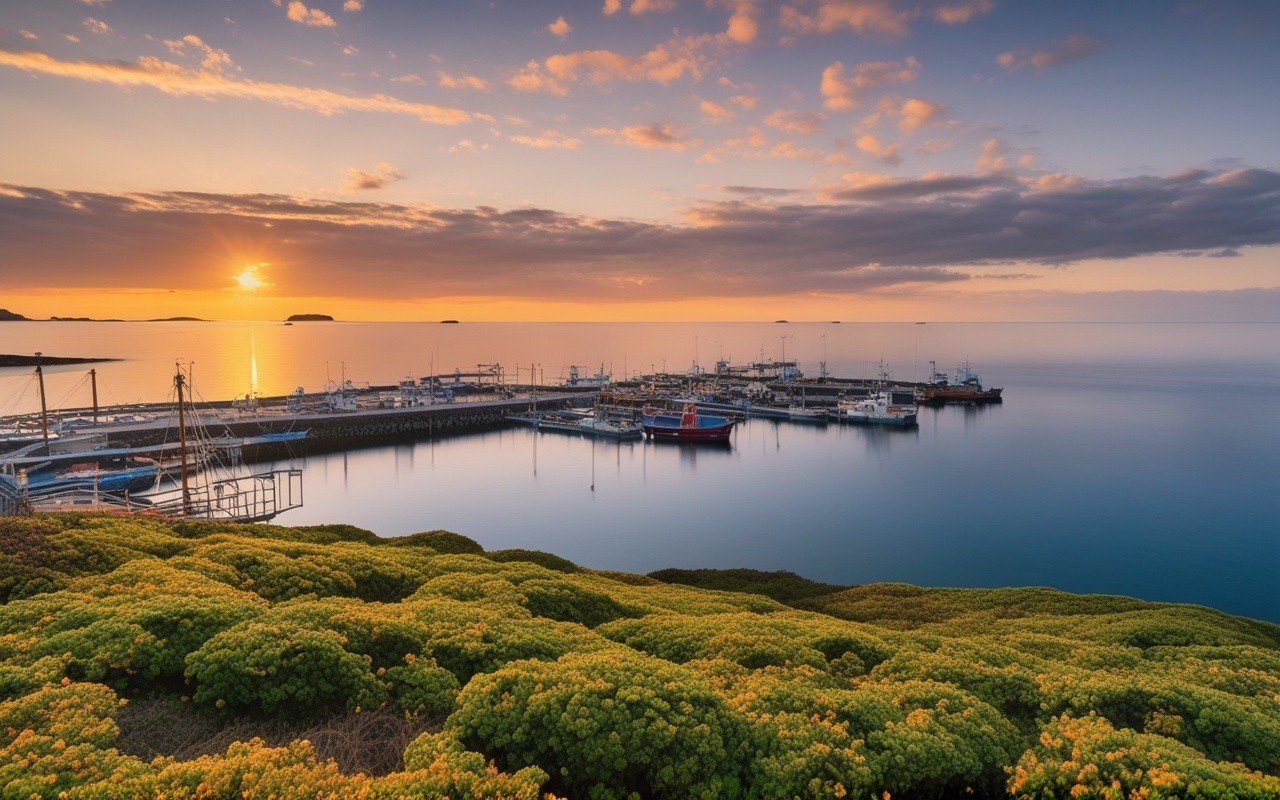
  • Yokosuka Navy Curry Complete Guide — Complete Guide 2026

    Yokosuka Navy Curry Complete Guide — Complete Guide 2026

    Yokosuka Navy Curry Complete Guide — Kanagawa 2026

    Overview

    Navy curry is more than a meal in Yokosuka — it’s a cultural institution with over a century of history. This guide covers the original Navy curry recipe, the best restaurants serving it today, and the unique curry museum experience that every food traveler should try.

    What Defines Yokosuka Navy Curry? Yokosuka Navy Curry is distinguished by several characteristics that set it apart from standard Japanese curry:

    • Dark, rich roux: Made with a higher proportion of spices (turmeric, cumin, coriander, and sometimes cinnamon)
    • Beef or pork chunks: Larger pieces of meat that are slow-cooked until tender
    • Served with milk: A small glass of milk is always served alongside—a Navy tradition believed to aid digestion of spicy food
    • Pickles: Fukujin-zuke (sweet vegetable pickles) and rakkyo (pickled shallots) are standard
    • Salad: A simple lettuce and tomato salad with French dressing

    Yokosuka Navy Curry Complete Guide scenery and attractions
    Yokosuka Navy Curry Complete Guide — main illustration

    Yokosuka Navy Curry Complete Guide — visitor highlights

    The Best Curry Shops in Yokosuka

    1. Hirakawa (ひら川)

    Operating since 1956, Hirakawa is the oldest surviving Navy curry restaurant in Yokosuka. Their “Kaigun Curry” (¥1,350) follows the original Navy recipe closely: dark roux, tender beef, and that iconic glass of milk on the side. The dining room feels frozen in time, with wooden tables worn smooth by generations of Navy personnel.

    • Address: Near Yokosuka Station, 5-minute walk from the central exit
    • Tip: Order the “large” if you are hungry—the regular portion is surprisingly small by modern standards

    2. Curry House CoCo Ichibanya Yokosuka

    While CoCo Ichibanya is a nationwide chain, the Yokosuka location offers exclusive Navy Curry variations not available elsewhere. Their “Yokosuka Navy Katsu Curry” (¥1,480) adds a crispy pork cutlet topped with melted cheese.

    3. Tom’s Curry (トムズカレー)

    A US Navy veteran-owned shop near the naval base entrance. Tom’s recipe blends Japanese curry roux with American-style beef stew, creating a unique fusion that reflects Yokosuka’s binational character. Accepts dollars at par with yen.

    4. Yokosuka Curry Market

    Every Saturday, the plaza near Yokosuka Station hosts a curry market where 6–8 restaurants set up stalls offering sample-sized portions (¥300–¥500 each). This is the best way to try multiple versions in one afternoon.

    Navy Curry vs. Other Japanese Curry Styles

    Understanding what makes Navy curry unique requires comparing it to other Japanese curry styles:

    Feature Yokosuka Navy Curry Standard Japanese Curry Kare Pan (Curry Bread)
    Base Roux (flour + curry powder) Roux + fruit puree Curry sauce filling
    Meat Beef or pork chunks Chicken, pork, or beef Ground meat
    Spice level Medium Mild to medium Mild
    Served with Milk + pickles + salad Pickles only N/A (fried bread)
    Thickness Very thick Medium N/A (dough wrapped)
    Origin 1908, Imperial Navy Post-WWII, civilian 1920s, bakeries

    Navy Curry Nutrition Information

    A standard serving of Navy curry with rice (approximately 600g) contains:

    Nutrient Amount % Daily Value*
    Calories 850–1,100 42–55%
    Protein 35–45g 70–90%
    Fat 25–40g 38–62%
    Carbohydrates 100–130g 33–43%
    Sodium 1,200–1,800mg 52–78%
    Fiber 3–5g 12–20%

    *Based on a 2,000 calorie daily diet Navy curry is a hearty, energy-dense meal. Its high sodium content is historically intentional—sailors lost salt through sweating in engine rooms and needed replacement. Modern versions are somewhat reduced in salt but remain a robust meal.

    The Spoon Tradition: Why Navy Curry Is Eaten with a Spoon

    Unlike most Japanese curry dishes that are eaten with chopsticks, Navy curry is traditionally eaten with a spoon. This tradition dates back to the Imperial Navy’s practical considerations:

    • Stability: On a pitching ship, a spoon provides better food retention than chopsticks
    • Efficiency: Sailors needed to eat quickly between duties
    • Uniformity: The thick roux makes chopsticks impractical anyway

    Today, every Yokosuka Navy curry restaurant serves the dish with a spoon as a nod to this tradition. The spoons are typically larger than dessert spoons but smaller than soup spoons—a unique size that has become part of the Navy curry identity.

    Planning Your Yokosuka Navy Curry Experience

    Morning itinerary (curry-focused)
    Arrive at Yokosuka Station by 10:30 AM. Walk to Hirakawa (5 minutes) and queue for the 11 AM opening. Order the Kaigun Curry set (¥1,350) with the glass of milk. After lunch, walk to the waterfront (10 minutes) and take photos of the naval base. Visit the Yokosuka Museum of Art for a post-curry stroll along the promenade.

    Saturday market itinerary
    If visiting on a Saturday, arrive by 10 AM and go directly to the Yokosuka Curry Market near the station. Purchase sample-sized portions (¥300–¥500 each) from 4–5 different vendors to compare styles. Use the remaining afternoon to explore Verny Park and Saru Island.

    Combined Itinerary (half day)

    • 10:30 AM: Arrive Yokosuka Station
    • 11:00 AM: Hirakawa for Kaigun Curry
    • 12:30 PM: Verny Park stroll
    • 1:30 PM: Ferry to Saru Island (¥1,400 round trip)
    • 2:30 PM: Explore abandoned bunkers on Saru Island
    • 4:00 PM: Return ferry, souvenir shopping at station

    Tips for first-timers: Bring cash (historic shops are cash-only), wear comfortable walking shoes (the port area is spread out), and allow 3–4 hours for a relaxed visit. English is not widely spoken at Hirakawa, but the menu has pictures, Pointing and smiling works perfectly.

    Getting there: Yokosuka is 60 minutes from Yokohama Station on the Keikyu Line (¥510) or 75 minutes from Tokyo Station on the JR Yokosuka Line (¥1,130). The Keikyu Weekend Pass (¥1,800) covers unlimited Keikyu Line travel for one day and pays for itself with a round trip from Tokyo.

    Exploring Yokosuka Beyond Curry

    While curry is the main draw, Yokosuka offers other attractions worth incorporating into your visit: Verny Park: A waterfront park along the port, perfect for a post-curry stroll, Named after French engineer François Léonce Verny, who helped build the Yokosuka Naval Arsenal. The park features cannons, a memorial to the first Japanese submarine, and excellent views of the US Navy base.

    Saru Island (猿島): A 15-minute ferry ride from Yokosuka, this uninhabited island features abandoned World War II bunkers and tunnels overgrown with vegetation. It is a popular spot for photography and picnicking. Ferry tickets (¥1,400 round trip) include access to the island’s walking trails.

    Yokosuka Museum of Art: Located on the waterfront, this museum features works by local artists and a cafe with, of course, Navy curry on the menu. The museum building itself is an architectural landmark, designed by renowned architect Sakakura Junzo.

    Retort Pouch Navy Curry Comparison

    Retort pouch curry makes an excellent souvenir. Here is a comparison of the major brands available at Yokosuka Station souvenir shops:

    Brand Style Price Spice Level Best For
    Yokosuka Kaigun Curry Traditional Navy ¥580 Medium Authenticity
    Curry House Yokosuka Modern thick roux ¥650 Mild Beginners
    Tom’s Navy Curry Beef stew fusion ¥720 Medium-Hot Adventurous
    Yokosuka Black Curry Charcoal-infused ¥850 Hot Novelty

    The Cultural Significance of Navy Curry

    Yokosuka Navy Curry is more than a meal—it is a cultural artifact that tells the story of Japan’s modernization and international relations. The tradition began in 1908 when the Imperial Japanese Navy officially adopted curry rice as a Friday meal for all sailors. The Navy’s Medical Bureau recommended curry because:

    • The spices (turmeric, cumin, coriander) had antibacterial properties that helped prevent food poisoning in tropical waters
    • Rice provided sustained energy for long voyages
    • The thick roux could be prepared in large quantities and kept warm for hours without quality deterioration
    • The meal could be eaten with a single spoon, convenient for rough seas

    After World War II, the tradition was maintained by the Japan Maritime Self-Defense Force, and Yokosuka’s proximity to the US Navy base added new elements to the recipe. American servicemen introduced thicker roux using wheat flour (instead of the traditional curry powder base), larger portions, and the side salad that is now standard.

    Making Navy Curry at Home: A Simplified Recipe

    For travelers who want to recreate the experience at home, here is a simplified version of the traditional Navy curry recipe:

    Ingredients (serves 4):

    • 500g beef chuck, cut into 2cm cubes
    • 2 onions, thinly sliced
    • 2 carrots, diced
    • 2 potatoes, cubed
    • 3 tbsp butter
    • 3 tbsp flour
    • 2 tbsp curry powder (Japanese brand recommended)
    • 1 tsp garam masala
    • 750ml beef broth
    • 2 tbsp soy sauce
    • 1 tbsp ketchup (secret ingredient!)
    • Salt and pepper to taste

    Instructions:

    1. Brown the beef in butter over high heat, then set aside
    2. Sauté onions in the same pot until caramelized (15–20 minutes)
    3. Add flour and curry powder, stirring constantly for 2 minutes
    4. Gradually add beef broth while stirring to prevent lumps
    5. Return beef to pot, add carrots, potatoes, soy sauce, and ketchup
    6. Simmer on low heat for 45–60 minutes until beef is tender
    7. Season with garam masala, salt, and pepper
    8. Serve over steamed Japanese rice with a small glass of milk and pickles on the side

    Yokosuka Navy Curry Events Calendar

    Event Month Description
    Navy Curry Festival March 30+ stalls, live music, ship tours
    Curry Grand Prix June Restaurants compete for best curry award
    Summer Curry Evening August Night market with curry and beer
    Yokosuka Port Festival October Navy ship open to public, curry specials
    Winter Navy Curry Fair December Limited edition retort pouches released

    Pairing Drinks with Navy Curry

    While milk is the traditional accompaniment, other beverages pair well:

    Drink Why It Works Where to Find
    Cold draft beer Cuts through the richness Most curry shops
    Oolong tea Cleanses the palate Served at all restaurants
    Yuzu lemonade Citrus brightness Tom’s Curry
    Lassi (sweet or salted) Traditional Indian pairing Hirakawa (limited)

    💡 Related: Also see our guide for For the most comprehensive guide with rankings and maps, see our complete Navy Curry guide

    What surprised me most was how affordable the set meals are compared to similar restaurants in Tokyo.

    Frequently Asked Questions (FAQ)

    Q: Why is milk served with Navy curry?
    A: The Imperial Japanese Navy adopted the practice of serving milk with curry because it was believed that the calcium and fat helped neutralize the spices and prevent stomach upset. It is a tradition that continues today.

    Q: Is Yokosuka Navy curry very spicy?
    A: Generally no—it is milder than Indian or Thai curries. The spice level is comparable to a mild-to-medium Japanese curry. If you want extra heat, most shops offer chili powder or pepper.

    Q: Can I visit the naval base to eat?
    A: The US Navy base has its own curry restaurants, but access is restricted to base personnel and their guests. Stick to the shops in town for the best experience.

    Q: What is the best time to visit Yokosuka for curry?
    A: Weekday lunch (11:00 AM–1:00 PM) offers shorter queues than weekends. Saturday during the Curry Market is also excellent.

    Q: Do I need reservations?
    A: Hirakawa and most of the historic shops are first-come, first-served. Arrive early for Hirakawa—the queue can reach 45 minutes at peak times.


    📍 Related Articles


    Last Updated: May 2026 — All restaurant information verified.

    Conclusion

    The details in this guide come from real visits, and the biggest lesson I took away was that the best experiences in Yokosuka rarely fit neatly into a checklist. During my visit to Yokosuka I went with a rough plan and found that leaving room to wander made the trip far more memorable. Plan the essentials, keep your schedule flexible, and you will leave Kanagawa wanting to return.