Tag: things-to-do

  • Hayama to Misaki Walking Route Guide 2026

    Hayama to Misaki Walking Route Guide 2026

    Hayama to Misaki Walking Route Guide 2026

    Overview

    Access

    Most visitors reach Hayama from central Tokyo by JR, private railway, or highway bus, and an IC card (Suica or Pasmo) works across all of them. From my experience, leaving Tokyo before the morning rush keeps the journey relaxed, and station luggage lockers are handy if you arrive early.

    Introduction: Walking Across the Peninsula

    The Miura Peninsula is only about 8 kilometres wide at its narrowest, but it holds more variety than its size suggests. The north, around Hayama, is hilly and forested — the so-called Miura Alps, where trails wind through cedar groves and emerge at viewpoints overlooking Sagami Bay. The center is agricultural: flat fields of daikon radish and cabbage, dotted with farmhouses and small shrines. The south, around Misaki, returns to the coast, with fishing harbours and views across the water to Jogashima Island.

    There is no official trail that connects these zones. The route described here was built by linking existing hiking courses with quiet roads and public bus routes. It is not a wilderness trek — you will walk through residential areas and cross roads — but it offers a genuine sense of crossing the peninsula on foot, which few visitors attempt.

    What to Expect:

    • Start: Hayama (Isshiki Beach or Zushi Station area)
    • Terrain: Forest trail (20%), country roads (50%), coastal path (15%), bus (15%)
    • Navigation: Google Maps works for the road sections; the trail section is marked in Japanese
    • Water: Available at convenience stores along the route (carry 1L minimum)
    • Lunch: Misaki Port’s tuna restaurants are the finish-line reward

    Our guide to Hayama Hidden Beaches has additional tips and recommendations.
    Updated: June 2026 (route verified)


    Route Overview

    Segment 1: Hayama to Sengenyama Summit

    Hayama → Sengenyama hiking course → Summit viewpoint

    Detail Info
    Distance 4 km
    Time 1.5–2 hours
    Elevation gain ~200 m
    Difficulty Moderate (steady climb)
    Trail type Forest path, some steep sections

    Route:

    Start from the Hayama area — either from the Hayama hidden beaches near Isshiki Beach, or from JR Zushi Station. If starting from Zushi Station, walk south through the residential streets toward the hills. The trailhead for the Sengenyama Hiking Course is marked with a small wooden sign at the edge of the forest, approximately 20 minutes from the station.

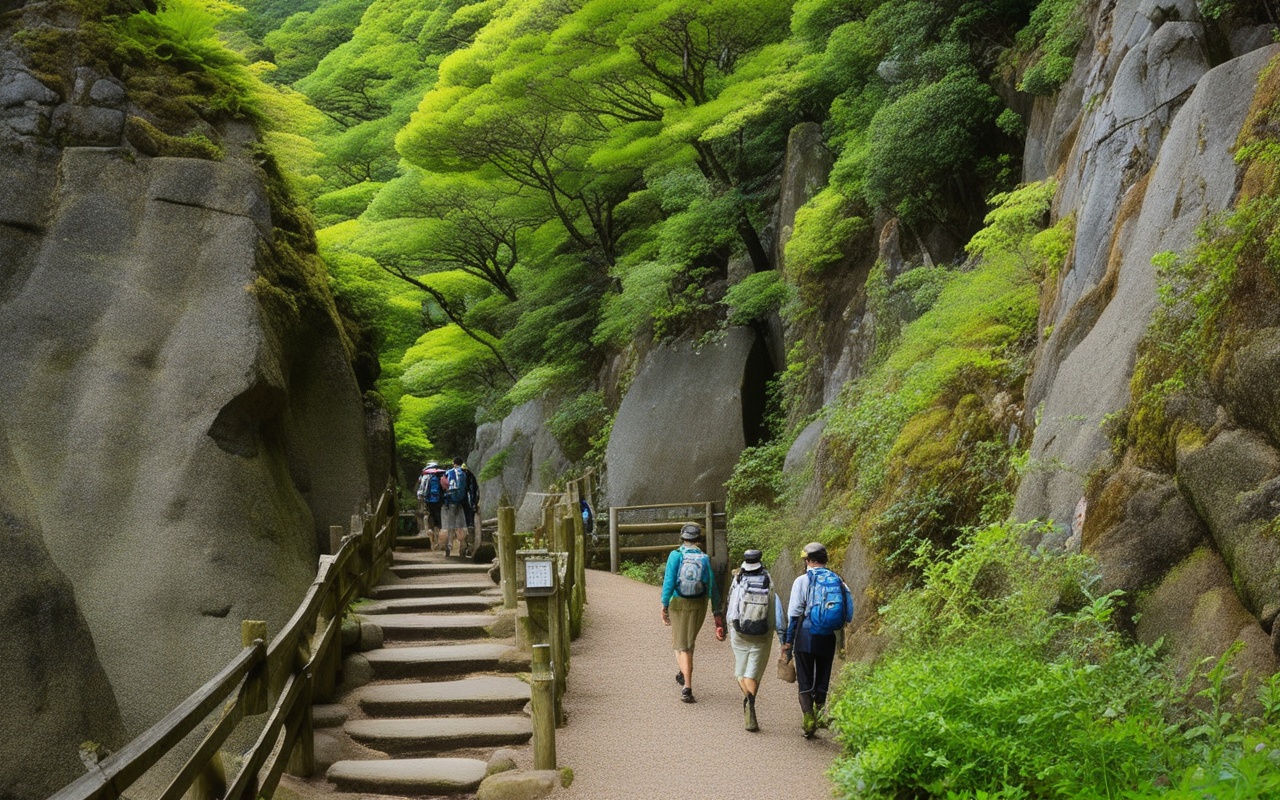
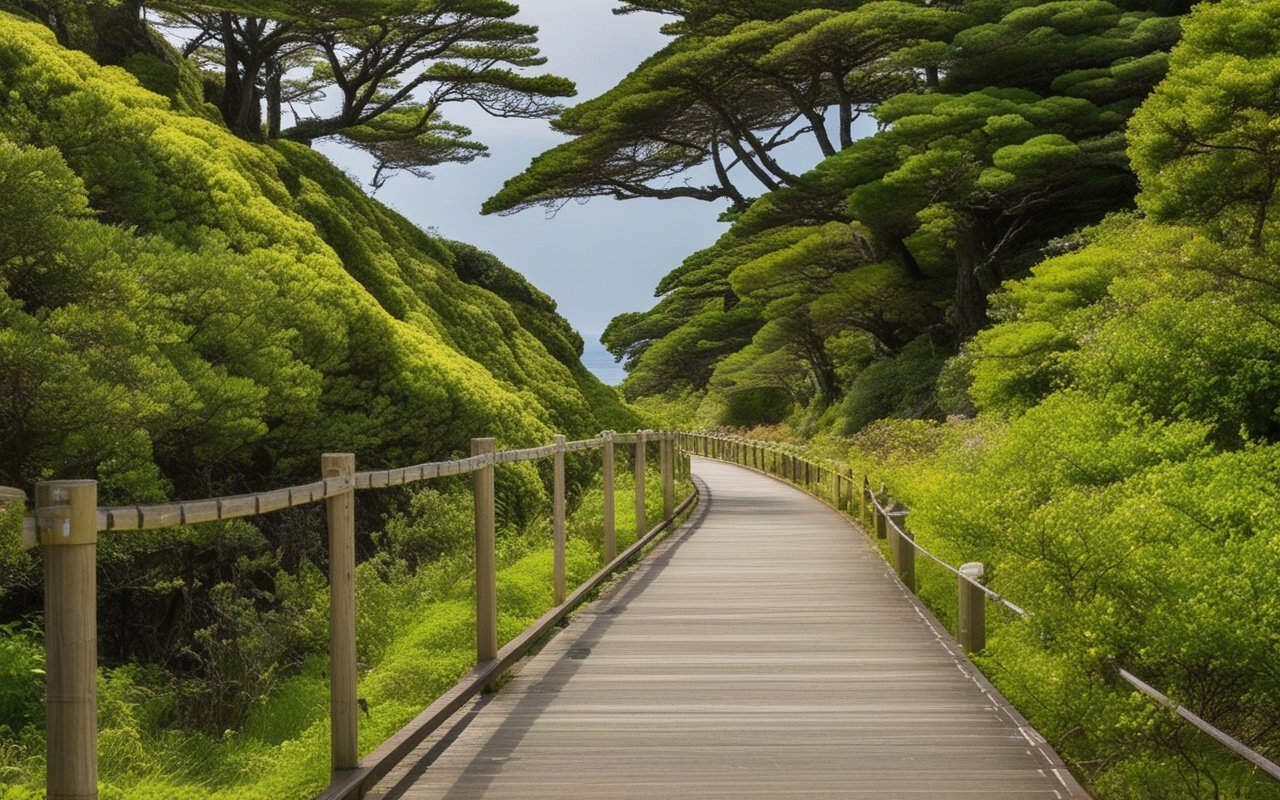
    The trail climbs steadily through mixed forest — cedar, cypress, and broadleaf trees provide shade even on warm days. The path is well-trodden but can be muddy after rain. Sturdy shoes are essential.

    After approximately 45 minutes of climbing, the trail reaches the Sengenyama summit (標高 186 m). The summit clearing offers a panoramic view of Sagami Bay, with Enoshima to the north, Jogashima to the south, and Mt. Fuji on the western horizon on clear days. There is a bench and a small sign marking the elevation.

    Tips for This Section:

    • Start by 8:00–9:00 AM to avoid the afternoon heat
    • The trail can be slippery after rain — take your time on the descent
    • No facilities or vending machines on the trail
    • Mosquito repellent recommended in summer months

    Segment 2: Ridge Walk and Descent

    Sengenyama summit → Ridge trail → Farmland descent

    Detail Info
    Distance 3 km
    Time 1–1.5 hours
    Elevation loss ~150 m
    Difficulty Easy to moderate
    Trail type Ridge path, gradually descending

    Route:

    From the summit, the trail continues south along the ridge. This section is the most scenic part of the walk — the path stays at elevation for about 1 km, offering intermittent views of both Sagami Bay (west) and Tokyo Bay (east) on clear days.

    The ridge section is narrower than the initial climb, with occasional tree roots crossing the path. After the ridge, the trail begins a gradual descent through the forest, eventually emerging at the edge of agricultural land.

    The transition from forest to farmland is abrupt — one moment you are walking under cedar canopy, the next you are in an open landscape of vegetable fields and greenhouses. This is the Miura Peninsula’s agricultural heartland, where much of Kanagawa’s daikon radish, cabbage, and Chinese chives are grown.

    • The ridge is exposed to wind — carry a light jacket
    • The descent has loose gravel in places — watch your footing
    • Take the last opportunity for forest shade before emerging into open farmland
    • The trail becomes less distinct near the farmland edge; head toward the road visible below

    Segment 3: Farmland Walking

    Farmland edge → Country roads → Misaki-bound bus stop

    Detail Info
    Distance 5 km
    Time 1.5–2 hours
    Elevation Flat (gentle undulations)
    Difficulty Easy
    Surface Paved roads, farm lanes

    Route:

    This section is the least dramatic but most authentic part of the walk. The roads here are quiet — mostly local traffic heading to and from farms — and the landscape is defined by the rhythm of agriculture, Depending on the season, you will see daikon radish being harvested (winter–early spring), rice paddies being planted (late spring), or fields lying fallow under the summer sun.

    The route follows prefectural roads and farm lanes southward. Navigation is straightforward — keep heading south, using the hills of Jogashima as a landmark on the horizon. The roads are flat or gently undulating, giving your legs a rest after the morning’s climb.

    Approximately 3 km into this section, you will pass through the small village of Minamishitaura (南下浦), where a convenience store provides a good opportunity to refill water and buy snacks. The village also has a bus stop that connects to Misakiguchi Station.

    Optional Bus Segment (Recommended):

    From Minamishitaura, the remaining 4 km to Misaki Port follows a busier road with narrower sidewalks. For a more pleasant walking experience, consider taking the bus for this segment:

    Bus: Minamishitaura → Misakiguchi Station
    Time: 10 minutes
    Cost: ¥200–250 (IC card accepted)
    Frequency: Every 20–30 minutes

    This bus segment bridges the least scenic part of the route and drops you at Misakiguchi Station, which is a short walk from Misaki Port and the Jogashima Island bridge.

    • Sun protection is essential — there is almost no shade on the farmland roads
    • Wave back at the farmers — they are friendly but busy
    • The convenience store in Minamishitaura has restrooms (ask at the counter)
    • Check the bus timetable at the Minamishitaura stop if you plan to ride

    Segment 4: Misaki Port and Finish

    Misakiguchi Station → Misaki Port → (Optional) Jogashima Island

    Detail Info
    Distance 1.5 km (to port) + 5 km optional (Jogashima loop)
    Time 20 minutes (to port) + 2–3 hours optional
    Difficulty Easy
    Surface Paved paths, sidewalks

    Route:

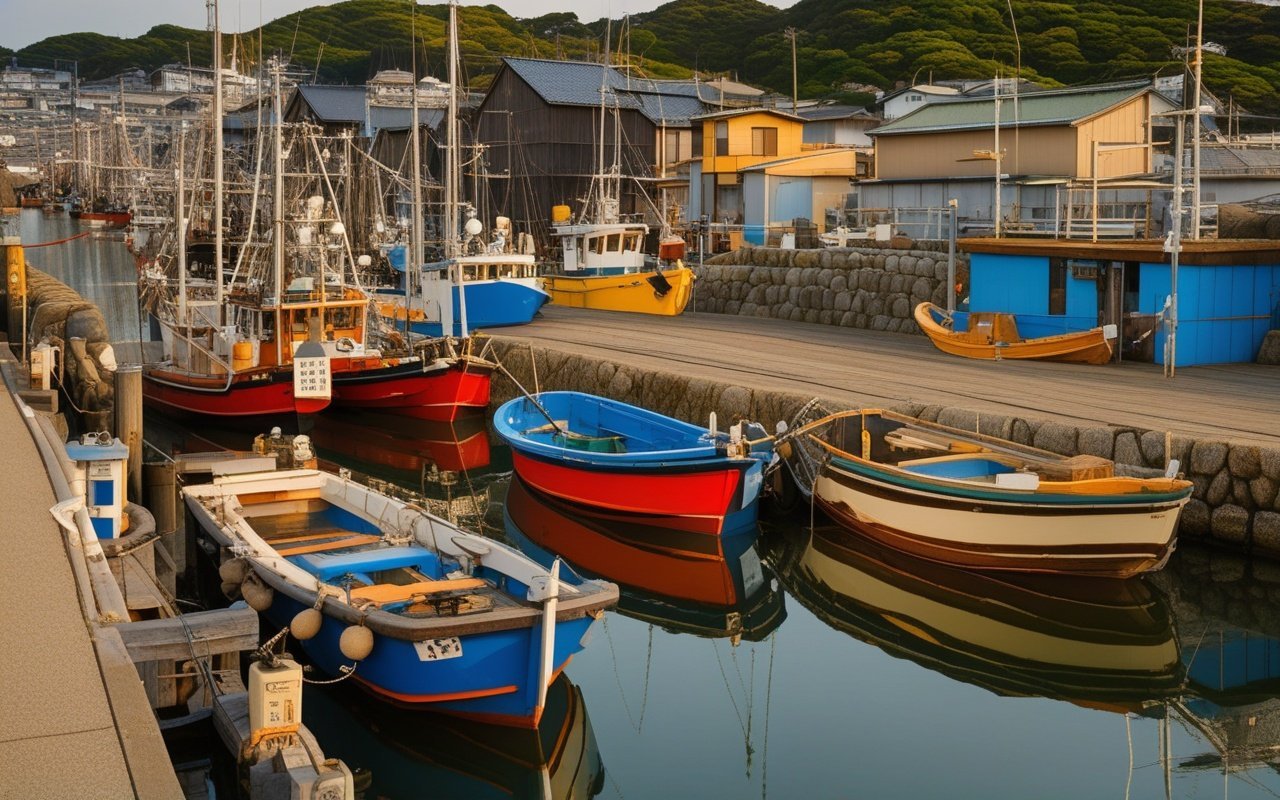
    From Misakiguchi Station, it is a 20-minute walk (or 5-minute bus ride) to Misaki Port (Misaki (三崎)港). The port is the peninsula’s premier destination for fresh tuna — the harbour is lined with restaurants serving maguro-don (tuna bowls), sushi, and grilled tuna steaks.

    The fish market is busiest in the morning, but the restaurants serve lunch from 11:00 AM onward. If you arrive by noon, you will find the restaurants in full swing with a lively atmosphere.

    Lunch Recommendations:

    Restaurant specialty Price Notes
    Maguro no Sato Tuna bowl (maguro-don) ¥1,500–2,000 Fast, reliable, popular
    Misaki Kō Sushi set ¥2,000–3,500 Higher quality, reservation recommended
    Port-side stalls Grilled tuna skewers ¥500–800 Quick, casual, eat while walking

    Optional Extension — Jogashima Island:

    If you have energy remaining, cross the bridge to Jogashima Island for a 2–3 hour loop walk. The Jogashima hiking trail covers the full circuit, and the Jogashima lighthouse is the island’s highlight.

    From the port, Jogashima is:

    • Walk: 15 minutes across the bridge
    • Bus: 5 minutes from Misaki Port bus stop (¥150)

    Practical Information

    Full Route Summary

    Segment Distance Time Terrain
    1: Hayama → Sengenyama 4 km 1.5–2 h Forest trail, uphill
    2: Ridge → Farm descent 3 km 1–1.5 h Ridge path, downhill
    3: Farmland walking 5 km 1.5–2 h Paved roads, flat
    3b: Bus option 4 km 10 min Bus ride
    4: Misaki Port 1.5 km 20 min Paved paths
    Total (walking) 13.5 km 4.5–6 h
    Total (with bus) 9.5 km + bus 3.5–4.5 h

    Start Time Recommendations

    Start Finish (walking) Finish (with bus) Notes
    7:00 AM 1:00–2:30 PM 11:30 AM–12:30 PM Best for summer heat avoidance
    8:00 AM 2:00–3:30 PM 12:30–1:30 PM Recommended — balanced timing
    9:00 AM 3:00–4:30 PM 1:30–2:30 PM Good for shorter days
    10:00 AM 4:00–5:30 PM 2:30–3:30 PM Tight before sunset

    What to Bring

    Essential:
    - Sturdy walking shoes (trail section has uneven footing)
    - Water (1L minimum, refill at Minamishitaura convenience store)
    - Sunscreen and hat (open farmland sections have no shade)
    - Light jacket or windbreaker (ridge section is exposed)
    - Cash (lunch and bus fare — IC card works for bus)
    - Phone with Google Maps downloaded offline
    
    Recommended:
    - Walking poles (helpful on the forest descent)
    - Insect repellent (summer months)
    - Snacks (trail mix, energy bars)
    - Small towel (for humidity)
    - Change of socks (for after the walk)

    Getting to the Start

    To Hayama (start):
    From Tokyo Station:
    1. JR Yokosuka Line to Kamakura (55 min, ¥1,040)
    2. JR to Zushi Station (5 min, ¥170)
    3. Keikyu Bus to Isshiki or Hayama stop (15 min, ¥230)
    Total: ~80 minutes, ¥1,320
    
    From Yokohama Station:
    1. JR Yokosuka Line to Zushi Station (25 min, ¥420)
    2. Keikyu Bus to Hayama (15 min, ¥230)
    Total: ~45 minutes, ¥650

    Getting Back from the Finish

    From Misaki Port / Misakiguchi Station:
    To Tokyo:
    - Keikyu Line: Misakiguchi → Shinagawa (75 min, ¥1,100)
    - Via Yokohama: Misakiguchi → Yokohama (55 min, ¥750)
    Last train: ~11:00 PM (check schedule)
    
    To Yokohama:
    - Keikyu Limited Express: Misakiguchi → Yokohama (55 min, ¥750)
    Last train: ~11:30 PM by Bus:
    - Keikyu Bus: Misaki Port → Misakiguchi Station (5 min, ¥150)

    Seasonal Considerations

    Spring (March–May):
    - Best weather for walking
    - Cherry blossoms along the farmland roads
    - Comfortable temperatures (15–22°C)
    - Trail may be muddy from spring rain
    
    Summer (June–August):
    - Hot and humid (30–35°C)
    - Start before 7:00 AM to avoid heat
    - Mosquito repellent essential
    - Heavy rain possible (check forecast)
    
    Autumn (September–November):
    - Clear skies, comfortable temperatures
    - Best Mt. Fuji visibility from Sengenyama
    - Dried grass on the ridge can be slippery
    - Daylight shorter (finish by 4:30 PM)
    
    Winter (December–February):
    - Cold but clear (5–15°C)
    - Best views of Mt. Fuji and the bay
    - Trail can be frosty in the morning
    - Lunch at Misaki Port is especially rewarding after a cold walk

    Safety Notes

    ⚠️ The forest trail section has limited mobile reception
    ⚠️ The ridge is exposed to strong winds in winter
    ⚠️ Farmland roads have occasional farm vehicle traffic — walk facing traffic
    ⚠️ No emergency services on the trail section
    ⚠️ Tell someone your planned route and expected finish time
    ⚠️ Check the weather forecast — cancel if heavy rain is predicted
    ⚠️ The trail section can be slippery after rain — turn back if conditions worsen

    Frequently Asked Questions

    Q: Is this route suitable for beginners?

    A: The farmland and Misaki sections are easy, but the Sengenyama climb is moderate. Beginners should allow extra time and take the bus option from Minamishitaura.

    Q: Can I do this route in reverse (Misaki → Hayama)?

    A: Yes, but the walk would be more challenging because the Sengenyama climb would come at the end of the day when you are tired. Start from Hayama for the best experience.

    Q: Are there restrooms along the route?

    A: There are no restrooms on the trail section. Restrooms are available at convenience stores in Hayama (start) and Minamishitaura (midpoint), and at Misakiguchi Station and Misaki Port (finish).

    Q: Can I bring a dog?

    A: The farmland roads and Misaki Port area are dog-friendly, but the forest trail section has uneven terrain that may be challenging for dogs. Keep dogs leashed at all times.

    Q: Is the route well-signposted in English?

    A: No. The Sengenyama trail markers are in Japanese only. Google Maps works for navigation on the road sections. Download offline maps before starting.

    🌟 Share Your Experience

    Walked this route? Found a better connection between Hayama and Misaki? Join our community forum to share your route tips!


    Hayama to Misaki Walking Route Guide 2026 — Share Your Experience

    Walking from Hayama to Misaki Port is not a classic hiking trail in the traditional sense — it is a patchwork of forest paths, country roads, and bus connections that together tell the story of the Miura Peninsula. The reward is an understanding of the landscape that you cannot get from a train window: the smell of cedar on the ridge, the sight of farmers working the daikon fields, and the taste of fresh tuna as a finishing-line celebration.

    For more ways to explore the Miura Peninsula, read our Hayama hidden beaches guide, the Hayama hidden cafes guide, and the Misaki Port food guide.


    ⏰ Best Time to Visit

    Early morning (8–10 AM): Peaceful atmosphere, fewer crowds, perfect for photos Late afternoon (4–6 PM): Beautiful lighting, local life, less crowded than midday

    🎯 What I Recommend

    • Don’t rush: Take your time to explore the side streets and hidden spots
    • Talk to locals: They often know the best lesser-known spots that aren’t in guidebooks
    • Try the local specialties: Each area has its own unique food and souvenirs

    ⚠️ Things to Watch Out For

    • Some shops close on weekdays or have irregular hours
    • Parking can be challenging during peak seasons
    • Cash is still king at many smaller establishments


    Conclusion

    Whether you are planning exploring Hayama for the first time or returning for another visit, taking a little extra time to go beyond the obvious sights makes all the difference. During my visit to Hayama I went with a rough plan and found that leaving room to wander made the trip far more memorable. I hope this guide helps you build an itinerary that fits your pace, and that your time in Kanagawa leaves you with memories worth coming back for.
  • Yokohama Day Onsen & Spa Guide 2026 — Urban Hot Springs…

    Yokohama Day Onsen & Spa Guide 2026 — Urban Hot Springs…

    Yokohama Day Onsen & Spa Guide 2026 — Urban Hot Springs…

    Overview

    📍 Quick Overview

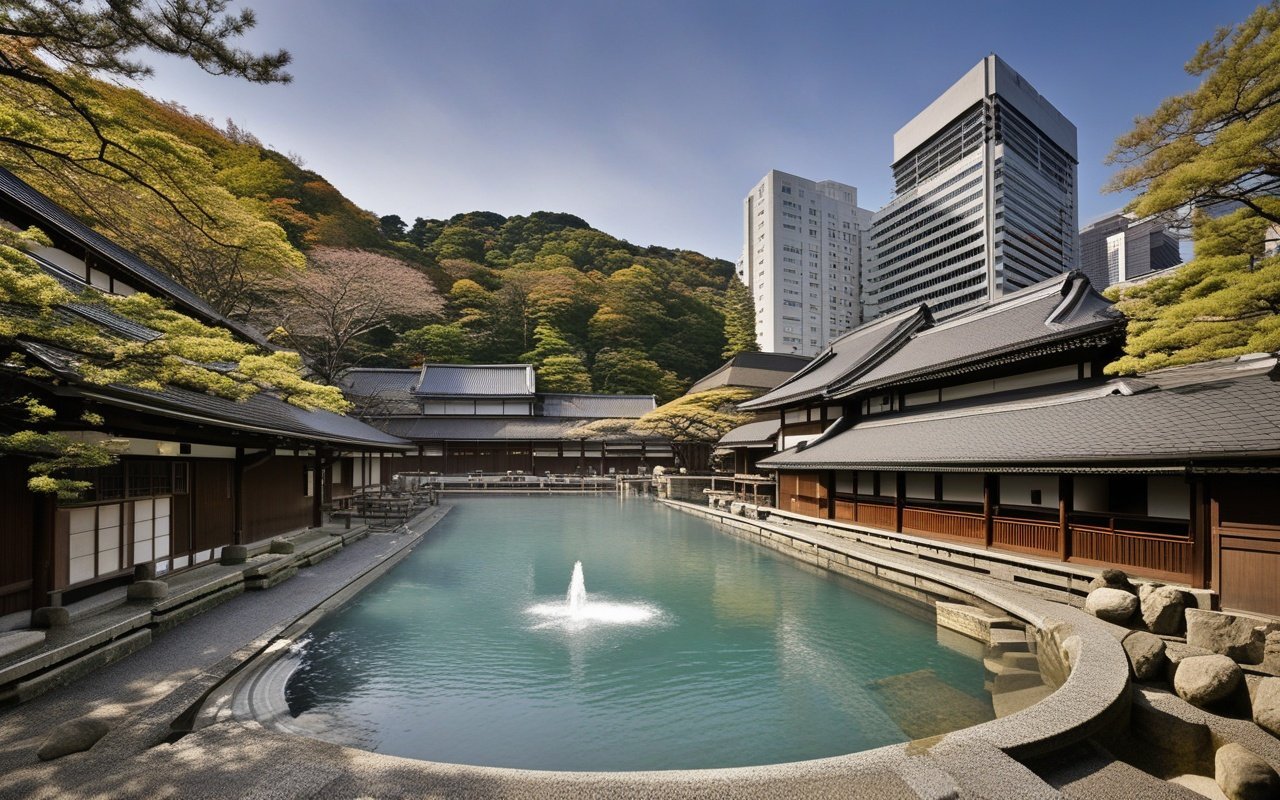
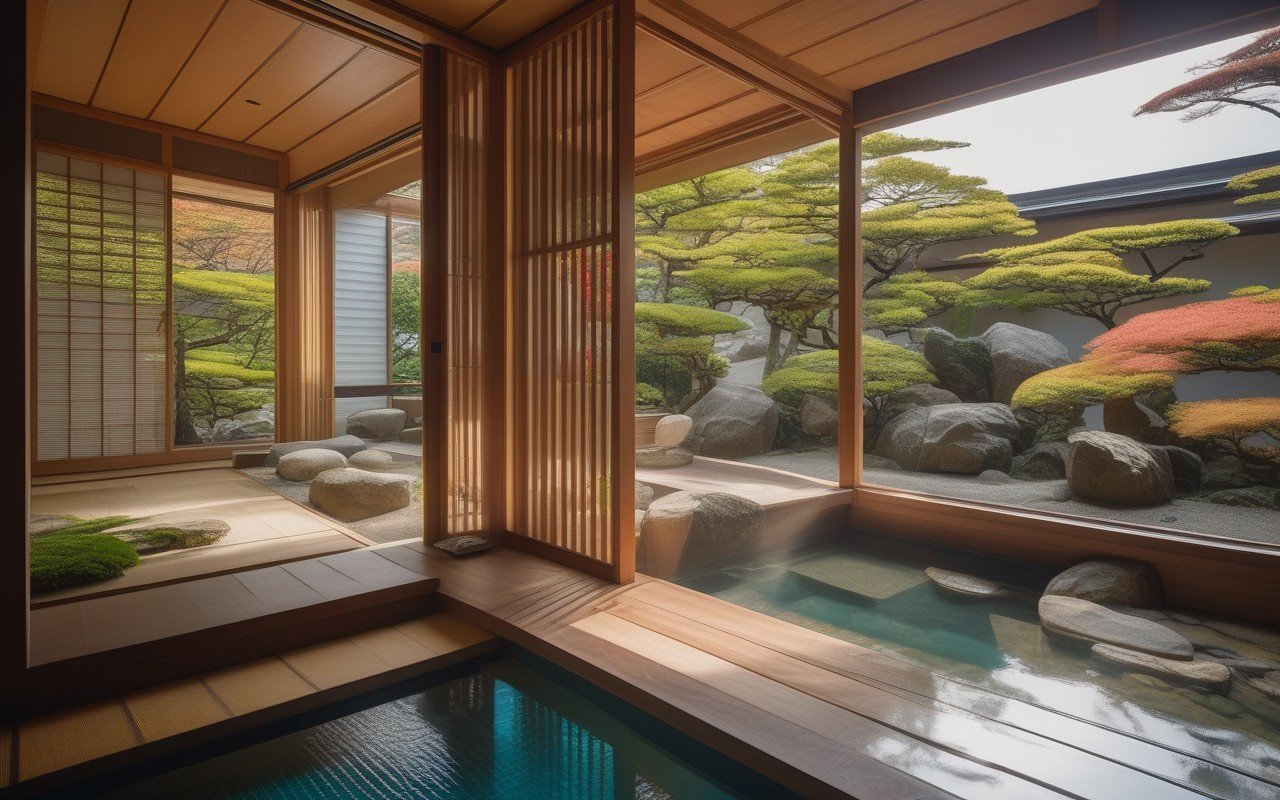
    Yokohama offers great day-use onsen and spa places that rival HakonHakonemous hot springs — without the 90-minute journey each way. This guide covers four top places where you can soak, steam, and relax within minutes of Yokohama’s main attractions. Whether you want a complete onsen time at Manyo Club in Minato Mirai or a quick evening soak at Manten no Yu near Yokohama Bay, these urban retreats provide genuine relaxation with all amenities included. – 4 top day-use onsen and spa places in Yokohama and surrounding areas

    • From ¥1,500 to ¥4,500 per adult — affordable relaxation without a Hakone trip
    • Open late — many places operate until 11:00 PM or later
    • Perfect for: Relaxation after sightseeing, evening unwinding
    • No need to go to Hakone — Yokohama has great urban hot spring places — the quality and attention to detail were remarkable. —

    Yokohama Day Onsen & Spa Guide scenery and attractions

    Introduction: Soak Without the Journey

    Hakone is famous for its natural hot springs, but getting there takes 90 minutes each way — a significant time commitment for many travelers. What fewer visitors realize is that Yokohama itself has great day-use onsen and spa places offering genuine relaxation without the travel time. These urban onsen are not natural hot springs in the traditional sense — the water is heated and circulated rather than sourced from a natural spring — but the time is authentic in every other way. Indoor and outdoor baths, saunas, cold plunges, and relaxation lounges with panoramic views provide a complete onsen time. Some places even use natural mineral-infused water that replicates the properties of famous hot springs across Japan. Why Choose an Urban Onsen:

    • No travel time — 5 to 15 minutes from Yokohama’s main attractions
    • Evening hours — most places are open until 9:00 to 11:00 PM. perfect after dinner
    • All amenities provided — towels, and yukata robes are included
    • Restaurants on site — traditional Japanese meals without leaving the facility
    • Weather independent — all indoor places unaffected by rain
    • Foreigner-friendly — English signs and staff support at major places

    1. Manyo Club — Minato Mirai’s Premium Onsen time

    Best for: Couples, evening relaxation

    Yokohama Day Onsen & Spa — detailed view

    Aspect Detail
    Location Minato Mirai. 5 min walk from Minato Mirai Station
    Hours 11:00 AM to 9:00 AM next day (20 hours)
    Price ¥3,000 to ¥4,500 per adult, varies by day
    Baths Indoor baths, cold bath
    Best For Couples, post-sightseeing relaxation

    Manyo Club is Yokohama’s premier urban onsen facility, offering an time that rivals many hot spring resorts in Hakone. The facility occupies multiple floors in Minato Mirai, with the outdoor rotemburo offering views of the Yokohama skyline, Soaking while watching the Cosmo Clock ferris wheel illuminate the night is a magical time unique to Yokohama. The Bath time:

    • Indoor baths — Large main bath with jet massages, and a waterfall feature
    • Outdoor rotemburo — Open-air bath with skyline views, the highlight of the visit
    • Sauna — Dry sauna with regular löyly sessions where water is poured over hot stones
    • Cold bath — Traditional cold plunge kept at 15 to 18 degrees Celsius
    • Carbonated bath — Gentle bubbling bath that is kind to the skin

    Beyond the Bath:

    Manyo Club is more than just an onsen — it is a full relaxation complex. The second floor features a spacious relaxation lounge with reclining chairs, and a cafe serving drinks and light meals. The third floor houses a restaurant serving traditional Japanese cuisine. The manyo set meal at ¥1,800 with sashimi, tempura, and seasonal vegetables is great value. places included:

    • Rest area with reclining chairs at no extra charge
    • Manga corner with hundreds of volumes
    • Restaurant serving Japanese cuisine
    • Cafe with soft drinks, and beer
    • Massage and treatment services at an additional charge
    • Gift shop with local products

    What to Bring: Nothing — towels, and basic toiletries including shampoo, and body soap are all included. Lockers are provided for your belongings. > Book Manyo Club Yokohama on Klook for discounted entry and skip-the-line access — check prices & book here. Pro Tips:

    • Late-night entry after 8:00 PM is often cheaper with a night passport option
    • Weekday mornings from 11:00 AM to 2:00 PM are the quietest
    • The facility allows overnight stays — enter after 10:00 PM and stay until morning
    • Tattoos are allowed — cover with provided stickers if small
    • Bring a ¥100 coin for the locker, refunded on exit

    2. Manten no Yu — Yokohama’s Natural Hot Spring time

    Best for: Waterfront relaxation, authentic onsen atmosphere

    Aspect Detail
    Location Near Yokohama Bay. 10 min bus from Yokohama Station
    Hours 10:00 AM to 11:00 PM. last entry at 10:00 PM
    Price ¥2,500 to ¥3,500 per adult
    Baths Large indoor bath, cold bath
    Best For Solo travelers, evening soak

    Manten no Yu offers a more traditional onsen atmosphere than Manyo Club, with a focus on the therapeutic qualities of the water. The facility uses water infused with natural minerals to recreate the time of a real hot spring. The water is soft on the skin and maintains temperature beautifully. places:

    • Large indoor bath — Spacious main bath with underwater jets
    • Outdoor rotemburo — Intimate stone-lined bath with curated garden views
    • Herbal sauna — Infused with Japanese herbs including yomogi and hinoki
    • Cold water bath — Traditional cold plunge
    • Foot bath — Open to all visitors free of charge, even without entry

    Additional amenities:

    • Relaxation room with reclining chairs
    • Restaurant serving soba, and set meals
    • Massage chairs at ¥100 for 10 minutes
    • Coin laundry for overnight guests
    • Retail corner with Japanese skincare products

    Book Manten no Yu Yokohama on Klook and save on entry fees — check prices & book here. Pro Tips:

    • Entry fee includes towel rental and basic toiletries
    • The restaurant’s onsen soba at ¥900 is the perfect post-bath meal
    • Tattoos are not permitted — private baths are available if you have visible tattoos
    • Weekdays after 7:00 PM are uncrowded and peaceful

    3. Wellness & Spa Options in Minato Mirai

    Best for: Spa treatments, luxury relaxation Yokohama has several great options for visitors seeking professional spa treatments rather than onsen bathing.

    Minato Mirai Spa Highlights

    The Kahala Hotel & Resort Spa
    | Attribute | Detail |
    |———–|——–|
    | Price | From ¥15,000 for a 60-minute treatment |
    | Access | Inside The Kahala Hotel, Minato Mirai |
    | Specialty | Hawaiian-Japanese fusion treatments |
    | Hours | 10:00 AM to 8:00 PM |

    The most luxurious spa time in Yokohama. The signature treatment combines Hawaiian lomi-lomi techniques with Japanese hot stone therapy. The relaxation lounge offers panoramic bay views. Westin Yokohama Spa
    | Attribute | Detail |
    |———–|——–|
    | Price | From ¥12,000 for a 60-minute treatment |
    | Access | Inside The Westin, Minato Mirai |
    | Specialty | Ayurvedic-inspired treatments using organic products |
    | Hours | 9:00 AM to 9:00 PM |

    The Westin’s Heavenly Spa offers a range of treatments using organic products. The indoor pool is available to spa guests and is one of the most pretty hotel pools in Yokohama.

    Chinatown Wellness Options

    Xijin Kowloon SPA Foot Massage
    | Attribute | Detail |
    |———–|——–|
    | Price | From ¥3,500 for a 60-minute foot massage |
    | Access | Inside Yokohama Chinatown, 5 min walk from Motomachi-Chukagai Station |
    | Specialty | Taiwanese foot massage and full body massage |
    | Hours | 10:00 AM to 10:00 PM |

    A professional foot massage and spa in the heart of Yokohama Chinatown. After hours of walking through Kanagawa’s temples and attractions, a therapeutic foot massage at Xijin Kowloon SPA offers genuine relief. The Taiwanese-style foot massage targets pressure points that relieve fatigue from long sightseeing days. > Book Xijin Kowloon SPA Foot Massage on Klook for the perfect recovery after a day of walking. RAKURAKUDOH Relaxation Salon
    | Attribute | Detail |
    |———–|——–|
    | Price | From ¥4,000 for a 60-minute treatment |
    | Access | 3 min walk from Kannai Station |
    | Specialty | Aromatherapy, full-body relaxation |
    | Hours | 10:00 AM to 9:00 PM |

    A tranquil relaxation salon offering aromatherapy, and full-body treatments near the Kannai district. The signature aromatherapy massage uses essential oils blended for deep relaxation. It is an ideal stop between exploring Chinatown and an evening in Minato Mirai. > Book RAKURAKUDOH Relaxation Salon on Klook for a calming break during your sightseeing day. —

    How to Choose Your Onsen time

    Choose Manyo Club if:

    • You want the most complete onsen time with multiple bath types
    • You have visible tattoos and need a tattoo-friendly facility
    • You want to relax for 3 to 4 hours or stay overnight
    • You want skyline views from the outdoor bath

    Choose Manten no Yu if:

    • You prefer a quieter, more traditional onsen atmosphere
    • You want a shorter visit of 1 to 2 hours
    • You are on a tighter budget
    • You do not have visible tattoos

    Choose a Hotel Spa if:

    • You want professional massage or beauty treatments
    • You are celebrating a special occasion
    • You prefer private treatment rooms

    Sample Onsen Evening Itinerary

    Classic Yokohama Onsen Night at Manyo Club:

    6:00 PM — Dinner at a Minato Mirai restaurant
    7:00 PM — Arrive at Manyo Club, change into yukata
    7:30 PM — Indoor bath and sauna session
    8:30 PM — Outdoor rotemburo during sunset and evening skyline
    9:00 PM — Relaxation lounge with a drink
    9:30 PM — Second bath rotation
    10:30 PM — Optional massage treatment
    11:30 PM — Late dinner at the onsen restaurant

    Quick Evening Soak at Manten no Yu:

    7:00 PM — Arrive at Manten no Yu
    7:15 PM — Indoor bath
    8:00 PM — Herbal sauna session
    8:30 PM — Outdoor rotemburo
    9:00 PM — Onsen soba dinner
    9:45 PM — Depart completely relaxed


    Onsen Etiquette Reminder

    1. Wash before entering — Use the shower stations to thoroughly clean your body before any bath
    2. No swimwear — Japanese onsen need nude bathing, and towels are provided
    3. Small towel only — Take the small towel to the bath area for drying between dips but do not let it touch the water
    4. No photos — Absolutely no phones or cameras in bathing areas
    5. Tattoo check — Manyo Club allows tattoos while Manten no Yu does not
    6. Hydrate — Drink water before and after soaking, available at water stations
    7. Limit each session — Soak for 10 to 15 minutes maximum and cool down between dips

    Frequently Asked Questions

    Q: Are these natural hot springs?

    A: Manyo Club and Manten no Yu use heated and filtered water rather than natural spring water. However, they are designed to replicate the onsen time with carefully designed baths, mineral-infused water, and traditional places. For genuine natural hot springs, visit Hakone, which is 90 minutes from Yokohama by train. Q: Can I visit if I have tattoos?

    A: Manyo Club has a tattoo-friendly policy with cover stickers available. Manten no Yu prohibits visible tattoos. Hotel spas generally allow tattoos in private treatment rooms. Q: Do I need to bring anything?

    A: No — towels, and basic toiletries are included in the entry fee. Lockers are provided for your belongings. Q: Are children allowed?

    A: Manyo Club welcomes children and is family-friendly. Manten no Yu is adults-only after 6:00 PM. Check individual facility policies before visiting. Q: Can I stay overnight at Manyo Club?

    A: Yes — Manyo Club operates for 24 hours and allows overnight stays. There is a surcharge for entry after 12:00 AM. Relaxation lounge chairs serve as sleeping spaces, though private rooms are not available. —


    🔗 Related Articles


    My personal exploration of Kanagawa has been incredibly rewarding, and I recommend adding this region to any Japan travel itinerary — the variety of experiences within short distances is what makes it special.


    After multiple visits to Kanagawa, . .

    Final Thoughts

    Whether you choose the premium Manyo Club time in Minato Mirai or the traditional atmosphere of Manten no Yu near Yokohama Bay, Yokohama’s day-use onsen and spa places offer genuine relaxation without the journey to Hakone. These urban hot spring retreats provide the perfect way to unwind after a day of sightseeing, and most are open late enough to fit comfortably into any evening itinerary, During my hike, I noticed that the trail markers are well-kept and easy to follow even for first-timers.

    Conclusion

    exploring Yokohama for its onsen can be as relaxed or as packed as you want it to be, and I have found that the best visits leave room for both planning and spontaneity. During my visit to Yokohama I went with a rough plan and found that leaving room to wander made the trip far more memorable. Use this guide to sort out the logistics in advance, then let the day surprise you — Kanagawa rewards travelers who stay curious.

  • Yokohama Photography Spots Guide 2026 — Best Photo…

    Yokohama Photography Spots Guide 2026 — Best Photo…

    Overview

    📍 Quick Overview

    • 12 best photos spots across Yokohama, from sunrise to nightscapes
    • Professional photos services available — book a snap photos time
    • Best times: Sunrise (5:00–6:30 AM). Golden Hour (4:00–5:30 PM). Blue Hour (6:00–7:30 PM)
    • Perfect for: Instagram enthusiasts, travel memory makers
    • Free and paid options — shoot iconic views without spending a yen, or book a pro session

    Introduction: Why Yokohama is a Photographer’s Dream

    yokohama-photos-guide sub2

    Yokohama offers photographers something rare: world-class urban landscapes without the crowds of Tokyo. The waterfront skyline, historic port architecture, and dramatic interplay of neon and ocean create endless compositional possibilities — and you can shoot most of it without fighting through crowds of tripods. The city’s unique geography — a compact waterfront district with towering skyscrapers, and a working harbor — means you can capture multiple genres in a single afternoon: architectural photos at Landmark Tower, street photos in Chinatown, portrait sessions at the Red Brick Warehouse, and long exposures of the bay at sunset. —

    📸 The 12 Best Photo Spots

    Sunrise & Morning (5:00–8:00 AM)

    1. Yamashita Park — Harbor Sunrise

    Best Time: 5:00–6:30 AM (sunrise)
    Gear: Wide-angle lens, tripod
    Vibe: Quiet harbor, silhouettes of ships
    Difficulty: Easy — flat, paved paths

    Yamashita Park faces east, making it Yokohama’s premier sunrise location. The light hits the bay’s surface at a low angle, creating a golden path across the water. The Hikawa Maru (moored ocean liner) and the Bay Bridge make great foreground subjects. Composition Tip: Position yourself near the rose garden for foreground flowers with the harbor in the background. In spring, the tulips add vibrant color to sunrise shots.

    2. Osanbashi Pier — Waterfront Panorama

    Best Time: 5:30–7:00 AM
    Gear: Wide-angle to telephoto (24–70mm ideal)
    Vibe: Open waterfront, 360-degree harbor views
    Difficulty: Easy — large wooden deck

    The swooping wooden deck of Osanbashi Pier creates natural leading lines toward both the Minato Mirai skyline and the working harbor. The pier’s architecture — a wavy wooden roof — is a photo subject in itself. Composition Tip: Use the wooden deck’s curves as leading lines toward the skyline. Low angle shots near the base of the roof create dramatic foreground shapes.

    Golden Hour & Afternoon (4:00–5:30 PM)

    3. Minato Mirai Waterfront — Skyline & Reflections

    Best Time: 4:00–5:30 PM (golden hour)
    Gear: Wide-angle, polarizing filter
    Vibe: Warm light on glass towers, reflections in canal
    Difficulty: Easy — well-kept promenade

    The canal that runs through Minato Mirai captures perfect reflections of the surrounding glass towers during golden hour. The warm light transforms the InterContinental Hotel’s sail-shaped facade into a glowing sculpture. Composition Tip: Shoot from the pedestrian bridge near Queen’s Square for elevated reflections. The symmetry of buildings reflected in still water creates stunning abstract compositions.

    4. Red Brick Warehouse — Historic Architecture

    Best Time: 4:00–6:00 PM
    Gear: Wide-angle for architecture, portrait lens for people
    Vibe: Warm brick, lively atmosphere
    Difficulty: Easy

    The Taisho-era brick buildings glow beautifully in late afternoon light. The contrast between the warm brick and the modern glass towers behind creates a compelling juxtaposition of old and new. Composition Tip: Frame the brick warehouse with the InterContinental Hotel in the background — the “old meets new” composition that Yokohama is famous for.

    5. Motomachi Shopping Street — Street photos

    Best Time: 3:00–5:00 PM
    Gear: 35mm or 50mm prime
    Vibe: Elegant trees, afternoon light filtering through leaves
    Difficulty: Easy — pedestrian street

    The tree-lined Motomachi Street is one of Yokohama’s most photogenic shopping streets. The zelkova trees create dappled light patterns, and the mix of Western and Japanese architecture provides rich backgrounds. Composition Tip: Shoot from the center of the street looking downhill toward the water. The trees create a natural frame, and the distant glimpse of the harbor anchors the composition.

    Blue Hour & Night (6:00–10:00 PM)

    6. Landmark Tower Sky Garden — City from Above

    Best Time: 6:00–7:30 PM (blue hour)
    Gear: Wide-angle, tripod (monopod sometimes allowed)
    Vibe: 360-degree views, city lights emerging
    Difficulty: Easy — elevator access
    Cost: ¥1,000 adults

    The 69th-floor observation deck offers the definitive Yokohama nightscape. The blue hour — when the sky transitions from deep blue to black and the city lights begin to twinkle — is magical from this height. Mount Fuji is visible on clear winter days. Composition Tip: The west-facing windows capture the best sunset-to-night transition. Use a fast wide-angle lens and brace against the glass for sharp long exposures (tripods are sometimes restricted).

    7. Cosmo World & Ferris Wheel — Neon & Motion

    Best Time: 6:30–9:00 PM
    Gear: Wide-angle, tripod for long exposures
    Vibe: Neon lights, playful colors
    Difficulty: Easy — amusement park setting

    The Cosmo Clock 21 ferris wheel is Yokohama’s most iconic night subject. The wheel is illuminated with changing colors, and its reflection in the adjacent canal creates a double-image effect. Composition Tip: Frame the ferris wheel with the canal in the foreground for reflection shots. Use a slow shutter speed (1–2 seconds) to capture the wheel’s motion blur while keeping the central structure sharp.

    8. Noge District — Neon Streets

    Best Time: 7:00–10:00 PM
    Gear: 35mm or 50mm fast prime
    Vibe: Retro neon, local atmosphere
    Difficulty: Easy — public streets

    The Noge area near Kannai Station is Yokohama’s most photogenic night neighborhood. Narrow alleys lined with izakayas, retro neon signs, and a lively local atmosphere make it a street photographer’s paradise. Composition Tip: Shoot from the main intersection looking into the narrow side alleys. The layers of neon signs create depth, and the warm light spilling from doorways adds atmosphere.

    Lesser-Known Spots & Unique Angles

    9. Nogeyama Park — Elevated Skyline View

    Best Time: Late afternoon or early evening
    Gear: Telephoto (70–200mm) for compressed skyline shots
    Vibe: Quiet park, fewer tourists
    Difficulty: Moderate — uphill walk

    A lesser-known viewpoint that offers a unique perspective of the Minato Mirai skyline. The park is slightly elevated, allowing you to shoot over the rooftops of the Kannai district.

    10. Daikoku Pier — Car Meets Coastline

    Best Time: Sunset
    Gear: Wide-angle. ND filter for long exposures
    Vibe: Industrial meets ocean, car culture
    Difficulty: Moderate — requires car or taxi

    The Daikoku Parking Area is famous among car enthusiasts, but photographers love it for the juxtaposition of industrial structures with the bay. The sunset views from the pier are amazing and rarely photographed.

    11. Sankeien Garden — Traditional Japan

    Best Time: Early morning or golden hour
    Gear: Wide-angle for landscapes, macro for details
    Vibe: Traditional Japanese garden, historic buildings
    Cost: ¥700 adults
    Difficulty: Easy — garden paths

    A traditional Japanese garden with historic buildings relocated from Kyoto and Kamakura. The contrast between the garden’s ancient atmosphere and the modern city visible in the distance creates unique compositions. Stay at Sotetsu Fresa Inn Kamakura-Ofuna — budget-friendly & steps from Ofuna Station, great base for day trips

    12. Yokohama Port & Shipping Lanes

    Best Time: Various (shipping traffic constant)
    Gear: Telephoto (100–400mm)
    Vibe: Working port, dramatic clouds
    Difficulty: Moderate — requires planning

    The working harbor east of Yamashita Park offers chances for industrial and maritime photos. Container cranes, cargo ships, and dramatic cloud formations create compelling compositions. —

    📸 Professional Snap photos time

    If you want professional-quality photos of yourself or your group in Yokohama’s most photogenic locations, consider booking a snap photos time. A professional photographer will guide you to the best spots, help with posing, and deliver edited photos within 24–48 hours. What’s Included:

    • Professional photographer guide (English-speaking available)
    • 30–60 minute session at 2–3 locations
    • 20–50 edited digital photos
    • Posing guidance and composition advice
    • Fast delivery (24–48 hours)

    Best Locations for Portrait Sessions:

    • Red Brick Warehouse — classic Yokohama backdrop
    • Yamashita Park — harbor views with ocean breeze
    • Minato Mirai waterfront — modern urban setting
    • Motomachi Street — elegant tree-lined boulevard

    Book a Snap photos time in Yokohama on Klook — professional photos at iconic locations → Reserve your session

    Pro Tips for Your Photo Session:

    • Book the golden hour slot (4:00–5:30 PM) for the best natural light
    • Wear solid colors (avoid busy patterns) for cleaner portraits
    • Bring a change of outfit for variety in your photos
    • Communicate your preferred style — candid, or a mix

    📷 Recommended Gear

    Shot Type Lens Filter Tripod
    Skyline panorama 16–35mm Polarizer Yes
    Nightscape 24–70mm None Yes
    Street photos 35mm or 50mm prime None No
    Portraits 85mm prime None Optional
    Reflections 24–70mm Polarizer Yes
    Architecture 16–35mm Tilt-shift (if available) Yes

    📊 Quick Reference: Best Times & Locations

    Time Best Spot Shot Type Crowd Level
    5:00–6:30 AM Yamashita Park Sunrise harbor Very low
    6:00–8:00 AM Osanbashi Pier Waterfront panorama Low
    10:00 AM–12:00 PM Sankeien Garden Traditional garden Moderate
    4:00–5:30 PM Minato Mirai Golden hour skyline Moderate
    4:00–6:00 PM Red Brick Warehouse Architecture High
    6:00–7:30 PM Landmark Tower Blue hour cityscape Moderate
    7:00–9:00 PM Cosmo World Neon & motion Moderate
    7:00–10:00 PM Noge District Street neon Moderate

    💡 photos Tips for Yokohama

    Best Seasons

    Season Light Advantages Challenges
    Spring (Mar–May) Soft, golden Cherry blossoms, mild weather Occasional haze
    Summer (Jun–Aug) Harsh midday Vibrant sunsets, heat
    Autumn (Sep–Nov) Clear, warm Best light quality, foliage Wind
    Winter (Dec–Feb) Low angle, crisp Mount Fuji visibility, clear air Cold, short days

    Legal & Etiquette

    • Tripods are allowed in public spaces but restricted in some commercial areas (check at Landmark Tower)
    • Drone photos is prohibited in most of Yokohama without special permits
    • Commercial photos requires permits in parks and public spaces
    • Respect privacy — ask before photographing people, mostly in residential areas
    • No photos in onsen bathing areas, temples with posted signs, or private property

    🔗 Related Articles


    Frequently Asked Questions

    Q: What’s the best time for photos in Yokohama?

    A: Golden hour (4:00–5:30 PM) and blue hour (6:00–7:30 PM) offer the most pretty light. Sunrise (5:00–6:30 AM) is great for photos without crowds. Q: Do I need a professional camera?

    A: Not at all — many of Yokohama’s best photo spots look stunning even on a smartphone. The Snap photos time provides professional photos regardless of your equipment. Q: Are there photos tours in English?

    A: Yes — the Snap photos time on Klook can be booked with English-speaking photographers who know the best locations. Q: Is it safe to walk around with camera equipment at night?

    A: Yes — Yokohama is extremely safe. The waterfront areas (Minato Mirai, Yamashita Park) are well-lit and populated until late evening. Q: Can I photograph the Geisha or Maiko in Yokohama?

    A: Unlike Kyoto, Yokohama has no geisha district. For traditional costume photos, consider a samurai or kimono rental time. — Last Updated: May 28. 2026
    Written by: Anaba OffJapan Editorial Team
    Photos: Editorial photos and AI-assisted imagery


    Yokohama rewards photographers who take the time to explore beyond the obvious viewpoints. From the iconic skyline reflections at Minato Mirai to the hidden neon alleys of Noge and the traditional tranquility of Sankeien Garden, the city offers endless chances for remarkable images. And for those who want professional photos of themselves in these stunning settings, the Snap photos time provides a handy. Book your professional Yokohama picture session through Klook for the best rates and availability. —

    My personal exploration of Kanagawa has been incredibly rewarding, and I recommend adding this region to any Japan travel itinerary — the variety of experiences within short distances is what makes it special.

    Whether you’re chasing golden hour at the coast or misty mornings at temples, Kanagawa offers photographers an endlessly rewarding canvas. Discover more scenic spots in our Yokohama Bay Cruise time.

    Conclusion

    exploring Yokohama for its photography can be as relaxed or as packed as you want it to be, and I have found that the best visits leave room for both planning and spontaneity. During my visit to Yokohama I went with a rough plan and found that leaving room to wander made the trip far more memorable. Use this guide to sort out the logistics in advance, then let the day surprise you — Kanagawa rewards travelers who stay curious.

  • Enoshima Hidden Cave Exploration – Kanagawa 2026

    Enoshima Hidden Cave Exploration – Kanagawa 2026

    Enoshima Hidden Cave Exploration – Kanagawa 2026

    Overview

    Introduction: Beyond Enoshima’s Main Path

    📍 Find on Google Maps

    Find this spot on Google Maps for easy navigation.

    📍 View on Google Maps

    Enoshima Hidden Cave Exploration - Kanagawa 2026 — Find on Google Maps

    Enoshima (江ノ島) welcomes millions of visitors each year, most following the same route: bridge → escalator → shrine → observation tower → back. This guide reveals the hidden side of the island — the western cliffs where the sea has carved caves into the volcanic rock, and where ancient hermits once meditated.

    Why Explore Enoshima’s Caves?

    • Historical depth: Worshipped since the Heian period
    • No crowds: Cave trails see 1% of island visitors
    • Dramatic scenery: Cliffs sculpted by typhoon waves
    • Cool refuge: Caves stay 5°C cooler than outside
    • Photography: Unique perspectives of Enoshima

    Safety First

    ⚠️ Important Notes:

    • Caves are natural, not developed for tourism
    • Some areas require bending/crawling
    • Tide-dependent (check before visiting)
    • Slippery when wet
    • Not recommended after dark
    • No guardrails on cliff paths

    The Cave Trail

    Finding the Starting Point

    From Enoshima Bridge:

    1. Cross bridge onto the island
    2. Turn LEFT at the first fork (NOT the main shrine path)
    3. Follow the coastal path (paved) south for 5 minutes
    4. Where the paved path ends, continue on dirt trail
    5. Look for a stone torii gate at the cave entrance

    Alternative route:

    • From Enoshima Iwaya Caves (main tourist caves)
    • Continue past paid entrance area
    • Follow coast another 200m

    Cave #1: Hidden Iwaya (隠れ岩屋)

    This is the first cave you encounter — not to be confused with the developed Iwaya Caves that charge admission. This one is natural, free, and much smaller.

    Location: Western cliff face, 5m above water
    Size: 8m deep, 3m high at entrance
    Access: Short scramble from coastal path
    Condition: Natural (no improvements)
    Features: Small stone altar, candle remnants
    History: Used by Shugendo ascetics

    Interior Experience:
    The cave narrows quickly. At the back, a small stone altar holds old coins and offerings. Damp air and the sound of waves from below create an atmosphere that feels genuinely ancient. Take a moment to sit in silence.

    Photography Tips:

    • Entrance: Frame with coastal view
    • Altar: Use small LED light (no flash)
    • Silhouette: Person at entrance, facing out

    Cave #2: Samurai Shelter (侍の隠れ家)

    A larger chamber further along the coast, this cave was reportedly used by Taira clan survivors after the Genpei War.

    Location: 100m south of Hidden Iwaya
    Size: 15m deep, 4m at highest
    Access: Path continues, watch for rope marker
    Features: Stacked stones, possible fortification
    History: Reputed samurai hiding spot (12th century)

    What to Look For:

    • Stacked stone wall at entrance (man-made)
    • Burn marks on ceiling (sign of occupation)
    • Small water source inside (seepage from above)
    • Shellfish remains (food source)

    Cave #3: The Echo Chamber (響きの洞窟)

    The deepest cave on the trail, this narrow fissure extends approximately 20m into the cliff.

    Location: Most southern point of trail
    Size: 20m deep, narrow (1-2m wide)
    Sound: Notable echo effect
    Features: Natural skylight at back
    ⚠️ Warning: Driest in winter, wettest after rain

    Sound Experience:
    Speak softly and hear your voice echo back for 2-3 seconds. The chamber’s acoustics were likely noticed by ancient worshippers who may have associated the effect with supernatural presence.


    The Coastal Path

    Beyond the caves, the dirt trail continues along the western cliffs for another 500m before looping back to the main area.

    Trail Profile:
    - Length: ~1km total (out and back optional routes)
    - Elevation: 5-20m above sea level
    - Surface: Packed earth, some rock scrambling
    - Width: 50cm-2m (narrow in sections)
    - Exposure: Open cliffs (vertigo warning)
    
    Viewpoints Along the Way:
    1. Western Point: Sagami Bay open view
    2. Southern Overlook: Enoshima lighthouse from below
    3. Channel View: Shonan coast across the water
    4. Hidden Beach: Small pebble beach at low tide

    The Hidden Beach

    At low tide (check tide tables), a small pebble beach is exposed at the base of the southern cliffs. Access requires a careful scramble down a steep path.

    Access: Only at low tide (tide under 50cm recommended)
    Surface: Smooth pebbles
    Size: ~30m long, 5m wide
    Swimming: Not recommended (currents)
    Best for: Photography, quiet contemplation
    ⚠️ Warning: Cut off at incoming tide

    Practical Information

    When to Visit

    Best Conditions:
    - Low tide (under 50cm)
    - Dry weather (at least 3 days since rain)
    - Weekday mornings (least people)
    - Winter (clearest views, no insects)
    
    Avoid:
    - High tide (caves may be inaccessible)
    - Stormy weather (wave spray)
    - Summer weekends (Enoshima crowded)
    - Typhoon season (Sept-Oct)

    What to Bring

    Essential:
    - Sturdy shoes (rocky, uneven terrain)
    - Water
    - Small flashlight/headlamp
    - Light jacket (coastal wind)
    
    Recommended:
    - Kneepad (for low cave sections)
    - Camera with wide lens
    - Tide chart app
    - Gloves (handholds on rocks)
    - Small bag for trash

    Safety Guidelines

    ✅ Check tide tables before going
    ✅ Tell someone your plans
    ✅ Watch foot placement carefully
    ✅ Allow 2+ hours before sunset
    ✅ Carry a phone (limited reception)
    
    ⚠️ High Risk:
    - Climbing on wet rocks
    - Entering caves during high tide
    - Standing near cliff edges for photos
    - Visiting alone after rain
    - Ignoring "No Entry" markers

    Combining with Enoshima

    Morning Cave Exploration (2 hours):
    8:00 AM Arrive on Enoshima
    8:15 AM Start cave trail
    10:00 AM Complete loop
    10:15 AM Rest at coastal cafe
    
    Afternoon Enoshima (3 hours):
    11:00 AM Enoshima Shrine
    12:30 PM Lunch at Enoshima
    1:30 PM Observation Tower
    2:30 PM Samuel Cocking Garden
    3:30 PM Return Best for: Full-day island exploration

    Frequently Asked Questions

    Q: Are these caves dangerous?
    A: Generally safe with caution. The main risk is slippery rocks and getting cut off by incoming tide. Avoid in bad weather. For safety tips, see our Kanagawa Safety Tips guide. Q: Do I need a guide?
    A: No, the trail is straightforward. The directions in this guide are sufficient. Q: Can I take children?
    A: Older children (10+) who are sure-footed. Not recommended for younger children or toddlers.

    Q: Are these the same as the paid Iwaya Caves?
    A: No. The paid Iwaya Caves are developed with lighting and paths. These are natural, free, and more adventurous. Q: Is there an entrance fee?
    A: No, the cave trail is completely free.


    Last Updated: May 19, 2026
    Written by: Anaba OffJapan Editorial Team
    Verified: Trail explored April 2026


    🌟 Share Your Experience

    Explored Enoshima’s hidden caves? Discovered anything unusual? Join our community forum to share your discoveries!


    Anaba OffJapan – Avoid the Crowds, Go Deeper into Japan.


    🦀 Marine Life & Tide Pool Guide

    One of the most rewarding aspects of exploring Enoshima’s hidden caves is observing how the marine ecosystem changes with the seasons. Winter months bring clearer water and different species than summer, making each season’s visit a unique experience. The best approach is to visit at least twice — once in winter for visibility and once in summer for maximum marine life activity.

    Best Time for Photography

    For photographers, timing your visit carefully can make a significant difference in image quality. The western cliffs face southwest, meaning the best light for cave photography occurs in the late afternoon (2-4 PM) when the sun illuminates the cave entrances from the side rather than directly overhead, During winter months (November-February), the lower sun angle creates longer shadows that emphasize the texture of the volcanic rock and moss. Summer photography is better suited to early morning (5-7 AM) when the light is softer and the humidity creates natural mist effects over the water.

    Essential Gear Checklist

    Before setting out on the cave trail, ensure you have the right equipment. The terrain is more demanding than standard Enoshima walking paths, and proper gear significantly enhances both safety and enjoyment:

    • Footwear: Sturdy closed-toe shoes with good grip. The volcanic rock can be sharp and slippery when wet. Avoid sandals or fashion sneakers.
    • Lighting: A headlamp is preferable to a handheld flashlight because it keeps both hands free for balance on uneven sections, Bring backup batteries.
    • Clothing: Lightweight long pants protect against scratches from undergrowth. A windproof jacket is a must-have even on warm days due to coastal gusts.
    • Hydration: At least 1 liter of water. There are no drinking fountains or shops along the cave trail.
    • Navigation: Download offline maps before arriving. Cell reception is spotty on the western cliff face.
    • Emergency: A basic first aid kit and a fully charged phone in a waterproof case.

    What You’ll Find in the Tidal Pools

    Photography Tips for Tide Pools

    Setting Recommendation
    Lens Macro (for small creatures) or 24-70mm
    Polarizer Essential to reduce water surface reflections
    Time 2 hours before low tide for best light
    Technique Shoot parallel to water surface for depth

    Conservation Ethics

    The tide pool ecosystem is fragile. Follow these guidelines:

    • Look, don’t touch — touching removes protective slime from creatures
    • Replace overturned rocks — each rock is a micro-habitat
    • No collecting — everything belongs in the wild
    • Watch your step — many creatures are well-camouflaged

    Geological Background

    The caves were formed over thousands of years by wave action eroding the softer volcanic tuff layers of Enoshima’s cliffs. The island itself is composed of andesite and tuff from ancient volcanic activity in the Hakone region. The caves continue to evolve — each typhoon season brings minor collapses that reshape the caverns. This constant geological change means the cave system looks slightly different every year.

    Combining with Local History

    The caves have drawn spiritual seekers for centuries, During the Kamakura period (1185–1333), Shugendo mountain ascetics used these caves for meditation and austerity training (shugyo). In the Edo period, they became pilgrimage stops for commoners, During World War II, some caves were used as air raid shelters. This layered history adds depth to any visit.


    Enoshima Hidden Cave Exploration - Kanagawa 2026 — Combining with Local History

    Enoshima’s hidden caves offer a rare glimpse into the island’s wilder, more mysterious side. Just steps from the main tourist trail, these natural chambers and cliff paths provide an adventure that most visitors completely miss — proving that even Kanagawa’s most popular destinations still hold secrets.


    Packing Essentials

    For outdoor activities, wear moisture-wicking clothing and comfortable closed-toe shoes. Sunscreen and a hat are essential during summer. A small towel is useful for wiping sweat. A waterproof phone pouch is useful for water activities. Pack snacks and extra water for remote areas.

    Conclusion

    Exploring Enoshima’s hidden caves was one of the most memorable afternoons I have spent on the island — just steps from the crowded shrine path, the western cliffs feel completely wild. Check the tide tables, wear sturdy shoes, and take your time along the coastal trail; the quiet chambers and sea-carved rock are a side of Enoshima most visitors never see.

  • Ofuna Kannon Hidden Hike – Kanagawa 2026

    Ofuna Kannon Hidden Hike – Kanagawa 2026

    Overview

    Introduction: Ofuna’s Hidden Trail

    Ofuna Kannon Hidden Hike - Kanagawa 2026 — Introduction: Ofuna's Hidden Trail

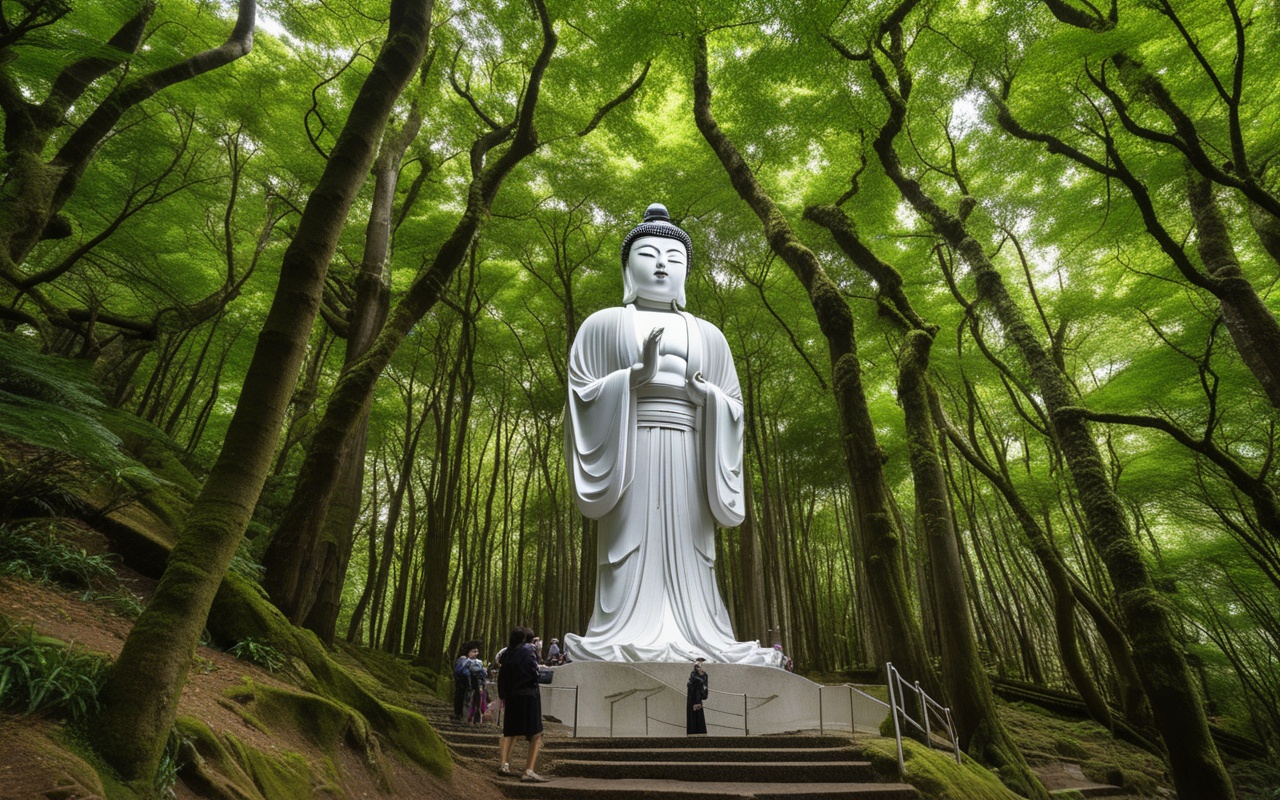
    Ofuna (大船) sits at the crossroads of Kamakura and Yokohama, best known as a transit hub. But directly behind the busy station area rises a forested hill crowned by the towering white Kannon statue — one of the largest such statues in the Kanto region.

    Why This Hike is Special:

    • Hidden trail: Most visitors only see the statue from the parking lot
    • Forest atmosphere: Cedar and bamboo groves
    • Panoramic payoff: Kamakura coast + Mt. Fuji views
    • Zero crowds: Even on weekends, this trail is quiet
    • Easy access: Walk from station, no car needed

    The Trail at a Glance:

    • Length: ~1.5 km loop
    • Elevation gain: ~80m
    • Time: 40-60 minutes
    • Difficulty: Easy (well-maintained path)

    💬 Traveler’s Note: I explored this trail on a quiet weekday afternoon and had the cedar and bamboo groves almost to myself — the only sounds were birds and the occasional temple bell. I recommend visiting in the late afternoon, when the Kannon statue catches golden light and the Kamakura coast views open up behind it.

    • Best season: Year-round (autumn foliage spectacular) Updated: May 2026 (trail verified)

    The Trail Route

    Starting Point: Kannonji Temple Grounds

    Location: 3-3-1 Ofuna, Kamakura City
    Access: 10-min walk from JR Ofuna Station (East Exit)
    Open: 9:00 AM - 5:00 PM (grounds always open)
    Admission: Free (donations welcome)

    Start at the Kannonji Temple (觀音寺) main hall, located at the base of the hill. The white Kannon statue looms above through the trees. Most visitors stop here, take a photo, and leave — missing the trail entirely.

    Don’t Miss:

    • Main hall with intricate ceiling paintings
    • Small garden with seasonal flowers
    • Jizo statues along the path
    • Water basin for purification

    Finding the Hidden Trail

    The trail entrance is not marked in English. Look for a narrow stone stairway on the left side of the main hall, partially hidden by camellia bushes. Follow this upward.

    Trail Entrance:
    - Location: Left of main hall
    - Marker: Small wooden sign in Japanese (大船観音裏山遊歩道)
    - Surface: Stone steps → packed earth
    - Width: 1 meter (single file)

    Trail Sections

    Section 1: Stone Steps to Midway Viewpoint (10 min)

    The first section climbs through a grove of camellia and evergreen trees. The stone steps are worn but stable. After about 100m, you reach a small clearing with a wooden bench — this is the first viewpoint with a partial view of the Kannon statue from behind.

    What to Look For:
    - Camellia flowers (Jan-Mar)
    - Tree ferns
    - Small shrines along the path
    - Bird song (bush warblers common)

    Section 2: Ridge Walk to Peak (15 min)

    The path levels onto a ridge line through mature cedar forest. The sound of traffic from below fades completely. On the left, occasional gaps in the trees reveal glimpses of the Kamakura coastline.

    Terrain:
    - Surface: Packed earth with roots
    - Width: 80cm-1m
    - Shade: 80% canopy coverage
    - Slopes: Gentle (5-10% grade)

    Section 3: Summit Viewpoint (5 min from ridge)

    The trail opens onto a rocky outcrop with a wooden platform. This is the best viewpoint on the trail.

    Summit Viewpoint:
    - Elevation: ~90m above sea level
    - View: 180° (Sagami Bay, Kamakura, Enoshima)
    - Seating: 2 wooden bencheEnoshimat time: Morning (sun behind you)
    - Mt. Fuji: Visible Nov-Feb on clear days

    What You Can See:

    • Kamakura coastline (left)
    • Enoshima Island (center distance)
    • Zushi and Miura Peninsula (right)
    • Mt. Fuji (far left, winter only)
    • Ofuna Station area (below)
    • Hakone mountains (far distance) ExplHakone Fuji & Hakone on a full-day trip with sukiyaki lunch, Hakone Cruise, Ropeway & Shinkansen return

    Section 4: Descent Loop (15 min)

    Instead of returning the same way, continue past the viewpoint for the loop descent. This section passes through a bamboo grove and emerges near the temple’s back gate.

    Descent Notes:
    - Surface: Stone steps (some steep sections)
    - Bamboo grove: 3-minute section
    - Small shrine: On the left mid-descent
    - Exit: Temple back parking lot

    Seasonal Highlights

    Spring (March-May)

    ✅ Cherry blossoms at temple grounds (late March)
    ✅ Camellias along trail (through April)
    ✅ New green leaves on deciduous trees
    ✅ Wild violets on forest floor
    Best for: First-time visitors

    Summer (June-August)

    ✅ Dense shade keeps trail cool
    ✅ Hydrangeas near temple entrance
    ✅ Cicada chorus
    ✅ Early morning best (avoid heat)
    Best for: Escaping coastal crowds

    Autumn (September-November)

    ✅ Spectacular fall colors (late November)
    ✅ Clear skies, best for photography
    ✅ Comfortable hiking temperature
    ✅ Fewer insects
    Best for: Photography

    Winter (December-February)

    ✅ Clearest Mt. Fuji views
    ✅ Best visibility from summit
    ✅ No insects
    ✅ Cold but invigorating
    ✅ Fewest visitors
    Best for: View-seekers

    Photography Tips

    Summit Viewpoint:
    - Lens: Wide-angle (16-35mm) for panorama
    - Time: 7-10 AM (sun behind camera)
    - Tripod: Useful for telephoto shots
    - Filter: Polarizer (reduce coastal haze)
    
    Kannon Statue from Trail:
    - Lens: 50-85mm (compression)
    - Angle: Shoot upward through tree branches
    - Best light: Morning sun on statue face
    - Silhouette: Late afternoon from trail
    
    Trail Details:
    - Macro lens for flowers/fungi
    - Bamboo grove: Shoot along path length
    - Stone steps: Leading lines composition
    - No flash on trail (disturbs wildlife)

    Nearby Hidden Spots

    Ofuna Flower Center (大船フラワーセンター)

    - 5-minute walk from station
    - beautiful seasonal flower displays
    - Greenhouses with tropical plants
    - Entrance fee: ¥350
    - Best for: Spring flowers

    Ofuna Shrine (大船shrine (神社))

    - Small local shrine near station
    - Quiet, no tourists
    - Good for: Quick cultural stop
    - Free admission

    Local Eateries Near Station

    - Kama-ya (釜屋) - Udon noodles since 1950
    - Ofuna Coffee (大船珈琲) - Retro kissaten
    - Station Market - Local snacks and produce

    What to Expect

    Most activities are designed to be accessible for international visitors. Staff at popular attractions are accustomed to non-Japanese speakers and can communicate through basic English or translation apps. Duration varies from 1-2 hour experiences to half-day adventures. Wear appropriate clothing – many activities involve walking or standing for extended periods. Some outdoor activities may have age or height restrictions. Always check the official website before visiting for the latest information.

    Nearby Recommendations

    The area surrounding this activity has plenty to offer. Nearby cafes and restaurants provide good options for a meal before or after your activity. Consider checking local event calendars for festivals or special events happening during your visit. Many activity venues offer guided combinations that include multiple experiences in one booking.

    Local Tips

    Those who frequent these activities suggest checking social media for last-minute openings and special events. Some venues offer discounted admission during certain hours or days of the week. Combining multiple activities in the same area saves travel time and often qualifies for package discounts. Consider joining a group tour for activities that require specialized equipment or guidance.n

    Conclusion

    Whether you are planning exploring Kanagawa for its hike for the first time or returning for another visit, taking a little extra time to go beyond the obvious sights makes all the difference. During my visit I went with a rough plan and found that leaving room to wander made the trip far more memorable. I hope this guide helps you build an itinerary that fits your pace, and that your time in Kanagawa leaves you with memories worth coming back for.
  • Sagami Bay Coastal Trail – Kanagawa 2026

    Sagami Bay Coastal Trail – Kanagawa 2026

    Overview

    Access

    Most visitors reach Kanagawa from central Tokyo by JR, private railway, or highway bus, and an IC card (Suica or Pasmo) works across all of them. From my experience, leaving Tokyo before the morning rush keeps the journey relaxed, and station luggage lockers are handy if you arrive early.

    Introduction: Kanagawa’s Wild Coast

    Sagami Bay Coastal Trail - Kanagawa 2026 — Introduction: Kanagawa's Wild Coast

    While most visitors explore Kamakura’s temples or Enoshima’s crowded observation decks, the Sagami Bay coast offers a different kind of Kanagawa experience. This trail follows the traditional route used by fishermen to travel between villages before modern roads were built. Today, it’s a quiet hiking path through a landscape that has changed little in centuries.

    Why This Trail is Special:

    • No crowds: Some days you’ll have the trail to yourself
    • Genuine fishing villages: Working communities, not tourist shows
    • Tidal pools: excellent for exploring at low tide
    • Historical features: Old stone walls, shrines, WWII remnants
    • Coastal views: Mt. Fuji on clear days (winter)

    Trail Profile:

    Route: Misakiguchi → Aburatsubo → Nagai → JogashJogashimaach
    Length: 10km (point to point)
    Elevation: Minimal (mostly flat, some short climbs)
    Surface: Paved (40%), dirt (40%), stone steps (20%)
    Water: Bring 1L minimum (no shops on sections)


    Trail Sections

    Section 1: Misakiguchi to Aburatsubo (2km, 40 min)

    Start from Misakiguchi Station and walk west toward the coast.

    Starting Point: Keikyu Misakiguchi Station
    Direction: West toward the bay
    Surface: Residential streets → coastal path
    Highlights:

    • Small fishing shrine at the harbor
    • Working fishing boats (morning best)
    • Old stone warehouse (明治-era, now abandoned)

    GPS Waypoint: 35.1567°N, 139.6134°E (harbor entrance) First Viewpoint: After 1km, the trail meets the open bay at a small seawall. On clear days, Mt. Fuji appears across the water. A wooden bench here is a good initial rest stop.

    Section 2: Aburatsubo Village Loop (1.5km, 30 min)

    Aburatsubo is the most picturesque village on the route — a cluster of traditional houses around a natural harbor.

    Terrain: Coastal path + village lanes
    Highlights:

    • Aburatsubo Inlet: Calm, emerald water
    • Fishing boats: Colorful wooden boats
    • Village shrine: Small, unattended
    • Old well: Still used by locals
    • Tidal pool area: At low tide (best exploration)

    **
    Tidal Pools at Aburatsubo:
    At low tide, the rocky shore reveals pools with:

    • Small crabs
    • Sea anemones
    • Hermit crabs
    • Small fish
    • Various seashells

    Best time: 2 hours before low tide (check tables)

    Section 3: Aburatsubo to Nagai Coast (3km, 60 min)

    This is the most scenic section, hugging the coastline with constant ocean views.

    Terrain: Dirt path + old stone steps
    Highlights:
    - Cliff views: 20m above the water
    - WWII bunker: Abandoned, visible from path
    - Old stone wall: Edo-era fishing boundary marker
    - Small cove: Pebble beach, good for breaks
    - Wildflowers: In season (spring and autumn)

    ⚠️ Caution: This section has some narrow parts with dropoffs. Watch footing, especially after rain. The WWII bunker is unstable — observe from the path.

    Midpoint Rest: At 4.5km, a small clearing with a stone Jizo statue offers a natural rest point with shade and a view.

    Section 4: Nagai Coast (2km, 40 min)

    The trail passes through the Nagai area, where the coast opens up and the path becomes easier.

    Terrain: Flat coastal path (paved sections)
    Highlights:

    • Nagai Beach (not for swimming, rocky)
    • Tide pools (extensive at Nagai)
    • Small lighthouse
    • Abandoned fishing huts
    • Beach glass (some areas)

    Note: This section has the best tidal pool exploration

    • Go at low tide (0.5m or lower)
    • Wear water shoes (sharp rocks)
    • Bring a small net (catch and release)
    • Watch for sea urchins (don’t touch)
    • Photography: Polarizer filter essential

    Section 5: Nagai to Jogashima Approach (1.5km, 30 min)

    The final section approaches the bridge to Jogashima Island.

    Terrain: Paved path, then road
    Highlights:

    • Fisherman’s shrine: Small, with unique stone torii
    • Jogashima Bridge: Final destination
    • Sunset viewpoint: End the walk here
    • Bus stop: Return to station

    Alternative: Continue to Jogashima Island for sunset


    Seasonal Notes

    Winter (Nov-Feb) — Best Season

    ✅ Clearest views, Mt. Fuji visible
    ✅ Cool hiking temperatures
    ✅ Low tide in daylight hours
    ✅ Fewest other walkers
    ✅ Sharp light for photography
    ❌ Cold wind off the water

    Spring (Mar-May)

    ✅ Wildflowers along the trail
    ✅ Mild temperatures
    ✅ Longer daylight
    ⚠️ More haze on the water
    ⚠️ Increasing visitors

    Summer (Jun-Aug)

    ✅ Longest days
    ✅ Warm water for tide pools
    ❌ Hot, humid
    ❌ High tide during daylight
    ❌ Insects
    ❌ Typhoon risk (Sept)

    Autumn (Sep-Nov)

    ✅ Comfortable temperatures
    ✅ Fall colors (limited on coast)
    ✅ Lower humidity
    ✅ Good visibility
    Best for: Photography


    Practical Information

    What to Bring

    Essential:

    • Sturdy walking shoes
    • Water (1.5L minimum)
    • Sun protection
    • Snacks/lunch
    • Windbreaker

    Recommended:

    • Binoculars (bird watching)
    • Camera (wide lens for coast)
    • Tide table
    • Small first aid kit
    • Cash (no ATMs on trail) Optional:
    • Snorkel mask (tide pools)
    • Field guide (coastal plants)
    • Fishing line (local fishermen friendly)

    Getting There and Back

    Start (Misakiguchi Station):
    From Yokohama: Keikyu Line (35 min, ¥450)
    From Kamakura: Keikyu Line (25 min, ¥350)
    From Tokyo: JR → Yokohama → Keikyu (90 min)
    
    End (Jogashima or Nagai):
    Bus from Jogashima entrance to Misakiguchi (15 min, ¥300)
    Last bus: Varies by season (check)

    Facilities Along the Trail

    Restrooms:
    - Misakiguchi Station (before start)
    - Aburatsubo Marine Park (km 2.5)
    - Nagai area (km 6)
    - Jogashima Bridge (km 9)
    
    Water:
    - Aburatsubo visitor center
    - Nagai (small shop, limited hours)
    - Bring your own (recommended) Food:
    - Bring your own (recommended)
    - Aburatsubo has limited snacks
    - Jogashima has vending machines

    Frequently Asked Questions

    Q: Can I do this trail in running shoes?
    A: Yes, the trail is mostly smooth enough for running shoes, Hiking boots not required.

    Q: Is the trail well-marked?
    A: Some sections are better marked than others. Download the GPS track before going. Signs are in Japanese. Q: Can I bring my dog?
    A: Yes, the trail is dog-friendly. Keep leashed near villages. Q: Is there shade?
    A: Limited. About 30% of the trail has tree cover. Bring sun protection. Q: Can I swim along the trail?
    A: Some coves are swimmable. Check conditions locally. No lifeguards.


    Last Updated: May 19, 2026
    Written by: Anaba OffJapan Editorial Team
    Verified: Trail hiked April 2026


    🌟 Share Your Experience

    Hiked this trail? Found a secret cove along the way? Join our community forum to share your coastal discoveries!


    Anaba OffJapan – Avoid the Crowds, Go Deeper into Japan.


    🐟 Fishing Village Culture & Local Life

    The Sagami Bay Coastal Trail offers more than just scenic walking — it’s a living museum of Japan’s coastal heritage. The fishing villages along this route have maintained traditional practices that have largely disappeared elsewhere in Kanagawa, Observing the daily rhythms of these communities — morning boat departures, afternoon net repairs, evening family meals — provides cultural insight that no museum can replicate.

    Trail Navigation Tips

    The coastal trail is not consistently marked. While some sections have wooden signposts in Japanese, others require careful attention to stay on route. Download the GPS track before departure and carry a fully charged power bank — phone battery drains faster near the coast due to constant searching for cellular signal. Key landmarks to watch for: at the end of the Aburatsubo village road, look for a stone marker with a carved fish (next to the old well); from there, the trail continues as a dirt path between two persimmon trees. The most confusing section is the Nagai approach, where the trail briefly crosses a paved road — look for the faded red arrow painted on the utility pole at the intersection.

    Packing for the Trail

    Beyond the standard hiking essentials, the coastal trail requires specific gear:

    • Sun protection: The trail has only 30% shade coverage. A wide-brimmed hat, UPF-rated clothing, and reef-safe sunscreen are essential.
    • Footwear: Water-resistant trail runners or approach shoes are ideal. The trail includes sections where waves splash across the path at high tide.
    • Camera protection: Coastal salt spray is corrosive. Wipe down camera gear with a dry microfiber cloth after the hike.
    • Plenty of water: There are no water refill points between Misakiguchi and Jogashima. The 10km trail requires at least 1.5 liters per person.
    • Snacks: Calorie-dense food like trail mix, onigiri (rice balls), or protein bars will sustain energy through the 3-5 hour hike.

    The Five Fishing Villages

    Each village along the trail has a distinct character shaped by its geography and history. Misaki (三崎) — The largest fishing port on the Miura Peninsula, famous for its tuna fleet. Misaki processes approximately 20% of Japan’s bluefin tuna. The morning auction (5:30-7:00 AM) is a spectacle of speed and expertise — buyers inspect tuna with flashlights and bid in rapid-fire calls. Visitors can observe from a designated viewing area near the market office.

    Aburatsubo (油壺) — Named for its oil-slick-smooth harbor waters, this village has been a fishing community since the Edo period. Its name comes from “abura” (oil) and “tsubo” (jar), referring to the harbor’s protected, oil-like calm waters. The village maintains traditional methods: small wooden boats (wasen) are still repaired by hand on the shore.

    Nagai (長井) — The most rural village on the route, with a declining population of under 2,000. The village’s few remaining fishing families have diversified into tourism — offering homestay experiences and fishing tours. The community center displays photographs documenting village life since the 1920s.

    Jogashima Area — While the island itself is a designated natural park, the mainland approach has small fishing shacks where you can buy freshly caught fish directly from the fishermen. Look for the hand-painted signs near the bridge entrance.

    Local Dialect and Phrases

    The Miura Peninsula has its own dialect (Miura-ben), though it’s gradually disappearing. You might hear:

    Standard Japanese Miura-ben English
    Arigatou Ooki-ni Thank you
    Tabemashou Kuwae-mau Let’s eat
    Samui Sabi-ne Cold, isn’t it?
    Ii tenki da ne Ee tenki ya na Nice weather

    Photography Along the Trail

    Best Light Conditions:

    • Morning (7-10 AM): Sun behind you when walking south to north
    • Late afternoon (3-5 PM): Golden light on the cliffs and villages
    • Winter: Lowest sun angle, longest shadows, most dramatic light
    • After a storm: Clearest air, maximum visibility of Mt. Fuji

    Recommended Gear:

    • 24-70mm zoom for village scenes and general landscapes
    • 70-200mm telephoto for compressing coastal layers and distant fishing boats
    • Polarizing filter for cutting through coastal haze and enhancing water color
    • Tripod for long exposure seascapes (1-4 second shutter for silky water effects)

    Sagami Bay Coastal Trail - Kanagawa 2026 — Photography Along the Trail

    The Sagami Bay Coastal Trail is one of Kanagawa’s best kept secrets — a genuine coastal hiking experience that shows a side of the prefecture most visitors never see. With its working fishing villages, tidal pools, and uninterrupted coastal views, it offers the kind of immersive travel experience that guidebooks rarely capture.


    Packing Essentials

    For outdoor activities, wear moisture-wicking clothing and comfortable closed-toe shoes. Sunscreen and a hat are essential during summer. A small towel is useful for wiping sweat. A waterproof phone pouch is useful for water activities. Pack snacks and extra water for remote areas.

    Conclusion

    Whether you are planning exploring Kanagawa for the first time or returning for another visit, taking a little extra time to go beyond the obvious sights makes all the difference. During my visit I went with a rough plan and found that leaving room to wander made the trip far more memorable. I hope this guide helps you build an itinerary that fits your pace, and that your time in Kanagawa leaves you with memories worth coming back for.
  • Miura Fishing Costs Guide 2026

    Miura Fishing Costs Guide 2026

    Miura Fishing Costs Guide 2026

    Overview

    Fishing off the Miura Peninsula offers excellent value compared to other Tokyo-accessible fishing destinations — but only if you know what to expect. Between charter boats, shore fishing, and market tours, costs range from ¥1,000 for a basic rod rental to ¥60,000 for a private charter. The key is matching your budget to the right experience.

    I tried fishing off Miura last spring. I booked a shared boat charter (¥10,000) through a local tackle shop near Misaki Port. The captain spoke enough English for basic instructions, and we caught sea bream and horse mackerel within two hours. The catch was cleaned on the boat and I took it to a nearby restaurant that cooks your catch for ¥1,500 — a highlight of the trip. For more Miura activities, see our Miura fishing experience guide or Miura peninsula access guide.

    Miura fishing costs

    Price Overview

    • Budget: ¥2,000–5,000 (net mending, basic shore fishing)
    • Mid-range: ¥5,000–10,000 (shore fishing, market tours)
    • Premium: ¥10,000–20,000 (boat fishing, sushi making)
    • Luxury: ¥20,000+ (private charters, full-day experiences)

    Activity Price Breakdown

    Boat Fishing

    Type Price Duration Group Includes
    Shared boat (group tour) ¥8,000–12,000/person 3–4 hours 4–8 people Boat, equipment, bait, safety gear, fresh catch. Weekdays cheaper. Book 1–2 weeks ahead
    Private boat charter ¥30,000–60,000/boat 4–6 hours 2–6 people Private boat, captain, all equipment, flexible schedule. Best split among 4–6 people (¥7,500–10,000/person). Book 2–4 weeks ahead

    Shore Fishing

    Type Price Duration Notes
    Guided shore fishing ¥3,000–6,000/person 2–3 hours Rod, tackle, bait, instruction included. Book 2–3 days ahead
    Self-guided (equipment rental) ¥1,000–2,000/person Flexible Rod rental, basic tackle, bait. Walk-in OK

    Market Tours & Experiences

    Activity Price Duration Booking
    Standard market tour ¥4,000–6,000 2–3 hours 1 week ahead
    Premium market + breakfast ¥7,000–10,000 3–4 hours 2 weeks ahead
    Standard sushi class ¥10,000–14,000 3–4 hours 2–3 weeks ahead
    Premium sushi experience ¥15,000–20,000 4–5 hours 3–4 weeks ahead
    Net mending ¥2,000–3,500 1–2 hours 2–3 days ahead
    Fishery museum + workshop ¥1,500–2,500 1–2 hours Walk-in OK

    Price Variations by Season

    Season Price vs base Booking ahead
    Peak (Apr–May, Oct–Nov) +10–20% 3–4 weeks
    Off-season (Dec–Feb, Jun–Sep) –10–30% Flexible
    Holidays (Golden Week, Obon, New Year) +20–50% 2–3 months

    Total Trip Budgets

    Budget Day (¥10,000): Self-guided shore fishing ¥2,000 + convenience store lunch ¥500 + net mending ¥3,000 + train from Tokyo ¥1,640 + local bus ¥760 = ¥9,900

    Mid-Range Day (¥25,000): Shared boat fishing ¥10,000 + market tour ¥5,000 + seafood lunch ¥3,000 + sushi dinner ¥5,000 + transport ¥3,640 = ¥27,640 Get the Yokohama Seaside Gourmet Train Pass — combine transport & dining for a perfect bay area day out

    Premium Day (¥50,000+): Private boat charter (4-way split) ¥12,500 + premium sushi class ¥18,000 + kaiseki dinner ¥15,000 + transfer ¥6,250 + ryokan ¥25,000 = ¥85,750

    What to Expect on Your First Fishing Trip

    If you’ve never fished in Japan before, here is what I learned: Most charter operators at Misaki Port provide everything including life jackets, rods, reels, bait, and fish storage. You only need to bring sun protection, a hat, and a cooler bag if you want to take your catch home. The crew handles all the setup and shows you how to use the gear.

    The language barrier is manageable — key phrases like “tsuri” (fishing) and “kore ikura” (how much is this) go a long way. Several tackle shops near Misaki Port have English price lists. I recommend stopping by the Misaki Port Tourist Information Center first — they have a fishing pamphlet in English with current prices and contact numbers for charter operators. For getting there, see our Misaki Port access guide or Miura peninsula access guide.

    Money-Saving Tips

    • Book directly with providers — avoid 10–20% third-party fees
    • Visit weekdays — 10–20% cheaper than weekends
    • Go off-season (winter or summer) — 20–30% discounts common
    • Package deals — combine 2+ activities for 10–15% discount
    • Group bookings (6+) — always ask for a group rate
    • Bring own equipment for shore fishing — save ¥1,000–2,000 on rental

    Payment Tips

    • Cash: Most providers are cash-only. Bring ¥10,000–20,000
    • Credit cards: Some accept for online bookings
    • IC cards (Suica/Pasmo): Transportation only, not activities
    • Tipping: Not required in Japan — show appreciation with a smile or review

    Frequently Asked Questions

    Q: What’s the cheapest fishing activity?
    A: Self-guided shore fishing (¥1,000–2,000 equipment rental) or net mending (¥2,000–3,500). Q: Is boat fishing worth the extra cost?
    A: Yes, for an authentic experience and better catch. Best value: shared group tours (¥8,000–12,000). Q: Can I negotiate prices?
    A: Off-season, yes (10–20% possible). Peak season, rarely. Group bookings, always ask. Q: Are children charged full price?
    A: Usually discounted. Under 6: often free. 6–12: 30–50% off.

    Q: Do I need a fishing license in Kanagawa?
    A: No license is required for recreational fishing in Kanagawa’s coastal waters. However, some freshwater areas near the peninsula do require a license. Your charter operator will tell you if one is needed.

    Q: What’s the best time of day for fishing?
    A: Early morning (6:00–9:00 AM) is generally best for Miura Peninsula fishing. Charters typically depart at sunrise. Afternoon fishing is less productive but still enjoyable.


    Last Updated: July 17, 2026
    Written by: Anaba OffJapan Editorial Team

    🎯 Practical Tips for Your Visit

    Based on my experience exploring this activity in Kanagawa, here are some practical tips to make the most of your visit:

    • Start early in the day to avoid crowds and make the most of daylight hours. I found that arriving by 9 AM gave me a much more relaxed experience.
    • Bring comfortable walking shoes and weather-appropriate clothing. The weather in Kanagawa can change quickly, especially near the coast.
    • Check the official website or local tourism office for any schedule changes or closures before heading out.

    📅 Planning Your Visit

    The best time to plan this activity depends on your preferences. Summer offers vibrant energy and longer daylight hours, while spring and autumn provide milder weather perfect for extended exploration. Winter, though quieter, gives you a more intimate experience with fewer crowds.

    Most venues in Kanagawa open around 9 AM or 10 AM. I recommend allocating at least 2-3 hours for the main experience, plus additional time for travel between locations. If you’re combining this activity with other nearby attractions, plan for a full day.

    Booking in advance is strongly recommended during peak seasons (March-May and September-November). Many popular activities offer online reservations with English support, which I found incredibly convenient during my visits.

    What I Typically Spend on a Miura Fishing Trip

    After several fishing trips on the Miura Peninsula, I have a clear picture of the costs involved. A typical day of shore fishing at Jogashima costs me about ¥3,500 total: ¥1,200 for bait (live shrimp or squid from the local tackle shop), ¥800 for a temporary fishing license (one-day permit), and the rest for snacks, drinks, and train fare from Yokohama.

    Boat fishing is more expensive but can be more productive. Misaki Port offers half-day boat charters starting at ¥8,000 per person, which includes bait and tackle rental. I went on one in October and caught a dozen mackerel and two sea bream — the boat captain cleaned and filleted the catch for me at no extra charge.

    My biggest money-saving tip: bring your own lunch. The restaurants near the fishing spots are convenient but charge tourist prices (¥1,200–1,500 for a simple set meal). Packing onigiri and a thermos of tea from home costs about ¥400 and lets you stay at your spot longer.

    Budget Breakdown from My Last Trip

    I tracked every expense during my most recent Miura fishing trip to give a realistic budget breakdown. The trip was a full day of shore fishing at Jogashima, and the total came to ¥4,650. Transport: ¥1,200 round trip from Yokohama to Misaki by Keikyu Line. Bait: ¥1,000 for a box of squid from the Misaki Port tackle shop. Food: ¥1,450 for lunch (a tuna bowl set at a portside restaurant) and ¥500 for drinks and snacks. License: ¥500 for the one-day fishing permit.

    Comparing costs between my trips, I found that shore fishing is significantly cheaper than boat fishing. My half-day boat charter cost ¥8,000, plus ¥2,500 for gear rental and tips. That said, the boat catch was much better — I brought home enough fish for three meals, which offset some of the cost. If you plan to eat your catch, the per-meat cost of boat fishing can be comparable to buying fish from the supermarket.

    Money-saving tip: bring a cooler bag and ice packs. The tackle shop near the station sells bluefin tuna scraps for ¥300 per bag — not pretty but delicious grilled. I bought two bags and had tuna with my instant ramen at the Airbnb. Also, the Misaki Port area has a public barbecue space (free, first-come-first-served) where you can cook your catch. I grilled a sea bream there, and the combination of fresh fish and sea air was unforgettable.

    Getting There

    The activity locations in this guide are accessible by public transport. Major train stations have clear signage in English. For remote locations, consider renting a bicycle from the station area. Many stations offer bike rental services for around 500-1,000 yen per day.

    Best Time to Visit

    Outdoor activities are best enjoyed in spring and autumn when temperatures are comfortable. Summer activities like swimming and surfing are popular from July to August. Some activities may close during winter months. Check operating schedules before planning your visit. Weekday mornings offer the best experience with fewer crowds.

    Conclusion

    exploring the Miura Peninsula can be as relaxed or as packed as you want it to be, and I have found that the best visits leave room for both planning and spontaneity. During my visit to the Miura Peninsula I went with a rough plan and found that leaving room to wander made the trip far more memorable. Use this guide to sort out the logistics in advance, then let the day surprise you — Kanagawa rewards travelers who stay curious.

  • Kanagawa Onsen Guide – Kanagawa 2026

    Kanagawa Onsen Guide – Kanagawa 2026

    Kanagawa offers a wide range of activities for every type of traveler. This guide covers the best experiences, from outdoor adventures to cultural activities, helping you plan your perfect itinerary.

    Overview

    Quick Links

    Planning a visit to experience Kanagawa Onsen Guide – Kanagawa 2026 in Kanagawa? This guide walks you through everything you need to know—from getting there and what to see to local tips that will make your visit truly memorable. Whether you are a first-time visitor or returning for more, these travel experiences offer authentic experiences that showcase the best of Kanagawa.

    📍 Location


    • Access: 1-1.5 hours from Tokyo
    • Best areas: Hakone, Yugawara, Miura
    • Best for: Day trips, overnight stays, relaxation
    • Best season: Year-round (winter especially popular)

    Kanagawa Onsen Guide - Kanagawa 2026 — Location
    Kanagawa Onsen Guide - Kanagawa 2026 — Location


    Introduction: Why Kanagawa Onsen?

    Kanagawa Onsen Guide - Kanagawa 2026 — Introduction: Why Kanagawa Onsen?

    Kanagawa Prefecture is home to some of Japan’s best hot springs, all within easy reach of Tokyo. From the famous Hakone area to hidden coastal onsens, Kanagawa offers diverse onsen experiences for day trippers and overnight guests alike.

    Highlights:

    • 100+ onsen facilities
    • Easy access from Tokyo (1-1.5 hours)
    • Day trip and overnight options
    • Various water types and benefits
    • beautiful natural settings

    Hakone

    Best for: Resort experience, Mount Fuji views, tourism

    Access: 1.5 hours from Tokyo
    Onsen type: Sulfur, simple alkaline
    Day trips: 20+ facilities
    Overnight: 100+ ryokan

    Japan’s most famous onsen resort area, offering stunning Mount Fuji views and numerous attractions. Top Onsen:

    • Hakone Yuryo (day trip)
    • Tenzan Onsen (day trip)
    • Gora Kadan (luxury ryokan)
    • Hakone Kowakien Ten-yu (resort)

    Yugawara

    Best for: Traditional atmosphere, quiet retreat

    Access: 1 hour from Tokyo (Shinkansen)
    Onsen type: Simple alkaline
    Day trips: 10+ facilities
    Overnight: 30+ ryokan

    A quiet onsen town with over 1,300 years of history, perfect for a peaceful retreat. Top Onsen:

    • Yugawara Station Onsen (day trip)
    • Hot Spring Resort Yugawara (day trip)
    • Traditional ryokan along the stream

    Miura Peninsula

    Best for: Coastal views, seafood, day trips

    Access: 1.5 hours from Tokyo
    Onsen type: Sodium chloride
    Day trips: 5+ facilities
    Overnight: 10+ hotels

    Coastal onsen with ocean views and fresh seafood, ideal for day trips. Top Onsen:

    • Misaki Onsen (day trip)
    • Jogashima Onsen (day trip)
    • Aburatsubo Onsen (day trip)

    Hakone Yuryo

    Best for: Forest setting, private baths

    Cost: ¥1,400 (day trip)
    Hours: 10:00 AM - 9:00 PM
    Access: 10 min bus from Gora Station
    Facilities: 11 baths, sauna, restaurant

    A beautiful onsen resort set in a forest valley, offering 11 different baths including private options. Features:

    • Outdoor rock baths
    • Private family baths (¥2,000/50min)
    • Forest views
    • Restaurant on-site

    Tenzan Onsen

    Best for: Variety of baths, value

    Cost: ¥1,500 (day trip)
    Hours: 7:00 AM - 11:00 PM
    Access: 15 min bus from Hakone-Yumoto
    Facilities: 8 baths, sauna, restaurant

    One of Hakone’s most popular day trip onsen with excellent facilities and reasonable prices. Features:

    • Large outdoor bath
    • Electric bath
    • Sauna with water bath
    • Massage services

    Manyo Club (Yugawara)

    Best for: 24-hour access, ocean views

    Cost: ¥1,650 (day trip)
    Hours: 24 hours
    Access: 5 min walk from Yugawara Station
    Facilities: 7 baths, restaurant, lounge

    A 24-hour onsen resort with ocean views, perfect for early morning or late night visits. Features:

    • Ocean view baths
    • 24-hour operation
    • Sleeping lounge
    • Restaurant and bar

    Luxury (¥40,000+/night)

    Gora Kadan (Hakone)

    Price: From ¥50,000/night
    Features: Michelin-starred kaiseki, private onsen
    Access: 5 min from Gora Station
    Rating: 5 stars

    Hakone Kowakien Ten-yu

    Price: From ¥40,000/night
    Features: All rooms with open-air bath
    Access: 10 min from Kowakidani Station
    Rating: 5 stars

    Mid-range (¥15,000-30,000/night)

    Hakone Suishoen

    Price: From ¥20,000/night
    Features: Large public baths, kaiseki meals
    Access: Free shuttle from Hakone-Yumoto
    Rating: 4 stars

    Yugawara Onsen Yado Sakan

    Price: From ¥18,000/night
    Features: Traditional atmosphere, riverside location
    Access: 5 min walk from Yugawara Station
    Rating: 4 stars

    Budget (Under ¥15,000/night)

    Hakone Pax Yoshino

    Price: From ¥12,000/night
    Features: Simple rooms, good onsen
    Access: 5 min walk from Hakone-Yumoto Station
    Rating: 3 stars


    Before Entering

    1. Remove shoes at the entrance
    2. Store belongings in provided lockers
    3. Wash thoroughly at shower stations
    4. No swimsuits (onsen are enjoyed nude)
    5. Tie up long hair

    In the Bath

    1. No soap in the baths
    2. No swimming or splashing
    3. Keep towels out of the water
    4. Be quiet and relax
    5. No photography in most facilities

    After Bathing

    1. Rinse off lightly (don’t wash off all minerals)
    2. Dry off before returning to locker room
    3. Hydrate with water or milk
    4. Rest in relaxation areas

    Simple Alkaline (Tanjun Kaisei)

    Found in: Hakone, Yugawara
    Benefits: Skin beautification, pain relief
    Color: Clear
    Feel: Smooth, silky

    Sulfur (Iou)

    Found in: Owakudani (Hakone)
    Benefits: Skin conditions, respiratory issues
    Color: Milky white
    Smell: Rotten egg scent

    Sodium Chloride (Shio)

    Found in: Miura Peninsula
    Benefits: Wound healing, cold sensitivity
    Color: Slightly yellow
    Feel: Warm after bathing


    To Hakone

    Romancecar (Recommended):

    • Shinjuku to Hakone-Yumoto: 85 minutes
    • Cost: ¥2,470 (reserved seat)
    • Frequency: Every 30 minutes Shinkansen:
    • Tokyo to Odawara: 40 minutes
    • Then local train: 15 minutes
    • Cost: ¥4,500 (covered by JR Pass)

    To Yugawara

    Shinkansen:

    • Tokyo to Yugawara: 50 minutes
    • Cost: ¥3,500 (covered by JR Pass) Local train:
    • Tokyo to Yugawara: 90 minutes
    • Cost: ¥1,500

    To Miura

    Train + Bus:

    • Tokyo to Misakiguchi: 90 minutes
    • Then bus: 15 minutes
    • Cost: ¥1,500

    Day Trip from Tokyo

    Morning:

    • Depart Tokyo (8 AM)
    • Arrive Hakone-Yumoto (9:30 AM)
    • Visit Tenzan Onsen Afternoon:
    • Lunch in Hakone
    • Visit Owakudani
    • Return to Tokyo (5 PM)

    Overnight Trip

    Day 1:

    • Depart Tokyo (10 AM)
    • Check into ryokan
    • Enjoy onsen and kaiseki dinner Day 2:
    • Morning onsen
    • Sightseeing
    • Return to Tokyo (3 PM)

    What to Bring

    Provided by most onsen:

    • Towels
    • Toiletries
    • Yukata (at ryokan) Bring yourself:
    • Change of clothes
    • Medications
    • Camera (for outside baths)

    Tattoos

    • Many onsen prohibit visible tattoos
    • Some allow with covering patches
    • Private baths available at some facilities
    • Check policies in advance

    Cost Savings

    • Hakone Free Pass: Covers transport + discounts
    • Day trip passes: ¥1,000-2,000
    • Overnight packages: Often include meals and activities

    Kanagawa Onsen Guide scenery and attractions


    Summary

    Kanagawa offers exceptional onsen experiences just 1-1.5 hours from Tokyo. Whether you’re looking for a quick day trip or a luxurious overnight stay, Kanagawa has the perfect onsen for you.

    Key highlights:

    • 100+ onsen facilities
    • Easy access from Tokyo
    • Day trip and overnight options
    • Various water types
    • beautiful natural settings

    Kanagawa Onsen Guide There is nothing quite like soaking in a natural hot spring while overlooking Mount Fuji or a forested valley. Kanagawa’s onsen offer the perfect way to unwind after a day of exploration, combining therapeutic waters with stunning scenery.

    Do onsen allow tattoos?

    A. Many don’t, but some do with covering patches. Private baths are an option.

    What should I wear?

    A, Nothing! Onsen are enjoyed nude. Small towels are provided.

    Can I visit onsen with children?

    A. Yes, many onsen welcome families. Some have family baths.

    Is the onsen water safe?

    A. Yes, onsen water is naturally filtered and regularly tested.

    Frequently Asked Questions

    Q: What is the best season to plan a visit here?
    A: The ideal seasons for visiting this area are spring (March-May) and autumn (September-November), when temperatures are moderate and rainfall is minimal. Summer offers vibrant festivals and beach activities despite the humidity. Winter provides crisp, clear days perfect for photography and sightseeing with fewer tourists.

    Q: Which train line should I take to get there?
    A: Multiple train lines serve different parts of Kanagawa from Tokyo. The JR Tokaido Line, Odakyu Line, Keikyu Line, and Shonan-Shinjuku Line all provide access. The best route depends on your starting point in Tokyo. Smartphone navigation apps provide real-time route guidance.

    Q: Is this destination manageable as a day trip from Tokyo?
    A: Yes, all destinations in this guide work well as day trips. Plan to arrive by late morning to see the main highlights. For a relaxed pace including lunch and optional detours, allow 6-8 hours. If you have more time, extending your stay overnight lets you explore at a leisurely pace and enjoy evening attractions.

    Q: Do I need any special skills or equipment to enjoy this destination?
    A: Most attractions in this guide are accessible to visitors of all backgrounds and fitness levels. Well-maintained paths, clear signage, and English information make navigation easy. For activities requiring specific gear (hiking shoes, swimwear, etc.), recommendations are included in the relevant sections above.

    Kanagawa Onsen Guide – Kanagawa 2026 provides everything you need to make your Kanagawa trip smooth and enjoyable. With these tips in hand, you’re ready to explore this beautiful region with confidence. Safe travels!


    Packing Essentials

    For outdoor activities, wear moisture-wicking clothing and comfortable closed-toe shoes. Sunscreen and a hat are essential during summer. A small towel is useful for wiping sweat. A waterproof phone pouch is useful for water activities. Pack snacks and extra water for remote areas.

    For more details, read our guide to Shonan Pet Friendly Spots.

    Conclusion

    exploring Kanagawa for its onsen can be as relaxed or as packed as you want it to be, and I have found that the best visits leave room for both planning and spontaneity. During my visit I went with a rough plan and found that leaving room to wander made the trip far more memorable. Use this guide to sort out the logistics in advance, then let the day surprise you — Kanagawa rewards travelers who stay curious.

  • Kanagawa Summer Fireworks Guide 2026

    Kanagawa Summer Fireworks Guide 2026

    Overview

    1. Sagami River Fireworks Festival

    Best for: Large-scale spectacle (20,000+ fireworks)

    Date: July 25, 2026 (Saturday)
    Time: 7:00 PM - 8:30 PM
    Location: Sagami River, Sagamihara
    Access: JR Sagamihara Station, then shuttle bus
    Admission: Free (reserved seating: ¥3,000)
    Expected crowd: 300,000+

    I arrived at Sagamihara Station around 3 PM for a 7 PM show, and even that felt late. The shuttle bus queue was already 20 minutes long. Next time, I’d aim for 2 PM and bring a proper picnic.

    Highlights:

    • 20,000 fireworks over a 1km river span
    • Musical synchronization during the finale
    • 100+ food stalls (try the yakitori from the third stall on the left — best pricing)

    Viewing spots:
    | Type | Location | Arrival Time | Cost |
    |——|———-|————-|——|
    | Free | Riverside park (bring tarp) | By 4 PM | Free |
    | Paid | Reserved seating | Book ahead | ¥3,000 |
    | Premium | Nearby restaurants | 2 months ahead | ¥5,000-8,000 |

    Crowd insight: Expect 300,000 people. The return train queue after the fireworks took me 45 minutes to clear. Consider walking one stop south to Shimomizo Station instead.


    2. Zushi Beach Fireworks

    Best for: Beach + fireworks combination

    Date: August 1, 2026 (Saturday)
    Time: 7:30 PM - 8:15 PM
    Location: Zushi Beach
    Access: JR Yokosuka Line to Zushi Station (5 min walk)
    Admission: Free
    Expected crowd: 50,000+

    What makes Zushi special is that you can spend the whole day at the beach and stay for the fireworks. I did exactly that last summer — swimming until 4 PM, grabbing dinner at a beachside cafe, then watching 3,000 shells burst over the water while sitting on my towel.

    Best viewing:

    • Beach: Arrive by 5 PM for a good towel spot
    • Restaurants: Reserve 1 month ahead for terrace seating
    • Hotels: Ocean-view rooms book 3 months ahead

    Combined day plan:

    12:00-4:00 PM: Beach swimming
    4:00-6:00 PM: Lunch at beachside cafe
    6:00-7:30 PM: Evening stroll along the marina
    7:30-8:15 PM: Fireworks display
    8:15 PM onwards: After-party at beach bars

    3. Odawara Castle Fireworks

    Best for: Historic castle backdrop

    Date: July 19, 2026 (Saturday)
    Time: 7:00 PM - 8:00 PM
    Location: Odawara Castle Park
    Access: JR Odawara Station (5 min walk)
    Admission: Free
    Expected crowd: 80,000+

    This was my personal favorite for photography. The illuminated castle against fireworks creates stunning shots. I set up near the castle moat around 4:30 PM and got composition shots with fireworks reflecting on the water.

    Photography spots:

    • Castle moat: Best for reflection shots (arrive by 4 PM)
    • Main gate: Castle + fireworks composition
    • Hill behind castle: Panoramic view of both

    Camera settings (what worked for me):

    - Tripod: Essential (I used a compact travel tripod)
    - Aperture: f/8
    - ISO: 100
    - Shutter: 3-4 seconds
    - Focus: Manual, set to infinity

    4. Enoshima Sea Candle Fireworks

    Best for: Island setting + intimate atmosphere

    Date: August 8, 2026 (Saturday)
    Time: 7:30 PM - 8:00 PM
    Location: Enoshima Island
    Access: Enoden to Enoshima Station (10 min walk)
    Admission: Free (island access: ¥200)
    Expected crowd: 30,000+

    Enoshima’s fireworks have a more intimate feel — only 2,000 shells but the island setting on the Sea Candle observation deck makes them feel personal. I watched from the Samuel Cocking Garden and could hear the waves between shell bursts.

    Access from Tokyo:

    1. Odakyu Line to Fujisawa (45 min)
    2. Enoden to Enoshima (10 min)
    3. Walk to viewing area (10 min)

    Total: 75 minutes


    5. Kawasaki Tama River Fireworks

    Best for: Quick access from Tokyo

    Date: August 15, 2026 (Saturday)
    Time: 6:30 PM – 7:30 PM
    Location: Tama River, Kawasaki
    Access: JR Kawasaki Station (10 min walk)
    Admission: Free
    Expected crowd: 170,000+

    This is the most accessible option from central Tokyo — just 25 minutes from Tokyo Station to the venue. I went with friends after work on a weekday, and we were at the riverbank by 6 PM with convenience store snacks. The 10,000-shell display is surprisingly good for how easy it is to reach.


    Quick Reference Calendar

    Date Event Location Shells Crowd
    Jul 19 Odawara Castle Odawara 5,000 80K
    Jul 25 Sagami River Sagamihara 20,000 300K
    Aug 1 Zushi Beach Zushi 3,000 50K
    Aug 8 Enoshima Sea Candle Enoshima 2,000 30K
    Aug 15 Kawasaki Tama River Kawasaki 10,000 170K
    Aug 22 Hiratsuka Tanabata Hiratsuka 8,000 100K

    6. Hiratsuka Tanabata Fireworks

    Best for: Traditional festival atmosphere

    Date: August 22, 2026 (Saturday)
    Time: 7:00 PM – 8:30 PM
    Location: Sagami River, Hiratsuka
    Access: JR Hiratsuka Station (15 min walk)
    Admission: Free
    Expected crowd: 100,000+

    Hiratsuka’s fireworks are part of a larger tanabata (star festival) celebration that runs throughout the day. I visited last August and arrived around 2 PM to explore the bamboo decorations lining the main street before heading to the riverbank. The daytime festival had food stalls, a yosakoi dance performance, and a children’s parade — the fireworks at night were the grand finale of a full community event.

    What makes it special:

    • Combined with tanabata decorations (bamboo branches with wishes, streamers)
    • Daytime: street festival with traditional performances
    • Nighttime: 8,000 shells launched over the Sagami River
    • Smaller crowd (100K) than Sagami River’s main festival (300K)

    Best viewing:

    • Riverbank east side: Less crowded, good sightlines (arrive by 5 PM)
    • Hiratsuka Station side: Convenient but packed (arrive by 4 PM)
    • Paid seating: ¥3,000, book 1 month ahead Combine with: Hiratsuka’s tanabata street festival (noon-7 PM), local restaurants serving shirasu (whitebait) dishes

    Pro tip: The tanabata decorations are illuminated at dusk (6:30-7:00 PM) before the fireworks start. This 30-minute window offers beautiful photography opportunities.


    Which to choose?

    • Best spectacle: Sagami River (20,000 shells)
    • Best photo ops: Odawara Castle (castle + fireworks)
    • Best beach day combo: Zushi Beach
    • Best for couples: Enoshima (intimate island setting)
    • Best from Tokyo: Kawasaki (25 min from Tokyo Station)

    Kanagawa Summer Fireworks Guide 2026 — 6. Hiratsuka Tanabata Fireworks

    I visited all five of these festivals last summer and each one offered a completely different experience. I recommend the Odawara Castle Fireworks for photographers and Zushi Beach for families. For more summer activities, check out our Kanagawa Seasonal Festivals Calendar and Kamakura Summer Festivals Guide.


    When to Go

    Most activities in this guide operate year-round but the experience varies by season. Spring and autumn offer the most comfortable conditions. Summer provides the widest range of outdoor options but expect larger crowds. Winter offers a quieter experience with potential seasonal closures.

    What to Expect

    Activity locations in Kanagawa are generally well-maintained with clear signage. Most sites offer English pamphlets or audio guides. Facilities like restrooms and drinking water are available at major attractions. Be prepared for queues during peak season (Golden Week, Obon, and autumn leaf season). Some activities may require advance booking, especially popular ones like samurai experiences or tea ceremony workshops. Photography is usually allowed but check for restrictions in indoor areas.

    Nearby Recommendations

    The area surrounding this activity has plenty to offer. Nearby cafes and restaurants provide good options for a meal before or after your activity. Consider checking local event calendars for festivals or special events happening during your visit. Many activity venues offer guided combinations that include multiple experiences in one booking.

    Local Tips

    Regular participants recommend bringing your own water bottle and wearing moisture-wicking clothing for active experiences. Arriving 15 minutes before your scheduled time allows for check-in and preparation. Many activities have seasonal variations, so check what’s available during your visit. Don’t be shy about asking questions – instructors are happy to help.n

    Conclusion

    Whether you are planning exploring Kanagawa for its summer for the first time or returning for another visit, taking a little extra time to go beyond the obvious sights makes all the difference. During my visit I went with a rough plan and found that leaving room to wander made the trip far more memorable. I hope this guide helps you build an itinerary that fits your pace, and that your time in Kanagawa leaves you with memories worth coming back for.
  • Kanagawa Wellness Retreat Spa Yoga Onsen 2026

    Kanagawa Wellness Retreat Spa Yoga Onsen 2026

    Overview

    🗺️ Key Points

    • Perfect for: Wellness seekers, relaxation
    • Duration: 2-3 days recommended
    • Budget: ¥15,000-30,000
    • Best season: Year-round (winter ideal for onsen)
    • Focus: Mind-body wellness

    📋 Overview

    Kanagawa Prefecture is a lesser-known spot for wellness enthusiasts, offering traditional Japanese onsen, yoga studios with ocean views, and meditation retreats in ancient temples. This guide covers the best wellness things in the region.

    🧘 Top Wellness things


    Kanagawa Wellness Retreat Spa Yoga Onsen — main illustration

    Popular Kanagawa activity location and attraction

    Kanagawa Wellness Retreat Spa Yoga Onsen 2026 — Top Wellness things

    1. Hakone Onsen Retreat

    📍 Wellness & Retreat Locations

    Find wellness retreats, and onsen places across Kanagawa.

    📍 View on Google Maps

    Location: Hakone
    Budget: ¥10,000-20,000/day
    Duration: 1-2 days Hakone is Japan’s most famous hot spring resort area, offering over 20 different onsen types. The mineral-rich waters are believed to have healing properties for various ailments. Top Onsen:

    • Hakone Yuryo (¥2,500): Private onsen with garden views
    • Tenzan Toji-kyo (¥1,800): Traditional outdoor baths
    • Hakone Kowakien Yunessun (¥2,800): Unique themed baths Wellness Benefits:
    • Stress relief
    • Improved circulation
    • Skin rejuvenation
    • Muscle relaxation

    2. Kamakura Zen Meditation

    Location: Kamakura
    Budget: ¥3,000-5,000/session
    Duration: Half-day time authentic Zen meditation at ancient Kamakura temples. Several temples offer English-guided sessions for beginners. Top Temples:

    • Hokokuji Temple (¥300 entry): Bamboo grove meditation
    • Kenchoji Temple (¥500): Formal Zen practice
    • Engakuji Temple (¥300): Morning meditation sessions What to Expect:
    • 30-60 minute guided sessions
    • Traditional posture instruction
    • Breathing techniques
    • Tea ceremony included

    3. Shonan Yoga Studios

    Location: Shonan Beach Area
    Budget: ¥2,000-3,500/class
    Duration: 1-2 hours Practice yoga with ocean views at Shonan’s beachfront studios. Many studios offer sunrise and sunset sessions. Top Studios:

    • Shonan Yoga Village (¥2,500): Beachfront classes
    • Kamakura Yoga Studio (¥2,000): Temple garden sessions
    • Zushi Beach Yoga (¥3,000): Sunrise sessions Class Types:
    • Hatha yoga (beginner-friendly)
    • Vinyasa flow (intermediate)
    • Sunrise meditation (all levels)
    • Beach yoga (seasonal)

    🏨 Wellness lodging

    Kanagawa Wellness Retreat Spa Yoga Onsen 2026 — Wellness lodging

    Budget-Friendly (¥5,000-8,000/night)

    Hostels with Onsen:

    • Hakone YH: ¥5,000/night, natural hot spring
    • Kamakura Guesthouse: ¥4,500/night, yoga mornings

    Mid-Range (¥10,000-20,000/night)

    Ryokan with Spa:

    • Hakone Suishoen: ¥15,000/night, private onsen
    • Kamakura Hana no Mai: ¥12,000/night, garden views

    Luxury (¥25,000+/night)

    Wellness Resorts:

    • Hakone Ginyu: ¥35,000/night, all-inclusive spa
    • Kayotei: ¥28,000/night, traditional wellness

    🌸 Seasonal Wellness Guide

    Spring (March-May)

    • Best for: Cherry blossom yoga, outdoor meditation
    • Temperature: 15-20°C
    • tip: Kamakura temple sessions

    Summer (June-August)

    • Best for: Beach yoga, sunrise sessions
    • Temperature: 25-30°C
    • tip: Shonan beachfront classes

    Autumn (September-November)

    • Best for: Onsen with foliage views
    • Temperature: 15-22°C
    • tip: Hakone mountain retreats

    Winter (December-February)

    • Best for: Traditional onsen, indoor wellness
    • Temperature: 5-10°C
    • tip: Hakone ryokan stays

    📍 Location

    Wellness destinations are spread across Kanagawa:

    • Hakone: 1.5 hours from Tokyo (onsen focus)
    • Kamakura: 1 hour from Tokyo (Zen meditation)
    • Shonan: 1 hour from Tokyo (yoga, beach wellness)
    • Zushi: 1 hour from Tokyo (quiet retreats)

    🗺️ Nearby Attractions

    Within 5km

    • Hakone Shrine: Lakeside meditation spots
    • Kamakura temples: Zen gardens
    • Shonan Beach: Sunrise yoga locations

    Within 15km

    • Lake Ashi: Peaceful walking trails
    • Yuigahama Beach: Beach yoga sessions
    • Mount Myojin: Hiking meditation

    Check out our Hayama Misaki Walking Route guide for detailed information.

    🎒 Essential Preparation Guide

    What to Pack

    Essential Items:

    • comfy walking shoes (most important)
    • Weather-appropriate clothing layers
    • small phone charger (long days out)
    • refillable water bottle (stay hydrated)
    • Small backpack for daily essentials
    • Cash (many places cash-only in Japan)
    • IC card (Suica/Pasmo for transport)
    • Pocket tissues (restrooms often lack paper)

    Seasonal Additions:

    • Spring: Light jacket, allergy medication
    • Summer: Sunscreen, cooling towel
    • Autumn: Light layers, rain jacket
    • Winter: Warm coat, scarf

    Money-Saving Tips:

    • Convenience store breakfast: ¥300-500
    • Supermarket dinner bento: ¥500-800 (after 7 PM discount)
    • Free attractions: Temples, beaches
    • Day passes: Unlimited transport for ¥500-1,500
    • Hostel lodging: ¥3,000-5,000/night

    Transportation Mastery

    Train System:

    • JR lines cover major destinations
    • Private lines (Tokyu. Keikyu) offer discounts
    • IC cards (Suica/Pasmo) work on all lines
    • Day passes save 30-50% on transport

    Bus System:

    • Local buses reach areas trains don’t
    • Day passes available for unlimited rides
    • English announcements on major routes
    • IC cards accepted on most buses

    Walking & Cycling:

    • Many attractions within walking distance
    • Bicycle rental: ¥1,000-1,500/day
    • Dedicated cycling paths in some areas
    • Best way to discover lesser-known spots

    🌟 Insider Secrets

    Best Kept Secrets

    Hidden Viewpoints:

    • Enoshima Sea Candle top floor (less crowded)
    • Hakone Shrine back trails (peaceful)
    • Kamakura hiking paths (panoramic views)
    • Yokohama rooftop gardens (free, stunning)

    Local Dining:

    • Isezakicho back alleys (authentic, cheap)
    • Komachi-dori side streets (local favorites)
    • Hakone Yumoto side roads (traditional)
    • Shonan fishing ports (fresh, direct)

    Quiet Times:

    • Temples: 8-9 AM (opening time)
    • Beaches: Weekday mornings
    • Museums: Tuesday-Thursday afternoons
    • Restaurants: 11:30 AM or 2 PM (off-peak)

    Photography Masterclass

    Golden Hour Locations:

    • Yuigahama Beach: 30 min before sunset
    • Lake Ashi: Morning (Fuji clearest)
    • Enoshima: Late afternoon (ocean glow)
    • Yokohama: Blue hour (30 min after sunset)

    Composition Tips:

    • Use foreground elements (trees, buildings)
    • Include people for scale
    • Capture local life (markets, temples)
    • Shoot vertical for social media

    Weather photos:

    • Rainy: Reflections, moody
    • Foggy: Mysterious atmosphere, layers
    • Clear: Distant views, vibrant colors
    • Snow: Rare, capture quickly

    📍 Local Neighborhood Guide

    Yokohama Neighborhoods

    Minato Mirai:

    • Modern waterfront district
    • Shopping, fun
    • Best for: First-time visitors
    • Time needed: Half day Chinatown:
    • Asia’s largest Chinatown
    • 500+ restaurants, shops
    • Best for: Food lovers
    • Time needed: 2-3 hours

    Yamashita Park Area:

    • Historic waterfront park
    • Marine Tower. Red Brick Warehouse
    • Best for: Relaxing, photos
    • Time needed: 2 hours

    Kamakura Neighborhoods

    Komachi-dori:

    • Main shopping street
    • Street food, souvenirs
    • Best for: Shopping, snacks
    • Time needed: 1-2 hours Temple District:
    • Great Buddha. Hokokuji
    • Cultural heart of Kamakura
    • Best for: History, spirituality
    • Time needed: Half day

    Beach Area:

    • Yuigahama. Zushi beaches
    • Surf culture, beach cafes
    • Best for: Ocean, relaxation
    • Time needed: 2-3 hours

    Hakone Areas

    Yumoto:

    • Gateway to Hakone
    • Onsen town, restaurants
    • Best for: Hot springs, base
    • Time needed: Half day

    Lake Ashi:

    • Scenic lake, cruises
    • Mount Fuji views (winter)
    • Best for: Nature, photos
    • Time needed: 2-3 hours

    Owakudani:

    • Volcanic valley, black eggs
    • Ropeway, hiking trails
    • Best for: Unique time
    • Time needed: 1-2 hours

    🌟 Advanced Local things

    Cultural Immersion Activities

    Traditional Craft Workshops:

    • Pottery making in Kamakura (¥3,000-5,000. 2 hours)
    • Incense blending at historic temples (¥2,000-3,000)
    • Calligraphy lessons with local masters (¥2,500-4,000)
    • Tea ceremony joining (¥3,000-5,000. includes matcha)
    • Origami workshops at cultural centers (¥1,000-2,000)

    Festival joining:

    • Spring matsuri (March-April): Local shrine festivals
    • Summer hanabi (July-August): Fireworks festivals
    • Autumn matsuri (September-November): Harvest celebrations
    • Winter lightss (December-February): Light displays

    Local Food things:

    • Sushi making classes (¥5,000-8,000. includes lunch)
    • Ramen broth cooking workshops (¥4,000-6,000)
    • Sake tasting tours (¥3,000-5,000. 5-7 varieties)
    • Wagashi (Japanese sweets) making (¥3,500-5,000)
    • Tofu making at traditional shops (¥2,000-3,000)

    Off-the-Beaten-Path Adventures

    Hidden Hiking Trails:

    • Kamakura Daibutsu hiking trail (2 hours, moderate)
    • Hakone old Tokaido road (3 hours, easy)
    • Enoshima island circumnavigation (1.5 hours, easy)
    • Mount Myojin panoramic trail (2.5 hours, moderate)
    • Sagami Bay coastal walk (4 hours, easy-moderate)

    Secret Beaches:

    • Shichirigahama (local surfers’ favorite)
    • Isshiki Beach in Hayama (quiet, clean)
    • Morito Beach in Zushi (family-friendly)
    • Koajiro Beach (lesser-known spot, few visitors)
    • Nagai Beach (local secret, great sunset)

    Local Neighborhoods:

    • Ofuna in Kamakura (residential, authentic)
    • Motomachi in Yokohama (upscale, historic)
    • Gora in Hakone (mountain village feel)
    • Zushi town center (surf culture, relaxed)
    • Fujisawa old town (traditional, unspoiled)

    Seasonal Deep Dives

    Spring (March-May) Deep time:

    • Cherry blossom hanami parties in local parks
    • Temple garden visits during peak bloom
    • Spring vegetable tasting menus at ryokan
    • Traditional flower arrangement workshops
    • Morning market visits for seasonal produce

    Summer (June-August) Deep time:

    • Early morning beach yoga sessions
    • Evening fireworks festivals (free viewing spots)
    • Indoor museum hopping during hot afternoons
    • Night cycling along coastal paths
    • Cold ramen and shaved ice tasting tour

    Autumn (September-November) Deep time:

    • Fall foliage hiking in Hakone mountains
    • Harvest festival joining at local shrines
    • Mushroom foraging guided tours
    • Hot spring visits with mountain views
    • photos workshops for autumn colors

    Winter (December-February) Deep time:

    • Onsen hopping with snow views
    • Clear Mount Fuji viewpoint hunting
    • lights walking tours
    • Hot pot restaurant crawling
    • Traditional New Year temple visits

    📍 Detailed Area Guides

    Yokohama Deep Dive

    Minato Mirai District:

    • Landmark Tower Sky Garden (¥1,030. 360° views)
    • Cup Noodles Museum (free entry. ¥500 activities)
    • Red Brick Warehouse (free, dining)
    • Cosmo World amusement park (free entry, pay per ride)
    • Queen’s Square shopping (100+ shops)

    Chinatown Exploration:

    • 500+ restaurants and food stalls
    • Paozu giant soup dumplings (¥800-1,200)
    • Good Luck Dumpling budget option (¥500)
    • Kanteibyo Temple (free, historic)
    • Covered arcades for rainy days

    Yamashita Park Area:

    • Waterfront park (free, pretty views)
    • Marine Tower (¥1,000. observation deck)
    • Hikawa Maru ship museum (¥500. historic)
    • NYK Maritime Museum (free, shipping history)
    • Harbor cruise boats (¥1,600. 40 minutes)

    Kamakura Deep Dive

    Temple Circuit:

    • Kotoku-in Great Buddha (¥300. iconic)
    • Hasedera Temple (¥400. ocean views)
    • Hokokuji Temple (¥300. bamboo grove)
    • Kenchoji Temple (¥500. oldest Zen temple)
    • Engakuji Temple (¥300. important cultural site)

    Beach Culture:

    • Yuigahama Beach (surfing, swimming)
    • Shichirigahama Beach (local favorite)
    • Beachside cafes and restaurants
    • Surfboard rental shops (¥3,000-5,000/day)
    • Sunset viewing spots

    Shopping & Dining:

    • Komachi-dori Street (main shopping)
    • Side street antique shops
    • Local soba noodle restaurants
    • Shirasu (whitebait) specialty restaurants
    • Matcha cafes and sweets shops

    Hakone Deep Dive

    Onsen Towns:

    • Yumoto (gateway, many options)
    • Gora (mountain village, quiet)
    • Miyanoshita (historic, traditional)
    • Tonosawa (quiet, local feel)
    • Sokokura (hidden, authentic)

    Nature things:

    • Lake Ashi cruise (¥1,000. scenic)
    • Owakudani volcanic valley (ropeway access)
    • Hakone Shrine (free, lakeside torii)
    • Old Tokaido road hiking (free, historic)
    • Botanical gardens (¥500. seasonal flowers)

    Art & Culture:

    • Open-Air Museum (¥1,600. sculpture park)
    • Venetian Glass Museum (¥1,800. unique)
    • Pola Museum of Art (¥1,800. impressionist)
    • Narukawa Art Museum (¥1,000. local artists)
    • Hakone Checkpoint (¥500. historic site)

    Kanagawa offers world-class wellness things combining ancient Japanese traditions with modern spa places. Whether you seek the healing waters of Hakone onsen, the spiritual calm of Kamakura Zen meditation, or the ocean breeze of Shonan yoga, this region provides the perfect setting for relaxation and rejuvenation. —

    Related Articles:

    🌟 Additional Wellness things

    Morning Wellness Routines

    Start your day with traditional Japanese wellness practices. Many ryokan offer morning meditation sessions overlooking gardens or mountains. These 30-minute sessions combine breathing exercises, gentle stretching, and mindfulness techniques passed down through generations.

    Evening Relaxation Rituals

    End your day with traditional onsen bathing rituals. The mineral-rich waters of Hakone and other hot spring areas are believed to heal various ailments. Follow the proper etiquette: wash thoroughly before entering, keep towels out of the water, and enjoy the peaceful atmosphere. Many places offer private baths for those who prefer solitude.

    Seasonal Wellness tips

    Each season offers unique wellness chances in Kanagawa, Spring brings cherry blossom meditation sessions in temple gardens. Summer features beachfront yoga at sunrise. Autumn provides hot spring bathing with fall foliage views. Winter offers the most traditional onsen time with snow-covered mountain backdrops.

    Wellness lodging Types

    Choose from traditional ryokan with private onsen, modern spa resorts with comprehensive wellness programs, budget-friendly guesthouses with yoga mornings, or temple lodging (shukubo) for authentic Zen things. Each type offers different levels of luxury and authenticity.

    Booking Wellness things

    Reserve onsen ryokan 2-3 months in advance for weekends. Yoga studios accept walk-ins but booking ensures spot. Temple lodging requires 1-2 weeks notice. Spa treatments can be booked day-of but advance booking preferred. Many places offer package deals combining lodging, meals, and wellness activities. —


    Frequently Asked Questions

    Q: When should I visit for the best weather?
    A: For the most comfy weather, plan your trip between late March and early June, or from September through November, During these months, temperatures range from 15-25°C, making outdoor exploration enjoyable. Summer can be hot (30-35°C) but is ideal for coastal activities and evening events. Q: Is this destination easy to reach by public transport?
    A: Yes. Kanagawa has great public transport connections from Tokyo. Most destinations are within an hour by train. The nearest station is typically a short walk or bus ride from the main attractions. For detailed route info, check the transport section above. Q: Is this destination manageable as a day trip from Tokyo?
    A: Yes, all destinations in this guide work well as day trips. Plan to arrive by late morning to see the main highlights. For a relaxed pace including lunch and optional detours, allow 6-8 hours. If you have more time, extending your stay overnight lets you explore at a leisurely pace and enjoy evening attractions. Q: Do I need any special skills or equipment to enjoy this destination?
    A: Most attractions in this guide are accessible to visitors of all backgrounds and fitness levels. Well-kept paths, clear signage, and English info make navigation easy. For activities needing specific gear (hiking shoes, swimwear, etc.), tips are included in the relevant sections above.

    Conclusion

    exploring Kanagawa for its onsen can be as relaxed or as packed as you want it to be, and I have found that the best visits leave room for both planning and spontaneity. During my visit I went with a rough plan and found that leaving room to wander made the trip far more memorable. Use this guide to sort out the logistics in advance, then let the day surprise you — Kanagawa rewards travelers who stay curious.