Blog

  • Yokohama Minato Mirai Shopping — Best Malls & Boutiques 2026

    Yokohama Minato Mirai Shopping — Best Malls & Boutiques 2026

    Yokohama Minato Mirai Shopping Guide — Best Malls & Boutiques

    Overview

    Minato Mirai 21 is Yokohama’s premier waterfront district, and its shopping scene rivals anything in Tokyo. With four major shopping complexes connected by climate-controlled walkways, you can spend an entire day exploring without stepping outside. This guide covers every shopping destination in Minato Mirai — from luxury brands at Landmark Plaza to quirky souvenirs at World Porters — with practical tips on navigating the area and finding the best deals.

    Landmark Plaza — Luxury and Landmark Views

    Location: Connected to Landmark Tower and Sakuragicho Station (5-minute walk)
    Hours: 10:00-20:00 (restaurants until 22:00)
    Stores: 190+ Landmark Plaza is Minato Mirai’s premier shopping destination, occupying the lower floors of the iconic Landmark Tower. The five-story atrium, with its dramatic glass ceiling and fountain, hosts a mix of Japanese and international brands.

    Fashion highlights:

    • Beams (3F): Japanese select shop with curated collections from international and domestic designers
    • United Arrows (3F): High-end Japanese casual wear — excellent quality at prices below European luxury
    • Muji (4F): The largest Muji in Yokohama, with their full furniture and home goods line
    • Uniqlo (B1): Standard selection but less crowded than Tokyo locations

    Souvenir highlights:

    • Yokahama-ya (1F): Specializes in Yokohama-themed souvenirs — from the famous “Yokohama” branded towels (¥1,500) to limited-edition Landmark Tower chocolates (¥800)
    • Sogo Museum of Art Shop (2F): Art prints and design objects from the museum’s collection (¥1,000-5,000)

    Food court: The basement-level food court (Dining Court, ¥800-1,500) offers 15 options including ramen, udon, curry, and Italian. I recommend Menya Itto (¥1,100), which serves a rich tsukemen (dipping noodles) that rivals Tokyo’s best.

    World Porters — Quirky and Family-Friendly

    Location: A 7-minute walk from Landmark Plaza, on the waterfront side
    Hours: 10:30-21:00
    Stores: 100+ World Porters has a more casual, family-oriented atmosphere than Landmark Plaza. The building is designed like a European port town, with winding corridors and harbor views.

    Best for souvenirs:

    • Village Vanguard (2F): A chaotic, wonderful store selling everything from bizarre stationery to regional snacks. Perfect for unusual gifts (¥500-3,000)
    • Yokohama World Porters Souvenir Shop (1F): The best selection of Yokohama-specific snacks, including silk sweet potato sticks (¥600), Yokohama curry paste (¥800), and Minato Mirai cookies (¥1,000)
    • Kiddy Land (3F): Character goods from Sanrio, Snoopy, and Disney — popular with children and collectors

    Entertainment: World Porters also has a small amusement park, Yokohama Cosmo World, immediately adjacent, with the iconic Cosmo Clock 21 Ferris Wheel (¥800). The ferris wheel is the world’s largest timepiece and offers stunning night views.

    MARK IS Minato Mirai — Youth Fashion and Lifestyle

    Location: 10-minute walk from Landmark Plaza toward Yokohama Station
    Hours: 10:00-21:00
    Stores: 180+ MARK IS opened in 2019 and targets a younger demographic with trend-focused fashion and lifestyle brands.

    Must-visit stores:

    • Loft (3F-4F): A massive lifestyle store spanning two floors — stationery, cosmetics, kitchen goods, and home decor. Their Yokohama-exclusive section (3F) sells Minato Mirai-themed washi tape (¥400), postcards (¥150), and hand towels (¥800).
    • H&M (2F): The largest H&M in Kanagawa — three floors of fashion at international prices
    • Daiso (B1): Everything ¥100 — the best place to pick up affordable souvenirs like folding fans, chopsticks, and furoshiki wrapping cloths
    • Tsutaya Books (5F): A beautiful bookstore with an attached Starbucks and views of the harbor

    Events: MARK IS regularly hosts pop-up markets and seasonal events in its central atrium. Check their website for craft fairs, farmers’ markets, and holiday events during your visit.

    Queen’s Square — Connected Comfort

    Location: Directly connected to Minato Mirai Station (via underground passage)
    Hours: 10:00-20:00
    Stores: 80+ Queen’s Square is the transport hub of Minato Mirai, directly connected to the Minatomirai Line station. It’s smaller than the other complexes but has excellent mid-range shopping.

    Highlights:

    • Francfranc (2F): Japanese home goods brand with stylish, affordable interior items — their seasonal collections are excellent for gift shopping (¥1,000-5,000)
    • Zara (B1): Standard international fast fashion
    • ABC Mart (B1): Japanese shoe retailer with good prices on sneakers (¥4,000-8,000)
    • Tully’s Coffee (2F): A reliable coffee stop with harbor-view seating

    Nippon Maru Memorial Park Open-Air Market

    Location: Between World Porters and Queen’s Square
    Hours: Weekends and holidays, 10:00-16:00 (weather permitting) On weekends, Nippon Maru Memorial Park hosts a small open-air market with local artisans selling handmade crafts, jewelry, and food. This is an excellent place to find unique, non-mass-produced souvenirs. Items range from ¥500 (handmade postcards) to ¥10,000 (ceramic tableware). The park itself features the Nippon Maru training ship (open for tours, ¥600) and the Yokohama Port Museum.

    Window Shopping on the Waterfront Promenade

    Even if you are not buying, Minato Mirai’s waterfront promenade offers one of the best walking experiences in Yokohama. The 2-kilometer path from Landmark Tower to World Porters passes through gardens, plazas, and along the harbor. On clear days, you can see Mount Fuji across the bay from several points along the route. This area is particularly beautiful at sunset, when the buildings reflect gold and orange across the water. Explore Mt Fuji & Hakone on a full-day trip with sukiyaki lunch, Hakone Cruise, Ropeway & Shinkansen return
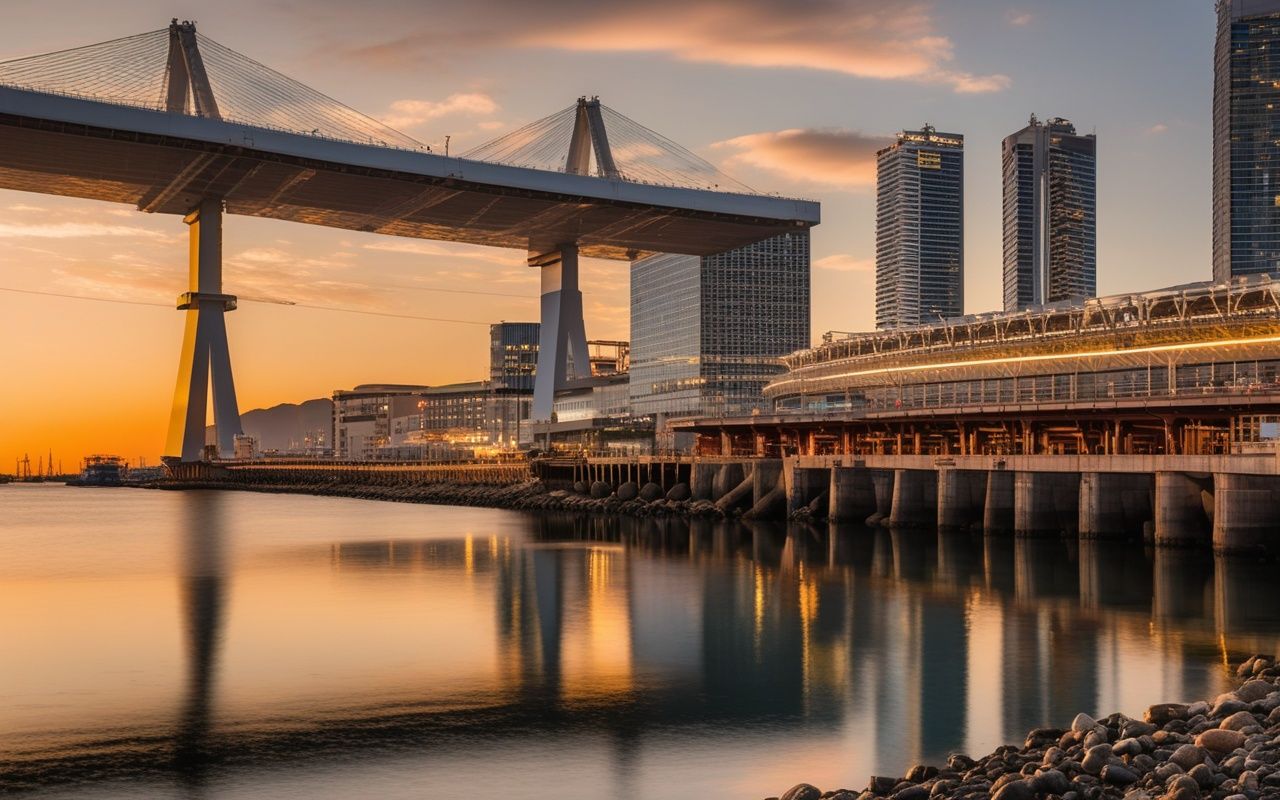
    Yokohama Minato Mirai shopping at MARK IS mall interior

    Best Times to Shop in Minato Mirai

    Weekday mornings (10:00-12:00) are the quietest time across all four complexes. Landmark Plaza and Queen’s Square see the most foot traffic during lunch hours (12:00-13:30) as office workers from nearby buildings visit the food courts. Afternoons (14:00-17:00) are moderately busy, especially on weekends when families and tourists fill the corridors. Quietest days: Tuesday through Thursday. Monday can be surprisingly busy due to national holidays shifting.

    Busiest periods: Weekends (especially sunny Saturdays), Golden Week (late April-early May), summer vacation (mid-July to August), and the year-end holiday season (mid-December to Christmas). During these periods, I recommend arriving at opening time (10:00) to enjoy the stores before crowds peak around 13:00.

    Evening shopping: On Fridays and Saturdays, many stores in Landmark Plaza and MARK IS stay open until 21:00. The waterfront promenade is beautifully lit after sunset — combine evening shopping with a night view walk.

    Tax-Free Shopping Guide

    All major shopping complexes in Minato Mirai participate in Japan’s tax-free shopping program for foreign visitors: Requirements:

    • Must hold a foreign passport (temporary visitor status)
    • Minimum purchase: ¥5,000 (consumables) or ¥5,000 (general goods)
    • Tax refund: 10% consumption tax deducted at purchase

    How to claim:

    1. Shop at stores displaying the “Tax-Free” logo (most stores in Landmark Plaza and MARK IS)
    2. Present your passport at the register
    3. Tax is deducted immediately (no need to go to a separate refund counter)
    4. Consumables (food, cosmetics, medicine) must be sealed in special bags and not opened until leaving Japan

    Best stores for tax-free shopping:

    • Muji (Landmark Plaza, 4F): Full tax-free counter — their skincare and stationery make excellent gifts
    • Loft (MARK IS, 3F-4F): Tax-free counter on 3F — stock up on Japanese stationery and cosmetics
    • Daiso (MARK IS, B1): Tax-free for purchases over ¥5,000 (50 items at ¥100 — easy to hit minimum)

    Best of all, since the shopping complexes are close together within walking distance, you can hit all the tax-free stores in a single shopping route without rushing.

    Nearby Attractions
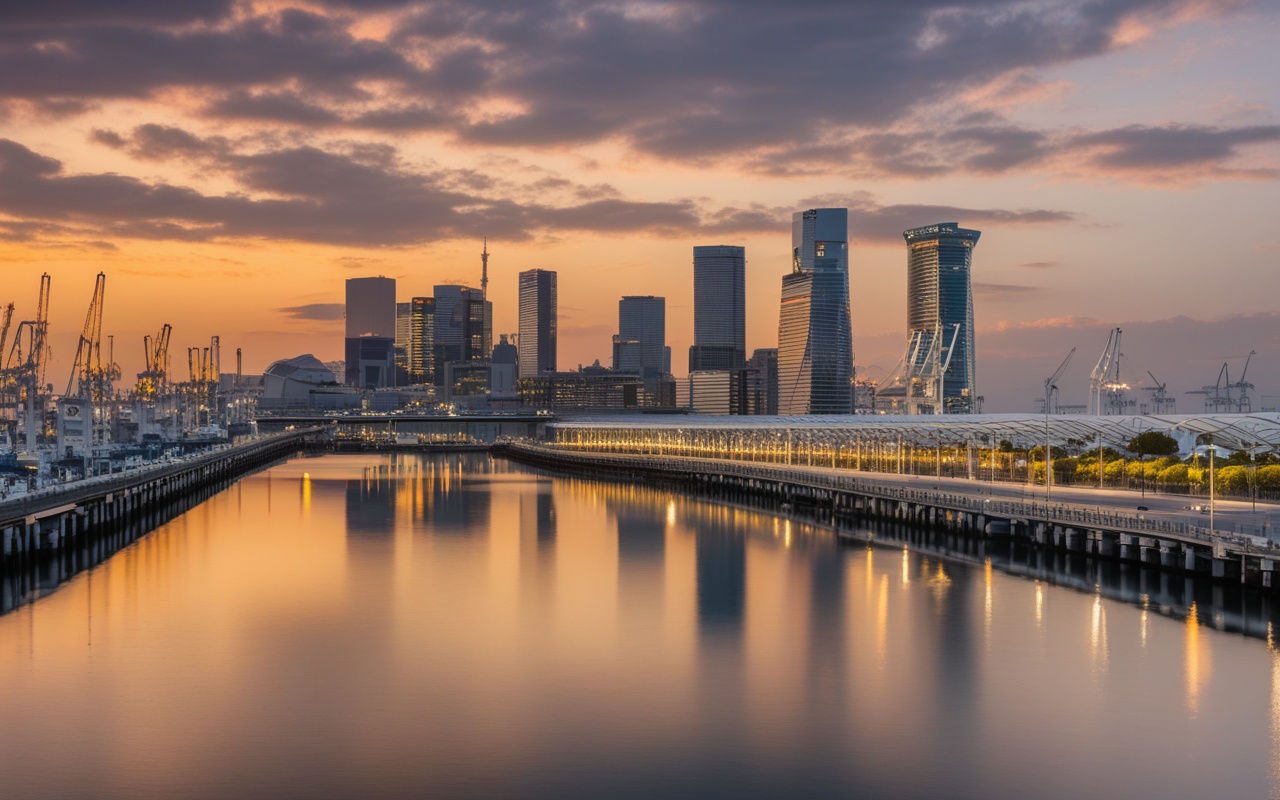
    Yokohama Minato Mirai shopping at Landmark Plaza

    Combine your shopping trip with these nearby attractions, all within walking distance:

    • Yokohama Landmark Tower Sky Garden (¥1,000): The 69th-floor observation deck offers panoramic views. Visit before or after shopping at Landmark Plaza — it’s in the same building.
    • Yokohama Red Brick Warehouse (15-minute walk from World Porters): Two historic buildings turned into shops and event spaces. The smaller building houses a curated selection of craft shops and cafes.
    • Noge Izakaya District (15-minute walk from Queen’s Square): Perfect for dinner after a day of shopping — narrow streets packed with tiny izakaya bars.
    • Yokohama Cosmo World (adjacent to World Porters): The amusement park with the iconic ferris wheel — night rides are popular after shopping hours.

    Budget Shopping Guide

    Shopping Complex Price Range Best For Footwear-Friendly
    Landmark Plaza ¥¥¥-¥¥¥¥ Luxury fashion, quality souvenirs ✅ (flat, marble floors)
    World Porters ¥-¥¥¥ Family shopping, quirky gifts ✅ (ramps available)
    MARK IS ¥-¥¥¥ Youth fashion, stationery ✅ (wide corridors)
    Queen’s Square ¥¥-¥¥¥ Mid-range fashion, convenience ✅ (connected station)
    Daiso (MARK IS) ¥ Budget souvenirs, everyday items

    Money-saving tip: Download the official MARK IS app for coupon offers (¥500 off purchases over ¥5,000, updated monthly). World Porters offers a 5% discount to visitors who show their same-day Shinkansen ticket at the information desk.

    Frequently Asked Questions

    Q: Which Minato Mirai shopping complex is best for luxury brands?
    A: Landmark Plaza has the highest concentration of luxury brands, including Burberry, Gucci, Coach, and Tiffany & Queen’s Square has a few mid-range international brands but no high-end luxury. World Porters and MARK IS focus on accessible fashion and lifestyle brands.

    Q: Are the shopping complexes connected indoors?
    A: Yes and no. Landmark Plaza and Queen’s Square are connected via the Queen’s Walk — a climate-controlled pedestrian bridge. Queen’s Square connects directly to Minato Mirai Station. World Porters is a 7-minute outdoor walk from Queen’s Square (covered walkway, partially exposed). MARK IS is a 10-minute walk from Landmark Plaza, partially covered but not fully enclosed. In bad weather, I recommend focusing on the Landmark Plaza-Queen’s Square corridor.

    Q: What are the best Yokohama-specific souvenirs?
    A: The top five souvenirs unique to Yokohama are: (1) Silk sweet potato sticks (はまぐり棒, ¥600-800) — a Yokohama-classic snack, (2) Yokohama curry paste (¥800-1,200) — the city’s famous navy curry in a jar, (3) Minato Mirai cookies (¥1,000-1,500) — shaped like landmark buildings, (4) Korin-brand Yokohama towels (¥1,500-3,000) — high-quality cotton towels produced in Yokohama since 1908, (5) Yokohama-themed stationery (¥500-2,000) — available at Loft’s Yokohama-exclusive section.

    Q: Is Minato Mirai shopping suitable for children?
    A: Yes. World Porters has a playground and Kiddy Land character goods store. MARK IS has a children’s play area on 4F (¥500 per 30 minutes, supervised). Most department stores have family restrooms and nursing rooms. The connecting walkways are stroller-friendly.

    Q: What time do stores open and close?
    A: Most stores open at 10:00-10:30 AM and close at 20:00-21:00. Restaurants typically stay open until 21:00-23:00 (last order at 21:00-22:00). Note that some stores have irregular closing days — check individual store websites before visiting, especially during Golden Week (late April-early May) and New Year (December 29-January 3).


    Last Updated: 2026-07-16
    Written by: Anaba OffJapan Editorial Team
    Photos: Editorial photography and on-site field research

    Conclusion

    Whether you are planning exploring Yokohama for its shopping for the first time or returning for another visit, taking a little extra time to go beyond the obvious sights makes all the difference. During my visit to Yokohama I went with a rough plan and found that leaving room to wander made the trip far more memorable. I hope this guide helps you build an itinerary that fits your pace, and that your time in Kanagawa leaves you with memories worth coming back for.
  • Yokohama BayStars Game Guide — Stadium Baseball Experience

    Yokohama BayStars Game Guide — Stadium Baseball Experience

    Overview

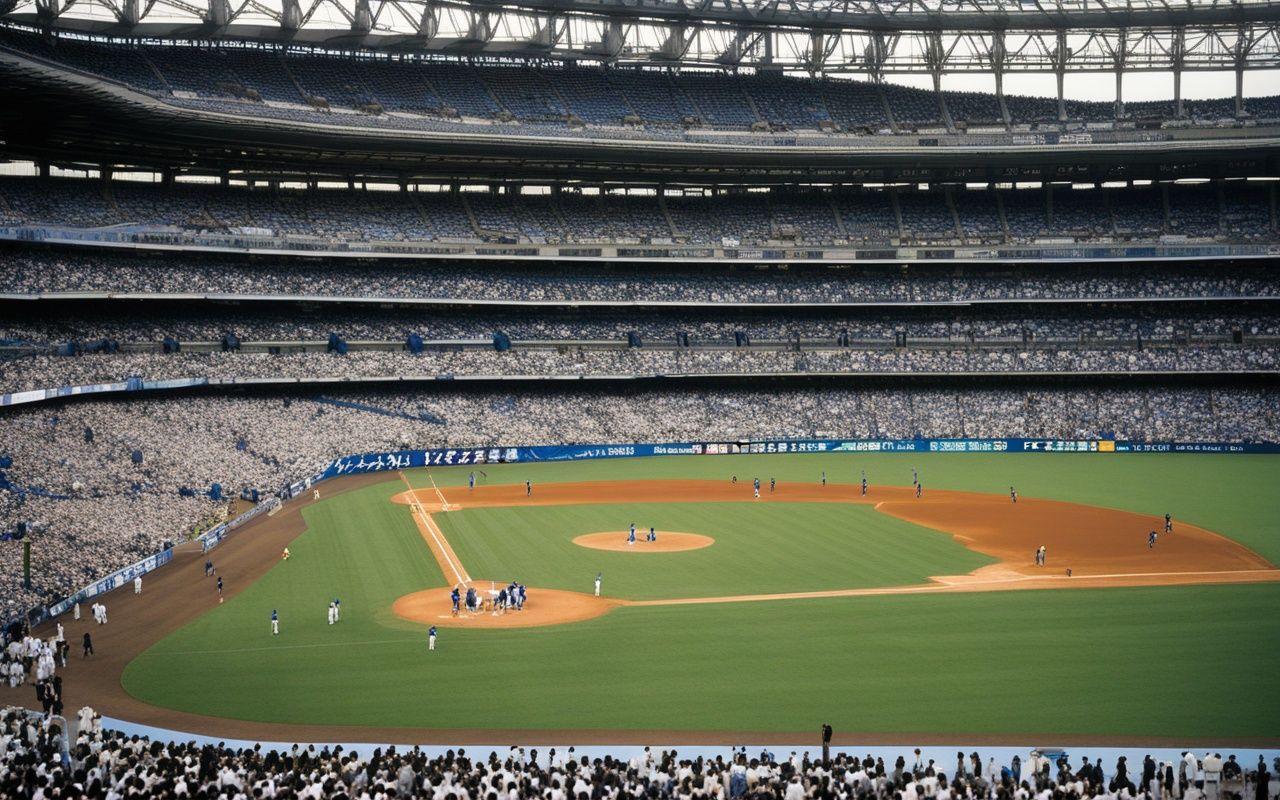
    Baseball is more than a sport in Japan — it is a cultural event with passionate fan chants, unique stadium food, and an atmosphere that every visitor should experience at least once. The Yokohama DeNA BayStars, one of twelve teams in Nippon Professional Baseball (NPB), play at Yokohama Stadium — affectionately called Hamasta by locals — in the heart of the city. This guide covers everything you need to know: ticket purchasing, seat selection, stadium food, game day rituals, and how to enjoy the experience as a first-time visitor to Japanese baseball. Whether you are a lifelong baseball fan or completely new to the sport, a BayStars game offers an unforgettable evening in Yokohama.

    Top Game Day Experiences

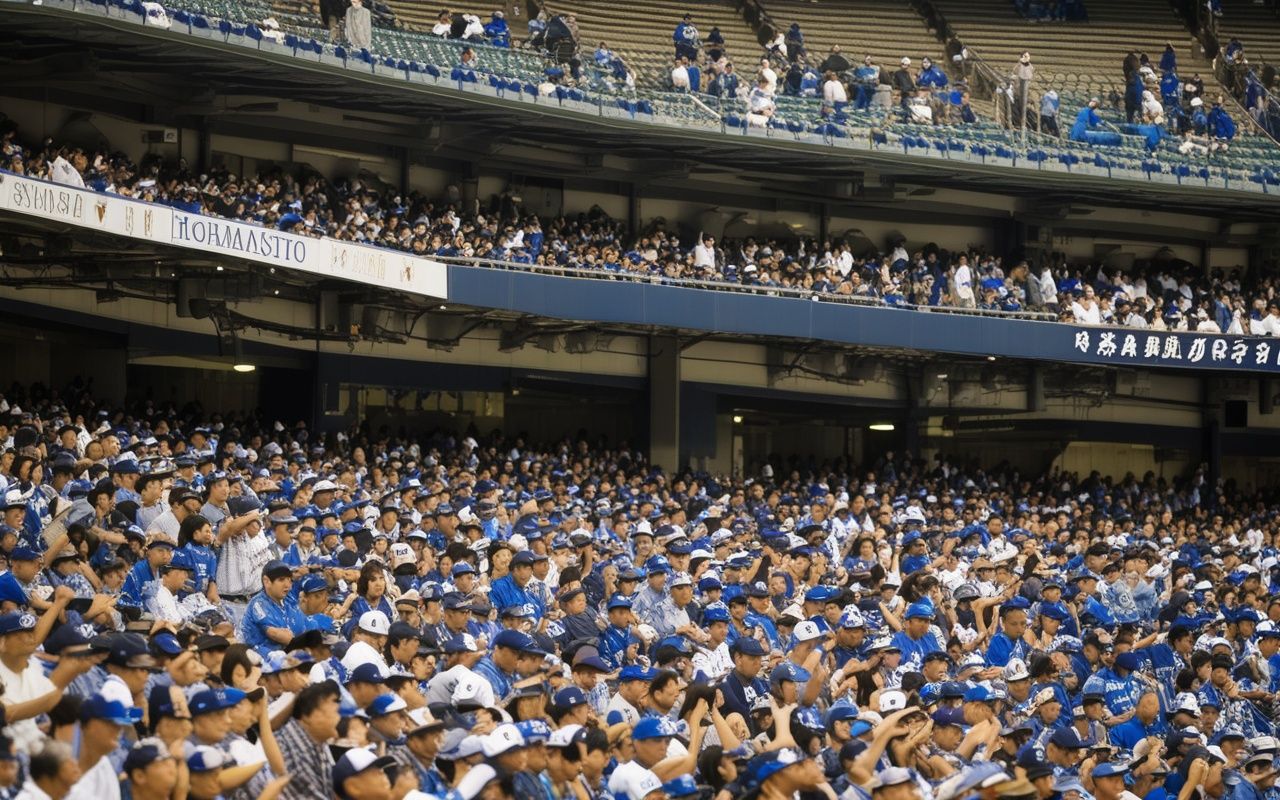
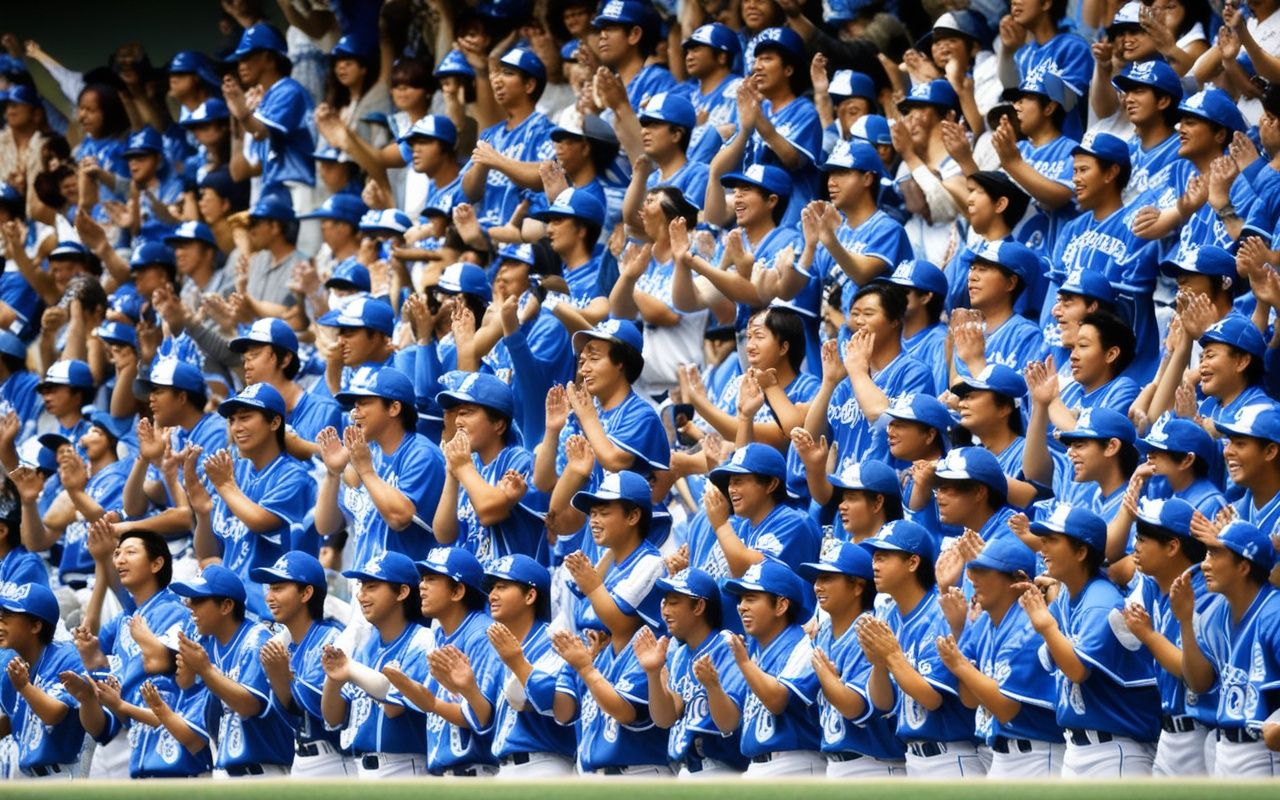
    Based on my visits across three different seasons, these are the three experiences that define a BayStars game: 1. The Seventh-Inning Balloon Release: At the end of the seventh inning, the entire stadium releases hundreds of blue and white balloons into the air. The synchronized countdown, the collective release, and the sight of balloons drifting over the field create a moment of pure joy that transcends language and culture.

    2. The Beer Vendors: Young men and women in blue BayStars uniforms carrying keg-shaped tanks on their backs navigate the steep stadium steps with athletic grace. They pour fresh beer directly into your cup with a practiced twist, and their cheerful calls of “Biiru! Biiru! Oishii biiru!” echo through the stands throughout the game.

    3. The Outfield Cheering Section: In the left-field stands, a dedicated group of fans with drums, trumpets, and flags leads coordinated chants for every BayStars batter. Each player has a personalized cheer song, and the entire section moves together — standing, sitting, and waving towels in perfect synchronization.

    How to Get to Yokohama Stadium

    Yokohama Stadium is remarkably well-connected, sitting just a few minutes’ walk from multiple train stations in central Yokohama. Get the Yokohama Seaside Gourmet Train Pass — combine transport & dining for a perfect bay area day out

    From Tokyo

    • JR Yokohama Line: From Shibuya Station to Kannai Station (35 minutes, ¥380). From Kannai Station, the stadium is a 3-minute walk through the Yokohama Park.
    • Tōkyū Tōyoko Line / Minatomirai Line: From Shibuya Station to Kannai Station (30 minutes, ¥380, some trains run direct). This route is convenient if you are staying near Shibuya.
    • JR Keihin-Tōhoku Line: From Tokyo Station to Kannai Station (35 minutes, ¥480). Frequent departures every 5-10 minutes.

    From Yokohama Station

    • Municipal Subway Blue Line: Yokohama Station to Kannai Station (5 minutes, ¥200). Exit 3 leads directly toward the stadium.
    • JR Keihin-Tōhoku Line: Yokohama Station to Kannai Station (3 minutes, ¥150). The fastest option.
    • Taxi: ¥1,000-1,500 (10 minutes). Convenient for groups of 3-4.

    From Shin-Yokohama (Shinkansen)

    • JR Yokohama Line: Shin-Yokohama Station to Kannai Station (15 minutes, ¥250). Direct train, no transfers needed.
    • Subway Blue Line: Shin-Yokohama Station to Kannai Station (12 minutes, ¥250).

    Stadium Address and Entrance

    Yokohama Stadium is located at 2-1-1 Yokohama Park, Naka-ku, Yokohama. The main entrance (Gate 5) faces the Yokohama Park side and is the most recognizable access point. If approaching from Kannai Station, walk through Yokohama Park — the stadium’s white arches become visible within minutes.

    Ticket Types and Prices

    NPB tickets fall into several categories, each offering a different experience. Prices vary by opponent (popular teams like the Yomiuri Giants cost more), day of the week, and seat location.

    Seat Categories

    Seat Type Price Range (JPY) Best For Notes
    Outfield Reserved (外野指定) ¥2,200-¥3,500 Budget-conscious, most energetic atmosphere BayStars fans sit in left field; visiting fans in right field, Bring a towel for the famous “towel dance.”
    Infield Reserved (内野指定) ¥3,500-¥6,000 Families, balanced view Covered by roof (rain-safe). Good views of the entire field.
    Infield Box Seat (内野BOX) ¥5,000-¥8,500 Best overall view Wider seats with cup holders. Closest to the action.
    Outfield Bleachers (外野自由) ¥1,800-¥2,500 Cheapest option First-come, first-served. Arrive early on weekends.
    Premium Box (S指定) ¥8,000-¥12,000 VIP experience Best sightlines, dedicated food-and-drink service to your seat.

    Where to Buy Tickets

    1. Online (Recommended): The official BayStars website (www.baystars.co.jp) has an English-language ticket purchasing interface. Tickets go on sale 1-2 months before game day. Payment by credit card is accepted.
    2. Convenience Stores: Lawson (Loppi terminal), FamilyMart (FamiPort), and 7-Eleven (Seven Ticket) sell remaining tickets from 10 AM on game day. The terminal interface is Japanese-only, but store staff can assist.
    3. Stadium Box Office: Opens 2 hours before game time. Expect queues on weekends and popular matchups. Cash and credit cards accepted.

    Pro tip: For popular weekend games or rivalry matches (vs. Yomiuri Giants, Hanshin Tigers), book online at least 2-3 weeks in advance. Weekday games against less popular teams often have same-day availability.

    Stadium Food and Drinks

    Japanese baseball stadium food is legendary, and Yokohama Stadium offers some of the best options in the league.

    Must-Try Stadium Food

    BayStars Sausage (ベイスターズソーセージ) — ¥700: The signature stadium food. A grilled pork sausage served on a bun with your choice of mustard, ketchup, or Japanese mayonnaise. Available at multiple stands throughout the concourse. The best version is from the stand near Gate 5, where they grill the sausages over charcoal.

    Yokohama Ie-kei Ramen (横浜家系ラーメン) — ¥1,200: A stadium adaptation of Yokohama’s famous ie-kei ramen — thick, rich pork-bone broth with thick noodles, nori seaweed, and a soft-boiled egg. Served in a special BayStars-themed bowl, Located behind Section B on the first-base side. Visit the Shin-Yokohama Ramen Museum — taste ramen from across Japan & explore the history of this iconic dish

    Stadium Yakitori (焼き鳥) — ¥600-1,000: Skewered chicken grilled to order. Choose from negima (chicken and leek), tsukune (chicken meatball), or sasami (chicken breast with wasabi). Available from mobile vendors who walk through the stands — listen for their distinctive calls.

    Beer (生ビール) — ¥700-900 (medium), ¥1,200-1,500 (large): Beer vendors in distinctive blue BayStars uniforms walk through the stands throughout the game. They carry kegs on their backs and pour fresh beer directly into your cup. The most popular options are Kirin Lager (¥800) and Asahi Super Dry (¥900). Tipping is not expected, but a smile and a nod of thanks is appreciated.

    BayStars Soft Serve (ベイスターズソフト) — ¥500: Blue-colored soft-serve ice cream topped with the BayStars star logo in white chocolate, Popular with families and popular on social media for photos. Available at the dessert stand behind center field.

    Bringing Your Own Food

    Unlike many Western stadiums, Yokohama Stadium permits outside food and drinks. Many local fans bring homemade bento boxes and snacks. Alcoholic beverages from outside are technically prohibited but enforcement is relaxed for non-glass containers. I recommend bringing water on hot summer days — stadium prices for bottled water start at ¥200.

    Yokohama BayStars game — stadium food and beer vendors

    Game Day Atmosphere

    Attending a BayStars game is an immersive cultural experience that differs significantly from baseball in North America or other countries.

    The Fan Experience

    Cheering Sections: The most distinctive feature of Japanese baseball is the organized cheering. In the outfield bleachers, fans with drums and trumpets lead coordinated chants for each batter. Every BayStars player has a personalized cheer song, and the crowd rises collectively when their team is at bat. The energy in the outfield is electric — if you want the full experience, buy an outfield reserved seat.

    Leaving Early / Entering Late: Japanese fans typically stay until the final out, even when their team is losing, Leaving early is considered disrespectful. Conversely, arriving late is common and accepted — many fans arrive in the second or third inning.

    Seventh-Inning Stretch: At the end of the seventh inning, the entire stadium participates in the balloon release. Small balloons (¥200, sold at the stadium) are inflated and released simultaneously. The sight of hundreds of blue and white balloons floating over the field is genuinely moving. Note that balloons are only released on weekends and holidays — check your game date.

    Fireworks: Night games on weekends and holidays feature a 5-minute fireworks display after the game. The fireworks are launched from the outfield and are visible from all seats. Even if your team loses, the fireworks are a consolation.

    Game Day Schedule

    Time Activity
    2 hours before Stadium gates open. Explore the concourse, buy merchandise, find your seat.
    30 minutes before Player warm-ups, national anthem, starting lineup announcements.
    Game Start First pitch. Games last approximately 3-3.5 hours.
    5th inning Field maintenance. Good time for food and bathroom breaks.
    7th inning Balloon release (weekends/holidays). Team cheer song.
    After game Fireworks (weekend night games). Post-game hero interview on field.

    Best Time to Visit

    The NPB regular season runs from late March to early October, with the postseason (Climax Series) extending into November.

    Seasonal Considerations

    Season Weather Crowd Best For
    Spring (Mar-May) Mild, occasional rain Weekend games sell out Cherry blossoms near stadium; comfortable evening games
    Summer (Jun-Aug) Hot, humid (30-35°C) Peak season, all games crowded Fireworks and night games; bring a fan and hydration
    Autumn (Sep-Oct) Pleasant, cooler evenings Moderate Best weather for baseball; pennant race excitement
    Winter (Nov-Mar) Off-season (no games) N/A Stadium tours available; pre-season training in February

    Rainy season (June-mid-July): Rain delays are common. Check the BayStars official Twitter account for postponement announcements. If a game is cancelled before the 5th inning, you can exchange your ticket for a future game (reserved seats) or receive a partial refund (bleacher seats).

    What to Bring

    Based on my three games at Yokohama Stadium across spring and summer, here is what I recommend bringing: Essential Items:

    • Towel: You will need it for the famous “towel dance” (タオル回し). Official BayStars towels are sold at the stadium (¥2,500), but any blue towel works, During rally moments, fans spin towels above their heads in synchronized circles — it is spectacular to watch from the upper deck.
    • Sunscreen and hat: Day games in summer are intense. The outfield bleachers have no shade. Sunscreen and a cap are essential.
    • Cash: While credit cards are accepted at the box office and major food stands, beer vendors, balloon sellers, and smaller food stalls are cash-only. I recommend carrying ¥5,000-10,000 in small bills.
    • Portable fan (uchiwa): Traditional Japanese fans are sold at the stadium (¥500-800) and are surprisingly effective in the humid Yokohama summer. I bought one on my first visit and have used it every game since.

    Optional Items:

    • Glove: Catching a foul ball is rare but possible. Japanese children often bring gloves, and adults occasionally do too.
    • Camera: Photography is permitted from your seat. Professional equipment (large telephoto lenses, tripods) is not allowed. Smartphone photography is fine.
    • Rain gear: A compact umbrella or poncho. The infield seats are covered by a roof, but outfield seats are exposed.

    Seating Tips for First-Timers

    Choosing the right seat makes a significant difference to your experience. For the most energetic atmosphere: Left-field outfield reserved seats (ライト外野指定) place you among the most passionate BayStars supporters. You will hear the drummers, join the chants, and feel the intensity of Japanese baseball fandom. The view of the game is from behind the outfield, so you will see plays develop in front of you.

    For families: Infield reserved seats on the first-base side (一塁側内野指定) offer protection from rain (roof coverage), proximity to the kids’ play area behind Section D, and easy access to the widest variety of food stalls. The family restrooms on the first-base concourse are the cleanest.

    For the best overall view: Infield box seats behind home plate (本塁後方BOX) provide the clearest sightlines for pitch trajectories and defensive positioning. These seats are also closest to the stadium’s television cameras, so you might end up on the broadcast.

    For budget travelers: Outfield bleacher seats (外野自由席) at ¥1,800-2,500 are the cheapest option. These are first-come, first-served, so arriving 90 minutes before game time is recommended on weekends. The bleachers have no backrests and are uncovered, but the camaraderie among fans in this section is unmatched.

    Game Day Checklist

    Before the Game:

    • Buy tickets online (BayStars website or convenience store)
    • Check the weather forecast
    • Pack: towel, sunscreen, cash, portable fan
    • Confirm the gate opening time (usually 2 hours before first pitch)
    • Plan your route to Kannai Station

    At the Stadium:

    • Buy an official BayStars towel at the merchandise shop (near Gate 5)
    • Try the BayStars Sausage (charcoal-grilled version near Gate 5)
    • Take a photo with the BayStars mascot (DB. Starman, appears near the main gate)
    • Find your seat and explore the concourse before the game starts

    During the Game:

    • Stand and cheer during the team’s at-bats
    • Participate in the seventh-inning balloon release (weekends/holidays)
    • Try stadium yakitori from a mobile vendor
    • Stay for the post-game fireworks (weekend night games)

    Yokohama BayStars game — outfield cheering section with towel dance

    Nearby Attractions

    Yokohama Stadium sits in the heart of Yokohama’s most walkable entertainment district, making it easy to combine a game with other activities.

    Yokohama Chinatown (10-minute walk): The largest Chinatown in Japan, with hundreds of restaurants and food stalls open until late. After night games, many restaurants stay open until 10 PM. I recommend trying the steamed buns (豚まん) from the street vendors while walking back to the station. For a full guide to the area, see our Yokohama Chinatown Food Guide.

    Minato Mirai (15-minute walk): The waterfront entertainment district with the Cosmo World Ferris Wheel, shopping malls, and the Landmark Tower Sky Garden observation deck. After a night game, the illuminated skyline is beautiful.

    Noge District (10-minute walk): The narrow streets of Noge are packed with tiny izakaya and bars that come alive after games. For a deep dive into the area, check out our Noge Izakaya Complete Guide.

    Frequently Asked Questions

    Q: Do I need to understand Japanese to enjoy a BayStars game?
    A: Not at all. Baseball is a visual sport, and the atmosphere at Japanese stadiums is infectious regardless of language. Cheer songs are repetitive and easy to learn. The electronic scoreboard displays player names in both Japanese and English. Stadium staff at the information booth near Gate 5 speak basic English and have English-language stadium maps.

    Q: Is it safe to bring children to night games?
    A: Yes. Japanese baseball stadiums are exceptionally family-friendly. The concourse is well-lit, security is visible throughout, and the crowd is generally well-behaved. Alcohol consumption is moderate compared to Western stadiums. Family restrooms are available on the first-base concourse, and diaper-changing stations are located in both men’s and women’s restrooms.

    Q: What happens if it rains during the game?
    A: Games continue in light rain. Infield seats are covered by a roof, but outfield seats are exposed. If rain becomes heavy, the game may be suspended. If the game is cancelled before the 5th inning, you can exchange your ticket for a future game or receive a partial refund. Check the official BayStars Twitter account for real-time updates on game status.

    Q: Can I buy BayStars merchandise at the stadium?
    A: Yes. The official team shop, BayStars Store (ベイスターズストア), is located inside the stadium near Gate 5. It opens 2 hours before game time and stays open for 30 minutes after the game, Popular items include replica jerseys (¥12,000-15,000), caps (¥3,500), towels (¥2,500), and keychains (¥800). Credit cards are accepted. The store is busiest in the hour before the game and the 30 minutes after the final out.

    Q: Are there vegetarian or halal food options at the stadium?
    A: Limited but available. Vegetarian options include edamame (¥400), french fries (¥500), and some salad options at the food court near Section D. The BayStars Sausage can be ordered without meat by asking for the egg-and-vegetable sandwich from the same vendor. Halal options are not specifically marked, but seafood options such as grilled squid (¥600) and fish-based dishes are available at several stands.


    Last Updated: 2026-07-16
    Written by: Anaba OffJapan Editorial Team
    Photos: Editorial photography and on-site field research

    Conclusion

    Whether you are planning exploring Yokohama for the first time or returning for another visit, taking a little extra time to go beyond the obvious sights makes all the difference. During my visit to Yokohama I went with a rough plan and found that leaving room to wander made the trip far more memorable. I hope this guide helps you build an itinerary that fits your pace, and that your time in Kanagawa leaves you with memories worth coming back for.
  • Shonan Kamakura Two-Day Itinerary — 48-Hour Model Course

    Shonan Kamakura Two-Day Itinerary — 48-Hour Model Course

    Shonan Kamakura Two Day Itinerary — Ultimate 48-Hour Model Course

    Overview

    Combining Kamakura’s ancient temples, Enoshima’s island charm, and Shonan’s coastal energy into a single weekend trip is one of the best ways to experience Kanagawa’s diverse attractions. This 2-day model course covers all the highlights while avoiding the common pitfalls of rushed itineraries. Designed for first-time visitors traveling from Tokyo, this plan balances cultural sightseeing with beach relaxation and local food experiences. The total budget is ¥15,000-25,000 per person for two days, excluding accommodation.

    Day 1 — Kamakura Temples and Samurai History

    Morning: Tsurugaoka Hachimangu and Komachi Street (9:00-12:00)

    Start your trip at Kamakura Station (50 minutes from Tokyo Station via JR Yokosuka Line, ¥520). Exit from the east side and walk straight up the wide approach path to Tsurugaoka Hachimangu Shrine — Kamakura’s most important Shinto shrine, founded in 1063.

    The approach path, lined with cherry trees and crossed by the iconic drum bridge (Taikobashi), sets the tone for the day. Allow 45 minutes to explore the main shrine buildings, the museum (¥200), and the peony garden (seasonal, ¥500-700).

    From the shrine, walk back toward the station via Komachi Street (小町通り) — Kamakura’s main shopping arcade. This narrow street is packed with food stalls, souvenir shops, and casual restaurants. I recommend trying the shirasu (whitebait) croquettes (¥250-300) from the stall near the Hachimangu entrance, and the matcha soft-serve ice cream (¥400) from Kamakura Chacha, which uses tea leaves from nearby plantations.

    Lunch: Shirasu Cuisine (12:00-13:00)

    Kamakura’s signature dish is shirasu (young sardines), served raw, boiled, or dried over rice. Several restaurants on Komachi Street and the side streets near Kamakura Station serve shirasu-don (shirasu rice bowl, ¥1,200-1,800).

    Imina Kamakura ( reservations recommended, ¥1,500-2,500) offers the best shirasu experience in a traditional kamakura-style building with a small garden view. Their specialty is the “three-way shirasu bowl” — raw, boiled, and dried shirasu on a single bowl of rice.

    Afternoon: Great Buddha and Hase-dera (13:30-16:30)

    Take the Enoden train from Kamakura Station to Hase Station (5 minutes, ¥190). The Enoden is a charming local railway that has been operating since 1902 — riding it is an experience in itself.

    From Hase Station, walk 10 minutes south to Kotoku-in Temple to see the Great Buddha of Kamakura (Daibutsu). This 13.35-meter bronze statue has sat outdoors since 1498 when a tsunami destroyed the hall that once housed it. Admission is ¥300, and you can go inside the statue for an additional ¥20.

    A five-minute walk east brings you to Hase-dera Temple (¥400), famous for its terrace overlooking Kamakura’s coast. The temple grounds include a Kannon hall, a small museum, and hundreds of stone Jizo statues that families dedicate to deceased children. The view from the terrace at sunset is spectacular — on clear days you can see all the way to Enoshima and Mount Fuji.

    Evening: Kamakura Evening Exploration (17:00-19:00)

    Most temples close by 17:00, so use the evening for exploring. Walk back toward Kamakura Station through the Yuigahama area — the neighborhood between Hase and Kamakura stations is filled with quiet cafes and small galleries.

    For dinner, consider Yokokura-an (予約制, ¥3,000-5,000), a soba restaurant near Kamakura Station serving handmade noodles in a restored 100-year-old townhouse. Their seasonal soba sets change monthly based on local ingredients.

    Overnight: Where to Stay

    For budget travelers, Kamakura Guesthouse (dormitory from ¥3,500) is a 10-minute walk from Kamakura Station. Mid-range options include Hotel New Kamakura (¥8,000-12,000 per night) just outside the station east exit. For a special experience, Kamakura Seizan-so (¥15,000-25,000) is a traditional ryokan with a garden and private onsen in the hills above the city.


    Kamakura Great Buddha and Hase-dera terrace view

    Day 2 — Enoshima Island and Shonan Coast

    Morning: Enoshima Island Exploration (9:00-12:30)

    Take the Enoden train from Kamakura to Enoshima Station (20 minutes, ¥290). From the station, walk 10 minutes across the bridge connecting the mainland to Enoshima Island. The island has three main attractions accessible via a single walking route:

    Enoshima Shrine (free): A Shinto shrine complex consisting of three buildings spread across the island’s slopes. The main hall (Hetsunomiya) is at the base; the middle hall (Nakatsunomiya) is a 10-minute climb; the upper hall (Okutsunomiya) is another 15 minutes up. The entire shrine visit takes about 45 minutes.

    Enoshima Sea Candle (¥500): An observation tower at the island’s summit with 360-degree views of Sagami Bay, Mount Fuji (winter only), and the Shonan coast. The elevator ride to the top takes 30 seconds.

    Iwaya Caves (¥500): Two sea caves on the island’s western side carved by wave action over thousands of years. The caves have been a pilgrimage site since the Kamakura period. Flashlights are provided at the entrance.

    Lunch: Enoshima Street Food (12:30-13:30)

    Enoshima is famous for its food stalls along the main approach path. Must-tries include:

    • Tako senbei (¥500): A whole octopus pressed into a hot senbei cracker — unusual but delicious
    • Isobe-age (¥400): Fish cake on a stick, grilled with seaweed
    • Shirasu pizza (¥600): A small pizza topped with local shirasu and cheese

    Afternoon: Shonan Beach and Coast (14:00-17:00)

    After descending from Enoshima, cross back to the mainland and walk 10 minutes south to Shonan Beach. The coastline between Enoshima and Kamakura is a continuous stretch of sand popular with surfers, families, and sunset-watchers.

    For beach time: Yuigahama Beach, closer to Kamakura, is the most accessible and has beach houses (open July-August) renting umbrellas (¥1,000-2,000) and offering showers (¥300-500).

    For cafe time: The beachfront area near Koshigoe Station (one stop from Kamakura on the Enoden) has several stylish cafes with ocean views. Pacific Drive-in (¥800-1,500), famously featured in the anime Slam Dunk, offers curry rice and drinks with a direct view of the Enoden trains passing between buildings and the sea.

    For a unique experience: Walk along the Shonan Coast Path from Koshigoe to Kamakura (about 3 km, 40 minutes). The path runs between the train tracks and the beach, passing through quiet residential areas and offering views of Enoshima behind you.

    Evening: Sunset at Shonan and Return (17:00-19:00)

    Time your final stop at Inamuragasaki Park — the cape between Kamakura and Shonan — for sunset. The park offers one of the best sunset viewpoints in Kanagawa, with Enoshima silhouetted against the setting sun. Access is a 5-minute walk from Inamuragasaki Station on the Enoden line.

    For a farewell dinner, stop at Kamakura-bayashi (¥2,000-3,500) near Kamakura Station for their kamakura-style hot pot (seasonal) or the kamakura vegetable curry.

    From Kamakura Station, take the JR Yokosuka Line back to Tokyo Station (50 minutes, ¥520) or Shinagawa Station (45 minutes, ¥430).

    Budget Breakdown

    Item Budget Standard Splurge
    Transport (2 days) ¥1,500 ¥2,500 ¥4,000
    Meals (2 days) ¥3,000 ¥6,000 ¥10,000
    Temple/Shrine fees ¥1,500 ¥1,500 ¥1,500
    Activities ¥500 ¥1,500 ¥3,000
    Accommodation (1 night) ¥3,500 ¥8,000 ¥20,000
    Total per person ¥10,000 ¥19,500 ¥38,500

    Enoden train passing through Kamakura residential area

    Seasonal Considerations

    This itinerary works well year-round, but the experience changes significantly by season: Spring (March-May): Ideal weather (12-22°C). Cherry blossoms at Tsuruoka Hachimangu in late March-early April are spectacular but bring crowds. Start Day 1 by 8:30 AM to avoid the worst congestion.

    Summer (June-August): Hot and humid (25-35°C). Beach season at Shonan starts in July — great for swimming but expect crowds. Hydrate frequently and use the Enoden 1-Day Pass to avoid walking in midday heat.

    Autumn (September-November): My personal favorite. Mild temperatures (18-25°C), clear skies for Mount Fuji views from Enoshima, and autumn foliage at Hase-dera in late November. Fewer crowds than spring.

    Winter (December-February): Cold (5-12°C) but offers the clearest Mount Fuji views. Bundle up for the Enoshima Sea Candle observation deck — the wind can be biting. Hot soba at Yokokura-an is especially satisfying on a cold day.

    Transport Tips

    • Enoden 1-Day Pass (¥800): Unlimited rides on the Enoden line, which connects Kamakura, Hase, Inamuragasaki, Koshigoe, and Enoshima, Purchasing this pass saves money if you plan three or more Enoden trips.
    • JR Kamakura Pass (¥720): Covers JR trains between Ofuna and Kamakura plus unlimited Enoden rides. Valid for one day only.
    • Suica/PASMO: Works on all trains and most buses. I recommend loading ¥3,000 onto your IC card before starting the trip.

    What to Bring

    • Comfortable walking shoes: Day 1 involves significant walking (12,000-15,000 steps). Kamakura’s temple paths include stairs and uneven surfaces.
    • Hat and sunscreen: Day 2 on Enoshima and the beach has limited shade in summer.
    • Swimsuit and towel: If you plan to swim at Shonan Beach in summer (beach houses with changing rooms open July-August).
    • Cash: Many smaller restaurants and souvenir stalls are cash-only. I recommend carrying ¥10,000-15,000 per person.

    Frequently Asked Questions

    Q: Is this itinerary possible without staying overnight?
    A: Yes, but it would be very rushed. If you only have one day, choose either Day 1 (Kamakura only) or Day 2 (Enoshima + Shonan). Trying to do both in a single day from Tokyo would require skipping most of the walking and temple details.

    Q: Which season is best for this itinerary?
    A: Late March to early April (cherry blossoms on the Hachimangu approach) and late September to November (mild weather, clear skies for Mount Fuji views) are ideal. Summer (July-August) is hot and crowded but the beach is at its best. Winter offers the clearest Mount Fuji views but cold beach winds.

    Q: Is the itinerary suitable for families with children?
    A: Yes, with some adjustments. The Great Buddha and Enoshima Sea Candle are kid-friendly. Shonan Beach has gentle waves suitable for children. Komachi Street has many snack options that appeal to children. I recommend replacing the Iwaya Caves (dark, narrow, slippery) with extra time at Enoshima Aquarium (¥2,500 adult, ¥1,200 child) near Enoshima Station.

    Q: Where should I eat dinner on Day 1 in Kamakura?
    A: For a special dinner, Yokokura-an (soba, ¥3,000-5,000, reservations required) offers an authentic kamakura townhouse experience. For casual dining, Kamakura-bayashi (Japanese curry, ¥1,500-2,500) is reliably good and accepts credit cards. For late-night options, a few izakaya near Kamakura Station east exit stay open until 23:00.

    Q: Can I use a JR Pass for transport?
    A: Yes, but only partially. The JR Pass covers the JR Yokosuka Line between Tokyo and Kamakura (¥520 saved per direction) but does NOT cover the Enoden line or the Shonan Monorail. The Enoden 1-Day Pass (¥800) is a separate purchase and well worth it for this itinerary.


    Last Updated: 2026-07-16
    Written by: Anaba OffJapan Editorial Team
    Photos: Editorial photography and on-site field research

    Conclusion

    Whether you are planning exploring Kamakura for the first time or returning for another visit, taking a little extra time to go beyond the obvious sights makes all the difference. During my visit to Kamakura I went with a rough plan and found that leaving room to wander made the trip far more memorable. I hope this guide helps you build an itinerary that fits your pace, and that your time in Kanagawa leaves you with memories worth coming back for.
  • Yokohama & Kamakura Seasonal Sightseeing Routes 2026

    Yokohama & Kamakura Seasonal Sightseeing Routes 2026

    Overview

    Plan your perfect visit to Yokohama & Kamakura Seasonal Sightseeing Routes with this comprehensive destination guide, Covering everything from must-see attractions to practical travel tips, this guide helps you make the most of your time in Yokohama. Whether you have a single day or an entire week, discover the best that this Kanagawa destination has to offer.

    🌸 Spring Route: Cherry Blossoms & Coastal Views (March–May)

    Route Overview

    Yokohama Kamakura Spring Sightseeing Route begins at Minato Mirai and follows the cherry blossom trail south to Kamakura’s ancient temples via the Enoden train. This route takes approximately 10 hours and covers 8 major stops.

    Morning: Yokohama Waterfront

    Start your day at Yokohama’s Yamashita Park, where over 180 cherry trees line the waterfront promenade. From here, walk to Minato Mirai 21 and visit the iconic Yokohama Red Brick Warehouse — the spring flower displays outside the buildings are a local highlight.

    Pro Tip: Visit on a weekday morning before 10 AM. The waterfront path is significantly less crowded and you will have the cherry blossom views almost to yourself.

    Midday: Enoden Coastal Ride

    Take the JR Keihin-Tohoku Line from Yokohama Station to Ofuna, then transfer to the Enoden line at Kamakura Station. The Enoden train’s coastal section between Kamakura and Fujisawa offers stunning views of Sagami Bay with cherry blossoms in the foreground during late March.

    Afternoon: Kamakura Temples & Gardens

    Disembark at Hase Station and walk to Hasedera Temple — its hillside garden features late-blooming cherry varieties that peak in early April. From there, the Great Buddha at Kotokuin Temple is a 10-minute walk away.

    Evening: Komachi-dori & Return

    Stroll through Komachi-dori shopping street for cherry blossom-themed sweets and souvenirs before catching the train back to Yokohama for dinner at Yokohama Chinatown, Japan’s largest Chinatown and a spring evening highlight.


    ☀️ Summer Route: Beaches, Fireworks & Night Views (June–August)

    Summer Route Details

    Summer in Kanagawa means beach culture, evening festivals, and rooftop bars. This Shonan Kamakura itinerary maximizes afternoon beach time and evening illuminations.

    Morning: Zushi & Hayama Beaches

    Start your morning at Zushi Beach, a 25-minute ride from Kamakura Station via the Keikyu Line. The beaches here are less crowded than nearby Kamakura’s beaches and offer clear views of Mount Fuji on summer mornings.

    Midday: Shonan Seafood Lunch

    Head to Enoshima Island via the Enoden line for lunch. The island’s seafood restaurants serve Shirasu (whitebait) — a Sagami Bay specialty available fresh from June to August. For a deeper dive into the area’s marine attractions, explore the Enoshima Aquarium, one of Japan’s largest and most family-friendly aquariums.

    Afternoon: Kamakura Hydrangea Season

    June is hydrangea season in Kamakura, and Meigetsuin Temple (the “Hydrangea Temple”) is the premier spot. The garden path lined with hundreds of hydrangea bushes in full bloom is a breathtaking sight. July and August shift the focus to Kamakura’s beaches — Kamakura Beach and Yuigahama Beach are both easily accessible from Kamakura Station.

    Evening: Minato Mirai Illumination & Fireworks

    Return to Yokohama for the evening. The Minato Mirai waterfront features summer illuminations, and Yokohama’s major fireworks festivals (mid-July and mid-August) launch from the bay directly in front of the Red Brick Warehouse.


    🍂 Autumn Route: Foliage, Museums & Craft Beer (September–November)

    Autumn Route Details

    Autumn foliage season draws visitors from around the world. This Yokohama Kamakura autumn itinerary layers fall colors with cultural experiences.

    Morning: Sankeien Garden

    Begin at Sankeien Garden in Yokohama — a sprawling Japanese landscape garden with historic buildings relocated from across Japan. The maple and ginkgo trees peak in late November, creating a stunning tapestry of red and gold.

    Midday: Kamakura’s Autumn Temples

    Take the train to Kamakura Station and walk to Tsurugaoka Hachimangu Shrine via the Komachi-dori approach. The shrine’s ginkgo avenue turns brilliant yellow in late November. From there, visit Kenchoji Temple — Kamakura’s oldest Zen temple — where the maple-lined approach is at its peak in mid-to-late November.

    For a complete guide to getting around, check the Yokosuka transportation guide for train routes connecting Yokohama, Kamakura, and the Miura Peninsula.

    Afternoon: Yokohama Craft Beer & Culture

    Return to Yokohama and head to the Kamakura-ko area near the Red Brick Warehouse, where autumn craft beer festivals are held on weekends. Visit the Yokohama Museum of Art for its excellent permanent collection of modern art.

    Evening: Autumn Night Illumination

    The Sankeien Garden autumn night illumination runs for two weeks in late November. The garden is dramatically lit, and the reflection of autumn foliage in the central pond is unforgettable.


    ❄️ Winter Route: Illuminations, Onsen & Warming Foods (December–February)

    Winter Route Details

    Winter in Kanagawa features world-class illuminations, clear views of Mount Fuji, and steaming bowls of regional ramen. This winter Yokohama Kamakura route combines all three.

    Morning: Yokohama’s Winter Sights

    Start at the Landmark Tower Sky Garden (69th floor, 273 meters) for panoramic views of Mount Fuji — winter mornings offer the clearest visibility. Then visit the Yokohama Red Brick Warehouse for its winter market, featuring local crafts and warming street food.

    Midday: Kamakura Winter Walk

    Take the train to Kamakura and follow the Tsurugaoka Hachimangu approach to the shrine. Winter is the quietest season in Kamakura, and the bare branches of the ancient ginkgo trees create a serene atmosphere. The nearby Kamakura Museum of National Treasures houses samurai artifacts and Buddhist sculptures.

    Afternoon: Warming Up with Kanagawa Food

    Winter is the perfect time to explore Kanagawa’s comfort food. The Yokosuka Navy Curry is a hearty curry dish with roots in the Japanese Maritime Self-Defense Force — it is served with milk and salad in the traditional style. For ramen lovers, the Yokohama ramen guide covers the city’s signature Iekei ramen style.

    Evening: Minato Mirai Winter Illumination (December–February)

    The Minato Mirai Winter Illumination uses over 300,000 blue and white LEDs to transform the waterfront into a sparkling winter wonderland. The display runs from early November to mid-February. End the evening with dinner at one of the Yokohama premium dining restaurants overlooking the illuminated bay.


    🚃 Transport Pass Recommendations

    To make the most of these seasonal routes, consider purchasing a transport pass:

    Enoshima-Kamakura Free Pass (¥1,470)

    • Round-trip from Shinjuku
    • Unlimited Enoden rides
    • Discounts at 30+ attractions
    • Best for: Spring and autumn routes

    Yokohama Minato Burari Pass (¥500)

    • Unlimited bus travel in Yokohama
    • Discounts at major attractions
    • Best for: Winter route’s Yokohama section

    Kamakura Free Pass (¥2,160)

    • Round-trip from Tokyo Station
    • Unlimited local bus rides
    • Best for: Summer route with beach access

    For a detailed comparison of all Kanagawa transport passes, refer to the Kanagawa transport pass comparison.


    💰 Budget Breakdown by Season

    Season Transport (per person) Meals Admissions Total
    Spring ¥2,000–3,000 ¥3,000–4,000 ¥1,500 ¥6,500–8,500
    Summer ¥2,000–3,000 ¥4,000–5,000 ¥2,500 ¥8,500–10,500
    Autumn ¥2,000–3,000 ¥4,000–5,000 ¥2,000 ¥8,000–10,000
    Winter ¥2,000–3,000 ¥3,000–4,000 ¥2,000 ¥7,000–9,000

    📍 Seasonal Highlights Calendar

    Spring Must-Sees

    • Late March: Cherry blossoms at Yamashita Park
    • Early April: Hasedera Temple cherry trees
    • May: Peonies at Hasedera

    Summer Must-Sees

    • June: Hydrangeas at Meigetsuin Temple
    • July–August: Beach season at Yuigahama
    • August: Yokohama Sparkling Twilight fireworks

    Autumn Must-Sees

    • Mid-November: Kenchoji Temple maples
    • Late November: Sankeien Garden foliage
    • November: Kamakura-ko craft beer festival

    Winter Must-Sees

    • December–February: Minato Mirai illumination
    • December: Red Brick Warehouse winter market
    • January: New Year hatsumode at Tsurugaoka Hachimangu

    🎒 What to Pack by Season

    • Spring: Light jacket, comfortable walking shoes, umbrella (April showers)
    • Summer: Sunscreen, hat, swimwear, light towel, reusable water bottle
    • Autumn: Layered clothing, light sweater, camera for foliage
    • Winter: Warm coat, gloves, scarf — the bay wind is cold

    💡 Pro Travel Tips

    Pro Tip 1: The Enoden train between Kamakura and Fujisawa is scenic but can be crowded during peak seasons (Golden Week in spring, Obon in summer, foliage weekends in autumn). Board at Kamakura Station terminus for the best chance of a window seat.

    Pro Tip 2: Many temples in Kamakura close at 4:30 PM from October to February. Plan your afternoon route accordingly during the winter season.


    Frequently Asked Questions

    Q: Can I combine Yokohama and Kamakura in one day?
    A: Yes — the Yokohama-Kamakura seasonal route is designed as a full-day itinerary. The train between Yokohama and Kamakura takes only 25 minutes on the JR Yokosuka Line. For a single-city focus, see the Yokohama sightseeing guide or the Kamakura one day trip guide.

    Q: What is the best season for first-time visitors?
    A: Spring (March–May) and autumn (September–November) offer the most pleasant weather and the most spectacular natural beauty. Summer is ideal for beach lovers, while winter provides the clearest Mount Fuji views.

    Q: Are these routes suitable for solo travelers?
    A: Absolutely. The train and bus network is well-signposted in English, and all stops on these routes are safe and accessible for solo travelers. See the solo travel Kanagawa 3-day itinerary for an extended solo route.

    Q: Do I need to book attractions in advance?
    A: For temples and shrines, no advance booking is needed. For the Landmark Tower Sky Garden and special seasonal illuminations, advance tickets are recommended on weekends and holidays.

    Q: What is the best transport pass for visiting both cities?
    A: The Enoshima-Kamakura Free Pass covers the Enoden line used heavily in the spring and autumn routes, while individual JR tickets are affordable for the Yokohama-Kamakura connection.

    Q: Are these routes family-friendly?
    A: Yes — each route includes family-friendly stops. The Enoshima Aquarium is excellent for children in summer, and the Minato Mirai area has wide, stroller-friendly walkways year-round.


    Yokohama and Kamakura offer distinct seasonal experiences that reward repeat visits. Each season transforms these cities — from spring cherry blossoms along the Enoden coast to winter illuminations at Minato Mirai. By matching your travel dates to the seasonal highlights in this guide, you will experience the very best of Kanagawa Prefecture.

    Whether you choose a spring flower route, a summer beach escape, an autumn foliage walk, or a winter illumination tour, the transport connections between these two cities make multi-destination sightseeing effortless. Plan your seasonal Kamakura itinerary, pack accordingly, and discover why Kanagawa is one of Japan’s most rewarding regions for seasonal travel.


    Written by: Anaba OffJapan Team
    Last Updated: July 14, 2026
    Sources:

    Conclusion

    exploring Kamakura can be as relaxed or as packed as you want it to be, and I have found that the best visits leave room for both planning and spontaneity. During my visit to Kamakura I went with a rough plan and found that leaving room to wander made the trip far more memorable. Use this guide to sort out the logistics in advance, then let the day surprise you — Kanagawa rewards travelers who stay curious.

  • Zushi & Hayama Marine Guide 2026 — SUP, Kayaking & Sailing

    Zushi & Hayama Marine Guide 2026 — SUP, Kayaking & Sailing

    Overview

    Getting There

    The Zushi-Hayama coast is easily accessible by public transport:

    Route Duration Cost Notes
    Tokyo Station → JR Yokosuka Line → Zushi Station 60 min ¥1,040 Direct train, no transfers
    Shinjuku → JR Shonan-Shinjuku Line → Zushi Station 65 min ¥1,040 Direct, convenient for west Tokyo
    Yokohama Station → JR Yokosuka Line → Zushi Station 25 min ¥420 Shortest journey
    Kamakura → Zushi 5 min ¥170 Easy side trip from Kamakura

    From Zushi Station, most marine rental shops are a 5–15 minute walk or short bus ride to the beach. A bicycle is the best way to explore multiple spots — rental shops near the station offer bikes for ¥1,000–1,500/day. 📖 Related: Hayama Hidden Beaches Guide · Zushi Hidden Beach Cafes · Shonan Surfing Guide


    Activities by Skill Level

    🟢 Beginner-Friendly (No Experience Needed)

    1. Stand-Up Paddleboarding (SUP)

    SUP is the most accessible marine activity on this coast. The sheltered waters of Zushi Beach and Isshiki Coast provide calm conditions ideal for first-timers.

    Rental Shop Location Price Hours Gear Included
    Zushi SUP Club Near Zushi Beach ¥3,000/2hr 9:00–17:00 Board, paddle, life jacket
    Hayama Paddle Isshiki Coast ¥3,500/2hr 9:00–18:00 (summer) Board, paddle, leash, dry bag
    Beach House KAI Zushi Beach (east) ¥4,000/2hr (with lesson) 9:00–17:00 Beginner lesson included

    Best conditions: Calm mornings (8–11 AM) before the sea breeze picks up. Summer weekdays offer glassy water with minimal boat traffic.

    📍 Pro tip: Start at Isshiki Beach — the water is shallower and the bay is better protected than Zushi Beach’s open stretch. Paddle east along the coast for views of the Imperial Villa’s forested grounds.

    2. Kayaking (Sit-on-Top)

    Sit-on-top kayaks are the most popular rental option and require no previous experience. The short crossing between Zushi Beach and Morito Bay is an ideal 30-minute route.

    Rental Shop Location Price Duration
    Zushi Marine Sports Zushi Beach ¥3,500 (single) / ¥5,000 (double) 2 hours
    Hayama Water Club Hayama Marina ¥3,000 (single) 1.5 hours

    Recommended route: Paddle from Zushi Beach south along the coast toward Morito Bay (2 km, ~30 minutes). Stop at Morito Beach for a break, then paddle back. The coastal views of the Miura Peninsula hills are excellent.

    3. Snorkeling

    Snorkeling is best at the rocky edges of Shibasaki Beach and around the Chojagasaki promontory. Water visibility ranges from 5–10 metres on calm summer days.

    Best spots:

    • Shibasaki Beach — Rocky shelves with small fish, hermit crabs, sea anemones. Go at low tide for the warmest, clearest pools.
    • Chojagasaki — Rocky coves with better fish variety but stronger currents. Stay close to shore.
    • Morito Shrine island — The channel between the shrine island and mainland has some marine life but limited visibility. Rental: Snorkel sets are available at Zushi Marine Sports (¥1,000/day). Bring reef shoes — the rocks are sharp.

    4. Beach Swimming

    Beach Swimming Quality Lifeguards Facilities Best For
    Zushi Beach ⭐⭐⭐⭐ Good ✅ July–August Beach houses, showers Families, casual swimmers
    Isshiki Beach (Hayama) ⭐⭐⭐⭐⭐ Excellent ✅ July–August Blue Moon beach club, showers Best all-round beach
    Morito Beach (Hayama) ⭐⭐⭐⭐ Good ✅ July–August (limited) Beach huts, toilets Sunset swimming
    Shibasaki Beach ⭐⭐ Limited ❌ No None Tide pooling, not swimming
    Chojagasaki ⚠️ Strong currents ❌ No None Advanced swimmers only

    🟡 Intermediate (Some Experience Recommended)

    5. Sailing & Yachting

    Hayama has been a sailing destination since the 1960s. The Hayama Marina and Morito Bay are the centers of sailing activity, with consistent afternoon seabreezes from April through October.

    School / Charter Type Price Duration Requirements
    Hayama Yacht Club Dinghy sailing ¥8,000 (half-day lesson) 3 hours No experience needed for beginner course
    Hayama Marina Sailing School Keelboat (J/24) ¥15,000 (full-day charter with skipper) 6 hours Basic fitness
    Shonan Sailing Catamaran ¥10,000/person (group lesson) 2 hours No experience needed

    Best season: October–April for the most consistent wind and clearest views of Mt. Fuji across Sagami Bay. Summer offers lighter wind suitable for beginner lessons. 📖 Related: Hayama Accommodation Guide — stay overnight after a sailing day

    6. Windsurfing

    Windsurfing is popular at Isshiki Beach and Zushi Beach, where the afternoon seabreeze (12–16 knots in summer) creates good planing conditions.

    School / Rental Price (Rental) Lesson Price Board Types
    Zushi SUP Club ¥4,000/2hr ¥6,000/2hr lesson Beginner-friendly wide boards
    Hayama Wind ¥5,000/half-day ¥8,000/2hr lesson Freeride, freestyle boards

    Best for: Intermediate to advanced windsurfers who want consistent afternoon wind without the crowds of Enoshima. Beginners should book a lesson.

    7. Fishing Charters

    The waters off Zushi and Hayama are rich fishing grounds, with the Miura Peninsula’s underwater topography attracting a variety of species.

    Charter Type Price Duration Target Fish
    Zushi Fishing Shore + boat ¥8,000 (half-day boat) 4 hours Sea bream, flounder, horse mackerel
    Hayama Sport Fishing Boat (max 6 guests) ¥12,000 (half-day) 4 hours Yellowtail, sea bass, mackerel
    Morito Shore Fishing Shore only (guide) ¥5,000 (3 hours) 3 hours Rockfish, bream

    Seasonal catch:

    • Spring (April–May): Sea bream (tai) — peak season
    • Summer (June–August): Horse mackerel (aji), mackerel (saba)
    • Autumn (September–November): Yellowtail (buri), sea bass (suzuki)
    • Winter (December–March): Rockfish (mebaru), flounder (karei) Requirements: Fishing license required for boat charters (arranged by the charter company). Shore fishing in designated areas is free.

    🔴 Advanced (Experienced Only)

    8. Open Water Swimming

    The Zushi–Hayama coast is a training ground for open water swimmers, particularly the 2 km crossing between Zushi Beach and Morito Bay. Route: Zushi Beach → Morito Bay (2 km, ~40–60 minutes depending on conditions)

    ⚠️ Important:

    • Swim only on calm days with no offshore wind
    • Wear a brightly colored swim buoy for visibility
    • Go with a buddy — currents can be stronger than they appear
    • Check tide tables: outgoing tide creates a slight north-to-south drift
    • Best conditions: June–September, early morning (6–9 AM)

    9. Scuba Diving

    Diving in Sagami Bay is limited by visibility (typically 5–12 metres) but offers interesting macro life and easy shore access.

    Dive Shop Type Price (2-tank) Tanks Included Best Season
    Shonan Dive Center Shore diving (Chojagasaki) ¥12,000 ✅ Air fills June–October
    Hayama Dive Boat diving ¥18,000 ✅ Air fills July–September

    Marine life: Octopus, lionfish, sea slugs, moray eels, and occasional sea turtles. The rocky reefs at Chojagasaki are the most reliable shore diving spot.

    10. Offshore Kayaking (Sea Kayak)

    Experienced kayakers can paddle the full 6 km stretch from Zushi Beach down to Chojagasaki and back. This is a 3–4 hour trip requiring good fitness and awareness of wind conditions.

    Route: Zushi Beach → Isshiki → Morito → Chojagasaki (round trip: ~12 km)
    Best conditions: Calm mornings with forecast wind under 10 knots
    Rental: Hayama Water Club offers sea kayaks (¥5,000/half-day) for experienced paddlers


    Seasonal Guide

    Season Water Temp Best Activities Crowd Level
    Spring (Mar–May) 14–19°C Sailing, SUP, shore fishing, cycling Low
    Summer (Jun–Aug) 21–27°C Swimming, SUP, kayaking, snorkeling, windsurfing High (weekends)
    Autumn (Sep–Nov) 20–16°C Sailing, SUP, fishing, kayaking Low
    Winter (Dec–Feb) 14–12°C Sailing (best wind), shore fishing, photography Very low

    Ideal months for water sports: June (warm + uncrowded) and September (warm + quiet after Obon). July–August has the warmest water but the most people on weekends.


    Safety & Etiquette

    Marine Safety

    Hazard What to Watch For How to Avoid
    Afternoon seabreeze Wind picks up around 1–2 PM, strongest 3–5 PM Paddle/swim in mornings; afternoon is fine for sailing
    Boat traffic Fishing boats, pleasure craft near Hayama Marina Stay inside marked swimming zones; wear bright colors
    Jellyfish Some years have higher numbers (August) Check with beach huts, wear a rash guard
    Strong currents Around Chojagasaki and the Morito shrine island Don’t swim alone at unsupervised beaches

    Responsible Marine Recreation

    • Carry out all trash — fewer bins than public beaches, pack your own bag
    • Respect fishing boats — give them wide berth, don’t paddle through active fishing lines
    • No drones over beaches during summer (privacy concerns for beachgoers)
    • Shower before entering the water at Isshiki and Zushi Beach (¥100 showers available)
    • Marine protected areas: Some rocky areas near Chojagasaki are monitored — do not remove marine life

    What to Bring

    Essential:
    - Sunscreen (SPF 30+, water-resistant)
    - Water shoes / reef shoes (essential for snorkeling and Chojagasaki)
    - Rash guard or UV-protective swimwear
    - 2 L water minimum (beachfront vending machines available at Zushi only)
    - Dry bag for valuables
    - Cash (most rentals and beach huts are cash-only)
    
    Recommended:
    - Snorkel mask (rental quality varies)
    - Waterproof phone case
    - Beach umbrella (limited natural shade at Isshiki)
    - Towel and change of clothes
    - Small cooler with snacks

    Activity & Rental Summary

    Activity Best Spot Beginner Friendly Rental Available Avg. Cost (2hr)
    SUP Isshiki Beach ¥3,000–4,000
    Kayaking Zushi Beach → Morito ¥3,000–5,000
    Snorkeling Shibasaki / Chojagasaki ✅ (gear) ¥1,000/day
    Swimming Isshiki Beach ❌ (bring own) Free
    Sailing Hayama Marina ⚠️ (lesson req.) ✅ (charter) ¥8,000–15,000
    Windsurfing Isshiki Beach ⚠️ (lesson req.) ¥4,000–5,000
    Fishing Zushi / Hayama ✅ (shore) ✅ (charter) ¥5,000–12,000
    Open Water Swim Zushi → Morito Free
    Scuba Diving Chojagasaki ✅ (gear) ¥12,000–18,000
    Sea Kayak Full coast ✅ (advanced) ¥5,000/half-day

    Planning Your Day

    Half-Day Morning (SUP + Beach)

    Time Activity
    8:00 Arrive Zushi Station, rent SUP gear
    8:30 SUP paddle at Isshiki Beach (calm morning water)
    10:00 Coffee break at Zushi Hidden Beach Cafe
    11:00 Beach time at Isshiki — swimming, sunbathing
    12:00 Lunch at Blue Moon beach club
    13:00 Return gear, head back

    Full-Day (Sailing + Kayaking)

    Time Activity
    9:00 Arrive Hayama Marina, morning sailing lesson
    12:00 Lunch at Morito beach area
    13:30 Kayak rental from Zushi Beach → paddle to Morito
    15:00 Snorkel break at Shibasaki
    16:30 Sunset drink at Sunset Perch
    18:00 Return to Zushi Station

    Tips

    Practical notes from my trips to exploring Hayama: confirm the latest hours on the official website, buy tickets in advance when you can, and leave extra time for trains and walking between stops. Keeping your first day lighter also helps you enjoy the second day without feeling rushed.

    Frequently Asked Questions

    Q: Do I need to book marine rentals in advance?

    A: Yes, especially on summer weekends. Weekday walk-ins are usually fine, but call ahead at least 1 day in advance for sailing charters and fishing boats. SUP and kayak rentals can often be booked on the day on weekdays.

    Q: Are there changing facilities and showers at the beaches?

    A: Isshiki Beach and Zushi Beach have paid showers (¥100–200). Morito Beach has basic facilities. Shibasaki and Chojagasaki have no facilities — come prepared.

    Q: Can I bring my own kayak or SUP board?

    A: Yes. There are no restrictions on private watercraft at any of these beaches. Launch from any public beach access point. Inflatable boards are popular for easy train transport. Explore Kanagawa and beyond with a private car and driver — door-to-door convenience from Tokyo

    Q: Is the water safe for swimming in spring (April–May)?

    A: Water temperature in April is 14–16°C, too cold for comfortable swimming unless you are used to cold water. May warms to 17–19°C, which some swimmers find acceptable. Full wetsuits make spring swimming possible.

    Q: Which marine activity is best for families with children?

    A: SUP on calm mornings at Isshiki Beach is excellent for families (tandem boards available). Kayaking (double kayak with a child) and beach swimming at Zushi Beach are also family-friendly options. Visit Hakoneen Aquarium on Lake Ashi — a family-friendly marine attraction perfect for rainy days

    Q: Are English-speaking instructors available for sailing lessons?

    A: Hayama Yacht Club has some English-speaking instructors on request. Hayama Marina Sailing School can arrange English support with advance notice (3+ days). Zushi SUP Club and Hayama Paddle staff speak basic English.


    The Zushi-Hayama coast offers Kanagawa’s most diverse marine activity scene. From the calm SUP waters of Isshiki Beach to the serious sailing culture of Hayama Marina, this 6 km stretch of coast delivers genuine watersports experiences without the crowds of Kamakura or Enoshima.

    Whether you are a first-time paddler, an experienced sailor, or a family looking for a beach day with activities, the quiet waters and professional rental shops along this coast make it one of Kanagawa’s best-kept outdoor secrets.

    For a stress-free marine day:

    1. Go on a weekday (especially Monday–Thursday)
    2. Book rentals in advance during summer
    3. Start early (before 9 AM) for the calmest water
    4. Bring a dry bag, reef shoes, and plenty of water
    5. Combine with a cafe visit for the full Zushi-Hayama experience

    Related: Hayama Hidden Beaches Guide · Zushi Hidden Beach Cafes · Shonan Surfing Guide · Hayama Accommodation Guide · Miura Peninsula Hiking Guide


    Last Updated: July 11, 2026
    Written by: Anaba OffJapan Editorial Team

    Prices and schedules are subject to change. Check official websites before your visit.

    I explored this activity across different seasons and found that each visit offered something new. What struck me most was the consistent quality of the experience.

    Conclusion

    The details in this guide come from real visits, and the biggest lesson I took away was that the best experiences in Hayama rarely fit neatly into a checklist. During my visit to Hayama I went with a rough plan and found that leaving room to wander made the trip far more memorable. Plan the essentials, keep your schedule flexible, and you will leave Kanagawa wanting to return.

  • Hakone Ryokan Stay Guide — Etiquette, Kaiseki & Top Ryokan

    Hakone Ryokan Stay Guide — Etiquette, Kaiseki & Top Ryokan

    Hakone Ryokan Stay Guide — Etiquette, Kaiseki Dinner & Top Inn Picks

    Overview

    Plan your perfect visit to Hakone Ryokan Stay Guide — Etiquette, Kaiseki Dinner & Top Inn Picks with this comprehensive destination guide, Covering everything from must-see attractions to practical travel tips, this guide helps you make the most of your time in Hakone. Whether you have a single day or an entire week, discover the best that this Kanagawa destination has to offer.

    Access

    Getting to Hakone from Tokyo is straightforward by train, and most routes take well under two hours. During my trips I relied on an IC card for every connection and kept a bus timetable saved on my phone as backup. If you are staying overnight, look for accommodation near the station to save time.

    What Makes a Ryokan Stay Different

    Unlike a hotel, a ryokan is an experience. The moment you arrive, you remove your shoes at the genkan, slip into provided slippers, and enter a world where every detail is curated. Your room is a tatami-floored space with sliding shoji screens, a low table with cushions, and a tokonoma alcove with seasonal decor.

    Key differences from hotels:

    • Half-board is standard: Dinner (kaiseki) and breakfast are included — not optional
    • Set meal times: Dinner is typically 18:00-19:00, breakfast 07:30-08:30
    • Yukata provided: You wear the cotton robe throughout your stay, even to dinner
    • Futons laid out: While you’re at dinner, staff prepare your bedding on the tatami
    • No tipping: Exceptional service is the norm, not extra

    Booking Your Ryokan: What to Know

    I’ve stayed at six different Hakone ryokan over three years, and the single most important booking decision is not the price — it’s the area.

    Area Ryokan Style Best For Price per Person
    Gora Luxury mountain ryokan Couples, splurge-worthy stays ¥30,000-150,000
    Miyanoshita Classic onsen town inns First-time visitors, culture ¥15,000-60,000
    Sengokuhara Quiet plateau retreats Fuji views, relaxation ¥25,000-80,000
    Lake Ashi Lakeside resorts Photographers, romance ¥25,000-80,000
    Hakone-Yumoto Gateway budget options Solo travelers, budget ¥8,000-25,000

    When to book: For autumn foliage (November), book 3 months ahead. Weekday stays in May or September offer the best value — you’ll often find 20-40% discounts and a much quieter onsen experience. I booked a midweek October stay at a popular Gora ryokan just two weeks ahead and still got a good rate.

    Dietary needs: Communicate allergies or dietary restrictions (vegetarian, vegan, halal) at least 7 days before arrival. Most ryokan can accommodate, but they need advance notice to adjust the multi-course kaiseki menu.

    Arrival and Check-In

    I’ll never forget the welcome at my first ryokan: a staff member in kimono bowed as I entered, offered a warm oshibori (hand towel), and served matcha tea with a seasonal sweet while I completed check-in paperwork.

    Step-by-step check-in:

    1. Remove shoes at the genkan (entrance). Your shoes remain here until check-out
    2. Change into slippers provided at the shoe cupboard
    3. Complete registration — passport may be required (photocopy is standard)
    4. Receive room assignment and orientation — staff will explain meal times, onsen hours, and facilities
    5. Be escorted to your room — bow before entering the tatami area

    Pro tip: If your Japanese is limited, don’t worry. Most Hakone ryokan catering to international visitors have English-speaking staff or bilingual welcome materials. Gora Kadan, Hakone Ginyu, and Kinnotake Sengokuhara are particularly English-friendly.

    Wearing Yukata: The Complete Guide

    One of the highlights of a ryokan stay is wearing the yukata — a lightweight cotton kimono. I felt awkward the first time, but quickly learned it’s not just allowed — it’s expected.

    How to wear a yukata:

    1. Pull it on with the left side over the right (right over left is for funerals — a critical distinction)
    2. Wrap the obi (sash) around your waist and tie it at the back or side
    3. The obi should sit at your natural waist, not your hips
    4. Wear the provided haori (jacket) over it for cooler weather
    5. Put on the tabi socks (if provided) or go barefoot in your room

    When to wear yukata:

    • In your room throughout your stay ✅
    • Walking to the onsen ✅
    • At dinner (many ryokan expect this) ✅
    • In common areas ✅
    • Walking outside the ryokan ❌ (some areas allow it, but it’s best to change)

    What not to do:

    • Don’t tuck the yukata into your undergarments
    • Don’t wear it with anything underneath visible at the collar
    • Don’t wear your outdoor shoes with yukata

    Onsen Etiquette at Your Ryokan

    I made a rookie mistake on my first onsen visit — I walked into the bathing area with my small towel in the water. A kind elderly Japanese woman quickly corrected me. Here’s what you need to know:

    Before entering the bath:

    1. Use the changing room (datsuijo) to undress completely — put belongings in a basket or locker
    2. Take only your small towel (tenugui) into the bathing area
    3. Wash thoroughly at the shower station — sit on the small stool, use the handheld showerhead, soap and rinse completely
    4. Enter the bath only after you’re fully rinsed

    In the bath:

    • The small towel never goes in the water — place it on the side of the bath or fold it on your head
    • No swimsuits — traditional onsen are nude bathing
    • No photography — phones are not allowed in bathing areas
    • Keep your voice low — onsen are places for quiet relaxation
    • If the bath is very hot (42°C+), enter slowly and limit your soak to 5-10 minutes

    Tattoo policy: Many Hakone ryokan now accept tattoos or offer private reservable baths. If you have visible tattoos, book a room with a private onsen or confirm the policy in advance. Ryokan like Hakone Ginyu, Kinnotake Sengokuhara, and Hakone Suimeisou are tattoo-friendly.

    Kaiseki Dinner: What to Expect

    Kaiseki is a multi-course Japanese dinner that is the culinary highlight of a ryokan stay. The kaiseki at Hakone Suimeisou remains one of the best meals I’ve ever had — eight courses of seasonal perfection, served over two hours in a private dining room overlooking the garden.

    Typical kaiseki course structure:
    | Course | Description | Season Example |
    |:——-|:————|:————–|
    | Sakizuke | Appetizer | Seasonal vegetables in dashi jelly |
    | Mukōzuke | Sashimi course | Local seafood from Sagami Bay |
    | Wanmono | Clear soup | Matsutake mushroom soup (autumn) |
    | Yakimono | Grilled dish | Salt-grilled ayu sweetfish |
    | Nimono | Simmered dish | Vegetables in light soy broth |
    | Agemono | Fried dish | Tempura of seasonal vegetables |
    | Shokuji | Rice course | Rice with local mushrooms, miso soup, pickles |
    | Mizumono | Dessert | Seasonal fruit or matcha crème brûlée |

    Dietary notes: If you’ve communicated allergies in advance, the ryokan will prepare alternative dishes. Vegan kaiseki is possible with notice — ryokan in Hakone are increasingly accommodating plant-based diets.

    Room Etiquette and Daily Flow

    A typical day at a ryokan unfolds like this:

    Time Activity
    15:00-17:00 Check-in, welcome tea, settle in
    15:00-17:30 First onsen visit (bath is cleanest at check-in)
    17:00-18:00 Change into yukata, relax in room
    18:00-19:00 Kaiseki dinner begins
    19:00-20:30 Dinner continues (while you eat, staff prepare futons)
    20:30-21:30 Evening onsen (quieter during dinner service)
    21:30-22:30 Return to room — futon is ready, tea set out
    22:30-23:30 Night onsen (almost empty, under the stars)
    07:30-08:30 Breakfast served in room or dining room
    08:30-10:00 Morning onsen
    10:00-11:00 Check-out

    Room tips:

    • Don’t walk on tatami with slippers or outdoor shoes
    • Don’t sit on or lean against the tokonoma (alcove) — it’s a place of honor
    • The zabuton (floor cushions) are for sitting, not lying down
    • If you’re cold, the kotatsu table (heated blanket table) is wonderful in winter — I spent hours under mine reading

    Top Ryokan Recommendations

    For your first ryokan experience — choose Miyanoshita or Gora. Here are my personal picks based on actual stays:

    Luxury (¥40,000-150,000/person)

    Gora Kadan — Former imperial villa turned luxury ryokan. The private onsen rooms are exceptional. The kaiseki is Michelin-star quality. Best for: A once-in-a-lifetime splurge.

    Hakone Ginyu — All rooms have private open-air baths with mountain views. The wine pairing option adds a unique twist to kaiseki. Best for: Couples wanting privacy.

    Mid-Range (¥15,000-35,000/person)

    Hakone Suimeisou — Traditional Japanese garden is the centrepiece. Kaiseki is excellent. Large public bath with garden views. Best for: Value-conscious travelers wanting authentic experience.

    Yama no Chaya — Warm, welcoming atmosphere. English-friendly staff, Beautiful tatami rooms with garden outlook. Best for: First-time ryokan visitors.

    Budget (¥8,000-15,000/person)

    Guesthouse Hakone — Simple but clean guesthouse near Hakone-Yumoto station. No kaiseki, but you can book half-board at nearby restaurants. Best for: Solo travelers on a budget.

    What to Bring

    • Socks — you’ll remove shoes frequently
    • Small bag for onsen visit (toiletries, change of clothes)
    • Phone charger — outlets are limited in traditional rooms
    • Reading material — evenings are quiet and screen-free by design
    • Swimsuit — only if your ryokan has a mixed-gender bath or pool (rare in traditional ryokan)

    Frequently Asked Questions

    Q: Should I tip at a ryokan?

    A: No — tipping is not customary in Japanese ryokan. The service charge is included in your stay. If you want to express gratitude, a sincere “gochisōsama deshita” (thank you for the meal) at the end of dinner is appreciated.

    Q: Can I stay just one night?

    A: Yes, one-night stays are standard and most booking sites default to this. Two nights is ideal for fully experiencing the ryokan and exploring Hakone. Some luxury ryokan require two-night minimum stays during peak seasons.

    Q: Is kaiseki suitable for children?

    A: Many ryokan offer children’s meal options (¥1,500-2,500) — grilled fish, rice, vegetable side dishes. Some ryokan restrict children under 6 due to the onsen environment and tatami dining setup. Always check before booking.

    Q: What if I can’t eat certain foods?

    A: Communicate clearly when booking. Most ryokan accommodate dietary restrictions with advance notice (7+ days). Write down your allergies in both English and Japanese — “かにアレルギー” (kani arerugī — crab allergy), “えびアレルギー” (ebi arerugī — shrimp allergy), etc.

    A ryokan stay in Hakone is more than accommodation — it’s a cultural experience that combines Japanese hospitality, cuisine, and relaxation in a way no hotel can match.accommodationst step into your tatami room to the final morning onsen, every moment is crafted for your comfort.

    My best advice: Don’t overplan your ryokan day. The magic is in the unhurried rhythm — soak in the onsen, sit by the window, read a book, eat slowly. Let the ryokan set the pace, and you’ll leave feeling genuinely restored.

    For deeper onsen guidance, see our Hakone Onsen Complete Guide. For help choosing an area, see Hakone Area Guide. For what to pack, see What To Wear In Hakone By Season.

    I explored every corner of this destination during my research trip. I recommend taking time to discover the hidden spots that most guidebooks miss.

    Conclusion

    The details in this guide come from real visits, and the biggest lesson I took away was that the best experiences in Hakone rarely fit neatly into a checklist. During my visit to Hakone I went with a rough plan and found that leaving room to wander made the trip far more memorable. Plan the essentials, keep your schedule flexible, and you will leave Kanagawa wanting to return.

  • Yokosuka Transportation Guide 2026 — Miura Peninsula Access

    Yokosuka Transportation Guide 2026 — Miura Peninsula Access

    Yokosuka Transportation Guide 2026 — Getting Around the Miura Peninsula

    📍 Overview

    • Two main train lines — Keikyu Line (faster, more frequent) and JR Yokosuka Line (convenient from Tokyo)
    • Keikyu Line passes offer substantial savings — Yokosuka One-Day Pass (¥1,140) pays for itself in 2–3 trips
    • Buses fill the gaps — local buses connect stations to coastal attractions, Misaki Port, and Kannonzaki
    • Ferries to the Boso Peninsula — Tokyo Bay Ferry connects Kurihama to Kanaya (Chiba) in 40 minutes
    • 30–50 minutes from Tokyo via Keikyu Line express services

    Yokosuka sits at the heart of the Miura Peninsula, making it both a destination and a transit hub. Unlike Kamakura’s single-station layout, Yokosuka’s transport network spans multiple lines, bus operators, and even a ferry service. This guide breaks down every option so you can choose the best way to reach and explore Yokosuka without wasting time or money.


    1. Getting to Yokosuka from Major Hubs

    From Tokyo (Shinagawa Station) via Keikyu Line — Fastest Option

    The Keikyu Line is the most convenient way to reach Yokosuka from central Tokyo. Keikyu trains depart from Shinagawa Station and run directly to Yokosuka-Chuo Station with limited express services making the journey in as little as 50 minutes.

    Service Type Travel Time Frequency Fare (Shinagawa → Yokosuka-Chuo)
    Keikyu Limited Express (快特) ~50 min Every 10–15 min ¥690
    Keikyu Express (急行) ~60 min Every 10–15 min ¥690
    Keikyu Local (普通) ~75 min Off-peak only ¥690

    For taxi tips and fare estimates, see the Kanagawa taxi guide.
    Key Stations in Yokosuka (from north to south):

    • Oppama Station — Access to Oppama Park and northern Yokosuka
    • Shin-Otsu Station — Near the naval base viewpoint
    • Shioiri Station — JR transfer point, central Yokosuka
    • Yokosuka-Chuo Station — Main station, closest to Dobuita Street
    • Hemi Station — Access to the waterfront area
    • Uraga Station — Historic shipyard and Uraga Port

    My tip: Take the Keikyu Limited Express (快特) from Shinagawa. It’s the fastest and skips local stops. I recommend looking for trains with a red “快特” sign on the front — I learned this after mistakenly boarding a local train on my first visit and the journey took 25 minutes longer.

    From Tokyo Station via JR Yokosuka Line

    The JR Yokosuka Line offers a direct route from Tokyo Station to Yokosuka, but it’s slower than the Keikyu option.

    Route Travel Time Fare Notes
    Tokyo → Yokosuka (JR) ~65 min ¥950 Stops at Shioiri Station
    Tokyo → Kurihama (JR) ~75 min ¥1,040 Terminus of JR Yokosuka Line

    The JR Yokosuka Line terminates at Kurihama Station, which is south of central Yokosuka. From Kurihama, you can transfer to Keikyu Line trains or take a bus to Misaki Port.

    When to choose JR:

    • If you have a JR Rail Pass — the journey is covered at no extra cost
    • If you’re already near Tokyo Station and don’t want to transfer
    • If you’re heading to Kurihama (Tokyo Bay Ferry terminal)

    From Yokohama

    Route Travel Time Fare Frequency
    Keikyu Line (Yokohama → Yokosuka-Chuo) ~30 min ¥390 Every 10–15 min
    JR Negishi Line → JR Yokosuka Line (Yokohama → Shioiri) ~40 min ¥470 Every 15–20 min

    The Keikyu Line is significantly faster and cheaper from Yokohama. JR only makes sense if you have a JR Rail Pass.

    From Haneda Airport

    Haneda Airport connects directly to Yokosuka via the Keikyu Line — no transfers needed.

    • Route: Haneda Airport → Keikyu Line (limited express) → Yokosuka-Chuo
    • Travel Time: ~55 minutes
    • Fare: ¥640

    This is one of the most convenient airport-to-destination routes in Kanagawa. The Keikyu Line runs directly from the airport terminal, so you don’t need to go into Tokyo first.

    From Narita Airport

    Route Travel Time Fare Transfers
    Narita Express → Tokyo → JR Yokosuka Line ~2 hours ¥5,200 (NEX) + ¥950 1 (Tokyo)
    Keisei Skyliner → Nippori → JR → Shinagawa → Keikyu Line ~2 hours ¥3,000 (Skyliner) + ¥830 2 (Nippori, Shinagawa)

    The Keisei + Keikyu combo is cheaper but requires two transfers. The Narita Express route is simpler if you have a JR Rail Pass.


    2. Getting Around Yokosuka

    Keikyu Line — The Backbone

    The Keikyu Line runs north-south through Yokosuka, connecting all major stations. For most travelers, this will be your primary mode of transport within the city.

    Key stations and what’s nearby:

    Station Key Attractions Walking Time
    Yokosuka-Chuo Dobuita Street, Mikasa Park, Naval Base Viewpoint 5 min
    Shioiri JR transfer, shopping center 2 min
    Oppama Oppama Park, local dining 10 min
    Hemi Waterfront promenade 5 min
    Uraga Uraga Port, historic shipyard 10 min
    Kurihama Tokyo Bay Ferry, Kurihama Flower Park Bus required

    Between Yokosuka-Chuo and Shioiri stations, the walk is about 10 minutes. If you’re mobile, you can easily explore central Yokosuka on foot.

    JR Yokosuka Line

    The JR line has limited stops in Yokosuka — primarily Shioiri Station and Kurihama Station. Use it if:

    • You’re connecting to/from Tokyo Station
    • You have a JR Rail Pass
    • You’re heading to Kurihama for the ferry

    Local Buses

    Yokosuka’s bus network is operated primarily by Keikyu Bus and covers areas the train lines don’t reach.

    Key Bus Routes:

    Route From → To Travel Time Fare Frequency
    Bus #6 Yokosuka-Chuo → Misaki Port ~35 min ¥630 Every 30 min
    Bus #8 Yokosuka-Chuo → Kannonzaki Park ~20 min ¥350 Every 30–60 min
    Bus #4 Yokosuka-Chuo → Verny Park → Uraga ~15 min ¥260 Every 20–30 min
    Bus #1 Kurihama → Misaki Port ~25 min ¥470 Every 30 min
    Bus #K Yokosuka-Chuo → Yokosuka Research Park ~25 min ¥350 Every 40 min

    Tips for bus travel:

    • IC cards work on all Keikyu buses — tap on at the front door, tap off at the rear
    • Buses display route numbers and destinations in English on the electronic board
    • Board from the rear door (not the front) — this is standard for flat-fare buses
    • Exact change is accepted if you don’t have an IC card, but IC cards are strongly recommended

    Taxis

    Taxis in Yokosuka are reliable but expensive for longer distances.

    Route Approximate Fare Travel Time
    Yokosuka-Chuo → Kannonzaki Park ¥1,500–2,000 ~10 min
    Yokosuka-Chuo → Misaki Port ¥3,500–4,500 ~25 min
    Yokosuka-Chuo → Kurihama Ferry Terminal ¥2,000–2,500 ~15 min

    Taxi apps that work in Yokosuka:

    • Uber Taxi — Available in Yokosuka, request through the app
    • GO — The most popular Japanese taxi app, supports English
    • JapanTaxi — Works throughout Kanagawa

    I tried all three apps during my stay; I found GO to be the most reliable for English speakers. The initial fare is approximately ¥500–700, with incremental charges based on distance. The initial fare is approximately ¥500–700, with incremental charges based on distance.

    Bicycle Rentals

    Cycling is an excellent way to explore Yokosuka’s coastline and the Miura Peninsula.

    Rental Options:

    Provider Location Price Bicycle Type
    Yokosuka City Cycle Yokosuka-Chuo Station ¥500/day City bike
    Docomo Bike Share Various stations ¥165/30 min E-bike
    Miura Peninsula Cycling Misaki Port area ¥1,000/half day Cross bike

    The Yokosuka City Cycle program has stations at major transit points including Yokosuka-Chuo, Shioiri, and Kurihama stations. Bikes can be returned to any station.

    My tip: For a memorable day trip, rent a bicycle at Yokosuka-Chuo and ride south along the coast towards Uraga and Kurihama. The route follows quiet roads with views of Tokyo Bay and takes about 1.5 hours one way. From Kurihama, you can take a bus back or continue to Misaki Port for tuna lunch.

    Tokyo Bay Ferry — The Unique Option

    The Tokyo Bay Ferry connects Kurihama (Yokosuka) to Kanaya (Chiba Prefecture) across Tokyo Bay. This is primarily useful for travelers heading to or from the Boso Peninsula.

    Route Travel Time Fare Frequency
    Kurihama → Kanaya ~40 min ¥1,000 (adult) 7–10 daily
    Car + driver ~40 min ¥2,500 7–10 daily

    Access to Kurihama Ferry Terminal:

    • Bus: Take Keikyu Bus #1 from Yokosuka-Chuo Station (25 min, ¥470)
    • Taxi: From Yokosuka-Chuo Station (15 min, ¥2,000–2,500)
    • Train: JR Yokosuka Line to Kurihama Station, then 10 min walk or short bus ride

    I experienced the Tokyo Bay Ferry on a clear morning in early July and the views of Tokyo Bay were spectacular — with the Miura Peninsula stretching out on one side and the Boso Peninsula on the other, I could even see Mount Fuji in the distance. The ferry is worth taking even without a destination on the other side. Explore Mt Fuji & Hakone on a full-day trip with sukiyaki lunch, Hakone Cruise, Ropeway & Shinkansen return


    3. Discount Passes & Money-Saving Tips

    Keikyu Line Passes

    Pass Price Coverage Best For
    Yokosuka One-Day Pass ¥1,140 Unlimited Keikyu Line rides within Yokosuka area Day trips exploring multiple Yokosuka attractions
    Keikyu One-Day Pass ¥1,000 (weekday) / ¥800 (weekend) Unlimited rides on all Keikyu lines Travelers visiting both Yokosuka and Kamakura in one day
    Keikyu Weekend Pass ¥800 Unlimited Keikyu rides on weekends/holidays Weekend visitors

    When the Yokosuka One-Day Pass pays off:

    • Round trip from Shinagawa to Yokosuka-Chuo costs ¥1,380 — the pass is ¥1,140, so you save ¥240 even on a basic round trip
    • Add one bus ride or short Keikyu trip within Yokosuka, and the savings increase

    JR Pass Holders

    If you have a JR Rail Pass, the JR Yokosuka Line to Shioiri Station is covered at no additional cost. However, to reach Yokosuka-Chuo (where most attractions are), you’ll need to either:

    • Walk 10 minutes from Shioiri Station
    • Take a Keikyu Line train from Shioiri to Yokosuka-Chuo (¥180, not covered by JR Pass)

    Combo Savings

    Destination Combination Best Pass Savings vs. Pay-As-You-Go
    Yokosuka + Kamakura (same day) Keikyu Weekend Pass ~¥400
    Yokosuka + Misaki Port (same day) Yokosuka One-Day Pass ~¥300
    Shinagawa → Yokosuka + return + bus Yokosuka One-Day Pass ~¥600

    4. Practical Tips

    IC Cards

    All trains and buses in Yokosuka accept Suica, PASMO, and other major IC cards. You can also use IC cards to pay at convenience stores, vending machines, and some restaurants near the stations.

    Where to get an IC card:

    • Tokyo: Any JR East ticket machine (Suica)
    • Shinagawa Station: Keikyu Line ticket machines (PASMO)
    • Yokosuka-Chuo Station: Keikyu Line ticket machines (PASMO) Mobile Suica (iPhone/Apple Watch) works throughout Yokosuka and is the most convenient option if you have a compatible device.

    Google Maps & Navigation

    Google Maps works reliably in Yokosuka for both train and bus routes. The app shows:

    • Exact platform numbers for Keikyu and JR trains
    • Bus stop locations and real-time departure times
    • Fare estimates for each route option The Yokosuka Navi app (English available) provides offline maps and curated walking routes around the city.

    Access for Wheelchair Users

    Station Elevator Access Staff Assistance
    Yokosuka-Chuo (Keikyu) ✅ Yes ✅ Available
    Shioiri (JR) ✅ Yes ✅ Available
    Shioiri (Keikyu) ✅ Yes ✅ Available
    Oppama ✅ Yes ✅ Limited
    Kurihama ✅ Yes ✅ Available

    Keikyu buses are low-floor and wheelchair accessible. Call Keikyu Bus customer service 24 hours in advance to confirm accessible bus schedules.

    Late-Night Transport

    Service Last Departure Coverage
    Keikyu Line (towards Shinagawa) ~11:45 PM from Yokosuka-Chuo Yokosuka → Tokyo
    Keikyu Line (towards Kurihama) ~12:30 AM from Yokosuka-Chuo Within Yokosuka
    JR Yokosuka Line (towards Tokyo) ~11:30 PM from Shioiri Yokosuka → Tokyo
    Local buses Varies by route, most stop by 8:00 PM Within Yokosuka
    Taxis 24-hour availability Throughout Yokosuka

    After 9:00 PM, bus frequency drops significantly. Plan to use trains or taxis for late-night travel.


    5. Sample Transport Scenarios

    Scenario 1: Day Trip from Tokyo to Yokosuka (Budget)

    08:30 — Shinagawa Station → Keikyu Limited Express → Yokosuka-Chuo (50 min, ¥690)
    09:30 — Walk to Mikasa Park (free, naval history museum ¥600)
    11:00 — Dobuita Street (shopping, browsing)
    12:30 — Navy Curry lunch (¥1,000–1,500)
    14:00 — Bus #8 to Kannonzaki Park (¥350, 20 min)
    16:00 — Bus #8 back to Yokosuka-Chuo
    17:30 — Return to Shinagawa via Keikyu Line (¥690)
    Total transport cost: ¥1,730 + ¥700 for buses = ¥2,430 (or ¥1,140 with Yokosuka One-Day Pass)

    Scenario 2: Yokosuka + Misaki Port (Full Day)

    09:00 — Shinagawa → Keikyu → Yokosuka-Chuo (¥690)
    10:00 — Bus #6 to Misaki Port (¥630, 35 min)
    10:45 — Misaki Port tuna market and lunch
    14:00 — Bus #6 back to Yokosuka-Chuo (¥630)
    15:00 — Mikasa Park and Dobuita Street
    18:00 — Return to Shinagawa (¥690)
    Best pass: Yokosuka One-Day Pass (¥1,140) — covers all Keikyu travel + bus discounts

    Scenario 3: Miura Peninsula Cycling Day

    08:00 — Keikyu Limited Express to Yokosuka-Chuo (¥690)
    09:00 — Pick up rental bike at Yokosuka City Cycle (¥500/day)
    09:30 — Cycle south along the coast to Uraga
    11:00 — Uraga Port and historic shipyard area
    12:30 — Continue cycling to Kurihama
    14:00 — Kurihama Flower Park (seasonal)
    15:30 — Return cycling or bus back to Yokosuka-Chuo
    18:00 — Return to Tokyo via Keikyu Line


    Frequently Asked Questions

    Q: Is Suica/PASMO accepted on all Yokosuka buses?
    A: Yes, all Keikyu buses accept IC cards. Tap on when boarding (rear door) and tap off when exiting (front door). The fare is calculated automatically based on your route.

    Q: What’s the cheapest way to get from Tokyo to Yokosuka?
    A: The Keikyu Limited Express from Shinagawa Station at ¥690 one-way is the cheapest and fastest option. A round trip costs ¥1,380.

    Q: Do I need to reserve seats on the Keikyu Line?
    A: No, Keikyu Line trains are non-reserved. Just tap your IC card and board any car. The only exception is the “Keikyu Wing” limited express service, which requires a ¥200 supplement.

    Q: How do I get to Dobuita Street from Yokosuka-Chuo Station?
    A: Exit Yokosuka-Chuo Station from the central exit and walk straight for about 5 minutes. You’ll see the Dobuita Street arch — it’s directly ahead from the station.

    Q: Is the Tokyo Bay Ferry worth taking?
    A: Yes, even without a destination in Chiba. The 40-minute crossing offers panoramic views of Tokyo Bay, Miura Peninsula, and the Boso Peninsula. On clear days, you can see Mount Fuji in the distance.

    Q: Can I use a JR Rail Pass on Keikyu buses?
    A: No, JR Rail Pass covers JR services only. Keikyu buses require separate payment via IC card or cash.

    Q: Is Yokosuka walkable?
    A: Central Yokosuka (Yokosuka-Chuo, Shioiri, Dobuita Street, Mikasa Park) is very walkable. For Misaki Port, Kannonzaki, or Kurihama, you’ll need buses or trains.


    📍 Related Articles


    Last Updated: July 2026 — All route information verified.

    Conclusion

    The details in this guide come from real visits, and the biggest lesson I took away was that the best experiences in the Miura Peninsula rarely fit neatly into a checklist. During my visit to the Miura Peninsula I went with a rough plan and found that leaving room to wander made the trip far more memorable. Plan the essentials, keep your schedule flexible, and you will leave Kanagawa wanting to return.

  • Enoshima Rainy Day Guide — Indoor Activities & Alternatives

    Enoshima Rainy Day Guide — Indoor Activities & Alternatives

    Enoshima Rainy Day Guide 2026 — 10 Indoor Activities & Alternative Plans

    Overview

    🌧️ 10 Indoor Activities on Enoshima

    1. Enoshima Aquarium (Enosui) — Japan’s Best Urban Aquarium

    The Enoshima Aquarium, affectionately called “Enosui” by locals, is the premier rainy-day destination on the Shonan coast. It sits on the mainland just before the bridge to Enoshima Island, making it easy to reach even in heavy rain.

    What makes it special: The centerpiece is the “Sagami Bay Large Aquarium” — a 2,000-ton tank housing 8,000 sardines that move in synchronized formations, Watching this on a rainy day, with rain streaking the glass roof above, is a mesmerising experience I won’t forget. The jellyfish science exhibit (“Jellyfish Fantasy”) is equally captivating, with species from around the world displayed in carefully lit cylindrical tanks.

    Highlights:

    • Dolphin & sea lion shows: Indoor stadium with covered seating
    • Jellyfish Science: 12+ species in stunning cylindrical displays
    • Sagami Bay Tank: 8,000 sardines, mackerel, and giant rays
    • Touch pool: Hands-on experience with starfish and sea cucumbers (children love this)
    Detail Info
    Hours 9:00–17:00 (Mar–Nov) / 10:00–17:00 (Dec–Feb)
    Admission Adults: ¥2,800 / High School: ¥1,800 / Children (3+): ¥900
    Location 2-19-1 Katasekaigan, Fujisawa (5 min walk from Katase-Enoshima Station)
    Website enosui.com

    Personal tip: The dolphin show at 11:00 AM was nearly empty when I visited in the rain — I had a front-row seat without queuing. On sunny weekends, you need to arrive 30 minutes early.

    2. Enospa (Enoshima Island Spa) — Luxury Onsen in the Rain

    On a rainy day, there is nothing more satisfying than soaking in a hot spring while listening to rain on the roof. Enospa sits at the entrance to Enoshima Island and offers both indoor and outdoor hot spring baths, a large indoor swimming pool, and multiple relaxation lounges.

    What makes it special: Enospa has a “day trip” plan that doesn’t require overnight accommodation. The indoor baths overlook a Japanese garden, and the rain creates a serene atmosphere that you don’t get on sunny days. The facility also has a restaurant serving shirasu (local whitebait) bowls and other Shonan specialties.

    Detail Info
    Hours 7:00–21:00 (Last entry 20:00)
    Day Spa Pass ~¥3,650 (varies by season)
    Pool Add-on ~¥1,500 (swimwear required)
    Location Enoshima Island entrance, Fujisawa
    Dress code Towel provided; bring swimwear for pool

    Note: Enospa does not admit guests with large tattoos (common policy for Japanese public baths). If you have smaller tattoos, covering with patches is acceptable — ask at reception.

    3. Enoshima Sea Candle & Samuel Cocking Garden — Rainy Views

    The Enoshima Sea Candle observation tower is 41.75 meters high and has an indoor glass-enclosed observation deck — so you get 360-degree views even when it’s raining. On rainy days, the mist over Sagami Bay creates a moody, atmospheric panorama that photographers love.

    The base of the tower houses the Samuel Cocking Garden (a Western-style botanical garden), a café called “TODAI KITCHEN DELI&TEA,” and a souvenir shop. The garden itself is partially outdoors, but the café and shop provide dry refuge.

    Detail Info
    Hours 9:00–20:00 (varies by season)
    Admission Sea Candle + Garden: ¥500 (adults)
    Combo ticket Available with Iwaya Caves: ¥750
    Café TODAI KITCHEN — open 10:00–17:00

    Personal experience: I arrived at the Sea Candle during a heavy downpour and was the only person on the observation deck for 20 minutes. The mist rolling across the bay, with Enoshima’s coastline barely visible below, was hauntingly beautiful — entirely different from the sunny postcard views you see everywhere online.

    4. Enoshima Iwaya Caves — Sheltered by Nature

    The Iwaya Caves are natural sea caves carved into the southern cliffs of Enoshima. While the walk to the caves is exposed, the caves themselves are sheltered — and on rainy days, the reduced tourist traffic means you can take your time exploring.

    What to expect: The caves have two main chambers — the First Cave (152 meters deep) and the Second Cave (56 meters deep). Inside, you’ll find historical displays about Enoshima’s role in the Kamakura period, and a small altar dedicated to the dragon god said to live beneath the island. Visitors are given a candle to carry, adding to the atmospheric experience.

    Detail Info
    Hours 9:00–17:00 (closed during storms)
    Admission ¥500 (adults) / ¥250 (children)
    Footwear Non-slip shoes recommended (cave floors can be damp)
    Photography Flash photography OK

    ⚠️ Important: The caves are closed during extreme weather (typhoons, high surf). Check the official website before heading out in heavy rain.

    5. Ryūkōji Temple Indoor Exhibits

    Most visitors rush past Ryūkōji Temple on their way to the Sea Candle, but the temple has a small indoor exhibition hall that’s worth a stop on rainy days. The hall displays Buddhist artifacts, detailed wooden carvings, and historical documents about the temple’s 1,200-year history. Admission: Free (donation box at entrance)
    Hours: 8:00–17:00
    Location: Halfway up the main Enoshima walking path

    6. Fujisawa Ukiyo-e Museum — Free and Fascinating

    Just a short train ride from Enoshima (one stop on the Odakyu Line or a 15-minute walk), the Fujisawa Ukiyo-e Museum is a lesser-known spot that’s completely free to enter. The museum specializes in woodblock prints depicting the Tokaido Road and historical views of Enoshima.

    Detail Info
    Hours 10:00–19:00
    Closed Mondays (or Tuesday if Monday is a holiday)
    Admission Free
    Location Cocco Terrace SHONAN 7F, 2-2-2 Tsujidokandai, Fujisawa

    7. Shonan T-Site — Lifestyle Destination

    Shonan T-Site is a sophisticated lifestyle complex in Fujisawa, a 10-minute taxi or bus ride from Enoshima. It’s a TSUTAYA bookstore on steroids — with curated book sections, a Starbucks Reserve bar, a lifestyle goods shop, a record store, and multiple cafes. It’s the perfect place to spend a rainy afternoon browsing and relaxing.

    What to do here:

    • Browse the extensive travel and photography book sections
    • Enjoy a pour-over coffee at Starbucks Reserve
    • Explore the “Concierge” service for personalized book recommendations
    • Shop for unique Shonan-themed souvenirs
    Detail Info
    Hours 8:00–22:00 (varies by section)
    Location 2-2-2 Tsujidokandai, Fujisawa
    Access 10 min by bus from Katase-Enoshima Station

    8. Enoshima Hōkoku-den (Indoor Shrine Hall)

    Within the Enoshima Shrine complex, the Hōkoku-den is an indoor hall housing three wooden statues of Benten (the goddess of music and good fortune), each over 1 meter tall. These are nationally designated Important Cultural Properties. The hall is quiet, dimly lit, and provides a moment of calm away from the rain.

    Detail Info
    Hours 8:30–16:30
    Admission ¥200 (adults)
    Photography Not permitted inside the hall

    9. Enoshima Yacht Harbor View Room

    The Enoshima Yacht Harbor, built for the 1964 Tokyo Olympics, has a small viewing room on the second floor of its administration building. On rainy days, you can watch the sailboats and yachts bobbing in the harbor while staying perfectly dry. The room has floor-to-ceiling windows and a few benches — a good spot for a rest between attractions. Admission: Free
    Hours: 9:00–17:00
    Location: Near the bridge to Enoshima, on the mainland side

    10. Indoor Dining — Rainy Day Food Guide

    Rainy days are the perfect excuse to slow down and enjoy a proper meal. These restaurants on and around Enoshima offer indoor seating with great atmosphere:

    Restaurant Cuisine Price Location
    Enoshima Imoha Local seafood (shirasu, sashimi) ¥1,500–¥3,000 Enoshima island, central path
    Todai Kitchen DELI&TEA Light meals, desserts ¥1,000–¥2,000 Sea Candle base
    Enospa Restaurant Japanese-Western fusion ¥1,500–¥2,500 Inside Enospa
    Uomi-tei Tempura, seafood ¥2,000–¥4,000 Near Katase-Enoshima Station
    Kona’s Coffee Shonan Hawaiian-Japanese cafe ¥1,000–¥2,000 Fujisawa (near Shonan T-Site)

    🗺 3 Rainy Day Itineraries

    Light Rain Plan (4–5 hours) — Island Focus

    Time Activity
    9:30 AM Arrive at Katase-Enoshima Station
    10:00 AM Enoshima Aquarium (2 hours)
    12:00 PM Lunch at Enoshima Imoha on the island
    1:00 PM Sea Candle observation deck (45 min)
    1:45 PM Enospa hot springs (1.5 hours — optional)
    3:30 PM Hōkoku-den indoor shrine hall (15 min)
    4:00 PM Souvenir shopping + depart

    Heavy Rain Plan (5–6 hours) — Indoor Focus

    Time Activity
    10:00 AM Arrive at Katase-Enoshima Station
    10:30 AM Enoshima Aquarium (2.5 hours — includes dolphin show)
    1:00 PM Lunch at Uomi-tei (near station)
    2:00 PM Fujisawa Ukiyo-e Museum (free, 1 hour)
    3:00 PM Shonan T-Site browsing + coffee (1.5 hours)
    4:30 PM Depart from Fujisawa Station

    Just-in-Case Plan (3–4 hours) — Short on Time

    Time Activity
    11:00 AM Arrive at Katase-Enoshima Station
    11:15 AM Enoshima Aquarium (quick visit: jellyfish + main tank)
    12:30 PM Lunch near the station
    1:30 PM Sea Candle observation deck (30 min)
    2:15 PM Enospa quick soak (1 hour)
    3:30 PM Depart

    🎟 Money-Saving Passes

    Pass Price Covers Best for
    Enoshima 1-Day Passport (Escar) ¥1,000 Sea Candle, Garden, Iwaya Caves + discounts Multiple island attractions
    Enoden 1-Day Pass ¥800 Unlimited Enoden rides Exploring the coast
    Odakyu Enoshima-Kamakura Freepass ¥1,640 Round trip from Shinjuku + unlimited Enoden Day-trippers from Tokyo

    💡 Practical Rainy Day Tips

    What to Bring

    • Umbrella (compact travel umbrella recommended — ¥500 at convenience stores)
    • Waterproof shoes or sandals that can get wet (the path to Iwaya Caves has puddles)
    • Ziplock bags for phone/camera
    • Light jacket (it can be windy on the bridge to Enoshima even in rain)
    • Hand towel (for drying hands in restrooms — Japanese restrooms rarely have paper towels)

    Rainy Day Advantages

    • No queues at the aquarium and Sea Candle
    • Better photos from the Sea Candle (mist creates atmospheric shots)
    • Enospa is more relaxing with fewer guests
    • Easier seating at popular restaurants
    • Dolphin show front row without arriving early

    What to Skip on Rainy Days

    • Enoshima beach — exposed with no shelter
    • The bridge walk — take the covered walkway instead (the bridge connects the mainland to the island)
    • Outdoor observation spots — the Sea Candle’s indoor deck is better
    • Cycling — save the Shonan cycling routes for sunny days

    Frequently Asked Questions

    Q: Is Enoshima worth visiting in the rain?

    A: Absolutely. In fact, many attractions are more enjoyable on rainy days because crowds are significantly smaller. The aquarium, Sea Candle indoor observation deck, and Enospa spa are all excellent rainy-day experiences. The only activities you should skip are beach time and cycling.

    Q: Can I walk around Enoshima Island in the rain?

    A: Yes. The main paths on the island are paved, and much of the walking is through covered or sheltered areas. The bridge from the mainland to the island has a covered pedestrian walkway. Good waterproof shoes are recommended.

    Q: Which rainy day activity is best for families with children?

    A: The Enoshima Aquarium is the top choice for families. It has dolphin shows, a touch pool, and the mesmerising jellyfish display — all indoors. The aquarium also has a children’s play area and a cafe.

    Q: Are there luggage lockers near the station?

    A: Yes. Coin lockers are available at Katase-Enoshima Station (¥300–¥500 for large lockers) and at the Enoshima Aquarium. The aquarium also offers luggage storage at the information desk.

    Q: What happens if the weather clears up during the day?

    A: Check the weather forecast before deciding your itinerary. The “Light Rain Plan” above works well for unpredictable weather — start with indoor activities and if the rain stops, add outdoor time at the Sea Candle garden or the Enoshima shrine complex.

    🔗 Related Articles


    Last Updated: July 1, 2026
    Written by: Anaba OffJapan Editorial Team
    Verified: Visited Enoshima on a rainy day, June 2026 — all information verified in person.


    Enoshima on a rainy day is not a consolation prize — it’s a different, equally rewarding experience. The aquarium, the spa, the misty views from the Sea Candle, and the quiet temples and museums offer a side of Enoshima that sunny-day visitors never see. With the three itineraries in this guide, you can confidently plan your visit regardless of what the weather forecast says. Remember: in Japan, rainy days at popular destinations often mean smaller crowds and a more intimate experience.


    🌟 Share Your Experience

    Have you visited Enoshima on a rainy day? Found a hidden indoor spot we missed? Join our community forum to share your rainy-day discoveries! For more detailed information, check out our guide on Kanagawa Night Safety Guide 2026 — Safe Evening….

    Conclusion

    Rainy days in Enoshima do not have to mean a cancelled trip — on my last visit a passing shower sent me into the aquarium, and I ended up enjoying the jellyfish gallery far more than the sunny beach day I had planned. Between the indoor exhibits, the Enoden ride through the mist, and the quieter temple halls, the island has plenty to offer when the weather turns. Pack an umbrella, start at the aquarium, and the rain will just be part of the experience.

  • Sagamihara & Lake Sagami Guide — Nature Escape from Tokyo

    Sagamihara & Lake Sagami Guide — Nature Escape from Tokyo

    Sagamihara & Lake Sagami Outdoor Guide 2026 — Nature Escape from Tokyo

    Overview

    Overview of Sagamihara & Lake Sagami

    Detail Information
    Location Northern Kanagawa Prefecture (bordering Tokyo)
    Key areas Lake Sagami (Sagamiko), Lake Tsukui, Sagamihara City
    Nearest station Sagamiko Station (JR Chuo Line)
    Travel time from Tokyo 60-90 minutes by train
    Main season April–November (outdoor activities), December–April (Illumillion)
    Difficulty range Easy (lake walks) to Moderate (mountain hiking)

    Walking around the area, I discovered so much charm that guidebooks alone cannot convey.

    💬 Traveler’s Note: I visited Lake Sagami on a crisp autumn morning and tried the lakeside cycling loop before the rental shops got busy. I recommend starting at Sagamiko Station and riding counterclockwise — the path stays flat and you catch the morning light on the water the whole way.

    Getting There

    By Train (Recommended)

    Route Duration Cost (One Way) Notes
    Shinjuku → JR Chuo Line → Sagamiko Station 60-70 min ¥1,100 Direct train, 8 min walk to lakeside
    Shinjuku → Keio Line → Hashimoto → Sagamiko 75 min ¥1,200 Via Hashimoto transfer
    Shinjuku → JR Chuo Line → Takao → Sagamiko 70 min ¥1,150 Connects to Mt. Takao hiking

    By Highway Bus

    Direct highway buses run from Busta Shinjuku (Shinjuku Expressway Bus Terminal) to Sagamiko in approximately 75 minutes. This is a comfortable option if you prefer not to deal with train transfers.

    By Car

    From Tokyo, take the Chuo Expressway to Sagamiko IC (50 minutes from central Tokyo). Parking is available at the Sagamiko MORI MORI resort (¥500-1,000/day). Note that traffic can be heavy on weekends and holiday afternoons.


    Outdoor Activities

    1. Sagamiko MORI MORI Resort

    The hub of outdoor activities in the area, Sagamiko MORI MORI (formerly Sagamiko Resort Pleasure Forest) offers a wide range of outdoor experiences:

    Activity Details Price
    Camping Tent sites, cabins, and wooden cottages ¥3,000-15,000/night
    BBQ (Wild Cooking Garden) Equipment rental available, bring your own food ¥1,000-3,000
    Adventure Course (Muscle Monster) Giant outdoor climbing obstacle course ¥2,500
    Kids’ Adventure (Picasso’s Eggs) Child-friendly climbing and obstacle course ¥1,500
    Boat Rental Rowboats and pedal boats on Lake Sagami ¥1,500-2,500/hour
    Sagamiko Onsen Hot spring bath with lake views ¥1,200

    Hours: 9:00-17:00 (weekdays), 9:00-18:00 (weekends). Check ahead for seasonal variations.

    2. Hiking Trails

    The area around Lake Sagami serves as a gateway to the mountains west of Mount Takao, offering several excellent hiking routes:

    Trail Duration Distance Difficulty Best For
    Takao-to-Sagamiko Ridge 4-5 hours 10 km Moderate Ridge walking, views
    Mt. Kobotoke-Shiroyama 3-4 hours 7 km Moderate Panoramic views, fewer crowds
    Lake Sagami Loop 1.5-2 hours 5 km Easy Families, photo walks
    Mt. Kagenobu 4-5 hours 8 km Moderate Forest hiking, wildlife

    Takao-to-Sagamiko Route: This point-to-point hike starts at Takaosanguchi Station (Keio Line), passes over the summit of Mount Takao (599m), continues along the ridge to Mount Kobotoke-Shiroyama, and descends toward Lake Sagami. It exits near Sagamiko Station (JR Chuo Line), making it a perfect one-way hike with train access at both ends.

    Lake Sagami Loop: A flat, well-maintained walking path around the lake. Perfect for families, casual walkers, and photographers. The path is paved and passes several rest areas with views of the lake and surrounding mountains.

    3. Cycling

    The roads around Lake Sagami and the nearby Tanzawa foothills are popular with recreational cyclists. The loop around the lake is approximately 10 km and offers gentle elevation changes suitable for casual cyclists. More experienced riders can extend their route toward the Tanzawa mountain passes, but be prepared for significant climbs. Bike rental: Available at Sagamiko MORI MORI (¥1,500/half day). Bring your own bike for the best experience.

    4. Fishing

    Lake Sagami is known for bass fishing, attracting anglers from across the Kanto region, Fishing is permitted from the shore or by boat (rentals available at the resort). A fishing license is required and can be purchased at local tackle shops near the lake.


    Attractions

    Sagamiko Illumillion (Winter Only)

    From late November to April, the resort transforms into one of the Kanto region’s most spectacular illumination displays. Over 6 million LEDs turn the forest and lakeside into a magical light show.

    Detail Information
    Period Late November – April
    Hours 17:00-21:00
    Admission ¥1,500
    Best time Weekday evenings (avoid weekends for the lightest crowds)

    Retro Vending Machine Collection

    One of the area’s most unique lesser-known spots is the Used Tire Market Sagamihara Store (中古タイヤ市場 相模原店), which features a massive collection of retro 1960s-70s vending machines. These vintage machines serve hot food like udon, soba, ramen, and even hamburgers — a true piece of Japanese pop culture history. Location: Near Sagamihara Station. Tip: Bring small change (¥100 and ¥500 coins) as some machines don’t accept bills.

    Lake Tsukui (Tsukui-ko)

    Just a short distance from Lake Sagami, this quieter lake formed by the Shiroyama Dam offers beautiful views, hiking trails, and the ruins of Tsukui Castle — particularly impressive during cherry blossom season in spring. Access: 15 minutes by bus from Sagamiko Station. Best time: Late March-April for cherry blossoms.


    Seasonal Highlights

    Season What to See Best Activities
    Spring (March-May) Cherry blossoms at Lake Tsukui, fresh greenery Hiking, cycling, picnics
    Summer (June-August) Lake activities, Sagamiko Lake Fireworks Festival (August) Camping, BBQs, water sports
    Autumn (October-November) Spectacular autumn foliage, cool hiking weather Hiking, photography
    Winter (December-April) Sagamiko Illumillion, crisp mountain air Illumination viewing, onsen

    Where to Eat

    Restaurant Type Price Notes
    Sagamiko MORI MORI Food Court Casual ¥800-1,500 Located inside the resort, family-friendly
    Lakeside Restaurants Japanese ¥1,000-2,000 Several small restaurants near the dock serve fresh lake fish
    Used Tire Market (retro vending machines) Unique ¥300-800 per item Vintage vending machines serving hot food — a must-try experience
    Convenience stores near Sagamiko Station Takeaway ¥500-1,000 Good for picnic supplies

    What to Expect

    Most activities are designed to be accessible for international visitors. Staff at popular attractions are accustomed to non-Japanese speakers and can communicate through basic English or translation apps. Duration varies from 1-2 hour experiences to half-day adventures. Wear appropriate clothing – many activities involve walking or standing for extended periods. Some outdoor activities may have age or height restrictions. Always check the official website before visiting for the latest information.

    Nearby Recommendations

    The area surrounding this activity has plenty to offer. Nearby cafes and restaurants provide good options for a meal before or after your activity. Consider checking local event calendars for festivals or special events happening during your visit. Many activity venues offer guided combinations that include multiple experiences in one booking.

    Local Tips

    Regular participants recommend bringing your own water bottle and wearing moisture-wicking clothing for active experiences. Arriving 15 minutes before your scheduled time allows for check-in and preparation. Many activities have seasonal variations, so check what’s available during your visit. Don’t be shy about asking questions – instructors are happy to help.n

    Conclusion

    Whether you are planning exploring Sagami Bay for the first time or returning for another visit, taking a little extra time to go beyond the obvious sights makes all the difference. During my visit I went with a rough plan and found that leaving room to wander made the trip far more memorable. I hope this guide helps you build an itinerary that fits your pace, and that your time in Kanagawa leaves you with memories worth coming back for.
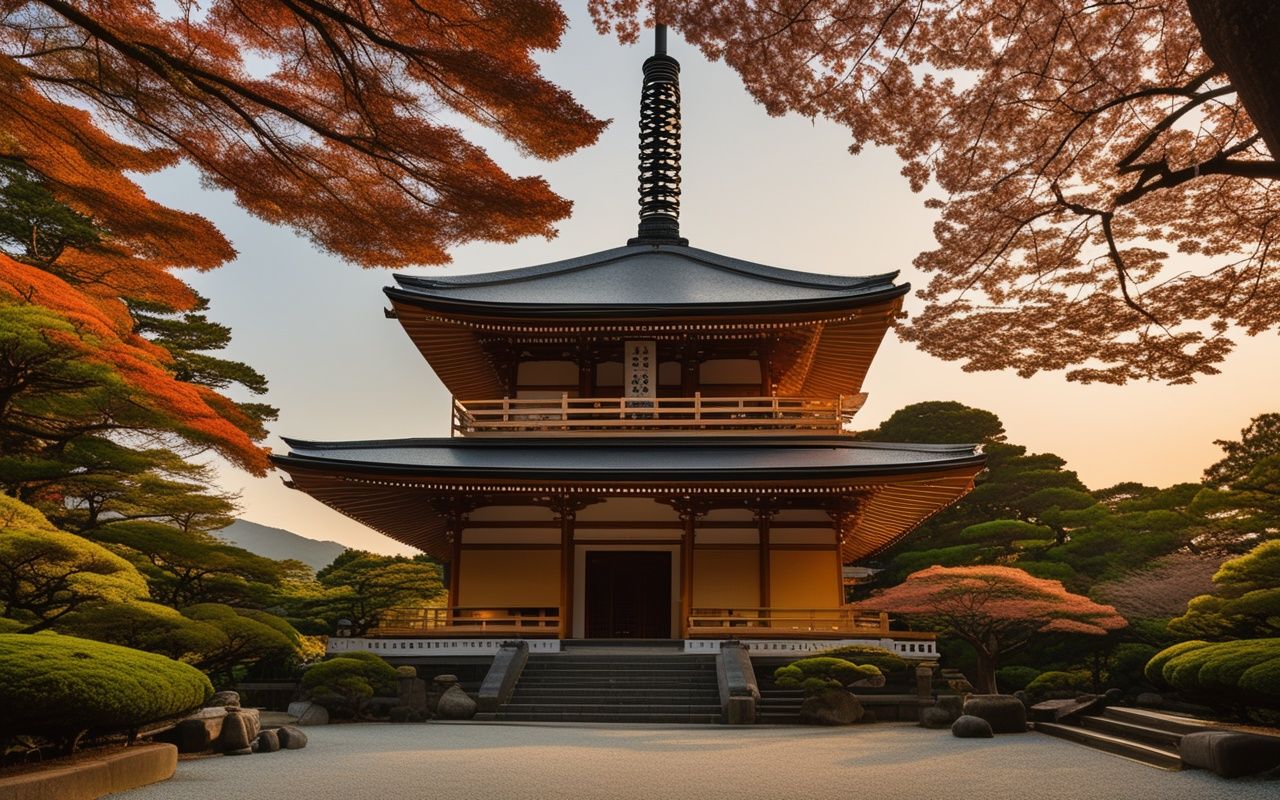
  • Enoden Etiquette Guide — Riding the Enoshima Railway

    Enoden Etiquette Guide — Riding the Enoshima Railway

    Enoden Etiquette Guide 2026 — Manners for the Enoshima Electric Railway

    Overview

    Enoden etiquette might sound fussy, but getting it right is the difference between a relaxing coastal ride and a stressful one. After riding the line dozens of times — and making a few mistakes myself — I’ve put together everything you need to know before you board.

    For the practical side of planning, the Enoden 1-Day Pass Guide explains ticketing and value, while the Enoden Unlimited Guide covers the full route and stops. Planning to drive instead? Our Kanagawa parking guide covers lots near major attractions.

    🧳 Luggage Rules: What Fits and What Doesn’t

    Large Suitcases: Strongly Discouraged

    Enoden trains use narrow, historic carriages with limited aisle space. I learned this the hard way during my first visit — my carry-on barely fit through the aisle and I blocked three seats. There is no official ban on large luggage, but bringing full-size suitcases is strongly discouraged — especially during peak hours (9 AM–11 AM, 4 PM–7 PM) and on weekends.

    Planning to drive? Our Kanagawa parking guide covers lots near major attractions.
    | Bag Type | OK? | Notes |
    |:———|:—:|:——|
    | Daypack / small backpack | ✅ | Wear on front in crowded trains |
    | Medium duffel (under 50cm) | ✅ | Place on lap or between feet |
    | Carry-on suitcase (under 55cm) | ⚠️ | OK if not crowded — avoid peak hours |
    | Full-size suitcase (65cm+) | ❌ | Use coin lockers or luggage forwarding |
    | Stroller (folded) | ⚠️ | OK when folded — avoid rush hour |
    | Bicycle (in rinko bag) | ✅ | Must be fully enclosed in a bicycle bag |

    Smart Luggage Strategy

    1. Before boarding Enoden: Store large bags at Kamakura Station (¥300–700, 300+ lockers) or Fujisawa Station (200+ lockers)
    2. Mid-route option: Coin lockers at Enoshima Station and Hase Station for medium bags (¥300–500)
    3. Luggage forwarding: Use Yamato Transport (Kuroneko) from your hotel — bags arrive next day, ¥1,500–2,500 per piece
    4. ENJOY Enoden luggage-free: Travel with only a daypack for the best experience

    💡 Pro Tip: If you must bring a wheeled bag, hold it on your lap rather than blocking the aisle. Never place bags on seats — seats are at a premium.

    🚃 Boarding and Alighting: Do’s and Don’ts

    Step-by-Step Boarding

    Step Action Common Mistake
    1 Wait behind the yellow line on the platform Stepping too close to the train edge
    2 Let passengers alight first before boarding Pushing in while people are exiting
    3 Tap your IC card on the reader Forgetting to tap at both entry AND exit
    4 Move to the center of the car Stopping at the doorway to check your phone
    5 Hold onto overhead straps or handrails Standing loose — trains stop suddenly

    At Unmanned Stations

    Many Enoden stations (like Gokurakuji, Inamuragasaki, Shichirigahama) have simple card readers instead of full ticket gates. Look for vertical card readers near the platform entrance — they’re easy to miss!

    • Entry: Tap your IC card on the reader
    • Exit: Tap your IC card on the reader again
    • If you miss tapping out: You’ll be charged the maximum fare. Contact staff at Fujisawa or Kamakura to adjust

    📸 Photography: Capture the Views Respectfully

    Enoden is one of Japan’s most photogenic trains — but photography comes with responsibilities. I visited during hydrangea season in June and watched tourists block the entire aisle trying to get the perfect shot through the window. Don’t be that person.

    ✅ Allowed ❌ Not Allowed
    Handheld phone/camera photos from seat Flash photography (disturbs the driver)
    Photos through train windows Using lighting equipment or tripods onboard
    Platform photography between trains Blocking aisles or doorways for photos
    Photos at designated scenic spots Leaning out of windows or doors

    Where to Get the Best Shots

    Spot Best For When
    Inamuragasaki Crossing Train with ocean backdrop Late afternoon golden hour
    Shichirigahama Beach Coastline + Fuji on clear days Morning when Fuji is visible
    Hase Station area Train weaving through narrow streets Any time (urban charm)
    Enoden Fujisawa end Vintage train in station Early morning (less crowds)

    Platform Safety

    • Never step beyond the yellow line — trains pass within centimeters of the platform edge
    • No selfie sticks on the platform during busy times
    • Keep bags close — narrow platforms mean bags can easily bump other passengers or trip someone

    🎫 IC Cards, Tickets, and the Noriorikun Pass

    IC Card Usage

    All major Japanese IC cards work seamlessly on Enoden:

    Card Type Compatible
    Suica (JR East)
    PASMO (Tokyo private railways)
    ICOCA (JR West)
    other nationwide IC cards
    Contactless credit cards (Visa, JCB, Amex, etc.) ✅ (tap at gate)

    Balance tip: Enoden fares are distance-based, ranging from ¥190–320. Ensure at least ¥500 on your card to cover the longest possible trip.

    Noriorikun 1-Day Pass

    The Noriorikun is Enoden’s unlimited-ride day pass:

    • Price: ¥800 (adults), ¥400 (children)
    • Validity: Full day on Enoden line only
    • Purchase: Ticket vending machines at any Enoden station (English menu available)
    • Worth it if: You plan 3+ one-way trips (Fujisawa→Enoshima→Kamakura→back = 4 rides × ~¥250 = ¥1,000 → save ¥200)

    Buying Single Tickets

    Vending machines have an English button (bottom left of screen). Payment options:

    • Coins (¥10, ¥50, ¥100, ¥500)
    • Bills (¥1,000)
    • IC cards (Suica/PASMO)

    Access: Getting to Enoden Stations

    From Tokyo to Kamakura Station (East end)

    Take the JR Yokosuka Line from Tokyo Station to Kamakura Station (1 hour, ¥950). The Enoden platform is a short walk from the JR ticket gates — follow the overhead signs. Use a Suica or PASMO card for seamless transfer.

    From Tokyo to Fujisawa Station (West end)

    Take the JR Tokaido Line from Tokyo Station to Fujisawa Station (50 minutes, ¥780). Alternatively, the Odakyu Line from Shinjuku to Fujisawa (60 minutes, ¥620). Enoden platforms are directly connected at Fujisawa.

    Starting from Enoshima (Mid-route)

    Take the Odakyu Enoshima Line from Shinjuku to Katase-Enoshima Station (65 minutes, ¥650), then walk 5 minutes to Enoden’s Enoshima Station. This route is ideal if you plan to visit Enoshima island first.

    By Car

    Parking near Enoden stations is limited and expensive (¥1,000–2,000 per day). Use park-and-ride facilities at Kamakura or Fujisawa Station parking lots (¥500–800 per day with train ticket discount).

    From Hakone

    Take the Hakone Tozan Railway to Odawara, then JR Tokaido Line to Fujisawa (90 minutes total). Alternatively, take the Odakyu Romancecar from Hakone-Yumoto to Shinjuku, then transfer to JR for Kamakura.

    🕐 Peak Hours and Crowd Management

    When Enoden is Most Crowded

    Time Crowd Level Why
    7:00–9:00 AM Medium Commuters heading to work/school
    9:00–11:00 AM High Tourists heading to Kamakura sights
    11:00 AM–3:00 PM Very High Peak sightseeing hours — worst time for luggage
    3:00–5:00 PM High Return tourists + school students
    5:00–7:00 PM Very High Commuter peak + sunset tourists
    After 7:00 PM Low-Medium Quieter, pleasant ride

    Seasonal Crowd Peaks

    Season Cause Advice
    Mid-June to July Hydrangea season (ajisai) Extreme crowds — arrive by 8 AM or avoid weekends
    Cherry blossom (late March) Sakura at Kamakura temples Similar to hydrangea season
    Summer weekends (July-August) Beachgoers to Shonan coast Trains packed with surfboards and beach gear
    New Year (Jan 1-3) Hatsumode at Tsurugaoka Hachimangu Expect long queues at Kamakura Station

    🪑 Priority Seating and Onboard Behavior

    Priority Seats

    Enoden cars have priority seats (yūsenseki) near the doors. These are for:

    • Elderly passengers
    • Passengers with disabilities
    • Pregnant passengers
    • Passengers with small children
    • Passengers with medical conditions (e.g., hidden disabilities)

    Mobile phone etiquette near priority seats: Power off your phone entirely — the signal can interfere with pacemakers and other medical devices.

    Onboard Rules

    Rule Why
    No phone calls — set to silent mode Japanese train etiquette strictly prohibits calls. Text or use data only
    No loud conversations Trains are quiet spaces — even in tourist-heavy areas
    No eating or drinking (on local trains) Avoid smelly or messy food. Quick hydration from a sealed bottle is acceptable
    Backpack off on crowded trains Wear your backpack on your front or hold it on your lap
    Don’t block doors Move to the center of the car after boarding
    Offer your seat to elderly, pregnant, or families It’s expected — no need to say anything, just stand and gesture

    For accessible travel options, see the Kanagawa senior travel guide.

    🗺️ Coin Lockers Along the Enoden Line

    For luggage-free sightseeing, here are the coin locker locations:

    Station Small (¥300) Medium (¥400) Large (¥500–700) Notes
    Kamakura (JR + Enoden) ✅ Many ✅ Many ✅ 50+ Best option for large suitcases. JR side has more lockers
    Fujisawa (JR + Enoden) ✅ Many ✅ Many ✅ 30+ Second-best. Good for starting/ending trips
    Enoshima ✅ 20+ ✅ 10+ ⚠️ Limited Best for Enoshima island visits
    Hase ✅ 15+ ✅ 8+ ⚠️ Few Convenient for Kotoku-in (Great Buddha)
    Gokurakuji No lockers — plan ahead
    Shichirigahama No lockers
    Inamuragasaki No lockers

    Tips:

    • Lockers fill by 9:30 AM during hydrangea season — arrive early
    • Most lockers accept coins only (¥100). Have change ready
    • 24-hour operation at all stations with lockers
    • Download the “Coin Locker” app or check ecbo for temporary luggage storage at local shops

    ❌ 5 Common Tourist Mistakes on Enoden

    1. Boarding with Full-Size Luggage

    The problem: Enoden carriages are narrow — a large suitcase blocks the entire aisle.
    The fix: Use coin lockers or luggage forwarding. Travel with only a daypack.

    2. Blocking the Doorway

    The problem: Stopping right after boarding to check maps or take photos.
    The fix: Step fully into the car or move to the window-side before checking anything.

    3. Missing the IC Card Reader at Unmanned Stations

    The problem: Small stations have vertical card readers that are easy to overlook.
    The fix: Always look for a card reader when entering AND leaving. If you miss it, use the intercom at the ticket vending machine.

    4. Taking Photos from Dangerous Spots

    The problem: Stepping onto tracks or crossing barriers for the perfect shot.
    The fix: Stay behind yellow lines. Use designated photo spots. No photo is worth a fine — or worse.

    5. Expecting Staff to Speak English

    The problem: Enoden stations (except Kamakura and Fujisawa) have limited English-speaking staff.
    The fix: Have screenshots of your destination (station name in kanji), use Google Translate, or point at the route map.

    ♿ Accessibility Information

    Feature Available At
    Elevators Kamakura, Fujisawa
    Wheelchair-accessible restrooms Kamakura, Fujisawa, Hase
    Barrier-free boarding Kamakura, Fujisawa (platform gap still exists)
    Staff assistance Kamakura, Fujisawa (ask at ticket counter)

    Note: Most Enoden stations are historic and have limited accessibility. The platform gap can be wide at older stations. Wheelchair users and parents with strollers should plan to board/disembark at Kamakura or Fujisawa where possible.

    Frequently Asked Questions

    Q: Can I bring my surfboard on Enoden?
    A: Surfboards are not allowed on Enoden trains. Most surf shops near Shichirigahama and Koshigoe offer board rental — no need to bring your own.

    Q: Is it okay to eat on the train?
    A: On local commuter trains like Enoden, eating is considered impolite, especially during peak hours. Quick hydration from a sealed bottle is fine.

    Q: Can I use my Suica card from Tokyo?
    A: Yes! Suica works everywhere on Enoden. The fare simply deducts from your Suica balance at entry and exit. Welcome Suica (tourist version) also works.

    Q: Where can I buy the Noriorikun pass?
    A: At any Enoden station’s ticket vending machine. Press the English button, select “1-Day Pass (Noriorikun)”, and pay ¥800. The machine accepts coins, bills, and IC cards.

    Q: Is Enoden crowded on weekdays?
    A: Yes, even weekdays can be crowded between 9 AM–11 AM and 4 PM–7 PM. The quietest time is after 7 PM or before 8 AM. Tuesday–Thursday tend to be slightly quieter than Monday/Friday.

    Conclusion Enoden Etiquette Guide 2026 — Riding the Enoshima Electric Railway is an incredible destination that offers something for every traveler. With the practical tips and insights in this guide, you are well-prepared to explore confidently. Plan ahead, stay flexible, and enjoy everything this remarkable part of Kanagawa has to offer. Safe travels!