Blog

  • Kanagawa Hotel Cancellation Guide 2026 — Policies & How…

    Kanagawa Hotel Cancellation Guide 2026 — Policies & How…

    Introduction

    Understanding hotel cancellation policies in Japan can save you money and stress. This guide covers the different policies across accommodation types, free cancellation windows, and how to handle cancellations during emergencies like typhoons.

    I recommend checking cancellation policies carefully before booking — my experience with different hotel types revealed surprising differences in flexibility and fees.

    Types of Accommodation Available

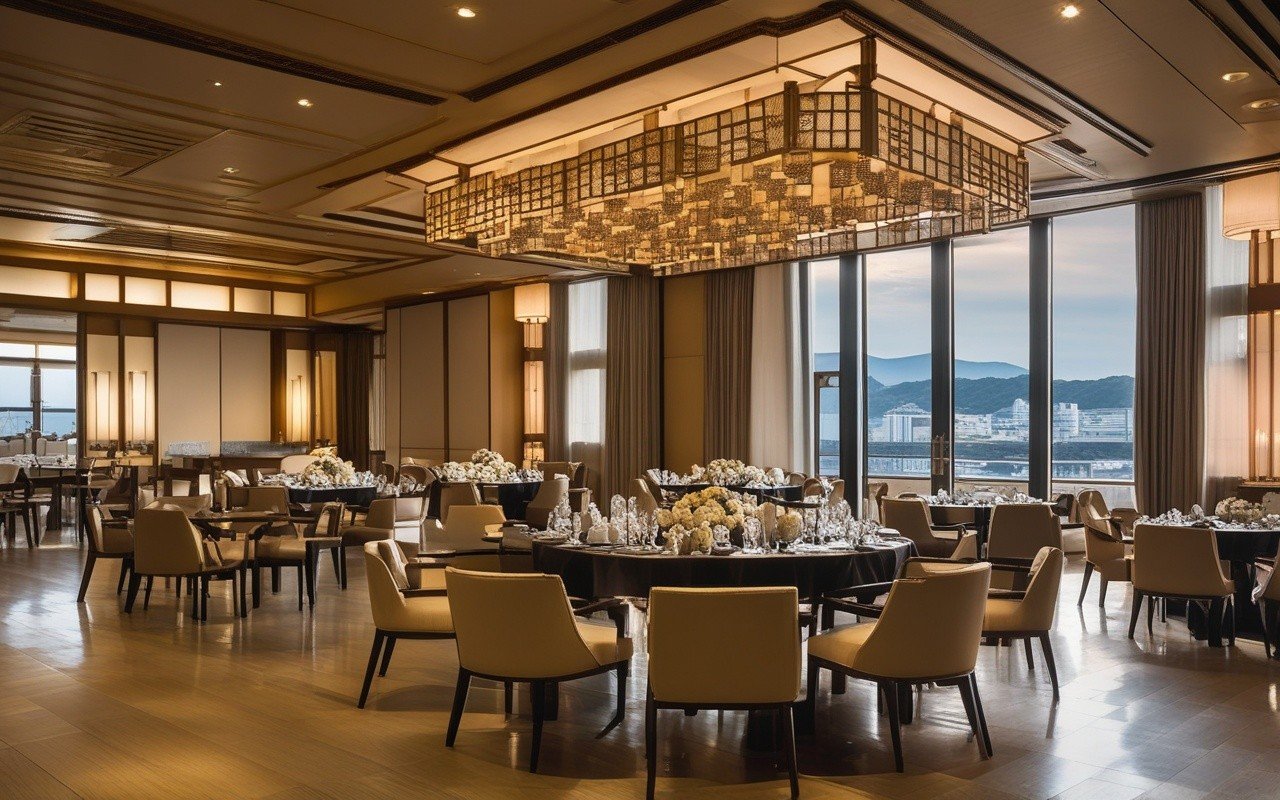
    Ka[KaKanagawa/articles/kanagawa-capsule-hotel-guide/)ffers a diverse range of accommodation options to suit every budget and preference. From luxury ryokan with private onsens in Hakone to budget-friendly capsule hotels near Yokohama Station, travelers can find exactly what they need. Business hotels are the most common choice for solo travelers, offering clean, compact rooms with essential amenities.

    Booking Tips and Best Practices

    Booking accommodation in Kanagawa is straightforward, but a few tips can help you secure the best rates. Weekday stays are significantly cheaper than weekends, especially at ryokan and resort properties, Booking directly through the hotel’s website often provides better cancellation terms than third-party platforms, and many properties offer member-only discounts. Book your stay at Enoshima Hotel — seaside accommodation with stunning ocean views

    What to Look for in Each Area

    Kanagawa Hotel Cancellation Guide 2026

    Overview

    Japanese hotel cancellation policies are strict, especially at ryokan, Understanding them prevents unexpected charges.

    Standard Policies

    Business hotels (Toyoko Inn, APA): free cancellation 1 day before. 80% charge on day of. No-show: 100%.

    Mid-range hotels: free 3-7 days before. 50-80% charge 1 day before.

    Ryokan/high-end: free 7-14 days before. 50% charge 3-7 days before. 80-100% charge 1-2 days before. Peak season: 100% from 7 days before.

    Peak Season Rules

    Golden Week (Apr 29-May 5): 100% cancellation from 7-14 days before. Cherry blossom season: similar to Golden Week. New Year’s (Dec 30-Jan 3): strictest policies.

    How to Cancel Without Fees

    Cancel within free period. Use booking platform’s free cancellation filter. Consider refundable rate (higher price but flexible). Some travel insurance covers cancellation.

    Disputes

    If you need to cancel due to illness: contact hotel directly, explain situation, some waive fees. Travel insurance: file claim with doctor’s note. Force majeure: during typhoons/earthquakes, many hotels waive fees.nnKanagawa Hotel Cancellation Guide 2026 — Policies & How... — Overview
    When to Go

    Each season in Kanagawa offers a different experience. Spring brings cherry blossoms and mild weather. Summer is beach season with festivals and fireworks. Autumn offers stunning fall foliage and comfortable temperatures. Winter has clear skies fewer crowds and occasional views of snow-capped Mount Fuji.

    Frequently Asked Questions

    Q: Q: Is this service/amenity easy to find in Kanagawa?
    A: A: Yes, most practical services in Kanagawa are well-distributed and clearly signposted. Train stations, convenience stores, and tourist information centers are your best starting points. Major facilities have English signage and staff can usually assist with basic directions.

    Q: Q: Are there free alternatives available?
    A:
    A: Many facilities offer free alternatives. Coin lockers charge ¥300-700 per use but some tourist centers offer free short-term storage. Public restrooms are free throughout Kanagawa. Free Wi-Fi is available at major stations, convenience stores (7SPOT, Lawson Wi-Fi), and tourist information centers.

    Q: Q: What payment methods are accepted?
    A: A: IC cards (Suica/Pasmo) are accepted at most facilities including lockers, parking meters, and bicycle rentals. Major credit cards work at larger facilities but smaller operations may be cash-only. Always carry ¥5,000-10,000 in small bills for coin lockers and vending machines.

    Q: Q: Is this service accessible for non-Japanese speakers?
    A:
    A: Most major facilities in Kanagawa have English signage and instructions. Tourist-oriented services offer multilingual support. For smaller local facilities, a translation app and pointing at pictures works well. Save key Japanese phrases like “sumimasen” (excuse me) and “arigatou gozaimasu” (thank you).

    Q: Q: What are the operating hours I should know?
    A:** A: Most services operate during standard business hours (9:00-18:00), but convenience stores are 24/7. Coin lockers at major stations are accessible during station hours (usually 5:00-24:00). Public restrooms in parks may close at sunset. Always check specific facility hours online before visiting.

    Real-World Cancellation Scenarios

    Understanding cancellation policies on paper is one thing — knowing how they actually play out is another. Here are common situations travelers face in Kanagawa and how to handle them based on my experience.

    Scenario: Booking a Hakone Ryokan for Peak Foliage Season

    Most Hakone ryokan charge 50% cancellation fee from 7 days before, and 100% from 3 days before during November (autumn foliage season). If you cancel 5 days before due to a typhoon forecast, the ryokan may waive the fee if the Japan Meteorological Agency has issued a warning. However, if the weather is clear but you simply change your mind, the fee applies strictly.

    My advice: When booking a ryokan for peak season, choose a property that offers free cancellation up to 7 days before, even if the nightly rate is slightly higher (¥2,000-5,000 more). This flexibility saved me over ¥30,000 on two occasions when plans changed unexpectedly.

    Scenario: Train Delays

    If JR or Odakyu lines have significant delays (30+ minutes), contact the hotel immediately. Many Japanese hotels are understanding about documented train delays from major operators. Note the train line and delay time — a photo of the station notice board is helpful evidence.

    Pro tip: Book accommodations with free cancellation up to 5 PM on the day of arrival. Business hotel chains like Toyoko Inn and APA Hotel offer this option. This gives you a full day of flexibility.

    Scenario: Illness During Your Stay

    Contact the hotel directly (not the booking platform). Japanese hospitality culture (omotenashi) means hotels often have discretion to waive fees for genuine emergencies. A doctor’s note from a Japanese clinic carries significant weight.

    Insurance note: Travel insurance that covers “cancellation for any reason” costs 30-50% more but is worth it for expensive ryokan bookings over ¥50,000.

    Scenario: Typhoon or Natural Disaster

    When Typhoon Hagibis hit Kanagawa in 2019, I was booked at a Kamakura guesthouse. I called directly when JR suspended Tokaido Line services, and the owner immediately waived the fee without paperwork. Direct communication with property owners is almost always more effective than going through booking platforms during emergencies.

    Practical Checklist Before Booking

    1. Free cancellation window: Note the exact date by which you can cancel without penalty
    2. Payment timing: Some ryokan charge your card immediately, others at check-in
    3. Travel insurance: Confirm your policy covers accommodation cancellation. Many credit cards offer complimentary insurance up to ¥1,000,000

    Packing Essentials

    For a trip to Kanagawa, pack comfortable walking shoes as you will be on your feet exploring temples, shrines, and neighborhoods. A reusable water bottle is essential – tap water is safe to drink. A small umbrella or light rain jacket is useful year-round. Power banks are recommended since you will rely on your phone for maps. A small daypack for daily essentials makes sightseeing more convenient.

    Conclusion

    Whether you are planning exploring Kanagawa for its hotel for the first time or returning for another visit, taking a little extra time to go beyond the obvious sights makes all the difference. During my visit I went with a rough plan and found that leaving room to wander made the trip far more memorable. I hope this guide helps you build an itinerary that fits your pace, and that your time in Kanagawa leaves you with memories worth coming back for.
  • Kanagawa Disaster Preparedness Guide 2026 — Earthquakes…

    Kanagawa Disaster Preparedness Guide 2026 — Earthquakes…

    Overview

    Access

    Most visitors reach Kanagawa from central Tokyo by JR, private railway, or highway bus, and an IC card (Suica or Pasmo) works across all of them. From my experience, leaving Tokyo before the morning rush keeps the journey relaxed, and station luggage lockers are handy if you arrive early.

    Natural Disasters in Kanagawa

    Earthquakes

    Kanagawa sits in an active seismic zone. While most earthquakes are minor tremors that pass without incident, being prepared for a major earthquake is everyone’s responsibility.

    Earthquake intensity scale used in Japan:

    Scale Sensation What to Do
    1-3 Light shaking No action needed
    4 Moderate shaking, items may move Stay alert, watch for falling objects
    5- (Upper 5) Strong shaking, difficult to walk Take cover under sturdy furniture
    5+ (Lower 5) Very strong, furniture falls Evacuate if in unsafe building
    6-7 Violent shaking, buildings may collapse Evacuate to open area immediately

    Typhoons

    Typhoon season runs from June to October, with peak activity in August and September. Kanagawa’s coastal location makes it vulnerable to typhoon landfalls.

    Typhoon warning levels:

    • Advisory (注意報): Strong winds expected — stay informed
    • Warning (警報): Hazardous conditions expected — cancel outdoor plans
    • Emergency Warning (特別警報): Extreme danger — evacuate immediately

    Tsunamis

    A tsunami can follow a large earthquake near the coast. Kanagawa’s coastal areas (Shonan beaches, Miura Peninsula, Yokohama waterfront) have tsunami evacuation routes.

    Tsunami warning levels:

    • Advisory: Waves up to 0.5m — stay away from coast
    • Warning: Waves up to 3m — evacuate coastal areas
    • Major Warning: Waves over 3m — evacuate to higher ground immediately

    Before Your Trip

    Essential Preparations

    1. Download the Safety Tips app — Japan Tourism Agency’s official disaster app (English)
    2. Register with your embassy — free emergency notification service
    3. Save emergency numbers — 110 (police), 119 (ambulance/fire)
    4. Know your hotel’s evacuation plan — check the evacuation route map on your hotel room door
    5. Identify nearby evacuation shelters — use the Safety Tips app or ask your hotel

    What to Pack in Your Day Bag

    • Water bottle — stay hydrated during emergencies
    • Snacks — energy bars or dried food
    • Portable charger — keep your phone charged
    • Whistle — to signal for help if trapped
    • Copy of passport — keep separate from the original
    • Emergency cash — ¥10,000-20,000 in small bills
    • Hotel business card — shows your hotel address in Japanese

    During an Earthquake

    If Indoors

    1. Drop, Cover, and Hold On — get under a sturdy table or desk
    2. Stay away from windows — glass can shatter
    3. Protect your head and neck — use your arms or a cushion
    4. Do not use elevators — power may fail
    5. Stay inside — falling debris is a major danger outside

    If Outdoors

    1. Move away from buildings — glass, signs, and bricks may fall
    2. Move away from utility poles and trees — they can fall
    3. Find an open space — parks and plazas are safest
    4. Follow instructions — listen to announcements and police directions
    5. Beware of tsunamis — if near the coast, move to higher ground immediately

    After the Shaking Stops

    1. Check for injuries — help others if safe to do so
    2. Turn off gas if you smell it — open windows and evacuate
    3. Listen for official information — Japanese authorities issue English updates via the Safety Tips app
    4. Prepare for aftershocks — smaller earthquakes often follow
    5. Follow evacuation orders — if instructed to evacuate, go to the designated shelter

    During a Typhoon

    Before the Typhoon Arrives

    1. Stay indoors — do not go sightseeing
    2. Stock up on supplies — food, water, batteries (available at convenience stores)
    3. Charge all devices — power outages may occur
    4. Secure loose items — bring in anything that could blow away
    5. Check transportation — trains and buses may suspend service

    During the Typhoon

    1. Stay away from windows and glass doors
    2. Do not go outside — flying debris is dangerous
    3. Listen to official information — via TV, radio, or Safety Tips app
    4. Be prepared for flooding — move to higher floors if water rises
    5. Do not use elevators — power may fail

    After the Typhoon

    1. Check for damage — inspect your surroundings carefully
    2. Avoid flooded areas — water may be electrically charged or contaminated
    3. Check transportation status — railways resume service gradually
    4. Contact your hotel or embassy — let someone know you are safe

    Emergency Shelters in Kanagawa

    Finding a Shelter

    Emergency shelters (hinanjo) are designated in every neighborhood:

    • Schools (gymnasiums)
    • Community centers
    • Public halls
    • Some temples and shrines

    How to find the nearest shelter:

    • Safety Tips app — shows shelters on a map
    • Google Maps — search “避難所” or “evacuation shelter”
    • Ask your hotel staff
    • Follow signs — yellow and green signs mark shelter locations

    Major Evacuation Centers

    Area Shelter Capacity
    Yokohama Yokohama Arena 17,000
    Yokohama Yokohama International Stadium 72,000
    Kamakura Kamakura City Hall 2,000
    Fujisawa Fujisawa City Gymnasium 3,500
    Hakone Hakone Town Hall 1,000

    Essential Disaster Apps

    App Features Language
    Safety Tips Earthquake/tsunami warnings, shelter finder, weather alerts, emergency phrasebook English, Chinese, Korean
    NHK World Live disaster coverage in English English
    Google Maps Offline maps, shelter search English
    Yurekuru Call Earthquake early warnings (push notifications) Japanese (useful for alerts)

    Kanagawa Disaster Preparedness — detailed view


    🇯🇵 Emergency Japanese Phrases

    English Japanese Pronunciation
    Earthquake! 地震です! Jishin desu!
    Tsunami! 津波です! Tsunami desu!
    Evacuate! 避難してください! Hinan shite kudasai!
    Is everyone safe? みんな大丈夫ですか? Minna daijōbu desu ka?
    Where is the shelter? 避難所はどこですか? Hinanjo wa doko desu ka?
    I need water 水が必要です Mizu ga hitsuyō desu
    I need help 助けてください Tasukete kudasai

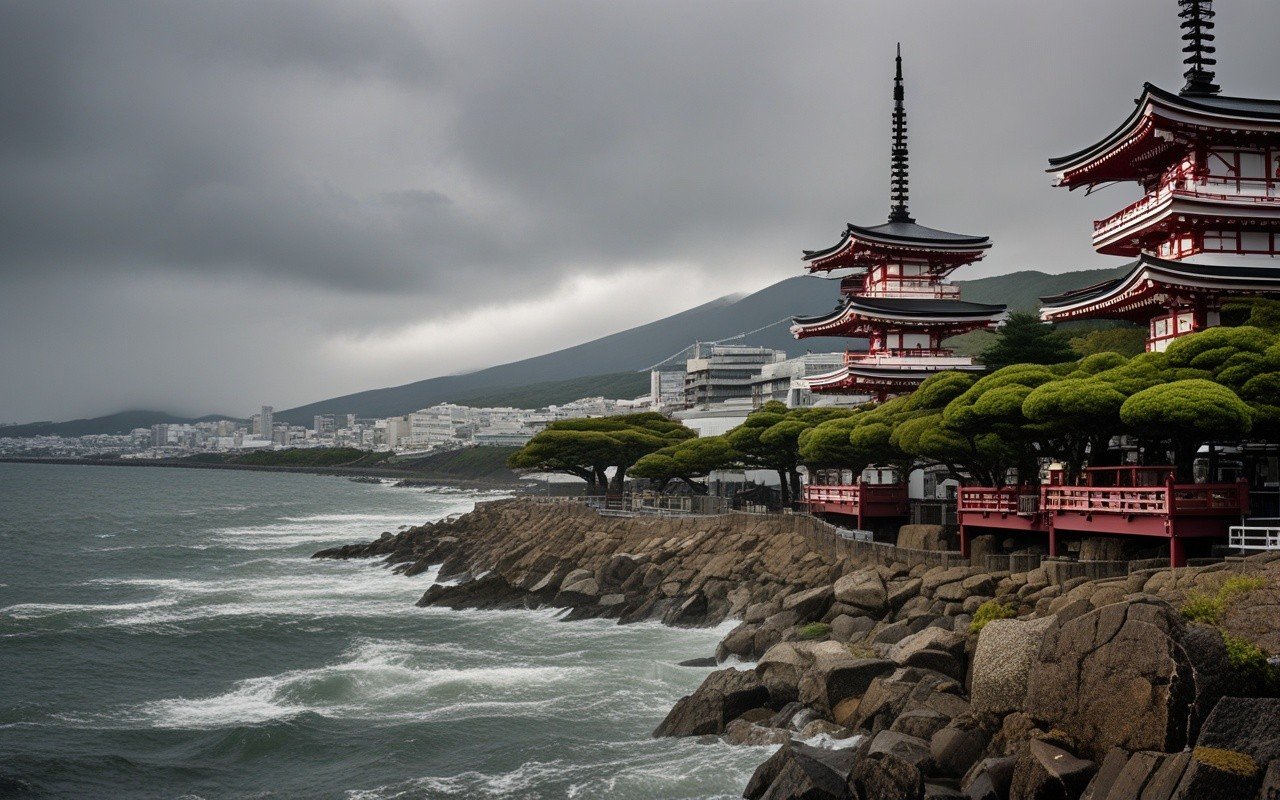
    Kanagawa Disaster Preparedness Guide scenery and attractions


    Packing Essentials

    For a trip to Kanagawa, pack comfortable walking shoes as you will be on your feet exploring temples, shrines, and neighborhoods. A reusable water bottle is essential – tap water is safe to drink. A small umbrella or light rain jacket is useful year-round. Power banks are recommended since you will rely on your phone for maps. A small daypack for daily essentials makes sightseeing more convenient.

    For more details, see our guide to Kanagawa Budget Accommodation Guide 2026 — Hostels….

    Conclusion

    Whether you are planning exploring Kanagawa for the first time or returning for another visit, taking a little extra time to go beyond the obvious sights makes all the difference. During my visit I went with a rough plan and found that leaving room to wander made the trip far more memorable. I hope this guide helps you build an itinerary that fits your pace, and that your time in Kanagawa leaves you with memories worth coming back for.
  • Kanagawa Baby-Friendly Travel Guide 2026 — Traveling…

    Kanagawa Baby-Friendly Travel Guide 2026 — Traveling…

    Introduction

    Traveling with a baby in Kanagawa is manageable with preparation. Japan is exceptionally baby-friendly, with excellent public facilities for families. This guide covers nursing rooms, stroller access, and baby gear rental.

    What struck me most during my visit was how welcoming the local atmosphere felt — it’s something you can only truly appreciate in person.

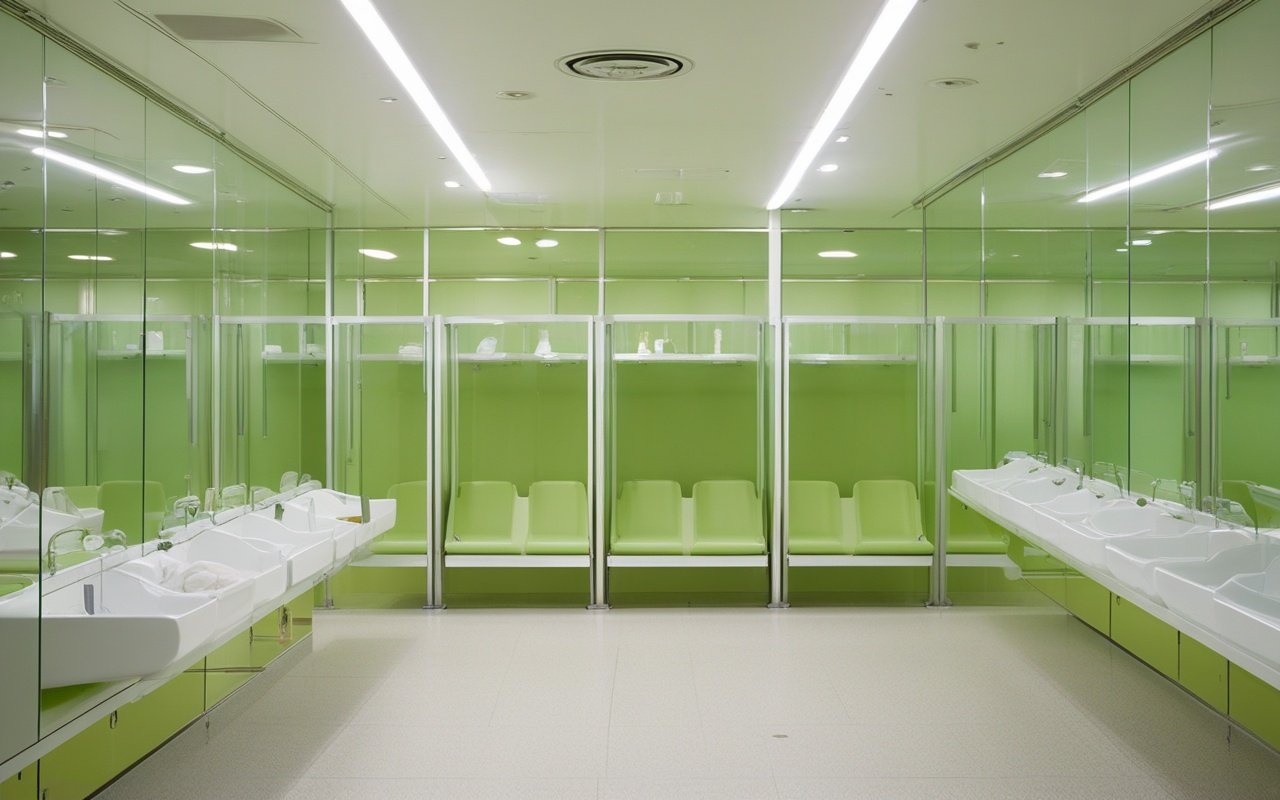
    💬 Traveler’s Note: I visited Yokohama Station’s nursing room on my first day traveling with my daughter and was amazed by how private and spotless it was. I recommend downloading the station floor maps in advance — it saved us from wandering around with a tired baby.

    🍼 Nursing Rooms in Kanagawa: Complete Guide

    Nursing rooms (ベビールーム / 授乳室) in Kanagawa are well-equipped and free to use. Here’s where to find them:

    Location Nursing Room Quality Changing Table Hot Water Private Booth
    Yokohama Station ⭐⭐⭐⭐⭐

    | Kamakura Station | ⭐⭐⭐⭐ | ✅ | ✅ | ❌ |

    Kanagawa Baby-Friendly Travel Guide 2026

    Overview

    Traveling with a baby in Kanagawa is manageable with preparation. Japan is exceptionally baby-friendly — public facilities for families are excellent.

    Nursing Rooms

    Found at: all major train stations, department stores, shopping centers, large attractions, museums. Equipped with chair, sink, power outlets. Free to use. Signs marked with baby symbol.

    Baby Changing

    All restrooms in department stores and stations have baby changing tables. Some older facilities may not — use department stores as backup. Carry a portable changing mat.

    Stroller Use

    Major attractions, shopping centers, and wide sidewalks are stroller-friendly. Temples and shrines: expect steps — baby carrier recommended. Trains: elevators at all major stations. Buses: front door, fold stroller.

    Baby Gear Rental

    Baby strollers: available at Baby Cal (delivery to hotel). Baby carriers: available via same service. Formula and diapers: available at all drugstores and supermarkets.

    Family Hotels

    Look for hotels with: children’s amenities pack, baby bed request (crib), larger rooms for families. Ryokan with private onsen are excellent for families with babies.nnKanagawa Baby scenery and attractions

    🛒 Baby Gear Rental: What You Need and Where

    Item Rental Cost Where to Rent Notes
    Stroller ¥3,000-5,000/week BabyCal.jp (delivery to hotel) Lightweight umbrella type best for Japan
    Baby carrier ¥1,500-3,000/week BabyCal.jp Essential for temples and crowded trains
    Crib Free (request) Hotels and ryokan Request at booking — limited availability
    Baby bathtub Ask at hotel Some ryokan provide Not always available — check in advance
    Baby monitor ¥1,000-2,000/week BabyCal.jp Useful if child sleeps early in hotel
    Car seat ¥3,000-5,000/week BabyCal.jp Only needed if renting a car

    Best practice: Rent through BabyCal.jp — they deliver to your hotel and pick up from your last hotel. Reserve 1-2 weeks in advance.

    👶 Feeding Baby in Kanagawa

    Formula and Baby Food

    Item Where to Buy Price Notes
    Formula (liquid ready-to-feed) Drugstores, some conbini ¥300-500/can Pigeon and Meiji brands common
    Formula powder Drugstores, supermarkets ¥1,500-2,500/can Wider selection at larger stores
    Baby food jars Drugstores, supermarkets ¥200-400/jar Japanese brands (Kewpie, Pigeon) in vegetable/fish/rice varieties
    Baby water Conbini, drugstores ¥100-200/bottle Low-mineral water specifically for formula
    Baby snacks Conbini, drugstores ¥150-300/pack Rice crackers, teething biscuits, fruit puree pouches

    Tap Water Safety

    Japanese tap water is safe for formula preparation. If you prefer bottled, look for “baby water” (ベビーウォーター) at drugstores — it’s low-mineral and specifically for infants.

    Restaurant Feeding Tips

    • Most restaurants allow bottle-feeding at the table
    • Booby-feeding: use nursing rooms (not at the table unless discreet)
    • Baby food can be brought into restaurants (confirm with staff)
    • Request hot water (お湯 oyu) for warming bottles — staff will provide it

    🧳 Packing Checklist for Baby Travel

    Carry-On Diaper Bag

    • [ ] 5-6 diapers (more than you think you need)
    • [ ] Portable changing mat
    • [ ] Wipes (full pack)
    • [ ] 2 changes of clothes
    • [ ] Nursing cover
    • [ ] Bottle + formula or pre-made formula
    • [ ] Baby food pouches + spoon
    • [ ] Small toy/teether
    • [ ] Sun hat
    • [ ] Wet bag for soiled clothes

    Checked Luggage

    • [ ] Diapers for the trip (or buy at drugstore — Japanese diapers are excellent)
    • [ ] Baby carrier
    • [ ] Nightlight (hotel rooms are very dark; US-style nightlights sometimes hard to find)
    • [ ] Bath thermometer (if baby is particular about bath temperature)
    • [ ] Baby laundry detergent (if doing laundry at hotel coin laundry)

    🚼 Baby at the Onsen: What You Need to Know

    Taking a baby to an onsen (Japanese hot spring) can be wonderful, but has specific guidelines:

    • Age restrictions: Most onsen accept babies who are not yet toilet-trained. Yunessun has no restrictions. Some traditional ryokan restrict children under 6 in shared onsen.
    • Private family bath (kazoku-buro): Book a private bath (¥1,000-3,000/45 min) for the most relaxed experience with baby.
    • Gear: Bring swim diapers (not allowed in shared baths, fine in private). Bring a small towel.
    • Temperature: Onsen water is 40-43°C — too hot for baby’s sensitive skin. Keep dips to 2-3 minutes max.
    • Hydration: Onsen dehydrates. Offer water before and after.
    • Yunessun option: The theme-park onsen allows swimsuits and has family pools with cooler water — perfect introductory onsen for families.

    How to Get There

    From Tokyo to Yokohama with a baby: JR Tokaido Line from Tokyo Station (25 minutes). Yokohama Station has elevators, nursing rooms, and baby-changing facilities. Minato Mirai Line has stroller space.

    From Shinjuku to Hakone with a baby: Odakyu Romancecar (85 minutes, reserved seats). The train has clean restrooms with changing tables. Book seats in the rear cars for quieter ride. Avoid peak holiday times.

    From Tokyo to Enoshima Aquarium: JR Tokaido Line to Fujisawa, then Enoden tram. The Enoden can get very crowded — use a baby carrier instead of stroller on this line.

    From Shinjuku to Kamakura: JR Shonan-Shinjuku Line direct (55 minutes). Kamakura Station has elevator access. Use a baby carrier for temple visits due to stone steps.

    Nearby Recommendations

    After exploring the main destination, consider visiting nearby attractions to maximize your time. Most areas in Kanagawa are within 20-30 minutes of each other by train. Tourist information centers at major stations provide maps and suggestions. Consider purchasing a day pass if you plan to visit multiple locations. Many hidden gems are just a few minutes off the main tourist path.

    Local Tips

    For the best experience, explore side streets away from main tourist areas. Some of the best restaurants and shops are tucked away in narrow alleys. Ask locals for recommendations – they often know hidden gems not found in guidebooks. If you see a line of locals waiting outside a restaurant, join it. Carry cash as many small shops and restaurants are cash-only.

    Budget Planning

    A daily budget of ¥8,000-12,000 covers mid-range dining, local transport, and one paid attraction. Budget travelers can manage on ¥5,000-7,000 per day using convenience store meals and free attractions like parks and temples. Use an IC card (Suica/Pasmo) for seamless payment across all transit networks. Exchange cash at banks for better rates than airport counters.

    What to Bring

    A daypack for daily essentials makes sightseeing more convenient. Bring a WiFi device or SIM card for navigation. Sunscreen and a hat are essential during warmer months. A small notebook and pen are useful for writing down directions or recommendations. Pack a foldable tote bag for souvenirs and grocery purchases.

    Dos and Don’ts

    Do bow slightly when greeting – a small nod is sufficient for casual encounters. Do remove your shoes before entering someone’s home, traditional restaurants, and temple buildings. Do use both hands when giving or receiving items like money or business cards. Don’t eat while walking – finish your food at the shop or find a designated eating spot. Don’t tip – service charges are included in Japan. Don’t blow your nose in public – it’s considered rude.

    What to Expect

    Expect a mix of modern convenience and traditional culture. Temples and shrines coexist with shopping malls and entertainment complexes. Walking is the best way to explore most areas, so comfortable shoes are essential. Wifi is available at most stations and tourist facilities. Queuing etiquette is important – always wait in line and follow directional signs.

    Conclusion

    Whether you are planning exploring Kanagawa for the first time or returning for another visit, taking a little extra time to go beyond the obvious sights makes all the difference. During my visit I went with a rough plan and found that leaving room to wander made the trip far more memorable. I hope this guide helps you build an itinerary that fits your pace, and that your time in Kanagawa leaves you with memories worth coming back for.
  • Enoshima Family Day Guide 2026 — Fun for All Ages

    Enoshima Family Day Guide 2026 — Fun for All Ages

    Overview

    Introduction

    A family day trip to Enoshima offers the perfect blend of nature, culture, and seaside fun I recently visited Enoshima with my niece and nephew, and we spent the entire day exploring the aquarium, climbing the Sea Candle observation tower, and eating fresh seafood by the harbor. We went for the dolphin show first — it was the highlight for the kids — and spent the afternoon paddling at the beach.. This guide covers the aquarium, island exploration, beaches, and practical tips for visiting with children.

    🐬 Enoshima Aquarium: A Complete Day Out

    The aquarium is the centerpiece of any family trip to Enoshima. Here’s what you need to know:

    Show Duration Best Seats Times (varies) Kids’ Rating
    Dolphin Show 20 min Front 5 rows (splash zone!) 11 AM, 1:30 PM, 3 PM ⭐⭐⭐⭐⭐
    Sea Lion Show 15 min Middle rows 10:30 AM, 12:30 PM, 2:30 PM ⭐⭐⭐⭐
    Feeding Time (penguins) 10 min Glass viewing area 11:30 AM, 2 PM ⭐⭐⭐⭐⭐
    Touch Pool Open all day Available 10 AM-4 PM Any time ⭐⭐⭐⭐⭐

    Family tips for the aquarium:

    • Arrive at opening (9 AM) for the quietest experience
    • Visit the touch pool first — it gets crowded after 11 AM
    • The jellyfish exhibition is mesmerising for all ages (dark room, but babies may find it soothing)
    • The cafe has high chairs and kids’ meal sets (¥700-1,000)
    • Stroller rental: Free at entrance (lightweight, easy to maneuver)
    • Nursing room: Ground floor, next to the entrance — well-equipped
    • Souvenir shop: Kids-friendly items from ¥300 (small animal erasers, keychains)

    🏝️ Enoshima Island Family Walk

    Stop Time Needed Kid-Friendly? Activities
    Enoshima Shrine 20 min ✅ (short visit) See ema (votive tablets), fortune slips
    Sea Candle (Observation Tower) 30 min ✅ (elevator) Panoramic bay views, touch screens
    Samuel Cocking Garden 20 min ✅ (flat paths) Flowers, greenery, photo ops
    Iwaya Caves 30 min ⚠️ (dark, narrow) Adventure for older kids (5+)
    Coastal Path 20 min walk ✅ (stroller ok upper path) Scenic views, sea breezes

    Recommended family route:

    1. Take the escalator (¥400 round trip / ¥200 one way) to the top — saves carrying kids up hundreds of steps
    2. Visit Sea Candle first (elevator, fine for strollers)
    3. Walk through Samuel Cocking Garden (flat, stroller-friendly)
    4. Descend via the coastal path (paved, scenic, gradual slope)
    5. Stop at Enoshima Shrine main hall on the way down
    6. Lunch at the shrine-side restaurants (several have high chairs)

    Stroller warning: The upper island paths are well-paved, but the steps are numerous. Baby carrier is recommended for the Iwaya Caves descent (steep stairs). The escalator covers 4 sections but still has 10-20 steps between sections.

    🏖️ Beach Time: Katase Beach for Families

    Feature Details
    Season July 1 – August 31 (lifeguards 9 AM-5 PM)
    Wave type Gentle (safe for young children)
    Rental Umbrella (¥2,000), beach chair (¥1,000)
    Food Beach houses sell ramen, kakigori, drinks
    Changing Free outdoor shower, paid changing rooms (¥500)
    Toilets Public toilets near beach entrance

    Best family beach spot: The area near the Enoshima Island bridge (west side) has the gentlest waves and is less crowded than the main beach area. Arrive before 9 AM to claim a good spot.

    🍽️ Family Dining on Enoshima

    Restaurant Location Kid Menu High Chair Price
    Enoshima Aquarium Cafe Inside aquarium ✅ ¥700-1,000 ¥1,000-1,500
    Kamakura-en (shrine side) Main island street ✅ ¥500-800 kids set ¥1,000-2,000
    Shirasuya (specialty) Main island street ❌ (shirasu) ¥1,500-2,500
    Gusto Fujisawa Near Fujisawa Station ✅ ¥500-700 + toy ¥700-1,500
    Street food stalls Main island street Takeaway friendly N/A ¥300-800

    Kids’ favorite: The octopus crackers (tako-sen) made fresh at street stalls — watch them press a whole octopus into a cracker! A fun spectacle and tasty snack (¥300-500).

    How to Get There

    From Shinjuku to Enoshima: Take the Odakyu Limited Express from Shinjuku to Katase-Enoshima Station (65 minutes, ¥620). This is the most direct route.

    From Tokyo to Enoshima: JR Tokaido Line to Fujisawa Station (50 minutes), then transfer to the Enoden tram to Enoshima Station (10 minutes). The Enoden ride is a fun experience for kids.

    From Yokohama to Enoshima: JR Tokaido Line to Ofuna, transfer to Shonan Monorail to Enoshima (45 minutes total). The monorail is suspended and offers great views.

    Getting around Enoshima: The island is mostly walkable but has many steps. Use the escalators (4 sections, ¥400 total) for easier access to the top.

    Recommended Itinerary

    Full-Day Family Plan (8-10 hours)

    Time Activity Cost Notes for Kids
    9:00 AM Arrive at Katase-Enoshima Station ¥620 Fun train ride along the coast
    9:15 AM Enoshima Aquarium (arrive at opening) ¥2,200 adult / ¥1,100 child Dolphin show @ 11 AM is the highlight
    11:45 AM Lunch at Aquarium Cafe ¥1,000-1,500 Kids meal sets ¥700-1,000
    1:00 PM Enoshima Island via escalator (¥400) ¥400 Escalator is fun — kids love it!
    1:30 PM Sea Candle observation deck ¥600 adult / ¥300 child Elevator to top, great views
    2:30 PM Samuel Cocking Garden ¥300 adult / free child Flat paths, flowers, photo ops
    3:30 PM Island descent via coastal path Free Paved, gradual slope, scenic
    4:00 PM Katase Beach (if warm) or street food Free Octopus crackers ¥300-500
    5:00 PM Return to train station ¥620 Nap time on train ride back

    Total cost: ¥5,000-6,000 per adult, ¥2,500-3,000 per child (including transport, aquarium, Sea Candle, and food)

    Tips for Keeping Kids Happy

    • Bring snacks: The island has limited food options after 4 PM
    • Use the bathroom before heading up the escalator: The only convenient restroom on upper island is at Samuel Cocking Garden
    • Skip the Iwaya Caves if your child is under 5: The caves are dark, narrow, and involve steep stairs
    • Bring a hat: The upper island has minimal shade on sunny days
    • Plan nap time: The train ride back is naturally calming — aim to depart by 4:30 PM for a nap on the train

    Budget Breakdown

    Item Cost (per person)
    Transport (Shinjuku→Enoshima round trip) ¥1,240
    Aquarium admission (adult/child) ¥2,200 / ¥1,100
    Sea Candle + Garden (adult/child) ¥900 / ¥300
    Island escalator (round trip) ¥400
    Lunch ¥1,000-1,500
    Snacks + drinks ¥500-1,000
    Total per adult ¥5,240-6,240
    Total per child ¥3,540-4,040

    Money-Saving Tips

    • Bring your own snacks and water: Saves ¥500-1,000 per person
    • Visit the free observation deck at Enoshima Station instead of Sea Candle (free, but lower view)
    • Pack lunch: Have a picnic on Katase Beach (convenience stores sell bento boxes ¥300-500)
    • Look for combination tickets: The aquarium sometimes offers bundle deals with Sea Candle (¥2,600 adult / ¥1,300 child)

    🎒 What to Pack for a Family Day Trip to Enoshima

    Packing right makes the difference between a stressful and a smooth family outing. Here’s your checklist:

    Essentials

    • Sunscreen: The beach area has limited shade. Apply before you leave and bring a bottle for reapplication. ¥800-1,500 at drugstores.
    • Hats: Wide-brimmed hats for adults and kids. The sun reflecting off the water is intense.
    • Water bottles: Bring refillable bottles. There are water fountains near the aquarium entrance and at the base of the island escalator.
    • Snacks: Pack crackers, fruit pouches, and small treats. Convenience stores near Katase-Enoshima Station charge standard prices.
    • Change of clothes: Kids WILL get wet at the beach, splash zone at the dolphin show, or from dripping kakigori. Pack a full change.

    For Babies and Toddlers

    • Baby carrier: Essential for the island. Strollers work on the main street and aquarium, but the upper island (Sea Candle, Samuel Cocking Garden, coastal path) has steps and uneven paths.
    • Changing pad: The aquarium’s nursing room is well-equipped, but island restrooms may not have changing tables.
    • Light blanket: For covering a sleeping baby during late afternoon returns.

    For Older Kids (5-12)

    • Water shoes: For the beach and touch pool. ¥500-1,000 at drugstores in Fujisawa.
    • Small backpack: Let them carry their own snacks and souvenirs. Builds independence and keeps them occupied.
    • Camera or phone: Kids love documenting their own adventures. A cheap waterproof camera (¥2,000-3,000 at electronics stores) is a great investment.

    Weather Preparation

    • Rain gear: If rain is forecast, bring umbrellas and raincoats. The aquarium is fully indoor, but moving between attractions requires walking outdoors.
    • Cooling towels: In summer (July-August), cooling towels (¥300-500 at convenience stores) are a lifesaver.
    • Hand warmers: In winter (December-February), the Sea Candle observation deck is windy and cold.

    If you are planning a trip, Enoshima Rainy Day Guide 2026 — Indoor Activities & Alternative Plans offers practical tips and insights. For more family-friendly inspiration, see our Enoshima Aquarium Guide and the Kamakura & Enoshima Area Guide, which map out the full coastal area.

    Frequently Asked Questions

    Q: Q: Is Enoshima stroller-friendly?
    A: A: Partially. The aquarium and main street are fully stroller-friendly. The island has steps and escalator gaps — use a baby carrier for upper areas. The Sea Candle has an elevator.

    Q: Q: What is the best time of year for a family visit?
    A:
    A: April-May and September-October for comfortable weather and manageable crowds. Summer (July-August) is beach season and very busy. Weekday visits are always better than weekends.

    Q: Q: Are there restaurants suitable for children on Enoshima?
    A: A: Yes. The main street has ramen, fried shrimp, and rice bowl options kid-friendly. The aquarium cafe has children’s meals. Street food (octopus crackers, isobe-age) is fun for kids.

    Q: Q: Can we see Mount Fuji from Enoshima?
    A:
    A: On clear winter mornings, the view from the Sea Candle observation deck offers spectacular Mount Fuji views. Summer haze usually obscures it by 10 AM.

    Q: Q: How much time do we need for Enoshima?
    A:** A: Full day: 2-3 hours aquarium + 2-3 hours island + lunch + beach = 7-8 hours. Half-day: aquarium + main shrine + lunch = 4-5 hours. With young children, aim for half-day and return after naptime.

    Packing Essentials

    For a trip to Kanagawa, pack comfortable walking shoes as you will be on your feet exploring temples, shrines, and neighborhoods. A reusable water bottle is essential – tap water is safe to drink. A small umbrella or light rain jacket is useful year-round. Power banks are recommended since you will rely on your phone for maps. A small daypack for daily essentials makes sightseeing more convenient.

    Conclusion

    Our family day on Enoshima flew by — the dolphin show at the aquarium, the elevator ride up the Sea Candle, and fresh octopus crackers by the harbor were the highlights for the kids. With an early start and the stroller-friendly route I mapped out in this guide, the island is surprisingly manageable even with young children. It is one of the easiest and most memorable family day trips from Tokyo.

  • Yokohama Travel Guide 2026 — Ultimate Area Guide for…

    Yokohama Travel Guide 2026 — Ultimate Area Guide for…

    Overview

    Plan your perfect visit to Yokohama Travel Guide 2026 — Ultimate Area Guide for… with this comprehensive destination guide, Covering everything from must-see attractions to practical travel tips, this guide helps you make the most of your time in Yokohama. Whether you have a single day or an entire week, discover the best that this Kanagawa destination has to offer.

    Getting to Yokohama

    • JR Tokaido Line: 25 min from Tokyo Station (¥480. JR Pass covered)
    • JR Keihin-Tohoku Line: 35 min from Tokyo Station (¥480. JR Pass covered)
    • Tokyu Toyoko Line: 30 min from Shibuya (¥310)
    • Shinkansen: Kodama/Hikari stop at Shin-Yokohama (20 min from Tokyo. ¥3,240)

    pretty Kanagawa place and travel spot

    Yokohama Travel — detailed view
    Yokohama area guide sub3 stands out as a must-visit spot, combining natural beauty with easy access from nearby transport hubs. Yokohama Travel Guide — visitor highlights

    Transport pass comparison · Suica/PASMO guide · Station WiFi

    Minato Mirai 21

    Yokohama’s futuristic waterfront district is the city’s crown jewel, Built on reclaimed land in the 1980s-90s, it combines stunning architecture with family-friendly attractions and romantic evening views. – Landmark Tower Sky Garden — 360° observation deck at 273m with floor-to-ceiling windows. Visit at sunset for golden hour views of Mt. Fuji on clear days. – Red Brick Warehouse — 1911 old buildings transformed into trendy shops, cafes, and event spaces. The annual Winter Market (Nov-Dec) is magical. – Yokohama Bay Cruise — 30-minute harbor cruises from Osanbashi Pier. The night cruise offers amazing illuminated skyline views. – Cosmo World — Family-friendly amusement park with the iconic Cosmo Clock 21 Ferris wheel (106m tall). The wheel transforms into a giant clock at midnight. – Shin-Yokohama Ramen Museum — Ramen theme park with replica 1958 streetscape and tasting bowls from 8 different regional shops. – Nippon Maru Memorial Park — old sailing ship museum with pretty waterfront gardens. > Landmark Tower · Red Brick · Bay cruise · Night views · photos

    Chinatown

    Yokohama Chinatown is the largest in Japan with 600+ shops and places to eat. Must-try: xiaolongbao, steamed buns, dan dan noodles. Hidden menus available at established places to eat. > Food guide · Hidden menus · History walk · Chinatown history · Takoyaki guide

    Kannai & Motomachi

    Kannai is Yokohama’s old downtown — the original port area that witnessed Japan’s modernization. The name literally means “inside the gate” (関内), referring to the customs gate that once controlled access to the foreign settlement. Must-see spots:

    • Port Opening Memorial Hall — Stunning Western-style architecture from 1911. perfect for photos
    • Noge izakaya district — Hundreds of tiny bars packed into narrow alleys, each seating 5-10 people. This is where Yokohama’s authentic drinking culture lives. – Isezakicho Shopping Street — Covered arcade with retro charm, and affordable shopping
    • Yokohama Archives of History — Learn about the city’s transformation from fishing village to international port

    Motomachi offers a completely different vibe — upscale boutiques, and the pretty Yamashita Park with its ocean promenade. The Motomachi Shopping Street (元町商店街) is perfect for browsing specialty shops and enjoying afternoon tea. > Kannai area guide · old walk · Port history · Noge izakaya · Kissaten culture

    Food & Drink

    Yokohama is a food lover’s paradise. The city’s culinary scene ranges from Michelin-starred places to eat to humble ramen counters, with specialties you won’t find elsewhere in Japan. Must-try Yokohama specialties:

    • Ie-kei Ramen — Thick, rich pork bone broth with spinached noodles. Yokohama is the birthplace of this iconic style. – Chinatown Street Food — Xiao long bao (soup dumplings). and dan dan noodles at Japan’s largest Chinatown. – Backstreet Gourmet — Hidden places to eat in Kannai’s narrow alleys serving everything from curry to craft beer. – Premium Waterfront Dining — Upscale places to eat in Minato Mirai with stunning bay views. – Yokohama Burgers — The city has a surprising burger culture with artisan shops and fusion spots. > Ie-kei ramen · Ramen tour · Ramen guide · Backstreet gourmet · Premium dining · Date night · Chinatown food

    Culture & Sightseeing

    • Sankeien Garden — old-style Japanese garden. 175,000 sqm
    • Shin-Yokohama Ramen Museum — Ramen theme park with replica 1958 streetscape
    • Hakkeijima Sea Paradise — Aquarium, amusement park
    • Kawasaki Factory Night View — Industrial夜景

    Sankeien · Ramen Museum · Hakkeijima · Kawasaki night view · Art museums · English garden

    Where to Stay

    Area Best For vibe
    Minato Mirai Luxury, modern
    Yokohama Station Convenience Busy, useful
    Kannai / Chinatown Nightlife, vibrant
    Shin-Yokohama Shinkansen access Train-connected

    Yokohama lodging · Kanagawa lodging · Day onsen

    Seasonal Guide

    • Spring: Cherry blossoms at Sankeien. Port Opening Festival (May)
    • Summer: Minato Mirai fireworks. Hakkeijima attractions
    • Autumn: Foliage at Sankeien, lights start
    • Winter: Winter lights. Chinatown New Year

    Autumn foliage · Winter lights · Rainy day spots

    🚶 1-Day Yokohama Walking Itinerary

    Morning (10:00-12:30) — Minato Mirai
    Start at Sakuragicho Station and walk west through Minato Mirai. Visit Landmark Tower Sky Garden (¥1,030) for panoramic bay views. Walk to Red Brick Warehouse (free entry) for shopping and architecture — the 1911 red brick buildings are a photographer’s dream. Grab coffee at one of the waterfront cafes overlooking the bay. Lunch (12:30-13:30) — Chinatown
    10-minute walk or one station on the Minato Mirai Line to Motomachi-Chukagai Station, see 600+ shops and places to eat. Must-try: xiaolongbao soup dumplings (¥500-800 for 4-6 pieces), or a full lunch set (¥1,500-2,500). Avoid the busiest stalls on the main street — walk one block in and you’ll find better quality and shorter queues. Afternoon (13:30-16:00) — Kannai & Yamashita Park
    Walk 15 minutes south through the old Kannai district. Visit Port Opening Memorial Hall (¥200 entry, pretty Western architecture from 1911). Stroll through Yamashita Park along the waterfront promenade — the 800m walk offers continuous views of the bay and, on clear winter days. Late Afternoon (16:00-17:30) — Optional: Sankeien Garden
    Take bus #8 or #148 from Sakuragicho Station (25 min, ¥220) to Sankeien Garden (¥700). The garden closes at 5 PM, so arrive by 3:30 PM to see the old-style Japanese garden with its three-story pagoda. Evening (18:00 onwards) — Minato Mirai lights
    Return to Minato Mirai for dinner and evening lights. The winter lights season (November-February) transforms the waterfront into a magical light display. Cosmo World ferris wheel offers night rides (¥800) with amazing city views.

    Travel Tips

    Budget-Friendly Yokohama

    • Free attractions: Chinatown entry. Minato Mirai waterfront walks
    • Low-cost gems: Sankeien Garden (¥700). Red Brick Warehouse (free). Port Opening Memorial Hall (¥200)
    • Budget meals: Chinatown street food (¥500-800). local ramen shops (¥800-1,000)

    Rainy Day Options

    • Indoor attractions: Ramen Museum. Landmark Tower Sky Garden. Hakkeijima Sea Paradise aquarium
    • Shopping: Motomachi Shopping Street. Queen’s Square shops
    • Culture: Yokohama Museum of Art. Silk Museum

    Eco-Friendly Travel

    • Highly walkable: Most central attractions are within walking distance
    • great public transport: Subways, and Yokohama駅 bikes
    • SDGs tourism: Yokohama is a leader in sustainable city initiatives

    Useful Tips

    • IC Cards: Suica/PASMO work everywhere — trains, convenience stores
    • Free WiFi: Available at major stations and tourist spots
    • Language: English signs at major attractions; place to eat menus often bilingual
    • Cash vs. Card: Major places to eat accept cards; Chinatown and izakaya prefer cash

    Rainy day Yokohama · Kanagawa under ¥5,000 · Weekend getaway · SDGs tourism · Upcycle shops

    During my stay, I discovered that the best photo chances come just before sunset.

    Conclusion

    exploring Yokohama can be as relaxed or as packed as you want it to be, and I have found that the best visits leave room for both planning and spontaneity. During my visit to Yokohama I went with a rough plan and found that leaving room to wander made the trip far more memorable. Use this guide to sort out the logistics in advance, then let the day surprise you — Kanagawa rewards travelers who stay curious.

  • Yokohama Kimono Rental Guide 2026 — Dress Up & Explore…

    Yokohama Kimono Rental Guide 2026 — Dress Up & Explore…

    Yokohama Kimono Rental Guide 2026 — Dress Up & Explore…

    Overview

    Explore the rich cultural heritage and historical significance of Yokohama Kimono Rental Guide 2026 — Dress Up & Explore… in KanaKanagawafecture. This guide delves into the fascinating stories, traditions, and landmarks that define Yokohama. From ancient temples to modern museums, discover how this destination has shaped Japan’s cultural landscape over centuries.

    📍 Quick Overview

    • Starting from ¥5,000 for a full kimono rental package (includes dressing & hair styling)
    • Professional dressing takes 30–60 minutes
    • Return by 5:30 PM same day (most shops)
    • Perfect for: Instagram-worthy photos, special occasions
    • Best areas to explore in kimono: Minato Mirai. Chinatown

    I found that visiting during weekday mornings offered the most relaxed time, something I confirmed over multiple trips. —

    Introduction: Why Rent a Kimono in Yokohama? Yokohama offers a unique backdrop for kimono dressing that combines traditional Japanese aesthetics with a modern port city atmosphere. Unlike Kyoto’s temple-heavy streets or Asakusa’s crowded lanes. Yokohama provides spacious promenades, and a relaxed pace that makes kimono walking genuinely enjoyable. Why Yokohama over Kyoto or Tokyo:

    • Fewer crowds — You won’t be jostling through packed streets
    • Waterfront backdrops — Minato Mirai and Yamashita Park offer stunning photo chances
    • More affordable — Rental prices are typically 20–30% lower than Kyoto
    • Easier walking — Wide pavements and flat terrain throughout the tourist areas
    • Diverse scenery — From historic buildings to modern architecture to Japanese gardens

    Renting a kimono transforms your sightseeing time. You’ll find that shopkeepers, and locals treat you with extra warmth — and the photos you take will be your most great from the trip. —

    1. VASARA Kimono & Yukata Rental — Yokohama’s Premier Shop

    Best for: First-timers. English-friendly service

    Yokohama Kimono Rental Guide scenery and attractions

    Aspect Detail
    Location Central Yokohama, near Kannai Station
    Price From ¥5,000 (kimono set). from ¥3,500 (yukata set)
    Included Kimono/yukata, hair styling
    Hours 9:00 AM – 6:00 PM (return by 5:30 PM)
    Best For First-timers, quality-conscious travelers

    VASARA is one of Japan’s largest kimono rental chains, and their Yokohama location delivers the same high standards as their famous Kyoto and Asakusa shops — with the added benefit of Yokohama’s pretty settings. The time:

    When you arrive at VASARA Yokohama, you’ll be greeted by professional stylists who guide you through the selection process. The shop carries hundreds of kimono and yukata in every color and pattern imaginable — from classic floral motifs to bold modern designs. Your appointment includes:

    1. Kimono selection (15–20 minutes) — Browse racks of kimono organized by color. The staff will help you choose based on your preferences and the season
    2. Dressing (20–30 minutes) — A professional dresser wraps you in layers with practiced efficiency. The process involves multiple steps — undergarment, nagajuban (inner robe), kimono, obi (belt), obijime (cord), and accessories
    3. Hair styling (10–15 minutes) — Simple but elegant hair arrangements to complement your kimono
    4. Accessory selection (5 minutes) — Choose your sandals (zori), bag, and any hair ornaments
    5. Out the door — You’re ready to explore Yokohama in style

    Book VASARA Kimono Rental Yokohama on Klook to secure your preferred time slot → Reserve your kimono time

    What to Expect:

    • The entire process takes about 60 minutes from arrival to departure
    • You can leave your belongings at the shop (locked storage provided)
    • The kimono is comfy for walking — the stylists ensure the obi is tied securely but not too tightly
    • Return by 5:30 PM for undressing (late fees apply after 6:00 PM)
    • Next-day return is sometimes available for an additional fee

    Pro Tips:

    • Book the earliest slot (9:00 AM) for the best selection and the most time to explore
    • Choose a kimono with short or pushed-up sleeves if visiting in summer — yukata (cotton kimono) is the standard summer option
    • Wear a thin camisole and shorts under your clothes — you’ll be undressed and re-dressed, and fewer layers under your kimono means a smoother result
    • Bring your camera — VASARA staff are happy to take photos of you before you leave the shop

    2. Where to Go in Kimono — Best Photo Spots in Yokohama

    Yokohama Kimono Rental — detailed view

    Minato Mirai Waterfront

    The broad promenades of Minato Mirai are perfect for kimono walking. The contrast between traditional attire and modern architecture creates striking photos. Top Spots:

    • Cosmo World Ferris Wheel — The colorful amusement park provides a fun, vibrant backdrop
    • Red Brick Warehouse — The historic brick buildings offer a rustic European feel that contrasts beautifully with kimono
    • Queen’s Square Plaza — The open square with fountains and modern glass towers Walking time from VASARA: 15 minutes Best time: Late afternoon (3:00–5:00 PM) for golden hour light on the bay

    Yamashita Park

    Yokohama’s premier waterfront park stretches along the harbor, and iconic views of the bay. Top Spots:

    • The rose garden (seasonal. May–October) — Colorful blooms frame kimono beautifully
    • The Hikawa Maru — The permanently docked ocean liner makes a nostalgic backdrop
    • The waterfront railings — Classic harbor views with ships and bridges Walking time from VASARA: 10 minutes Best time: Morning (9:00–11:00 AM) for soft light and fewer people

    Sankeien Garden

    A traditional Japanese garden in southern Yokohama. Sankeien features historic buildings relocated from across Japan. Top Spots:

    • Three-story pagoda — A 15th-century pagoda from Kyoto, perfectly framed by cherry trees in spring
    • Choshukaku Villa — A 17th-century samurai residence with tatami rooms open to visitors
    • The pond with teahouse — Classic Japanese garden scenery Access: 25-minute bus ride from Kannai Station or taxi (¥2,000–2,500) Admission: ¥700 (adults) Best time: Early morning just after opening (9:00 AM) for solitude

    Yokohama Chinatown

    Yokohama’s vibrant Chinatown offers colorful, energetic backdrops with its ornate gates. Top Spots:

    • Zenrinmon Gate (Good Luck Gate) — The most photogenic entrance to Chinatown
    • Kanteibyo Temple — An elaborate Chinese temple in the heart of the district
    • Colorful alleyways — Lantern-lined streets with food stalls and shops Walking time from VASARA: 12 minutes Best time: Late morning (10:00–11:30 AM) before the lunch crowds

    3. What to Know Before You Go

    Seasonal Considerations

    Season Recommended Wear Duration Comfort Best Photo Spots
    Spring (Mar–May) Kimono (medium weight) All day comfy Sankeien Garden (cherry blossoms). Yamashita Park
    Summer (Jun–Aug) Yukata (light cotton) comfy, but avoid midday heat Minato Mirai waterfront (evening). Chinatown (air-conditioned)
    Autumn (Sep–Nov) Kimono (medium weight) All day comfy Sankeien Garden (fall foliage). Red Brick Warehouse
    Winter (Dec–Feb) Kimono + shawl provided 3–4 hours max (cold!) Indoors: Cup Noodles Museum, outdoor: Yamashita Park (clear skies)

    Kimono vs. Yukata — What’s the Difference? Kimono — The traditional full-length garment worn in cooler months, Made of silk or synthetic silk, with multiple layers, a formal obi, and zori sandals. More elegant, more structured, and warmer. Yukata — A lightweight cotton robe traditionally worn in summer. Single layer, simpler tying, and worn with geta (wooden sandals). More casual, cooler, and easier to move in. For most first-time visitors, yukata in summer and kimono in other seasons is the right choice

    Dress Code & Etiquette

    • Walk with small steps — The kimono’s narrow hem restricts your stride. This naturally creates the graceful, measured walk associated with kimono
    • Sit with care — When sitting on chairs. On tatami, use the proper kneeling position (seiza) or a modified side-sit
    • Food and drink — Be careful with dark-colored drinks near light kimono. Most rental shops have stain removal options if accidents happen
    • Restrooms — Kimono makes using restrooms a challenge. The staff will show you how to manage before you leave. Yukata is much easier
    • photos — Most places welcome kimono-clad visitors. Some temples and gardens offer discounted entry for those wearing kimono

    What to Bring

    • Thin inner layers (for under the kimono)
    • comfy tabi socks (some shops include them, but bring your own if you have them)
    • A small bag for your phone and wallet (the rental bag is small)
    • Lip balm — Your lips can dry out during the dressing process
    • A light jacket if visiting in winter

    4. Sample Kimono Itinerary

    Classic Yokohama Kimono Day

    9:00 AM — Arrive at VASARA Yokohama
      → Kimono selection & dressing
    10:00 AM — Depart in full kimono
    10:15 AM — Yamashita Park stroll & photos
    11:00 AM — Walk to Chinatown
      → Photos at Zenrinmon Gate
      → Dim sum lunch at a Chinatown restaurant
    1:00 PM — Walk to Minato Mirai
      → Photos at Red Brick Warehouse
      → Photos at Cosmo World
    2:30 PM — Tea break at a cafe near Queen's Square
    3:00 PM — Optional: Cup Noodles Museum or Sankeien Garden
    4:00 PM — Return to VASARA for undressing
    5:00 PM — Free to explore in regular clothes

    📊 Kimono Rental Comparison

    Shop Price (Kimono) Price (Yukata) Dressing Time English Support Location
    VASARA Yokohama ¥5,000 ¥3,500 60 min ✅ great Kannai
    VASARA Kamakura ¥5,000 ¥3,500 60 min ✅ great Kamakura Station

    Book VASARA Kimono Rental in Yokohama on Klook for guaranteed availability and exclusive online rates → Secure your kimono time


    Frequently Asked Questions

    Q: Do I need to make a booking?
    A: Yes — bookings are essential, mostly during cherry blossom season (March–April). Golden Week (late April–early May). and autumn foliage season (November). Walk-ins are sometimes accepted but may face long waits or limited selection. Q: Can I wear kimono if I have tattoos?
    A: Yes — kimono rental shops generally do not have tattoo restrictions. The kimono covers most of your body, so tattoos are invisible during wear. Q: Is the kimono heavy?
    A: A full kimono weighs about 3–5 kg (6–11 lbs). It’s noticeable but not uncomfortable. Most first-timers adjust within 30 minutes. Yukata is a lot lighter. Q: Can I eat and drink in kimono?
    A: Yes — just be careful with dark drinks (coffee, red wine) near light-colored kimono. Most rental shops provide napkins and have stain removal services. Q: What if it rains?
    A: Most shops provide plastic rain covers for your kimono. Yukata is less suitable for rain. Check the weather forecast before booking.

    Final Thoughts

    From ancient temples to living traditions, Kanagawa’s cultural heritage offers layers of discovery that reveal themselves with each visit.

    Conclusion

    Whether you are planning exploring Yokohama for its rental for the first time or returning for another visit, taking a little extra time to go beyond the obvious sights makes all the difference. During my visit to Yokohama I went with a rough plan and found that leaving room to wander made the trip far more memorable. I hope this guide helps you build an itinerary that fits your pace, and that your time in Kanagawa leaves you with memories worth coming back for.
  • Yokohama English Garden Guide 2026

    Yokohama English Garden Guide 2026

    Overview

    Introduction: A Rose Lover’s Garden

    Yokohama English Garden was designed by landscape architect Hidetoshi Kobayashi, who drew on classic English garden principles to create a space that feels intimate despite its size, Winding paths lead through layered plantings, with hidden benches, archways, and small clearings that reward slow exploration. The garden’s identity is defined by roses. They are woven throughout the landscape — climbing over arches, spilling from raised beds, trained into standards and cascading from trellises. The collection includes both classic varieties (David Austin, hybrid teas) and modern cultivars bred mostly for the Japanese climate. Seasonal Rhythm:

    Season What’s Blooming Best Time
    Late April–May Peak roses — Rose Festival, tunnels in full bloom Peak season
    June Hydrangeas, early summer perennials Mid-June
    July–August Summer roses, lavender Morning
    September–October Autumn roses — deeper color, stronger scent Late September
    November Late autumn color, foliage Mid-November

    The Garden Features

    Rose Tunnels

    The garden’s most photographed feature — two long archways covered in climbing roses. In peak bloom (late April to mid-May). the tunnels become a canopy of overlapping flowers in shades of pink. photos Tips for the Tunnels:

    • Best time: Early morning (10:00–10:30. just after opening) or late afternoon (16:00–17:00)
    • Lens: Wide-angle (16–24mm) for the full tunnel effect; telephoto (70–200mm) for compression shots
    • Tripods: Prohibited during regular hours — use a held camera or monopod
    • Crowds: Weekday mornings are quietest; weekends see queues for photo spots

    Rose Beds

    Organised by variety and color, the main rose beds spread across the garden’s central section. Each bed is labelled with the variety name (Japanese and Latin), making it easy to identify favorites for your own garden.

    Pergola Walk

    A shaded walkway covered in climbing hydrangeas and wisteria, offering a cool break from the open rose beds. The pergola is at its best in June (hydrangeas) and April (wisteria).

    Admission and Hours

    Admission Fees

    Category Weekday Weekend/Holiday
    Adult (peak season — late Apr–May) ¥1,500 ¥1,800
    Adult (mid season — Jun. Sep–Oct) ¥1,000 ¥1,200
    Adult (low season — Jul–Aug. Nov) ¥700 ¥800
    Child (4–12. peak) ¥750 ¥900
    Child (4–12. mid) ¥500 ¥600
    Child (4–12. low) ¥400 ¥400

    Note: Prices are dynamic — they change based on the current bloom status. The official website always shows the current pricing.

    Hours

    Season Hours Last Entry
    March–November 10:00–18:00 17:30
    December–February 10:00–17:00 16:30

    Closed: December 29 – January 3 (winter upkeep)

    Discounts

    • Online advance ticket: ¥100–200 discount per person
    • Combo ticket: Discounted entry with tvk Housing Plaza places
    • Group rate: 20+ people, contact the garden in advance


    Photo Rules

    The garden enforces specific photos rules to keep a pleasant time for all visitors:

    Item Regular Hours Early Morning Sessions
    Handheld cameras ✅ Allowed ✅ Allowed
    Smartphones ✅ Allowed ✅ Allowed
    Tripods ❌ Prohibited ✅ Allowed
    Monopods ❌ Prohibited ✅ Allowed
    Selfie sticks ❌ Prohibited ❌ Prohibited
    Drones ❌ Prohibited ❌ Prohibited

    Early Morning photos Sessions: sometimes held during peak rose season. These sessions (typically 8:00–10:00) allow tripods and are quieter. Check the official website for dates and pricing. —

    Practical info

    What to Bring

    Recommended:
    - Camera (handheld only during regular hours)
    - Sunscreen and hat (limited shade in the rose beds)
    - Small cushion or mat (benches can be damp in spring)
    - Water bottle (fountain available near the cafe)
    
    Provided:
    - Garden map (English available)
    - Umbrellas (at the entrance, free to borrow)
    - Plant labels with names (Japanese and Latin)

    Etiquette

    Do's:
    ✅ Stay on the paths (do not step into flower beds)
    ✅ Touch flowers gently when leaning in for photos
    ✅ Use the hand sanitiser provided at the entrance
    ✅ Be mindful of other visitors when taking photos
    ✅ buy online tickets in advance during peak season
    
    Don'ts:
    ❌ No tripods or monopods during regular hours
    ❌ No touching or handling the roses (thorns + damage)
    ❌ No picnicking on the lawn with outside food
    ❌ No smoking within the garden
    ❌ No pets (except service animals)

    When to Visit

    For the fullest bloom: Late April to mid-May
    For quieter time: Weekday mornings (10:00–11:30)
    For autumn color: Late September to October
    For fewer crowds + value: July–August (lower admission)
    
    Avoid: Weekend afternoons during Rose Festival (extremely crowded)

    Nearby Attractions

    The English Garden can be combined with several other Yokohama destinations:

    • Yokohama Station area — shopping and dining (10 min walk)
    • Sankeien Garden — traditional Japanese garden (20 min by bus)
    • Yokohama Minato Mirai — waterfront attractions (15 min by train)
    • Shin-Yokohama Ramen Museum — 25 min by train (see our Ramen Museum guide)
    • Hakkeijima Sea Paradise — 35 min by train (see our Sea Paradise guide)

    What to Expect

    Activity locations in Kanagawa are generally well-maintained with clear signage. Most sites offer English pamphlets or audio guides. Facilities like restrooms and drinking water are available at major attractions. Be prepared for queues during peak season (Golden Week, Obon, and autumn leaf season). Some activities may require advance booking, especially popular ones like samurai experiences or tea ceremony workshops. Photography is usually allowed but check for restrictions in indoor areas.

    Local Tips

    Those who frequent these activities suggest checking social media for last-minute openings and special events. Some venues offer discounted admission during certain hours or days of the week. Combining multiple activities in the same area saves travel time and often qualifies for package discounts. Consider joining a group tour for activities that require specialized equipment or guidance.

    Budget Planning

    Activity costs in Kanagawa range from ¥500 for temple entry to ¥5,000+ for premium experiences. Plan your activity budget based on your interests rather than trying to do everything. Many free activities like hiking, beach visits, and temple grounds exploration are equally rewarding. Allocate more budget for one or two memorable experiences rather than spreading funds thin across many paid activities.n

    Dos and Don’ts

    Do arrive 10-15 minutes early for scheduled activities. Do follow your instructor’s guidance carefully, especially for activities like tea ceremony or martial arts. Do wear appropriate clothing and footwear as specified by the venue. Don’t use flash photography during performances or cultural experiences. Don’t touch exhibits or artifacts unless explicitly permitted. Don’t bring food or drinks into activity areas unless specified.

    Frequently Asked Questions

    Q: Is the garden worth visiting outside of rose season?

    A: Yes. June brings hydrangeas and summer perennials, and the autumn roses (September–October) are often more fragrant than spring blooms. Even in low season (July–August, November), the garden is well-kept and pleasant. Q: How long should I plan to spend?

    A: 1–2 hours is sufficient for a relaxed visit, photos enthusiasts may want 2–3 hours. Q: Is the garden wheelchair accessible?

    A: Largely yes. The paths are wide and paved, though some sections have gentle slopes. The rose tunnels are accessible. Q: Can I buy plants at the garden?

    A: Yes. The shop sells a small selection of rose varieties and garden plants. Stock varies by season. Q: Is the garden suitable for children?

    A: Yes, but young children may find 1 hour sufficient. There is no dedicated play area. The open lawn is safe for toddlers to explore.

    🌟 Share Your time

    Visited Yokohama English Garden? favorite rose variety or season? Join our community forum to share your photos and tips! —

    Yokohama English Garden is a reminder that Japan’s garden culture extends far beyond the traditional Zen and tea gardens, or anyone needing a quiet afternoon surrounded by color and fragrance, it is one of Yokohama’s most underrated attractions. —

    ⏰ Best Time to Visit

    Early morning (8–10 AM): Peaceful atmosphere, perfect for photos Late afternoon (4–6 PM): pretty lighting, less crowded than midday

    🎯 What I Recommend

    • Don’t rush: Take your time to explore the side streets and hidden spots
    • Talk to locals: They often know the best lesser-known spots that aren’t in guidebooks
    • Try the local specialties: Each area has its own unique food and souvenirs

    ⚠️ Things to Watch Out For

    • Some shops close on weekdays or have irregular hours
    • Parking can be hard during peak seasons
    • Cash is still king at many smaller establishments

    Packing Essentials

    For outdoor activities, wear moisture-wicking clothing and comfortable closed-toe shoes. Sunscreen and a hat are essential during summer. A small towel is useful for wiping sweat. A waterproof phone pouch is useful for water activities. Pack snacks and extra water for remote areas.

    Money-Saving Tips

    Save on activities by booking online in advance. Combination tickets covering multiple attractions often provide 15-25% savings. Visit during off-peak hours. Check local tourist websites for digital coupons. Consider free alternatives like public gardens.

    Conclusion

    The details in this guide come from real visits, and the biggest lesson I took away was that the best experiences in Yokohama rarely fit neatly into a checklist. During my visit to Yokohama I went with a rough plan and found that leaving room to wander made the trip far more memorable. Plan the essentials, keep your schedule flexible, and you will leave Kanagawa wanting to return.

  • Shin-Yokohama Ramen Museum Guide 2026

    Shin-Yokohama Ramen Museum Guide 2026

    Overview

    Explore the rich cultural heritage and historical significance of Shin-Yokohama Ramen Museum Guide in Kanagawa Prefecture. This guide delves into the fascinating stories, traditions, and landmarks that define Shin. From ancient temples to modern museums, discover how this destination has shaped Japan’s cultural landscape over centuries.

    Introduction: The Museum Concept

    When the Shin-Yokohama Ramen Museum opened in 1994, the idea of a food-themed amusement park was unprecedented. The founders wanted to create a place where visitors could experience the diversity of Japanese ramen — from Hokkaido’s miso ramen to Kyushu’s tonkotsu — without spending days traveling across the country.

    The key design decision was to set the museum in 1958, the year Momofuku Ando invented instant ramen (Chicken Ramen). The basement level was built as a full-scale indoor recreation of a Showa-era Tokyo streetscape, complete with retro signage, period advertisements, dim “sunset” lighting, and the sounds of the era.

    Why 1958 Matters:

    • First instant ramen (Chicken Ramen) launched
    • Japan’s post-war recovery was in full swing
    • Ramen was transitioning from street food to a national obsession
    • The Showa atmosphere evokes nostalgia for older visitors and novelty for younger ones

    How It Works

    Step Detail
    1 Purchase admission ticket at the entrance (ground floor)
    2 Descend to the basement “1958 Tokyo” streetscape
    3 Explore the retro street, visit shops, read menus
    4 Choose a ramen shop and queue (no reservations)
    5 Order from a vending machine or counter
    6 Eat at communal counters or standing tables
    7 Repeat — try a second or third bowl from different shops
    8 Visit the gift shop, candy store, or museum shop on the way out

    The Showa Streetscape

    Atmosphere

    The basement level is the heart of the museum. The ceiling is designed to look like a dusky evening sky, with gradually dimming lights that simulate twilight. The street is lined with period-accurate shop fronts — a pharmacy, a tobacco shop, a barber, a candy store — interspersed with the ramen shops.

    The attention to detail is extraordinary:

    • Signage: Hand-painted signs in period typography
    • Advertisements: Vintage posters for long-discontinued products
    • Street furniture: Old mailboxes,公用電話 (public phones), bicycles
    • Soundtrack: Showa-era popular music plays softly through hidden speakers
    • Smells: The aroma of simmering broth mixes with the scent of old wood

    Dagashi-ya (Traditional Candy Shop)

    The retro candy shop sells classic Showa-era sweets:

    • Ramune soda (¥150)
    • Konpeito (star-shaped sugar candy, ¥200)
    • Older-style chewing gum and chocolate (¥100–300)
    • Traditional rice crackers (¥200–400)

    Kateko Cafe

    A Showa-style café serving:

    • Classic pudding (¥400)
    • Parfaits (¥600–800)
    • Coffee and tea sets (¥500)
    • Cream soda (¥500)

    Featured Ramen Shops

    The shop lineup changes periodically — typically every 6–12 months — as new regional shops are invited and old ones rotate out. This keeps the experience fresh for returning visitors. Below is the current lineup; check the official website for the latest list.

    Current Selection (Summer 2026)

    Shop Region Style Signature Bowl Price
    Hakata Issou Fukuoka Tonkotsu Tonkotsu cappuccino (creamy pork broth) ¥950
    Ramen Jiro Tokyo Garlic-heavy Miso ramen with mountain of bean sprouts ¥850
    Santouka Hokkaido Shio (salt) Charshu ramen with tokotsu-shoyu broth ¥1,100
    Kumamoto Ramen Kikusha Kumamoto Tonkotsu + garlic Rich tonkotsu with garlic chips ¥900
    Okinawa Soba Kokusai Okinawa Okinawa soba Pork rib soba in clear broth ¥1,000

    Sample Sizes

    Most shops offer a mini ramen option (約 half size, ¥500–700) for visitors who want to try multiple bowls. This is the recommended strategy — three mini bowls from different shops is more satisfying than one full bowl.

    Eating Strategy for First-Time Visitors:

    Option A: Regional Tour
    1. Mini miso ramen (Hokkaido-style)
    2. Mini tonkotsu (Hakata-style)
    3. Mini shio ramen (Hokkaido-style)
    Best for: Understanding regional differences
    
    Option B: Contrast Tour
    1. Full tonkotsu (rich, heavy)
    2. Mini shio (light, clean)
    3. Mini tsukemen (dipping noodles)
    Best for: Maximum variety
    
    Option C: Quick Visit (60 min)
    1. One full bowl from whichever shop has the shortest queue
    2. Dessert at Kateko Cafe
    Best for: Limited time

    Activities and Experiences

    Ramen Making Class

    The hands-on noodle-making class is the museum’s most popular activity.

    Detail Info
    Duration ~90 minutes
    Price ¥1,500 per person
    Language Japanese (visual instructions provided)
    Reservation Required (book online or at the ticket counter)
    Ages 6 and up (children under 12 must be accompanied)

    What You Do:

    1. Mix flour and water (比例 is measured for you)
    2. Knead the dough by hand
    3. Use the Aodake-uchi technique — a traditional method where a bamboo pole is used to press and fold the dough repeatedly
    4. Cut the noodles by machine
    5. Take your fresh noodles home (they cook in 60 seconds)

    Ra-haku Sugomen Lab

    A newer addition where visitors create custom cup noodles:

    Detail Info
    Duration 30 minutes
    Price ¥800 per cup
    Language All visual — no language barrier
    Reservation Walk-in (no booking needed)

    What You Do:

    1. Choose a cup design (draw or select a pattern)
    2. Select your broth base (shoyu, miso, tonkotsu, or curry)
    3. Pick 4 toppings from 12 options
    4. Watch your cup be sealed and packaged
    5. Take it home as a souvenir (good for 3 months)

    Museum Shop

    The ground floor shop sells:

    • Rare instant ramen from across Japan (¥200–500 per pack)
    • Ramen-themed merchandise (towels, chopsticks, bowls)
    • Limited-edition collaboration products
    • Regional ramen kits (make your own at home)

    Practical Information

    Admission Fees

    Category Price
    Adult (19+) ¥450
    Youth (6–18) ¥100
    Child (under 6) Free
    Re-entry Allowed (hand stamp)

    Hours

    Day Hours Last Order
    Weekdays 11:00–21:00 20:30
    Weekends & Holidays 10:30–21:00 20:30
    Closed Dec 31 – Jan 1

    Food Budget

    Item Price Range
    Full bowl of ramen ¥850–1,200
    Mini ramen ¥500–700
    Dessert at Kateko ¥400–800
    Total for 2 bowls + dessert ¥1,800–2,500

    Access

    From Tokyo Station:
    1. JR Tokaido Shinkansen to Shin-Yokohama (20 min, ¥2,400)
       (Note: Free if covered by JR Pass)
    2. Walk 5 minutes from the Shinkansen exit
    Total: ~30 minutes, ¥2,400 (or free with JR Pass)
    
    Alternate from Tokyo Station:
    1. JR Yokohama Line to Shin-Yokohama (40 min, ¥350)
       (Local train, no Shinkansen needed)
    Total: ~50 minutes, ¥350
    
    From Yokohama Station:
    1. Yokohama Municipal Subway Blue Line to Shin-Yokohama (10 min, ¥230)
    2. Kyushu Shinkansen / JR Yokohama Line also available
    Total: ~20 minutes, ¥230 From Shinagawa Station:
    1. JR Tokaido Shinkansen to Shin-Yokohama (13 min, ¥1,650)
    Total: ~20 minutes, ¥1,650

    When to Visit

    Best times (shortest queues):
    - Weekday mornings (11:00–12:00)
    - Weekday evenings (after 18:00)
    - Rainy days (fewer visitors)
    
    Busiest times (longest queues):
    - Weekends 12:00–14:00
    - National holidays
    - School holidays (spring, summer, winter breaks) Recommended strategy:
    - Arrive at opening (11:00 on weekdays)
    - Visit the ramen shops first (before 12:00)
    - Explore the retro street and shops after eating
    - Save the Ramen Making Class for after lunch

    Tips for First-Time Visitors

    ✅ Bring cash — some vending machines are cash-only
    ✅ Start with a mini bowl from 2–3 different shops
    ✅ Share with a friend to try more varieties
    ✅ Visit the candy store for Showa-era nostalgia
    ✅ Take photos of the retro street before it gets busy
    ✅ Combine with a Shin-Yokohama Station visit (try the Shinkansen bento shops)
    
    ❌ Don't come with a full stomach (you will want to eat)
    ❌ Don't expect a quiet meal (it's lively and bustling)
    ❌ Don't skip the basement (the ground floor lobby is just the entrance)
    ❌ Don't forget your camera (the Showa street is highly photogenic)

    Nearby Attractions

    Shin-Yokohama is a convenient hub for exploring northern Yokohama:

    • Yokohama Hakkeijima Sea Paradise — 25 min by train (covered separately in our Sea Paradise guide)
    • Kohoku New Town — shopping and dining complex
    • Nissan Stadium — home of the Yokohama F. Marinos
    • Shin-Yokohama Station — the Shinkansen bento selection is excellent

    For a full day, combine the Ramen Museum (morning) with Sea Paradise (afternoon).


    Frequently Asked Questions

    Q: Do I need to speak Japanese to enjoy the museum?

    A: No. Menus have English and photos. The ramen-making class has visual instructions. Most visitors navigate without Japanese.

    Q: Can I re-enter the museum after leaving?

    A: Yes. Get a hand stamp at the exit and you can re-enter on the same day.

    Q: Is the museum suitable for vegetarians?

    A: Most ramen broths are meat-based (pork or chicken). Some shops offer vegetable-based options — ask at each counter. The Kateko Cafe has vegetarian-friendly desserts.

    Q: How long should I plan to spend?

    A: 2–3 hours for a relaxed visit with 2 bowls of ramen and exploration. Allow 4 hours if you want to do the ramen-making class.

    Q: Can I buy tickets in advance?

    A: Tickets are sold at the door only. No advance online sales. The queue moves quickly (it’s a large venue).

    🌟 Share Your Experience

    Visited the Ramen Museum? favorite shop in the current lineup? Join our community forum to share your ramen recommendations!


    Shin-Yokohama Ramen Museum Guide 2026 — Share Your Experience

    The Shin-Yokohama Ramen Museum is a testament to Japan’s ability to turn a humble bowl of noodles into a cultural experience. It is kitschy, crowded, and thoroughly entertaining — exactly what a food theme park should be. For ramen lovers, it is essential. For casual visitors, it is a fun and delicious way to spend a few hours in Yokohama. For more food adventures in Yokohama, read our Ie-kei ramen Yokohama guide and the comprehensive Yokohama ramen guide.


    ⏰ Best Time to Visit

    Early morning (8–10 AM): Peaceful atmosphere, fewer crowds, perfect for photos Late afternoon (4–6 PM): Beautiful lighting, local life, less crowded than midday

    🎯 What I Recommend

    • Don’t rush: Take your time to explore the side streets and hidden spots
    • Talk to locals: They often know the best lesser-known spots that aren’t in guidebooks
    • Try the local specialties: Each area has its own unique food and souvenirs

    ⚠️ Things to Watch Out For

    • Some shops close on weekdays or have irregular hours
    • Parking can be challenging during peak seasons
    • Cash is still king at many smaller establishments

    Getting There

    Best Time to Visit

    Temples and cultural sites are most enjoyable during weekdays when crowds are smaller. Early morning before 9 AM offers a peaceful atmosphere. Spring and autumn provide the most pleasant weather for exploring outdoor sites. Many temples have seasonal events and special openings.

    What to Expect

    Visiting historical sites in Kanagawa requires respect for local customs and traditions. Dress modestly when visiting temples and shrines – cover shoulders and knees. The atmosphere at cultural sites varies by season and time of day. Early morning visits offer a peaceful experience before crowds arrive. Many temples charge a small admission fee (¥200-500) that helps with preservation. Some sites close earlier in winter months. Check opening hours before planning your visit. Goshuin (temple stamp) books make wonderful souvenirs collected at each site.

    Local Tips

    Cultural enthusiasts recommend visiting on weekdays when crowds are smaller and the atmosphere is more contemplative. Some temples offer special access to normally restricted areas during certain times of the year. Photography is best in early morning or late afternoon when the light creates dramatic shadows and warm tones. Dress in layers as temple buildings can be significantly cooler or warmer than outside.n

    Conclusion

    Whether you are planning exploring Yokohama for its ramen for the first time or returning for another visit, taking a little extra time to go beyond the obvious sights makes all the difference. During my visit to Yokohama I went with a rough plan and found that leaving room to wander made the trip far more memorable. I hope this guide helps you build an itinerary that fits your pace, and that your time in Kanagawa leaves you with memories worth coming back for.
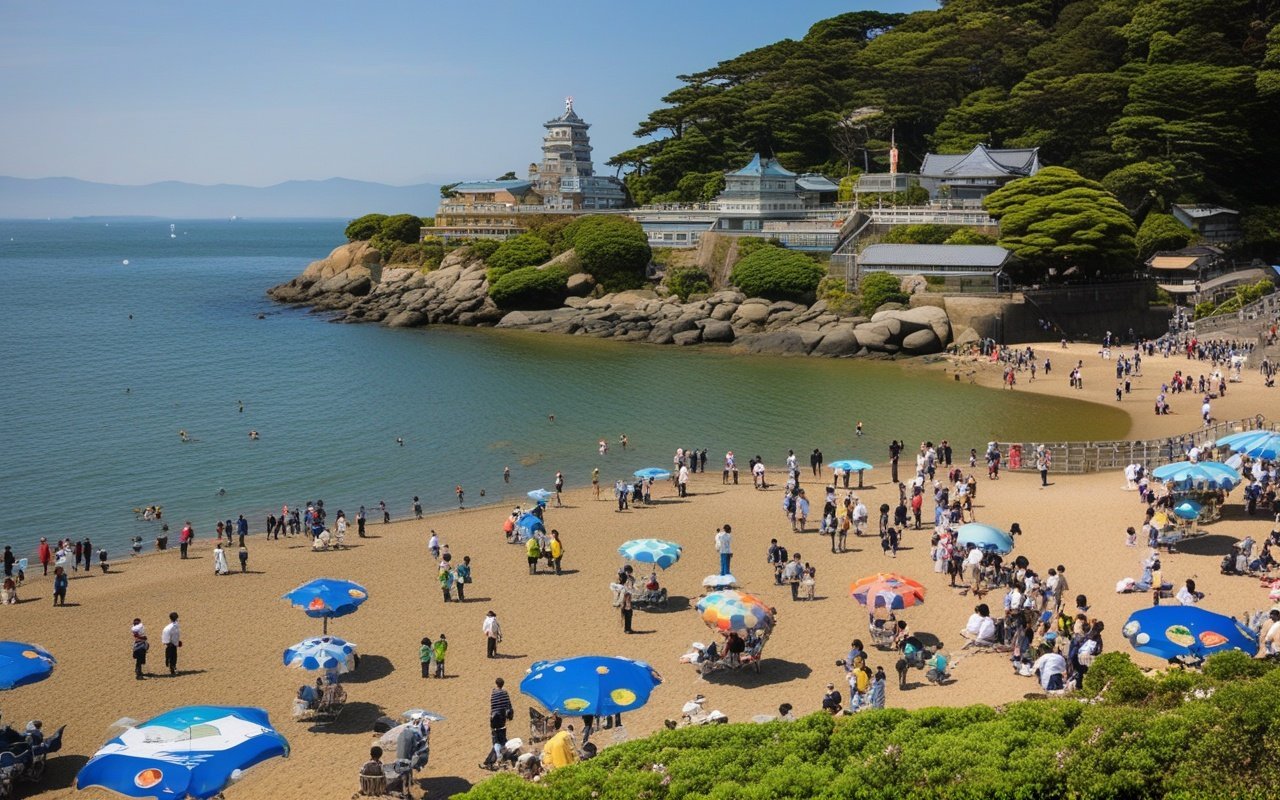
  • Only Yu Onsen Hakone — Modern Toji Resort Guide 2026

    Only Yu Onsen Hakone — Modern Toji Resort Guide 2026

    Overview

    Introduction: What Is Modern Toji?

    Tōji (湯治) is a Japanese tradition dating back centuries — the practice of staying at a hot spring for an extended period (days or weeks) to treat specific health conditions. Only Yu takes this concept and adapts it for the modern lifestyle, where a full day of intentional relaxation can provide many of the same benefits.

    The philosophy is simple:

    1. Good water — alkaline hot spring water that softens the skin
    2. Time — stay from morning until evening (or overnight) without rush
    3. Environment — forest setting, natural light, quiet spaces
    4. Mindfulness — complimentary activities that encourage presence

    Unlike a typical onsen where you might spend 1–2 hours bathing and leave, Only Yu encourages you to settle in. The entry fee includes a samue set (top and pants), towels, and access to all facilities. You can bathe, rest in the tatami lounge, read, meditate, eat, and bathe again — all in a single visit.

    Why Choose Only Yu Over Other Hakone Onsen? Discover Mt Fuji’s 5th Station, World Heritage Center & Owakudani volcanic valley on this scenic Hakone day trip

    Only Yu Typical Hakone Onsen
    Samue included (wear all day) Towel-only (change in/out)
    Complimentary activities (zazen, calligraphy) Bathing only
    Forest setting, quiet atmosphere Often crowded, tourist-oriented
    Day trip + overnight both available Most are either day or overnight
    pH 9.5 alkaline (skin-beautifying) Varied water quality
    Free shuttle from station Pay local bus

    The Hot Spring Water

    Water Quality

    Only Yu’s water is classified as alkaline simple spring (アルカリ性単純onsen (温泉, hot spring)). With a pH of 9.5, it is among the most alkaline hot springs in Kanagawa Prefecture.

    Effects:

    Property Effect
    High alkalinity (pH 9.5) Dissolves sebum and dead skin cells — leaves skin smooth
    Low temperature (38–42°C) Gentle on the body, safe for longer baths
    Clear, odourless No sulfur smell, comfortable for sensitive noses
    Soft feel Water feels silky on the skin

    Commonly described as: Bihada-no-yu (美肌の湯) — skin-beautifying hot spring.

    Baths

    Indoor Bath (大浴場):

    • Large windows facing the forest
    • Temperature: 40–42°C
    • Separate men’s and women’s sections (rotating daily)

    Outdoor Rotenburo (露天風呂):

    • Surrounded by broadleaf trees
    • Temperature: 38–40°C
    • Natural light throughout the day
    • Bird calls and rustling leaves create the soundscape
    • Rotating gender schedule

    Private Family Bath (家族風呂 / 貸切風呂):

    • Available for reservation (additional fee)
    • 45-minute sessions
    • Indoor only
    • Good for couples or small groups who prefer privacy

    Facilities and Amenities

    Samue Loungewear

    Upon check-in, you receive a set of samue — the traditional Japanese clothing worn by monks and craftspeople. This is central to the Only Yu experience: changing into samue signals the transition from everyday life to relaxation mode.

    The samue sets are available in multiple sizes, clean and pressed. You wear them throughout the facility — in the baths (before and after), in the restaurant, in the relaxation rooms. It eliminates the need to change between street clothes and bathing wear multiple times.

    Kakure-za Relaxation Room

    The Kakure-za (隠れ座) is a large tatami room where guests can lie down, nap, read, or simply stare at the ceiling. Low ambient lighting, the scent of tatami, and distant forest sounds create an atmosphere that encourages genuine rest.

    Etiquette:

    • Keep voices low (others may be sleeping)
    • No phones on speaker mode
    • Shoes off before stepping onto tatami
    • Photography allowed but be mindful of others

    Library Corner

    A small collection of books (mostly Japanese) about hot springs, wellness, and nature. The selection changes seasonally. Digital detox is encouraged — the library corner has limited mobile reception.

    Suhari Cafe

    The on-site cafe serves light refreshments:

    • Matcha and coffee sets (¥500–700)
    • Seasonal desserts (¥600–800)
    • Soft drinks and fresh juice (¥400–500)

    Yururi Restaurant

    The buffet restaurant focuses on healthy, vegetable-forward Japanese cuisine:

    Meal Time Price Notes
    Lunch buffet 11:30–14:00 ¥1,800 Local vegetables, seasonal dishes
    Cafe menu 14:00–17:00 ¥500–1,000 Light snacks and drinks
    Dinner (overnight guests) 18:00–20:00 Included Kaiseki-style course

    Complimentary Activities

    Only Yu offers a selection of free activities designed to complement the hot spring experience. These are included in the entrance fee.

    Zazen (Sitting Meditation)

    • Schedule: Daily, morning session (30 min)
    • Location: Dedicated meditation space
    • Instructor: Staff-guided (beginner-friendly)
    • Language: Japanese with basic English guidance
    • What to expect: Simple sitting meditation, no special clothing required

    Japanese Calligraphy (Shodo)

    • Schedule: Afternoon sessions (45 min)
    • Materials: All provided
    • What to do: Practice basic brush strokes, write your favorite kanji
    • Take-home: Your work becomes a souvenir

    Stretching and Relaxation Class

    • Schedule: Morning and afternoon (20 min)
    • Focus: Gentle stretches suitable for all ages and fitness levels
    • Location: Kakure-za room or outdoor deck (weather permitting)

    Seasonal Activities

    Season Activity
    Spring Forest walking guide (cherry blossom route)
    Summer Evening cooling deck (outdoor relaxation)
    Autumn Leaf-peeping walk (maple route)
    Winter Indoor tea ceremony demonstration

    Day Trip vs Overnight

    Day Trip Plan

    Time Activity
    10:00 Arrive, check in, change into samue
    10:30 Morning bath (rotenburo)
    11:30 Zazen session (if available)
    12:00 Lunch at Yururi buffet
    13:00 Kakure-za rest / reading
    14:00 Calligraphy workshop
    15:00 Afternoon bath (indoor)
    16:00 Cafe break at Suhari
    17:00 Final bath before closing
    18:00 Change back, depart

    Day trip fee: ¥2,500–3,500 (varies by season)
    Includes: Samue, towels, all facilities, activities

    Overnight Stay

    Overnight guests can check in from 10:00 AM and stay until 12:00 PM the next day — up to 35.5 hours of relaxation.

    Overnight fee: ¥15,000–25,000 per person (varies by season and room type)
    Includes: Day trip access + dinner + breakfast + futon accommodation

    Some rooms include a private indoor bath with the same alkaline water — a worthwhile upgrade for couples or those seeking complete privacy.


    Practical Information

    Fees

    Plan Adult Child (4–12)
    Day trip (weekday) ¥2,500 ¥1,200
    Day trip (weekend/holiday) ¥3,500 ¥1,700
    Overnight (per person) ¥15,000–25,000 Varies by plan
    Private bath (45 min) ¥2,000

    Hours

    Day Hours Last admission
    Daily 10:00–21:30 20:00

    What to Bring

    Provided (included in fee):
    - Samue (loungewear, top and pants)
    - Large towel and face towel
    - Sandals
    - Lockers (coin-operated, refundable)
    
    Recommended to bring:
    - Hair ties (long hair must be tied up in baths)
    - Moisturiser (alkaline water can be drying after prolonged bathing)
    - Small change for lockers (¥100 coin, refundable)
    - Book or journal (for the Kakure-za room)
    - Water bottle (hydration is important)

    Rules and Etiquette

    Do's:
    ✅ Wash thoroughly before entering any bath
    ✅ Tie up long hair before entering the water
    ✅ Use the small towel for drying (never dip it in the bath)
    ✅ Speak quietly in relaxation areas
    ✅ Enjoy the samue throughout the facility
    
    Don'ts:
    ❌ No tattoos (Japanese onsen policy — cover with patches if small)
    ❌ No photography in bathing areas
    ❌ No swimwear in the baths
    ❌ No infants with diapers in the water
    ❌ No food or drinks in the bath area
    ❌ No phones in the Kakure-za room

    When to Visit

    Best for solitude: Weekday mornings (before 12:00 PM)
    Best for atmosphere: Autumn weekdays (colorful leaves)
    Best for budget: Weekday day trips
    Avoid: Weekend afternoons (busiest), national holidays
    Seasonal recommendation: Autumn (forest colors + outdoor bath)

    Frequently Asked Questions

    Q: Is Only Yu suitable for people with tattoos?

    A: Like most Japanese onsen, Only Yu does not permit tattoos in the bathing areas. Small tattoos can be covered with waterproof patches (available at the front desk). If you have large or multiple tattoos, consider reserving a private family bath instead.

    Q: Can I visit as a same-sex couple?

    A: Yes. The baths are gender-separated (rotating schedule), but the Kakure-za relaxation room, restaurant, and cafe are co-ed spaces. Same-sex couples can enjoy all shared areas together.

    Q: Is English spoken at the facility?

    A: Basic English is understood at the front desk. Signage has some English. The zazen and calligraphy sessions are conducted primarily in Japanese but are visual enough for non-speakers to follow.

    Q: Do I need to book the shuttle in advance?

    A: Yes — the free shuttle requires a reservation made at least 24 hours in advance. Contact the facility by phone or through their website.

    Q: Can I bring my own food?

    A: Outside food and drinks are not permitted. The Yururi buffet and Suhari cafe cover all dining needs.

    🌟 Share Your Experience

    Visited Only Yu? Tips for combining it with a Hakone day trip? Join our community forum to share your experience!


    Only Yu Onsen Hakone — Modern Toji Resort Guide 2026 — Share Your Experience

    Only Yu is not the most famous onsen in Kanagawa, and that is precisely its appeal. It offers something increasingly rare in Hakone’s crowded hot spring landscape: genuine silence, space to breathe, and water that rewards slow soaking. Whether you visit for a day of modern toji or an overnight stay with private bath, the experience is defined not by what you do, but by how long you allow yourself to do nothing at all.

    For more onsen options in the region, read the Hakone onsen complete guide, the Hakone day trip onsen guide, or the broader Kanagawa onsen guide.


    ⏰ Best Time to Visit

    Early morning (8–10 AM): Peaceful atmosphere, fewer crowds, perfect for photos Late afternoon (4–6 PM): Beautiful lighting, local life, less crowded than midday

    🎯 What I Recommend

    • Don’t rush: Take your time to explore the side streets and hidden spots
    • Talk to locals: They often know the best lesser-known spots that aren’t in guidebooks
    • Try the local specialties: Each area has its own unique food and souvenirs

    ⚠️ Things to Watch Out For

    • Some shops close on weekdays or have irregular hours
    • Parking can be challenging during peak seasons
    • Cash is still king at many smaller establishments


    Conclusion

    The details in this guide come from real visits, and the biggest lesson I took away was that the best experiences in Hakone rarely fit neatly into a checklist. During my visit to Hakone I went with a rough plan and found that leaving room to wander made the trip far more memorable. Plan the essentials, keep your schedule flexible, and you will leave Kanagawa wanting to return.

  • Misaki Port Walking Guide 2026

    Misaki Port Walking Guide 2026

    Kanagawa offers a wide range of activities for every type of traveler. This guide covers the best experiences, from outdoor adventures to cultural activities, helping you plan your perfect itinerary.

    Misaki Port Walking Guide 2026

    Overview

    Overview: A Morning in Misaki Port

    Misaki Port is one of the most walkable destinations on the Miura Peninsula. Unlike sprawling tourist hubs, Misaki’s attractions are concentrated in a compact area around the harbor, Everything is within a 15-minute walk, making it perfect for a relaxed half-day exploration on foot.

    Misaki Port Walking Guide 2026 — Overview: A Morning in Misaki Port

    Misaki Port Walking Guide — main illustration

    Misaki Port Walking Guide 2026 — Overview: A Morning in Misaki Port

    Why Walk Misaki Port?

    • Compact layout: All attractions within walking distance
    • Authentic atmosphere: Showa-era streets untouched by modernization
    • Fresh tuna at every turn: Restaurants and shops line the route
    • Harbor views: The port is the constant companion throughout
    • Easy access: Direct walk from Misakiguchi Station

    Walk Stats:

    • Total distance: ~2.5 km
    • Duration: 2-3 hours (including stops)
    • Difficulty: Easy (flat terrain)
    • Best start time: 9:00-10:00 AM
    • Wheelchair accessible: Main route is accessible

    Route Overview:

    Stop 1: Misakiguchi Station (start)
    Stop 2: Misaki Port Harbor View
    Stop 3: Urari Marche & Fisherman's Market
    Stop 4: Misaki Ginza Shopping Street
    Stop 5: Hidden Alleyways & Showa Streets
    Stop 6: Waterfront Promenade
    Stop 7: Tuna Lunch (finish)

    Stop 1: Start at Misakiguchi Station

    Start your walk here — the gateway to Misaki Port. From the station exit, head south on the main road toward the harbor. The walk is a pleasant 10-minute downhill stroll with the first glimpses of the port appearing between buildings as you descend.

    What to Do:

    • Get your bearings at the station information board
    • Check the bus schedule for Jogashima (optional extension)
    • Visit the small convenience store for water and snacks
    • Take the first photo looking down the hill toward the harbor Pro Tip: Vending machines near the station have better prices than those at the port.

    Stop 2: Misaki Port Harbor View

    Walk: 10 minutes from station The harbor opens up as you reach the bottom of the hill. This is where Misaki’s identity as a major tuna fishing port becomes immediately clear — rows of fishing boats bob at their moorings, seagulls circle overhead, and the air carries a distinct salt-and-fish aroma.

    What to See:

    • Tuna fishing boats: Some over 100 tons, these vessels fish across the Pacific
    • Harbor cranes: Loading and unloading the daily catch
    • Jogashima Bridge view: The red arch bridge visible to the south
    • Fishing gear: Nets, buoys, and equipment stacked along the quay Photo Opportunity: The long view of the harbor with Jogashima Bridge in the background is the quintessential Misaki shot. Best Time: 9:00-10:00 AM — boats are docked, activity is visible

    Stop 3: Urari Marche & Fisherman’s Market

    Walk: 2 minutes from harbor view Urari Marche is Misaki Port’s modern market complex. Despite its contemporary architecture, it functions as a genuine fisherman’s market where locals shop for the day’s catch.

    What to See:

    • Fresh seafood stalls: Tuna, squid, local fish displayed on ice
    • Dried fish shop: Traditional himono (dried fish) in rows
    • Local produce: Miura vegetables, known for their sweetness
    • Food court: Sample fresh tuna bowls and seafood dishes

    What to Buy:


    Stop 4: Misaki Ginza Shopping Street

    Walk: 3 minutes from Urari Marche Turn inland from the harbor and you will find Misaki Ginza — a covered shopping street that feels frozen in the Showa era (1950s-1960s). This is not a tourist shopping arcade but a genuine local shopping street serving the Misaki community.

    What to See:

    • Traditional fishmongers: Selling whole tuna and cuts
    • Dry goods store: Rice, beans, pickles in barrels
    • Old-fashioned barber shop: Red, white, and blue pole still spinning
    • Local pharmacy: With herbal medicines and traditional remedies

    What to Buy:

    • Pickled vegetables: Misaki’s tsukemono (pickles) are local specialty
    • Senbei (rice crackers): Made with local seafood
    • Handmade kitchen tools: Traditional Japanese knives and utensils

    Photo Opportunity: The street’s covered arcade creates interesting light patterns. Midday sun filtering through the translucent roof makes for atmospheric shots.

    Pro Tip: Many shop owners are elderly and happy to chat. A smile and simple greeting go a long way.


    Stop 5: Hidden Alleyways & Showa Streets

    Walk: Branch off Ginza Street into side alleys The real magic of Misaki lies in its narrow alleyways that branch off the main shopping street. These residential lanes offer a glimpse into daily life away from the harbor.

    What to See:

    • Wooden townhouses: Traditional machiya (townhouses) with tiled roofs
    • Bonsai gardens: Tiny but meticulously maintained
    • Outdoor tai chi: Morning exercise groups in small community spaces
    • Cats: Misaki has a notable population of friendly neighborhood cats

    Photography Tips:

    • Look for laundry hanging between buildings — authentic daily life
    • Early morning light creates long shadows in narrow alleys
    • Rainy days add reflections on wet pavement
    • Black and white photography suits the Showa atmosphere

    lesser-known spots:

    1. Small Inari shrine tucked between houses on a side street
    2. Community notice board with hand-drawn maps and local events
    3. Vintage vending machine selling unusual local drinks

    Pro Tip: There is no set route here — the point is to wander. Allow 20-30 minutes for aimless exploration.


    Stop 6: Waterfront Promenade

    Walk: 5 minutes back to harbor, south of Urari Marche Walk south from the market along the waterfront. A paved promenade runs parallel to the harbor, offering uninterrupted views of the port, Jogashima Bridge, and the open sea beyond.

    What to See:

    • Jogashima Bridge: Best close-up view from the promenade
    • Fishing boats returning: Watch the afternoon boats come in
    • Seaside benches: Perfect for a rest with harbor views
    • Distant Mt. Fuji: On clear days, visible southwest Optional Extension: Walk across Jogashima Bridge (10 minutes) for sunset views from the island side.

    Photo Opportunity: From the southern end of the promenade, frame Jogashima Bridge with fishing boats in the foreground for a classic Misaki composition.


    Stop 7: Tuna Lunch (Finish)

    Walk: 3 minutes to any port-side restaurant Finish your walk with Misaki’s specialty — tuna, prepared every way imaginable. The area around the harbor is packed with restaurants specializing in maguro (tuna).

    Recommended Lunch Spots:

    Restaurant Specialty Price Range Hours
    Maguro no Sato Tuna sashimi set meal ¥1,500-3,000 11:00-15:00
    Misaki Port Rest House Maguro donburi (bowl) ¥1,000-1,500 10:00-16:00
    Kuroiwa Shokudo Grilled tuna steak ¥1,200-2,000 11:00-14:00
    Urari Marche Food Court Variety (light lunch) ¥800-1,500 9:00-17:00

    What to Order:

    • Maguro donburi: Raw tuna over rice, simplest and best
    • Negi toro don: Minced fatty tuna with green onion
    • Tuna katsu: Deep-fried tuna cutlet (unique to Misaki)
    • Aburi tuna: Seared tuna with ponzu sauce Pro Tip: Lunch service typically starts at 11:00 AM. Arrive by 11:30 AM to beat the crowd.

    Optional Extension: Jogashima Island

    If you have extra time and energy, cross Jogashima Bridge to explore Jogashima Island — a 15-minute walk from the port. The island offers:

    • Jogashima Lighthouse: Historic lighthouse with panoramic views
    • Coastal hiking trails: Cliffside paths with dramatic scenery
    • Umanose Cave: Natural sea arch tunnel in the volcanic rock
    • Sunset viewpoints: Among the best in Kanagawa Prefecture

    Allow: 1-2 hours for a brief exploration Related Guides:


    Frequently Asked Questions

    Q: How long does the walking route take?

    A: The full route including stops takes 2-3 hours. Add 1-2 hours if crossing to Jogashima Island.

    Q: Is the route suitable for children?

    A: Yes, the terrain is flat and paved. Children will enjoy the boats, market, and cats in the alleyways.

    Q: What should I bring?

    A: Comfortable walking shoes, camera, small bag for market purchases, cash (smaller shops don’t take cards), water bottle.

    Q: Can I do this walk in the afternoon?

    A: Yes, but the morning (9 AM-12 PM) is best for the market and harbor activity. Afternoon walks are quieter with better sunset light.

    Q: Are there restrooms along the route?

    A: Yes, at Misakiguchi Station, Urari Marche, and the waterfront area.


    Last Updated: June 4, 2026
    Written by: Anaba OffJapan Editorial Team
    Verified: All locations tested June 2026


    🌟 Share Your Experience

    Walked this route? Discovered a hidden spot we missed? Join our community forum to share your discoveries!


    Anaba OffJapan – Avoid the Crowds, Go Deeper into Japan.

    Misaki Port Walking Guide 2026 — Share Your Experience


    ⏰ Best Time to Walk

    Morning (9 AM-12 PM): Market is most active, harbor boats are docked, shops are open, and the morning light is beautiful Late afternoon (3-5 PM): Quieter streets, golden light, good for photography, combine with Jogashima sunset

    🎯 What I Recommend

    • Start early: The market is best before noon, and you will have Misaki Ginza mostly to yourself
    • Try something from every food stall: Sampling is half the fun of Misaki’s food culture
    • Don’t skip the alleyways: The planned route is good, but spontaneous detours often lead to the best discoveries

    ⚠️ Things to Watch Out For

    • Many shops close on Wednesdays and Thursdays — plan accordingly
    • The fish market can be slippery when wet — wear non-slip shoes
    • Seagulls may swoop for food near the harbor — eat under cover
    • Limited ATM availability — bring enough cash

    Miura Peninsula Area

    |—|—|—|—|—|
    | Misaki Port Rest House | Tuna Bowl | 🔗 Official Website | 10:00-16:00 | ¥1,000-1,500 |
    | Maguro no Sato | Tuna Restaurant | 🔗 Official Website | 11:00-15:00 | ¥1,500-3,000 |
    | Kuroiwa Shokudo | Tuna Steak | — | 11:00-14:00 | ¥1,200-2,000 |

    • Market: 9:00-11:00 AM (peak freshness and selection)

    • Walking: 9:00 AM – 12:00 PM (most shops open, activity visible)

    • Lunch: 11:30 AM – 1:00 PM (tuna is freshest at lunch)

    • Credit Cards: Accepted at Urari Marche and larger restaurants

    • Cash: Essential for smaller shops and market stalls

    • IC Cards (Suica/Pasmo): Not widely accepted in the port area

    📱 Useful Apps

    Conclusion

    Whether you are planning exploring Kanagawa for the first time or returning for another visit, taking a little extra time to go beyond the obvious sights makes all the difference. During my visit I went with a rough plan and found that leaving room to wander made the trip far more memorable. I hope this guide helps you build an itinerary that fits your pace, and that your time in Kanagawa leaves you with memories worth coming back for.