Category: kamakura-fujisawa

鎌倉・藤沢地域の旅行ガイド

  • Kamakura Rainy Day Activities: Top 10 Indoor Spots 2026

    Kamakura Rainy Day Activities: Top 10 Indoor Spots 2026

    Overview

    🗺️ Key Points

    • Kamakura has great rainy-day options — museums, and craft workshops
    • Best indoor spots: Kamakura Museum of National Treasures, tea ceremony things
    • Rainy days mean fewer crowds — 30-50% fewer visitors than sunny days
    • Budget: ¥2,000-5,000 per person for a full rainy day
    • Bottom line: Rain in Kamakura is an chance, not a problem

    During a rainy June visit to Kamakura, we discovered that the hydrangea temples were nearly empty — the rain had kept the crowds away, and the damp petals were at their most vibrant, That time changed how we think about wet-weather travel in Kamakura.


    Why Rainy Days Are Actually Great in Kamakura

    Most travelers cancel Kamakura plans when rain is forecast. This is a mistake. Rainy days offer:

    • Dramatically fewer crowds — popular temples at 50% capacity
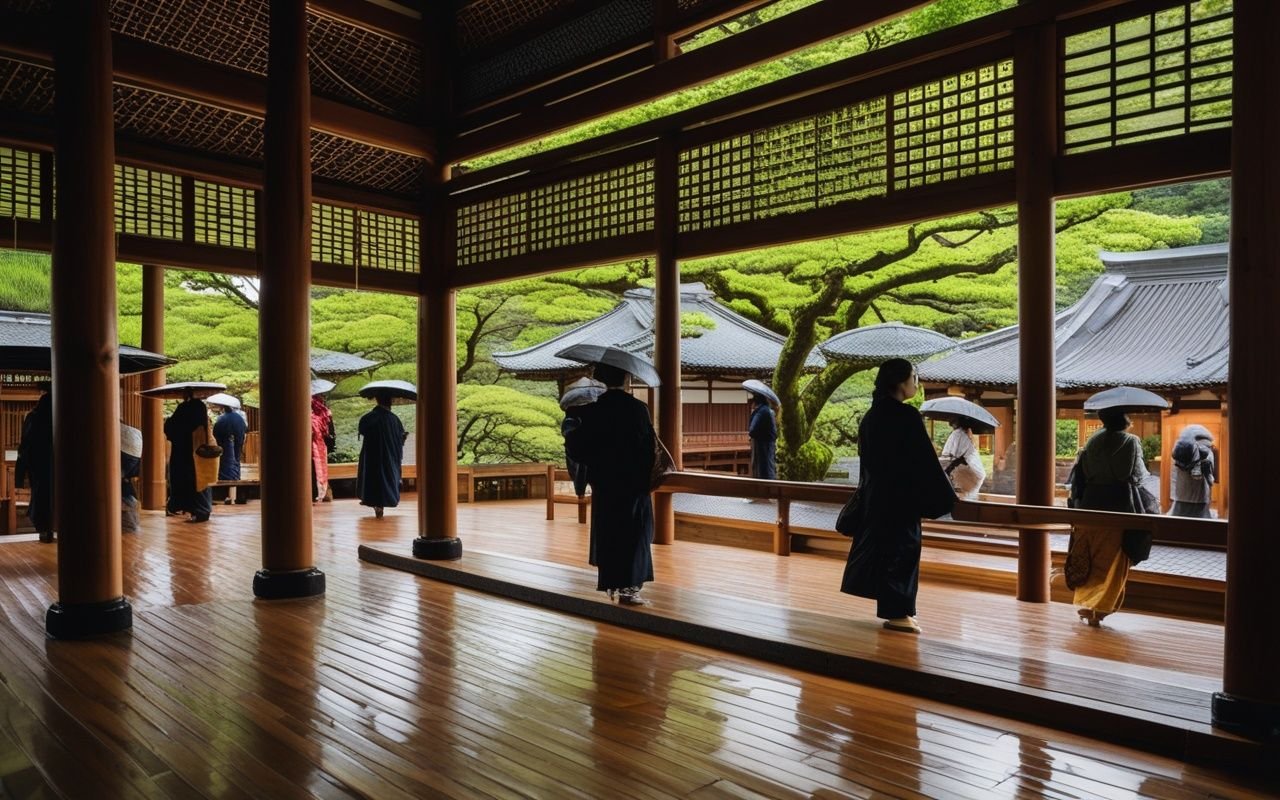
    • pretty atmosphere — rain-soaked temple gardens, misty hydrangea views
    • Better photos — soft diffused light, vibrant colors
    • Unique things — tea ceremonies feel cozier, onsen more inviting

    Mindset shift: A rainy day in Kamakura isn’t a ruined day — it’s a different. —

    Top Indoor Activities in Kamakura

    1. Kamakura Museum of National Treasures (Kamakura Kokuhōkan)

    Detail Info
    Location Near Tsurugaoka Hachimangu
    Access 10 min walk from Kamakura Station
    Hours 9:00-16:30 (closed Mondays. Dec 29-Jan 1)
    Fee ¥500 adults. ¥200 students
    Time needed 45-60 minutes

    Why visit: Houses Kamakura’s most important cultural artifacts — samurai swords. The building itself is a pretty example of traditional museum architecture. English labels are available for major exhibits. Highlights:

    • National Treasure wooden statues from the Kamakura period
    • Samurai armor displays with English explanations
    • Rotating special exhibitions (check website)
    • Peaceful garden visible from indoor viewing areas

    2. Komachi-dori (Covered Shopping Street)

    Detail Info
    Location Kamakura Station East Exit
    Access 1 min walk from station
    Hours 10:00-18:00 (shops vary)
    Fee Free
    Time needed 1-2 hours

    Why visit: Kamakura’s main shopping street has covered arcades for most of its length — perfect for rainy-day browsing. Sample street food, buy traditional crafts, and explore dozens of specialty shops without getting wet. Rainy day highlights:

    • Traditional wagashi (Japanese sweets) shops with indoor sampling
    • Kamakura-bori lacquerware shops — watch craftspeople at work
    • Matcha & tea houses — duck inside for a warm bowl of matcha
    • Kamakura vegetables — indoor farmers market section
    • Umbrella shops — buy a traditional Japanese wagasa (optional, ¥3,000-5,000)

    3. Kamakura-bori Lacquerware Workshop

    Detail Info
    Location Various studios near Komachi-dori
    Access 5-10 min walk from Kamakura Station
    Hours 10:00-17:00 (booking recommended)
    Fee ¥2,000-4,000 per person
    Time needed 1-2 hours

    Why visit: Kamakura-bori (Kamakura (鎌倉)彫) is a traditional lacquerware craft dating back 800 years. Several studios offer hands-on workshops where you can paint your own lacquerware piece — a perfect rainy-day activity and unique souvenir. Recommended studios:

    • Kamakura-bori Crafts Center — Near Tsurugaoka Hachimangu. English-friendly
    • Kamakura Traditional Crafts Center — Komachi-dori, walk-in possible

    4. Tea Ceremony time (Indoor)

    Detail Info
    Location Multiple venues near Kamakura Station
    Access 5-15 min walk
    Hours 10:00-17:00 (booking essential)
    Fee ¥1,500-3,000 per person
    Time needed 45-90 minutes

    Why visit: A traditional tea ceremony is even more atmospheric on a rainy day — the sound of rain on the roof, the warmth of matcha, and the quiet contemplation are perfectly suited to wet weather. Recommended venues:

    • Kamakura Tea House — Near Tsurugaoka Hachimangu. English instruction available
    • Enoden Tea Room — Near Hase Station, casual atmosphere
    • Hachimangu Tea House — Inside Tsurugaoka Hachimangu grounds

    5. Tsurugaoka Hachimangu (Covered Areas)

    Detail Info
    Location Kamakura city center
    Access 10 min walk from Kamakura Station
    Hours Grounds: 5:00-20:30 (free). Museum: 9:00-16:00 (¥200)
    Fee Grounds free; Museum ¥200
    Time needed 45-60 minutes

    Why visit: While the approach is open, and treasure house are covered. The shrine’s Treasure Museum displays artifacts, swords, and masks. The main hall offers sheltered contemplation of the grounds. Rainy day highlights:

    • Treasure Museum (covered. ¥200)
    • Main hall (covered, free)
    • Gekkō-in (sub-shrine with covered walkway)
    • Maiden (dance stage, covered viewing area)

    6. Kamakura Museum of Literature

    Detail Info
    Location Near Hase Station
    Access 15 min walk from Hase Station
    Hours 9:00-16:30 (closed Mondays)
    Fee ¥300 adults
    Time needed 45-60 minutes

    Why visit: Housed in a historic Western-style building, this museum showcases works by writers connected to Kamakura — including Natsume Sōseki. The atmospheric reading room is perfect for a rainy-day pause. —

    7. Zen Meditation time (Indoor)

    Detail Info
    Location Kencho-ji or Engaku-ji temples
    Access 15-20 min walk from Kamakura Station
    Hours 9:00-16:00 (booking needed)
    Fee ¥500-1,000
    Time needed 1-2 hours

    Why visit: Many Zen temples in Kamakura offer seated meditation (zazen) sessions in their main halls — a covered, contemplative time that’s enhanced by the sound of rain. Kencho-ji and Engaku-ji offer regular sessions with English instruction. —

    8. Kamakura Craft & Sweets Making

    Detail Info
    Location Various locations
    Hours 10:00-17:00 (booking recommended)
    Fee ¥2,000-4,000
    Time needed 1-2 hours

    Options:


    9. Indoor Cafes & Bookshops

    Cafe Location Vibe Price
    Cafe Vivement Dimanche Near Kamakura Station cozy, jazz ¥800-1,500
    Kamakura Coffee Stand Komachi-dori area Specialty coffee ¥500-1,000
    Hachinoki Near Tsurugaoka Hachimangu Organic, vegetarian ¥1,000-2,000
    Slow Coffee Near Hase Station Rustic, quiet ¥600-1,200
    Kamakura Ten Komachi-dori Matcha + views ¥800-1,500

    Bookshops to browse:

    • Kamakura Buchhandlung — German-language bookstore with cozy reading corner. ¥500-1,500 coffee included

    10. Kamakura-bori Lacquerware Museum + Shopping

    Detail Info
    Location Near Kamakura Station
    Hours 10:00-17:00
    Fee Free (museum area)
    Time needed 30-45 minutes

    View exquisite lacquerware pieces, watch artisans at work, and shop for souvenirs — all indoors. Many pieces are reasonably priced (¥2,000-10,000) and make great gifts. —

    Rainy Day Itineraries

    Half-Day Course (4 hours)

    Time Activity
    10:00 Arrive Kamakura Station
    10:15 Komachi-dori covered shopping + street food
    11:30 Kamakura Museum of National Treasures
    12:30 Lunch at covered Komachi-dori restaurant
    13:30 Tea ceremony time
    15:00 Return to Tokyo

    Full-Day Course (7 hours)

    Time Activity
    9:30 Arrive Kamakura Station
    10:00 Tsurugaoka Hachimangu (covered areas + museum)
    11:00 Kamakura-bori workshop (make your own lacquerware)
    12:30 Lunch — indoor restaurant near Komachi-dori
    14:00 Kamakura Museum of National Treasures
    15:00 Tea ceremony or calligraphy time
    16:30 Cafe time — warm matcha + bookshop browsing
    17:30 Return to Tokyo

    Rainy Day + Onsen Combo

    Time Activity
    10:00 Explore covered Komachi-dori
    12:00 Lunch + museum visit
    14:00 Day-use onsen at Ofuna Kannon-ji Onsen (20 min from Kamakura by JR)
    17:00 Return to Tokyo — refreshed and dry

    Rainy Day Packing List

    Item Why
    Compact umbrella Available at any convenience store (¥500-800)
    Waterproof shoes Essential — temple paths get muddy
    Small towel For drying hands after temple visits
    Plastic bag For wet umbrella at restaurant entrances
    Extra socks If shoes get wet, you’ll thank yourself
    Phone charger More indoor time means more browsing/photos

    Best Rainy Day Activities by Interest

    Interest Activity
    Art & culture Museum of National Treasures. Literature Museum
    Food & cooking Wagashi making. Komachi-dori food crawl
    Hands-on craft Kamakura-bori workshop, calligraphy
    Relaxation Tea ceremony, onsen
    Shopping Komachi-dori covered arcade
    Spiritual Zen meditation at Kencho-ji
    photos Rain-soaked temple gardens (covered paths)

    Rain Probability by Month

    Month Rain Days Best Rainy Backup
    January 6 Museums + cafe hopping
    February 7 Craft workshops + tea ceremony
    March 10 Komachi-dori + museums
    April 10 Tea ceremony + onsen combo
    May 10 Museum + Komachi-dori
    June 12 (rainy season) Full indoor plan recommended
    July 10 Covered shopping + craft workshops
    August 9 Air-conditioned museums + cafes
    September 12 (typhoon) Full indoor plan recommended
    October 9 Museum + tea ceremony
    November 7 Craft workshops + Komachi-dori
    December 6 Museums + cozy cafes

    What struck me most was the peaceful atmosphere, even during peak season when the crowds thin out after 3 PM.

    Frequently Asked Questions (FAQ)

    Q: Are temples open during rain?
    A: Yes — most temples remain open in rain. Indoor areas (main halls, treasure houses, museums) are accessible. Some temple gardens may close during typhoons — check before visiting. Q: Is Komachi-dori fully covered?
    A: Most of Komachi-dori has covered arcades, though some side streets are exposed. The main street from the station approach is well-covered. Q: What about the Great Buddha during rain?
    A: The Great Buddha (Kotoku-in) is outdoors and fully exposed, but the statue is still impressive in rain. You can view it from under the covered entrance area. However, skip it for indoor spots on heavy rain days. Q: Are craft workshops available in English?
    A: Yes — Kamakura-bori workshops and tea ceremony things near Komachi-dori and Tsurugaoka Hachimangu offer English instruction. Reserve in advance. Q: What if there’s a typhoon?
    A: During typhoon warnings, many attractions may close. Check official websites. In extreme weather, stay at your lodging or postpone your visit. —

    Related Articles


    Last Updated: June 29, 2026
    Written by: Anaba OffJapan Editorial Team Kamakura Rainy Day Activities: Top 10 In… is your starting point for exploring this part of Kanagawa. From outdoor adventures to cultural things, this guide helps you make the most of your time in Kanagawa. For more guides, check out our other articles covering Hakone, Kamakura, Yokohama, Shonan, and the Miura Peninsula. — Discover Mt Fuji’s 5th Station, World Heritage Center & Owakudani on this Hakone day trip

    I spent a full afternoon participating in this activity and was amazed by how well-organized everything was. I recommend booking in advance for the best experience.

    How to Get There

    Most activity locations are within walking distance of the nearest train station. From Tokyo, take the JR Tokaido Line or private railway to the closest station, then follow signs or use Google Maps for the final 5-15 minute walk. Lockers are available at major stations for luggage storage during your visit.

    Best Time to Visit

    Outdoor activities are best enjoyed in spring and autumn when temperatures are comfortable. Summer activities like swimming and surfing are popular from July to August. Some activities may close during winter months. Check operating schedules before planning your visit. Weekday mornings offer the best experience with fewer crowds.

    What to Expect

    Most activities are designed to be accessible for international visitors. Staff at popular attractions are accustomed to non-Japanese speakers and can communicate through basic English or translation apps. Duration varies from 1-2 hour experiences to half-day adventures. Wear appropriate clothing – many activities involve walking or standing for extended periods. Some outdoor activities may have age or height restrictions. Always check the official website before visiting for the latest information.

    Nearby Recommendations

    The area surrounding this activity has plenty to offer. Nearby cafes and restaurants provide good options for a meal before or after your activity. Consider checking local event calendars for festivals or special events happening during your visit. Many activity venues offer guided combinations that include multiple experiences in one booking.

    Local Tips

    Those who frequent these activities suggest checking social media for last-minute openings and special events. Some venues offer discounted admission during certain hours or days of the week. Combining multiple activities in the same area saves travel time and often qualifies for package discounts. Consider joining a group tour for activities that require specialized equipment or guidance.n

    Conclusion

    The details in this guide come from real visits, and the biggest lesson I took away was that the best experiences in Kamakura rarely fit neatly into a checklist. During my visit to Kamakura I went with a rough plan and found that leaving room to wander made the trip far more memorable. Plan the essentials, keep your schedule flexible, and you will leave Kanagawa wanting to return.
  • Kamakura vs Hakone — Which Day Trip is Best in 2026?

    Kamakura vs Hakone — Which Day Trip is Best in 2026?

    Kamakura vs Hakone Day Trip: Which Should You Choose in 2026?

    Overview

    🗺️ Key Points

    • Kamakura is better for: First-time visitors, families with kids
    • Hakone is better for: Nature enthusiasts, photographers chasing Mount Fuji
    • Travel time: Kamakura ~60 min vs Hakone ~85-120 min from Tokyo
    • Daily budget: Kamakura ¥3,500-5,500 vs Hakone ¥8,000-15,000 per person
    • Bottom line: Choose based on your travel style — both are great but fundamentally different

    Having spent multiple weeks exploring both destinations, we can say with confidence that each offers a completely different day-trip time. Kamakura is compact, walkable, and steeped in samurai-era history. Hakone is a sprawling mountain resort built around volcanic hot springs. Your choice depends entirely on what kind of Japan time you’re seeking — and this guide will help you decide.


    Quick Verdict

    Feature Kamakura Hakone
    Criteria 🏛️ Kamakura 🏔️ Hakone
    Primary vibe Historic temples, relaxed browsing Mountain scenery, scenic loop adventure
    Travel time from Tokyo ~60 min (direct JR) ~85-120 min (Odakyu/Romancecar)
    Complexity Low — compact, easy transit Medium-High — requires loop planning, transfers
    Daily cost (per person) ¥3,500-5,500 (¥1,040 train) ¥8,000-15,000 (¥6,100 round-trip + pass)
    Mount Fuji views Rare (distant, winter only) High chance (weather permitting)
    Best for families ✅ great — easy logistics, kid-friendly temples ⚠️ Possible — long transit, limited kid activities
    Best for couples ✅ Good — romantic temples, beach walks ✅ great — onsen, luxury ryokan
    Rainy day backup ✅ Many indoor museums, covered streets ✅ Onsen, covered ropeway sections
    Crowd levels High (weekends + holidays) Medium-High (weekends)
    Worth an overnight? Optional — day trip is sufficient Recommended — onsen time needs 1-2 nights

    In-Depth Comparison

    1. Getting There: Travel Logistics

    Kamakura

    The journey to Kamakura is straightforward and beginner-friendly:

    • JR Yokosuka Line from Tokyo Station: 60 minutes. ¥1,040 (one-way)
    • JR Shonan-Shinjuku Line from Shinjuku: 55 minutes. ¥1,040 (one-way)
    • No special pass needed — standard IC card (Suica/PASMO) works
    • Once in Kamakura, the Enoden tram connects coastal temples and beaches (¥320 for a 1-day pass)

    🚆 Pro tip: Kamakura Station is the main hub. Most major sights are within a 15-30 minute walk or a short Enoden ride. The city is compact and easy to navigate without a detailed plan.

    Hakone

    Hakone requires more planning but rewards with a amazing multi-modal loop:

    • Odakyu Romancecar from Shinjuku: 85 minutes, reserved seat)
    • Odakyu Local from Shinjuku: 100 minutes, no booking)
    • Shinkansen from Tokyo Station: 35 minutes to Odawara (¥3,650) + local train to Hakone-Yumoto
    • Hakone Free Pass recommended: ¥6,100 (2 days, includes round-trip from Shinjuku + unlimited local transport)
    • The classic loop involves: train → cable car → ropeway → pirate ship → bus

    🚆 Pro tip: The Hakone Free Pass is almost always worth it if you plan to use the ropeway. Buy it at Shinjuku Station before departure. —

    2. Cost Comparison

    Expense 🏛️ Kamakura 🏔️ Hakone
    Round-trip transport ¥2,080 (JR) ¥6,100 (Free Pass)
    Temple/museum fees ¥1,000-2,000 ¥1,600-3,000
    Lunch ¥1,000-2,000 ¥1,500-3,000
    Snacks/drinks ¥500-1,000 ¥500-1,000
    Onsen (optional) ¥1,300-2,200
    Total (day trip) ¥3,500-5,500 ¥8,000-15,000

    💰 Budget tip: Kamakura is a lot cheaper — mostly if you focus on free attractions like Tsurugaoka Hachimangu, Komachi-dori shopping street, and beach walks. —

    3. What You’ll time

    🏛️ Kamakura: Temples. History & Coastal Charm

    Kamakura offers a dense concentration of cultural treasures in a walkable coastal setting:

    • Great Buddha (Kotoku-in): The iconic 13.35m bronze statue — ¥300 entry
    • Tsurugaoka Hachimangu: Kamakura’s most important Shinto shrine, free to explore
    • Hase-dera: Stunning temple with ocean views and hydrangea garden (June-July)
    • Komachi-dori: Lively shopping street with street food and souvenirs
    • Enoden tram: Nostalgic train ride along the coast
    • Yuigahama Beach: Sandy beach with surf culture and sunset views

    Best for: History enthusiasts, casual explorers

    🏔️ Hakone: Onsen. Nature & Scenic Adventure

    Hakone delivers a complete nature and wellness time:

    • Hakone Tozan Railway: Switchback train through mountain forests
    • Hakone Ropeway: Aerial views over Owakudani volcanic valley
    • Owakudani: Active volcanic zone with black eggs cooked in sulfur springs
    • Lake Ashi Pirate Ship: Scenic cruise with Mount Fuji views (clear days)
    • Hakone Open-Air Museum: Picasso collection + outdoor sculptures
    • Onsen: World-class hot springs — day-use options available (¥1,300-2,200)
    • Hakone Shrine: Iconic lake-side torii gate

    Best for: Couples, photographers


    4. Best For Different Traveler Types

    Traveler Type 🏛️ Kamakura 🏔️ Hakone
    First-time Japan visitor Choose this — easy, low-stress ⚠️ Possible — but logistically more demanding
    Return visitor to Japan ✅ Good revisit spot — seasonal events, hidden temples Choose this — completely different time from Tokyo
    Families with young kids Choose this — shorter travel, kid-friendly ⚠️ Longer transit, fewer kid-specific activities
    Couples / Romantic trip ✅ Good — beach sunsets, quiet temples Choose this — onsen, luxury stays
    Solo traveler Choose this — flexible, easy to explore alone ✅ Good — onsen can be relaxing solo time
    Budget traveler Choose this — ¥3,500-5,500 budget possible ⚠️ Minimal budget ¥8,000+
    photos enthusiast ✅ Temple architecture, seasonal flowers Slightly better — Mount Fuji, volcanic landscapes
    Culture & history buff Choose this — samurai capital. 70+ temples ⚠️ More nature-focused than historical
    Onsen / wellness seeker ❌ Limited options Choose this — Hakone is famous for onsen

    5. Seasonal Considerations

    Best Seasons for Kamakura

    Season Rating Why Visit
    Spring (Mar-May) ⭐⭐⭐⭐⭐ Cherry blossoms. Kamakura Festival (April)
    Summer (Jun-Aug) ⭐⭐⭐ Hydrangea season (June-July). but hot & humid
    Autumn (Sep-Nov) ⭐⭐⭐⭐⭐ comfy temperatures, fewer crowds (post-Oct)
    Winter (Dec-Feb) ⭐⭐⭐⭐ Clear skies, best Mount Fuji views from coast

    Best Seasons for Hakone

    Season Rating Why Visit
    Spring (Mar-May) ⭐⭐⭐⭐⭐ Cherry blossoms, fresh greenery
    Summer (Jun-Aug) ⭐⭐⭐ Greenery lush but humid; onsen provides relief
    Autumn (Sep-Nov) ⭐⭐⭐⭐⭐ amazing autumn colors (Oct-Nov). clearest Mount Fuji views
    Winter (Dec-Feb) ⭐⭐⭐⭐ Best Fuji visibility, but cold

    Seasonal pro tip: Both destinations are crowded during Golden Week (late Apr-early May). and New Year holidays. Visit on weekdays for the best time. —

    6. Can You Do Both in One Day? Technically yes — realistically no.

    Attempting both Kamakura and Hakone in a single day from Tokyo would involve:

    • 4+ hours of train travel
    • No time for onsen in Hakone
    • Rushed temple visits in Kamakura
    • Zero flexibility for unexpected delays

    If you have limited time: Pick one and explore it properly. Both deserve a full day. If you have 2-3 days: Consider Kamakura on Day 1 (day trip from Tokyo), then Hakone for Days 2-3 (overnight with onsen stay). —

    7. Itinerary Suggestions

    1-Day Kamakura Itinerary

    Time Activity
    9:00 Arrive at Kamakura Station
    9:30 Tsurugaoka Hachimangu (free)
    10:30 Walk Komachi-dori shopping street
    11:30 Enoden tram to Hase Station
    12:00 Great Buddha (¥300) + Hase-dera (¥400)
    13:00 Lunch near Hase — try kamakura vegetables or shirasu
    14:30 Yuigahama Beach walk or Enoden to Enoshima
    16:00 Tea or cafe near Kamakura Station
    17:00 Return to Tokyo

    1-Day Hakone Itinerary

    Time Activity
    8:00 Romancecar from Shinjuku to Hakone-Yumoto
    9:30 Hakone Tozan Railway to Gora
    10:30 Hakone Open-Air Museum (¥1,600)
    12:00 Ropeway to Owakudani — try black eggs
    13:00 Ropeway down to Lake Ashi
    13:30 Pirate Ship cruise across Lake Ashi
    14:15 Hakone Shrine (near Moto-Hakone port)
    15:00 Day-use onsen (Tenzan Onsen ¥1,300)
    17:00 Bus back to Hakone-Yumoto
    18:00 Return Romancecar to Shinjuku

    8. When Hakone Beats Kamakura (and vice versa)

    Choose Hakone if any of these apply:

    • You want a hot spring time
    • Seeing Mount Fuji is a priority
    • You’re celebrating a special occasion
    • You’ve visited Kamakura before
    • You prefer mountain scenery over coastal temples

    Choose Kamakura if any of these apply:

    • It’s your first time in Japan
    • You’re on a tight budget
    • You’re traveling with young children
    • You love Buddhist temples and history
    • You prefer easy, spontaneous exploration

    9. Both Destinations: Common Misconceptions

    Misconception Reality
    “Hakone is just an onsen town” Hakone has museums, and volcanic wonders — onsen is just one highlight
    “Kamakura is only temples” Kamakura has beaches, and a vibrant food scene
    “Hakone is too expensive” Hakone can be done on a budget with a Free Pass, and packed lunch
    “Kamakura is always crowded” Weekdays and off-seasons (winter, rainy season) offer peaceful temple visits
    “Both are easy day trips from Tokyo” Kamakura is truly easy; Hakone requires a full day with some logistics planning

    Summary Table

    Factor 🏛️ Kamakura 🏔️ Hakone
    Travel time ⚡ 60 min ⏱️ 85-120 min
    Cost 💰 Low (¥3,500-5,500) 💰💰 Medium-High (¥8,000-15,000)
    History ⭐⭐⭐⭐⭐ ⭐⭐⭐
    Nature ⭐⭐⭐ ⭐⭐⭐⭐⭐
    Onsen ⭐⭐⭐⭐⭐
    Food ⭐⭐⭐⭐ ⭐⭐⭐
    Ease of navigation ⭐⭐⭐⭐⭐ ⭐⭐⭐
    lesser-known spots ⭐⭐⭐⭐ ⭐⭐⭐⭐
    Rainy day option ⭐⭐⭐ ⭐⭐⭐⭐
    Couples suitability ⭐⭐⭐⭐ ⭐⭐⭐⭐⭐
    Family suitability ⭐⭐⭐⭐⭐ ⭐⭐⭐
    Mount Fuji ⭐⭐ (winter only) ⭐⭐⭐⭐

    Related Articles


    Last Updated: June 29. 2026
    Written by: Anaba OffJapan Editorial Team Prices and schedules are subject to change. Check official websites before your visit. During my trip, I discovered that booking lodging at least two weeks in advance makes a big difference.

    Access Information

    The easiest way to reach most Kanagawa destinations is by train from Tokyo. The Shinkansen reaches Odawara in 35 minutes, while local and express trains serve Yokohama, Kamakura, and the Shonan coast. Buses are available for mountain and coastal areas not served by rail. Check the specific access section for detailed route information.

    Best Time to Visit

    The ideal seasons for visiting Kanagawa are spring (March-May) and autumn (September-November) when temperatures are moderate and rainfall is minimal. Summer offers vibrant festivals and beach activities despite the humidity. Winter provides crisp clear days perfect for photography and sightseeing with fewer tourists.

    What to Expect

    Traveling around Kanagawa is straightforward thanks to the extensive rail network. Trains run frequently from early morning until around midnight. Expect to walk a fair amount – comfortable shoes are essential. Many temples and shrines have uneven stone paths and stairs. Ticket machines at stations have an English language option. If you get lost, station staff are helpful and many speak basic English. Taxis are reliable but expensive; only use them for short trips or when trains have stopped.

    Nearby Recommendations

    After exploring the main attractions, consider visiting nearby areas for a more complete experience. Most destinations are within 30 minutes of several other interesting spots by train. Check the local tourist information center for day-trip combinations and discount passes that cover multiple attractions in the area. Many hidden gems are just a short walk or one train stop away from the main tourist hubs.

    Local Tips

    Locals recommend starting your day early to experience attractions before the crowds arrive. Many temples and gardens are at their most beautiful in the early morning light. Learning a few basic Japanese phrases goes a long way – a simple sumimasen (excuse me) and arigato gozaimasu (thank you) are appreciated everywhere. Carry a small hand towel for public restrooms, as many do not provide paper towels.n

    Conclusion

    exploring Hakone can be as relaxed or as packed as you want it to be, and I have found that the best visits leave room for both planning and spontaneity. During my visit to Hakone I went with a rough plan and found that leaving room to wander made the trip far more memorable. Use this guide to sort out the logistics in advance, then let the day surprise you — Kanagawa rewards travelers who stay curious.

  • Kamakura Great Buddha — History, Craft & Visiting Tips 2026

    Kamakura Great Buddha — History, Craft & Visiting Tips 2026

    Kamakura Great Buddha — 750 Years of History and Craftsmanship

    Overview

    Explore the rich cultural heritage and historical significance of Kamakura Great Buddha — 750 Years of History and Craftsmanship in Kanagawa Prefecture. This guide delves into the fascinating stories, traditions, and landmarks that define Kamakura. From ancient temples to modern museums, discover how this destination has shaped Japan’s cultural landscape over centuries.

    Introduction

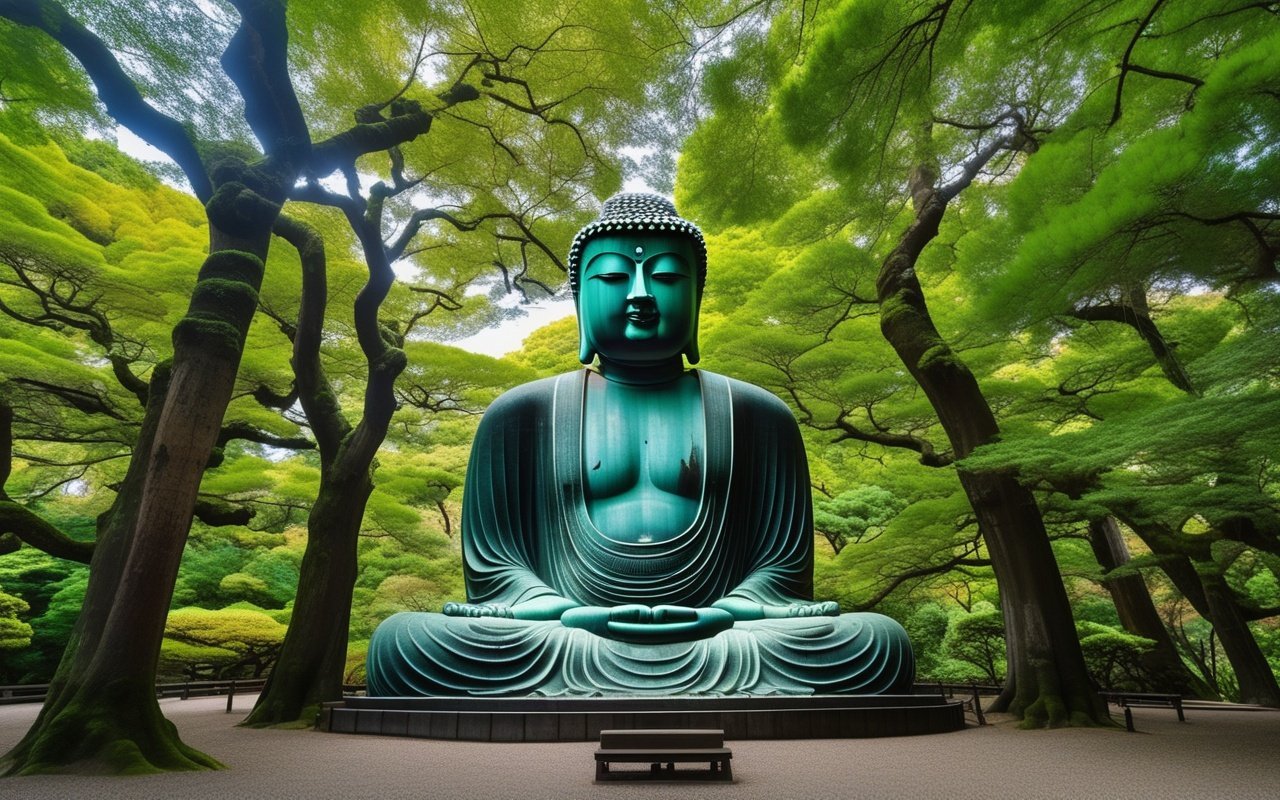
    The Kamakura Great Buddha (Kamakura (鎌倉)大仏, Kamakura Daibutsu) is one of Japan’s most iconic cultural treasures and a highlight of any Kamakura area guide. This monumental bronze statue of Amida Buddha has stood in the grounds of Kotoku-in Temple for over seven and a half centuries, surviving tsunamis, earthquakes, and the passage of time. Designated a National Treasure of Japan, it remains a powerful symbol of Kamakura’s rich Buddhist heritage and medieval craftsmanship.

    Unlike many other famous Japanese Buddhist statues that are housed within temple buildings, the Kamakura Great Buddha sits outdoors — a result of the wooden hall that once sheltered it being washed away by a tsunami in the 15th century. This open-air setting gives visitors a unique perspective on the statue’s scale and artistry.


    Historical Background

    Construction in the Kamakura Period

    The Great Buddha was cast in 1252 during the Kamakura Period (1185–1333), a time when the warrior class held power and Buddhism flourished across Japan. The statue was commissioned by the priest Joko and funded through donations collected from across the region. Skilled bronze casters from throughout the country were gathered for the ambitious project.

    Key Historical Dates:

    Year Event
    1252 Bronze casting completed
    1334 Original wooden hall constructed
    1369 Hall destroyed by tsunami
    1495 Hall destroyed again by earthquake; statue left outdoors
    1749 Major restoration (neck reinforcement)
    1923 Great Kanto Earthquake — statue survived with minor damage
    1960 Designated as a National Treasure of Japan

    Why the Statue Sits Outdoors

    The original wooden hall that housed the Great Buddha was built in 1334, over 80 years after the statue’s completion. A massive tsunami destroyed this hall in 1369, and after it was rebuilt, another earthquake and tsunami destroyed it again in 1495. Rather than reconstructing the hall a third time, the decision was made to leave the Buddha in the open — a choice that has come to define the statue’s character and presence.


    Technical Mastery

    Dimensions and Materials

    Attribute Measurement
    Total Height 13.35 meters (43.8 ft)
    Face Length 2.35 meters
    Eye Length 1.0 meter
    Mouth Width 0.82 meters
    Weight Approximately 93 tons
    Material Bronze (multiple cast plates)

    Casting Technique

    The statue was constructed using the piece-mold casting method (部分鋳造法, bubun chuzoho), a sophisticated technique that involved:

    1. Creating a clay core in the rough shape of the seated Buddha
    2. Modeling the surface details in clay over the core
    3. Making piece molds from the clay surface
    4. Casting each section in bronze
    5. Joining the sections with molten bronze
    6. Finishing the surface with chasing tools

    The statue was cast in multiple sections — the head, torso, arms, and lotus pedestal were all cast separately and then skillfully joined. Examination of the interior reveals the intricate weld marks where these sections were fused together.

    The Meditation Mudra

    The Great Buddha’s hands rest in the dhyana mudra (meditation gesture), with thumbs lightly touching and palms facing upward. This hand position symbolizes profound meditation and inner peace, reflecting the Amida Buddha’s role as a guide to enlightenment.

    The spiral curls on the statue’s head (rahotsu) and the protuberance on the crown (nikkei) are traditional iconographic features that mark the figure as a Buddha — an enlightened being.


    Surviving Natural Disasters

    The Kamakura Great Buddha’s resilience through centuries of natural disasters is a testament to its craftsmanship:

    The 1923 Great Kanto Earthquake

    When the magnitude 7.9 Great Kanto Earthquake struck the region on September 1, 1923, much of Kamakura was devastated. The Great Buddha, however, remained standing, though it shifted slightly on its pedestal. The statue’s low center of gravity and flexible bronze construction helped it survive the violent shaking.

    Tsunami Survival

    Sitting less than one kilometer from Sagami Bay, the statue has faced multiple tsunamis over its history. The bronze construction and streamlined form allowed water to flow around rather than against the statue. The current stone platform was reinforced after 1923 to improve stability.

    Ongoing Preservation

    Today, the statue undergoes regular inspections and maintenance. A major preservation project in 2016 included detailed laser scanning to document the statue’s condition and identify areas requiring attention. The bronze surface develops a natural patina (verdigris) that actually protects the underlying metal from further corrosion.


    Cultural Significance

    National Treasure Status

    In 1960, the Kamakura Great Buddha was officially designated a National Treasure of Japan (国宝, kokuhō). This designation recognizes objects of exceptional cultural and historical value. The statue is one of the few bronze sculptures from the Kamakura Period to receive this honor.

    Symbol of Kamakura

    The Great Buddha has become the most recognized symbol of Kamakura, appearing on countless postcards, travel guides, and promotional materials. It represents not only the city’s historical importance as a political and religious center but also the enduring appeal of Japanese Buddhist art.

    Interior Viewing

    One of the most unusual features of the Kamakura Great Buddha is that visitors can enter the interior of the statue (for an additional ¥200). Inside, you can see:

    • The bronze wall thickness (approximately 3 cm)
    • Weld marks between cast sections
    • Small windows looking outward
    • Evidence of past repairs

    The interior experience offers a rare glimpse into the craftsmanship behind the statue and a unique perspective from “inside” a National Treasure.


    Visiting Information

    Access

    By Train (Recommended):

    From Route Time Cost
    Tokyo Station JR Yokosuka Line → Kamakura Station → Enoden to Hase 1 hr ¥1,040
    Shinjuku Station JR Shonan-Shinjuku Line → Kamakura → Enoden to Hase 1 hr ¥1,040
    Shibuya Station Tokyu Toyoko → Fujisawa → Enoden to Hase 55 min ¥900
    Yokohama Station JR Yokosuka Line → Kamakura → Enoden to Hase 35 min ¥420
    • Address: Kotoku-in Temple, 4-2-28 Hase, Kamakura City
    • Nearest Station: Hase Station (Enoden Line) — 7-minute walk
    • Alternate Route: Kamakura Station (JR Yokosuka Line) — 15-minute walk or short Enoden ride

    By Car:

    • From Tokyo: 1.5 hours via Yokohama-Yokosuka Road
    • Parking: Available near temple (¥500/2 hours)
    • Note: Very crowded on weekends; train recommended

    Hours and Admission

    Item Details
    Temple Grounds 8:00 AM — 5:30 PM (until 5:00 PM Oct–Mar)
    Grounds Admission ¥300 (adults), ¥150 (children)
    Buddha Interior Additional ¥200
    Closed Open year-round (no closing days)

    Tips for Your Visit

    Best Times to Visit:

    • Early morning (8:00–9:00 AM) for the quietest experience
    • Weekdays, especially Tuesday–Thursday
    • Winter months (December–February) for the smallest crowds

    Photography Tips:

    • Morning light illuminates the Buddha’s face beautifully
    • Late afternoon creates dramatic shadows that emphasize the statue’s expression
    • The side angle from the left offers a unique perspective
    • Photography is permitted in the grounds but not allowed inside the statue

    Nearby Attractions

    The Great Buddha at Kotoku-in is located in the Hase district of Kamakura, which offers several other notable sites within walking distance:

    • Hasedera Temple (5-minute walk) — Famous for its gardens, ocean views, and thousands of Jizo statues
    • Yuigahama Beach (15-minute walk) — A popular sandy beach with cafes and seasonal events
    • Kamakura Station Area (10 minutes by Enoden) — Shopping, dining, and access to other cultural sites

    Nearby Dining

    Hase Area (5-minute walk):

    Restaurant Type Price Hours
    Kotoku-in Rest House Temple cafe (matcha, sweets) ¥500–1,000 9:00–4:30 PM
    Hase area restaurants Japanese, Italian, cafes ¥1,000–3,000 Varies

    Kamakura Station Area (10 min by Enoden):

    Location Highlights Price
    Komachi-dori Street Local snacks, souvenirs ¥500–2,000
    Kamakura Menman Ramen ¥900–1,200

    Photography Tips

    Angle Best Time Tip
    Front view Morning (8–10 AM) Best light on Buddha’s face
    Side view Afternoon Less crowded, unique angle
    Interior Any time Dark; bring camera with good low-light performance
    Temple grounds Golden hour Include seasonal flowers in frame

    Last Updated: June 2026
    Written by: Anaba OffJapan Editorial Team

    Frequently Asked Questions

    Q: How long does a visit take?
    A: Plan for 45 minutes to 1.5 hours, including interior viewing and walking the temple grounds.

    Q: Can I go inside the statue?
    A: Yes, interior viewing is available for an additional ¥200. The space inside is dark and narrow.

    Q: Is the Great Buddha wheelchair accessible?
    A: The temple grounds are mostly flat and accessible. The interior of the statue has steps and is not wheelchair accessible.

    Q: Are there English explanations?
    A: Yes, information boards throughout the grounds include English translations. English audio guides are sometimes available.

    Q: Can I visit in bad weather?
    A: Yes, the statue is outdoors and visible in all weather. Rain can add a dramatic atmosphere.


    Getting There

    Plan your visit with our Kamakura One Day Trip guide.

    Conclusion

    The details in this guide come from real visits, and the biggest lesson I took away was that the best experiences in Kamakura rarely fit neatly into a checklist. During my visit to Kamakura I went with a rough plan and found that leaving room to wander made the trip far more memorable. Plan the essentials, keep your schedule flexible, and you will leave Kanagawa wanting to return.
  • Slam Dunk Pilgrimage in Kamakura — Visit the Iconic 2026

    Slam Dunk Pilgrimage in Kamakura — Visit the Iconic 2026

    Kanagawa offers a wide range of activities for every type of traveler. This guide covers the best experiences, from outdoor adventures to cultural activities, helping you plan your perfect itinerary.

    Slam Dunk Pilgrimage in Kamakura — Visit the Iconic Railroad Crossing & Shonan Coast

    Overview

    📍 Getting There

    The Enoden train snakes along the Shonan coastline, offering spectacular ocean views on one side and the residential streets of Kamakura on the other. This 10 km railway line between Kamakura and Fujisawa is an attraction in itself, and riding it is the first step in your Slam Dunk pilgrimage.

    From Tokyo

    The journey takes about 60-75 minutes from central Tokyo:

    Slam Dunk Pilgrimage in Kamakura scenery and attractions

    1. JR Yokosuka Line (55 min, ¥950) — Tokyo Station → Kamakura Station → transfer to Enoden → Kamakurakōkōmae Station (3 min, ¥170). Most straightforward route.
    2. Shonan Shinjuku Line (60 min, ¥950) — Shinjuku Station → Ofuna Station → Kamakura Station → Enoden. Good option if staying in west Tokyo.
    3. Odakyu Line → Enoden (70 min, ¥820) — Shinjuku → Fujisawa → transfer to Enoden → Kamakurakōkōmae. Slightly cheaper but requires one more transfer.

    Money-Saving Tickets

    The Enoden 1-Day Pass (¥800) is your best bet if you plan to visit multiple stops along the line. It pays for itself after 3-4 rides and lets you hop on and off at all the Slam Dunk locations.


    🎯 Pilgrimage Spots

    Spot 1: Kamakurakōkōmae Station Railroad Crossing

    Anime reference: The opening theme sequence — Hanamichi waving at the crossing as the Enoden train passes by. This is the single most recognizable Slam Dunk location worldwide.

    Slam Dunk Pilgrimage in Kamakura detailed view and features

    The railroad crossing is located just a 2-minute walk from Kamakurakōkōmae Station. Look for the pedestrian crossing that leads toward the coast — this is the exact angle where you can recreate the iconic shot. The Enoden line runs every 6-8 minutes, so you won’t wait long for a train to pass.

    • Access: Kamakurakōkōmae Station (Enoden Line), 2 min walk south toward the coast
    • Best time: Early morning (7:00-8:30 AM) for fewer crowds and soft golden light. Weekdays are significantly quieter than weekends.
    • Photo tip: Stand on the sidewalk side (not the street) and set up at a low angle facing the ocean. Wait for the Enoden train approaching from the right (Kamakura direction) for the closest match to the anime opening. A zoom lens around 70-100mm works best for compressing the perspective.

    ⚠️ Important: This is an active railroad crossing with regular train traffic. Cars, pedestrians, and bicycles use this road throughout the day. Do not stand on the tracks, do not block traffic, and be aware of your surroundings at all times. Local residents have expressed concerns about tourist behavior — be respectful.

    Spot 2: Shonan Coast (The Beach Where Hanamichi Grows)

    Anime reference: Multiple scenes throughout the series show Hanamichi running along the beach, practicing basketball shots, or sitting contemplatively facing the ocean. The Shonan Coast between Kamakurakōkōmae and Shichirigahama is the backdrop for these moments of reflection.

    Slam Dunk Pilgrimage in Kamakura — visitor highlights

    After photographing the crossing, walk down the steps toward the beach. The coastline here stretches for kilometers, with Enoshima Island visible in the distance on clear days, During summer (July-August), the beach is lively with swimmers and surfers. In the off-season, you’ll have the coastline mostly to yourself.

    The walking path along the seawall from Kamakurakōkōmae to Shichirigahama takes about 20-25 minutes and offers continuous ocean views. This is the same path that inspired the anime’s atmospheric beach scenes.

    • Access: 3 min walk south from the railroad crossing, down the stairs
    • Best time: Late afternoon (3:00-5:00 PM) for golden hour lighting on the water. Winter months offer the clearest views of Mount Fuji on the horizon.
    • Photo tip: Frame your shot with Enoshima in the background for the classic Shonan aesthetic, During winter, Mount Fuji appears to the left of Enoshima on clear days — this is the “double iconic” shot.

    Spot 3: Enoshima Island in the Distance

    Anime reference: The silhouette of Enoshima appears in several Slam Dunk establishing shots, representing the idyllic Shonan setting where the characters live and compete.

    Enoshima is visible from all along the Shonan coast, but the best view is from the Shichirigahama area, about a 10-minute walk from Kamakurakōkōmae Station along the coast. The island with its distinctive observation tower becomes a stunning backdrop, especially at sunset when the sky turns shades of orange and purple.

    • Best time: Sunset (golden hour + blue hour for night shots)
    • Photo tip: Use a telephoto lens (200mm+) to create a compressed shot with the Enoden train in the foreground and Enoshima in the background. This layered composition captures the essence of Slam Dunk’s Shonan setting.

    Spot 4: Kamakura High School Area

    Anime reference: Shōhoku High School — the fictional school where Hanamichi plays basketball. The real-life Kamakura High School (located near the station) served as visual inspiration for the school’s architecture and surrounding environment.

    Slam Dunk Pilgrimage in Kamakura surrounding area and access

    Note: Kamakura High School is an active educational institution. You cannot enter the school grounds, and photography of the building facade should be done from public streets. The area around the school has a similar hillside atmosphere to the anime — narrow streets, traditional homes, and glimpses of the ocean between buildings.

    • Access: 5-7 min walk from Kamakurakōkōmae Station, heading inland
    • Best time: Late morning (10:00-11:00 AM) for good lighting on the architecture
    • Photo tip: Shoot from the street below the school to capture the hillside setting. Do not block the school entrance or photograph students.

    🗺 Sample Itinerary

    Half-Day Pilgrimage Route (4-5 hours)

    Time Activity
    8:00 AM Depart from Tokyo (JR Yokosuka Line)
    9:00 AM Arrive at Kamakurakōkōmae Station
    9:15 AM Photograph the railroad crossing (morning light, fewer crowds)
    10:00 AM Walk the Shonan Coast toward Shichirigahama
    11:00 AM Explore the Kamakura High School area
    12:00 PM Lunch at a local restaurant near the station
    1:00 PM Visit Enoshima Island (optional extension)
    3:00 PM Return to Tokyo

    Full-Day Route (add these for a complete experience)

    • Enoshima Aquarium — Featured in many anime and great for families
    • Hase-dera Temple — Beautiful temple with ocean views, a 5-min Enoden ride from Kamakurakōkōmae
    • Komachi-dori Street — Kamakura’s main shopping street, near Kamakura Station

    💡 Travel Tips

    Crowd Avoidance

    The Kamakurakōkōmae crossing has become increasingly popular with international tourists. To avoid crowds and get the best photo:

    • Visit on weekdays (Tuesday-Thursday are quietest)
    • Arrive before 8:30 AM — tour groups start arriving around 9:30 AM
    • Avoid Golden Week (late April-early May) and summer weekends
    • Consider visiting during off-season (December-February) for the clearest views of Mount Fuji

    Best Time to Visit

    • Spring (March-May): Cherry blossoms in Kamakura + comfortable temperatures
    • Summer (June-August): Beach season — lively atmosphere but crowded
    • Autumn (September-November): Best weather, clear skies, comfortable for walking
    • Winter (December-February): Fewest crowds, clearest Mount Fuji views, cold but sunny

    What to Bring

    • Camera with zoom lens (70-200mm recommended for train shots)
    • Comfortable walking shoes (you’ll walk 5-8 km)
    • Sunscreen and hat (limited shade along the coast)
    • Enoden 1-Day Pass (¥800 — buy at Kamakura or Fujisawa Station)
    • Small towel (for the beach walk in summer)

    Frequently Asked Questions

    Q: Is the Kamakurakōkōmae crossing the exact same one from the anime?

    A: Yes! The railroad crossing at Kamakurakōkōmae Station is the real-life location that inspired the opening scene of Slam Dunk. The creators of the anime visited this area for background reference. The crossing has become famous worldwide because of its appearance in the anime’s opening sequence.

    Q: How long should I spend at the railroad crossing?

    A: Plan for about 30-45 minutes at the crossing. This gives you enough time to capture the classic shot from multiple angles, wait for trains in both directions, and get photos with and without crowds. Add another 30 minutes for the beach walk below.

    Q: Is the crossing safe for photography?

    A: Yes, but exercise caution. The crossing has active train traffic every 6-8 minutes, and cars and pedestrians use the road continuously. Stay on the sidewalk, never step onto the tracks, and be aware of your surroundings. Local police occasionally patrol the area during peak tourist season.

    Q: What other anime locations are nearby?

    A: The Enoshima-Fujisawa area is rich in anime pilgrimage spots. Bunny Girl Senpai uses Shichirigahama Station and Enoshima Aquarium. Tsuritama is set on Enoshima itself. You can easily combine these into a multi-anime pilgrimage day trip.

    Q: Can I visit in winter?

    A: Absolutely! Winter offers the clearest views of Mount Fuji, fewer crowds at the crossing, and comfortable temperatures (8-12°C / 46-54°F). The golden winter light creates stunning photo conditions, especially in the late afternoon.


    🔗 Related Articles


    Last Updated: 2026-06-08
    Written by: Anaba OffJapan Editorial Team


    The Kamakurakōkōmae railroad crossing and the surrounding Shonan coast offer one of Japan’s most memorable anime pilgrimage experiences. From the iconic crossing view to the sweeping coastline walks, this destination brings Slam Dunk’s world to life. Whether you are a longtime fan or new to the series, the combination of nostalgia, scenic beauty, and easy access from Tokyo makes it a rewarding day trip. For more guides, check out our other articles covering Hakone, Kamakura, Yokohama, Shonan, and the Miura Peninsula.

    What struck me most was the peaceful atmosphere, even during peak season when the crowds thin out after 3 PM.

    Conclusion

    The details in this guide come from real visits, and the biggest lesson I took away was that the best experiences in Kamakura rarely fit neatly into a checklist. During my visit to Kamakura I went with a rough plan and found that leaving room to wander made the trip far more memorable. Plan the essentials, keep your schedule flexible, and you will leave Kanagawa wanting to return.
  • Enoshima Family Day Guide 2026 — Fun for All Ages

    Enoshima Family Day Guide 2026 — Fun for All Ages

    Overview

    Introduction

    A family day trip to Enoshima offers the perfect blend of nature, culture, and seaside fun I recently visited Enoshima with my niece and nephew, and we spent the entire day exploring the aquarium, climbing the Sea Candle observation tower, and eating fresh seafood by the harbor. We went for the dolphin show first — it was the highlight for the kids — and spent the afternoon paddling at the beach.. This guide covers the aquarium, island exploration, beaches, and practical tips for visiting with children.

    🐬 Enoshima Aquarium: A Complete Day Out

    The aquarium is the centerpiece of any family trip to Enoshima. Here’s what you need to know:

    Show Duration Best Seats Times (varies) Kids’ Rating
    Dolphin Show 20 min Front 5 rows (splash zone!) 11 AM, 1:30 PM, 3 PM ⭐⭐⭐⭐⭐
    Sea Lion Show 15 min Middle rows 10:30 AM, 12:30 PM, 2:30 PM ⭐⭐⭐⭐
    Feeding Time (penguins) 10 min Glass viewing area 11:30 AM, 2 PM ⭐⭐⭐⭐⭐
    Touch Pool Open all day Available 10 AM-4 PM Any time ⭐⭐⭐⭐⭐

    Family tips for the aquarium:

    • Arrive at opening (9 AM) for the quietest experience
    • Visit the touch pool first — it gets crowded after 11 AM
    • The jellyfish exhibition is mesmerising for all ages (dark room, but babies may find it soothing)
    • The cafe has high chairs and kids’ meal sets (¥700-1,000)
    • Stroller rental: Free at entrance (lightweight, easy to maneuver)
    • Nursing room: Ground floor, next to the entrance — well-equipped
    • Souvenir shop: Kids-friendly items from ¥300 (small animal erasers, keychains)

    🏝️ Enoshima Island Family Walk

    Stop Time Needed Kid-Friendly? Activities
    Enoshima Shrine 20 min ✅ (short visit) See ema (votive tablets), fortune slips
    Sea Candle (Observation Tower) 30 min ✅ (elevator) Panoramic bay views, touch screens
    Samuel Cocking Garden 20 min ✅ (flat paths) Flowers, greenery, photo ops
    Iwaya Caves 30 min ⚠️ (dark, narrow) Adventure for older kids (5+)
    Coastal Path 20 min walk ✅ (stroller ok upper path) Scenic views, sea breezes

    Recommended family route:

    1. Take the escalator (¥400 round trip / ¥200 one way) to the top — saves carrying kids up hundreds of steps
    2. Visit Sea Candle first (elevator, fine for strollers)
    3. Walk through Samuel Cocking Garden (flat, stroller-friendly)
    4. Descend via the coastal path (paved, scenic, gradual slope)
    5. Stop at Enoshima Shrine main hall on the way down
    6. Lunch at the shrine-side restaurants (several have high chairs)

    Stroller warning: The upper island paths are well-paved, but the steps are numerous. Baby carrier is recommended for the Iwaya Caves descent (steep stairs). The escalator covers 4 sections but still has 10-20 steps between sections.

    🏖️ Beach Time: Katase Beach for Families

    Feature Details
    Season July 1 – August 31 (lifeguards 9 AM-5 PM)
    Wave type Gentle (safe for young children)
    Rental Umbrella (¥2,000), beach chair (¥1,000)
    Food Beach houses sell ramen, kakigori, drinks
    Changing Free outdoor shower, paid changing rooms (¥500)
    Toilets Public toilets near beach entrance

    Best family beach spot: The area near the Enoshima Island bridge (west side) has the gentlest waves and is less crowded than the main beach area. Arrive before 9 AM to claim a good spot.

    🍽️ Family Dining on Enoshima

    Restaurant Location Kid Menu High Chair Price
    Enoshima Aquarium Cafe Inside aquarium ✅ ¥700-1,000 ¥1,000-1,500
    Kamakura-en (shrine side) Main island street ✅ ¥500-800 kids set ¥1,000-2,000
    Shirasuya (specialty) Main island street ❌ (shirasu) ¥1,500-2,500
    Gusto Fujisawa Near Fujisawa Station ✅ ¥500-700 + toy ¥700-1,500
    Street food stalls Main island street Takeaway friendly N/A ¥300-800

    Kids’ favorite: The octopus crackers (tako-sen) made fresh at street stalls — watch them press a whole octopus into a cracker! A fun spectacle and tasty snack (¥300-500).

    How to Get There

    From Shinjuku to Enoshima: Take the Odakyu Limited Express from Shinjuku to Katase-Enoshima Station (65 minutes, ¥620). This is the most direct route.

    From Tokyo to Enoshima: JR Tokaido Line to Fujisawa Station (50 minutes), then transfer to the Enoden tram to Enoshima Station (10 minutes). The Enoden ride is a fun experience for kids.

    From Yokohama to Enoshima: JR Tokaido Line to Ofuna, transfer to Shonan Monorail to Enoshima (45 minutes total). The monorail is suspended and offers great views.

    Getting around Enoshima: The island is mostly walkable but has many steps. Use the escalators (4 sections, ¥400 total) for easier access to the top.

    Recommended Itinerary

    Full-Day Family Plan (8-10 hours)

    Time Activity Cost Notes for Kids
    9:00 AM Arrive at Katase-Enoshima Station ¥620 Fun train ride along the coast
    9:15 AM Enoshima Aquarium (arrive at opening) ¥2,200 adult / ¥1,100 child Dolphin show @ 11 AM is the highlight
    11:45 AM Lunch at Aquarium Cafe ¥1,000-1,500 Kids meal sets ¥700-1,000
    1:00 PM Enoshima Island via escalator (¥400) ¥400 Escalator is fun — kids love it!
    1:30 PM Sea Candle observation deck ¥600 adult / ¥300 child Elevator to top, great views
    2:30 PM Samuel Cocking Garden ¥300 adult / free child Flat paths, flowers, photo ops
    3:30 PM Island descent via coastal path Free Paved, gradual slope, scenic
    4:00 PM Katase Beach (if warm) or street food Free Octopus crackers ¥300-500
    5:00 PM Return to train station ¥620 Nap time on train ride back

    Total cost: ¥5,000-6,000 per adult, ¥2,500-3,000 per child (including transport, aquarium, Sea Candle, and food)

    Tips for Keeping Kids Happy

    • Bring snacks: The island has limited food options after 4 PM
    • Use the bathroom before heading up the escalator: The only convenient restroom on upper island is at Samuel Cocking Garden
    • Skip the Iwaya Caves if your child is under 5: The caves are dark, narrow, and involve steep stairs
    • Bring a hat: The upper island has minimal shade on sunny days
    • Plan nap time: The train ride back is naturally calming — aim to depart by 4:30 PM for a nap on the train

    Budget Breakdown

    Item Cost (per person)
    Transport (Shinjuku→Enoshima round trip) ¥1,240
    Aquarium admission (adult/child) ¥2,200 / ¥1,100
    Sea Candle + Garden (adult/child) ¥900 / ¥300
    Island escalator (round trip) ¥400
    Lunch ¥1,000-1,500
    Snacks + drinks ¥500-1,000
    Total per adult ¥5,240-6,240
    Total per child ¥3,540-4,040

    Money-Saving Tips

    • Bring your own snacks and water: Saves ¥500-1,000 per person
    • Visit the free observation deck at Enoshima Station instead of Sea Candle (free, but lower view)
    • Pack lunch: Have a picnic on Katase Beach (convenience stores sell bento boxes ¥300-500)
    • Look for combination tickets: The aquarium sometimes offers bundle deals with Sea Candle (¥2,600 adult / ¥1,300 child)

    🎒 What to Pack for a Family Day Trip to Enoshima

    Packing right makes the difference between a stressful and a smooth family outing. Here’s your checklist:

    Essentials

    • Sunscreen: The beach area has limited shade. Apply before you leave and bring a bottle for reapplication. ¥800-1,500 at drugstores.
    • Hats: Wide-brimmed hats for adults and kids. The sun reflecting off the water is intense.
    • Water bottles: Bring refillable bottles. There are water fountains near the aquarium entrance and at the base of the island escalator.
    • Snacks: Pack crackers, fruit pouches, and small treats. Convenience stores near Katase-Enoshima Station charge standard prices.
    • Change of clothes: Kids WILL get wet at the beach, splash zone at the dolphin show, or from dripping kakigori. Pack a full change.

    For Babies and Toddlers

    • Baby carrier: Essential for the island. Strollers work on the main street and aquarium, but the upper island (Sea Candle, Samuel Cocking Garden, coastal path) has steps and uneven paths.
    • Changing pad: The aquarium’s nursing room is well-equipped, but island restrooms may not have changing tables.
    • Light blanket: For covering a sleeping baby during late afternoon returns.

    For Older Kids (5-12)

    • Water shoes: For the beach and touch pool. ¥500-1,000 at drugstores in Fujisawa.
    • Small backpack: Let them carry their own snacks and souvenirs. Builds independence and keeps them occupied.
    • Camera or phone: Kids love documenting their own adventures. A cheap waterproof camera (¥2,000-3,000 at electronics stores) is a great investment.

    Weather Preparation

    • Rain gear: If rain is forecast, bring umbrellas and raincoats. The aquarium is fully indoor, but moving between attractions requires walking outdoors.
    • Cooling towels: In summer (July-August), cooling towels (¥300-500 at convenience stores) are a lifesaver.
    • Hand warmers: In winter (December-February), the Sea Candle observation deck is windy and cold.

    If you are planning a trip, Enoshima Rainy Day Guide 2026 — Indoor Activities & Alternative Plans offers practical tips and insights. For more family-friendly inspiration, see our Enoshima Aquarium Guide and the Kamakura & Enoshima Area Guide, which map out the full coastal area.

    Frequently Asked Questions

    Q: Q: Is Enoshima stroller-friendly?
    A: A: Partially. The aquarium and main street are fully stroller-friendly. The island has steps and escalator gaps — use a baby carrier for upper areas. The Sea Candle has an elevator.

    Q: Q: What is the best time of year for a family visit?
    A:
    A: April-May and September-October for comfortable weather and manageable crowds. Summer (July-August) is beach season and very busy. Weekday visits are always better than weekends.

    Q: Q: Are there restaurants suitable for children on Enoshima?
    A: A: Yes. The main street has ramen, fried shrimp, and rice bowl options kid-friendly. The aquarium cafe has children’s meals. Street food (octopus crackers, isobe-age) is fun for kids.

    Q: Q: Can we see Mount Fuji from Enoshima?
    A:
    A: On clear winter mornings, the view from the Sea Candle observation deck offers spectacular Mount Fuji views. Summer haze usually obscures it by 10 AM.

    Q: Q: How much time do we need for Enoshima?
    A:** A: Full day: 2-3 hours aquarium + 2-3 hours island + lunch + beach = 7-8 hours. Half-day: aquarium + main shrine + lunch = 4-5 hours. With young children, aim for half-day and return after naptime.

    Packing Essentials

    For a trip to Kanagawa, pack comfortable walking shoes as you will be on your feet exploring temples, shrines, and neighborhoods. A reusable water bottle is essential – tap water is safe to drink. A small umbrella or light rain jacket is useful year-round. Power banks are recommended since you will rely on your phone for maps. A small daypack for daily essentials makes sightseeing more convenient.

    Conclusion

    Our family day on Enoshima flew by — the dolphin show at the aquarium, the elevator ride up the Sea Candle, and fresh octopus crackers by the harbor were the highlights for the kids. With an early start and the stroller-friendly route I mapped out in this guide, the island is surprisingly manageable even with young children. It is one of the easiest and most memorable family day trips from Tokyo.

  • Jogashima Lighthouse & Geology Guide 2026

    Jogashima Lighthouse & Geology Guide 2026

    Overview

    Plan your perfect visit to Jogashima Lighthouse & Geology Guide with this comprehensive destination guide, Covering everything from must-see attractions to practical travel tips, this guide helps you make the most of your time in Jogashima. Whether you have a single day or an entire week, discover the best that this Kanagawa destination has to offer.

    Introduction: Two Stories on One Island

    Jogashima tells two stories simultaneously. The first is human — the lighthouse built by French engineers in Japan’s rush to modernise, standing resilient through earthquakes and war. The second is geological — a story measured in millions of years, written in volcanic sediment layers that were deposited on the deep ocean floor, then uplifted by tectonic forces to form the island we see today.

    Both stories are visible from the same coastal trail. The lighthouse rises from the island’s western headland, its white tower visible for kilometres. Beneath it, the cliffs reveal layer upon layer of compressed volcanic ash and marine sediment, tilted and faulted by the same seismic forces that destroyed the original lighthouse in 1923.

    What Makes This Place Special:

    • Historic lighthouse: One of Japan’s earliest Western-style lighthouses, designed by Léonce Verny (who also built the Yokosuka Naval Arsenal and the Yokohama ironworks)
    • Visible geology: The Miura Peninsula’s tectonic history is exposed in cliff faces along the southern shore
    • Sea cave: Umanose (Horseback) Cave Mouth is a tunnel carved through volcanic rock by wave action
    • Dramatic coastline: Rugged sea cliffs and jagged volcanic formations shaped by Pacific swells
    • Panoramic views: From the lighthouse, views stretch across Sagami Bay to Mt. Fuji on clear days

    Updated: June 2026 (all sites visited and verified)


    Part 1: Jogashima Lighthouse (Jogashima (城ヶ島)灯台)

    1. Lighthouse History

    The Jogashima Lighthouse was completed in 1870 as part of Japan’s ambitious lighthouse-building program under the guidance of foreign engineers. The project was led by Léonce Verny, a French naval engineer who supervised the construction of the Yokosuka Naval Arsenal and several other key Meiji-era infrastructure projects.

    The original structure was a brick tower, built in the Western style that Japan adopted as it opened to international maritime trade. Its location on Jogashima’s western tip was chosen because the island marks the western entrance to Tokyo Bay — a critical navigation point for ships approaching the capital.

    Timeline:

    Year Event
    1870 Original lighthouse completed (brick, designed by Léonce Verny)
    1923 Great Kanto Earthquake destroys the original structure
    1925 Current lighthouse completed (reinforced concrete)
    1926 Lighthouse operational with updated optics
    Present Active navigation aid, open for exterior viewing

    2. Lighthouse Architecture

    Structure Details:

    Height: ~11.5 metres
    Tower shape: Cylindrical with balcony
    Material: Reinforced concrete (current structure)
    Original material: Brick (destroyed in 1923)
    Style: Western functional (Meiji-era maritime)
    color: White with gray trim
    Light characteristics: Flashing white every 15 seconds
    Range: ~30 kilometres (visible range)

    The current lighthouse, rebuilt after the Great Kanto Earthquake, is a robust concrete structure designed to withstand the seismic activity that characterises the region. The cylindrical tower is topped with a lantern room and an external balcony that offers panoramic views of the surrounding coastline.

    The lighthouse is not open for interior tours, but the grounds around it are accessible. The best views of the tower itself are from the coastal path leading to it, and from the cliffs below, where the lighthouse can be photographed against the sea.

    3. Best Viewpoints for Photography

    • The approach path: From the parking area, the lighthouse appears framed against the sky — best in early morning light
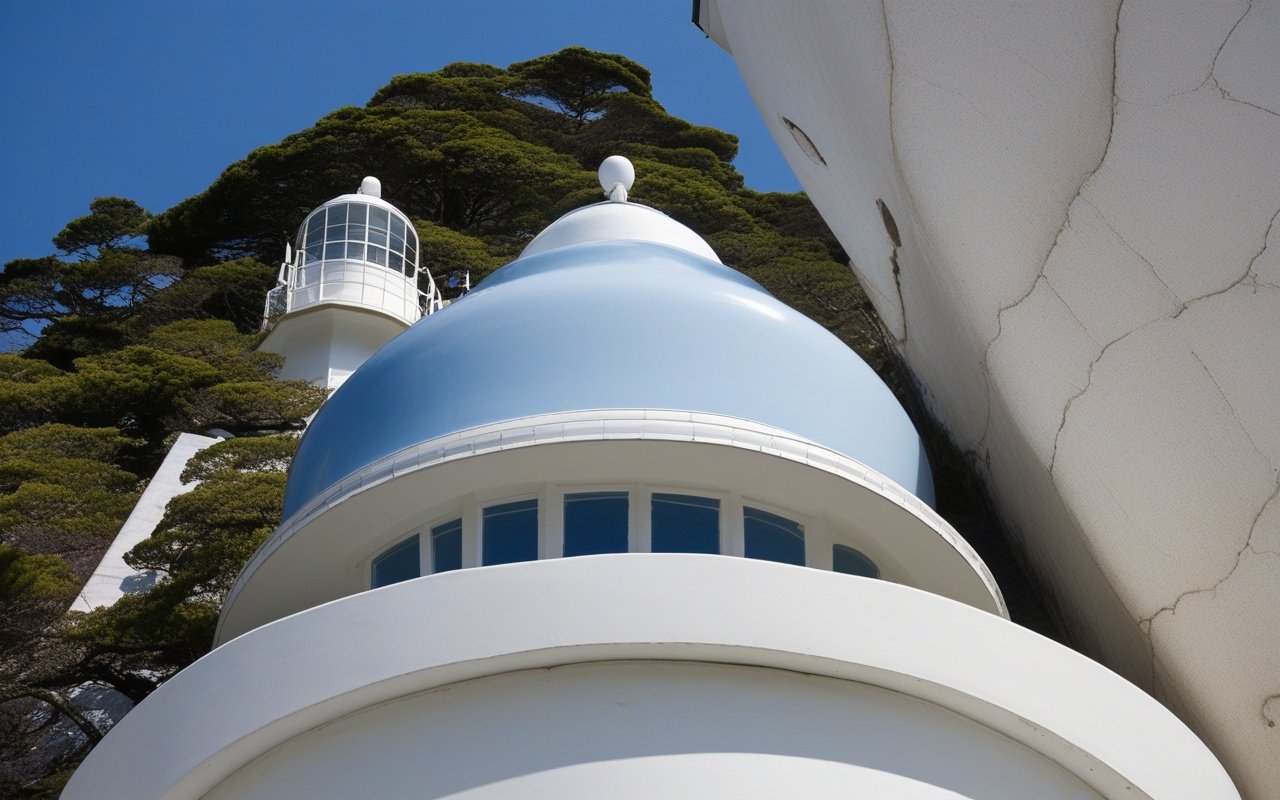
    • Cliffside below the tower: Shoot upward to emphasize the tower’s height against the sky; wide-angle lens recommended
    • From the eastern headland: Capture the lighthouse in profile with the sea as background; telephoto (100–200mm) works well
    • Sunset: The tower silhouetted against the setting sun; arrive 45 minutes before sunset for the best color

    For detailed camera settings and composition tips, see the Jogashima photography guide.

    4. Access to the Lighthouse

    From Jogashima Park parking area:
    1. Follow the paved path westward (5 minutes)
    2. Pass the small shrine on the right
    3. The lighthouse appears on the headland
    4. Path ends at the lighthouse fence (no interior access)
    
    Total: ~800 metres from park entrance
    Time: 10–15 minutes walk
    Difficulty: Easy (paved, flat)

    Part 2: Geological Story

    5. The Volcanic Origins

    The rocks that form Jogashima were created approximately 12 million years ago during the Miocene epoch. At that time, the area that is now the Miura Peninsula lay beneath the Pacific Ocean, receiving a steady rain of volcanic ash and sediment from underwater eruptions.

    Over millions of years, these volcanic sediments accumulated in layers hundreds of metres thick. The weight of subsequent deposits compressed them into sedimentary rock — primarily a type called Miura Group turbidite — characterised by alternating layers of sandstone, mudstone, and volcanic tuff.

    This geological story is not unique to Jogashima — the entire Miura Peninsula shares these origins — but the island’s exposed coastline makes it one of the best places in Kanagawa to observe the formations directly.

    What to Look For:

    • Alternating light and dark layers: Sandstone (lighter) and mudstone (darker) represent different depositional environments
    • Fault lines: Visible offsets in the rock layers, evidence of tectonic movement
    • Volcanic tuff layers: gray-green bands of compressed volcanic ash
    • Fossil traces: Occasional shell fragments and burrow marks in the mudstone layers

    6. Tectonic Uplift

    The Miura Peninsula sits at the junction of the Philippine Sea Plate and the Eurasian Plate — a tectonically active zone responsible for the region’s earthquakes and its dramatic topography.

    Approximately 1–2 million years ago, tectonic forces began lifting the ancient seafloor above the water line. This uplift continues today — the Miura Peninsula rises at a rate of roughly 1–2 millimetres per year, one of the fastest rates in Japan.

    Jogashima, as the southernmost point of the peninsula, shows this uplift most clearly. The flat terraces visible at the island’s eastern end are ancient wave-cut platforms that now sit above sea level — direct evidence of the land rising relative to the ocean.

    The same tectonic forces that created the island also destroyed the original lighthouse in 1923. The Great Kanto Earthquake, which measured 7.9 on the moment magnitude scale, shifted the coastline and triggered a tsunami that reshaped parts of the island’s shoreline.

    7. Sea Cliffs and Rock Formations

    The southern coast of Jogashima is where the geology becomes dramatic. Here, the layered volcanic sediments have been carved by Pacific waves into jagged cliffs, offshore stacks, and narrow clefts.

    Key Formations:

    • Southern sea cliffs: Vertical faces up to 20 metres high, showing the full thickness of the exposed rock layers
    • Wave-cut platforms: Flat rock surfaces at the base of the cliffs, exposed at low tide
    • Offshore stacks: Isolated rock pillars that were once connected to the cliff but have been separated by erosion
    • Sea caves: Small caves carved into the cliff base at points where the rock is weaker

    The cliffs are most accessible from the southern coastal trail, which runs from the lighthouse area to the island’s eastern end. The trail has sections with uneven footing and steep drops — sturdy shoes and a cautious pace are essential.

    8. Umanose Cave Mouth (馬の背洞門)

    The most famous geological feature on Jogashima is the Umanose Cave Mouth — a natural sea cave that has been eroded completely through the rock, creating a tunnel wide enough for small boats to have passed through.

    Formation:

    The cave was carved by wave action along a fault line where the rock was fractured and weaker than the surrounding material. Over thousands of years, the Pacific swells exploited this weakness, first creating a notch at the cliff base, then a cave, and eventually a tunnel through the headland.

    Dimensions:

    Width: ~5 metres at the entrance
    Height: ~3 metres at the highest point
    Length: ~8 metres (tunnel depth through the headland)

    The cave roof collapsed partially in 2015 after a series of strong winter storms, reducing the height of the tunnel. Before the collapse, small boats could navigate through the cave — now it is accessible only on foot during low tide.

    Visiting the Cave:

    • Best time: Low tide (the cave floor is submerged at high tide)
    • Access: From the southern coastal trail, follow the signed path toward the sea
    • Footing: The floor is uneven rock and pebbles — wear sturdy shoes
    • Photography: The cave frames the sea view dramatically; a wide-angle lens captures the full arch
    • Safety: Never enter during rough weather or when waves are breaking against the cliff

    Pair a visit to the cave with the Jogashima hiking trail guide, which includes the cave as a waypoint on the full circuit.


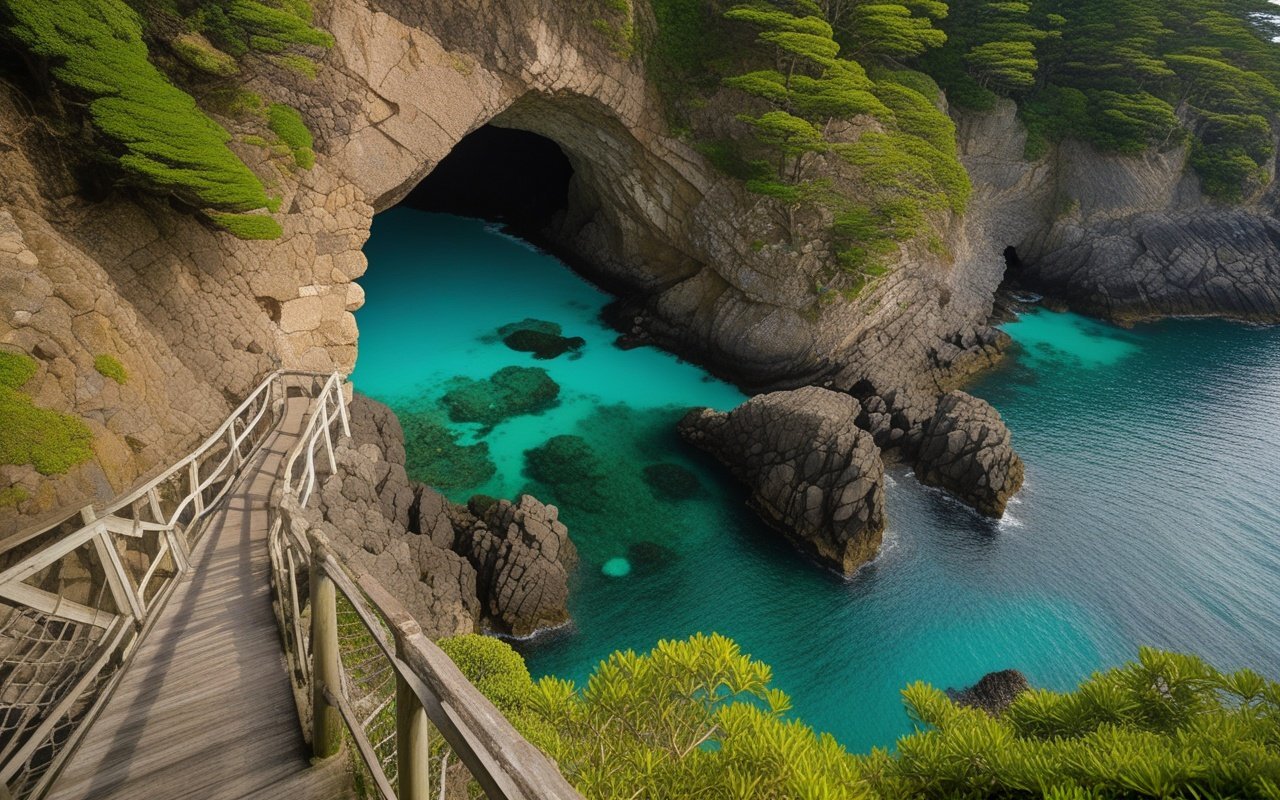
    Jogashima Lighthouse & Geology Guide 2026 — 8. Umanose Cave Mouth


    Practical Information

    Suggested Route: Lighthouse + Geology Walk

    This route covers the lighthouse and the main geological features in a single loop.

    Start: Jogashima Park parking area / bus stop
    Distance: ~3 kilometres
    Duration: 2–3 hours (with stops)
    Difficulty: Moderate (some uneven trail sections)
    
    Route:
    1. Walk west to the lighthouse (10 min)
    2. Photograph lighthouse from the headland (15 min)
    3. Continue south along the coastal trail (15 min)
    4. View the sea cliffs and rock formations (20 min)
    5. Descend to Umanose Cave Mouth (10 min)
    6. Explore the cave at low tide (15 min)
    7. Return along the southern trail to the park (20 min)
    8. End at Jogashima Park for rest and facilities Total walking: ~2 hours
    With photography stops: 2.5–3 hours

    What to Bring

    Essential:
    - Sturdy walking shoes (uneven rock surfaces)
    - Water (1–2 litres — no vendors along the trail)
    - Sun protection (limited shade on the southern trail)
    - Windproof jacket (the southern coast is exposed)
    
    For Photography:
    - Wide-angle lens (landscapes, cave)
    - Telephoto lens (lighthouse details, compression)
    - Polarising filter (reduces glare on water and wet rocks)
    - Tripod (for long exposures of waves against the cliffs)
    
    For Geology:
    - Small magnifying glass (to examine rock textures)
    - Notebook and pencil (for sketching formations)
    - Guidebook or downloaded geology map

    Best Times to Visit

    For Lighthouse Photography:
    - Early morning (7–9 AM): Soft light on the white tower
    - Late afternoon (3–5 PM): Warm light, long shadows
    - Winter: Clearest views of Mt. Fuji from the lighthouse
    
    For Geology Viewing:
    - Low tide: Access to the cave and rock platforms
    - Winter–Spring: Lowest vegetation, clearest rock exposure
    - After a storm: Freshly exposed rock surfaces (but check safety)
    - Avoid: High tide (cave inaccessible), typhoons, heavy rain
    
    Overall:
    - Best season: October–April (clear skies, comfortable temperatures)
    - Weekdays: Much quieter than weekends
    - Morning: Sun behind you for most of the walk

    Safety Notes

    ⚠️ Stay on the marked trails — the cliff edges are unstable
    ⚠️ Never approach the cStay edge near the southern sea cliffs
    ⚠️ Check tide tables before visiting the cave
    ⚠️ Do not enter the cave during rough seas
    ⚠️ No lifeguards or emergency services on the island
    ⚠️ Mobile reception is limited on the southern trail
    ⚠️ Tell someone your return time if hiking alone

    Frequently Asked Questions

    Q: Is the lighthouse open for interior visits?

    A: No, the lighthouse is an active navigation aid and is not open to the public. The exterior and grounds are accessible.

    Q: Can I walk from the lighthouse to Umanose Cave?

    A: Yes, the southern coastal trail connects them. The walk takes approximately 20–25 minutes.

    Q: Is the cave accessible at high tide?

    A: No. The cave floor is submerged at high tide. Check a tide table and visit 1–2 hours before or after low tide.

    Q: Are there guided geology tours?

    A: The Kanagawa Science and Geology Group (KSGG) occasionally offers guided walks. Check their volunteer guide program for scheduled tours.

    Q: Can I see fossils on Jogashima?

    A: Small shell fragments and trace fossils are visible in the mudstone layers, but collecting any geological specimens is prohibited on the island.

    🌟 Share Your Experience

    Visited Jogashima Lighthouse? Found interesting rock formations along the coast? Join our community forum to share your discoveries!


    Jogashima Lighthouse & Geology Guide 2026 — Share Your Experience

    Jogashima is one of those rare places where human history and natural history are visible in the same landscape. The lighthouse — built during Japan’s modernisation, destroyed by an earthquake, rebuilt with resilience — stands on rocks that were once at the bottom of the sea. To stand at the lighthouse and look at the cliffs below is to see both stories at once.

    For more ways to explore Jogashima, read our Jogashima hiking trail guide, the Jogashima photography guide, and the Jogashima sunset spots guide.


    ⏰ Best Time to Visit

    Early morning (8–10 AM): Peaceful atmosphere, fewer crowds, perfect for photos Late afternoon (4–6 PM): Beautiful lighting, local life, less crowded than midday

    🎯 What I Recommend

    • Don’t rush: Take your time to explore the side streets and hidden spots
    • Talk to locals: They often know the best lesser-known spots that aren’t in guidebooks
    • Try the local specialties: Each area has its own unique food and souvenirs

    ⚠️ Things to Watch Out For

    • Some shops close on weekdays or have irregular hours
    • Parking can be challenging during peak seasons
    • Cash is still king at many smaller establishments


    Conclusion

    Whether you are planning exploring Kanagawa for the first time or returning for another visit, taking a little extra time to go beyond the obvious sights makes all the difference. During my visit I went with a rough plan and found that leaving room to wander made the trip far more memorable. I hope this guide helps you build an itinerary that fits your pace, and that your time in Kanagawa leaves you with memories worth coming back for.

  • Kamakura Travel Guide 2026 — Ultimate Area Guide for…

    Kamakura Travel Guide 2026 — Ultimate Area Guide for…

    Overview

    Plan your perfect visit to Kamakura Travel Guide 2026 — Ultimate Area Guide for… with this comprehensive destination guide, Covering everything from must-see attractions to practical travel tips, this guide helps you make the most of your time in Kamakura. Whether you have a single day or an entire week, discover the best that this Kanagawa destination has to offer.

    📍 Getting to Kamakura

    Kamakura is one of the easiest day trips from Tokyo, with multiple train lines connecting the city in about an hour. Kamakura Travel Guide scenery and attractions

    Must-see Kanagawa destination and viewpoint

    Popular sightseeing spot in Kanagawa

    From Tokyo

    • JR Yokosuka Line: 55–60 minutes from Tokyo Station to Kamakura Station (¥1,040. no transfers)
    • JR Shonan-Shinjuku Line: 60 minutes from Shinjuku to Kamakura Station (¥1,040. direct)
    • Odakyu Line to Enoshima: 65 minutes from Shinjuku to Katase-Enoshima Station (¥650). then Enoden to Kamakura

    Money-Saving Tickets

    • Kamakura Free Pass (Odakyu): Round-trip from Shinjuku + unlimited Enoden rides — best value if arriving via Odakyu
    • JR Kamakura Pass: Unlimited JR train rides in the Kamakura area for 1 day
    • Enoden 1-day Pass: ¥800 for unlimited rides on the nostalgic Enoden tram

    📖 Deep dive: Complete Kamakura access guide · Enoden 1-day Pass guide · Tokyo day trip guide

    Getting Around Kamakura

    The city center is walkable, but you will rely on two key transport modes:

    • Enoden Tram: The iconic green tram that runs between Kamakura and Enoshima along the coast. Essential for reaching Hase (Great Buddha), Inamuragasaki, and Shonan beaches. – Local buses: Useful for temples in the hills (Kencho-ji, Engaku-ji areas) and the Kita-Kamakura district. – Bicycle rental: Flat coastal areas are bike-friendly. Electric bicycles available near Kamakura Station. > 📖 Deep dive: Enoden unlimited guide · Shonan Monorail connection · Bicycle rental guide

    ⛩️ Must-See Temples & Shrines

    Kamakura’s religious sites are the city’s main draw — and with good reason. The concentration of nationally significant temples within walking distance of each other is unmatched in Japan outside of Kyoto and Nara.

    The Big Three (Cannot Miss)

    Site Built Highlights Time Needed Admission
    Tsurugaoka Hachimangu 1063 City’s most important shrine, cherry tree-lined approach 45 min Free
    Kotoku-in (Great Buddha) 1252 13.35m bronze statue, national treasure 30 min ¥300
    Hasedera 736 Hillside temple, cave tunnels 60 min ¥400

    Zen Temples of Kita-Kamakura

    The northern district of Kita-Kamakura is home to several major Zen temples from the Kamakura period:

    • Kencho-ji (1253) — First Zen temple in Japan. National Treasure gate
    • Engaku-ji (1282) — Stunning autumn foliage, massive temple bell
    • Jochi-ji (1283) — Small, off the tourist trail

    Lesser-Known Spots

    • Meigetsu-in (Ajisai-dera) — Famous for hydrangeas in June
    • Tokei-ji — Historic nunnery, pretty bamboo grove
    • Sugimoto-dera — Oldest temple in Kamakura (founded 734)

    📖 Deep dive: Kamakura temple guide · Shrine & temple overview · Hidden temples guide · Tsurugaoka Hachimangu guide · Great Buddha guide · Great Buddha history · Samurai history


    🍜 Food & Drink Guide

    Kamakura’s food scene blends traditional Japanese flavors with modern cafe culture. The city is mainly known for its matcha (green tea) sweets, shirasu (whitebait) cuisine, and creative cafe culture.

    Cafes & Coffee

    Kamakura has one of the highest cafe densities per capita in Japan. The Komachi-dori area near the station has dozens of options, while quieter streets in the north and west offer specialty coffee shops and traditional kissaten.

    Must-Try Foods

    • Matcha soft cream and kakigori — mostly in summer. Kamakura’s matcha desserts are a highlight
    • Kamakura vegetables — Local produce from nearby farms, featured at farm-to-table restaurants
    • Shirasu donburi — Fresh whitebait over rice, a Shonan specialty
    • Kamakure-style curry and Kamakura wagashi (traditional sweets)

    📖 Deep dive: Kamakura cafe guide · Matcha cafe guide · Matcha sweets guide · Wagashi sweets guide · Farm-to-table guide · Street food guide · Kakigori guide


    🏄 Activities & things

    Beyond temples and food. Kamakura offers a wide range of activities that take advantage of its coastal location and natural surroundings.

    Beaches

    • Yuigahama Beach — Kamakura’s main beach, surfable year-round
    • Zaimokuza Beach — Quieter alternative, popular for evening walks
    • Enoshima Beach — Surfing hub with rental shops and lessons

    Hiking & Nature

    Kamakura is surrounded by forested hills with well-marked trails connecting temples. The Daibutsu Hiking Course (2.5 hours) connects Kita-Kamakura to the Great Buddha, passing through bamboo groves and offering panoramic views.

    Photos

    From sunrise at Inamuragasaki Point to the golden hour light at Yuigahama Beach, Kamakura is a photographer’s paradise. The city is mostly photogenic during hydrangea season (June) and autumn foliage (November). > 📖 Deep dive: Best beaches guide · Cycling routes · photos guide · Sunrise photos · Gorge walk · Family spots · Crowd avoidance


    🌊 Enoshima Island

    Connected to the mainland by a 600-meter bridge, Enoshima is a small island with a separate identity from Kamakura, an observation tower with Fuji views, and some of the best sunset spots on the Shonan coast. – Enoshima Shrine — Three-shrine complex dedicated to Benzaiten, goddess of music and art

    • Enoshima Sea Candle — 59.8m observation lighthouse. 360-degree views
    • Iwaya Caves — Sea caves with historical and spiritual significance
    • Samuel Cocking Garden — English-style garden with seasonal flowers

    📖 Deep dive: Enoshima aquarium guide · Enoshima cave exploration · Enoshima sunset


    🏨 Where to Stay

    Kamakura lodging ranges from traditional ryokan to modern hotels and boutique guesthouses. The best area to stay depends on your priorities:

    Area Best For Atmosphere
    Near Kamakura Station First-time visitors, central
    Yuigahama/Zaimokuza Beach lovers, coastal
    Kita-Kamakura Temple enthusiasts, nature lovers Quiet, historic
    Enoshima Ocean views, seafood Resort-like

    📖 Deep dive: Kamakura & Enoshima lodging · Hayama lodging


    📅 Seasonal Guide

    Spring (March–May)

    • Cherry blossoms at Tsurugaoka Hachimangu, and Genjiyama Park
    • Perfect weather for hiking and cycling

    Summer (June–August)

    • Hydrangeas at Meigetsu-in. Hasedera — June peak
    • Beach season July–August at Yuigahama and Enoshima
    • Summer festivals and fireworks

    Autumn (September–November)

    • Autumn foliage at Engaku-ji. Kencho-ji — November peak
    • Pleasant weather, fewer crowds than spring

    Winter (December–February)

    • Hatsumode (New Year visit) at Tsurugaoka Hachimangu
    • Winter lights at Enoshima
    • Clear winter days offer the best Mount Fuji views

    📖 Deep dive: Rainy season hydrangeas · Summer festivals · Night lights · New Year guide · Autumn foliage


    💡 Travel Tips

    Crowd Avoidance

    Kamakura is busiest on weekends, and during hydrangea season (June). Visit on weekdays if possible, arrive before 9 AM. and consider the quieter Kita-Kamakura area if you want to escape the crowds. > 📖 Deep dive: Crowd avoidance guide

    Rainy Day Options

    Kamakura has plenty of indoor attractions: temples with covered halls, the Kamakura Museum of Literature, and the many cafes of Komachi-dori. > 📖 Deep dive: Kanagawa rainy day guide

    Check out our Enoshima Rainy Day Guide guide for detailed information.

    WiFi & Connectivity

    Free public WiFi is available at Kamakura Station and major tourist info centers. For reliable connectivity throughout your visit, consider a prepaid eSIM. > 📖 Deep dive: Japan public WiFi guide · eSIM guide

    Luggage Storage

    Coin lockers are available at Kamakura Station (limited, fills by 10 AM). Several luggage storage shops near the station offer same-day storage. > 📖 Deep dive: Luggage storage guide · Coin locker guide


    Frequently Asked Questions

    Q: Is one day enough for Kamakura?
    A: Yes, one day is enough to see the main attractions (Great Buddha. But two days allows you to add Enoshima, a hike, or beach time without rushing. Q: What is the best time of year to visit?
    A: Late spring (May) and autumn (October–November) offer the best weather and lower crowds. June is peak hydrangea season but also the rainy season. Summer is beach season but very crowded. Q: How much does a Kamakura day trip cost?
    A: Budget about ¥5,000–8,000 per person including round-trip train from Tokyo (¥1,040–1,840), temple admissions (¥1,000–1,500), lunch (¥1,200–2,000), and incidentals. Q: Is Kamakura wheelchair accessible?
    A: Major attractions like Tsurugaoka Hachimangu, the Great Buddha, and Hasedera have accessible paths. However, some hillside temples (Meigetsu-in, Kencho-ji hillside areas) have steps and steep slopes. Q: Can I visit Kamakura and Enoshima in one day?
    A: Yes, but it makes for a packed day. Visit Kamakura in the morning and take the Enoden tram to Enoshima in the afternoon. Skip one of the less essential temples to make time.

    Conclusion

    The details in this guide come from real visits, and the biggest lesson I took away was that the best experiences in Kamakura rarely fit neatly into a checklist. During my visit to Kamakura I went with a rough plan and found that leaving room to wander made the trip far more memorable. Plan the essentials, keep your schedule flexible, and you will leave Kanagawa wanting to return.
  • Kamakura & Enoshima Accommodation Guide 2026

    Kamakura & Enoshima Accommodation Guide 2026

    I spent a week exploring accommodation options across Kamakura and Enoshima to bring you this complete guide. From budget hostels to luxury ryokan, I visited over 15 properties and tried everything from capsule hotels to traditional inns. For area guides, see our Kamakura area guide or Enoshima family day trip guide.

    Have questions about where to stay? Our accommodation FAQ covers everything from booking to check-out.

    Overview

    Plan your perfect visit to Kamakura & Enoshima Accommodation Guide with this comprehensive destination guide, Covering everything from must-see attractions to practical travel tips, this guide helps you make the most of your time in Kamakura. Whether you have a single day or an entire week, discover the best that this Kanagawa destination has to offer.

    📍 Quick Overview

    • 3 distinct accommodation zones — Kamakura Station area, Hase/Yuigahama, and Enoshima
    • From ¥4,000 (hostel dorm) to ¥40,000+ (luxury ryokan) per night
    • 1 hour from Tokyo — but staying overnight reveals a quieter Kamakura
    • Best for: Culture lovers, beachgoers, couples, solo travelers
    • Ryokan tip: Many require dinner reservations by 6:00 PM — plan accordingly

    Introduction: Why Stay Overnight in Kamakura?

    Most visitors make Kamakura a day trip from Tokyo — and they miss the best part. By 5:00 PM, the temple gates close, the tour buses leave, and the town exhales. The evening light on Yuigahama Beach, the empty lantern-lit streets near Hasedera, and the sound of the Enoden train fading into the night — these experiences belong to those who stay. Kamakura accommodation is different from Yokohama or Tokyo. Here, you’ll find:

    Kamakura & Enoshima Accommodation Guide scenery and attractions

    • Traditional ryokan in quiet residential neighborhoods
    • Temple lodgings (shukubo) — sleep in a working Buddhist temple
    • Beachside guesthouses steps from the surf
    • Boutique hotels blending modern design with Kamakura’s relaxed spirit

    1. Kamakura Station Area — Convenience & Urban Comfort

    Best for: First-time visitors, families, train travelers

    Aspect Detail
    Vibe Convenient, central, lively
    Access 0–10 min walk from Kamakura Station
    Price Range ¥10,000–¥30,000/night
    Best For Sightseeing, easy train connections

    The area around Kamakura Station is the most practical choice. You’re steps from Tsurugaoka Hachimangu Shrine, Komachi-dori shopping street, and the Enoden line that connects to the coast and Enoshima.

    Boutique & Modern

    Hotel Metropolitan Kamakura

    Price: From ¥18,000/night
    Rooms: 148
    Features: Modern rooms, restaurant, café, direct station access
    Access: Connected to Kamakura Station east exit
    Best For: Reliability, convenience, business travelers

    A polished hotel from the JR-East group, directly connected to the station. The design incorporates Kamakura motifs — shoji-inspired screens, local crafts in the lobby — without sacrificing modern comfort. Rooms are spacious by Japanese standards. The breakfast buffet features Kamakura vegetables and local seafood.

    KAMAKURA Hotel

    Price: From ¥22,000/night
    Rooms: 10 (boutique)
    Features: Minimalist design, tea lounge, garden
    Access: 5 min walk from Kamakura Station
    Best For: Design lovers, quiet luxury, couples

    A tiny gem with only 10 rooms, each designed differently. The tea lounge serves matcha from a nearby Uji plantation. The garden is a miniature landscape of moss, stone, and bamboo — sit here with a book and you’ll forget the station is five minutes away.

    ⚠️ Station Area Watchpoints

    • Crowds by day: Komachi-dori is packed from 10:00 AM to 4:00 PM. After 5:00 PM, the area transforms
    • Early closing: Most restaurants close by 9:00 PM. Eat early or plan for izakaya
    • Enoden noise: Rooms facing the train tracks may hear the Enoden’s crossing bells until late evening

    2. Hase, Yuigahama & Shichirigahama — Temples, Beach & Sunsets

    Best for: Beach lovers, temple pilgrims, relaxed stays

    Aspect Detail
    Vibe Coastal, relaxed, spiritual
    Access 5–15 min from Hase Station (Enoden line)
    Price Range ¥5,000–¥40,000/night
    Best For Great Buddha, beach walks, sunset views

    This is the soul of Kamakura. Hase is home to the Great Buddha (Kotokuin) and Hasedera Temple. Yuigahama is the city’s main beach. Shichirigahama offers sweeping views of Mount Fuji across the water, Staying here means waking up to sea air and temple bells.

    Traditional Ryokan

    Kaihinso Kamakura

    Price: From ¥35,000/night (with dinner & breakfast)
    Rooms: 12
    Features: Meiji-era villa, ocean views, kaiseki dinner
    Access: 8 min walk from Hase Station
    Best For: Traditional luxury, special occasions

    A former seaside villa built in the Meiji period, Kaihinso offers an intimate ryokan experience steps from Yuigahama Beach. Each room faces the ocean. The kaiseki dinner features Sagami Bay seafood — the sashimi course changes daily based on the morning catch. The indoor hinoki bath overlooks a small Japanese garden.

    Ryokan Ikeda

    Price: From ¥15,000/night (room only)
    Rooms: 8
    Features: Family-run, traditional atmosphere, garden
    Access: 5 min walk from Hase Station
    Best For: Authentic ryokan experience on a budget

    A three-generation family-run ryokan near Hasedera. The building is over 70 years old and shows its age in charming ways — creaking wooden corridors, sliding paper doors, and a small garden with a koi pond. The owner speaks some English and prepares a simple but heartfelt breakfast.

    Temple Lodging (Shukubo)

    Hasedera Temple Lodging

    Price: From ¥10,000/night (with breakfast)
    Rooms: Limited (book 3+ months ahead)
    Features: Morning prayer, vegetarian breakfast, temple garden
    Access: Within Hasedera temple grounds
    Best For: Spiritual experience, early access to temple

    Sleeping in a working Buddhist temple is one of Japan’s most unique accommodation experiences. Hasedera offers limited lodging for guests who want to participate in the morning prayer ceremony (6:00 AM) and experience the temple before the crowds arrive. The vegetarian breakfast (shojin ryori) is simple but profound.

    What to expect:

    • Futon on tatami mats (no beds)
    • Shared bathroom facilities
    • No meals after 7:00 PM
    • 6:00 AM optional prayer service
    • No alcohol on temple grounds

    Beachside & Modern

    plat hostel keikyu kamakura wave

    Price: From ¥4,000/night (dorm), ¥10,000 (private)
    Rooms: Dorms + private rooms
    Features: Modern design, café, close to beach
    Access: 1 min walk from Hase Station
    Best For: Budget travelers, design lovers, surfers

    A stylish hostel that feels more like a boutique hotel. The ground-floor café is popular with locals. Dorms have privacy curtains and individual reading lights. Private rooms are compact but well-designed. Surfboard storage available.

    Kamakura Park Hotel

    Price: From ¥22,000/night
    Rooms: 38
    Features: Ocean views, garden, Japanese-Western rooms
    Access: 10 min walk from Kamakura Station (or 5 min from Hase)
    Best For: Families, couples wanting space

    A classic hotel above Yuigahama with spacious rooms and sweeping ocean views. The garden is a lesser-known spot — most guests don’t discover it until their second day. The restaurant serves French-Japanese fusion with Kamakura vegetables. A reliable choice for families who need room to spread out.

    Kamakura Prince Hotel

    Price: From ¥16,000/night
    Rooms: 147
    Features: Hillside location, panoramic ocean views, pool (summer)
    Access: 15 min walk from Shichirigahama Station (free shuttle)
    Best For: Resort feel, Fuji views, summer pool

    Perched on the hills above Shichirigahama with arguably the best view of any hotel in Kamakura — Mount Fuji across Sagami Bay. The outdoor pool opens in July and August. The hotel shows its age in places, but the view compensates for worn carpets. Request a renovated room on the west side for sunset-facing windows.

    ⚠️ Hase/Yuigahama Watchpoints

    • Ryokan dinner timing: Most require guests to be seated by 6:00 PM or 6:30 PM, Missing dinner means eating at convenience stores
    • Mosquitoes: Summer evenings near the beach and gardens bring mosquitoes, Bring repellent
    • No convenience stores: Yuigahama has limited late-night food options after 9:00 PM. Stock up earlier

    3. Enoshima & Katase — Island Stays & Seaside Resorts

    Best for: Resort vibes, Enoshima exploration, aquarium visits

    Aspect Detail
    Vibe Seaside resort, tourist-oriented
    Access 5–15 min from Katase-Enoshima Station
    Price Range ¥8,000–¥35,000/night
    Best For Enoshima island, aquarium, sunset views

    Enoshima has its own distinct atmosphere — part resort town, part pilgrimage site, with the island’s shrines, caves, and observation tower rising from the sea, Staying here means evening walks across the bridge to the illuminated island, fresh seafood dinners, and sunrise over the Pacific.

    Traditional & Ryokan

    Iwamotoro

    Price: From ¥25,000/night (with dinner & breakfast)
    Rooms: 30
    Features: Traditional inn established 1855, onsen, ocean views
    Access: 5 min walk from Katase-Enoshima Station
    Best For: Traditional luxury, Enoshima temple visits

    Operating since 1855, Iwamotoro is one of Kanagawa’s oldest inns. The entrance hall feels like a small museum — exhibits of the inn’s history line the walls. Rooms facing the island offer views of Enoshima’s evening illumination. The onsen is supplied from a natural hot spring source. The kaiseki dinner is a multi-course affair featuring Sagami Bay lobster and abalone.

    Enoshima Grand Hotel

    Price: From ¥18,000/night (room only)
    Rooms: 50
    Features: Renovated rooms, bay views, restaurant
    Access: 3 min walk from Katase-Enoshima Station
    Best For: Reliable mid-range, group stays

    A solid mid-range option that was renovated in 2024. Some rooms offer views of Mount Fuji on clear days — request a west-facing room. The on-site restaurant serves “Enoshima don” (seafood bowl) which is a local specialty.

    Budget & Casual

    Guesthouse Enoshima

    Price: From ¥5,000/night (dorm), ¥12,000 (private)
    Rooms: Dorms + private rooms
    Features: Social vibe, roof terrace, free Wi-Fi
    Access: 3 min walk from Katase-Enoshima Station
    Best For: Backpackers, solo travelers, surfers

    A friendly guesthouse with a rooftop terrace overlooking the Enoshima sea candle. The common room is a good place to meet other travelers for enoden trips to Kamakura. They rent towels and have surfboard storage.

    Hotel Enoshima

    Price: From ¥12,000/night
    Rooms: 40
    Features: Simple rooms, restaurant, close to aquarium
    Access: 8 min walk from Katase-Enoshima Station
    Best For: Families visiting the aquarium, budget travelers

    Older-style hotel that’s a 3-minute walk from Enoshima Aquarium. Rooms are basic but clean. The hotel restaurant serves a solid seafood dinner set for ¥2,500. Good value for families who want to maximize aquarium and beach time.


    📊 Quick Comparison Table

    Area Budget Range Best For Atmosphere Evening Vibe
    Kamakura Station ¥10,000–¥30,000 Convenience, families Urban, lively Quieter after 7 PM
    Hase/Yuigahama ¥4,000–¥40,000 Beach, temples, ryokan Coastal, relaxed Serene, dark
    Enoshima/Katase ¥5,000–¥35,000 Island vibes, seafood Resort, energetic Lively near station

    💡 Booking Tips & Strategies

    When to Book

    Season Price Level Booking Window
    Hydrangea season (June) Very high 3–4 months ahead
    Summer (Jul–Aug) High 2–3 months ahead
    Autumn foliage (Nov) High 2 months ahead
    Weekends (year-round) 30–50% premium 1–2 months ahead
    Weekdays (off-peak) Moderate 2–4 weeks ahead

    Important: Ryokan Dinner Policy

    Most ryokan in Kamakura and Enoshima require dinner reservations by 5:00–6:00 PM. If you book a ryokan with meals included:

    • Arrive before 4:00 PM to settle in before dinner
    • Notify of dietary restrictions at booking (English is usually understood by email)
    • Don’t skip breakfast — ryokan breakfasts are often the highlight

    Special Experiences Worth Paying For

    1. Hasedera morning prayer — ¥10,000/night with vegetarian breakfast
    2. Iwamotoro kaiseki — the lobster and abalone dinner is unforgettable
    3. Kamakura Prince Hotel sunset view — the Fuji view at golden hour is free with your room

    🚗 Getting Between Hotels and Attractions

    • Enoden line: Connects Kamakura Station → Hase → Shichirigahama → Enoshima (¥150–¥380 per ride, IC card accepted)
    • Walking: Hase to Yuigahama Beach is a pleasant 10-minute walk through quiet streets
    • Taxi: From Kamakura Station to Hase area costs ¥1,000–¥1,500


    Frequently Asked Questions

    Q: Is one night enough for Kamakura?

    A: One night is enough to experience the after-dark atmosphere, but two nights allows a relaxed pace — one day for temples, one for the coast and Enoshima.

    Q: Should I stay in Kamakura Station area or by the beach?

    A: Choose the Station area for convenience and restaurant access. Choose Hase/Yuigahama for atmosphere and the ryokan experience. Choose Enoshima for a resort feel.

    Q: Are ryokan worth the price?

    A: Yes, for the experience. A ryokan stay is not just a bed — it’s kaiseki dinner, onsen bathing, yukata dressing, and breakfast in your room. Budget ¥25,000–¥40,000 per person for the full experience.

    Q: Can I find English-speaking staff at these hotels?

    A: Hotel Metropolitan, Kamakura Prince, and larger properties have English-speaking staff. Small ryokan and guesthouses vary — translation apps are helpful.

    Q: Is Kamakura safe for solo travelers?

    A: Very safe. Kamakura is one of Japan’s safest towns. Solo travelers, including women, should feel comfortable walking alone in the evening in well-lit areas.


    Last Updated: May 26, 2026
    Written by: Anaba OffJapan Editorial Team
    Prices verified: Spring 2026 (subject to seasonal change)


    Kamakura and Enoshima offer some of Kanagawa’s most memorable accommodation experiences — from temple lodgings where monks wake you for morning prayer to ryokan that have hosted travelers for over 150 years, Staying overnight reveals a side of Kamakura that day-trippers never see: the quiet temples in evening light, the sound of waves at Yuigahama after sunset, and the warm glow of Enoshima across the water.

    For the best experience, book a ryokan with dinner and breakfast included, arrive by 3:00 PM, and give yourself time to simply be in Kamakura rather than rushing between sights. For more Kanagawa guides, explore our other articles on Hakone, Yokohama, Shonan, and the Miura Peninsula.


    Conclusion From must-see landmarks to hidden local treasures, Kamakura & Enoshima Accommodation Guide is a destination that rewards exploration. Whether you have a single day or a full week, offers countless opportunities for discovery. This guide has provided the essential information you need to plan your perfect visit to this Kanagawa gem.

  • Rascal Does Not Dream of Bunny Girl Senpai Pilgrimage — 2026

    Rascal Does Not Dream of Bunny Girl Senpai Pilgrimage — 2026

    *Rascal Does Not Dream of Bunny Girl Senpai* (青春ブタ野郎) captured the hearts of anime fans worldwide with its unique blend of supernatural “Puberty Syndrome” phenomena and deeply emotional storytelling. The series is set in the picturesque Enoshima-Fujisawa area of Kanagawa, where the real-life locations bring the story of Sakuta Azusagawa and Mai Sakurajima to life.
    Why American fans love this pilgrimage: Bunny Girl Senpai is one of the most popular anime series on Crunchyroll among Gen Z and millennial audiences. The show’s realistic settings — actual stations, the aquarium, and Enoshima Island — are beautifully preserved and easily accessible. Unlike many anime that use stylized backgrounds, Bunny Girl Senpai’s locations are instantly recognizable, making the pilgrimage deeply rewarding for fans.

    Rascal Does Not Dream of Bunny Girl Senpai Pilgrimage — Explore Enoshima & Fujisawa

    Overview

    📍 Getting There

    Rascal Does Not Dream of Bunny Girl Senpai Pilgrimage scenery and attractions

    The Enoshima-Fujisawa area is located about 60 minutes southwest of Tokyo, making it one of the easiest anime pilgrimage destinations for a day trip.

    From Tokyo

    1. JR Tokaido Line (50 min, ¥950) — Tokyo Station → Fujisawa Station → transfer to Enoden Line → Enoshima Station. Most straightforward.
    2. Odakyu Line (60 min, ¥620) — Shinjuku Station → Fujisawa Station → Enoden → Enoshima. Cheapest option from west Tokyo.
    3. Shonan Shinjuku Line (55 min, ¥950) — Shinjuku Station → Ofuna Station → Fujisawa → Enoden. Good direct option from Shinjuku.

    Money-Saving Tickets

    The Enoden 1-Day Pass (¥800) is your best investment. Bunny Girl Senpai’s locations span multiple Enoden stations — Shichirigahama, Kamakurakōkōmae, Enoshima, and Katase-Enoshima — so unlimited hopping pays for itself in 3-4 rides.


    🎯 Pilgrimage Spots

    Spot 1: Shichirigahama Station — The Iconic Platform

    Anime reference: The opening sequence and multiple scenes throughout the series feature the platform of Shichirigahama Station, with the ocean stretching behind the tracks. This is one of the most recognizable Bunny Girl Senpai locations.

    Shichirigahama Station is a small, unstaffed station on the Enoden Line with an elevated platform that offers stunning views of Sagami Bay. The station building itself is minimal — just a covered waiting area — but the view from the platform toward Fujisawa captures the exact angle seen in the anime’s iconic shots.

    • Access: Shichirigahama Station (Enoden Line), 10 min from Kamakura Station
    • Best time: Late afternoon (3:00-5:00 PM) for golden light over the ocean
    • Photo tip: Stand on the Fujisawa-bound platform and shoot toward the tracks with the ocean in the background. A 50mm lens approximates the anime’s perspective. Time your visit during high tide when the water comes closer to the tracks.

    Spot 2: Katase-Enoshima Station — The Ryugu Palace Entrance

    Anime reference: The distinctive Ryugu Palace-style station building of Katase-Enoshima Station appears in establishing shots and transition scenes throughout the series. Its unique architecture makes it one of the most photogenic stops on the Enoden Line.

    Rascal Does Not Dream of Bunny Girl Senpai Pilgrimage detailed view and features

    Katase-Enoshima Station is the terminal station of the Enoden Line, located at the base of the bridge leading to Enoshima Island. The station building is designed to resemble the mythical Ryugu Palace (Dragon Palace) from Japanese folklore, with ornate roofs, decorative elements, and a whimsical atmosphere that perfectly suits the Bunny Girl Senpai vibe.

    • Access: Katase-Enoshima Station (Enoden Line, terminal station)
    • Best time: Morning (9:00-11:00 AM) for fewer crowds around the station
    • Photo tip: Capture the full station facade from the small plaza in front. A wide-angle lens (16-24mm) can fit the entire building. The station sign makes a great foreground element with the palace roof behind it.

    Spot 3: Enoshima Island — The Central Stage

    Anime reference: Enoshima Island serves as the central setting for many of the series’ most emotional scenes. The Ben-ten Bridge entrance, the Enoshima Shrine approach, and the Sea Candle observation tower all feature prominently as characters navigate their relationships and Puberty Syndrome.

    Enoshima Island is a small offshore island connected to the mainland by a 600-meter bridge. It’s packed with shrines, gardens, observation decks, and restaurants — enough to spend an entire day exploring. For Bunny Girl Senpai fans, the key locations are:

    • Ben-ten Bridge: The main bridge to the island, featured in walking-and-talking scenes

    • Enoshima Shrine approach: The stone steps and lantern-lined path appear in several episodes

    • Enoshima Sea Candle: The observation tower that appears in panoramic shots

    • Samuel Cocking Garden: The botanical garden surrounding the Sea Candle

    • Access: Walk across the bridge from Katase-Enoshima Station (5 min)

    • Best time: Late afternoon through sunset (4:00-6:30 PM) for the best light on the shrine approach

    • Photo tip: On the Ben-ten Bridge, shoot toward the island with the Sea Candle tower centered in the frame. This matches a key visual from the series.

    Spot 4: Enoshima Aquarium — The Date Spot

    Anime reference: The Enoshima Aquarium (Enosui) is where Sakuta and Mai go on their first date. The jellyfish exhibit, the main tank, and the outdoor dolphin pool all appear in the series, making this one of the most important pilgrimage locations.

    Rascal Does Not Dream of Bunny Girl Senpai Pilgrimage — visitor highlights

    The Enoshima Aquarium, affectionately known as “Enosui” by locals, is one of Kanagawa’s premier aquariums. The jellyfish exhibit — featuring multiple species illuminated in color-changing tanks — was beautifully recreated in the anime. The main tank with its massive shoals of sardines and the outdoor dolphin performance pool are also must-see spots.

    • Access: 5 min walk from Katase-Enoshima Station, on the beachfront before the bridge
    • Hours: 9:00-17:00 (varies by season)
    • Admission: ¥2,500 (adult)
    • Best time: Weekday mornings for the fewest crowds
    • Photo tip: The jellyfish exhibit allows photography (no flash). Use a fast lens (f/1.8 or wider) and high ISO to capture the bioluminescent glow without flash. The main tank is best photographed during feeding times (check schedule at entrance).

    Spot 5: Shichirigahama High School Area

    Anime reference: Minegahara High School, the school attended by Sakuta and Mai, is visually inspired by schools in the Shichirigahama area. The coastal road along the seawall, where characters walk and talk, is a real location along Shichirigahama Beach.

    The area around Shichirigahama offers the iconic view of the Enoden train running alongside the coast — a scene that appears repeatedly as characters commute to school. While the actual high school is a generic background element, the coastal road and seawall are unmistakably real.

    • Access: 5 min walk south from Shichirigahama Station toward the coast
    • Best time: Early morning (7:00-9:00 AM) for the commuter atmosphere
    • Photo tip: From the seawall, wait for an Enoden train to pass and capture it against the ocean backdrop. This is the classic “anime commute” shot.

    Spot 6: Fujisawa Station Area

    Anime reference: Fujisawa Station and its surrounding shopping streets appear in scenes showing the characters’ daily lives — meeting after school, going to restaurants, and navigating the urban environment of Fujisawa city.

    The area around Fujisawa Station is a bustling commercial district with department stores, restaurants, and entertainment. While the specific shops in the anime are fictional, the atmosphere of a medium-sized Japanese city station precinct is faithfully captured.

    • Access: Fujisawa Station (JR Tokaido Line, Odakyu Line, Enoden Line)
    • Best time: Late afternoon through evening (4:00-7:00 PM) for the bustling after-school atmosphere
    • Photo tip: The station’s south exit plaza and the surrounding shopping arcades capture the everyday urban feel of the series.

    🗺 Sample Itinerary

    Full-Day Bunny Girl Senpai Pilgrimage Route (7-8 hours)

    Time Activity
    9:00 AM Depart from Tokyo (JR Tokaido Line from Tokyo Station)
    10:00 AM Fujisawa Station — explore the station area
    10:30 AM Enoden to Shichirigahama Station — platform photos
    11:00 AM Walk the coastal seawall — commute route photos
    12:00 PM Enoden to Katase-Enoshima Station — palace station photos
    12:30 PM Lunch at Enoshima — try shirasu (whitebait) bowl
    1:30 PM Enoshima Aquarium — the date spot (2 hours)
    3:30 PM Cross Ben-ten Bridge to Enoshima Island
    4:00 PM Enoshima Shrine approach — photos
    4:30 PM Sea Candle observation deck — sunset views
    5:30 PM Descend the island — shopping street souvenirs
    6:30 PM Return via Enoden + JR to Tokyo

    💡 Travel Tips

    Crowd Avoidance

    • Weekdays are significantly quieter than weekends
    • Enoshima Aquarium is busiest between 11:00 AM and 2:00 PM
    • Enoshima Island gets crowded on sunny weekends, especially spring and autumn
    • Visit Shichirigahama Station early morning for empty platform shots
    • Summer (July-August) is peak season for Enoshima beaches — expect crowds

    Best Time to Visit

    • Spring (March-May): Cherry blossoms + mild weather — ideal for walking the island
    • Summer (June-August): Beach season, lively atmosphere, but hot and humid
    • Autumn (September-November): Best season — comfortable temperatures, clear skies
    • Winter (December-February): Fewest crowds, crisp winter light, cold but photogenic

    What to Bring

    • Enoden 1-Day Pass (¥800) — essential for hopping between locations
    • Camera with versatile lens (24-70mm covers station, beach, and indoor aquarium shots)
    • Comfortable walking shoes (you’ll cover 10+ km)
    • Light jacket (ocean breeze can be cool even in summer)
    • Aquarium-friendly camera settings (fast lens or high ISO for jellyfish exhibit)

    Frequently Asked Questions

    Q: Is the Enoshima Aquarium the exact same one from the anime?

    A: Yes! The Enoshima Aquarium (Enosui) is the real-life location that inspired the aquarium date scenes in Bunny Girl Senpai. The jellyfish exhibit, main tank, and outdoor areas are all faithfully recreated in the anime.

    Q: Can I visit all Bunny Girl Senpai locations in one day?

    A: Absolutely. The locations are concentrated along a 5-km stretch of the Enoden Line, making it one of the most compact and accessible anime pilgrimages in Kanagawa. A full day (7-8 hours) is plenty of time.

    Q: When is the best time to photograph Shichirigahama Station?

    A: Late afternoon (3:00-5:00 PM) offers golden-hour light over the ocean. For the iconic platform shot with the sea behind the tracks, position yourself on the Fujisawa-bound platform. Avoid midday when the sun is directly overhead.

    Q: Is there an official Bunny Girl Senpai store in Enoshima?

    A: There is no permanent dedicated store, but the Enoshima area occasionally hosts anime collaboration events. Local souvenir shops in Enoshima sometimes carry Bunny Girl Senpai merchandise. Check the Anaba OffJapan community forum for current event information.

    Q: How much time should I budget for Enoshima Aquarium?

    A: Plan for at least 1.5-2 hours. The jellyfish exhibit alone is worth 30 minutes, and the main tank and dolphin show add another hour. It’s the single most time-consuming pilgrimage spot, but also the most rewarding.


    🔗 Related Articles


    Last Updated: 2026-06-08
    Written by: Anaba OffJapan Editorial Team


    Conclusion

    Walking through the Bunny Girl Senpai pilgrimage route in Enoshima was one of my favorite anime trips in Kanagawa — the platform at Shichirigahama, the Ryugu Palace station, and the aquarium where the characters go on their date all feel exactly like the anime. I recommend the Enoden 1-Day Pass and an early start, finishing at the Enoshima Sea Candle in time for sunset. Even if you’ve never seen the series, the Enoshima–Fujisawa coastline is one of the most photogenic stretches in Kanagawa. For more anime location guides, check out our Kamakura Enoshima area guide and Enoshima aquarium guide.


  • Kamakura Hidden Gorge Walk – Kanagawa 2026

    Kamakura Hidden Gorge Walk – Kanagawa 2026

    Kamakura Hidden Gorge Walk – Kanagawa 2026

    Overview

    Plan your perfect visit to Kamakura Hidden Gorge Walk – Kanagawa with this comprehensive destination guide, Covering everything from must-see attractions to practical travel tips, this guide helps you make the most of your time in Kamakura. Whether you have a single day or an entire week, discover the best that this Kanagawa destination has to offer.

    Introduction: Kamakura’s Secret Stream

    Kamakura Hidden Gorge Walk - Kanagawa 2026 — Introduction: Kamakura's Secret Stream

    Kamakura was built in a valley surrounded by forested hills. Several small streams flow down from these hills, and one of them — the Namiki River — has carved a surprisingly deep gorge through the soft volcanic stone. Local residents have maintained a walking path along this stream for over a century.

    Why This Walk is Special:

    • Temperature drop: The gorge stays 3-5°C cooler
    • Sound insulation: Stream drowns out city noise
    • Hidden in plain sight: Entrance unmarked in English
    • Year-round beauty: Each season transforms the gorge
    • Free and always open

    Seasonal Highlights:

    • Spring: Cherry blossoms over the stream
    • Summer: Cool refuge from heat
    • Autumn: Maple leaves reflected in water
    • Winter: Clear stream, moss vibrant green Updated: May 2026

    Finding the Entrance

    The entrance is the hardest part — the gorge is completely invisible from the main streets.

    Starting Point: Kenchoji Temple intersection
    
    Directions:
    1. From Kamakura Station, walk toward Kenchoji Temple [Explore Kamakura & Yokohama on a day tour — Great Buddha, Enoshima, Enoden train & night views from Tokyo](Explore Kamakura & Yokohama on a day tour — Great Buddha, Enoshima, Enoden train & night views from Tokyo)
       (15 min via Komachi Street or Kannana Avenue)
    
    2. Just before Kenchoji's main gate, turn RIGHT
       onto the small residential lane
    
    3. Walk past 3 houses on your left
    
    4. Look for a narrow gap between two stone walls
       — this is the gorge entrance
    
    Entrance Markers:
       - No sign in English
       - Small wooden post (Japanese: 遊歩道入口)
       - Stone paving begins

    The Gorge Walk: Section by Section

    Section 1: The Stone Corridor (0-200m)

    The path begins as a narrow stone walkway between high stone walls. The stream runs below on your left. Moss covers the walls, and ferns grow from every crevice.

    Terrain: Flat stone paving
    Width: 1.5m
    Canopy: 90% shade
    Sound: Stream + birds
    Key feature: 3 small stone bridges cross the stream

    Photo Spot #1: The first stone bridge, looking upstream. Mossy walls frame the view.

    Section 2: The Bamboo Grove (200-400m)

    The walls open up and a bamboo grove appears on the right. The path widens and benches appear. This is the widest and brightest section.

    Terrain: Packed gravel
    Width: 2-3m
    Canopy: Partial (bamboo filters light)
    Sound: Bamboo rustling + stream
    Features: 2 wooden benches, information board (Japanese)

    Photo Spot #2: Looking up through the bamboo toward the sky. Light filters through in geometric patterns.

    Section 3: The Waterfall Zone (400-600m)

    The stream gradient increases here. A series of small waterfalls (1-2m drops) create consistent white noise. The path narrows again and gets closer to the water.

    Terrain: Stone + compacted earth
    Width: 1m
    Canopy: 70% shade
    Sound: Waterfall white noise
    Features: 3 small waterfalls, deeper pools
    ⚠️ Warning: Path can be slippery near water

    Photo Spot #3: The main waterfall (1.5m drop) with a small stone lantern beside it. Best with a slow shutter (1/15 sec).

    Section 4: The Viewpoint Exit (600-800m)

    The path climbs slightly and ends at a small overlook platform overlooking the lower valley. From here, you can see the coast in the distance on clear days.

    Terrain: Stone steps (gradual climb)
    Exit: Small wooden platform
    View: Valley opening toward the sea
    Benches: 1 at platform
    Exit path: Returns to street level (3-min walk)

    Practical Information

    Best Times to Walk

    Weekday mornings (7-9 AM):
    - Nearly empty
    - Birds most active
    - Best light for photography
    
    Weekday afternoons:
    - Some local walkers
    - Good light in bamboo section
    - Pleasant temperatures Weekends:
    - More local families
    - Still quiet by Kamakura standards [Book Kamakura, Enoshima & Yokohama day trip from Tokyo — ride the iconic Enoden train & skip transport planning](Book Kamakura, Enoshima & Yokohama day trip from Tokyo — ride the iconic Enoden train & skip transport planning)
    - Mornings recommended Avoid:
    - After dark (no lighting)
    - During/after typhoon (flood risk)
    - Summer midday (still cool but humid)

    What to Bring

    Recommended:
    - Comfortable walking shoes
    - Camera (smartphone sufficient)
    - Water
    - Light jacket (cooler in gorge)
    - Insect repellent (summer)
    
    Optional:
    - Tripod (waterfall photos)
    - Picnic snacks (benches available)
    - Bird identification guide

    Etiquette

    ✅ Keep voices low (gorge amplifies sound)
    ✅ Stay on the path
    ✅ Pack out all trash
    ✅ Photography welcome (no flash)
    ✓ Respect private property bordering path
    ❌ No smoking
    ❌ No swimming in the stream
    ❌ No climbing on mossy walls

    Combining with Nearby Temples

    The gorge walk connects naturally to several temples:

    Route A: Morning Gorge + Kenchoji (2 hours)
    1. Enter gorge from Kenchoji side (8 AM)
    2. Walk through to exit (20 min)
    3. Return to Kenchoji (5 min)
    4. Visit Kenchoji Temple (1 hour)
    Best for: First-time visitors
    
    Route B: Gorge + Engakuji Loop (2.5 hours)
    1. Enter gorge from Kenchoji side (9 AM)
    2. Exit and walk toward Engakuji (10 min)
    3. Visit Engakuji (1 hour)
    4. Return via Komachi Street
    Best for: Temple enthusiasts
    
    Route C: Full Valley Walk (3 hours)
    1. Start at Kenchoji
    2. Gorge walk (20 min)
    3. Continue to hidden bamboo grove beyond exit
    4. Small shrine above the gorge
    5. Return through residential streets
    Best for: Explorers

    Frequently Asked Questions

    Q: Is this walk suitable for elderly or children?
    A: Yes, the path is flat and well-maintained. Only the last section has a gentle climb.

    Q: How long does the walk take?
    A: The gorge itself is 20 minutes one way. Most visitors spend 30-40 minutes total, including photo stops.

    Q: Is the gorge accessible in rain?
    A: Light rain is fine and actually enhances the atmosphere. Avoid during heavy rain (slippery, flood risk).

    Q: Can I access the gorge from both ends?
    A: Yes, enter from the Kenchoji side or the upper end. The lower entrance is better marked. Q: Are there restrooms along the walk?
    A: No. Use facilities at Kamakura Station or Kenchoji Temple before starting.


    Last Updated: May 19, 2026
    Written by: Anaba OffJapan Editorial Team
    Verified: Walk confirmed April 2026


    🌟 Share Your Experience

    Discovered this hidden gorge? Have photos to share? Join our community forum to share your Kamakura lesser-known spots!


    Anaba OffJapan – Avoid the Crowds, Go Deeper into Japan.


    🌿 Flora & Fauna Along the Gorge

    The Namiki Gorge’s unique microclimate supports an extraordinary variety of plant and animal life that changes dramatically with each season. Regular visitors often remark that the gorge feels like a completely different place depending on when they visit, Understanding these seasonal patterns allows you to plan your walk for the experience you want most — whether that’s vibrant autumn colors, spring blossoms, or the deep green tranquility of summer.

    How the Gorge Was Formed

    The Namiki Gorge was carved over millennia by the Namiki River, which originates in the hills behind Kenchoji Temple. The soft volcanic tuff and loam layers of Kamakura’s geology erode relatively easily, allowing the stream to cut a channel 5-8 meters deep through the surrounding terrain. This type of gorge formation is called a “valley incision” in geological terms — the stream maintained its course while the surrounding land gradually rose due to tectonic activity. Evidence of this process can be seen in the exposed rock layers along the path, where different colored strata tell the story of volcanic eruptions from Mt. Fuji and the Hakone region over the past 100,000 years. Visit Kamakura Great Buddha, Hachimangu Shrine & Enoshima on a guided day trip from Tokyo with transport included

    Best Photography Spots

    Location Best Time Recommended Lens Subject
    First stone bridge 9-11 AM 16-35mm wide Mossy walls framing stream
    Bamboo grove 10 AM-2 PM 50mm prime Light rays through bamboo
    Main waterfall Overcast days 24-70mm Long exposure water effect
    Viewpoint exit Late afternoon 70-200mm tele Valley opening to coast

    For the waterfall shots, a neutral density filter allows exposures of 0.5-2 seconds, turning the falling water into a smooth, silky cascade. A tripod is a must-have for this technique — even the steadiest hands cannot hold a half-second exposure without blur.

    Mindfulness Walk Technique

    The gorge’s acoustic environment — layered sounds of running water, bamboo rustling, bird calls, and wind through trees — creates what sound therapists call a “natural sound bath.” To experience this fully, find a bench in the bamboo section (200-400m), close your eyes for 3 minutes, and focus only on auditory input. Notice how the stream provides a constant bass layer, bamboo adds a mid-frequency rustle, and bird calls create treble accents. Regular practice of this technique has been shown to lower cortisol levels and improve mental clarity — a free therapy session that costs nothing and is available to anyone who visits.

    Trees and Plants to Identify

    Bird Species Commonly Seen

    • Bush warbler (uguisu) — heard more than seen, classic Japanese songbird
    • Japanese white-eye (mejiro) — small, active, attracted to flowers
    • Brown-eared bulbul (hiyodori) — loud calls, fruit eater
    • great tit (shijūkara) — acrobatic, common in the trees
    • Common kingfisher (kawasemi) — rare but occasionally seen near the stream if you’re patient and quiet

    Mindfulness Walk Tips

    Treat the gorge walk as a mindfulness exercise. At the bamboo section (200-400m), pause, put away your phone, and stand still for 3 minutes. Notice the layered sounds: stream base (constant), bamboo rustling (rhythmic), bird calls (sporadic), leaves falling (random). This acoustic environment has been shown to reduce cortisol levels — effectively a natural sound bath. Many local residents visit specifically for this purpose.


    Kamakura Hidden Gorge Walk - Kanagawa 2026 — Mindfulness Walk Tips

    Kamakura Hidden Gorge Walk proves that you don’t need to leave the city center to find peace. Just minutes from the busiest tourist streets, this cool, mossy streamside path offers a quiet escape into nature — and it’s completely free. It’s the perfect 20-minute reset between temple visits.


    Conclusion

    Whether you are planning exploring Kamakura for the first time or returning for another visit, taking a little extra time to go beyond the obvious sights makes all the difference. During my visit to Kamakura I went with a rough plan and found that leaving room to wander made the trip far more memorable. I hope this guide helps you build an itinerary that fits your pace, and that your time in Kanagawa leaves you with memories worth coming back for.