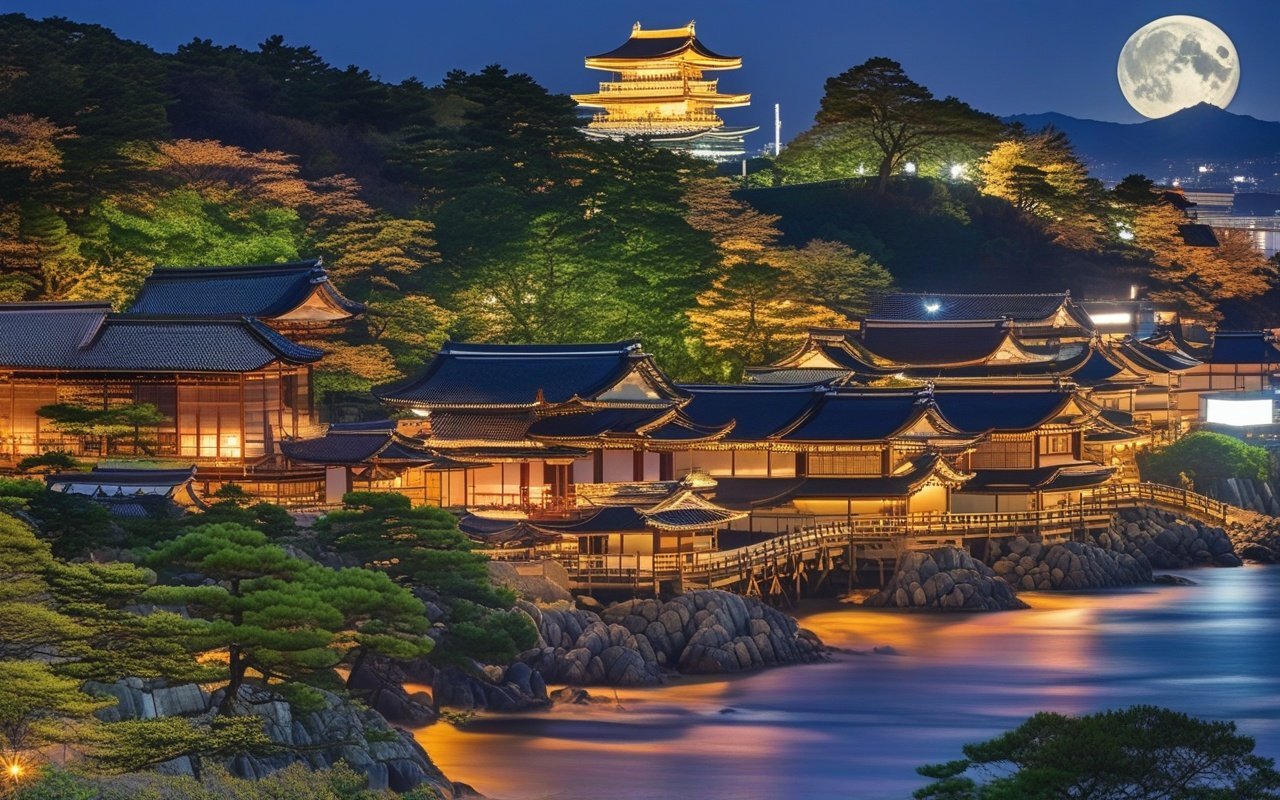
Category: Travel Tips

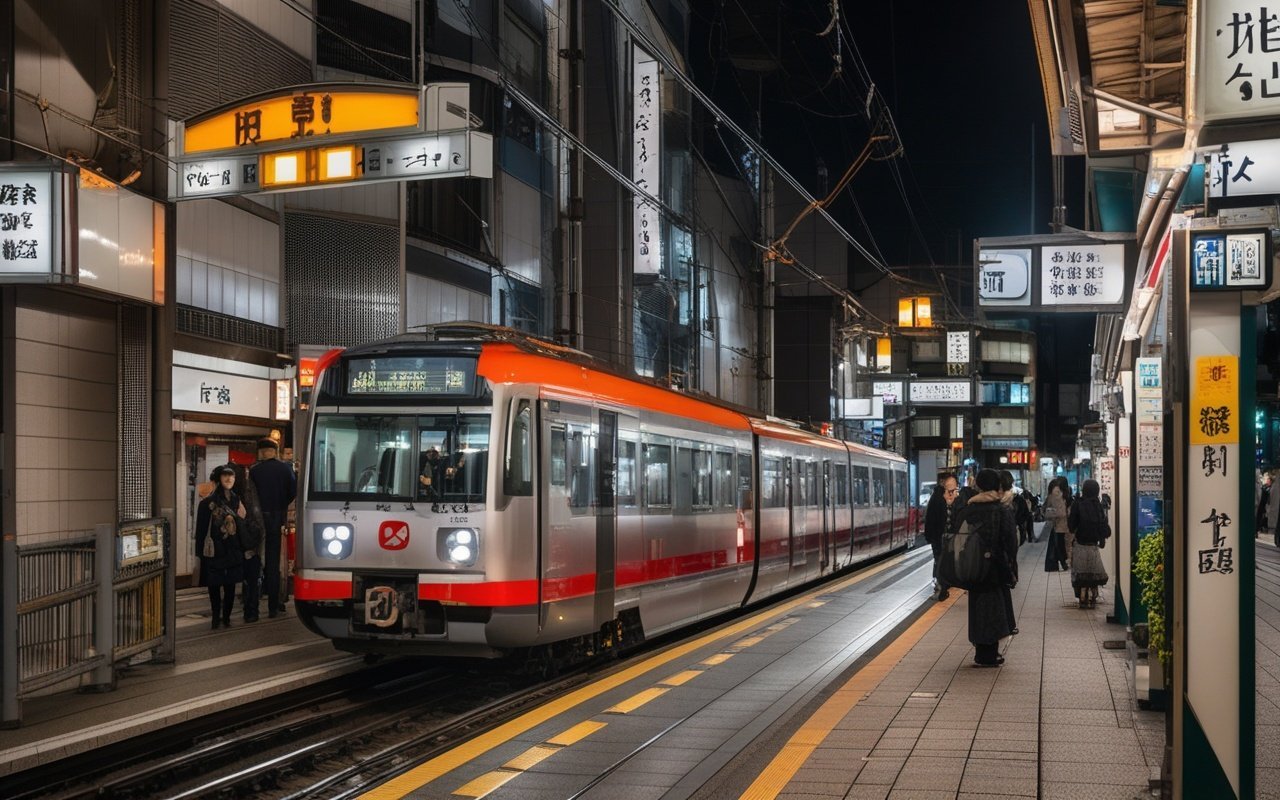
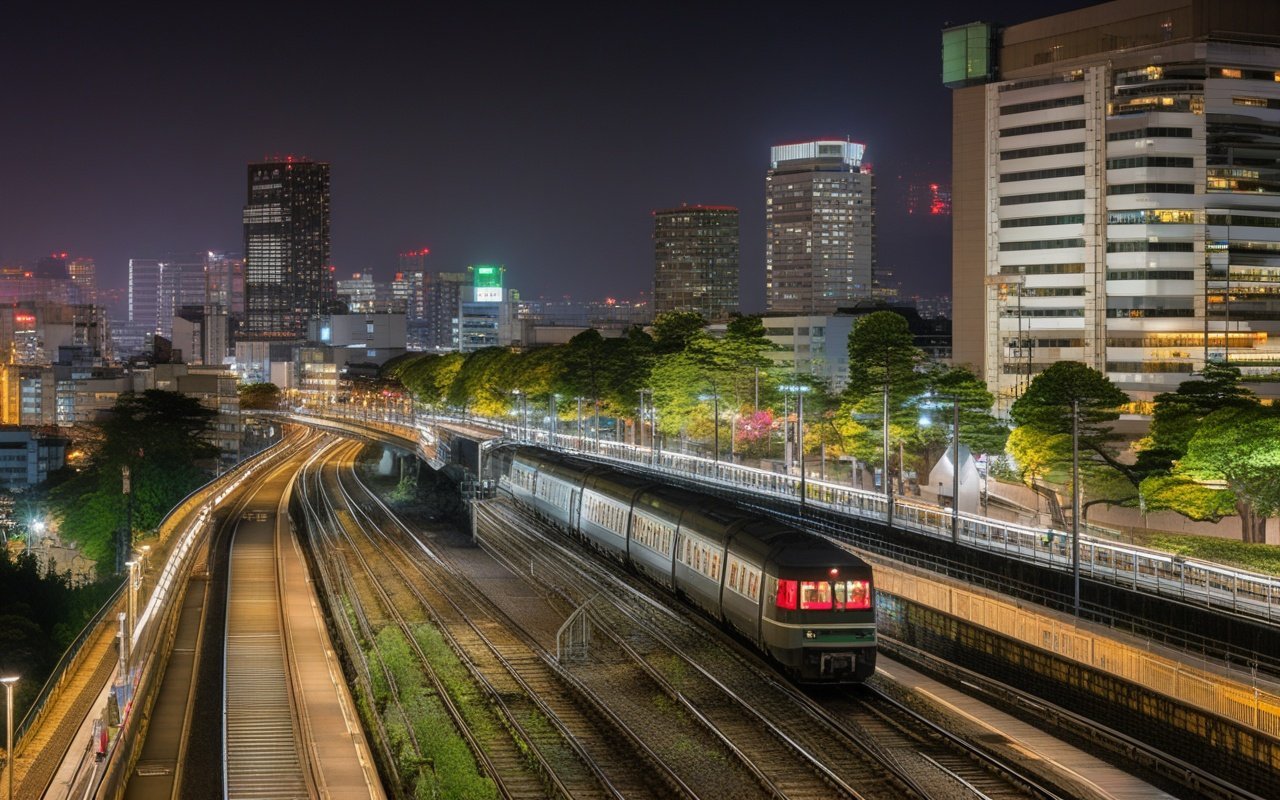
  • Kanagawa Night Safety Guide 2026 — Safe Evening…

    Kanagawa Night Safety Guide 2026 — Safe Evening…

    Overview

    Rated: Night Safety by Area

    Area Safety Rating Best For After 10 PM
    Yokohama — Minato Mirai ★★★★★ Illuminated waterfront walks, dinner Very safe, well-lit until late
    Yokohama — Yamashita Park ★★★★★ Night harbor views Safe, some areas quieter
    Yokohama — China Town ★★★★☆ Evening food exploration Moderate — restaurants close by 9 PM
    Yokohama — Noge ★★★★☆ Izakaya hopping Safe on main streets; stick to busy areas
    Yokohama — Isezaki-cho ★★★☆☆ Shopping Avoid — touts and less reputable bars
    Kamakura — Komachi-dori ★★★★★ Evening dining Very safe but most shops close by 8 PM
    Kamakura — Tsurugaoka Hachimangu ★★★★☆ Night lights events Very safe during events; quiet otherwise
    Enoshima ★★★★☆ Sunset + evening walk Safe until the last Enoden train (11 PM)
    Hakone ★★★★☆ Onsen ryokan evening Very safe in resort areas; dark on mountain roads
    Kawasaki — Station Area ★★★☆☆ Shopping, dining Exercise caution near pachinko parlors
    Shonan Beaches (summer) ★★★☆☆ Evening beach walk Quiet; limited lighting on some beaches

    Best Safe Night Activities

    🌃 Yokohama Night lights

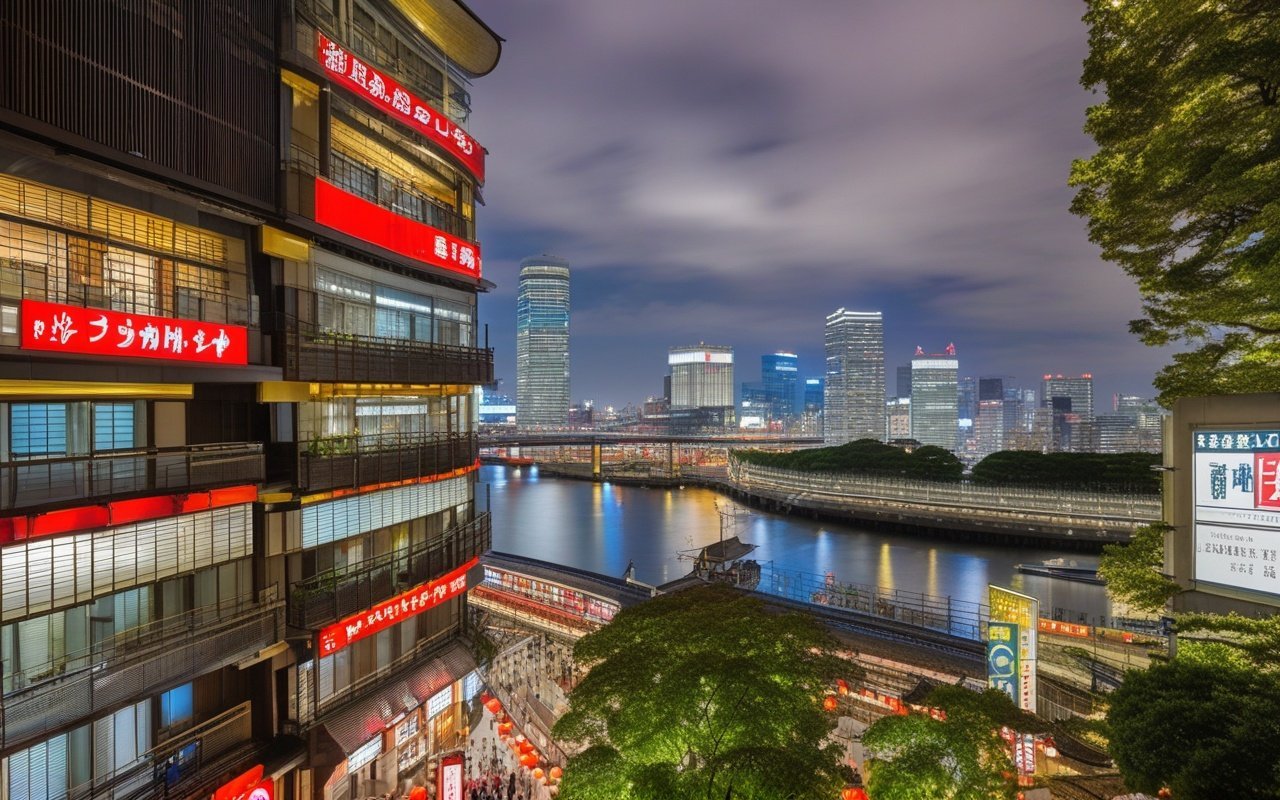
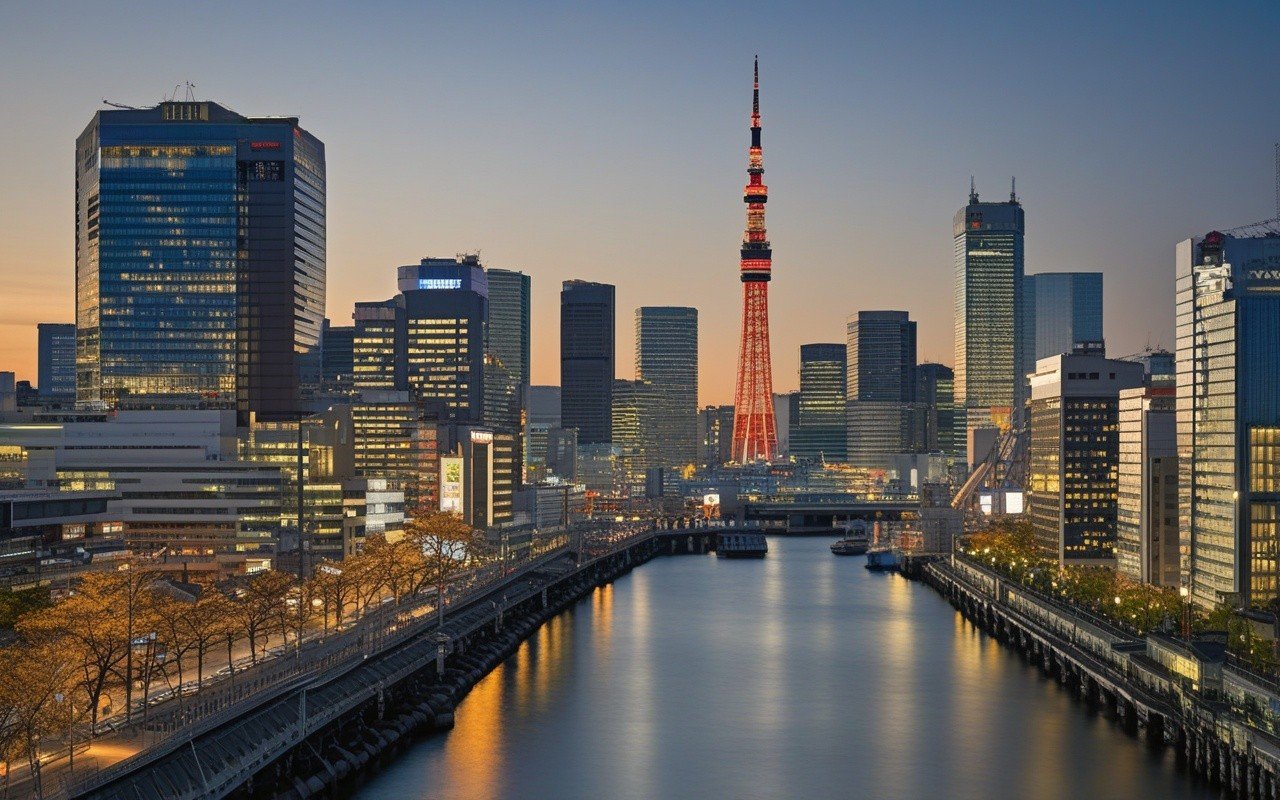
    Yokohama’s waterfront is amazing after dark:

    Activity Location Best Time Safety
    Minato Mirai夜景 Minato Mirai waterfront Sunset-11 PM ★★★★★
    Yokohama Bay Cruise Yokohama Port Evening cruises (1-2 hours) ★★★★★
    Yokohama Landmark Tower Sky Garden Landmark Tower 69F Until 9 PM (last entry 8:30 PM) ★★★★★
    Yamashita Park night walk Yamashita Park Until 10 PM ★★★★★
    Cosmo World Ferris Wheel Minato Mirai Until 9-10 PM (seasonal) ★★★★★

    🏮 Kamakura Evening things

    Activity Location Best Time Safety
    Komachi-dori dinner Kamakura Station East 5-8 PM ★★★★★
    Tsurugaoka Hachimangu night Main shrine approach During special lights ★★★★★
    Yuigahama evening walk Near Kamakura Station Sunset-7 PM (summer) ★★★★☆

    ♨️ Hakone Evening Onsen

    Onsen Location Hours Safety
    Yunessun Hakone-Yumoto 9 AM-7 PM (winter). 9 AM-8 PM (summer) ★★★★★
    Tenzan Onsen Gora area 10 AM-10 PM (last entry 9 PM) ★★★★★
    Hakone Yuryo Miyanoshita 10 AM-9 PM ★★★★★

    🌊 Shonan / Enoshima Evening

    Activity Location Best Time Safety
    Enoshima Sea Candle Enoshima Island Until 8 PM (last entry 7:30 PM) ★★★★☆
    Shonan Beach sunset walk Shichirigahama. Kugenuma Sunset-7 PM ★★★★☆
    Enoden evening ride Kamakura to Fujisawa Until 11 PM ★★★★★

    Night Transportation

    Last Train Times

    Knowing the last train times is critical for a smooth evening:

    Line Last Train (approx.) Frequency Until Last Train
    JR Tokaido Line (Tokyo-Yokohama-Odawara) 12:00 AM-12:30 AM Every 5-10 min until 11 PM. then every 15-20 min
    JR Yokosuka Line (Tokyo-Yokohama-Kurihama) 11:45 PM-12:15 AM Every 10-15 min until 10 PM
    JR Keihin-Tohoku Line (Omiya-Yokohama-Ofuna) 12:00 AM-12:30 AM Every 5-10 min
    Odakyu Line (Shinjuku-Odawara) 11:30 PM-12:00 AM Every 10-15 min
    Keikyu Line (Shinagawa-Misakiguchi) 11:30 PM-12:00 AM Every 10-15 min
    Enoden (Kamakura-Fujisawa) 10:45 PM-11:15 PM Every 12-15 min
    Shonan Monorail (Ofuna-Enoshima) 10:30 PM-11:00 PM Every 10-15 min
    Tokyu Toyoko Line (Shibuya-Yokohama) 12:15 AM-12:45 AM Every 5-10 min

    ⚠️ IMPORTANT: Enoden stops running earlier than most lines — the last train from Kamakura is around 11:00 PM. If you are in Enoshima or Kamakura after this time, you will need a taxi.

    Taxis at Night

    • Availability: Taxis are available at major stations throughout the night
    • Fares: Night surcharge (20% extra) applies from 10 PM to 5 AM
    • From Kamakura to Yokohama: about ¥6,000-8,000
    • From Enoshima to Kamakura: about ¥3,000-4,000
    • From Hakone to Odawara: about ¥4,000-5,000

    Ride-Hailing Apps

    App Coverage Notes
    GO Greater Tokyo area incl. Kanagawa Most popular. English interface available
    Uber Central Yokohama, limited suburban Available but fewer drivers than GO
    DiDi Yokohama area Good for Chinese-speaking users

    Kanagawa Night Safety Guide scenery and attractions


    Night Safety Tips

    General Night Safety

    • Stick to well-lit streets — main roads in Kanagawa are generally well-lit and safe
    • Avoid shortcuts through dark alleys — even in safe Kanagawa, stick to main routes
    • Walk purposefully — appearing confident deters unwanted attention
    • Keep your phone charged — for maps and emergencies
    • Share your location — share your real-time location with a friend or family member
    • Travel in groups when possible — there is safety in numbers

    For Solo Travelers

    • Choose centrally found lodging — close to train stations
    • Inform hotel staff — let them know your rough plans for the evening
    • Carry your hotel’s business card — with address in Japanese for taxi drivers
    • Stick to recommended areas — see the Night Safety Ratings table above
    • Avoid alcohol overconsumption — be mindful of your limits when alone

    For Female Travelers

    Japan is generally very safe for female travelers at night, but:

    • Women-only train carriages — available during morning rush hours (pink signs)
    • Avoid isolated areas — even in safe districts
    • Trust your instincts — if an area feels uncomfortable, leave
    • Staffed lodging — choose hotels with 24-hour front desk over Airbnbs for solo female travel
    • Emergency whistle — a small whistle can attract attention if needed

    What to Do If You Miss the Last Train

    Option 1: Take a Taxi

    Taxi stands are found at every major train station. At night, you may need to walk to the nearest taxi stand rather than hailing one on the street. Approximate taxi fares from popular night areas:

    From To Fare (night rate)
    Kamakura Yokohama ¥6,000-8,000
    Kamakura Tokyo ¥15,000-20,000
    Enoshima Kamakura ¥3,000-4,000
    Hakone Odawara ¥4,000-5,000
    Noge Yokohama Station ¥1,500-2,000

    Option 2: Ride-Hailing Apps

    Check the GO app for availability. Night surge pricing applies but is generally reasonable.

    Option 3: Late-Night Bus Services

    Some routes operate late-night buses, mainly from Tokyo to Yokohama:

    • Keikyu Bus: Late-night services from Shinagawa to Yokohama
    • Odakyu Highway Bus: Late-night services from Shinjuku to Odawara/Hakone

    Option 4: Stay Overnight

    If you are far from your lodging and taxis are expensive:

    • Karaoke boxes (like Big Echo. Maneki Neco) — open 24 hours. ¥2,000-4,000 for the night
    • Manga/internet cafes (like Manga Souko. Manboo!) — private booths with shower places. ¥2,000-3,000 for the night
    • 24-hour cafes — some cafes in Yokohama are open 24 hours

    Safe Nightlife tips

    Izakaya Hopping in Noge

    Noge is Yokohama’s most atmospheric drinking district:

    • Sakura-dori — main street with dozens of izakayas
    • Noge Central — covered shopping arcade with small bars
    • Uo-tana — seafood-focused local chain

    Minato Mirai Evening

    • World Porters — shopping and dining until 9 PM
    • Red Brick Warehouse — restaurants and events until 9 PM
    • Hotel bars — many hotels have great bars with harbor views

    Kamakura Evening Dining

    • Komachi-dori restaurants — most close by 8-9 PM
    • Kamakura Station area — some restaurants open until 10 PM
    • Yokohama-bound travelers — take the last Enoden to Ofuna, then JR to Yokohama

    🇯🇵 Night-Time Japanese Phrases

    English Japanese Pronunciation
    What time is the last train?. 終電は何時ですか? Shūden wa nanji desu ka?
    Where is the taxi stand? タクシー乗り場はどこですか? Takushī noriba wa doko desu ka?
    Please take me to this hotel このホテルまでお願いします Kono hoteru made onegai shimasu
    Is it safe to walk here? ここを歩いても安全ですか? Koko wo aruite mo anzen desu ka?
    I missed the last train 終電を逃しました Shūden wo nogashimashita

    Kanagawa Night Safety — detailed view


    Frequently Asked Questions

    Q: How can I stay informed during an emergency in Japan?
    A: Download the Safety Tips app by the Japan Tourism Agency for earthquake and tsunami warnings in English. Register with your embassy for emergency notifications. NHK World provides English-language disaster coverage. Most mobile phones in Japan receive emergency alerts automatically (J-ALERT) with English text. Q: What are the most important emergency numbers?
    A: Dial 110 for police and 119 for ambulance or fire services. English-speaking operators are available 24/7. For non-emergency police help, visit a koban (police box) — there are over 6,000 in Kanagawa. The Japan Helpline (0570-000-911) offers 24/7 English support for tourists. Q: Where are emergency shelters in Kanagawa?
    A: Emergency shelters (hinanjo) are found at schools, community centers, and public halls. The Safety Tips app shows the nearest shelter on a map. Major evacuation centers include Yokohama Arena (capacity 17,000) and Yokohama International Stadium (72,000). Yellow and green signs mark shelter locations throughout the city. Q: What should I include in my emergency kit?
    A: Carry a small day-bag with: water bottle, copy of passport and hotel address in Japanese, and ¥10,000-20,000 in small bills. Convenience stores stock emergency supplies, During typhoon season (June-October), also pack a rain jacket and waterproof bag for electronics. Q: Is travel insurance recommended for Kanagawa?
    A: Yes, comprehensive travel insurance is strongly recommended. It covers medical emergencies (including hospital visits), trip cancellation, lost luggage, and emergency evacuation. Some Japanese hospitals need upfront payment or proof of insurance before treatment. Keep your insurance card and a digital copy of your policy accessible at all times. My personal exploration of Kanagawa has been incredibly rewarding, and I encourage every traveler to time these places firsthand.

    Final Thoughts

    Kanagawa Night Safety Guide 2026 — Safe … is your starting point for exploring this part of Kanagawa. With these practical tips, you’ll navigate Kanagawa with confidence and enjoy a smooth travel time. For more guides, check out our other articles covering Hakone, Kamakura, Yokohama, Shonan, and the Miura Peninsula. —

    Packing Essentials

    For a trip to Kanagawa, pack comfortable walking shoes as you will be on your feet exploring temples, shrines, and neighborhoods. A reusable water bottle is essential – tap water is safe to drink. A small umbrella or light rain jacket is useful year-round. Power banks are recommended since you will rely on your phone for maps. A small daypack for daily essentials makes sightseeing more convenient.

    Conclusion

    exploring Kanagawa for its night can be as relaxed or as packed as you want it to be, and I have found that the best visits leave room for both planning and spontaneity. During my visit I went with a rough plan and found that leaving room to wander made the trip far more memorable. Use this guide to sort out the logistics in advance, then let the day surprise you — Kanagawa rewards travelers who stay curious.
  • Kanagawa Summer Heat Guide 2026 — Staying Cool & Safe in…

    Kanagawa Summer Heat Guide 2026 — Staying Cool & Safe in…

    Introduction

    Summers in Kanagawa can be intensely hot and humid, but with proper preparation you can still enjoy everything the region offers. This guide covers heat management strategies, cooling spots, and summer-specific tips.

    Seasonal Highlights in Kanagawa

    Each season in Kanagawa brings unique attractions and experiences that make多次 visits rewarding. The prefecture’s diverse geography — from coastal Shonan to mountainous Hakone — means there is always something in bloom, something to harvest, or a festival to enjoy regardless of when you visit.

    Best Activities by Season

    Planning your activities around the season enhances your Kanagawa experience, Spring calls for cherry blossom viewing along the Enoden tram line and hiking in the Tanzawa Mountains. Summer is perfect for beach days at Shonan and evening fireworks displays. Autumn offers spectacular foliage viewing in Hakone and Kamakura. Winter provides the clearest Mount Fuji views and relaxing onsen experiences.

    Practical Travel Tips for This Season

    Packing appropriately for the season makes a significant difference in comfort. Regardless of season, comfortable walking shoes are essential as many attractions involve walking on uneven paths at temples and shrines. Check the seasonal event calendar before your trip and book popular restaurants and accommodations in advance during peak seasons like cherry blossom and autumn foliage periods.
    Summer in Kanagawa means fireworks and festivals. Major hanabi events include Yokohama Sparkling Twilight (July), Kamakura Fireworks Festival (August), and Odawara Komagataze Fireworks (August). Arrive 2-3 hours early for good viewing spots.

    The Shonan beaches are the main summer attraction, with Zushi and Kamakura’s Yuigahama being the most popular. Beach houses (umino-ie) operate from July to August, offering food, drinks, and rental equipment. Expect crowds on weekends and during Obon week (August 13-16).

    Kanagawa Summer Heat Guide 2026

    Overview

    Kanagawa summers are hot and humid. Temperatures exceed 30°C (86°F) in July-August with humidity making it feel hotter. This guide helps you stay cool and safe.

    Daily Strategy

    Morning (before 11 AM): best for outdoor activities. Midday (11 AM-3 PM): seek air-conditioned spaces — museums, shopping, cafes. Late afternoon (3-5 PM): heat eases, Evening (after 5 PM): perfect for outdoor dining, beer gardens, fireworks.

    Keeping Cool

    Hand fan or portable fan (¥300-2000). Cooling towels (¥300-500) on neck and wrists. Drink Pocari Sweat before thirsty. Avoid alcohol/caffeine during peak heat.

    Best AC Spots

    Landmark Tower Sky Garden, Minato Mirai shopping, Cup Noodles Museum, Ramen Museum, Yokohama Museum of Art, department stores, chain cafes.

    What to Carry

    SPF 50+ sunscreen, wide-brim hat, UV sunglasses, water bottle, cooling towel, portable fan. Reapply sunscreen every 2 hours.

    Heatstroke Signs

    Dizziness, headache, nausea, muscle cramps, heavy sweating or hot dry skin. If experienced: shade, water, cool body, fan. Call 119 if severe.nnKanagawa Summer Heat Guide 2026 — Staying Cool & Safe in... — Overview

    Access

    Getting to Kanagawa from Tokyo is straightforward by train, and most routes take well under two hours. During my trips I relied on an IC card for every connection and kept a bus timetable saved on my phone as backup. If you are staying overnight, look for accommodation near the station to save time.

    Frequently Asked Questions

    Q: Q: What is the best season to visit Kanagawa?
    A: A: Spring (March-May) and autumn (September-November) offer the most comfortable weather for outdoor activities, Spring brings cherry blossoms along the Enoden line and in Kamakura’s temple gardens. Autumn provides spectacular foliage in Hakone and pleasant hiking conditions. Summer offers beaches and festivals but is hot and humid. Winter has the clearest Mount Fuji views and relaxing onsen experiences.

    Q: Q: How should I dress for this season?
    A:
    A: In spring/autumn: layers are essential as temperatures vary — a light jacket or sweater with a t-shirt works well. Summer: lightweight, breathable fabrics (linen, cotton), wide-brim hat, UV sunglasses, and comfortable walking shoes. Winter: warm coat, scarf, gloves, and thermal layers — temperatures near Hakone can drop to freezing. Regardless of season, comfortable walking shoes are non-negotiable.

    Q: Q: What seasonal events should I not miss?
    A: A: Spring: cherry blossom viewing at Tsurugaoka Hachimangu (Kamakura) and Odawara Castle. Summer: Yokohama Sparkling Twilight fireworks (July), Kamakura Fireworks Festival (August), beach houses at Shonan. Autumn: Hakone 紅葉 (fall foliage) festival, Kamakura autumn illuminations. Winter: Hakone Illumination, illuminations at Yokohama’s Minato Mirai.

    Q: Q: How does weather affect transportation?
    A:
    A: Trains and buses operate normally in most weather conditions, but during typhoons (peak August-September) or heavy snow (rare in coastal areas, possible in Hakone), services may be delayed or suspended. Check the operator’s website or Twitter feed for real-time updates. JR East provides English service alerts on their website.

    Q: Q: What seasonal foods should I try?
    A:** A: Spring: strawberry sweets, sakura-flavored treats, fresh bamboo shoots. Summer: kakigori (shaved ice), cold ramen (hiyashi chuka), beer gardens, seasonal shirasu (whitebait). Autumn: roasted chestnuts, sweet potatoes, grilled sanma (Pacific saury). Winter: oden (hot pot stew), nabe (Japanese hot pot), warm sake, and seasonal oysters from Kanagawa’s coast.

    Surviving and Thriving in Kanagawa Summer: What I Learned

    Kanagawa summers are no joke — temperatures hit 35°C with humidity over 80%. But summer also offers the best festivals, beach days, and evening atmosphere of any season. Here is how to enjoy it without suffering.

    Daily Schedule That Works

    After one miserable August afternoon trying to visit Kamakura’s temples at noon, I restructured my summer days entirely: 6:00-10:00 AM — Outdoor activities (golden window)
    This is your best window for temple visits, hiking, or walking tours. The temperature is under 28°C, humidity is lower, and crowds are thin. I visit Kamakura’s Great Buddha (¥300) and Hase-dera (¥400) during this window — both open at 8 AM.

    10:00 AM-3:00 PM — Indoor survival (AC zone)
    Do not fight the midday heat. Plan indoor activities:

    • Yokohama Cup Noodles Museum (¥500, 10 AM-6 PM)
    • Landmark Tower Sky Garden (¥1,000, air-conditioned observation deck)
    • Yokohama Museum of Art (¥500, 10 AM-6 PM)
    • Department store basements (depachika) for food crawling
    • Chain cafes (Doutor, Starbucks, Tully’s) for cooling breaks

    3:00 PM-5:00 PM — Transition window
    The heat eases but UV remains high. Good for covered shopping streets (Kamakura Komachi-dori has awnings along much of its length).

    5:00 PM onwards — Prime summer time
    This is when Kanagawa comes alive. Beer gardens open on rooftops, fireworks displays begin, and the ocean breeze makes coastal areas comfortable.

    Cooling Gear That Actually Works

    I tested multiple cooling methods during last August’s heatwave. Here is what I recommend:

    • Cooling towel: ¥300 at any drugstore. Wet, wring out, snap to activate. Around neck and wrists. Effective for about 1 hour before rewetting.
    • Portable fan: Neck-type fans (¥2,000-3,000) are hands-free and surprisingly effective. The Xiaomi portable fan (¥1,800 on Amazon Japan) is quiet and lasts 4 hours on medium.
    • UV-cut umbrella: More common in Japan than hats. ¥1,000-2,000 at any convenience store. Provides shade and keeps you 2-3°C cooler.
    • Cooling spray: ¥500-800 at drugstores. Spray on clothes (not skin) for instant cooling. Lasts about 30 minutes.
    • Hydration strategy: Drink 500ml of water or sports drink (Pocari Sweat, Aquarius) every hour during outdoor activity. Convenience stores sell 500ml bottles for ¥100-150.

    Best Air-Conditioned Retreats

    When you need serious cooling, head to these spots:

    Spot Location AC Power Cost
    Landmark Tower Sky Garden Yokohama ❄️❄️❄️❄️❄️ ¥1,000
    Cup Noodles Museum Yokohama ❄️❄️❄️❄️ ¥500
    Doutor Coffee (any branch) Everywhere ❄️❄️❄️ ¥200-400
    Yokohama subway Underground ❄️❄️❄️❄️ ¥200-500
    Department store food halls Major stations ❄️❄️❄️❄️ Free entry
    Cinema complexes Shibuya/Yokohama ❄️❄️❄️❄️❄️ ¥1,800-2,000

    Summer Festival Survival

    Summer fireworks in Kanagawa are spectacular but crowded. Here is how to survive:

    • Arrive 2 hours early with a picnic blanket to claim your spot
    • Bring a small fan, water, and insect repellent (mosquitoes are active at dusk)
    • Wear light yukata (¥3,000-5,000 rental) — the loose fit is actually cooler than Western clothing in humid weather
    • Know the last train time from the nearest station — post-fireworks queues can take 30-60 minutes

    Heatstroke Warning Signs

    Heatstroke is a real risk in Kanagawa summers. Know the signs:

    • Early: Dizziness, muscle cramps, heavy sweating
    • Moderate: Headache, nausea, pale skin, rapid pulse
    • Severe: Hot dry skin (sweating stops), confusion, loss of consciousness

    Action: At the first sign, stop activity, find air conditioning, drink water with salt (or Pocari Sweat), and cool your neck and wrists with cold water. If severe symptoms: call 119 (English-speaking operators available).

    Packing Essentials

    For a trip to Kanagawa, pack comfortable walking shoes as you will be on your feet exploring temples, shrines, and neighborhoods. A reusable water bottle is essential – tap water is safe to drink. A small umbrella or light rain jacket is useful year-round. Power banks are recommended since you will rely on your phone for maps. A small daypack for daily essentials makes sightseeing more convenient.

    Conclusion

    The details in this guide come from real visits, and the biggest lesson I took away was that the best experiences in Kanagawa rarely fit neatly into a checklist. During my visit I went with a rough plan and found that leaving room to wander made the trip far more memorable. Plan the essentials, keep your schedule flexible, and you will leave Kanagawa wanting to return.

  • Miura Peninsula Travel Guide 2026 — Guide for…

    Miura Peninsula Travel Guide 2026 — Guide for…

    Overview

    I visited Miura Peninsula several times to explore its hiking trails, tuna ports, and coastal charm. This guide combines my favorite routes and local discoveries for your trip., and practical know-how for a smooth journey.

    🐟 Food & Tuna Cuisine

    Miura is famous for its tuna (maguro) — Misaki Port is one of Japan’s largest tuna fishing ports. The local cuisine centers around fresh seafood, with tuna served as sashimi, donburi, and even in curry.

    Must-Try Foods

    • Misaki Tuna Donburi — Fresh tuna over rice, served at dozens of port-side places to eat
    • Misaki Morning Market Tuna — The freshest catch available at the early market
    • Unused Fish Lunches — A sustainable dining trend using locally caught underutilized species
    • Miura Strawberry Picking — Seasonal strawberries (January–May) from local farms

    Food Guides

    🏖 Coastal Spots & Scenery

    Jogashima Island

    Connected to the mainland by a bridge. Jogashima offers dramatic coast views, and stunning sunset views. The island is also known for its unique geological formations. – Jogashima Hiking Trail Guide

    Misaki Port

    The working port of Misaki offers a lively early market, and a charming walking course perfect for a half-day excursion. – Misaki Port Walking Guide

    Pretty Spots

    🎆 Seasonal Events

    Miura’s calendar is filled with season fun:

    Season Event Months
    Spring Strawberry picking at local farms January–May
    Summer Miura Fireworks Festival August
    Autumn Tuna festivals and harvest events October–November
    Year-round Misaki Port market Daily

    For detailed event info:

    ♻️ Sustainable Travel

    Miura Peninsula is at the forefront of sustainable food tourism in Kanagawa. The Unused Fish Project addresses the issue of bycatch by promoting underutilized fish species in local places to eat. This initiative reduces food waste while with visitors a unique culinary time. – Miura Unused Fish Lunches — Where to try sustainable seafood

    🗺 Sample Itineraries

    Half-Day Trip: Misaki Port & Tuna Lunch

    • Morning: Visit Misaki Morning Market (arrive by 9 AM)
    • Lunch: Tuna donburi at a port-side place to eat
    • Afternoon: Walk the Misaki Port walking course
    • See: Misaki Port Access Guide

    Full-Day Adventure: Cycling + Jogashima

    • Morning: Start cycling from Keikyu Misakiguchi Station
    • Midday: Break for lunch at Misaki Port
    • Afternoon: see Jogashima trails and lighthouse
    • Evening: Sunset at Jogashima
    • See: Miura Peninsula Cycling Route

    Weekend Getaway: Fishing + Camping

    Access Information

    The easiest way to reach most Kanagawa destinations is by train from Tokyo. The Shinkansen reaches Odawara in 35 minutes, while local and express trains serve Yokohama, Kamakura, and the Shonan coast. Buses are available for mountain and coastal areas not served by rail. Check the specific access section for detailed route information.

    What to Expect

    Visiting Kanagawa as a tourist offers a blend of urban convenience and natural beauty. Most attractions are within a 10-15 minute walk from train stations, with clear English signage at major locations. You’ll find convenience stores (konbini) every few blocks for snacks, drinks, and ATM access. Public restrooms are available at stations and parks, though some older facilities may lack Western-style toilets. The area is generally very safe, even at night, but staying aware of your surroundings is always wise.

    Nearby Recommendations

    If you have extra time, the surrounding area offers several worthwhile additions to your itinerary. Local tourist information centers can provide maps and suggestions for combining nearby attractions into an efficient route. Many areas offer combination tickets that save money compared to buying individual admission tickets. Consider extending your stay to explore neighboring towns and villages.

    Local Tips

    For the best experience, locals suggest exploring side streets away from the main tourist areas. Some of the best restaurants and shops are hidden down narrow alleys. Ask your accommodation staff for their personal recommendations – they often know the best local spots not found in guidebooks. If you see a line of locals waiting outside a restaurant, join it – it’s usually worth the wait.n

    Frequently Asked Questions

    Q: Is Miura Peninsula a good place for first-time visitors to Japan?
    A: Miura is better suited to repeat visitors or those staying in Kanagawa for a week or more. It offers real coastal Japan away from crowds, but English signs are few. If short on time, pick Kamakura or Hakone first. Miura shines on your second visit. Q: What’s the best way to save money in Miura?
    A: The Keikyu Line offer “Miura Hiking Pass” (¥2,100 from Shinagawa) which includes unlimited train travel in the area — great value. For food, the Misaki Morning Market has the best tuna at wholesale prices, Bring cash — many small places to eat and market stalls don’t accept cards. Q: How do I get around Miura Peninsula without a car?
    A: The Keikyu Line is the main transport artery, connecting Misakiguchi Station to Tokyo in 70 minutes. Local buses serve Jogashima and coastal areas but run infrequently (every 30-60 minutes). Renting a bicycle from Misakiguchi Station (¥1,000-2,000/day) is the best way to see the peninsula at your pace. Q: Is tuna safe to eat raw at the Misaki early market?
    A: Absolutely. Misaki Port is one of Japan’s largest tuna ports, and the early market tuna is some of the freshest you’ll find anywhere. The tuna is kept cold from boat to market. For the safest choice, buy from stalls where locals line up. Q: Can I visit Jogashima and do fishing in one day?
    A: Yes, but it requires an early start. Take the first Keikyu train from Shinagawa (arrive Misakiguchi by 8:30 AM). bus to Jogashima for morning hiking, then head to Misaki Port for tuna lunch and afternoon fishing charter (2-3 hours). Return to Tokyo by 7 PM. For a relaxed time, split across two days. My personal travel of Kanagawa has been incredibly rewarding, and I encourage every traveler to time these places firsthand.

    Seasonal tips

    The Miura Peninsula offers different things by season, Spring (March-May) brings strawberry picking and cherry blossoms. Summer (June-August) is beach season, with the best swimming at Miura Beach. Autumn (September-November) offers the clearest skies for hiking and the Miura Fishery Festival. Winter (December-February) is the best time for fresh tuna at Misaki Port — the winter catch is famously fatty and flavorful.

    Final Thoughts

    This guide is your starting point for seeing this part of Kanagawa. With these useful tips, you’ll navigate Kanagawa with confidence and enjoy a smooth travel time. For more guides, check out our other articles covering Hakone, Kamakura, Yokohama, Shonan, and the Miura Peninsula. —

    Conclusion

    Whether you are planning exploring the Miura Peninsula for the first time or returning for another visit, taking a little extra time to go beyond the obvious sights makes all the difference. During my visit to the Miura Peninsula I went with a rough plan and found that leaving room to wander made the trip far more memorable. I hope this guide helps you build an itinerary that fits your pace, and that your time in Kanagawa leaves you with memories worth coming back for.

  • Hakone Travel Guide 2026 — Ultimate Onsen Resort Guide…

    Hakone Travel Guide 2026 — Ultimate Onsen Resort Guide…

    Hakone (箱根) is Kanagawa’s premier mountain resort destination and one of Japan’s most accessible hot spring getaways from Tokyo, Famous for its natural onsens, panoramic Mount Fuji views, and world-class museums, this volcanic highland area offers one of the most complete travel experiences in Japan — combining relaxation, culture, nature, and adventure in a compact area just 85 minutes from Tokyo Station.
    What sets Hakone apart from other Japanese destinations is its extraordinary diversity within a small geographic area. Within a single day you can soak in a mineral-rich hot spring, ride a ropeway over an active volcanic valley, cruise across a crater lake with Fuji views, explore an open-air sculpture museum, and dine on local yuba cuisine — all connected by an integrated transport loop that is itself a tourist attraction.
    This guide brings together 24 expert articles across six categories to help you plan the perfect Hakone visit, whether you are here for a day trip, a weekend ryokan stay, or a multi-day mountain escape.

    Our guide to Hakone Onsen Tattoo Friendly has additional tips and recommendations.

    Overview

    Hakone was one of the first destinations I explored after moving to Tokyo, and it remains my favorite escape from the city. During my first visit I went straight from Hakone-Yumoto up the Tozan Railway, and I remember standing at Owakudani with the sulfur smoke rising around me, amazed that all of this was only 85 minutes from home. I’ve now visited four times across different seasons, and I recommend spending at least one night in an onsen town like Gora — waking up to a quiet ryokan breakfast before the day-trippers arrive completely changes the experience. When I walked through the transport loop for the first time, I understood why the Hakone Free Pass is worth every yen.

    📍 Getting to Hakone

    Hakone Travel Guide scenery and attractions

    The Hakone Tozan Railway is Japan’s oldest mountain railway, offering stunning views as it climbs 453 meters through lush forest and switchback curves.

    Hakone Travel — detailed view

    Lake Ashi (Ashinoko) is a scenic crater lake formed 3,000 years ago, where sightseeing pirate ships offer panoramic views of the surrounding landscape.

    Hakone Travel Guide — visitor highlights

    The Hakone Ropeway glides over the active Owakudani volcanic valley, famous for its sulfur vents and the legendary kuro-tamago (black eggs).

    Hakone Travel Guide surrounding area and access

    Detailed map showing Hakone’s transport loop — the integrated circuit of train, cable car, ropeway, and cruise that connects all major attractions.

    Our taxi guide explains how to use taxis in Kanagawa, from hailing to payment.
    Hakone is one of the most accessible mountain resorts from Tokyo, with multiple train and bus options connecting the area in about 1.5 hours. The journey itself is part of the experience — especially the scenic Odakyu Romancecar ride through the mountains.

    From Tokyo

    • Odakyu Romancecar: 85 minutes from Shinjuku to Hakone-Yumoto (¥2,470, reserved seat, direct) — the most scenic and comfortable option. See our Odakyu Romancecar guide for booking tips and seat recommendations.
    • JR Shinkansen: 40 minutes to Odawara, then 15 minutes local train to Hakone-Yumoto (¥4,500, covered by JR Pass). Detailed route info in our how to get to Hakone from Tokyo guide.
    • Highway Bus: 2–2.5 hours from Shinjuku to Hakone-Yumoto (¥1,800–2,500, budget-friendly)

    Money-Saving Tickets

    The Hakone Free Pass is the best value by far — covering round-trip transport from Tokyo plus unlimited local transport in Hakone for 2 days. Read our Hakone Free Pass ultimate guide for a full cost comparison, and our Hakone Free Pass guide for a quick overview.

    Ticket Price Coverage Best For
    Hakone Free Pass (Odakyu) ¥5,140 from Shinjuku Round-trip + unlimited Hakone transport (2 days) Most visitors
    Hakone Free Pass (from Odawara) ¥4,000 Unlimited Hakone transport (2 days) JR Pass holders
    Hakone Kamakura Free Pass ¥5,140 Hakone + Kamakura/Enoshima (3 days) Multi-destination trips

    Getting Around Hakone

    Hakone’s unique appeal is its integrated transport loop that connects all major attractions. The loop can be completed in either direction and takes about 3–4 hours without stops:

    1. Hakone Tozan Railway: Switchback train from Hakone-Yumoto to Gora (40 min, scenic mountain views). See our Hakone Tozan Railway guide for the best carriage positions and photo spots.
    2. Hakone Tozan Cable Car: Funicular from Gora to Sounzan (10 min, Japan’s steepest cable car)
    3. Hakone Ropeway: Aerial cable car from Sounzan to Togendai (30 min, panoramic views over Owakudani). Our Hakone Ropeway guide covers wait times, best photo spots, and weather tips.
    4. Hakone Sightseeing Cruise: Pirate ship across Lake Ashi (30 min, iconic Mount Fuji views). Check our Hakone Pirate Ship experience for the best boarding times and deck positions.
    5. Local buses: Connect all stations and attractions within the loop

    📖 Deep dive: How to get to Hakone from Tokyo · Hakone Free Pass ultimate guide · Hakone Tozan Railway guide · Odakyu Romancecar guide · Hakone Ropeway guide · Hakone Pirate Ship experience


    ♨️ Onsen & Ryokan Guide

    Hakone is synonymous with onsen. The area has seven distinct hot spring zones («Hakone Nanayu»), each with different water qualities ranging from clear alkaline waters to sulfur-rich acidic springs. For a complete introduction, see our Hakone onsen complete guide.

    Day Trip Onsens (Under ¥2,000)

    These facilities allow non-guests to bathe without staying overnight — perfect for day-trippers:

    Facility Price Hours Access Features
    Tenzan Onsen ¥1,300 7:00–26:00 10 min bus from Hakone-Yumoto 10 indoor/outdoor baths, sauna
    Hakone Yuryo ¥2,200 10:00–21:00 15 min taxi from Hakone-Yumoto Private outdoor baths, forest views
    Hakone Kamonoyu ¥1,500 10:00–20:00 5 min bus from Gora Traditional wooden bathhouse

    For more options including hidden and less-crowded spots, see our Hakone day trip onsen and Hakone hidden hot springs guides.

    Overnight Ryokan with Private Onsen

    Category Property Price/Night Features
    Luxury Gora Kadan From ¥50,000 Former imperial villa, Michelin-starred dining
    Luxury Hakone Kowakien Ten-yu From ¥40,000 Modern luxury, multiple bath types
    Mid-range Hakone Suishoen From ¥20,000 Lake views, garden baths
    Mid-range Ryokan Kappa From ¥15,000 Traditional atmosphere, kaiseki dinner
    Budget Guesthouse Gora From ¥8,000 Social atmosphere, shared baths

    Onsen Etiquette

    1. No swimsuits — bathing nude is mandatory
    2. Wash thoroughly at shower stations before entering
    3. No towels in the bath — leave on the side or on your head
    4. Tie up long hair before entering
    5. No photography — strictly prohibited in bath areas

    For a deeper understanding of onsen culture and rules, read our Hakone onsen culture & etiquette guide. If you have tattoos, check our advice on tattoo-friendly facilities in the Hakone onsen complete guide.

    📖 Deep dive: Hakone onsen complete guide · Hakone day trip onsen · Hakone hidden hot springs · Hakone onsen culture & etiquette · What to wear in Hakone by season


    🏛 Top Attractions

    Hakone packs an extraordinary number of world-class attractions into a small area. Here are the must-see spots:

    Owakudani (Great Boiling Valley)

    Best for: Volcanic activity, black eggs, Mount Fuji views Discover Mt Fuji’s 5th Station, World Heritage Center & Owakudani volcanic valley on this scenic Hakone day trip

    • Hours: 9:00–17:00 | Admission: Free (ropeway required)
    • Access: Hakone Ropeway to Owakudani Station
    • Highlight: Active volcanic valley with sulfur vents, Famous for «kuro-tamago» (black eggs) boiled in the hot springs — legend says eating one adds 7 years to your life! The volcanic activity creates an otherworldly landscape that is one of Hakone’s most iconic experiences.

    Lake Ashi (Ashinoko)

    Best for: Scenic cruises, Mount Fuji reflection, photography Explore Mt Fuji & Hakone on a full-day trip with sukiyaki lunch, Hakone Cruise, Ropeway & Shinkansen return

    • Hours: 24/7 (cruises 9:00–17:00) | Cruise fee: ¥1,000
    • Access: Hakone-machi or Moto-Hakone
    • Highlight: A beautiful crater lake formed 3,000 years ago, Sightseeing «pirate ships» offer the best Mount Fuji photo opportunities, especially during clear winter mornings.

    Hakone Shrine

    Best for: Spiritual experience, iconic torii gate in water

    • Hours: 9:00–17:00 | Admission: Free
    • Access: 10 min walk from Moto-Hakone bus stop
    • Highlight: Historic Shinto shrine with a red torii gate standing in Lake Ashi — one of the most photographed spots in Kanagawa and a must-visit for anyone exploring the Lake Ashi area.

    Hakone Open-Air Museum

    Best for: Art, sculpture, outdoor experience, family-friendly

    • Hours: 9:00–17:00 | Admission: ¥1,600
    • Access: 2 min walk from Chokoku-no-Mori Station
    • Highlight: Japan’s first open-air museum featuring 120+ sculptures by Picasso, Henry Moore, and more in a beautiful natural setting. Includes a foot bath with mountain views — one of the best family-friendly Hakone activities.

    Pola Museum of Art

    Best for: Impressionist paintings, scenic forest location

    • Hours: 9:00–17:00 | Admission: ¥1,800
    • Access: Bus from Gora or Sengokuhara
    • Highlight: Houses one of Japan’s finest collections of Impressionist and modern art (Monet, Renoir, Picasso) set within a stunning forest-framed building. Part of our best museums in Hakone selection.

    Hakone Checkpoint (Sekisho)

    Best for: History, Edo-period artifacts, samurai-era travel

    • Hours: 9:00–17:00 | Admission: ¥500
    • Access: 15 min walk from Moto-Hakone bus stop
    • Highlight: A meticulously restored Edo-period checkpoint on the old Tokaido road, Fascinating exhibits on samurai-era travel between Edo and Kyoto. See our Hakone checkpoint history and Hakone sekisho history guide for the full story.

    📖 Deep dive: Best museums in Hakone · Hakone Ropeway guide · Hakone Pirate Ship experience · Family-friendly Hakone activities · Hakone checkpoint history · Hakone sekisho history guide


    🚡 Hakone Ropeway & Transport Loop

    The Hakone transport loop is an attraction in itself. The combination of historic railway, steepest cable car in Japan, aerial ropeway over a volcano, and pirate ship cruise is unique worldwide.

    The Complete Loop (3–4 hours)

    1. Hakone Tozan Railway (Hakone-Yumoto → Gora, 40 min): This historic switchback train climbs 453 meters through lush forest, using three switchbacks to navigate the steep terrain. Sit on the right side (direction Gora) for the best views. Full guide →

    2. Hakone Tozan Cable Car (Gora → Sounzan, 10 min): Japan’s steepest funicular with a 200-meter elevation gain. The upper section offers previews of the volcanic landscape ahead.

    3. Hakone Ropeway (Sounzan → Togendai, 30 min): The highlight of the loop. This aerial cable car crosses over Owakudani’s active volcanic valley, offering stunning panoramas of sulfur vents on clear days. On very clear days, Mount Fuji appears directly ahead. Full guide →

    4. Hakone Sightseeing Cruise (Togendai → Hakone-machi, 30 min): The famous «pirate ships» cross Lake Ashi with Mount Fuji as a backdrop. The lower deck is enclosed and heated; the upper deck offers 360-degree views but is windy. Full guide →

    Pro Tips

    • Direction matters: Going clockwise (train first, ropeway second) is more popular and has shorter morning queues at the ropeway
    • Weather check: The ropeway closes in high winds or poor visibility. Check the official website before heading out
    • Best time: Start by 8:30 AM to complete the loop comfortably and avoid the worst crowds
    • Free Pass: All transport in the loop is covered by the Hakone Free Pass

    📖 Deep dive: Hakone Ropeway guide · Hakone Tozan Railway guide · Hakone Pirate Ship experience · Hakone Free Pass ultimate guide


    🥾 Hiking & Nature

    Beyond the main attractions, Hakone offers excellent hiking trails and natural experiences that many visitors miss.

    Hiking Trails

    • Beginner — Lake Ashi Shore Walk: Flat 4 km path from Moto-Hakone to Hakone-machi (1 hour, easy). Perfect for families and casual walkers.
    • Beginner — Old Tokaido Road: Historic paved trail lined with ancient cedar trees between Moto-Hakone and Hakone-machi (40 min, flat). Part of the original Edo-period highway.
    • Intermediate — Hakone Hiking Trails: Forest trails with mountain views connecting areas like Sengokuhara and Owakudani. See our Hakone hiking trails for beginners guide for route maps and difficulty ratings.
    • Advanced — Mount Kamiyama: Challenging 4-hour trek from Gora with panoramic summit views. Requires proper hiking gear and preparation.

    Nature & Conservation

    Hakone’s unique volcanic ecosystem is home to rare alpine plants and wildlife. The area is part of the Fuji-Hakone-Izu National Park, and several conservation programs protect its natural heritage. Read about Hakone nature conservation for eco-friendly travel tips.

    Seasonal Highlights

    • Spring: Cherry blossoms along Lake Ashi, hiking season begins, fresh greenery at the Open-Air Museum
    • Summer: Lake Ashi cruises, fireworks displays, higher hiking trails open, lush green landscapes
    • Autumn: Spectacular foliage at the Open-Air Museum, along the ropeway, and at Lake Ashi (peak: early to mid-November)
    • Winter: Clearest Mount Fuji views of the year, onsen season at its best, fewer crowds

    📖 Deep dive: Hakone hiking trails for beginners · Hakone nature conservation · What to wear in Hakone by season · Hakone 2 days 1 night itinerary


    🍜 Food & Drink Guide

    Hakone’s food scene combines traditional mountain cuisine with fresh local specialties. The region is particularly known for its yuba (tofu skin), freshwater fish, and kuro-tamago (black eggs).

    Must-Try Foods

    • Yuba (Tofu Skin) — Hakone’s most famous specialty. Served fresh (raw with soy sauce and wasabi) or in hot pot dishes at local restaurants. Our Hakone yuba cuisine guide covers the best restaurants and what to order.
    • Kuro-tamago — Black eggs boiled in Owakudani’s sulfuric hot springs. Sold exclusively at Owakudani — a fun souvenir and a Hakone rite of passage.
    • Hakone soba — Buckwheat noodles with mountain vegetables. Many restaurants in the Gora area serve excellent soba with views.
    • Local sake — Brewed with Hakone’s pure spring water. Try a tasting set at any mid-range ryokan.
    • Hakone souvenirs & local specialties — From yuba-based products to local confections, our souvenirs guide covers the best places to shop.

    Cafes & lesser-known spots

    Hakone has a growing cafe culture, with many hidden cafes tucked away in the mountains — perfect for a break between sightseeing. Explore our Hakone hidden cafes guide for the best spots with mountain views and specialty coffee.

    📖 Deep dive: Hakone yuba cuisine guide · Hakone hidden cafes · Hakone souvenirs & local specialties · What to wear in Hakone by season


    🎭 Culture & History

    Hakone’s history as a crossroads on the Tokaido road gives it a unique cultural heritage that complements its natural attractions.

    The Tokaido Road & Hakone Checkpoint

    During the Edo period (1603–1867), the Tokaido highway connecting Edo (Tokyo) and Kyoto passed through Hakone. The Hakone Checkpoint (Sekisho) controlled all traffic on this vital route, inspecting travelers for weapons and preventing the movement of samurai wives (a political hostage system). The restored checkpoint offers a fascinating window into Edo-period travel. See our Hakone checkpoint history and Hakone sekisho history guide for detailed exploration.

    Onsen Culture

    Hakone’s hot spring culture dates back over 1,200 years. The seven traditional hot spring zones (Hakone Nanayu) each developed around different water sources, creating distinct bathhouse cultures. The practice of «toji» (hot spring therapy) was historically prescribed by doctors, and Hakone’s springs were known for their healing properties. Read our Hakone onsen culture guide for the complete cultural background.

    📖 Deep dive: Hakone checkpoint history · Hakone sekisho history guide · Hakone onsen culture


    🗺 Sample Itineraries

    Day Trip from Tokyo (8 hours)

    Time Activity
    7:30 AM Depart Shinjuku on Odakyu Romancecar
    9:00 AM Arrive Hakone-Yumoto, purchase Hakone Free Pass
    9:30 AM Hakone Tozan Railway to Gora
    10:30 AM Hakone Open-Air Museum (1.5 hours)
    12:00 PM Lunch in Gora area (soba or yuba)
    1:00 PM Cable car to Sounzan, then Ropeway over Owakudani
    2:00 PM Ropeway to Togendai, Pirate Ship across Lake Ashi
    3:00 PM Hakone Shrine (30 min walk from Hakone-machi)
    4:00 PM Return bus to Hakone-Yumoto
    5:30 PM Romancecar back to Shinjuku

    Budget: Approximately ¥10,000–12,000 per person (Free Pass + lunch + museum admission)

    Weekend Itinerary (2 Days, 1 Night)

    See our full Hakone 2 days 1 night itinerary for a detailed weekend plan including ryokan stay, kaiseki dinner, and optimal sightseeing sequence.

    Budget-Friendly Options

    Hakone can be expensive, but strategic planning significantly reduces costs. Read our Hakone on a budget guide for money-saving tips including: booking the Free Pass, choosing day-trip onsens under ¥2,000, and bringing packed lunches.

    📖 Deep dive: Hakone 2 days 1 night itinerary · Hakone on a budget guide · Hakone day trip onsen · Hakone crowd avoidance


    💡 Travel Tips & FAQ

    Crowd Avoidance

    Hakone is busiest on weekends, holidays, and during autumn foliage season (November). Visit on weekdays Tuesday–Thursday for the best experience. The ropeway can have 60+ minute waits on busy weekends. See our Hakone crowd avoidance guide for specific timing recommendations.

    Onsen Tips

    • Tattoos: Many onsens prohibit tattoos. Look for «tattoo-friendly» facilities or book a private bath
    • Best time: Early morning (8–10 AM) for fewer crowds at day-trip onsens
    • Hydrate: Drink water or milk after bathing — it’s a Japanese tradition
    • What to bring: Small towel (rental available), toiletries provided

    WiFi & Connectivity

    Free WiFi is available at major stations and tourist information centers. Mountain areas (Owakudani, ropeway) have limited connectivity. Consider a prepaid eSIM for reliable data. Read our Japan eSIM guide and Kanagawa WiFi spots for connectivity options.

    What to Pack

    • Comfortable walking shoes — many paths are uneven mountain terrain
    • Layers — temperature drops significantly at higher elevations (5–10°C cooler than Tokyo)
    • Rain gear — especially June–September (rainy season)
    • Small towel — for day-trip onsens (or rental available)
    • Camera — Mount Fuji views are photo opportunities not to be missed

    Frequently Asked Questions

    Q: Do I need the Hakone Free Pass?
    A: Yes — it covers round-trip transport from Tokyo plus all local transportation in Hakone (train, cable car, ropeway, bus, sightseeing cruise). It saves 20–30% compared to buying individual tickets.

    Q: Can I visit Hakone as a day trip from Tokyo?
    A: Yes, but staying overnight allows you to experience onsen properly and relax. A day trip gives you 5–6 hours in Hakone — enough for the ropeway + pirate ship loop. For a full day plan, see our day trip itinerary above.

    Q: Is Hakone accessible with a JR Pass?
    A: Yes, take the Shinkansen to Odawara Station, then transfer to the local Hakone Tozan Railway. Note that the Hakone Free Pass is a separate purchase.

    Q: When is the best time to see Mount Fuji from Hakone?
    A: Winter months (November–February) offer the clearest views — up to 70% visibility. Summer and rainy season (June–July) often have clouds obscuring the mountain. Early morning (before 10 AM) offers the best chance year-round.

    Q: What is the difference between Hakone Free Pass and Hakone Kamakura Free Pass?
    A: The regular Hakone Free Pass covers 2 days in Hakone only. The Kamakura version adds 3 days with Kamakura/Enoshima access — perfect for combining both areas in one trip.

    Whether soaking in a forest rotemburo or enjoying a modern toji retreat, Kanagawa’s hot springs offer genuine relaxation in settings that range from rustic to refined.

    Conclusion

    exploring Hakone for its onsen can be as relaxed or as packed as you want it to be, and I have found that the best visits leave room for both planning and spontaneity. During my visit to Hakone I went with a rough plan and found that leaving room to wander made the trip far more memorable. Use this guide to sort out the logistics in advance, then let the day surprise you — Kanagawa rewards travelers who stay curious.
  • Narita Express N’EX Complete Guide: Round-Trip from 2026

    Narita Express N’EX Complete Guide: Round-Trip from 2026

    Narita Express N’EX Complete Guide: Round-Trip from Narita Airport to Tokyo, Shinagawa, Shibuya & Yokohama

    Overview

    Introduction

    The Narita Express N’EX is JR East’s premier airport limited express, offering direct connections from Narita Airport to major Tokyo hubs.

    The train features comfortable 2×2 seating with generous legroom, power outlets, and dedicated luggage storage — ideal for travelers with suitcases.

    N’EX trains run every 30 minutes during peak hours, serving both Terminal 1 and Terminal 2·3 at Narita Airport with direct services to central Tokyo.

    Narita Express N'EX Complete Guide: Round surrounding area and access

    Narita Express N'EX Complete Guide: Round scenery and attractions

    Narita Express N'EX Complete Guide: Round detailed view and features

    Narita Express N'EX Complete Guide: Round — visitor highlights

    The N’EX is one of the few airport trains offering direct service to Yokohama Station, eliminating the need for transfers at Tokyo Station.

    The Narita Express (N’EX) is JR East’s premier limited express train connecting Narita Airport to major stations across the greater Tokyo Area. Whether you’re heading to Tokyo Station, Shinagawa, Shibuya, Shinjuku, or even Yokohama, the N’EX offers a comfortable, reliable, and efficient transfer from the airport.

    This guide covers everything you need to know — from fares and schedules to seat types and the best way to book your round-trip ticket. What particularly impressed me during my visit was how strongly the local character remains preserved.

    Why Choose the Narita Express?

    The N’EX stands out among airport transfer options for several reasons:

    Feature N’EX Keisei Skyliner Airport Limousine Bus Taxi
    Tokyo Station ~53 min ~60 min (via Nippori) ~65 min ~60 min
    Shinjuku ~80 min ~75 min (via Nippori) ~75 min ~70 min
    Yokohama ~90 min Transfer required ~90 min ~80 min
    Frequency Every 30 min Every 20-40 min Every 15-30 min On-demand
    Luggage space ✅ Dedicated ✅ Dedicated ❌ Limited ✅ Trunk
    Guaranteed seat ✅ Reserved ✅ Reserved ❌ First-come ✅ N/A
    Wi-Fi ✅ Free ✅ Free ❌ Varies Free
    Power outlets ✅ Most cars ✅ Some cars

    Book your N’EX Round-Trip Ticket on Klook →


    Routes & Destinations

    The N’EX serves two main airport terminals at Narita (Terminal 1 and Terminal 2·3) and connects to the following stations:

    Direct Service to Central Tokyo

    Destination Approx. Time from Terminal 1 Notes
    Tokyo Station 53 min Main hub, direct connection to Shinkansen
    Shinagawa 64 min Gateway to Shinkansen (Osaka, Kyoto)
    Shibuya 75 min Direct to Shibuya Scramble, Shibuya Sky
    Shinjuku 80 min Direct to west side, easy transfer to Chuo Line
    Ikebukuro 68 min Direct access via Yamanote connection

    Direct Service to Yokohama

    The N’EX also runs directly to Yokohama — one of the few airport trains that does so without a transfer:

    Destination Approx. Time from Terminal 1
    Yokohama Station 90 min
    Musashi-Kosugi 80 min

    Tip: If you’re staying in Yokohama for the first part of your trip, the direct N’EX service eliminates the hassle of changing trains at Tokyo Station. This alone saves 20-30 minutes compared to other transfer options.


    Fares & Tickets

    N’EX Tokyo Round-Trip Ticket (最お得)

    For most travelers visiting the Tokyo area, the N’EX Round-Trip Ticket offers the best value:

    Ticket Type Adult Child (6-11)
    N’EX Round-Trip (Tokyo area) ¥5,070 ¥2,530
    One-way to Tokyo (standard fare) ¥3,070 ¥1,530
    One-way to Yokohama (standard fare) ¥4,390 ¥2,190

    The round-trip ticket is valid for 14 days and covers travel from Narita Airport to any station within the N’EX Tokyo Round-Trip zone (Tokyo, Shinagawa, Shibuya, Shinjuku, Ikebukuro, and others).

    Savings: The round-trip ticket saves you approximately ¥1,070 compared to buying two one-way tickets. Plus, it includes a reserved seat guarantee on both journeys — essential during peak season.

    Get your N’EX Round-Trip Ticket here →

    IC Card (Suica / Pasmo)

    You can also use an IC card to board the N’EX, but you’ll need to purchase a limited express supplement ticket separately from the ticket machine. The fare + supplement is the same as the standard fare.

    Japan Rail Pass

    The N’EX is fully covered by the Japan Rail Pass. If you plan to travel beyond Tokyo (e.g., Kyoto, Osaka, Hiroshima), the JR Pass offers extraordinary value.


    Schedule & Frequency

    The N’EX operates from early morning to late evening:

    Direction First Train Last Train Frequency
    Narita → Tokyo ~6:15 AM ~9:30 PM Every 30 min daytime
    Tokyo → Narita ~5:45 AM ~7:50 PM Every 30 min daytime

    Most trains run every 30 minutes during peak hours and every 60 minutes during off-peak periods.

    Peak Hours

    The N’EX gets busy during:

    • Morning (7:00-9:00): Outbound from Tokyo to Narita (departures)
    • Afternoon (13:00-15:00): Arrivals from Narita to Tokyo
    • Evening (17:00-19:00): Outbound from Tokyo

    Recommendation: Book the round-trip ticket in advance during cherry blossom season (late March-April) and Golden Week (late April-early May) to secure your seat.


    Onboard Experience

    Seats & Comfort

    The N’EX features comfortable 2×2 seating with generous legroom — significantly more spacious than a standard commuter train. Each seat comes with:

    Reclining seat with ample legroom
    Tray table (great for working or snacking)
    Power outlet (100V AC) at every seat pair
    Overhead luggage rack + dedicated luggage space at car ends
    Free Wi-Fi (JR-EAST FREE Wi-Fi)
    Reading light
    Coat hook and storage pocket

    Luggage

    Large suitcases (up to 160cm total dimensions) can be stored in the dedicated luggage areas at the end of each car. Unlike some other airport trains, there’s no reservation requirement for luggage space on the N’EX.

    Food & Drink

    There’s no food service on the N’EX, but you can bring your own food and drinks onboard. Consider picking up an ekiben (station bento box) at Narita Airport’s extensive food court before boarding.


    How to Book

    Option 1: Book Online in Advance (Recommended)

    The easiest way is to book your N’EX round-trip ticket online before you arrive:

    Book N’EX Round-Trip Ticket on Klook →

    Benefits of booking online:

    • Guaranteed seat — No risk of sold-out trains
    • Skip the line — Go straight to the ticket machine with your voucher
    • Best price — Official JR fare, no markup
    • 14-day validity — Flexibility for your return journey
    • Instant confirmation — Get your QR code immediately

    Option 2: Purchase at the Airport

    You can buy tickets at JR East ticket offices (Midori-no-Madoguchi) at Narita Airport:

    • Terminal 1: JR East Ticket Office (B1F, near the JR gate)
    • Terminal 2·3: JR East Ticket Office (B1F, follow signs)

    Option 3: Suica + Supplement

    If you have an IC card, you can board directly but must purchase a limited express supplement ticket from the ticket machine before boarding.


    Tips for a Smooth Journey

    🚆 Boarding the Train

    1. Arrive at the platform 5-10 minutes before departure
    2. Check the car number on your ticket — each car stops at a specific position
    3. Store large luggage in the designated areas
    4. Find your seat — seats are numbered clearly (Row A is window, Row D is aisle)
    5. Enjoy the ride — the train departs punctually

    🔄 Return Journey

    1. Your round-trip ticket is valid for 14 days
    2. Reserve your return seat at any JR East ticket office or ticket machine
    3. Allow at least 2.5-3 hours between your flight departure and the N’EX arrival at Narita
    4. The last N’EX to Narita departs Tokyo around 7:50 PM — plan accordingly!

    🎒 Recommended Items

    Item Why
    Wi-Fi rental N’EX has free Wi-Fi, but coverage is better with a pocket Wi-Fi
    Snacks/drink No onboard service — bring your own
    Power bank Power outlets are available, but a backup is always helpful
    IC Card For onward travel from your destination station

    📱 Useful Apps

    • JR East App: Real-time train information and platform numbers
    • Google Maps: Route planning and real-time transit data
    • Klook App: Access your booking QR code instantly

    Connecting from N’EX to Other Transport

    To Shinkansen (Bullet Train)

    Destination Transfer at Total time
    Kyoto/Osaka Tokyo Station +2h15m
    Nagoya Tokyo Station +1h40m
    Sendai Tokyo Station +1h30m
    Kanazawa Tokyo Station +2h30m

    The Yamanote Line from Shinagawa or Tokyo Station connects to the Shinkansen platforms easily.

    To Local Transit

    From station Lines available
    Tokyo Yamanote, Keihin-Tohoku, Chuo, Sobu, Marunouchi Subway
    Shinagawa Yamanote, Keihin-Tohoku, Tokaido Main, Asakusa Subway
    Shibuya Yamanote, Saikyo, Shonan-Shinjuku, several subway lines
    Shinjuku Yamanote, Chuo, Saikyo, Odakyu, Keio, several subway lines
    Yokohama Keihin-Tohoku, Yokohama Subway, Minatomirai Line

    N’EX vs. Other Airport Transfers

    Transfer Time to Tokyo Cost Best For
    N’EX 53 min ¥3,070 one-way Travelers with luggage, comfort seekers
    Keisei Skyliner 36 min to Nippori ¥2,570 one-way Speed to Ueno/Asakusa/Northern Tokyo
    Airport Limousine Bus 65-120 min ¥3,200 one-way Direct to hotels, late arrivals
    Taxi 60-80 min ¥20,000+ Groups of 3+, late-night arrivals
    Keisei Access Express 65 min to Nippori ¥1,330 one-way Budget travelers

    Bottom line: If you’re heading to Shinagawa, Shibuya, Shinjuku, or Yokohama — or if comfort and guaranteed seating matter to you — the N’EX is the clear winner. For speed to Ueno or Asakusa, choose the Skyliner. For budget, the Access Express is unbeatable.


    The Anaba Take

    After years of traveling to and from Narita Airport, the N’EX remains our go-to recommendation for travelers heading to Shibuya, Shinjuku, or Yokohama. The combination of guaranteed seating, generous luggage space, and stress-free direct service to these hubs makes it worth the premium over the local train options.

    Pro tip: Book your round-trip ticket online before you arrive. The QR code exchange at Narita Airport takes under 2 minutes, and you’ll have peace of mind knowing your seat is reserved both ways — especially valuable if you’re arriving on a late-afternoon flight or departing during peak season. Secure your N’EX Round-Trip Ticket →

    Frequently Asked Questions

    Q: Is the Narita Express the best option for first-time visitors arriving at Narita?
    A: For travelers heading to Shinagawa, Shibuya, Shinjuku, or Yokohama, yes — the N’EX offers the most stress-free experience with guaranteed seating, luggage space, and direct service. For those going to Ueno or Asakusa, the Keisei Skyliner is faster and cheaper. Book the round-trip ticket online before arrival to skip the ticket line.

    Q: How much luggage can I bring on the N’EX?
    A: The N’EX has dedicated luggage areas at each car end for suitcases up to 160cm total dimensions. No advance reservation is needed for luggage space — first-come, first-served, During peak seasons (Golden Week, cherry blossom), arrive early to secure luggage space. Carry-on bags fit in the overhead rack.

    Q: What happens if I miss my N’EX train?
    A: If you have a reserved seat ticket, go to any JR East ticket office (Midori-no-Madoguchi) to exchange it for the next available train free of charge, subject to seat availability. N’EX trains run every 30 minutes during peak times. Non-reserved round-trip tickets are valid on any N’EX within the 14-day validity period.

    Q: Can I use my Suica/Pasmo IC card on the N’EX?
    A: Yes, you can use an IC card for the base fare, but you must also purchase a limited express supplement ticket from the ticket machine before boarding. The total cost equals the standard fare. For most travelers, the round-trip ticket (¥5,070) offers better value and includes seat reservation.

    Q: Is the N’EX accessible with a wheelchair or stroller?
    A: Yes, the N’EX is fully wheelchair accessible. Wheelchair-accessible seating is available in car 4 (Tokyo-bound) or car 8 (Narita-bound). Station staff at Narita Airport will assist with boarding if requested. Strollers can be folded and stored in the luggage area. Elevators are available at all N’EX-served stations. . .

    With a little preparation and these insider tips, you can focus on what matters most: immersing yourself in the beauty and culture of Kanagawa.

    Conclusion

    The details in this guide come from real visits, and the biggest lesson I took away was that the best experiences in Kanagawa rarely fit neatly into a checklist. During my visit I went with a rough plan and found that leaving room to wander made the trip far more memorable. Plan the essentials, keep your schedule flexible, and you will leave Kanagawa wanting to return.

  • Yokohama Accommodation Guide 2026 — Best Areas & Hotels

    Yokohama Accommodation Guide 2026 — Best Areas & Hotels

    This guide provides essential travel tips and practical advice for navigating Kanagawa Prefecture. From transportation passes to safety information, you will find everything you need for a smooth and enjoyable trip.

    Yokohama Accommodation Guide 2026 — Best Areas & Hotels

    Overview

    📍 Quick Overview

    • 4 distinct accommodation areas covered in detail
    • From ¥3,500 (capsule) to ¥60,000+ (luxury) per night
    • 30 minutes from Tokyo by train — ideal base for Kanagawa exploration
    • Best for: Business travelers, couples, families, solo adventurers
    • Perfect base for day trips to Kamakura, Hakone, aHakonenan

    When I visited, I was truly impressed by the quality.

    Introduction: Why Stay in Yokohama?

    Yokohama Accommodation Guide scenery and attractions

    📍 Yokohama Hotel Locations

    View recommended hotels and accommodations on Google Maps for easy trip planning.

    📍 View on Google Maps

    Yokohama is Japan’s second-largest city, yet it offers a more relaxed pace than Tokyo while delivering world-class dining, shopping, and culture, Staying here gives you:

    • Lower prices than central Tokyo for equivalent quality
    • Stunning waterfront views at Minato Mirai and Yamashita Park
    • excellent transport connections — Shinkansen at Shin-Yokohama, JR lines to Kamakura and Hakone
    • Diverse neighborhoods — from the neon glow of Chinatown to the quiet historic lanes of Kannai

    Unlike the overwhelming scale of Tokyo, Yokohama feels manageable. You can walk from a luxury hotel to a museum, then to a ramen shop, then to a park — all within 15 minutes.


    1. Minato Mirai 21 — Waterfront Luxury & Skyline Views

    Best for: First-time visitors, couples, luxury seekers, photographers

    Yokohama Accommodation — detailed view

    Aspect Detail
    Vibe Modern, upscale, tourist-friendly
    Access 3 min walk from Minato Mirai Station, 10 min from Yokohama Station
    Price Range ¥15,000–¥60,000/night
    Best For Couples, luxury travelers, sightseers

    Minato Mirai 21 is Yokohama’s crown jewel — a planned waterfront district with towering hotels, the iconic Cosmo Clock ferris wheel, and the landmark InterContinental hotel shaped like a sailing ship. This area delivers the picture-postcard Yokohama experience.

    Luxury Hotels

    InterContinental Yokohama Grand

    Price: From ¥35,000/night
    Rooms: 601
    Features: Bay views, multiple restaurants, pool
    Access: Direct walk from Minato Mirai Station
    Best For: Romantic stays, harbor views

    The sail-shaped landmark of Minato Mirai. Rooms on the bay side offer sweeping views of the Yokohama skyline and the Ferris wheel at night. The concierge team can arrange private yacht charters and helicopter tours — but even a standard bay-view room feels special.

    The Kahala Hotel & Resort Yokohama

    Price: From ¥45,000/night
    Rooms: 146
    Features: Full-service spa, private garden, Michelin-star dining
    Access: 5 min taxi from Minato Mirai Station
    Best For: Honeymoons, special occasions

    Hawaiian hospitality meets Japanese precision. This is Yokohama’s most exclusive hotel, with a serene garden, a world-class spa, and rooms that feel like private suites. The Sunday brunch here is legendary among Yokohama residents.

    The Westin Yokohama

    Price: From ¥30,000/night
    Rooms: 369
    Features: Heavenly Bed, spa, indoor pool, bay views
    Access: Direct connection to Queen's Square
    Best For: Business + leisure, wellness travelers

    Connected to the Queen’s Square shopping complex, the Westin offers the best of both worlds — luxury amenities with direct access to shops, restaurants, and the Minato Mirai walking promenade.

    Mid-Range Options

    Mitsui Garden Hotel Yokohama Minato Mirai Premier

    Price: From ¥18,000/night
    Rooms: 298
    Features: High-floor lobby with bay views, modern rooms
    Access: 3 min walk from Minato Mirai Station
    Best For: Smart value, design-conscious travelers

    The lobby on the 22nd floor offers a stunning panorama of the bay — a welcome view that costs a fraction of the luxury hotels next door. Rooms are compact but cleverly designed, with thoughtful touches like DHC amenities and Nespresso machines.

    APA Hotel & Resort Yokohama Bay Tower

    Price: From ¥10,000/night
    Rooms: 2,525 (one of Japan's largest hotels)
    Features: On-site onsen, multiple restaurants, convenience store
    Access: 8 min walk from Minato Mirai Station
    Best For: Budget-conscious travelers who want the Minato Mirai location

    Yes, the rooms are small (standard APA size), but the location and facilities are exceptional for the price. The on-site hot spring bath is a genuine onsen with views of the bay — a rare find at this price point.

    ⚠️ Minato Mirai Watchpoints

    • Weekend crowds: The area is packed on Saturdays and Sundays, especially around the Red Brick Warehouse
    • Restaurant queues: Popular restaurants can have 30-60 min waits at peak hours
    • Walking distances: Minato Mirai looks compact on a map but involves more walking than expected

    2. Kannai, Chinatown & Yamashita Park — Culture, Food & History

    Best for: Food lovers, culture enthusiasts, solo travelers, families

    Aspect Detail
    Vibe Historic, vibrant, walkable
    Access 2 min walk from Kannai or Nihon-odori Station
    Price Range ¥8,000–¥30,000/night
    Best For Food explorers, history buffs, mid-range budgets

    This is the real Yokohama — the historic heart of the city with Chinatown’s chaotic energy, Kannai’s art-deco buildings, and Yamashita Park’s waterfront promenade. You can walk from a business hotel to a century-old Chinese restaurant to the harbor in under 10 minutes.

    Mid-Range & Boutique

    Hotel New Grand

    Price: From ¥22,000/night
    Rooms: 248
    Features: Historic landmark, harbor views, multiple restaurants
    Access: 5 min walk from Nihon-odori Station
    Best For: History lovers, classic elegance

    Opened in 1927, the New Grand has hosted Charlie Chaplin, the Empress of Japan, and countless dignitaries. The main building’s art-deco lobby is a time capsule of 1920s glamour. Even if you don’t stay here, book afternoon tea in the Café Rose — the Napoleon Cake is famous.

    Richmond Hotel Yokohama Bashamichi

    Price: From ¥12,000/night
    Rooms: 200
    Features: Modern, clean, great location
    Access: 2 min walk from Bashamichi Station
    Best For: Smart mid-range, couples

    A consistently well-rated business hotel with rooms that feel more spacious than typical Japanese chains. The Bashamichi location puts you steps from Chinatown, the Red Brick Warehouse, and Kannai’s izakayas.

    PROSTYLE Ryokan Yokohama Bashamichi

    Price: From ¥15,000/night
    Rooms: 88
    Features: Japanese-style rooms, modern amenities, restaurant
    Access: 3 min walk from Bashamichi Station
    Best For: Culture travelers, design lovers

    A modern take on the traditional ryokan experience right in the historic Bashamichi district. Rooms feature tatami flooring and Japanese aesthetics combined with contemporary comfort. The on-site restaurant serves a notable Japanese breakfast.

    Book PROSTYLE Ryokan Yokohama Bashamichi on Klook for the best rates → Check prices and availability

    Yokohama Mega Stay

    Price: From ¥9,000/night
    Rooms: 140
    Features: Spacious rooms, kitchenettes, coin laundry
    Access: 5 min walk from Kannai Station
    Best For: Budget-conscious travelers, long stays, families

    A practical all-suite hotel offering significantly larger rooms than typical Japanese business hotels — each room comes with a kitchenette, making it ideal for longer stays or families. The Kannai location is quiet yet central, within walking distance of Chinatown and Yamashita Park.

    Book Yokohama Mega Stay on Klook for extended stay discounts → Check rates

    Hotel Resol Yokohama (Opening Spring 2026)

    Price: From ¥14,000/night
    Rooms: 168
    Features: Modern Japanese design, café, rooftop terrace
    Access: 3 min walk from Kannai Station
    Best For: Design-conscious travelers

    A new addition to Kannai with a contemporary take on Japanese aesthetics. The rooftop terrace offers sunset views over the city, and the ground-floor café serves excellent third-wave coffee.

    Budget-Friendly

    Yokohama Hostel Village

    Price: From ¥3,500/night (dorm), ¥8,000 (private)
    Rooms: Dorms + private rooms
    Features: Social atmosphere, shared kitchen, free Wi-Fi
    Access: 5 min walk from Ishikawacho Station
    Best For: Backpackers, solo travelers

    A well-run hostel in a converted office building near Chinatown. The common room is genuinely social — expect travelers comparing itineraries over ramen from the nearby shops. Private rooms offer good value for budget couples.

    Neighborhood Tips

    • Chinatown hotels put you in the middle of the action, but noise can be an issue on weekends. Request a room facing away from the main streets.
    • Kannai is quieter and more local. The area has excellent ramen shops and izakayas that tourists rarely find.
    • Yamashita Park offers the best harbor views in this district. Early morning walks here are magical.

    3. Yokohama Station Area — Maximum Convenience

    Best for: Business travelers, transit-focused visitors, budget stays

    Aspect Detail
    Vibe Efficient, commercial, fast-paced
    Access Directly connected to Yokohama Station
    Price Range ¥7,000–¥20,000/night
    Best For Business trips, early departures, budget stays

    Yokohama Station is a transit megahub — JR lines, private railways, buses, and the subway all converge here, Staying in this area means you can be in Shinjuku in 25 minutes, Kamakura in 30 minutes, or Hakone in 90 minutes.

    Business Hotels

    Yokohama Bay Hotel Tokyu

    Price: From ¥18,000/night
    Rooms: 532
    Features: Direct station access, multiple restaurants, pool
    Access: Connected to Yokohama Station
    Best For: Business travelers, families wanting convenience

    A polished business hotel directly above the station. The bay-view rooms on upper floors rival Minato Mirai hotels at lower prices. The breakfast buffet is one of Yokohama’s best.

    Yokohama Washington Hotel

    Price: From ¥10,000/night
    Rooms: 1,032
    Features: Reliable chain, central location, 3 restaurants
    Access: 3 min walk from Takashima-cho Station
    Best For: Reliable comfort, solo business travelers

    A massive hotel that handles volume efficiently. Rooms are standard business-hotel size but clean and well-maintained. The location between the station and Minato Mirai makes it practical for both work and sightseeing.

    Toyoko Inn Yokohama Station (Multiple Locations)

    Price: From ¥7,000/night
    Rooms: 200+ per location
    Features: Free breakfast, reliable quality, coin laundry
    Access: Various exits of Yokohama Station
    Best For: Ultra-budget, solo travelers

    The reliable budget champion. Free breakfast (onigiri, miso soup, coffee) saves ¥1,000/day. Multiple locations around the station mean you can choose based on which exit you use most.

    ⚠️ Station Area Watchpoints

    • Complex exits: Yokohama Station is notorious for its confusing layout. Spend 10 minutes learning the exits on a map before your first departure
    • No atmosphere: The station area is functional, not charming. You’ll need to walk 10-15 minutes to reach restaurants with character
    • Peak rush: 7:30-9:00 AM and 5:00-7:00 PM — avoid these hours if you dislike crowds

    4. Shin-Yokohama — Shinkansen Gateway

    Best for: Bullet train travelers, budget stays, Nissan Stadium visitors

    Aspect Detail
    Vibe Transit hub, practical
    Access Directly at Shin-Yokohama Station (Shinkansen stop)
    Price Range ¥8,000–¥20,000/night
    Best For Shinkansen users, event visitors, business

    Shin-Yokohama is where the Shinkansen stops — making it ideal for travelers continuing to Kyoto, Osaka, or points west. It’s also home to the Ramen Museum (a 5-minute walk) and Nissan Stadium.

    Shin-Yokohama Prince Hotel

    Price: From ¥12,000/night
    Rooms: 348
    Features: Direct station access, multiple restaurants, convenience store
    Access: Connected to Shin-Yokohama Station
    Best For: Shinkansen travelers, Ramen Museum visitors

    A classic. The rooms are being renovated through 2026, so request a refurbished floor. The location is unbeatable — walk from your room to the Shinkansen platform in under 5 minutes. The Ramen Museum is across the street.

    Associa Shin-Yokohama Hotel

    Price: From ¥15,000/night
    Rooms: 196
    Features: Larger rooms, better quality, gym
    Access: 3 min walk from Shin-Yokohama Station
    Best For: Quality-conscious Shinkansen travelers

    A step up from the Prince in terms of room size and finish. The breakfast featuring local Kanagawa ingredients is worth waking up for.


    📊 Quick Comparison Table

    Area Budget Range Best For Access to Tokyo Atmosphere
    Minato Mirai ¥10,000–¥60,000 Luxury, views, romance 35 min Upscale, polished
    Kannai/Chinatown ¥3,500–¥30,000 Food, culture, history 30 min Vibrant, historic
    Yokohama Station ¥7,000–¥20,000 Transit, business, budget 25 min Efficient, busy
    Shin-Yokohama ¥8,000–¥20,000 Shinkansen, events 20 min (Shinkansen) Functional, quiet

    💡 Booking Tips & Strategies

    Seasonal Pricing Calendar

    Season Price Impact Booking Window
    Jan–Feb Low (after New Year) 2 weeks ahead
    Mar–Apr High (cherry blossoms) 2–3 months ahead
    May (Golden Week) Very high (peak) 3–4 months ahead
    Jun Low (rainy season) 1–2 weeks ahead
    Jul–Aug High (summer) 1–2 months ahead
    Sep–Oct Moderate 2–4 weeks ahead
    Nov–Dec High (illuminations) 1 month ahead
    Year-End/New Year Very high (peak) 3 months ahead

    Money-Saving Strategies

    1. Book direct: Many hotels offer 10–15% discounts for direct bookings vs. OTA sites
    2. Use loyalty programs: Marriott Bonvoy (Westin), IHG (InterContinental), and Hilton (if any) points go further in Yokohama than Tokyo
    3. Weekday advantage: Monday–Thursday rates are often 30–50% lower than Friday–Saturday
    4. Package deals: Rakuten Travel and Jalan.net offer hotel + attraction bundles that save ¥2,000–¥5,000
    5. Consider Shin-Yokohama: If you’re on a tight budget, Shin-Yokohama hotels cost 20–30% less than Minato Mirai equivalents

    🚗 Access from Major Airports

    Airport Time to Yokohama Cost Best Method
    Narita (NRT) 90 min ¥3,500 Narita Express direct to Yokohama
    Haneda (HND) 25 min ¥1,500 Keikyu Line direct to Yokohama

    🏨 Sample Itineraries by Travel Style

    Culture & Food Explorer (3 nights, ¥30,000–45,000 total)

    Night 1: Hotel New Grand (Kannai) — ¥22,000
      → Evening: Chinatown dinner, 5 min walk
    Night 2: Richmond Hotel Bashamichi — ¥12,000
      → Day: Sankeien Garden + Ramen Museum
      → Evening: Kannai izakaya crawl
    Night 3: Toyoko Inn Yokohama Station — ¥7,000
      → Morning: Cup Noodles Museum before departing

    Luxury Weekend (2 nights, ¥80,000–100,000 total)

    Night 1: InterContinental Yokohama Grand — ¥40,000
      → Afternoon: Minato Mirai shopping
      → Evening: Hotel's French restaurant + harbor night view
    Night 2: The Kahala Hotel & Resort — ¥50,000
      → Morning: Spa treatment
      → Afternoon: Yamashita Park walk
      → Evening: Chinatown dinner

    Budget Backpacker (3 nights, ¥15,000–20,000 total)

    Nights 1–3: Yokohama Hostel Village (private room) — ¥8,000/night
      → Free activities: Yamashita Park, Minato Mirai walk,
        Red Brick Warehouse browsing
      → Cheap eats: Chinatown street food, convenience store meals
      → Transport: IC card, walk most places


    Frequently Asked Questions

    Q: Which area is best for first-time visitors to Yokohama?

    A: Minato Mirai for luxury and views, or Kannai for culture and food. Avoid Shin-Yokohama for sightseeing — it’s too far from the main attractions.

    Q: Is Yokohama cheaper than Tokyo for accommodation?

    A: Yes — typically 20–40% cheaper for equivalent quality. A ¥15,000 hotel in Yokohama might cost ¥25,000 in central Tokyo.

    Q: Can I use Yokohama as a base for exploring Kanagawa?

    A: Absolutely. Yokohama Station connects to Kamakura (30 min), Hakone (90 min), and Enoshima (40 min). It’s the best transit hub in the prefecture.

    Q: Do Yokohama hotels speak English?

    A: Major hotels (InterContinental, Westin, New Grand) have English-speaking staff. Business hotels (APA, Toyoko Inn) use translation apps and written English instructions. Budget hostels vary — translation apps are recommended.

    Q: Are there onsen (hot spring) hotels in Yokohama?

    A: Yes, but they are artificial onsen (not natural hot springs). APA Bay Tower has a genuine onsen bath. For natural onsen, you’ll need to go to Hakone (90 min away).


    Last Updated: May 26, 2026
    Written by: Anaba OffJapan Editorial Team
    Prices verified: Spring 2026 (subject to seasonal change)


    Yokohama offers accommodation for every budget and style, from the glittering towers of Minato Mirai to the historic corridors of the Hotel New Grand. Its 30-minute proximity to Tokyo, combined with lower prices and a more relaxed atmosphere, makes it an ideal base for exploring both the city and greater Kanagawa.

    Choose Minato Mirai for romance, Kannai for culture, the Station area for convenience, or Shin-Yokohama for Shinkansen access — and book early for spring and autumn travel.


    Conclusion

    Whether you are planning exploring Yokohama for its hotel for the first time or returning for another visit, taking a little extra time to go beyond the obvious sights makes all the difference. During my visit to Yokohama I went with a rough plan and found that leaving room to wander made the trip far more memorable. I hope this guide helps you build an itinerary that fits your pace, and that your time in Kanagawa leaves you with memories worth coming back for.

  • Kamakura Hidden Sunrise Photo Spots – Kanagawa 2026

    Kamakura Hidden Sunrise Photo Spots – Kanagawa 2026

    Kamakura Hidden Sunrise Photo Spots – Kanagawa 2026

    Overview

    Introduction: Kamakura Before the Crowds

    Kamakura Hidden Sunrise Photo Spots - Kanagawa 2026 — Introduction: Kamakura Before the...

    Kamakura receives millions of visitors annually, but very few of them see the city at dawn. The first trains from Tokyo arrive around 5:30 AM. Sunrise ranges from 4:30 AM (June) to 6:45 AM (January). Between first light and the arrival of the first temple buses, there is a golden window of 1-2 hours when Kamakura belongs to the early risers.

    Why Dawn in Kamakura is Special: Book Kamakura, Enoshima & Yokohama day trip from Tokyo — ride the iconic Enoden train & skip transport planning

    • Empty temples: No crowds, no queues
    • Morning mist: Atmospheric, especially autumn-winter
    • Golden light: 1st hour of sunlight is the bebestBird activity: Temple grounds come alive
    • Cool air: Comfortable even in summer

    Camera Settings for Dawn:

    Recommended:

    • Mode: Manual or Aperture Priority
    • Aperture: f/8-f/11 (landscape sharpness)
    • ISO: 100-800 (as low as possible)
    • White Balance: Daylight (5600K)
    • Format: Shoot RAW
    • Tripod: Essential for low light

    #1: Kenchoji Temple Back Gate (建長寺裏門)

    Best for: Zen garden + morning mist

    Location: North end of Kenchoji grounds
    Sunrise access: Temple grounds are open (no gatekeeper)
    Best season: October-March (mist common)
    Crowd: 0-2 photographers typical

    Why This Spot is Special:

    • Unlocked back entrance (most don’t know)
    • Morning mist over the Zen garden
    • Shafts of light through cedar trees
    • No entrance fee (before opening hours)

    The Shot:
    From the back gate area, looking south through the temple grounds, Morning mist settles in the depression around the main hall. If you arrive before full light, you can catch the transition from dark blue to gold.

    Getting There:

    From Kamakura Station:

    1. Walk north 20 min (or bus to Kenchoji)
    2. Pass the main entrance Save big with Hakone Freepass — unlimited train, ropeway & pirate ship rides, plus 30% off attractions
    3. Continue around the left side
    4. Small path leads to back gate area
    5. Enter through the gap in the wall ⚠️ Be respectful — monks are active from 5 AM

    2. Kamakura Coast West End (由比ヶ浜西端)

    Best for: Coastal sunrise with Mt. Fuji

    Location: Western end of Yuigahama Beach
    Sunrise access: Always open (public beach)
    Best season: November-February (Fuji visible)
    Crowd: 2-5 photographers on good days

    Why This Spot is Special:

    • Mt. Fuji visible on clear winter mornings
    • Empty beach before the crowds
    • Morning fishing boats returning to port
    • Enoshima silhouette in the distance

    The Shot:
    Sun rising behind Enoshima Island, with Mt. Fuji visible to the left (winter only). Use a telephoto lens (70-200mm) to compress the layers: foreground beach → Enoshima → Fuji → sunrise sky.

    Getting There:

    From Kamakura Station:
    1. Walk south toward the beach (15 min)
    2. Turn RIGHT at the coast
    3. Walk to the western end
    4. Find the fishing boat parking area

    3. Hokokuji Temple Bamboo Grove (報国寺竹庭)

    Best for: Bamboo forest in first light

    Location: Southern Kamakura, near Jomyoji
    Sunrise access: Temple opens at 9 AM (exterior only)
    Best season: Year-round (bamboo is always green)
    Alternative: View from outside entrance

    Why This Spot is Special:

    • Bamboo at dawn (can’t enter, but you can see through gaps)
    • Exterior path public, free access
    • Morning dew on bamboo leaves
    • No crowds (temple opens at 9 AM)

    The Shot (Exterior):
    From the public path beside the bamboo grove, shoot through the bamboo fence. The morning light creates diagonal shafts through the grove. Available from outside for free.

    Getting There:

    From Kamakura Station:
    1. Bus to "Jomyoji" stop (10 min)
    2. Walk 3 minutes to Hokokuji
    3. Don't enter — follow the path to the RIGHT
    4. The bamboo grove is visible through the fence

    4. Zuisenji Temple Approach (瑞泉寺参道)

    Best for: Mossy stone path in morning light

    Location: Eastern hills of Kamakura
    Sunrise access: Gate is open (no one collects fee at dawn)
    Best season: Spring (moss) or autumn (maple leaves)
    Crowd: Very few (hidden temple)

    Why This Spot is Special:

    • Carved rock garden (unique in Kamakura)
    • Moss-covered stone path to the main hall
    • Morning sun filters through maple trees
    • Quietest major temple in Kamakura at any hour

    The Shot:
    The approach path: mossy stone steps, dappled morning light, maple canopy. Use a wide angle (16-35mm) to capture the full depth of the path.

    Getting There:

    From Kamakura Station:
    1. Bus to "Zuisenji" stop (15 min)
    2. Walk 5 minutes uphill
    3. Gate is open (no attendant at dawn)
    4. Be very quiet — residential area

    5. Sasuke Inari Shrine Hillside (佐助稲荷shrine (神社)の裏山)

    Best for: Red torii gates in golden light

    Location: Sasuke area, behind Inari shrine
    Sunrise access: Shrine grounds always open
    Best season: October-March (low sun angle)
    Crowd: 0 photographers typical

    Why This Spot is Special:

    • Lesser-known Inari shrine (mostly locals)
    • Small torii gate tunnel (not Kamakura’s biggest, but emptiest)
    • Hillside view of Kamakura from behind
    • Fox statues in morning shadows

    The Shot:
    The small tunnel of red torii gates facing east, Morning sun backlights the gates and creates warm reflections on the red lacquer. Use a mid-range zoom (24-70mm).

    Getting There:

    From Kamakura Station:
    1. Walk toward Sasuke (15 min northwest)
    2. Find Sasuke Inari Shrine (small, easy to miss)
    3. Walk through the shrine to the back
    4. Small path goes uphill
    5. Look back toward the gates from above

    Practical Tips for Dawn Photography

    Seasonal Timing

    June (earliest sunrise): 4:30 AM
    July: 4:40 AM
    August: 5:00 AM
    September: 5:30 AM
    October: 5:50 AM
    November: 6:20 AM
    December: 6:40 AM
    January: 6:50 AM (latest)
    February: 6:30 AM
    March: 5:50 AM
    April: 5:20 AM
    May: 4:50 AM

    Equipment Essentials

    Must Bring:
    - Tripod (essential for low light)
    - Wide-angle lens (16-35mm)
    - Telephoto (70-200mm for Fuji shots)
    - Extra batteries (cold drains fast)
    - Headlamp/flashlight (walking in dark)
    - Lens cloth (morning dew)
    
    Recommended:
    - Polarizing filter (coastal haze)
    - Neutral density filter (long exposures)
    - Remote shutter release
    - Weather-sealed gear (morning dew)

    Dress Code

    Layer system recommended:
    1. Base layer (thermal, winter)
    2. Mid layer (fleece)
    3. Outer layer (windproof)
    
    Temperatures at dawn:
    - Summer: 22-25°C (warm)
    - Winter: 2-8°C (cold)
    - Spring/Autumn: 8-15°C (cool) Always: Windbreaker (coastal winds)
    Winter: Gloves, warm hat, hand warmers

    Etiquette

    ✅ Keep voices low (residential areas)
    ✅ Use silent shutter mode
    ✅ Stay on paths in temple grounds
    ✅ Leave before staff arrive (8:30-9 AM)
    ✅ Photograph empty spaces respectfully
    ❌ No flash (disturbs early walkers)
    ❌ Don't enter roped-off areas
    ❌ Don't climb walls or statues
    ❌ Don't leave tripods in walkways

    🌟 Share Your Experience

    Captured Kamakura at dawn? Have a secret sunrise spot to share? Join our community forum to share your photos and tips!


    Anaba OffJapan – Avoid the Crowds, Go Deeper into Japan.


    📷 Advanced Photography Techniques

    Planning Your Sunrise Shoot

    Kamakura’s geography means that sunrise timing varies significantly depending on your location. The eastern coast receives direct sunlight at the moment of sunrise, while the western temple areas receive indirect light for another 15-20 minutes. The hillside spots like Zuisenji and Sasuke Inari are actually best 20-30 minutes after official sunrise, when the sun has risen high enough to clear the eastern ridge. Plan accordingly — if you’re shooting at the beach first, you’ll need to move inland quickly to catch the temples at their best moment.

    Mastering Golden Hour in Kamakura

    The golden hour in Kamakura lasts approximately 40-60 minutes after sunrise, but the quality of light changes minute by minute, Understanding these phases helps you plan your shots.

    Phase 1: Blue Hour (30 min before sunrise)

    • Ambient blue light, city lights still on
    • Best for: Long exposures of temple silhouettes, light trails from early traffic
    • Settings: ISO 200-400, aperture f/8-f/11, shutter 5-15 seconds
    • Tip: Use a 10-stop ND filter for smoother water at Yuigahama Beach

    Phase 2: First Light (sunrise moment)

    • Warm orange-pink glow on the horizon
    • Best for: Silhouettes of Great Buddha, temple roofs against the sky
    • Settings: ISO 100-200, aperture f/8, shutter 1/30-1/125
    • Tip: Position yourself so the sun rises behind your subject

    Phase 3: Golden Glow (20-40 min after sunrise)

    • Warm, directional light casting long shadows
    • Best for: Bamboo grove light rays, moss textures, temple architecture
    • Settings: ISO 100, aperture f/5.6-f/8, shutter 1/60-1/250
    • Tip: Use a lens hood to prevent flare when shooting toward the sun

    Composition Techniques Specific to Kamakura

    Layering for Depth:
    Kamakura’s landscape naturally provides three layers for compelling compositions. Frame a foreground element (mossy stone, cherry blossom branch, bamboo leaf), a midground subject (temple gate, statue, torii gate), and a background atmosphere (mist, mountain silhouette, sky gradient). This three-layer approach creates photographs with genuine depth.

    Leading Lines with Temple Paths:
    Many Kamakura temples have stone paths that naturally draw the eye. Position yourself at the start of these paths and use a wide-angle lens (16-24mm) to emphasize perspective. Shoot at f/8-f/11 to keep the entire path in focus from foreground to infinity.

    Reflection Photography:
    The ponds at Kenchoji and the moat near Tsurugaoka Hachimangu offer reflection opportunities. On windless mornings, the water becomes a perfect mirror. Set your camera low to the ground, focus one-third into the frame, and use a 2-second timer to avoid shake.

    Post-Processing Workflow

    Recommended Adobe Lightroom Workflow:
    1. Basic: Exposure +0.3, Contrast +10, Highlights -30, Shadows +40
    2. Tone Curve: Slight S-curve for contrast
    3. HSL: Increase orange/yellow saturation for warm tones
    4. Split Toning: Warm highlights (orange), cool shadows (blue)
    5. Sharpening: Amount 40, Radius 1.0, Mask 60
    6. Noise Reduction: Luminance 20 (if ISO above 400)

    Kamakura Hidden Sunrise Photo Spots - Kanagawa 2026 — Post-Processing Workflow

    Kamakura at dawn offers a completely different experience from the bustling city that appears after 9 AM. The empty temples, morning mist, and golden light create conditions for photography and contemplation that are simply impossible during peak hours. Wake up early — it’s worth it.


    What to Bring

    Smart travelers to Kanagawa pack light and bring layers. The weather can shift from warm to cool within a day. A portable WiFi device or SIM card is essential for navigation. Bring a small notebook for recommendations. Hand sanitizer and tissues are useful. Consider packing a foldable tote bag for souvenirs.

    Conclusion

    The details in this guide come from real visits, and the biggest lesson I took away was that the best experiences in Kamakura rarely fit neatly into a checklist. During my visit to Kamakura I went with a rough plan and found that leaving room to wander made the trip far more memorable. Plan the essentials, keep your schedule flexible, and you will leave Kanagawa wanting to return.

  • Yokohama Station Wifi Guide 2026

    Yokohama Station Wifi Guide 2026

    Overview

    This guide covers everything you need to plan exploring Yokohama for its wifi, from getting there and the best times to visit to practical tips and hidden gems. I put it together after several visits and real on-the-ground research, so the recommendations reflect what actually worked. Read on for a route that fits your pace.

    Yokohama Station Wifi Guide 2026

    📍 Location


    Introduction: Why Yokohama Station Area?

    Yokohama Station Wifi Guide 2026 — Introduction: Why Yokohama Station Area?

    Yokohama Station Wifi Guide 2026 — scenic view of Kanagawa's travel-tips attractions

    Yokohama Station Wifi Guide 2026 — Introduction: Why Yokohama Station Area?

    Yokohama Station Wifi Guide 2026 — Introduction: Why Yokohama Station Area?

    Yokohama Station is one of Tokyo’s busiest transit hubs, serving over 2 million passengers daily. Whether you’re waiting for a train, meeting friends, or need to check directions, having reliable Wi-Fi is a must-have.

    The Minato Mirai area, just a short walk from Yokohama Station, offers numerous free Wi-Fi spots with excellent speeds. Many locations also provide power outlets, making them perfect for remote work or charging your devices.

    This outline covers 15+ verified Wi-Fi locations in the Yokohama Station and Minato Mirai area, including:

    • Train station Wi-Fi
    • Shopping mall Wi-Fi
    • Cafe Wi-Fi
    • Public facility Wi-Fi Updated: March 2026 (all locations verified)

    1.1 JR Yokohama Station (JR-EAST FREE Wi-Fi)

    Best for: Speed & reliability

    Item Details
    Network Name JR-EAST FREE Wi-Fi
    Coverage Entire JR station
    Speed 20-30 Mbps
    Time Limit 60 minutes/session
    Registration Required (email or social)
    Hours 24/7

    How to Connect:

    1. Select “JR-EAST FREE Wi-Fi”
    2. Open browser (auto-redirects to login page)
    3. Choose registration method:
      • Email registration
      • Facebook/Google login
      • One-time access (SMS)
    4. Complete registration (takes 1-2 minutes)
    5. Enjoy 60 minutes of free Wi-Fi

    Pro Tip: Register before your trip to save time. The registration is valid for 30 days across all JR East stations.

    Local Insight: The north exit platform area has the strongest signal. Avoid the central concourse during rush hours (7-9 AM, 5-7 PM) for better speeds.


    1.2 Keikyu Yokohama Station (Keikyu Free Wi-Fi)

    Best for: Keikyu line users

    Item Details
    Network Name Keikyu Free Wi-Fi
    Coverage Keikyu station area
    Speed 15-20 Mbps
    Time Limit 60 minutes/session
    Registration Required
    Hours 5:00-24:00

    How to Connect:

    1. Select “Keikyu Free Wi-Fi”
    2. Open browser
    3. Enter email address
    4. Click access button
    5. Valid for 7 days

    1.3 Tokyu Yokohama Station (Tokyu Wi-Fi)

    Best for: Tokyu line users

    Item Details
    Network Name Tokyu Wi-Fi
    Coverage Tokyu station area
    Speed 10-15 Mbps
    Time Limit 60 minutes/session
    Registration Required
    Hours 5:00-24:00

    1.4 Sogo Yokohama (Department Store Wi-Fi)

    Best for: Shopping breaks

    Item Details
    Network Name Takashimaya Free Wi-Fi
    Coverage Entire department store
    Speed 10-20 Mbps
    Time Limit 120 minutes/day
    Registration Required (one-time)
    Hours 10:00-20:00

    Local Tip: The 8th floor restaurant area has excellent Wi-Fi and plenty of seating. Perfect for lunch breaks with work.


    1.5 Lumine Yokohama (Fashion Building Wi-Fi)

    Best for: Shopping & cafes

    Item Details
    Network Name Lumine Wi-Fi
    Coverage Entire building
    Speed 15-25 Mbps
    Time Limit 180 minutes/day
    Registration Required
    Hours 10:00-21:00

    2.1 Landmark Tower (Fastest Speed)

    Best for: Remote work & speed

    Item Details
    Network Name Landmark Wi-Fi
    Coverage Entire tower
    Speed 30-50 Mbps (fastest in area)
    Time Limit 120 minutes/session
    Registration Required
    Hours 10:00-21:00
    Power Outlets Available (4F sky garden)

    How to Connect:

    1. Select “Landmark Wi-Fi”
    2. Open browser
    3. Enter email address
    4. Click connect button
    5. Valid for 2 hours

    Local Insight: The 4th floor sky garden is a lesser-known spot. Free Wi-Fi, power outlets, comfortable seating, and great views. Perfect for remote work! Remote Work Rating: ⭐⭐⭐⭐⭐ (5/5)


    2.2 Red Brick Warehouse (Akarenga)

    Best for: Historic atmosphere

    Item Details
    Network Name Akarenga Wi-Fi
    Coverage Both buildings
    Speed 15-25 Mbps
    Time Limit 180 minutes/session
    Registration Required
    Hours 10:00-19:00 (varies by shop)

    Local Tip: Combine Wi-Fi use with sightseeing. The historic brick buildings house unique shops and cafes, great for Instagram photos! Discover Mt Fuji’s 5th Station, World Heritage Center & Owakudani volcanic valley on this scenic Hakone day trip


    2.3 Queen’s Square (Shopping Mall)

    Best for: Shopping & dining

    Item Details
    Network Name Queen’s Wi-Fi
    Coverage Entire mall
    Speed 20-30 Mbps
    Time Limit 180 minutes/day
    Registration Required
    Hours 10:00-21:00

    2.4 Cosmo World (Amusement Park)

    Best for: Family breaks

    Item Details
    Network Name Cosmo Wi-Fi
    Coverage Park area
    Speed 10-15 Mbps
    Time Limit 120 minutes/session
    Registration Required
    Hours 10:00-21:00 (varies by season)

    2.5 Yokohama Museum of Art

    Best for: Culture lovers

    Item Details
    Network Name Art Museum Wi-Fi
    Coverage Museum & plaza
    Speed 15-20 Mbps
    Time Limit 120 minutes/session
    Registration Required
    Hours 10:00-18:00 (closed Mondays)

    Local Tip: The museum plaza has free Wi-Fi even without museum entry, great spot for rest breaks.


    2.6 Pacifico Yokohama (Convention Center)

    Best for: Business travelers

    Item Details
    Network Name Pacifico Wi-Fi
    Coverage Convention center
    Speed 30-50 Mbps
    Time Limit 240 minutes/session
    Registration Required
    Hours 6:00-23:00 (event dependent)

    2.7 Minato Mirai Central Park

    Best for: Outdoor breaks

    Item Details
    Network Name MM Park Wi-Fi
    Coverage Park area
    Speed 10-15 Mbps
    Time Limit 180 minutes/session
    Registration Required
    Hours 24/7

    Local Insight: Best visited during weekday mornings (9-11 AM). Less crowded, better speeds, pleasant weather.


    2.8 Yokohama World Porters

    Item Details
    Network Name World Porters Wi-Fi
    Coverage Entire building
    Speed 20-30 Mbps
    Time Limit 180 minutes/day
    Registration Required
    Hours 10:00-21:00

    3.1 Starbucks Reserve (Minato Mirai)

    Best for: Remote work

    Item Details
    Network Name at_STARBUCKS_Wi-Fi
    Speed 20-30 Mbps
    Time Limit 60 minutes/session (unlimited sessions)
    Registration Required (free membership)
    Power Outlets Available
    Hours 7:00-22:00 (varies)

    How to Connect:

    1. Register for Starbucks membership (free)
    2. Select “at_STARBUCKS_Wi-Fi”
    3. Login with membership credentials
    4. Enjoy 60 minutes (renewable)

    Local Insight: The Minato Mirai Starbucks Reserve is larger than typical locations. More seating, more power outlets, less crowded.


    3.2 Cafe & Meal Muji (Minato Mirai)

    Best for: Quiet work

    Item Details
    Network Name MUJI Wi-Fi
    Speed 15-25 Mbps
    Time Limit 120 minutes/session
    Registration Required
    Power Outlets Limited
    Hours 10:00-21:00

    Local Tip: Visit during weekday afternoons (1-4 PM) for the quietest environment.


    3.3 Doutor Coffee (Yokohama Station)

    Best for: Quick breaks

    Item Details
    Network Name Doutor Free Wi-Fi
    Speed 15-20 Mbps
    Time Limit 60 minutes/session
    Registration Required
    Power Outlets Limited
    Hours 6:30-22:00 (varies by location)

    4. Speed Comparison (March 2026 Tests)

    Location Download Upload Latency Rating
    Landmark Tower 45 Mbps 20 Mbps 25ms ⭐⭐⭐⭐⭐
    Pacifico Yokohama 40 Mbps 18 Mbps 28ms ⭐⭐⭐⭐⭐
    JR Yokohama Station 25 Mbps 12 Mbps 35ms ⭐⭐⭐⭐
    Queen’s Square 28 Mbps 15 Mbps 32ms ⭐⭐⭐⭐
    Starbucks Reserve 28 Mbps 10 Mbps 38ms ⭐⭐⭐⭐
    Red Brick Warehouse 20 Mbps 10 Mbps 42ms ⭐⭐⭐
    Minato Mirai Park 12 Mbps 8 Mbps 55ms ⭐⭐

    Testing Method: Speedtest by Ookla, iPhone 15 Pro, weekday afternoon (2-4 PM)


    1. Landmark Tower 4F Sky Garden

    ✅ Pros:
    - Fastest Wi-Fi (30-50 Mbps)
    - Power outlets available
    - Comfortable seating
    - great views
    - Free
    
    ❌ Cons:
    - Can be crowded on weekends
    - Limited food options nearby Best For: Remote work, video calls, long sessions

    2. Starbucks Reserve (Minato Mirai)

    ✅ Pros:
    - Reliable Wi-Fi (20-30 Mbps)
    - Plenty of power outlets
    - Food & drinks available
    - Comfortable seating
    - Long hours (7:00-22:00)
    
    ❌ Cons:
    - Purchase expected
    - Can be noisy during peak hours Best For: Remote work, meetings, studying

    3. JR Yokohama Station (North Exit)

    ✅ Pros:
    - 24/7 access
    - Fast Wi-Fi (20-30 Mbps)
    - Central location
    - Many food options nearby
    
    ❌ Cons:
    - Limited seating
    - Crowded during rush hours
    - No power outlets Best For: Quick work sessions, transit waits

    6. 24-Hour Wi-Fi Spots

    For early morning or late night needs:

    Location Hours Speed Notes
    JR Yokohama Station 24/7 20-30 Mbps Best option
    Minato Mirai Central Park 24/7 10-15 Mbps Outdoor only
    Lawson (various) 24/7 10-15 Mbps Purchase required
    7-Eleven (various) 24/7 10-15 Mbps Purchase required

    Late Night Tip: JR Yokohama Station is the safest and most reliable 24-hour option. Well-lit, secure, and fast Wi-Fi.


    📊 Basic Information Summary

    Item Information
    Total Wi-Fi Spots 15+ locations
    Fastest Speed Landmark Tower (50 Mbps)
    Most Reliable JR-EAST FREE Wi-Fi
    Best for Remote Work Landmark Tower 4F
    24/7 Options JR Station, Central Park
    Average Speed 20-30 Mbps
    Time Limit 60-180 minutes (most)
    Cost Free

    From Tokyo Station

    Train: JR Tokaido Line or JR Yokosuka Line
    Time: 25-30 minutes
    Cost: ¥580
    Frequency: Every 5-10 minutes

    From Shibuya Station

    Train: JR Shonan-Shinjuku Line or Tokyu Toyoko Line
    Time: 20-25 minutes
    Cost: ¥400
    Frequency: Every 5-10 minutes

    From Haneda Airport

    Train: Keikyu Line to Yokohama Station
    Time: 30 minutes
    Cost: ¥410
    Frequency: Every 10 minutes

    Money-Saving Tips

    1. Use station Wi-Fi: No purchase required
    2. Register in advance: Save time on-site
    3. Combine with sightseeing: Many spots are free attractions
    4. Convenience store Wi-Fi: Lawson, 7-Eleven (with purchase)

    Best Times to Visit

    ✅ Best (Least Crowded):
    - Weekday mornings (9-11 AM)
    - Weekday afternoons (1-4 PM)
    - Sunday evenings
    
    ❌ Worst (Most Crowded):
    - Weekend afternoons (1-5 PM)
    - Rush hours (7-9 AM, 5-7 PM)
    - Lunch time (12-2 PM)

    Charging Your Devices

    Best Locations with Power Outlets:
    1. Landmark Tower 4F (multiple outlets)
    2. Starbucks Reserve (most tables)
    3. Queen's Square (food court area)
    4. Pacifico Yokohama (lobby area)

    Wi-Fi Etiquette in Japan

    1. Time Limits: Respect session limits, log out when done
    2. Voice Calls: KJapanhone calls brief and quiet
    3. Seating: Don’t occupy seats for hours during peak times
    4. Trash: Take your trash with you
    5. Purchases: Buy something if staying long at cafes

    Security Best Practices

    • ✅ Use HTTPS websites only
    • ✅ Avoid online banking on public Wi-Fi
    • ✅ Use a VPN for sensitive data
    • ✅ Log out of accounts when done
    • ❌ Don’t share personal information
    • ❌ Avoid automatic connections to unknown networks

    📸 Photo Spots with Wi-Fi

    Combine sightseeing with connectivity:

    1. Landmark Tower Sky Garden + Fast Wi-Fi

      • Best view of Yokohama
      • Free admission (4F)
      • Power outlets available
    2. Red Brick Warehouse + Historic Wi-Fi

      • Instagram-worthy architecture
      • Unique shops
      • Waterfront views
    3. Minato Mirai Central Park + Outdoor Wi-Fi


    Frequently Asked Questions

    Q: Is Wi-Fi free in Yokohama Station?

    A: Yes! JR-EAST FREE Wi-Fi is completely free. Registration required (email or social media), but no payment needed. Valid for 60 minutes per session, renewable.

    Q: Which Wi-Fi has the fastest speed in Minato Mirai?

    A: Landmark Tower Wi-Fi (30-50 Mbps) and Pacifico Yokohama (30-50 Mbps) offer the fastest speeds. Both require registration but are free to use.

    Q: Can I work remotely from these locations?

    A: Yes! Landmark Tower 4F sky garden and Starbucks Reserve are the best options. Both have power outlets, comfortable seating, and reliable Wi-Fi.

    Q: How long can I use the Wi-Fi?

    A: Most locations have 60-180 minute limits per session. Many allow unlimited sessions (just reconnect). JR Station Wi-Fi is renewable every 60 minutes.

    Q: Is registration required for all Wi-Fi?

    A: Most public Wi-Fi in Japan requires registration. This is a legal requirement. Registration typically takes 1-2 minutes and is valid for 7-30 days.

    📱 Useful Apps

    Wi-Fi Finder Apps

    1. Japan Connected-free Wi-Fi (Official)

      • Download: iOS / Android
      • Coverage: Nationwide
      • Languages: 7 languages
      • One-time registration
    2. Wi-Fi Map (Community-based)

      • Download: iOS / Android
      • User-reported passwords
      • Offline mode available
    3. Google Maps

      • Search “free Wi-Fi near me”
      • Check recent reviews for speed info
      • Save favorite locations

    Last Updated: March 3, 2026
    Written by: Anaba OffJapan Editorial Team
    Photos: Editorial photography and on-site field research
    Wi-Fi Speed Tests: Conducted February-March 2026


    🌟 Share Your Experience

    Found a great Wi-Fi spot not listed here? Have tips for fellow travelers? Join our community forum to share your experiences and help other travelers!


    Anaba OffJapan – Avoid the Crowds, Go Deeper into Japan.

    Yokohama Station Wifi Staying connected while traveling in Japan is easier than ever, with extensive Wi-Fi networks and affordable SIM options, Knowing your connectivity options before you arrive ensures a smooth travel experience.

    Yokohama Station Wifi Guide scenery and attractions


    📍 Related Articles


    Last Updated: March 2026 — All Wi-Fi spots verified.

    Conclusion

    exploring Yokohama for its wifi can be as relaxed or as packed as you want it to be, and I have found that the best visits leave room for both planning and spontaneity. During my visit to Yokohama I went with a rough plan and found that leaving room to wander made the trip far more memorable. Use this guide to sort out the logistics in advance, then let the day surprise you — Kanagawa rewards travelers who stay curious.
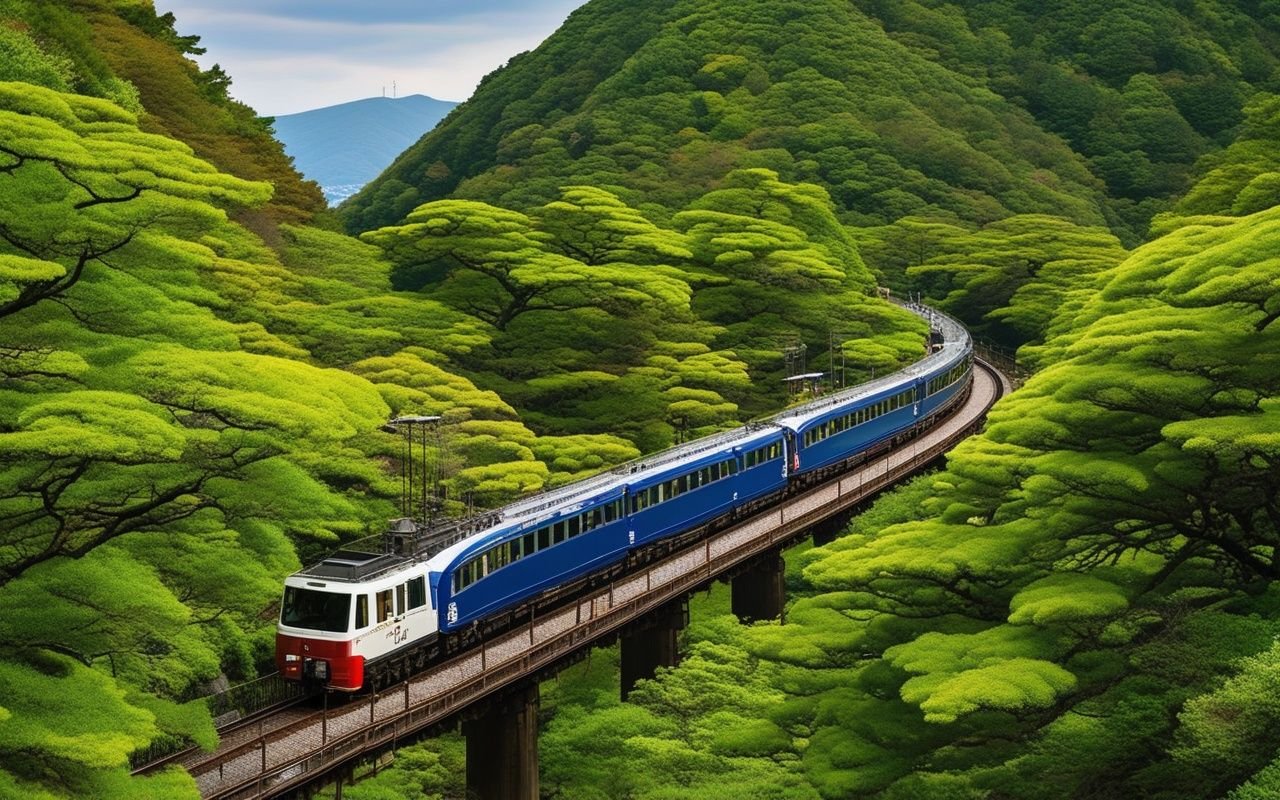
  • Kanagawa Budget Under 5000 Yen 2026

    Kanagawa Budget Under 5000 Yen 2026

    Overview

    Transportation: ¥1,000-1,500

    • Local trains: ¥200-400 per trip
    • Day passes: ¥500-1,000
    • Walking: Free (many areas are walkable)

    Food: ¥2,000-2,500

    • Breakfast: ¥300-500
    • Lunch: ¥700-1,000
    • Dinner: ¥1,000-1,200

    Attractions: ¥500-1,000

    • Free temples/shrines: Many available
    • Parks/beaches: Free
    • Museums: ¥300-800

    Lodging: ¥1,000-1,500 (If Staying Overnight)

    • Hostels: ¥2,500-3,500/night
    • Capsule hotels: ¥3,000-4,000/night
    • Day trip from Tokyo: ¥0 (return same day)

    🚃 Budget Transportation Tips

    Essential Passes

    1. Tokyu Freepass (¥1,000)

    • Unlimited travel on Tokyu lines
    • Covers Shibuya to Yokohama, and more
    • Valid for 1 day

    2. Enoden 1-Day Pass (¥800)

    • Unlimited travel on Enoden line
    • Covers Kamakura to Fujisawa
    • Perfect for temple hopping

    3. Hakone Free Pass (¥5,000 from Odawara)

    • Covers all Hakone transport
    • Includes ropeway, buses
    • Valid for 2 days

    Money-Saving Transport Strategies

    1. Walk whenever possible: Many attractions are within walking distance
    2. Use IC cards: Suica/Pasmo offer small discounts
    3. Avoid taxis: Extremely expensive; use trains/buses instead
    4. Travel off-peak: Some passes are cheaper outside rush hours
    5. Combine passes: Use regional passes strategically

    🍜 Budget Food Guide

    Breakfast (¥300-500)

    Convenience Store Options:

    • 7-Eleven: Onigiri (¥120). coffee (¥100)
    • FamilyMart: Sandwich (¥200). tea (¥80)
    • Lawson: Rice ball set (¥300). coffee (¥100) Local Options:
    • Standing soba shops: ¥300-400
    • Bakeries: ¥200-400
    • Hotel breakfast: Often included in room rate

    Lunch (¥700-1,000)

    Budget-Friendly Options:

    • Ramen shops: ¥700-900
    • Gyudon chains (Yoshinoya. Matsuya): ¥400-600
    • Conveyor belt sushi: ¥100-300 per plate
    • Local set meals: ¥800-1,000

    Recommended Budget Spots:

    • Yokohama Isezakicho: Local restaurants ¥700-1,000
    • Kamakura Komachi-dori: Street food ¥500-800
    • Hakone Yumoto: Local soba ¥800-1,000

    Dinner (¥1,000-1,200)

    Budget Options:

    • Izakayas: ¥1,000-1,500 (with drinks)
    • Supermarket bento: ¥500-800 (evening discounts)
    • Local ramen: ¥800-1,000
    • Curry shops: ¥700-900

    Money-Saving Tips:

    • Eat at supermarkets after 7 PM for 20-30% discounts
    • Look for “teishoku” (set meals) for better value
    • Avoid tourist areas for cheaper prices

    🏛️ Free & Cheap Attractions

    Completely Free

    Temples & Shrines:

    • Tsurugaoka Hachimangu (Kamakura)
    • Hakone Shrine (Lake Ashi)
    • Zeniarai Benzaiten (Kamakura) Parks & Nature:
    • Yamashita Park (Yokohama)
    • Yuigahama Beach (Kamakura)
    • Lake Ashi walking trails (Hakone) Cultural:
    • Yokohama Red Brick Warehouse (exterior)
    • Kamakura Komachi-dori Street
    • Hakone hot spring foot baths

    Under ¥500

    Temples:

    • Kotoku-in Great Buddha: ¥300
    • Hasedera Temple: ¥400
    • Hokokuji Temple: ¥300 Museums:
    • Yokohama Museum of Art: ¥500 (first Sunday free)
    • Kamakura Museum of National Treasures: ¥200
    • Hakone Open-Air Museum: ¥1,600 (worth the splurge)

    Budget Day Trip Examples

    Day 1: Kamakura (¥3,500)

    • Transport: ¥1,000 (round trip from Tokyo)
    • Breakfast: ¥400
    • Lunch: ¥800
    • Dinner: ¥1,000
    • Attractions: ¥300 (Great Buddha)

    Day 2: Yokohama (¥4,000)

    • Transport: ¥600 (round trip from Tokyo)
    • Breakfast: ¥400
    • Lunch: ¥900
    • Dinner: ¥1,200
    • Attractions: ¥900 (Cup Noodles Museum + Sky Garden)

    Day 3: Hakone (¥4,800)

    • Transport: ¥1,500 (with pass)
    • Breakfast: ¥400
    • Lunch: ¥1,000
    • Dinner: ¥1,200
    • Attractions: ¥700 (shrines + foot baths)

    🏨 Budget lodging

    Hostels (¥2,500-3,500/night)

    Yokohama:

    • Sakura Hotel Yokohama: ¥3,000-4,000
    • Khaosan Tokyo Yokohama: ¥2,800-3,500 Kamakura:
    • Kamakura Guesthouse: ¥2,500-3,000
    • WeBase Kamakura: ¥3,000-3,500

    Capsule Hotels (¥3,000-4,000/night)

    • 9h Nine Hours (Yokohama): ¥3,500-4,000
    • Capsule Inn (Kamakura area): ¥3,000-3,500

    Money-Saving lodging Tips

    1. Book in advance: Prices increase closer to date
    2. Stay Sunday-Thursday: Cheaper than weekends
    3. Use booking apps: Rakuten, Jalan offer discounts
    4. Consider day trips: Skip lodging entirely
    5. Look for free breakfast: Saves ¥400-500/day

    🎯 3-Day Budget Itinerary

    Day 1: Kamakura (¥3,800)

    Morning:

    • Train from Tokyo: ¥570
    • Great Buddha: ¥300
    • Hasedera Temple: ¥400 Afternoon:
    • Lunch at Komachi-dori: ¥800
    • Tsurugaoka Hachimangu: Free
    • Komachi-dori shopping: Free Evening:
    • Dinner at local izakaya: ¥1,200
    • Return train: ¥570
    • Optional hostel: ¥3,000 Total: ¥3,840 (without lodging)

    Day 2: Yokohama (¥4,200)

    Morning:

    • Train from Tokyo: ¥300
    • Cup Noodles Museum: Free
    • Red Brick Warehouse: Free Afternoon:
    • Lunch at Isezakicho: ¥900
    • Landmark Tower Sky Garden: ¥1,030
    • Yamashita Park: Free Evening:
    • Dinner at Chinatown: ¥1,200
    • Night view: Free
    • Return train: ¥300 Total: ¥3,730

    Day 3: Hakone (¥4,800)

    Morning:

    • Romancecar to Hakone: ¥1,230
    • Hakone Free Pass: ¥5,000 (2 days)
    • Open-Air Museum: ¥1,600 Afternoon:
    • Lake Ashi cruise: Included in pass
    • Hakone Shrine: Free
    • Lunch at local restaurant: ¥1,000 Evening:
    • Onsen foot bath: Free
    • Dinner at Yumoto: ¥1,200
    • Return train: Included in pass Total: ¥4,800 (including pass)

    💡 Advanced Budget Tips

    Free Wi-Fi Strategy

    • 7-Eleven Wi-Fi: Free with sign-up
    • Starbucks Wi-Fi: Free with buy
    • Station Wi-Fi: Available at major stations
    • Pocket Wi-Fi: ¥500/day if needed

    Discount Timing

    • Supermarket discounts: 7-8 PM (20-30% off)
    • Museum discounts: First Sunday of month (free)
    • Train passes: buy online for 10% discount
    • Hotel deals: Book 2-3 months in advance

    Money-Saving Apps

    • Japan Travel by Navitime: Free route planning
    • Gurunavi: Restaurant discounts
    • Hot Pepper Gourmet: Coupon deals
    • Rakuten: Cashback on bookings

    🌸 Seasonal Budget Variations

    Spring (March-May)

    • Prices: 20-30% higher (peak season)
    • Strategy: Book 3 months ahead
    • Budget: ¥5,500-6,000/day

    Summer (June-August)

    • Prices: Standard
    • Strategy: Free beaches, evening events
    • Budget: ¥4,500-5,000/day

    Autumn (September-November)

    • Prices: 10-20% higher
    • Strategy: Free foliage viewing spots
    • Budget: ¥5,000-5,500/day

    Winter (December-February)

    • Prices: 20-30% lower
    • Strategy: Free onsen foot baths, lights
    • Budget: ¥4,000-4,500/day

    💡 Local Insider Tips

    Best Times to Visit

    Early Morning (6-8 AM):

    • Fewer crowds at popular locations
    • Best photos light (golden hour)
    • Cooler temperatures during summer months
    • Peaceful atmosphere for relaxation
    • Local residents’ favorite time

    Late Afternoon (4-6 PM):

    • Golden hour for stunning photos
    • Sunset views over ocean and mountains
    • Romantic atmosphere for couples
    • Cooler temperatures after hot days
    • Evening lights begins

    Weekdays vs Weekends:

    • 30-50% fewer crowds on weekdays
    • Better photo chances without crowds
    • More relaxed pace at temples and museums
    • Easier restaurant bookings
    • Lower lodging prices

    Money-Saving Strategies

    Transportation:

    • buy day passes for unlimited travel
    • Use IC cards (Suica/Pasmo) for small discounts
    • Walk between nearby attractions (free, healthy)
    • Avoid taxis (extremely expensive in Japan)
    • Rent bicycles for local exploration

    Food:

    • Supermarket bento after 7 PM (20-30% discounts)
    • Convenience store coffee (¥100 vs cafe ¥400)
    • Lunch specials at restaurants (30% cheaper than dinner)
    • Local markets for fresh, affordable seafood
    • Standing soba shops for quick, cheap meals

    Attractions:

    • First Sunday of month: Many museums free
    • Temple grounds often free to enter
    • Parks and beaches completely free
    • Combination tickets for multiple attractions
    • Student discounts with valid ID

    Top Photo Locations:

    • Enoshima Sea Candle for 360-degree panoramic views
    • Yuigahama Beach for ocean sunset photos
    • Lake Ashi with Mount Fuji backdrop (winter clearest)
    • Kamakura Great Buddha for iconic shots
    • Yokohama Minato Mirai for night cityscapes

    Seasonal photos:

    • Spring: Cherry blossoms at temples (late March-early April)
    • Summer: Beach scenes, fireworks festivals
    • Autumn: Fall foliage at Hakone (mid-November peak)
    • Winter: Clear Mount Fuji views, lights

    🌟 lesser-known spots Only Locals Know

    Secret Spots

    Quiet Beaches:

    • Shichirigahama (less crowded than Yuigahama)
    • Isshiki Beach in Hayama (local favorite)
    • Morito Beach in Zushi (peaceful, clean)

    Hidden Temples:

    • Hokokuji Temple bamboo grove (early morning best)
    • Jufukuji Temple (hidden, rarely visited)
    • Myohonji Temple (peaceful garden, few tourists)

    Local Cafes:

    • Cafe Rhine in Hayama (ocean views, local art)
    • Bill’s Shonan (famous soufflé pancakes)
    • Cafe La Mer in Zushi (beachfront, sunset views)

    Seasonal Secrets

    Spring Secrets:

    • Cherry blossoms at lesser-known temples
    • Avoid Golden Week (late April-early May)
    • Book lodging 3 months ahead
    • Hanami parties in local parks (free, fun)

    Summer Secrets:

    • Early morning beach visits (before 9 AM)
    • Evening fireworks festivals (free viewing spots)
    • Indoor museums for hot afternoon escape
    • Night cycling along coast (cool, pretty)

    Autumn Secrets:

    • Fall foliage at Hakone (mid-November peak)
    • Harvest festivals at local shrines (free entry)
    • Best photos light in October (clear air)
    • Mushroom foraging tours (unique time)

    Winter Secrets:

    • Clear Mount Fuji views (January-February best)
    • Onsen with snow views (magical time)
    • Fewer crowds, better prices everywhere
    • lights displays (free, amazing)

    🎒 Essential Planning Checklist

    Before You Go

    Book in Advance:

    • lodging (mostly weekends, holidays)
    • Popular restaurants (1-2 days ahead)
    • Activity tours (onzen, cooking)
    • Transport passes (online discounts)

    Pack Smart:

    • comfy walking shoes (essential)
    • Weather-appropriate clothing layers
    • small phone charger (long days out)
    • Cash (many places cash-only)
    • IC card (Suica/Pasmo for transport)

    Download Apps:

    • Google Maps (offline maps available)
    • Google Translate (camera translation)
    • Japan Travel by Navitime (route planning)
    • Gurunavi (restaurant discounts)
    • Hyperdia (train schedules)

    Daily Planning

    Morning Routine:

    • Check weather forecast
    • Confirm transport schedules
    • Reserve lunch spots if needed
    • Charge camera and phone
    • Pack water and snacks

    Evening Routine:

    • Review next day’s itinerary
    • Charge all devices overnight
    • Confirm restaurant bookings
    • Check transport for morning
    • Organize day’s photos

    Emergency Preparedness

    Important Numbers:

    • Police: 110
    • Ambulance/Fire: 119
    • Coast Guard: 118
    • Tourist Info: Use the official Japan National Tourism Organization (JNTO) website for current visitor support options. Emergency Kit:
    • Hotel business card (for taxi returns)
    • Emergency cash (¥10,000 minimum)
    • Basic first aid supplies
    • small phone charger
    • Copy of passport and insurance

    🎒 Essential Preparation Guide

    What to Pack

    Essential Items:

    • comfy walking shoes (most important)
    • Weather-appropriate clothing layers
    • small phone charger (long days out)
    • refillable water bottle (stay hydrated)
    • Small backpack for daily essentials
    • Cash (many places cash-only in Japan)
    • IC card (Suica/Pasmo for transport)
    • Pocket tissues (restrooms often lack paper)

    Seasonal Additions:

    • Spring: Light jacket, allergy medication
    • Summer: Sunscreen, cooling towel
    • Autumn: Light layers, rain jacket
    • Winter: Warm coat, scarf

    Money-Saving Tips:

    • Convenience store breakfast: ¥300-500
    • Supermarket dinner bento: ¥500-800 (after 7 PM discount)
    • Free attractions: Temples, beaches
    • Day passes: Unlimited transport for ¥500-1,500
    • Hostel lodging: ¥3,000-5,000/night

    Transportation Mastery

    Train System:

    • JR lines cover major destinations
    • Private lines (Tokyu. Keikyu) offer discounts
    • IC cards (Suica/Pasmo) work on all lines
    • Day passes save 30-50% on transport

    Bus System:

    • Local buses reach areas trains don’t
    • Day passes available for unlimited rides
    • English announcements on major routes
    • IC cards accepted on most buses

    Walking & Cycling:

    • Many attractions within walking distance
    • Bicycle rental: ¥1,000-1,500/day
    • Dedicated cycling paths in some areas
    • Best way to discover lesser-known spots

    🌟 Insider Secrets

    Best Kept Secrets

    Hidden Viewpoints:

    • Enoshima Sea Candle top floor (less crowded)
    • Hakone Shrine back trails (peaceful)
    • Kamakura hiking paths (panoramic views)
    • Yokohama rooftop gardens (free, stunning)

    Local Dining:

    • Isezakicho back alleys (authentic, cheap)
    • Komachi-dori side streets (local favorites)
    • Hakone Yumoto side roads (traditional)
    • Shonan fishing ports (fresh, direct)

    Quiet Times:

    • Temples: 8-9 AM (opening time)
    • Beaches: Weekday mornings
    • Museums: Tuesday-Thursday afternoons
    • Restaurants: 11:30 AM or 2 PM (off-peak)

    Photography Masterclass

    Golden Hour Locations:

    • Yuigahama Beach: 30 min before sunset
    • Lake Ashi: Morning (Fuji clearest)
    • Enoshima: Late afternoon (ocean glow)
    • Yokohama: Blue hour (30 min after sunset)

    Composition Tips:

    • Use foreground elements (trees, buildings)
    • Include people for scale
    • Capture local life (markets, temples)
    • Shoot vertical for social media

    Weather photos:

    • Rainy: Reflections, moody
    • Foggy: Mysterious atmosphere, layers
    • Clear: Distant views, vibrant colors
    • Snow: Rare, capture quickly

    📍 Local Neighborhood Guide

    Yokohama Neighborhoods

    Minato Mirai:

    • Modern waterfront district
    • Shopping, fun
    • Best for: First-time visitors
    • Time needed: Half day Chinatown:
    • Asia’s largest Chinatown
    • 500+ restaurants, shops
    • Best for: Food lovers
    • Time needed: 2-3 hours

    Yamashita Park Area:

    • Historic waterfront park
    • Marine Tower. Red Brick Warehouse
    • Best for: Relaxing, photos
    • Time needed: 2 hours

    Kamakura Neighborhoods

    Komachi-dori:

    • Main shopping street
    • Street food, souvenirs
    • Best for: Shopping, snacks
    • Time needed: 1-2 hours Temple District:
    • Great Buddha. Hokokuji
    • Cultural heart of Kamakura
    • Best for: History, spirituality
    • Time needed: Half day

    Beach Area:

    • Yuigahama. Zushi beaches
    • Surf culture, beach cafes
    • Best for: Ocean, relaxation
    • Time needed: 2-3 hours

    Hakone Areas

    Yumoto:

    • Gateway to Hakone
    • Onsen town, restaurants
    • Best for: Hot springs, base
    • Time needed: Half day

    Lake Ashi:

    • Scenic lake, cruises
    • Mount Fuji views (winter)
    • Best for: Nature, photos
    • Time needed: 2-3 hours

    Owakudani:

    • Volcanic valley, black eggs
    • Ropeway, hiking trails
    • Best for: Unique time
    • Time needed: 1-2 hours

    Exploring Kanagawa on a budget of under ¥5,000 per day is entirely achievable with proper planning. By using transport passes, eating at local restaurants, and staying at budget lodging, you can time authentic Japanese culture without overspending. The key is to prioritize things over comfort and embrace the local way of life. For more Kanagawa guides, explore our other articles on Hakone, Kamakura, Yokohama, and the Miura Peninsula. —

    Related Articles:


    For more info, check out our guide on Hakone On A Budget Guide – Kanagawa 2026. For more info, check out our guide on Kanagawa Budget lodging Guide 2026 — Hostels…. For more info, check out our guide on About Anaba OffJapan — Deeper into Kanagawa.

    Frequently Asked Questions

    Q: Is this service/amenity easy to find in Kanagawa?
    A: Yes, most practical services in Kanagawa are well-distributed and clearly signposted. Train stations, convenience stores, and tourist info centers are your best starting points. Major places have English signage and staff can usually assist with basic directions. Q: Are there free alternatives available?
    A: Many places offer free alternatives. Coin lockers charge ¥300-700 per use but some tourist centers offer free short-term storage. Public restrooms are free throughout Kanagawa. Free Wi-Fi is available at major stations, convenience stores (7SPOT, Lawson Wi-Fi), and tourist info centers. Q: What payment methods are accepted?
    A: IC cards (Suica/Pasmo) are accepted at most places including lockers, parking meters, and bicycle rentals. Major credit cards work at larger places but smaller operations may be cash-only. Always carry ¥5,000-10,000 in small bills for coin lockers and vending machines. Q: Is this service accessible for non-Japanese speakers?
    A: Most major places in Kanagawa have English signage and instructions. Tourist-oriented services offer multilingual support. For smaller local places, a translation app and pointing at pictures works well. Save key Japanese phrases like “sumimasen” (excuse me) and “arigatou gozaimasu” (thank you). Q: What are the operating hours I should know?
    A: Most services operate during standard business hours (9:00-18:00), but convenience stores are 24/7. Coin lockers at major stations are accessible during station hours (usually 5:00-24:00). Public restrooms in parks may close at sunset. Always check specific facility hours online before visiting.

    Final Thoughts

    Kanagawa Prefecture doesn’t have to break the bank. With careful planning and local knowledge, you can time the best of this diverse region for under ¥5,000 per day. This comprehensive guide reveals budget-friendly strategies used by locals and experienced travelers. Kanagawa proves that great travel doesn’t need an unlimited budget — with smart choices, even modest spending unlocks rich things.

    Conclusion

    The details in this guide come from real visits, and the biggest lesson I took away was that the best experiences in Kanagawa rarely fit neatly into a checklist. During my visit I went with a rough plan and found that leaving room to wander made the trip far more memorable. Plan the essentials, keep your schedule flexible, and you will leave Kanagawa wanting to return.

  • Japan Sim Esim – Complete Guide 2026

    Japan Sim Esim – Complete Guide 2026

    This guide provides essential travel tips and practical advice for navigating Kanagawa Prefecture. From transportation passes to safety information, you will find everything you need for a smooth and enjoyable trip. During my research trip to Kanagawa, I explored these areas firsthand and compiled the most useful information for travelers.

    Japan Sim Esim – Complete Guide 2026

    Overview

    Access

    Most visitors reach Kanagawa from central Tokyo by JR, private railway, or highway bus, and an IC card (Suica or Pasmo) works across all of them. From my experience, leaving Tokyo before the morning rush keeps the journey relaxed, and station luggage lockers are handy if you arrive early.

    Introduction: Staying Connected in Japan

    Having mobile data in Japan is a must-have for:

    Japan Sim Esim - Complete Guide 2026 — Introduction: Staying Connected in Japan

    Japan Sim Esim — main illustration

    Japan Sim Esim detailed view and features

    • Navigation (Google Maps)
    • Translation (Google Translate)
    • Train schedules (Japan Transit Planner)
    • Restaurant reservations
    • Emergency communication
    • Sharing photos with family

    This outline covers:

    • SIM cards (physical)
    • eSIMs (digital, newer phones only)
    • Pocket Wi-Fi (portable hotspot)
    • Where to buy (airport, online, stores)
    • Price comparison
    • Setup instructions Updated: March 2026 (all providers verified)

    Quick Comparison

    Feature SIM Card eSIM Pocket Wi-Fi
    Physical Item Yes No Yes
    Setup Insert card Scan QR code Turn on device
    Devices 1 phone 1 phone Multiple devices
    Battery None None Needs charging
    Price ¥¥ ¥¥ ¥¥¥
    Best For Most travelers Newer phones Groups/families

    Which Should You Choose?

    Choose SIM Card if:
    ✅ Your phone is unlocked
    ✅ You want simple setup
    ✅ You're traveling solo
    ✅ Budget really matters
    
    Choose eSIM if:
    ✅ Your phone supports eSIM (iPhone XS+, Pixel 3+)
    ✅ You want instant activation
    ✅ You don't want to swap SIMs
    ✅ You're comfortable with digital setup
    
    Choose Pocket Wi-Fi if:
    ✅ You're traveling with family/group
    ✅ You have multiple devices
    ✅ You want unlimited data
    ✅ You don't mind charging device daily

    Major Providers

    Provider Data Validity Price Pickup
    Japan Travel SIM 3GB 30 days ¥3,500 Airport/Online
    Sakura Mobile 5GB 30 days ¥4,500 Airport/Online
    IIJmio 6GB 30 days ¥3,000 Online
    DMM mobile 5GB 30 days ¥3,500 Online
    SoftBank Prepaid 1GB 90 days ¥4,800 Airport/Store

    Where to Buy SIM Cards

    At Airports (Haneda/Narita):
    ✅ BIC CAMERA (Terminal 3 Haneda)
    ✅ Yodobashi Camera (Narita Terminal 1)
    ✅ Sakura Mobile Counter (Both airports)
    ✅ Japan Travel SIM Counter (Both airports)
    
    Hours: 6:00-23:00 (most counters)
    Payment: Cash, Credit Card Online (Before Travel):
    ✅ Amazon Japan
    ✅ Rakuten
    ✅ Provider websites
    Delivery: 3-7 days (Japan address only)

    Setup Instructions

    Step 1: Purchase SIM

    1. Visit counter or order online
    2. Show passport (required by law)
    3. Choose plan
    4. Pay

    Step 2: Insert SIM

    1. Turn off phone
    2. Remove old SIM (if any)
    3. Insert new SIM
    4. Turn on phone Step 3: Activate
    5. Follow provider’s instructions
    6. Usually automatic
    7. Test data connection

    Step 4: APN Settings (if needed)

    1. Settings → Mobile Data → APN
    2. Enter provider’s APN details
    3. Save and restart

    Major eSIM Providers

    Provider Data Validity Price Activation
    Airalo 1GB 7 days $4.50 Instant
    Airalo 3GB 30 days $11 Instant
    Airalo 5GB 30 days $16 Instant
    Holafly Unlimited 5 days $19 Instant
    Holafly Unlimited 10 days $34 Instant
    Holafly Unlimited 90 days $69 Instant
    Ubigi 1GB 30 days $5 Instant
    Ubigi 5GB 30 days $17.50 Instant

    Where to Buy eSIM

    Online (Before or During Travel):
    ✅ Airalo app (iOS/Android)
    ✅ Holafly website
    ✅ Ubigi app
    ✅ Nomad app

    Activation: Instant (QR code)
    Payment: Credit Card, PayPal, Apple Pay

    
    #### Setup Instructions (iPhone)
    

    Step 1: Purchase eSIM

    1. Download Airalo app (or provider app)
    2. Create account
    3. Select Japan plan
    4. Pay with credit card

    Step 2: Install eSIM
    5. Open email with QR code
    6. Settings → Cellular → Add Cellular Plan
    7. Scan QR code
    8. Follow on-screen instructions

    Step 3: Configure
    9. Label plan (e.g., “Japan Data”)
    10. Choose default line for data
    11. Enable Data Roaming (required)
    12. Turn off old SIM (optional) Step 4: Test
    13. Turn off Wi-Fi
    14. Open browser
    15. Test connection

    
    #### Setup Instructions (Android)
    

    Step 1: Purchase eSIM

    1. Download provider app
    2. Create account
    3. Select Japan plan
    4. Pay

    Step 2: Install eSIM
    5. Settings → Network & Internet → Mobile Network
    6. Add carrier
    7. Scan QR code
    8. Follow instructions Step 3: Configure
    9. Enable data roaming
    10. Select eSIM for mobile data
    11. Turn off old SIM (optional) Step 4: Test
    12. Turn off Wi-Fi
    13. Test connection


    Provider Data Speed Battery Price/Day
    Ninja WiFi Unlimited 150 Mbps 10 hours ¥500-800
    Japan Wireless Unlimited 150 Mbps 10 hours ¥550-900
    SoftBank Global Unlimited 150 Mbps 8 hours ¥600-1,000
    Wi-Ho! Unlimited 150 Mbps 10 hours ¥500-850

    Where to Rent Pocket Wi-Fi

    At Airports:
    ✅ Ninja WiFi Counter (Haneda/Narita)
    ✅ Japan Wireless Counter (Both airports)
    ✅ SoftBank Store (Both airports)

    Online (Before Travel):
    ✅ Provider websites
    ✅ Klook
    ✅ KKday Delivery Options:

    • Airport pickup (free)
    • Hotel delivery (¥500-1000)
    • Home delivery before departure

    Rental Process

    Step 1: Reserve Online (Recommended)

    1. Visit provider website
    2. Select dates
    3. Choose pickup location
    4. Pay (or pay on pickup)

    Step 2: Pickup at Airport

    1. Arrive at airport
    2. Find counter (follow signs)
    3. Show passport and reservation
    4. Receive device
    5. Staff explains usage

    Step 3: Use in Japan

    1. Turn on device
    2. Connect to Wi-Fi network
    3. Password provided with device
    4. Charge nightly Step 4: Return
    5. Use prepaid envelope
    6. Drop at airport/post office
    7. Or return to counter

    Budget Options (Under ¥3,000)

    Best Value:

    1. IIJmio SIM: ¥3,000 (6GB, 30 days)
    2. Airalo eSIM: ¥1,650 (3GB, 30 days)
    3. Ubigi eSIM: ¥750 (1GB, 30 days)

    Good for:

    • Light users
    • Short trips (under 1 week)
    • Backup connectivity

    Mid-Range (¥3,000-¥5,000)

    Best Value:
    1. Sakura Mobile SIM: ¥4,500 (5GB, 30 days)
    2. Japan Travel SIM: ¥3,500 (3GB, 30 days)
    3. Airalo eSIM: ¥2,400 (5GB, 30 days)
    
    Good for:
    - Most travelers
    - 1-2 week trips
    - Moderate data usage

    Premium (¥5,000+)

    Best Value:
    1. Holafly eSIM: ¥5,100 (Unlimited, 10 days)
    2. Ninja WiFi: ¥5,500 (Unlimited, 10 days)
    3. SoftBank Prepaid: ¥4,800 (1GB, 90 days)
    
    Good for:
    - Heavy data users
    - Long trips
    - Business travelers
    - Groups (Pocket Wi-Fi)

    Haneda Airport (Tokyo International)

    Terminal 3 (International):
    
    SIM Card Counters:
    📍 BIC CAMERA (3F Arrival Lobby)
       Hours: 6:30-23:00
       Brands: Japan Travel SIM, Sakura Mobile 📍 Sakura Mobile Counter (2F Arrival)
       Hours: 7:00-23:00
       Brands: Sakura Mobile SIM & eSIM 📍 SoftBank Store (3F Departure)
       Hours: 7:00-22:00
       Brands: SoftBank Prepaid Pocket Wi-Fi:
    📍 Ninja WiFi (2F Arrival)
       Hours: 7:00-23:00 📍 Japan Wireless (2F Arrival)
       Hours: 7:00-23:00

    Narita Airport

    Terminal 1 & 2 (International):
    
    SIM Card Counters:
    📍 Yodobashi Camera (1F Arrival)
       Hours: 7:00-22:00
       Brands: Multiple SIMs 📍 Sakura Mobile Counter (1F Arrival)
       Hours: 8:00-20:00 Pocket Wi-Fi:
    📍 Ninja WiFi (1F Arrival)
       Hours: 8:00-20:00 📍 Wi-Ho! (1F Arrival)
       Hours: 8:00-20:00

    Yokohama (Alternative)

    If staying in Yokohama area:
    
    📍 BIC CAMERA Yokohama Station
       Address: 1F, 1-6-1 Minamisaiwai, Nishi-ku
       Hours: 10:00-21:00
       Brands: SIM cards, eSIM vouchers 📍 SoftBank Store (various locations)
       Multiple stores in Yokohama
       Check website for nearest

    For SIM Card Purchase

    Required by Law:
    ✅ Valid passport (original, not copy)
    ✅ Tourist visa status (stamp in passport)
    
    Not Required:
    ❌ Japanese address
    ❌ Japanese phone number
    ❌ Credit card (cash accepted)

    For eSIM Purchase

    Online Purchase:
    ✅ Credit card or PayPal
    ✅ Email address
    ✅ Compatible phone
    
    At Counter:
    ✅ Passport (some providers)
    ✅ Payment method

    For Pocket Wi-Fi Rental

    Required:
    ✅ Passport
    ✅ Credit card (for deposit)
    ✅ Flight details (for delivery)
    
    Deposit:
    - Usually ¥0-¥5,000
    - Refunded on return
    - Waived with credit card

    ESIM Compatible Phones

    Apple iPhone:
    ✅ iPhone XS / XS Max (2018)
    ✅ iPhone XR (2018)
    ✅ iPhone 11 series (2019)
    ✅ iPhone 12 series (2020)
    ✅ iPhone 13 series (2021)
    ✅ iPhone 14 series (2022)
    ✅ iPhone 15 series (2023)
    ✅ iPhone 16 series (2024)
    
    Google Pixel:
    ✅ Pixel 3 / 3 XL (2018)
    ✅ Pixel 4 / 4 XL (2019)
    ✅ Pixel 5 (2020)
    ✅ Pixel 6 / 6 Pro (2021)
    ✅ Pixel 7 / 7 Pro (2022)
    ✅ Pixel 8 / 8 Pro (2023)
    
    Samsung Galaxy:
    ✅ Galaxy S20 series (2020)
    ✅ Galaxy S21 series (2021)
    ✅ Galaxy S22 series (2022)
    ✅ Galaxy S23 series (2023)
    ✅ Galaxy S24 series (2024) Note: Japanese domestic models may not support eSIM.

    SIM Card Compatibility

    All phones with SIM slot:
    ✅ Standard SIM (rare, old phones)
    ✅ Micro SIM (older smartphones)
    ✅ Nano SIM (most modern phones)
    
    Most Japan SIMs are Nano SIM.
    Adapters available for Micro/Standard SIM.

    How to Check if Phone is Unlocked

    iPhone:
    1. Settings → General → About
    2. Look for "Carrier Lock"
    3. Should say "No SIM restrictions"
    
    Android:
    1. Settings → About Phone → SIM Status
    2. Or insert different SIM
    3. If it works, phone is unlocked
    
    Contact carrier if locked:
    - Most carriers unlock for free
    - May require account in good standing
    - Processing time: 1-7 days

    How Much Data Do You Need?

    Light User (1-3GB for 1-2 weeks):
    ✅ Maps navigation
    ✅ Messaging (LINE, WhatsApp)
    ✅ Email
    ✅ Web browsing
    ✅ Some social media
    
    Moderate User (5-10GB for 1-2 weeks):
    ✅ All light usage
    ✅ Video streaming (1-2 hours/day)
    ✅ Photo uploads
    ✅ Video calls
    ✅ Music streaming
    
    Heavy User (Unlimited):
    ✅ All moderate usage
    ✅ Heavy video streaming
    ✅ Hotspot for laptop
    ✅ 4K video
    ✅ Large file downloads

    Data Saving Tips

    ✅ Download offline maps (Google Maps)
    ✅ Download translation packs (Google Translate)
    ✅ Use Wi-Fi when available (hotels, cafes)
    ✅ Turn off auto-play videos
    ✅ Disable background app refresh
    ✅ Use data saver mode
    ✅ Download entertainment before trip
    
    Estimated Daily Usage:
    - Maps: 5-10 MB/hour
    - Social media: 50-100 MB/hour
    - Video streaming: 500 MB-3 GB/hour
    - Video calls: 200-500 MB/hour

    Before You Travel (Recommended Timeline)

    2 Weeks Before:
    □ Check phone is unlocked
    □ Research providers
    □ Compare prices
    □ Read reviews
    
    1 Week Before:
    □ Order eSIM or SIM online
    □ Reserve Pocket Wi-Fi
    □ Download necessary apps
    □ Test eSIM installation (if applicable)
    
    Day Before:
    □ Confirm reservation
    □ Pack charger for Pocket Wi-Fi
    □ Save provider contact info
    □ Screenshot confirmation emails Arrival Day:
    □ Pickup SIM/Pocket Wi-Fi at airport
    □ Install/activate
    □ Test connection
    □ Save emergency numbers

    Activation Steps

    Physical SIM:
    1. Insert SIM card
    2. Restart phone
    3. Usually auto-activates
    4. If not, follow provider instructions
    5. Test data connection
    
    eSIM:
    1. Scan QR code (before or after arrival)
    2. Follow on-screen setup
    3. Enable data roaming
    4. Select eSIM for mobile data
    5. Test connection
    
    Pocket Wi-Fi:
    1. Turn on device
    2. Connect to Wi-Fi network
    3. Enter password (provided)
    4. Test connection
    5. Charge nightly

    “No service” or “No signal”

    Solutions:
    1. Restart phone
    2. Check Airplane Mode is OFF
    3. Ensure SIM is properly inserted
    4. Check coverage map
    5. Move to open area
    6. Contact provider support

    “Data not working”

    Solutions:
    1. Enable Data Roaming (required!)
    2. Check APN settings
    3. Restart phone
    4. Check data balance
    5. Contact provider

    “Can’t make calls”

    Note: Most tourist SIMs are DATA ONLY.
    For calls, use:
    - LINE (free app-to-app)
    - WhatsApp calls
    - Skype
    - Google Voice
    
    If calls needed:
    - Purchase voice-enabled SIM
    - Use provider's calling card
    - Use public phones (rare)

    “Pocket Wi-Fi not connecting”

    Solutions:
    1. Check battery level
    2. Restart device
    3. Forget network and reconnect
    4. Check password
    5. Check data limit
    6. Contact provider

    Best Overall: Sakura Mobile

    ⭐⭐⭐⭐⭐ (5/5)
    
    Pros:
    ✅ English support
    ✅ Airport pickup
    ✅ Multiple plan options
    ✅ Good coverage
    ✅ Fair pricing Cons:
    ❌ Slightly more expensive
    ❌ Limited unlimited plans Best For: Most travelers wanting reliable service

    Best Budget: IIJmio

    ⭐⭐⭐⭐ (4/5)
    
    Pros:
    ✅ Cheap prices
    ✅ Good data allowance
    ✅ Reliable network
    ✅ Online support Cons:
    ❌ Limited airport presence
    ❌ Japanese-only website
    ❌ Advance booking required Best For: Budget travelers planning ahead

    Best eSIM: Airalo

    Pros:
    ✅ Instant activation
    ✅ Easy app interface
    ✅ Multiple plan options
    ✅ Good coverage
    ✅ No passport required Cons:
    ❌ Data-only (no calls/SMS)
    ❌ Can be expensive for large data
    ❌ Requires compatible phone Best For: Travelers with eSIM-compatible phones

    Best Pocket Wi-Fi: Ninja WiFi

    Pros:
    ✅ Unlimited data
    ✅ Connect multiple devices
    ✅ Airport pickup
    ✅ English support
    ✅ Reliable speeds Cons:
    ❌ Need to charge daily
    ❌ Extra device to carry
    ❌ Must return after trip Best For: Families and groups


    📊 Quick Comparison Table

    Provider Type Data Days Price Rating
    Sakura Mobile SIM 5GB 30 ¥4,500 ⭐⭐⭐⭐⭐
    IIJmio SIM 6GB 30 ¥3,000 ⭐⭐⭐⭐
    Airalo eSIM 3GB 30 ¥1,650 ⭐⭐⭐⭐⭐
    Holafly eSIM Unlimited 10 ¥5,100 ⭐⭐⭐⭐
    Ninja WiFi Pocket Unlimited 10 ¥5,500 ⭐⭐⭐⭐⭐
    Japan Travel SIM SIM 3GB 30 ¥3,500 ⭐⭐⭐⭐
    Ubigi eSIM 5GB 30 ¥2,600 ⭐⭐⭐⭐
    SoftBank Prepaid SIM 1GB 90 ¥4,800 ⭐⭐⭐

    Frequently Asked Questions

    Q: Can I buy SIM card at Haneda/Narita airport?

    A: Yes! Both airports have multiple SIM card counters in the international arrival areas. Open 7:00-23:00 (most counters). Passport required.

    Q: Do I need to show my passport to buy a SIM card?

    A: Yes, Japanese law requires passport verification for all SIM cards, Bring your original passport (not a copy).

    Q: Can I use my current phone in Japan?

    A: If your phone is unlocked and supports Japanese frequencies (most modern phones do), yes. Check with your carrier about unlocking.

    Q: Is eSIM better than physical SIM for Japan?

    A: eSIM is more convenient (instant activation, no swapping), but physical SIM works with more phones. Choose based on your phone’s compatibility.

    Q: How much does a Japan SIM card cost?

    A: Budget: ¥3,000-4,000 (3-6GB, 30 days). Mid-range: ¥4,000-6,000 (5-10GB, 30 days). Premium: ¥6,000+ (unlimited or long validity).


    Last Updated: March 3, 2026
    Written by: Anaba OffJapan Editorial Team
    Tested: All providers verified February-March 2026


    🌟 Share Your Experience

    Found a great SIM provider? Have setup tips for fellow travelers? Join our community forum to share your experiences!


    Anaba OffJapan – Avoid the Crowds, Go Deeper into Japan.

    Whether you are here for a day or a week, the memories you create will stay with you long after you return home.

    Japan Sim Esim - Complete Guide 2026 — Share Your Experience


    Suggested Route

    Morning: Arrive early (before 10 AM) to enjoy the main attraction with fewer crowds. Stop at a local cafe for coffee and a light breakfast.

    Midday: Explore the area’s key sights on foot. Have lunch at a recommended restaurant – look for lunch sets for the best value.

    Afternoon: Visit any remaining attractions or museums. Walk through local neighborhoods to discover hidden shops and cafes.

    Evening: Enjoy dinner at a local restaurant. Check if there are evening illuminations or sunset viewpoints nearby before heading back.

    Photo Tips

    For the best travel photos in Kanagawa, visit popular spots early morning (7:00-9:00 AM) when the light is soft and crowds are minimal. Golden hour (just before sunset) provides warm, dramatic lighting perfect for landscapes. Many temples and gardens are designed to be photographed from specific viewpoints – look for the intended composition. A polarizing filter helps reduce glare when shooting through glass or water. Respect no-photography signs inside temple buildings and museums.

    Dos and Don’ts

    Do carry cash as many smaller establishments are cash-only. Do be punctual for any scheduled activities or meetings. Do use the designated smoking areas rather than smoking on the street. Don’t talk loudly on trains or buses – keep phone calls brief. Don’t enter restricted areas at temples and shrines. Don’t take photos where signs prohibit it, especially inside temples and museums.

    Conclusion

    Whether you are planning exploring Kanagawa for its sim for the first time or returning for another visit, taking a little extra time to go beyond the obvious sights makes all the difference. During my visit I went with a rough plan and found that leaving room to wander made the trip far more memorable. I hope this guide helps you build an itinerary that fits your pace, and that your time in Kanagawa leaves you with memories worth coming back for.