Category: kanagawa

神奈川県の旅行ガイド記事のカテゴリ

  • Hakkeijima Sea Paradise Yokohama Guide 2026

    Hakkeijima Sea Paradise Yokohama Guide 2026

    Hakkeijima Sea Paradise Yokohama Guide 2026

    Overview

    Introduction: An Island of Marine Entertainment

    Sea Paradise opened in 1993 on reclaimed land in Tokyo Bay. The concept was ambitious — build a complete marine leisure destination on its own island, combining state-of-the-art aquarium technology with amusement park rides and retail. Three decades later, it remains one of Yokohama’s most popular family destinations, drawing over 4 million visitors annually.

    Traveling during school breaks? Our school holiday travel guide helps plan around peak seasons.
    What Makes Sea Paradise Special:

    • No entrance fee: Walk onto the island and explore freely
    • Flexible ticketing: Choose from aquarium-only, rides-only, or all-inclusive passes
    • Oceanfront setting: The bay views are integrated into the experience
    • Dolphin interactions: From watching shows to touching dolphins in the lagoon
    • Night operations: Summer evenings feature illuminated aquariums and night rides

    Aqua Resorts (The Aquarium Complex)

    The aquarium complex is the heart of Sea Paradise, comprising four distinct facilities spread across the island.

    Aqua Museum

    The centrepiece aquarium, housed in a distinctive pyramid-shaped building.

    Main Tank:

    • Capacity: 5,000 tons of water
    • Species: Over 700 types of marine life
    • Highlights: Giant groupers, rays, and schools of tuna circling overhead
    • Viewing: Floor-to-ceiling windows plus an overhead tunnel section

    Polar Bear Exhibit:

    One of the few places in Japan where you can see polar bears. The exhibit includes both an underwater viewing window and an above-ground observation area, Feeding times (usually 11:00 and 14:00) draw the biggest crowds.

    Sea Otter Pool:

    The sea otters are a consistent crowd-pleaser, especially during feeding sessions when they float on their backs cracking shellfish against their chests.

    Marine Mammal Arena (Dolphin Show):

    Show Duration Times (typical)
    Dolphin & Sea Lion Show 20 min 11:00, 13:00, 15:00
    Dolphin Jump Performance 15 min 12:00, 14:30, 16:00
    Night Dolphin Show (seasonal) 20 min 18:00–19:00 (summer)

    Shows are included with the Aqua Resorts Pass. Arrive 15 minutes early for good seats — the arena fills up quickly on weekends.

    Dolphin Fantasy

    A tranquil walk-through aquarium where dolphins swim in a large, naturally lit tank. Visitors walk through a transparent tunnel while dolphins glide overhead, close enough to see the texture of their skin.

    Best time to visit: Late afternoon (16:00–17:00) when the light from above creates beautiful patterns in the water. Weekday mornings are quietest.

    Fureai Lagoon

    An interactive touch pool area where visitors can:

    • Touch bottlenose dolphins (guided sessions, ¥500 extra)
    • Feed sea lions (¥300 per serving)
    • Touch starfish and sea cucumbers (free, included with any aquarium pass)

    Note: Dolphin touching sessions have limited capacity and sell out quickly. Register at the lagoon entrance as soon as you arrive.

    UMI FARM

    A hands-on fishing and cooking experience:

    • Fish catching: Catch small fish from a shallow pool (¥500, 15 min)
    • Cook and eat: Staff prepare your catch as tempura (¥300 extra)
    • Seasonal activities: Net fishing, crab catching, sea creature exploration Good for children who want a more active experience than just looking.

    Pleasure Land (Amusement Park)

    Surf Coaster Leviathan

    A roller coaster that runs partially over the water, with several moments where the track extends beyond the island’s edge. The feeling of speeding over open water with the bay stretching beneath you is the ride’s signature experience.

    Detail Info
    Height 40 m
    Top speed 75 km/h
    Duration 2 min 30 sec
    Minimum height 110 cm

    Blue Fall

    A vertical drop tower — 35 metres of free fall. The seats rotate outward as you rise, so you face the ground during the drop. Not for the faint of heart.

    Other Rides

    Ride Type Minimum Height
    Carousel Classic merry-go-round None (with adult)
    Ferris Wheel Bay view wheel (50 m) None
    Kids’ Adventure Children’s play area 90 cm
    Water Battle Splash boats 80 cm

    Ride Tickets vs Pass

    Option Price (adult) Best For
    Individual ride ¥500–800 each 1–2 rides only
    Pleasure Land Pass (unlimited rides) ¥2,500 3+ rides
    One-Day Pass (aquarium + rides) ¥4,500–5,500 Full day

    Ticket Options

    Pass Types (Adult Prices)

    Pass Price (approx) What’s Included
    One-Day Pass ¥4,500–5,500 All 4 aquariums + unlimited rides
    Aqua Resorts Pass ¥3,000–3,500 All 4 aquariums only
    Pleasure Land Pass ¥2,500 Unlimited rides only
    Night Pass ¥1,800–2,500 Aquariums + rides after 16:00

    Note: Prices vary by season. Check the official website for current rates.

    Discounts

    • Online booking: ¥200–500 discount on most passes
    • Combination tickets: Discounted passes available with the Shin-Yokohama Ramen Museum
    • Group rates: 15+ people, contact the park directly
    • Annual pass: ¥8,000 (pays for itself in 2–3 visits)

    Practical Information

    Hours

    Season Hours
    Spring (Mar–May) 10:00–17:00
    Summer (Jun–Aug) 9:30–18:00 (extended to 20:00 on weekends)
    Autumn (Sep–Nov) 10:00–17:00
    Winter (Dec–Feb) 10:00–17:00

    Closed: Occasional maintenance days (check calendar)

    Access

    From Yokohama Station:
    1. JR Negishi Line to Shin-Sugita Station (15 min, ¥230)
    2. Transfer to Kanazawa Seaside Line (monorail)
    3. Ride to Hakkeijima Station (15 min, ¥330)
    Total: ~35 minutes, ¥560
    
    From Shin-Yokohama Station:
    1. JR Yokohama Line to Shin-Sugita (20 min, ¥280)
    2. Seaside Line to Hakkeijima (15 min, ¥330)
    Total: ~40 minutes, ¥610
    
    From Tokyo Station:
    1. JR Tokaido Line to Yokohama (25 min, ¥470)
    2. Transfer to Negishi Line (15 min, ¥230)
    3. Seaside Line to Hakkeijima (15 min, ¥330)
    Total: ~60 minutes, ¥1,030

    Dining

    Restaurant Type Price Location
    Aqua Cafe Light meals, pasta ¥1,000–1,500 Aqua Museum 1F
    Marine Grill Seafood BBQ (summer) ¥2,000–3,000 Waterfront terrace
    Pleasure Food Court Burgers, ramen, curry ¥800–1,200 Pleasure Land area
    Bay View Restaurant Buffet style ¥1,800–2,500 Island center

    When to Visit

    Best time:
    - Weekday mornings (shortest queues for both aquarium and rides)
    - Late afternoon for Night Pass (best value)
    - Summer weekdays (longest hours, dolphin shows run more frequently)
    
    Avoid:
    - Weekends during school holidays (August, Golden Week)
    - Rainy days (rides close in bad weather)
    - National holidays
    
    Strategy for a full day:
    9:30  – Arrive, buy One-Day Pass online
    10:00 – Dolphin show (arrive early for seats)
    10:30 – Aqua Museum (main tank, polar bears)
    12:00 – Lunch at Marine Grill
    13:00 – Surf Coaster + Blue Fall (lighter queues after lunch)
    14:00 – Dolphin Fantasy + Fureai Lagoon
    15:00 – UMI FARM activities
    16:00 – Last dolphin show
    16:30 – Ferris Wheel for bay views
    17:00 – Depart

    Nearby Attractions

    Sea Paradise is well-positioned for combination with other Yokohama destinations:

    • Shin-Yokohama Ramen Museum — 25 min by train (see our Ramen Museum guide)
    • Yokohama English Garden — 30 min by train
    • Kanazawa Hakkei — nearby scenic area with temples and gardens
    • Yokohama Family Day Trip — combine Sea Paradise with Kamakura sightseeing
    • Yokohama Hakkeijima Marina — waterfront dining and walking

    Frequently Asked Questions

    Q: Can I bring my own food into the park?

    A: Yes. Picnics are allowed in designated areas. The waterfront promenade has several benches and shaded spots.

    Q: Are there lockers for luggage?

    A: Yes. Coin lockers are available near the Seaside Line station exit and at the Aqua Museum entrance. Sizes range from small (¥300) to large (¥700).

    Q: Is the park wheelchair accessible?

    A: Yes. All aquarium buildings and most rides are wheelchair accessible. The Surf Coaster and Blue Fall require transferring from a wheelchair to the ride seat.

    Q: Can I leave and re-enter?

    A: Yes. Get a hand stamp at the exit and you can re-enter the same day. Your pass remains valid.

    Q: What happens if it rains?

    A: The aquarium sections (Aqua Museum, Dolphin Fantasy) are fully indoors. Rides close during rain. Umbrellas are available at the information counter.

    🌟 Share Your Experience

    Visited Sea Paradise? Tips for combining it with other Yokohama attractions? Join our community forum to share your recommendations!


    Hakkeijima Sea Paradise is one of those rare attractions that works for almost everyone — families with young children, couples on a date, solo travelers passing through Yokohama. The flexibility of the free island access means you can tailor the experience to your budget and schedule, and the quality of the aquariums rivals purpose-built marine parks across Japan.


    ⏰ Best Time to Visit

    Early morning (8–10 AM): Peaceful atmosphere, fewer crowds, perfect for photos Late afternoon (4–6 PM): Beautiful lighting, local life, less crowded than midday

    🎯 What I Recommend

    • Don’t rush: Take your time to explore the side streets and hidden spots
    • Talk to locals: They often know the best lesser-known spots that aren’t in guidebooks
    • Try the local specialties: Each area has its own unique food and souvenirs

    ⚠️ Things to Watch Out For

    • Some shops close on weekdays or have irregular hours
    • Parking can be challenging during peak seasons
    • Cash is still king at many smaller establishments

    Getting There

    Best Time to Visit

    Outdoor activities are best enjoyed in spring and autumn when temperatures are comfortable. Summer activities like swimming and surfing are popular from July to August. Some activities may close during winter months. Check operating schedules before planning your visit. Weekday mornings offer the best experience with fewer crowds.

    What to Expect

    Most activities are designed to be accessible for international visitors. Staff at popular attractions are accustomed to non-Japanese speakers and can communicate through basic English or translation apps. Duration varies from 1-2 hour experiences to half-day adventures. Wear appropriate clothing – many activities involve walking or standing for extended periods. Some outdoor activities may have age or height restrictions. Always check the official website before visiting for the latest information.

    Local Tips

    Regular participants recommend bringing your own water bottle and wearing moisture-wicking clothing for active experiences. Arriving 15 minutes before your scheduled time allows for check-in and preparation. Many activities have seasonal variations, so check what’s available during your visit. Don’t be shy about asking questions – instructors are happy to help.

    Packing Essentials

    For outdoor activities in Kanagawa, wear moisture-wicking clothing and comfortable closed-toe shoes. Sunscreen and a hat are essential during summer months. Bring a small towel for wiping sweat or for use at rest facilities. A waterproof phone pouch is useful for beach or water activities. Pack snacks and extra water for activities in remote areas where shops may be limited. A small first-aid kit with band-aids and pain relievers is always practical.

    Money-Saving Tips

    Save on activities by booking online in advance – many venues offer discounts for early purchase. Combination tickets covering multiple attractions often provide 15-25% savings. Visit during off-peak hours when some venues offer reduced rates. Check local tourist websites for digital coupons and promotional codes. Consider free alternatives like public gardens and observation decks that offer similar experiences to paid attractions.n

    Conclusion

    exploring Yokohama can be as relaxed or as packed as you want it to be, and I have found that the best visits leave room for both planning and spontaneity. During my visit to Yokohama I went with a rough plan and found that leaving room to wander made the trip far more memorable. Use this guide to sort out the logistics in advance, then let the day surprise you — Kanagawa rewards travelers who stay curious.
  • Hayama to Misaki Walking Route Guide 2026

    Hayama to Misaki Walking Route Guide 2026

    Hayama to Misaki Walking Route Guide 2026

    Overview

    Access

    Most visitors reach Hayama from central Tokyo by JR, private railway, or highway bus, and an IC card (Suica or Pasmo) works across all of them. From my experience, leaving Tokyo before the morning rush keeps the journey relaxed, and station luggage lockers are handy if you arrive early.

    Introduction: Walking Across the Peninsula

    The Miura Peninsula is only about 8 kilometres wide at its narrowest, but it holds more variety than its size suggests. The north, around Hayama, is hilly and forested — the so-called Miura Alps, where trails wind through cedar groves and emerge at viewpoints overlooking Sagami Bay. The center is agricultural: flat fields of daikon radish and cabbage, dotted with farmhouses and small shrines. The south, around Misaki, returns to the coast, with fishing harbours and views across the water to Jogashima Island.

    There is no official trail that connects these zones. The route described here was built by linking existing hiking courses with quiet roads and public bus routes. It is not a wilderness trek — you will walk through residential areas and cross roads — but it offers a genuine sense of crossing the peninsula on foot, which few visitors attempt.

    What to Expect:

    • Start: Hayama (Isshiki Beach or Zushi Station area)
    • Terrain: Forest trail (20%), country roads (50%), coastal path (15%), bus (15%)
    • Navigation: Google Maps works for the road sections; the trail section is marked in Japanese
    • Water: Available at convenience stores along the route (carry 1L minimum)
    • Lunch: Misaki Port’s tuna restaurants are the finish-line reward

    Our guide to Hayama Hidden Beaches has additional tips and recommendations.
    Updated: June 2026 (route verified)


    Route Overview

    Segment 1: Hayama to Sengenyama Summit

    Hayama → Sengenyama hiking course → Summit viewpoint

    Detail Info
    Distance 4 km
    Time 1.5–2 hours
    Elevation gain ~200 m
    Difficulty Moderate (steady climb)
    Trail type Forest path, some steep sections

    Route:

    Start from the Hayama area — either from the Hayama hidden beaches near Isshiki Beach, or from JR Zushi Station. If starting from Zushi Station, walk south through the residential streets toward the hills. The trailhead for the Sengenyama Hiking Course is marked with a small wooden sign at the edge of the forest, approximately 20 minutes from the station.

    The trail climbs steadily through mixed forest — cedar, cypress, and broadleaf trees provide shade even on warm days. The path is well-trodden but can be muddy after rain. Sturdy shoes are essential.

    After approximately 45 minutes of climbing, the trail reaches the Sengenyama summit (標高 186 m). The summit clearing offers a panoramic view of Sagami Bay, with Enoshima to the north, Jogashima to the south, and Mt. Fuji on the western horizon on clear days. There is a bench and a small sign marking the elevation.

    Tips for This Section:

    • Start by 8:00–9:00 AM to avoid the afternoon heat
    • The trail can be slippery after rain — take your time on the descent
    • No facilities or vending machines on the trail
    • Mosquito repellent recommended in summer months

    Segment 2: Ridge Walk and Descent

    Sengenyama summit → Ridge trail → Farmland descent

    Detail Info
    Distance 3 km
    Time 1–1.5 hours
    Elevation loss ~150 m
    Difficulty Easy to moderate
    Trail type Ridge path, gradually descending

    Route:

    From the summit, the trail continues south along the ridge. This section is the most scenic part of the walk — the path stays at elevation for about 1 km, offering intermittent views of both Sagami Bay (west) and Tokyo Bay (east) on clear days.

    The ridge section is narrower than the initial climb, with occasional tree roots crossing the path. After the ridge, the trail begins a gradual descent through the forest, eventually emerging at the edge of agricultural land.

    The transition from forest to farmland is abrupt — one moment you are walking under cedar canopy, the next you are in an open landscape of vegetable fields and greenhouses. This is the Miura Peninsula’s agricultural heartland, where much of Kanagawa’s daikon radish, cabbage, and Chinese chives are grown.

    • The ridge is exposed to wind — carry a light jacket
    • The descent has loose gravel in places — watch your footing
    • Take the last opportunity for forest shade before emerging into open farmland
    • The trail becomes less distinct near the farmland edge; head toward the road visible below

    Segment 3: Farmland Walking

    Farmland edge → Country roads → Misaki-bound bus stop

    Detail Info
    Distance 5 km
    Time 1.5–2 hours
    Elevation Flat (gentle undulations)
    Difficulty Easy
    Surface Paved roads, farm lanes

    Route:

    This section is the least dramatic but most authentic part of the walk. The roads here are quiet — mostly local traffic heading to and from farms — and the landscape is defined by the rhythm of agriculture, Depending on the season, you will see daikon radish being harvested (winter–early spring), rice paddies being planted (late spring), or fields lying fallow under the summer sun.

    The route follows prefectural roads and farm lanes southward. Navigation is straightforward — keep heading south, using the hills of Jogashima as a landmark on the horizon. The roads are flat or gently undulating, giving your legs a rest after the morning’s climb.

    Approximately 3 km into this section, you will pass through the small village of Minamishitaura (南下浦), where a convenience store provides a good opportunity to refill water and buy snacks. The village also has a bus stop that connects to Misakiguchi Station.

    Optional Bus Segment (Recommended):

    From Minamishitaura, the remaining 4 km to Misaki Port follows a busier road with narrower sidewalks. For a more pleasant walking experience, consider taking the bus for this segment:

    Bus: Minamishitaura → Misakiguchi Station
    Time: 10 minutes
    Cost: ¥200–250 (IC card accepted)
    Frequency: Every 20–30 minutes

    This bus segment bridges the least scenic part of the route and drops you at Misakiguchi Station, which is a short walk from Misaki Port and the Jogashima Island bridge.

    • Sun protection is essential — there is almost no shade on the farmland roads
    • Wave back at the farmers — they are friendly but busy
    • The convenience store in Minamishitaura has restrooms (ask at the counter)
    • Check the bus timetable at the Minamishitaura stop if you plan to ride

    Segment 4: Misaki Port and Finish

    Misakiguchi Station → Misaki Port → (Optional) Jogashima Island

    Detail Info
    Distance 1.5 km (to port) + 5 km optional (Jogashima loop)
    Time 20 minutes (to port) + 2–3 hours optional
    Difficulty Easy
    Surface Paved paths, sidewalks

    Route:

    From Misakiguchi Station, it is a 20-minute walk (or 5-minute bus ride) to Misaki Port (Misaki (三崎)港). The port is the peninsula’s premier destination for fresh tuna — the harbour is lined with restaurants serving maguro-don (tuna bowls), sushi, and grilled tuna steaks.

    The fish market is busiest in the morning, but the restaurants serve lunch from 11:00 AM onward. If you arrive by noon, you will find the restaurants in full swing with a lively atmosphere.

    Lunch Recommendations:

    Restaurant specialty Price Notes
    Maguro no Sato Tuna bowl (maguro-don) ¥1,500–2,000 Fast, reliable, popular
    Misaki Kō Sushi set ¥2,000–3,500 Higher quality, reservation recommended
    Port-side stalls Grilled tuna skewers ¥500–800 Quick, casual, eat while walking

    Optional Extension — Jogashima Island:

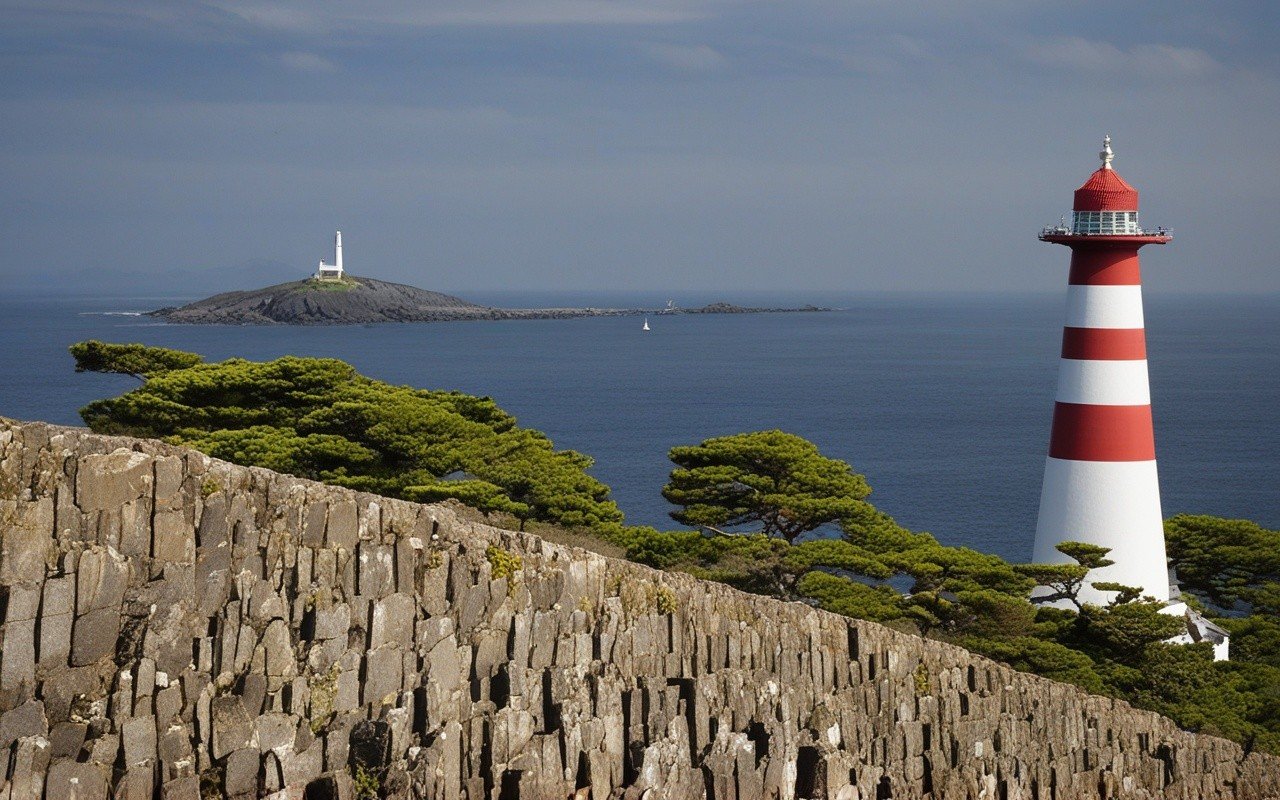
    If you have energy remaining, cross the bridge to Jogashima Island for a 2–3 hour loop walk. The Jogashima hiking trail covers the full circuit, and the Jogashima lighthouse is the island’s highlight.

    From the port, Jogashima is:

    • Walk: 15 minutes across the bridge
    • Bus: 5 minutes from Misaki Port bus stop (¥150)

    Practical Information

    Full Route Summary

    Segment Distance Time Terrain
    1: Hayama → Sengenyama 4 km 1.5–2 h Forest trail, uphill
    2: Ridge → Farm descent 3 km 1–1.5 h Ridge path, downhill
    3: Farmland walking 5 km 1.5–2 h Paved roads, flat
    3b: Bus option 4 km 10 min Bus ride
    4: Misaki Port 1.5 km 20 min Paved paths
    Total (walking) 13.5 km 4.5–6 h
    Total (with bus) 9.5 km + bus 3.5–4.5 h

    Start Time Recommendations

    Start Finish (walking) Finish (with bus) Notes
    7:00 AM 1:00–2:30 PM 11:30 AM–12:30 PM Best for summer heat avoidance
    8:00 AM 2:00–3:30 PM 12:30–1:30 PM Recommended — balanced timing
    9:00 AM 3:00–4:30 PM 1:30–2:30 PM Good for shorter days
    10:00 AM 4:00–5:30 PM 2:30–3:30 PM Tight before sunset

    What to Bring

    Essential:
    - Sturdy walking shoes (trail section has uneven footing)
    - Water (1L minimum, refill at Minamishitaura convenience store)
    - Sunscreen and hat (open farmland sections have no shade)
    - Light jacket or windbreaker (ridge section is exposed)
    - Cash (lunch and bus fare — IC card works for bus)
    - Phone with Google Maps downloaded offline
    
    Recommended:
    - Walking poles (helpful on the forest descent)
    - Insect repellent (summer months)
    - Snacks (trail mix, energy bars)
    - Small towel (for humidity)
    - Change of socks (for after the walk)

    Getting to the Start

    To Hayama (start):
    From Tokyo Station:
    1. JR Yokosuka Line to Kamakura (55 min, ¥1,040)
    2. JR to Zushi Station (5 min, ¥170)
    3. Keikyu Bus to Isshiki or Hayama stop (15 min, ¥230)
    Total: ~80 minutes, ¥1,320
    
    From Yokohama Station:
    1. JR Yokosuka Line to Zushi Station (25 min, ¥420)
    2. Keikyu Bus to Hayama (15 min, ¥230)
    Total: ~45 minutes, ¥650

    Getting Back from the Finish

    From Misaki Port / Misakiguchi Station:
    To Tokyo:
    - Keikyu Line: Misakiguchi → Shinagawa (75 min, ¥1,100)
    - Via Yokohama: Misakiguchi → Yokohama (55 min, ¥750)
    Last train: ~11:00 PM (check schedule)
    
    To Yokohama:
    - Keikyu Limited Express: Misakiguchi → Yokohama (55 min, ¥750)
    Last train: ~11:30 PM by Bus:
    - Keikyu Bus: Misaki Port → Misakiguchi Station (5 min, ¥150)

    Seasonal Considerations

    Spring (March–May):
    - Best weather for walking
    - Cherry blossoms along the farmland roads
    - Comfortable temperatures (15–22°C)
    - Trail may be muddy from spring rain
    
    Summer (June–August):
    - Hot and humid (30–35°C)
    - Start before 7:00 AM to avoid heat
    - Mosquito repellent essential
    - Heavy rain possible (check forecast)
    
    Autumn (September–November):
    - Clear skies, comfortable temperatures
    - Best Mt. Fuji visibility from Sengenyama
    - Dried grass on the ridge can be slippery
    - Daylight shorter (finish by 4:30 PM)
    
    Winter (December–February):
    - Cold but clear (5–15°C)
    - Best views of Mt. Fuji and the bay
    - Trail can be frosty in the morning
    - Lunch at Misaki Port is especially rewarding after a cold walk

    Safety Notes

    ⚠️ The forest trail section has limited mobile reception
    ⚠️ The ridge is exposed to strong winds in winter
    ⚠️ Farmland roads have occasional farm vehicle traffic — walk facing traffic
    ⚠️ No emergency services on the trail section
    ⚠️ Tell someone your planned route and expected finish time
    ⚠️ Check the weather forecast — cancel if heavy rain is predicted
    ⚠️ The trail section can be slippery after rain — turn back if conditions worsen

    Frequently Asked Questions

    Q: Is this route suitable for beginners?

    A: The farmland and Misaki sections are easy, but the Sengenyama climb is moderate. Beginners should allow extra time and take the bus option from Minamishitaura.

    Q: Can I do this route in reverse (Misaki → Hayama)?

    A: Yes, but the walk would be more challenging because the Sengenyama climb would come at the end of the day when you are tired. Start from Hayama for the best experience.

    Q: Are there restrooms along the route?

    A: There are no restrooms on the trail section. Restrooms are available at convenience stores in Hayama (start) and Minamishitaura (midpoint), and at Misakiguchi Station and Misaki Port (finish).

    Q: Can I bring a dog?

    A: The farmland roads and Misaki Port area are dog-friendly, but the forest trail section has uneven terrain that may be challenging for dogs. Keep dogs leashed at all times.

    Q: Is the route well-signposted in English?

    A: No. The Sengenyama trail markers are in Japanese only. Google Maps works for navigation on the road sections. Download offline maps before starting.

    🌟 Share Your Experience

    Walked this route? Found a better connection between Hayama and Misaki? Join our community forum to share your route tips!


    Hayama to Misaki Walking Route Guide 2026 — Share Your Experience

    Walking from Hayama to Misaki Port is not a classic hiking trail in the traditional sense — it is a patchwork of forest paths, country roads, and bus connections that together tell the story of the Miura Peninsula. The reward is an understanding of the landscape that you cannot get from a train window: the smell of cedar on the ridge, the sight of farmers working the daikon fields, and the taste of fresh tuna as a finishing-line celebration.

    For more ways to explore the Miura Peninsula, read our Hayama hidden beaches guide, the Hayama hidden cafes guide, and the Misaki Port food guide.


    ⏰ Best Time to Visit

    Early morning (8–10 AM): Peaceful atmosphere, fewer crowds, perfect for photos Late afternoon (4–6 PM): Beautiful lighting, local life, less crowded than midday

    🎯 What I Recommend

    • Don’t rush: Take your time to explore the side streets and hidden spots
    • Talk to locals: They often know the best lesser-known spots that aren’t in guidebooks
    • Try the local specialties: Each area has its own unique food and souvenirs

    ⚠️ Things to Watch Out For

    • Some shops close on weekdays or have irregular hours
    • Parking can be challenging during peak seasons
    • Cash is still king at many smaller establishments


    Conclusion

    Whether you are planning exploring Hayama for the first time or returning for another visit, taking a little extra time to go beyond the obvious sights makes all the difference. During my visit to Hayama I went with a rough plan and found that leaving room to wander made the trip far more memorable. I hope this guide helps you build an itinerary that fits your pace, and that your time in Kanagawa leaves you with memories worth coming back for.

  • Jogashima Lighthouse & Geology Guide 2026

    Jogashima Lighthouse & Geology Guide 2026

    Overview

    Plan your perfect visit to Jogashima Lighthouse & Geology Guide with this comprehensive destination guide, Covering everything from must-see attractions to practical travel tips, this guide helps you make the most of your time in Jogashima. Whether you have a single day or an entire week, discover the best that this Kanagawa destination has to offer.

    Introduction: Two Stories on One Island

    Jogashima tells two stories simultaneously. The first is human — the lighthouse built by French engineers in Japan’s rush to modernise, standing resilient through earthquakes and war. The second is geological — a story measured in millions of years, written in volcanic sediment layers that were deposited on the deep ocean floor, then uplifted by tectonic forces to form the island we see today.

    Both stories are visible from the same coastal trail. The lighthouse rises from the island’s western headland, its white tower visible for kilometres. Beneath it, the cliffs reveal layer upon layer of compressed volcanic ash and marine sediment, tilted and faulted by the same seismic forces that destroyed the original lighthouse in 1923.

    What Makes This Place Special:

    • Historic lighthouse: One of Japan’s earliest Western-style lighthouses, designed by Léonce Verny (who also built the Yokosuka Naval Arsenal and the Yokohama ironworks)
    • Visible geology: The Miura Peninsula’s tectonic history is exposed in cliff faces along the southern shore
    • Sea cave: Umanose (Horseback) Cave Mouth is a tunnel carved through volcanic rock by wave action
    • Dramatic coastline: Rugged sea cliffs and jagged volcanic formations shaped by Pacific swells
    • Panoramic views: From the lighthouse, views stretch across Sagami Bay to Mt. Fuji on clear days

    Updated: June 2026 (all sites visited and verified)


    Part 1: Jogashima Lighthouse (Jogashima (城ヶ島)灯台)

    1. Lighthouse History

    The Jogashima Lighthouse was completed in 1870 as part of Japan’s ambitious lighthouse-building program under the guidance of foreign engineers. The project was led by Léonce Verny, a French naval engineer who supervised the construction of the Yokosuka Naval Arsenal and several other key Meiji-era infrastructure projects.

    The original structure was a brick tower, built in the Western style that Japan adopted as it opened to international maritime trade. Its location on Jogashima’s western tip was chosen because the island marks the western entrance to Tokyo Bay — a critical navigation point for ships approaching the capital.

    Timeline:

    Year Event
    1870 Original lighthouse completed (brick, designed by Léonce Verny)
    1923 Great Kanto Earthquake destroys the original structure
    1925 Current lighthouse completed (reinforced concrete)
    1926 Lighthouse operational with updated optics
    Present Active navigation aid, open for exterior viewing

    2. Lighthouse Architecture

    Structure Details:

    Height: ~11.5 metres
    Tower shape: Cylindrical with balcony
    Material: Reinforced concrete (current structure)
    Original material: Brick (destroyed in 1923)
    Style: Western functional (Meiji-era maritime)
    color: White with gray trim
    Light characteristics: Flashing white every 15 seconds
    Range: ~30 kilometres (visible range)

    The current lighthouse, rebuilt after the Great Kanto Earthquake, is a robust concrete structure designed to withstand the seismic activity that characterises the region. The cylindrical tower is topped with a lantern room and an external balcony that offers panoramic views of the surrounding coastline.

    The lighthouse is not open for interior tours, but the grounds around it are accessible. The best views of the tower itself are from the coastal path leading to it, and from the cliffs below, where the lighthouse can be photographed against the sea.

    3. Best Viewpoints for Photography

    • The approach path: From the parking area, the lighthouse appears framed against the sky — best in early morning light
    • Cliffside below the tower: Shoot upward to emphasize the tower’s height against the sky; wide-angle lens recommended
    • From the eastern headland: Capture the lighthouse in profile with the sea as background; telephoto (100–200mm) works well
    • Sunset: The tower silhouetted against the setting sun; arrive 45 minutes before sunset for the best color

    For detailed camera settings and composition tips, see the Jogashima photography guide.

    4. Access to the Lighthouse

    From Jogashima Park parking area:
    1. Follow the paved path westward (5 minutes)
    2. Pass the small shrine on the right
    3. The lighthouse appears on the headland
    4. Path ends at the lighthouse fence (no interior access)
    
    Total: ~800 metres from park entrance
    Time: 10–15 minutes walk
    Difficulty: Easy (paved, flat)

    Part 2: Geological Story

    5. The Volcanic Origins

    The rocks that form Jogashima were created approximately 12 million years ago during the Miocene epoch. At that time, the area that is now the Miura Peninsula lay beneath the Pacific Ocean, receiving a steady rain of volcanic ash and sediment from underwater eruptions.

    Over millions of years, these volcanic sediments accumulated in layers hundreds of metres thick. The weight of subsequent deposits compressed them into sedimentary rock — primarily a type called Miura Group turbidite — characterised by alternating layers of sandstone, mudstone, and volcanic tuff.

    This geological story is not unique to Jogashima — the entire Miura Peninsula shares these origins — but the island’s exposed coastline makes it one of the best places in Kanagawa to observe the formations directly.

    What to Look For:

    • Alternating light and dark layers: Sandstone (lighter) and mudstone (darker) represent different depositional environments
    • Fault lines: Visible offsets in the rock layers, evidence of tectonic movement
    • Volcanic tuff layers: gray-green bands of compressed volcanic ash
    • Fossil traces: Occasional shell fragments and burrow marks in the mudstone layers

    6. Tectonic Uplift

    The Miura Peninsula sits at the junction of the Philippine Sea Plate and the Eurasian Plate — a tectonically active zone responsible for the region’s earthquakes and its dramatic topography.

    Approximately 1–2 million years ago, tectonic forces began lifting the ancient seafloor above the water line. This uplift continues today — the Miura Peninsula rises at a rate of roughly 1–2 millimetres per year, one of the fastest rates in Japan.

    Jogashima, as the southernmost point of the peninsula, shows this uplift most clearly. The flat terraces visible at the island’s eastern end are ancient wave-cut platforms that now sit above sea level — direct evidence of the land rising relative to the ocean.

    The same tectonic forces that created the island also destroyed the original lighthouse in 1923. The Great Kanto Earthquake, which measured 7.9 on the moment magnitude scale, shifted the coastline and triggered a tsunami that reshaped parts of the island’s shoreline.

    7. Sea Cliffs and Rock Formations

    The southern coast of Jogashima is where the geology becomes dramatic. Here, the layered volcanic sediments have been carved by Pacific waves into jagged cliffs, offshore stacks, and narrow clefts.

    Key Formations:

    • Southern sea cliffs: Vertical faces up to 20 metres high, showing the full thickness of the exposed rock layers
    • Wave-cut platforms: Flat rock surfaces at the base of the cliffs, exposed at low tide
    • Offshore stacks: Isolated rock pillars that were once connected to the cliff but have been separated by erosion
    • Sea caves: Small caves carved into the cliff base at points where the rock is weaker

    The cliffs are most accessible from the southern coastal trail, which runs from the lighthouse area to the island’s eastern end. The trail has sections with uneven footing and steep drops — sturdy shoes and a cautious pace are essential.

    8. Umanose Cave Mouth (馬の背洞門)

    The most famous geological feature on Jogashima is the Umanose Cave Mouth — a natural sea cave that has been eroded completely through the rock, creating a tunnel wide enough for small boats to have passed through.

    Formation:

    The cave was carved by wave action along a fault line where the rock was fractured and weaker than the surrounding material. Over thousands of years, the Pacific swells exploited this weakness, first creating a notch at the cliff base, then a cave, and eventually a tunnel through the headland.

    Dimensions:

    Width: ~5 metres at the entrance
    Height: ~3 metres at the highest point
    Length: ~8 metres (tunnel depth through the headland)

    The cave roof collapsed partially in 2015 after a series of strong winter storms, reducing the height of the tunnel. Before the collapse, small boats could navigate through the cave — now it is accessible only on foot during low tide.

    Visiting the Cave:

    • Best time: Low tide (the cave floor is submerged at high tide)
    • Access: From the southern coastal trail, follow the signed path toward the sea
    • Footing: The floor is uneven rock and pebbles — wear sturdy shoes
    • Photography: The cave frames the sea view dramatically; a wide-angle lens captures the full arch
    • Safety: Never enter during rough weather or when waves are breaking against the cliff

    Pair a visit to the cave with the Jogashima hiking trail guide, which includes the cave as a waypoint on the full circuit.


    Jogashima Lighthouse & Geology Guide 2026 — 8. Umanose Cave Mouth


    Practical Information

    Suggested Route: Lighthouse + Geology Walk

    This route covers the lighthouse and the main geological features in a single loop.

    Start: Jogashima Park parking area / bus stop
    Distance: ~3 kilometres
    Duration: 2–3 hours (with stops)
    Difficulty: Moderate (some uneven trail sections)
    
    Route:
    1. Walk west to the lighthouse (10 min)
    2. Photograph lighthouse from the headland (15 min)
    3. Continue south along the coastal trail (15 min)
    4. View the sea cliffs and rock formations (20 min)
    5. Descend to Umanose Cave Mouth (10 min)
    6. Explore the cave at low tide (15 min)
    7. Return along the southern trail to the park (20 min)
    8. End at Jogashima Park for rest and facilities Total walking: ~2 hours
    With photography stops: 2.5–3 hours

    What to Bring

    Essential:
    - Sturdy walking shoes (uneven rock surfaces)
    - Water (1–2 litres — no vendors along the trail)
    - Sun protection (limited shade on the southern trail)
    - Windproof jacket (the southern coast is exposed)
    
    For Photography:
    - Wide-angle lens (landscapes, cave)
    - Telephoto lens (lighthouse details, compression)
    - Polarising filter (reduces glare on water and wet rocks)
    - Tripod (for long exposures of waves against the cliffs)
    
    For Geology:
    - Small magnifying glass (to examine rock textures)
    - Notebook and pencil (for sketching formations)
    - Guidebook or downloaded geology map

    Best Times to Visit

    For Lighthouse Photography:
    - Early morning (7–9 AM): Soft light on the white tower
    - Late afternoon (3–5 PM): Warm light, long shadows
    - Winter: Clearest views of Mt. Fuji from the lighthouse
    
    For Geology Viewing:
    - Low tide: Access to the cave and rock platforms
    - Winter–Spring: Lowest vegetation, clearest rock exposure
    - After a storm: Freshly exposed rock surfaces (but check safety)
    - Avoid: High tide (cave inaccessible), typhoons, heavy rain
    
    Overall:
    - Best season: October–April (clear skies, comfortable temperatures)
    - Weekdays: Much quieter than weekends
    - Morning: Sun behind you for most of the walk

    Safety Notes

    ⚠️ Stay on the marked trails — the cliff edges are unstable
    ⚠️ Never approach the cStay edge near the southern sea cliffs
    ⚠️ Check tide tables before visiting the cave
    ⚠️ Do not enter the cave during rough seas
    ⚠️ No lifeguards or emergency services on the island
    ⚠️ Mobile reception is limited on the southern trail
    ⚠️ Tell someone your return time if hiking alone

    Frequently Asked Questions

    Q: Is the lighthouse open for interior visits?

    A: No, the lighthouse is an active navigation aid and is not open to the public. The exterior and grounds are accessible.

    Q: Can I walk from the lighthouse to Umanose Cave?

    A: Yes, the southern coastal trail connects them. The walk takes approximately 20–25 minutes.

    Q: Is the cave accessible at high tide?

    A: No. The cave floor is submerged at high tide. Check a tide table and visit 1–2 hours before or after low tide.

    Q: Are there guided geology tours?

    A: The Kanagawa Science and Geology Group (KSGG) occasionally offers guided walks. Check their volunteer guide program for scheduled tours.

    Q: Can I see fossils on Jogashima?

    A: Small shell fragments and trace fossils are visible in the mudstone layers, but collecting any geological specimens is prohibited on the island.

    🌟 Share Your Experience

    Visited Jogashima Lighthouse? Found interesting rock formations along the coast? Join our community forum to share your discoveries!


    Jogashima Lighthouse & Geology Guide 2026 — Share Your Experience

    Jogashima is one of those rare places where human history and natural history are visible in the same landscape. The lighthouse — built during Japan’s modernisation, destroyed by an earthquake, rebuilt with resilience — stands on rocks that were once at the bottom of the sea. To stand at the lighthouse and look at the cliffs below is to see both stories at once.

    For more ways to explore Jogashima, read our Jogashima hiking trail guide, the Jogashima photography guide, and the Jogashima sunset spots guide.


    ⏰ Best Time to Visit

    Early morning (8–10 AM): Peaceful atmosphere, fewer crowds, perfect for photos Late afternoon (4–6 PM): Beautiful lighting, local life, less crowded than midday

    🎯 What I Recommend

    • Don’t rush: Take your time to explore the side streets and hidden spots
    • Talk to locals: They often know the best lesser-known spots that aren’t in guidebooks
    • Try the local specialties: Each area has its own unique food and souvenirs

    ⚠️ Things to Watch Out For

    • Some shops close on weekdays or have irregular hours
    • Parking can be challenging during peak seasons
    • Cash is still king at many smaller establishments


    Conclusion

    Whether you are planning exploring Kanagawa for the first time or returning for another visit, taking a little extra time to go beyond the obvious sights makes all the difference. During my visit I went with a rough plan and found that leaving room to wander made the trip far more memorable. I hope this guide helps you build an itinerary that fits your pace, and that your time in Kanagawa leaves you with memories worth coming back for.

  • Misaki Port Photography & Sunset Guide 2026

    Misaki Port Photography & Sunset Guide 2026

    Kanagawa offers a wide range of activities for every type of traveler. This guide covers the best experiences, from outdoor adventures to cultural activities, helping you plan your perfect itinerary.

    Misaki Port Photography & Sunset Guide 2026

    Overview

    Introduction: Photographer’s Paradise

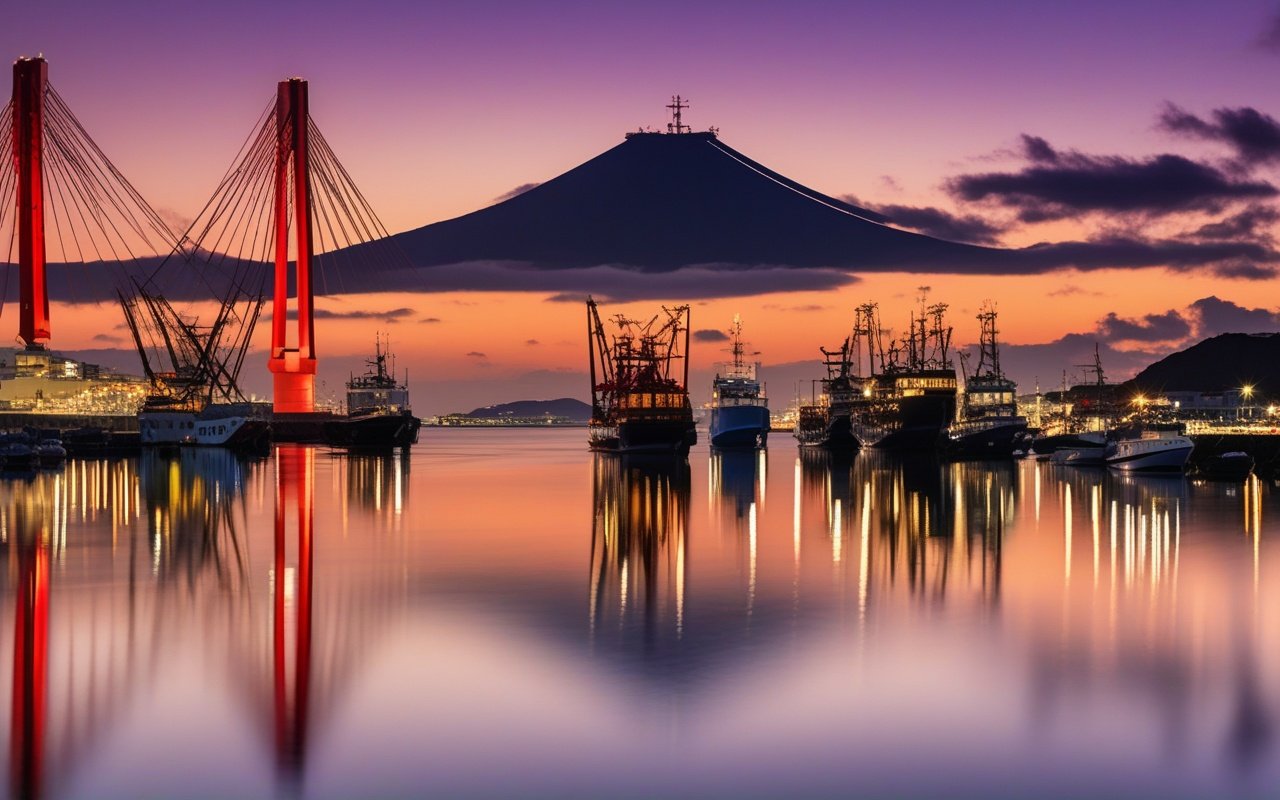
    Misaki Port, at the southern tip of the Miura Peninsula, offers a unique blend of working fishing port authenticity and spectacular coastal scenery. Unlike manicured tourist destinations, Misaki’s charm lies in its raw, unpolished beauty — rows of tuna fishing boats at dawn, the iconic red JoJogashimaridge against golden skies, and narrow Showa-era alleys that seem frozen in time.

    Misaki Port Photography & Sunset Guide 2026 — Introduction: Photographer's Paradise

    Misaki Port Photography Guide

    Misaki Port Photography & Sunset Guide 2026 — Introduction: Photographer's Paradise

    What Makes Misaki Port Special:

    • Authentic fishing port: Working boats, not tourist attractions
    • Jogashima Bridge: Iconic red arch, perfect for sunrise/sunset
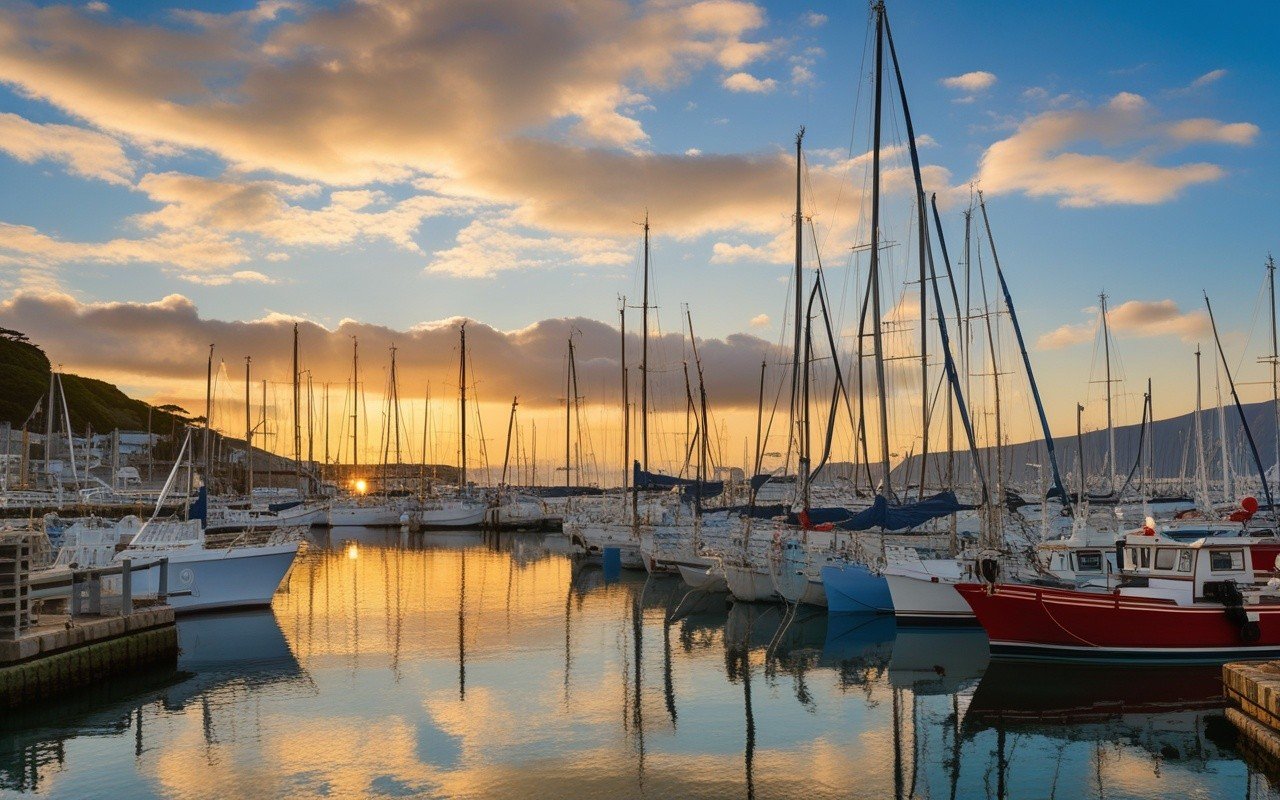
    • Harbor reflections: Calm water creates mirror effects at sunrise
    • Showa atmosphere: Retro storefronts and fishing gear
    • Tuna culture: Boats, markets, and restaurants tell a story

    Photography Stats:

    • Best months: October-March (clearest air)
    • Golden hour: 1 hour before sunset
    • Blue hour: 20-40 minutes after sunset
    • Harbor activity peak: 6:00-8:00 AM (tuna boats returning)
    • Mt. Fuji visibility: November-February (highest clarity) Updated: June 2026 (all locations verified)

    Zone 1: Main Harbor & Tuna Boats

    Best For: Authentic fishing port photography, boat details, harbor life Coordinates: 35.1345°N, 139.6156°E Key Shots:

    1. Rows of tuna boats: Morning light, mist rising
    2. Fishing nets and gear: Textural close-ups
    3. Fishermen at work: Candid documentary style
    4. Reflections in calm water: Symmetry shots

    Equipment:

    • Wide-angle (16-35mm): Harbor panoramas
    • Telephoto (70-200mm): Boat details from a distance
    • Standard zoom (24-70mm): Versatile walk-around

    Best Times:

    • Early morning (6-8 AM): Peak harbor activity
    • Overcast days: Diffused light, moody atmosphere
    • Golden hour: Warm light on white boat hulls

    Local Tips:

    ✅ Arrive by 6:00 AM for boat activity
    ✅ Ask fishermen before photographing them
    ✅ Respect work areas (don't block operations)
    ✅ Early morning mist adds atmosphere
    ✅ Weekdays are quieter than weekends

    Zone 2: Jogashima Bridge

    Best For: Iconic bridge shots, reflection photography, sunset silhouettes Coordinates: 35.1312°N, 139.6178°E Key Shots:

    1. Bridge + sunset: Red arch against orange sky
    2. Reflection in harbor: Calm water mirror effect
    3. Bridge from below: Dramatic perspective
    4. Night lights: Bridge illuminated after dark

    Equipment:

    • Wide-angle (16-35mm): Full bridge + environment
    • Telephoto (70-200mm): Compress bridge + Mt. Fuji
    • Tripod: Essential for blue hour and night
    • ND filter: Long exposure water smoothing

    Best Times:

    • Sunset: Best from mainland side (west)
    • Sunrise: Good from Jogashima side (east)
    • Blue hour: Bridge lights illuminate
    • Low tide: Access to reflection pools

    Camera Settings:

    Recommended Settings (Sunset):
    Mode: Manual
    Aperture: f/8-f/11
    ISO: 100-200
    Shutter: 1/30-1/125
    White Balance: Daylight (preserves warm tones)
    Format: RAW

    Local Tips:

    ✅ Scout location during daytime first
    ✅ Best bridge angle from Misaki Port side
    ✅ Calm windless days = best reflections
    ✅ Include fishing boats in foreground
    ✅ Blue hour: 20 minutes after sunset is magic

    Zone 3: Urari Marche & Waterfront

    Best For: Modern harbor views, local food culture, street photography Visit the Shin-Yokohama Ramen Museum — taste ramen from across Japan & explore the history of this iconic dish Coordinates: 35.1348°N, 139.6149°E

    Key Shots:

    1. Urari Marche building: Modern + traditional contrast
    2. Food stalls: Vibrant colors of fresh seafood
    3. Harbor from terrace: Elevated perspective
    4. Crowd scenes: Weekend market atmosphere

    Equipment:

    • Standard zoom (24-70mm): Versatile for people + architecture
    • Fast prime (35mm or 50mm f/1.8): Low light interior
    • Smartphone: Quick food shots

    Best Times:

    • Weekend mornings: Market in full swing
    • Midday: Best light for food photography
    • Late afternoon: Golden light on terrace

    Local Tips:

    ✅ Try misaki don (bowl) for food shots
    ✅ Ask permission before photographing stall owners
    ✅ Morning light through market canopy is beautiful
    ✅ Second-floor deck provides elevated harbor view

    Zone 4: Misaki Ginza Shopping Street

    Best For: Showa retro atmosphere, street photography, architectural details Coordinates: 35.1340°N, 139.6142°E Key Shots:

    1. Narrow street perspective: Leading lines into distance
    2. Old storefronts: Wooden facades, faded signage
    3. Local characters: Shopkeepers, customers
    4. Evening scenes: Warm light spilling onto street Equipment:
    • Wide-angle (16-35mm): Street scenes
    • Standard zoom (24-70mm): Candid shots
    • Fast prime: Low light evening photography

    Best Times:

    • Late afternoon: Warm light on facades
    • Evening: Nostalgic atmosphere
    • Rainy days: Wet reflections on pavement

    Local Tips:

    ✅ Early morning has best light on facades
    ✅ Many shops close by 5:00 PM
    ✅ Look up: second-floor windows are photogenic
    ✅ Rainy days create beautiful wet reflections
    ✅ Black and white conversions work well here

    Zone 5: Waterfront Promenade

    Best For: Harbor panoramas, people photography, relaxed sunset shots Coordinates: 35.1342°N, 139.6145°E Key Shots:

    1. Harbor panorama: Stitch multiple shots
    2. Benches + sunset: Lifestyle photography
    3. Walking path leading to bridge: Leading lines
    4. Fishing from pier: Documentary style Equipment:
    • Wide-angle (16-35mm): Panoramas
    • Standard zoom (24-70mm): Versatile
    • Tripod: For sunset exposures Best Times:
    • Sunset: Main event
    • Late afternoon: Pleasant strolling light
    • Weekend: More local life visible

    Local Tips:

    ✅ Panorama stitch recommended for wide harbor views
    ✅ Benches are well-positioned for sunset
    ✅ Combine with Jogashima Island visit (bridge connects)

    Zone 6: Jogashima Island Sunset Point

    Best For: Spectacular Mt. Fuji sunsets, dramatic coastal photography Coordinates: 35.1234°N, 139.6234°E (Jogashima Lighthouse area) Key Shots:

    1. Mt. Fuji silhouette behind bridge: Iconic composition
    2. Rocky shoreline foreground: Texture + depth
    3. Lighthouse + sunset: Classic composition
    4. Waves crashing on rocks: Long exposure

    Equipment:

    • Wide-angle (16-35mm): Landscape + Fuji
    • Telephoto (70-200mm): Compress Mt. Fuji
    • Tripod: Essential
    • ND filter: Long exposure waves Best Times:
    • Winter: Clearest Mt. Fuji visibility
    • Sunset: Light up the bridge/fuji
    • Blue hour: Dramatic afterglow Access: Cross Jogashima Bridge, 15-minute walk from bus stop

    Local Tips:

    ✅ Check Mt. Fuji visibility forecast before going
    ✅ Arrive 1 hour before sunset
    ✅ Winter = best visibility but coldest
    ✅ Stay 30 min after sunset for blue hour

    Spring (March-May)

    Characteristics:

    • Mild temperatures, occasional rain
    • Cherry blossoms near the port area
    • Wildflowers on coastal trails
    • Soft spring light after rain

    Best Subjects:

    • Cherry blossoms + harbor boats
    • Wildflowers in foreground compositions
    • Clear air after rain showers
    • Soft diffused light on overcast days Camera Settings:
      Aperture: f/5.6-f/8
      ISO: 100-200
      White Balance: Daylight or Cloudy
      Polarizer: Reduce glare on water

    Pro Tips:

    ✅ Cherry blossoms: Late March-early April
    ✅ After rain: Clearest air and reflections
    ✅ Spring fog = moody harbor shots

    Summer (June-August)

    Characteristics:

    • Hot, humid, dramatic clouds
    • Latest sunsets (7:00+ PM)
    • Haze common
    • Tanabata festival decorations Best Subjects:
    • Dramatic cumulus clouds
    • Long golden hour sessions
    • Festival atmosphere
    • Green hillsides Camera Settings:
      Aperture: f/8-f/11
      ISO: 100-400
      White Balance: Daylight
      ND Filter: Long exposure clouds

    Pro Tips:

    ✅ Sunset: Latest of year (longer shooting window)
    ✅ Afternoon thunderstorms = dramatic clouds
    ✅ Haze: Use polarizer to cut through

    Autumn (September-November)

    Characteristics:

    • Best visibility and stable weather
    • Comfortable temperatures
    • Clear air, clean light
    • Fewer crowds Best Subjects:
    • Mt. Fuji (clear autumn days)
    • Autumn colors (late November)
    • Crisp golden hour light
    • Clean architectural shots Camera Settings:
      Aperture: f/8-f/11
      ISO: 100
      White Balance: Daylight
      Polarizer: Enhance autumn clarity

    Pro Tips:

    ✅ Best season for overall photography
    ✅ Mt. Fuji most visible in October-November
    ✅ Comfortable temperature for long shoots

    Winter (December-February)

    Characteristics:

    • Cold, windy but clearest air
    • Earliest sunsets (4:30 PM)
    • Fewest crowds
    • Best Mt. Fuji visibility

    Best Subjects:

    • Mt. Fuji + bridge (iconic combination)
    • Minimalist winter compositions
    • Warm food market interiors
    • Sunrise harbor activity Camera Settings:
      Aperture: f/8-f/11
      ISO: 100-400
      White Balance: Cloudy (warms up scene)
      Battery: Keep spare warm

    Pro Tips:

    ✅ Best season for Mt. Fuji shots
    ✅ Earliest sunsets = convenient timing
    ✅ Fewest tourists = clean compositions

    Frequently Asked Questions

    Q: What’s the best lens for Misaki Port photography?

    A: A 24-70mm f/4 is the most versatile. Add a 16-35mm for harbor panoramas and a 70-200mm for Mt. Fuji compression and boat details.

    Q: Is Jogashima better than the port for sunset?

    A: Both are excellent. The port offers harbor + boat foregrounds, while Jogashima gives unobstructed ocean + Mt. Fuji views. Visit both if possible.

    Q: Can I photograph inside Urari Marche?

    A: Yes, the market is open to photography. Ask permission for close-ups of vendor stalls. Food photography is generally welcome.

    Q: What time do the tuna boats come in?

    A: Most boats return between 6:00-8:00 AM. Arrive early for the best harbor activity shots.

    Q: Do I need a tripod?

    A: Recommended for sunset, blue hour, and long exposure photography. A compact travel tripod is sufficient.


    Last Updated: June 4, 2026
    Written by: Anaba OffJapan Editorial Team
    Verified: All locations tested June 2026


    🌟 Share Your Experience

    Have Misaki Port photos to share? Photography tips for fellow travelers? Join our community forum to share your experiences!


    Anaba OffJapan – Avoid the Crowds, Go Deeper into Japan.

    Misaki Port Photography & Sunset Guide 2026 — Share Your Experience


    ⏰ Best Time to Visit

    Early morning (6-8 AM): Port is most active with returning fishing boats, mist over water, quiet atmosphere Late afternoon (4-6 PM): Beautiful golden light, Jogashima Bridge silhouettes, sunset photography

    🎯 What I Recommend

    • Walk across Jogashima Bridge: The perspective from the bridge offers unique compositions you cannot get from shore
    • Combine port + island: Start at the harbor for morning activity, cross to Jogashima for sunset
    • Talk to local fishermen: They often know the best hidden viewpoints and will share local stories

    ⚠️ Things to Watch Out For

    • Early morning mist can obscure Mt. Fuji — check weather forecasts
    • Seagulls are bold near the port — protect your gear
    • Some piers are private — respect posted signs and boundaries
    • Wind can be strong near the water — secure tripod with weight

    Miura Peninsula Area

    |—|—|—|—|—|
    | Misaki Port Tuna Market | Seafood Market | 🔗 Official Website | 8:00-17:00 | ¥1,000-3,000 |
    | Maguro no Sato | Tuna Restaurant | 🔗 Official Website | 11:00-15:00 | ¥1,500-4,000 |
    | Urari Marche Food Court | Food Court | 🔗 Official Website | 9:00-18:00 | ¥800-2,000 |

    • Photography: 6:00-8:00 AM (harbor activity) or 4:00-6:00 PM (golden hour)

    • Dining: 11:30 AM – 1:30 PM (fresh tuna lunch)

    • Market: 9:00 AM – 12:00 PM (best selection)

    • Credit Cards: Accepted at larger restaurants and Urari Marche

    • Cash: Preferred at smaller shops and fish market stalls

    • IC Cards (Suica/Pasmo): Not widely accepted

    📱 Useful Apps

    • Sun Surveyor: Plan sunset and sunrise positions
    • Google Maps: Check tide schedules at port
    • Windy: Check wind and visibility conditions for Mt. Fuji shots

    Packing Essentials

    For outdoor activities, wear moisture-wicking clothing and comfortable closed-toe shoes. Sunscreen and a hat are essential during summer. A small towel is useful for wiping sweat. A waterproof phone pouch is useful for water activities. Pack snacks and extra water for remote areas.

    Conclusion

    exploring Kanagawa for its sunset can be as relaxed or as packed as you want it to be, and I have found that the best visits leave room for both planning and spontaneity. During my visit I went with a rough plan and found that leaving room to wander made the trip far more memorable. Use this guide to sort out the logistics in advance, then let the day surprise you — Kanagawa rewards travelers who stay curious.
  • Misaki Port Walking Guide 2026

    Misaki Port Walking Guide 2026

    Kanagawa offers a wide range of activities for every type of traveler. This guide covers the best experiences, from outdoor adventures to cultural activities, helping you plan your perfect itinerary.

    Misaki Port Walking Guide 2026

    Overview

    Overview: A Morning in Misaki Port

    Misaki Port is one of the most walkable destinations on the Miura Peninsula. Unlike sprawling tourist hubs, Misaki’s attractions are concentrated in a compact area around the harbor, Everything is within a 15-minute walk, making it perfect for a relaxed half-day exploration on foot.

    Misaki Port Walking Guide 2026 — Overview: A Morning in Misaki Port

    Misaki Port Walking Guide — main illustration

    Misaki Port Walking Guide 2026 — Overview: A Morning in Misaki Port

    Why Walk Misaki Port?

    • Compact layout: All attractions within walking distance
    • Authentic atmosphere: Showa-era streets untouched by modernization
    • Fresh tuna at every turn: Restaurants and shops line the route
    • Harbor views: The port is the constant companion throughout
    • Easy access: Direct walk from Misakiguchi Station

    Walk Stats:

    • Total distance: ~2.5 km
    • Duration: 2-3 hours (including stops)
    • Difficulty: Easy (flat terrain)
    • Best start time: 9:00-10:00 AM
    • Wheelchair accessible: Main route is accessible

    Route Overview:

    Stop 1: Misakiguchi Station (start)
    Stop 2: Misaki Port Harbor View
    Stop 3: Urari Marche & Fisherman's Market
    Stop 4: Misaki Ginza Shopping Street
    Stop 5: Hidden Alleyways & Showa Streets
    Stop 6: Waterfront Promenade
    Stop 7: Tuna Lunch (finish)

    Stop 1: Start at Misakiguchi Station

    Start your walk here — the gateway to Misaki Port. From the station exit, head south on the main road toward the harbor. The walk is a pleasant 10-minute downhill stroll with the first glimpses of the port appearing between buildings as you descend.

    What to Do:

    • Get your bearings at the station information board
    • Check the bus schedule for Jogashima (optional extension)
    • Visit the small convenience store for water and snacks
    • Take the first photo looking down the hill toward the harbor Pro Tip: Vending machines near the station have better prices than those at the port.

    Stop 2: Misaki Port Harbor View

    Walk: 10 minutes from station The harbor opens up as you reach the bottom of the hill. This is where Misaki’s identity as a major tuna fishing port becomes immediately clear — rows of fishing boats bob at their moorings, seagulls circle overhead, and the air carries a distinct salt-and-fish aroma.

    What to See:

    • Tuna fishing boats: Some over 100 tons, these vessels fish across the Pacific
    • Harbor cranes: Loading and unloading the daily catch
    • Jogashima Bridge view: The red arch bridge visible to the south
    • Fishing gear: Nets, buoys, and equipment stacked along the quay Photo Opportunity: The long view of the harbor with Jogashima Bridge in the background is the quintessential Misaki shot. Best Time: 9:00-10:00 AM — boats are docked, activity is visible

    Stop 3: Urari Marche & Fisherman’s Market

    Walk: 2 minutes from harbor view Urari Marche is Misaki Port’s modern market complex. Despite its contemporary architecture, it functions as a genuine fisherman’s market where locals shop for the day’s catch.

    What to See:

    • Fresh seafood stalls: Tuna, squid, local fish displayed on ice
    • Dried fish shop: Traditional himono (dried fish) in rows
    • Local produce: Miura vegetables, known for their sweetness
    • Food court: Sample fresh tuna bowls and seafood dishes

    What to Buy:


    Stop 4: Misaki Ginza Shopping Street

    Walk: 3 minutes from Urari Marche Turn inland from the harbor and you will find Misaki Ginza — a covered shopping street that feels frozen in the Showa era (1950s-1960s). This is not a tourist shopping arcade but a genuine local shopping street serving the Misaki community.

    What to See:

    • Traditional fishmongers: Selling whole tuna and cuts
    • Dry goods store: Rice, beans, pickles in barrels
    • Old-fashioned barber shop: Red, white, and blue pole still spinning
    • Local pharmacy: With herbal medicines and traditional remedies

    What to Buy:

    • Pickled vegetables: Misaki’s tsukemono (pickles) are local specialty
    • Senbei (rice crackers): Made with local seafood
    • Handmade kitchen tools: Traditional Japanese knives and utensils

    Photo Opportunity: The street’s covered arcade creates interesting light patterns. Midday sun filtering through the translucent roof makes for atmospheric shots.

    Pro Tip: Many shop owners are elderly and happy to chat. A smile and simple greeting go a long way.


    Stop 5: Hidden Alleyways & Showa Streets

    Walk: Branch off Ginza Street into side alleys The real magic of Misaki lies in its narrow alleyways that branch off the main shopping street. These residential lanes offer a glimpse into daily life away from the harbor.

    What to See:

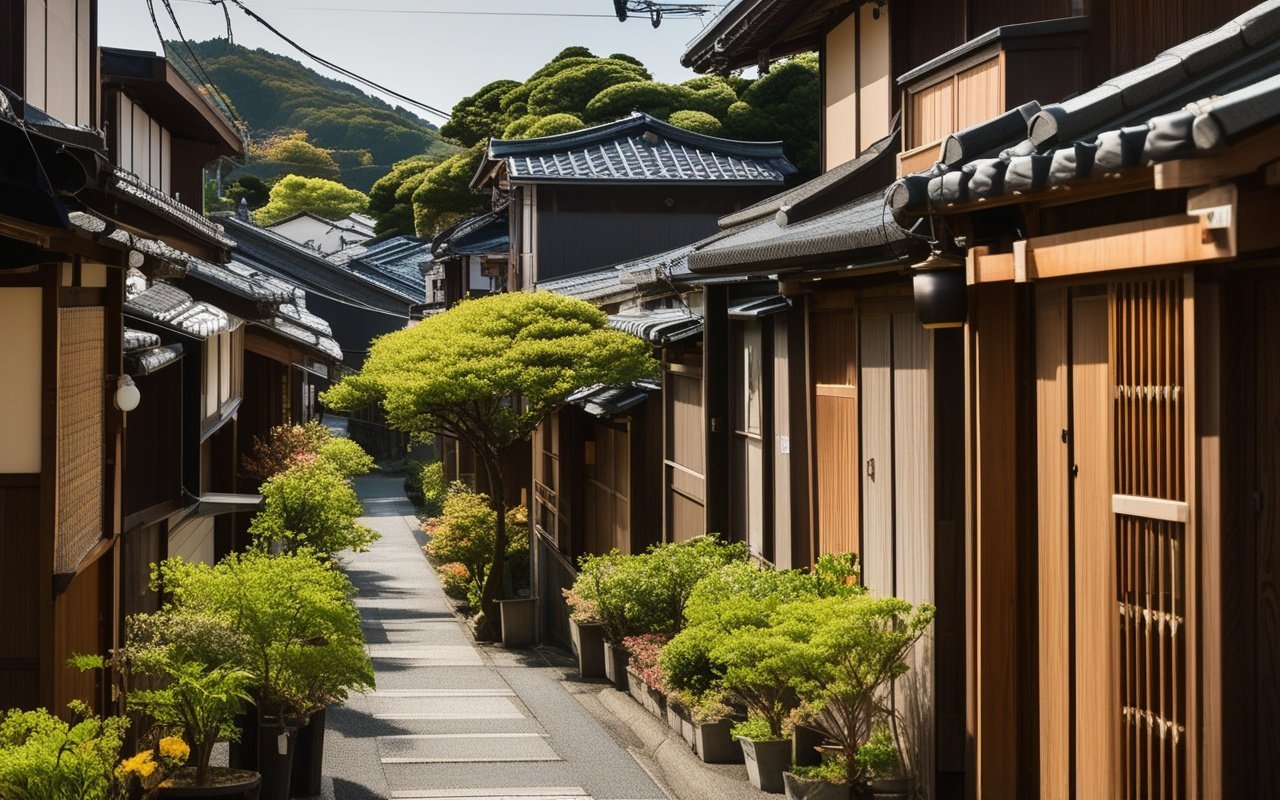
    • Wooden townhouses: Traditional machiya (townhouses) with tiled roofs
    • Bonsai gardens: Tiny but meticulously maintained
    • Outdoor tai chi: Morning exercise groups in small community spaces
    • Cats: Misaki has a notable population of friendly neighborhood cats

    Photography Tips:

    • Look for laundry hanging between buildings — authentic daily life
    • Early morning light creates long shadows in narrow alleys
    • Rainy days add reflections on wet pavement
    • Black and white photography suits the Showa atmosphere

    lesser-known spots:

    1. Small Inari shrine tucked between houses on a side street
    2. Community notice board with hand-drawn maps and local events
    3. Vintage vending machine selling unusual local drinks

    Pro Tip: There is no set route here — the point is to wander. Allow 20-30 minutes for aimless exploration.


    Stop 6: Waterfront Promenade

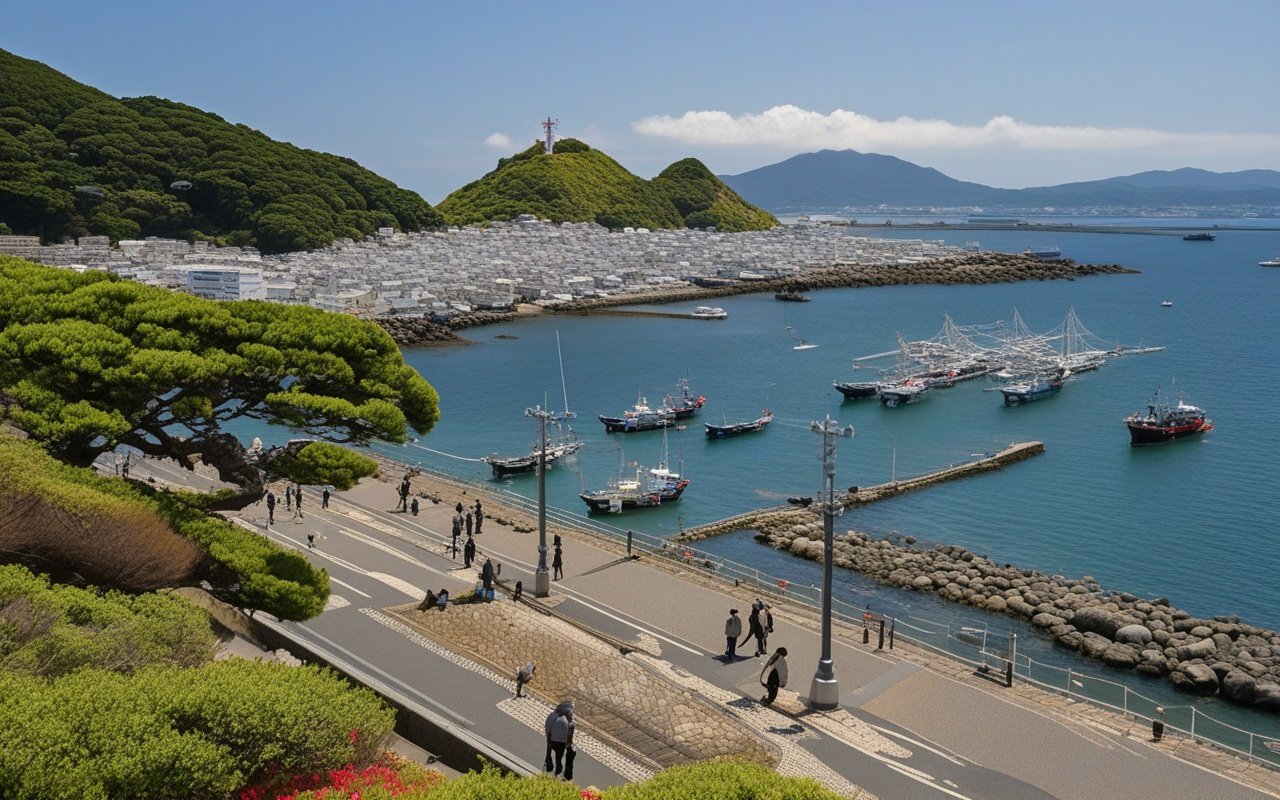
    Walk: 5 minutes back to harbor, south of Urari Marche Walk south from the market along the waterfront. A paved promenade runs parallel to the harbor, offering uninterrupted views of the port, Jogashima Bridge, and the open sea beyond.

    What to See:

    • Jogashima Bridge: Best close-up view from the promenade
    • Fishing boats returning: Watch the afternoon boats come in
    • Seaside benches: Perfect for a rest with harbor views
    • Distant Mt. Fuji: On clear days, visible southwest Optional Extension: Walk across Jogashima Bridge (10 minutes) for sunset views from the island side.

    Photo Opportunity: From the southern end of the promenade, frame Jogashima Bridge with fishing boats in the foreground for a classic Misaki composition.


    Stop 7: Tuna Lunch (Finish)

    Walk: 3 minutes to any port-side restaurant Finish your walk with Misaki’s specialty — tuna, prepared every way imaginable. The area around the harbor is packed with restaurants specializing in maguro (tuna).

    Recommended Lunch Spots:

    Restaurant Specialty Price Range Hours
    Maguro no Sato Tuna sashimi set meal ¥1,500-3,000 11:00-15:00
    Misaki Port Rest House Maguro donburi (bowl) ¥1,000-1,500 10:00-16:00
    Kuroiwa Shokudo Grilled tuna steak ¥1,200-2,000 11:00-14:00
    Urari Marche Food Court Variety (light lunch) ¥800-1,500 9:00-17:00

    What to Order:

    • Maguro donburi: Raw tuna over rice, simplest and best
    • Negi toro don: Minced fatty tuna with green onion
    • Tuna katsu: Deep-fried tuna cutlet (unique to Misaki)
    • Aburi tuna: Seared tuna with ponzu sauce Pro Tip: Lunch service typically starts at 11:00 AM. Arrive by 11:30 AM to beat the crowd.

    Optional Extension: Jogashima Island

    If you have extra time and energy, cross Jogashima Bridge to explore Jogashima Island — a 15-minute walk from the port. The island offers:

    • Jogashima Lighthouse: Historic lighthouse with panoramic views
    • Coastal hiking trails: Cliffside paths with dramatic scenery
    • Umanose Cave: Natural sea arch tunnel in the volcanic rock
    • Sunset viewpoints: Among the best in Kanagawa Prefecture

    Allow: 1-2 hours for a brief exploration Related Guides:


    Frequently Asked Questions

    Q: How long does the walking route take?

    A: The full route including stops takes 2-3 hours. Add 1-2 hours if crossing to Jogashima Island.

    Q: Is the route suitable for children?

    A: Yes, the terrain is flat and paved. Children will enjoy the boats, market, and cats in the alleyways.

    Q: What should I bring?

    A: Comfortable walking shoes, camera, small bag for market purchases, cash (smaller shops don’t take cards), water bottle.

    Q: Can I do this walk in the afternoon?

    A: Yes, but the morning (9 AM-12 PM) is best for the market and harbor activity. Afternoon walks are quieter with better sunset light.

    Q: Are there restrooms along the route?

    A: Yes, at Misakiguchi Station, Urari Marche, and the waterfront area.


    Last Updated: June 4, 2026
    Written by: Anaba OffJapan Editorial Team
    Verified: All locations tested June 2026


    🌟 Share Your Experience

    Walked this route? Discovered a hidden spot we missed? Join our community forum to share your discoveries!


    Anaba OffJapan – Avoid the Crowds, Go Deeper into Japan.

    Misaki Port Walking Guide 2026 — Share Your Experience


    ⏰ Best Time to Walk

    Morning (9 AM-12 PM): Market is most active, harbor boats are docked, shops are open, and the morning light is beautiful Late afternoon (3-5 PM): Quieter streets, golden light, good for photography, combine with Jogashima sunset

    🎯 What I Recommend

    • Start early: The market is best before noon, and you will have Misaki Ginza mostly to yourself
    • Try something from every food stall: Sampling is half the fun of Misaki’s food culture
    • Don’t skip the alleyways: The planned route is good, but spontaneous detours often lead to the best discoveries

    ⚠️ Things to Watch Out For

    • Many shops close on Wednesdays and Thursdays — plan accordingly
    • The fish market can be slippery when wet — wear non-slip shoes
    • Seagulls may swoop for food near the harbor — eat under cover
    • Limited ATM availability — bring enough cash

    Miura Peninsula Area

    |—|—|—|—|—|
    | Misaki Port Rest House | Tuna Bowl | 🔗 Official Website | 10:00-16:00 | ¥1,000-1,500 |
    | Maguro no Sato | Tuna Restaurant | 🔗 Official Website | 11:00-15:00 | ¥1,500-3,000 |
    | Kuroiwa Shokudo | Tuna Steak | — | 11:00-14:00 | ¥1,200-2,000 |

    • Market: 9:00-11:00 AM (peak freshness and selection)

    • Walking: 9:00 AM – 12:00 PM (most shops open, activity visible)

    • Lunch: 11:30 AM – 1:00 PM (tuna is freshest at lunch)

    • Credit Cards: Accepted at Urari Marche and larger restaurants

    • Cash: Essential for smaller shops and market stalls

    • IC Cards (Suica/Pasmo): Not widely accepted in the port area

    📱 Useful Apps

    Conclusion

    Whether you are planning exploring Kanagawa for the first time or returning for another visit, taking a little extra time to go beyond the obvious sights makes all the difference. During my visit I went with a rough plan and found that leaving room to wander made the trip far more memorable. I hope this guide helps you build an itinerary that fits your pace, and that your time in Kanagawa leaves you with memories worth coming back for.

  • Hayama Hidden Beaches Guide 2026

    Hayama Hidden Beaches Guide 2026

    Hayama Hidden Beaches Guide 2026

    Overview

    Plan your perfect visit to Hayama Hidden Beaches Guide with this comprehensive destination guide, Covering everything from must-see attractions to practical travel tips, this guide helps you make the most of your time in Hayama. Whether you have a single day or an entire week, discover the best that this Kanagawa destination has to offer.

    Introduction: Why Hayama’s Coastline is Different

    The Imperial Family’s Hayama Villa, located directly above Isshiki Beach, set the tone for the area a century ago. Rather than developing into a neon-lit resort, Hayama remained deliberately understated. The beaches have no towering hotels, no boardwalk arcades, no crowds of tour buses. What they offer instead is space, clean water, and views that have attracted artists, writers, and sailors for generations.

    What Makes Hayama Beaches Special:

    • Calm waters: Sagami Bay’s sheltered orientation means gentler waves than Pacific-facing beaches
    • Mt. Fuji views: On clear days, the mountain floats across the bay — best at sunset
    • Low-rise coastline: No high-rises block the horizon
    • Local character: Many visitors are regulars who return every summer
    • Beach huts with taste: The umi-no-ie here are relaxed and stylish, not loud

    Best Times to Visit:

    • Weekdays: Quiet enough that you might share the beach with fewer than 20 people
    • July–August: Official swimming season with lifeguards and beach huts
    • Winter: Cold for swimming, but crystal-clear air for Mt. Fuji photography
    • Sunset: Every beach faces directly into the setting sun

    Updated: June 2026 (all beaches visited and verified)


    1. Isshiki Beach (一色海岸)

    The Classic — Hayama’s Most Beautiful Beach

    Location: Central Hayama coast
    Coordinates: 35.2711°N, 139.5778°E
    Access: 15-min bus from Zushi Station + 5-min walk
    Length: ~1 km crescent
    Sand: gray volcanic sand
    Water: Calm, good for swimmers of all levels
    Lifeguards: July–August (9:00–17:00)
    Beach Huts: ✅ Seasonal (Blue Moon, others)
    Parking: ¥500–1,000/day (limited)

    Why It’s Special:

    Isshiki Beach is the heart of Hayama’s coastal identity. The beach forms a gentle arc between two rocky points, creating a natural enclosure that keeps the water calm even on days when other beaches have chop. The Imperial Villa’s forested grounds rise behind the beach, ensuring that no construction will ever block the view.

    From the water, the sight of Mt. Fuji aligning with the beach’s western point at sunset is one of Kanagawa’s great coastal experiences. The sand has a distinctive dark gray color from volcanic minerals, which stays cool enough to walk on barefoot even in August.

    Beach Huts (Umi-no-ie):

    • Blue Moon — the most famous, with stylish deck seating, cocktails, and food (¥1,500–3,000 per person)
    • Isshiki Beach House — family-friendly, yakisoba and shaved ice (¥800–1,200)
    • Both operate roughly July 15–August 31

    What to Do:

    • Swim in the calm, roped-off area
    • SUP or kayak (bring your own or rent from Zushi)
    • Walk east along the rocks at low tide to find small tidal pools
    • Photograph the sunset alignment with Fuji (winter months best)

    Getting There:

    From Zushi Station:
    1. Keikyu Bus to "Hayama" or "Isshiki" stop (15 min, ¥230)
    2. Walk toward the water (5 min)
    3. Beach is directly ahead
    
    From Hayama Town Center:
    - 10-minute walk from the main shopping street
    - Follow signs toward the Imperial Villa

    Insider Tip:

    Arrive before 9 AM on weekdays for the best experience — you may share the beach with only a handful of early-morning swimmers and a few paddleboarders. The light at this hour is soft, and the water is at its calmest.


    2. Morito Beach (森戸海岸)

    The Town Beach — Best Sunset Views

    Location: Central Hayama, near Morito Shrine
    Coordinates: 35.2722°N, 139.5733°E
    Access: 12-min bus from Zushi Station
    Length: ~600 m
    Sand: gray volcanic sand mixed with pebbles
    Water: Calm, shallow entry
    Lifeguards: July–August (limited)
    Beach Huts: ✅ (2–3 seasonal)
    Parking: ¥500–800/day (public lot)

    Morito Beach sits directly in front of Morito Shrine, whose vermilion torii gate and small shrine island create one of Kanagawa’s most photographed coastal compositions. The shrine island — connected to the mainland by a short path at low tide — is a Shinto site dedicated to the sea god, and local fishermen still pray here before heading out.

    The beach is slightly busier than Isshiki because of its central location, but still far quieter than Kamakura’s beaches. The water entry is gradual and sandy, making it a good choice for families with young children.

    Morito Shrine Connection:

    The shrine’s annual summer festival (late July) includes a procession of boats and portable shrines (mikoshi) carried into the surf. This is one of Hayama’s most vibrant community events, and the beach fills with locals in yukata. If your visit coincides with the festival, expect crowds — but the atmosphere is celebratory and welcoming.

    What to Do:

    • Swim in the central swimming zone
    • Walk to Morito Shrine island at low tide
    • Watch sunset from the beach’s western end (Fuji views)
    • Visit the shrine’s main hall for sea-safety amulets

    Getting There:

    From Zushi Station:
    1. Keikyu Bus to "Morito" stop (12 min, ¥230)
    2. Walk toward the shrine (3 min)
    3. Beach is to the left of the shrine entrance
    
    From Isshiki Beach:
    - 10-minute walk along the coastal path

    Insider Tip:

    The beach’s far western end, near the rocky point, is where photographers set up for sunset shots of Mt. Fuji framed by the Morito Shrine torii, Bring a telephoto lens (70–200mm) for the best compression effect.


    3. Shibasaki Beach (芝崎海岸)

    Best for Tide Pooling — Quiet Rocky Shore

    Location: Eastern Hayama, toward Zushi
    Coordinates: 35.2767°N, 139.5811°E
    Access: 10-min walk from Keikyu Shin-Zushi Station
    Length: ~300 m (rocky shoreline)
    Sand: Minimal sand, primarily rock shelves and pebbles
    Water: Clear, shallow pools at low tide
    Lifeguards: ❌ None
    Beach Huts: ❌ None
    Parking: Street parking only (limited)

    Shibasaki is not a swimming beach in the traditional sense — the shoreline is rockier and less forgiving than the sandy crescents of Isshiki and Morito. What it offers instead is the best tide-pooling on Hayama’s coast. At low tide, the rocky shelves reveal shallow pools teeming with small fish, hermit crabs, sea anemones, and the occasional starfish.

    The water clarity is remarkable on calm days — you can see the bottom at 3–4 metres depth. Snorkellers will find small schools of juvenile fish among the rocks, and octopus sometimes hide in crevices.

    What to Bring:

    • Reef shoes or water sandals (essential — sharp barnacles)
    • Snorkel mask (clear water rewards it)
    • Small net or bucket for observing tide pool life (release everything)
    • Waterproof camera or phone case

    What to Do:

    • Tide pool exploration at low tide
    • Snorkelling along the rocky edges
    • Photography of marine life and rock formations
    • Quiet picnicking on the flat rock shelves (bring a mat)

    Getting There:

    From Shin-Zushi Station (Keikyu Line):
    1. Exit toward the coast
    2. Walk straight for 8 minutes
    3. Turn left at the small fishing boat mooring
    4. Shoreline access at the end of the path
    
    From Zushi Station (JR):
    - 20-minute walk south along the coast

    Insider Tip:

    Check the tide tables before visiting — low tide is the magic window. Aim for 1–2 hours before the low tide mark. The best pools are on the eastern side of the beach, where the rock shelves are flattest and the water warms up fastest in the sun.


    4. Chojagasaki Beach (長者ヶ崎海岸)

    Wildest Coast — Rugged Scenery, Fewest People

    Location: Southern Hayama, border with Yokosuka
    Coordinates: 35.2556°N, 139.5867°E
    Access: Bus from Zushi Station + 10-min walk
    Length: ~400 m (rocky coves)
    Sand: Small sandy pockets between rock formations
    Water: Open ocean exposure — stronger currents
    Lifeguards: ❌ None
    Beach Huts: ❌ None
    Parking: ¥500 (small lot, fills early)

    Chojagasaki is Hayama’s wild edge. The coast here is defined by a volcanic rock promontory that juts into Sagami Bay, creating a series of small coves and rocky platforms that feel far removed from the polite beach culture elsewhere in town. The wind is stronger, the waves have more energy, and the scenery is dramatic enough to attract photographers even on overcast days.

    A small Shinto shrine sits on the point itself, dedicated to the protection of local fishermen. The path to the shrine winds through wind-sculpted pine trees and past weathered rock formations that have been shaped by decades of winter swells.

    Swimming Warning:

    Unlike Isshiki and Morito, Chojagasaki has no lifeguards and no designated swimming zone. The water can have sudden drop-offs and stronger currents. Swim here only on calm days, stay close to shore, and never alone, During the official swimming season (July–August), local volunteers sometimes mark safe zones with buoys — look for them before entering.

    What to Do:

    • Photography (sunrise, sunset, storm light)
    • Walk the promontory trail to the shrine
    • Explore the small coves at low tide
    • Picnic on the flat rock terrace near the shrine

    Getting There:

    From Zushi Station:
    1. Keikyu Bus toward "Chojagasaki" or "Yokosuka" (20 min, ¥350)
    2. Get off at "Chojagasaki" bus stop
    3. Walk toward the water (5 min)
    4. Trail to the point starts at the parking area
    
    From Morito Beach:
    - 30-minute walk south along the coastal road
    - Or 10-minute bus ride

    Insider Tip:

    Chojagasaki is at its most beautiful in late autumn and winter, when the air is clearest and Mt. Fuji dominates the horizon from the promontory’s tip. Dress warmly — the wind here is strong even on sunny days, and there is no shelter from the elements.

    Hayama Hidden Beaches Guide 2026 — 4. Chojagasaki Beach


    Practical Information

    How to Get to Hayama Beaches

    From Tokyo Station:
    1. JR Yokosuka Line to Kamakura Station (55 min, ¥1,040)
    2. Transfer to Enoden or JR to Zushi Station (5 min, ¥170)
    3. Keikyu Bus to your chosen beach (10–20 min, ¥230–350)
    Total: ~90 minutes, ¥1,300–1,500
    
    From Yokohama Station:
    1. JR Yokosuka Line to Zushi Station (25 min, ¥420)
    2. Keikyu Bus to beach (10–20 min)
    Total: ~45 minutes, ¥650–800

    Best Way to Get Around

    Bicycle is the ideal way to explore all four beaches in a single day. Rental shops near Zushi Station offer bikes for ¥1,000–1,500/day. The coastal road between Zushi and Chojagasaki is flat and scenic, with wide sidewalks and dedicated bike parking at most beaches.

    What to Bring

    Essential:
    - Water (2 L minimum — no vendors at Shibasaki or Chojagasaki)
    - Sunscreen (SPF 30+, water-resistant)
    - Hat and sunglasses
    - Reef shoes (essential for Shibasaki and Chojagasaki)
    - Towel and change of clothes
    - Cash (many beach huts are cash-only)
    
    Recommended:
    - Snorkel mask (clear water at Shibasaki)
    - Beach umbrella (limited natural shade)
    - Cooler with snacks and drinks
    - Dry bag for valuables
    - Camera (sunset photography at Isshiki)

    Beach Comparison

    Beach Swimming Facilities Crowds Best For
    Isshiki ✅ Excellent ✅ Huts, showers Moderate Swimming, sunset
    Morito ✅ Good ✅ Huts, toilets Moderate Families, photos
    Shibasaki ⚠️ Limited ❌ None Low Tide pooling, snorkel
    Chojagasaki ⚠️ Advanced ❌ None Very low Photography, solitude

    Seasonal Guide

    Summer (July–August):
    - Swimming season (lifeguards at Isshiki and Morito)
    - Beach huts open (mid-July to August 31)
    - Water temperature: 23–27°C
    - Crowded on weekends (arrive before 9 AM)
    - Morito Shrine festival: late July
    
    Autumn (September–November):
    - No lifeguards (swim at your own risk)
    - Clearest Mt. Fuji views start in October
    - Fewer visitors, more peaceful
    - Water still warm through September
    
    Winter (December–February):
    - Best Mt. Fuji visibility
    - Dramatic winter light for photography
    - Too cold for swimming
    - Windy at Chojagasaki
    
    Spring (March–May):
    - Cherry blossoms along the coastal path
    - Water too cold for swimming
    - Perfect for coastal walks and photography
    - Fewer visitors than summer

    Beach Etiquette

    Do's:
    ✅ Carry out all trash (there are fewer bins than public beaches)
    ✅ Respect the neighborhood (beaches are adjacent to residential areas)
    ✅ Shower before entering the water (showers available at Isshiki, ¥100)
    ✅ Check water quality notices posted at beach entrances
    ✅ Support local beach huts (they fund beach maintenance)
    
    Don'ts:
    ❌ No amplified music (sound carries across the bay)
    ❌ No drones over the Imperial Villa area
    ❌ Don't walk on the dune grass (helps prevent erosion)
    ❌ Don't feed the birds (seagulls become aggressive)
    ❌ Don't block narrow access paths with large groups

    Frequently Asked Questions

    Q: Which Hayama beach is best for families with young children?

    A: Isshiki Beach has the calmest water, gradual depth, lifeguards in summer, and beach huts with food and shade. Morito Beach is also family-friendly with easy access and facilities.

    Q: Are the beaches free to visit?

    A: Yes, all beaches are free. Paid parking and paid showers at Isshiki and Morito are the only costs.

    Q: Can I rent snorkel gear or SUP boards?

    A: Not directly at the beaches. Rental shops near Zushi Station SUP boards (¥2,000–3,000/day) and snorkel sets (¥1,000/day). Some beach huts at Isshiki occasionally have limited SUP rental.

    Q: Is there food available at the beaches?

    A: Isshiki and Morito have beach huts during summer (July–August) serving yakisoba, shaved ice, drinks, and light meals. Shibasaki and Chojagasaki have no vendors — bring your own food.

    Q: Which beach has the best sunset view?

    A: Morito Shore for photos with the shrine torii in the foreground. Isshiki Coastline for the classic Fuji-aligned sunset. Chojagasaki for a wilder, more dramatic perspective.

    🌟 Share Your Experience

    Found a quiet cove between these beaches? Tips for Hayseasideeach days? Join our community forum to share your discoveries!


    Hayama Hidden Beaches Guide 2026 — Share Your Experience

    Hayama’s beaches offer something increasingly rare on Kanagawa’s coast: genuine quiet, clean water, and views that haven’t been obstructed by development. Whether you’re swimming at Isshiki, exploring tide pools at Shibasaki, or watching the sunset from Chojagasaki’s wild promontory, the experience is defined by the town’s deliberate restraint — and that is precisely what makes it special.

    For more ways to explore Hayama and the Miura Peninsula, read our Hayama hidden cafes guide, Hayama local cafes guide, and the comprehensive Hayama accommodation guide.


    ⏰ Best Time to Visit

    Early morning (8–10 AM): Peaceful atmosphere, fewer crowds, perfect for photos Late afternoon (4–6 PM): Beautiful lighting, local life, less crowded than midday

    🎯 What I Recommend

    • Don’t rush: Take your time to explore the side streets and hidden spots
    • Talk to locals: They often know the best lesser-known spots that aren’t in guidebooks
    • Try the local specialties: Each area has its own unique food and souvenirs

    Our guide to Hakone Souvenirs Local Specialties has additional tips and recommendations.

    ⚠️ Things to Watch Out For

    • Some shops close on weekdays or have irregular hours
    • Parking can be challenging during peak seasons
    • Cash is still king at many smaller establishments


    Conclusion

    Whether you are planning exploring Hayama for its beach for the first time or returning for another visit, taking a little extra time to go beyond the obvious sights makes all the difference. During my visit to Hayama I went with a rough plan and found that leaving room to wander made the trip far more memorable. I hope this guide helps you build an itinerary that fits your pace, and that your time in Kanagawa leaves you with memories worth coming back for.

  • Hakone Travel Guide 2026 — Ultimate Onsen Resort Guide…

    Hakone Travel Guide 2026 — Ultimate Onsen Resort Guide…

    Hakone (箱根) is Kanagawa’s premier mountain resort destination and one of Japan’s most accessible hot spring getaways from Tokyo, Famous for its natural onsens, panoramic Mount Fuji views, and world-class museums, this volcanic highland area offers one of the most complete travel experiences in Japan — combining relaxation, culture, nature, and adventure in a compact area just 85 minutes from Tokyo Station.
    What sets Hakone apart from other Japanese destinations is its extraordinary diversity within a small geographic area. Within a single day you can soak in a mineral-rich hot spring, ride a ropeway over an active volcanic valley, cruise across a crater lake with Fuji views, explore an open-air sculpture museum, and dine on local yuba cuisine — all connected by an integrated transport loop that is itself a tourist attraction.
    This guide brings together 24 expert articles across six categories to help you plan the perfect Hakone visit, whether you are here for a day trip, a weekend ryokan stay, or a multi-day mountain escape.

    Our guide to Hakone Onsen Tattoo Friendly has additional tips and recommendations.

    Overview

    Hakone was one of the first destinations I explored after moving to Tokyo, and it remains my favorite escape from the city. During my first visit I went straight from Hakone-Yumoto up the Tozan Railway, and I remember standing at Owakudani with the sulfur smoke rising around me, amazed that all of this was only 85 minutes from home. I’ve now visited four times across different seasons, and I recommend spending at least one night in an onsen town like Gora — waking up to a quiet ryokan breakfast before the day-trippers arrive completely changes the experience. When I walked through the transport loop for the first time, I understood why the Hakone Free Pass is worth every yen.

    📍 Getting to Hakone

    Hakone Travel Guide scenery and attractions

    The Hakone Tozan Railway is Japan’s oldest mountain railway, offering stunning views as it climbs 453 meters through lush forest and switchback curves.

    Hakone Travel — detailed view

    Lake Ashi (Ashinoko) is a scenic crater lake formed 3,000 years ago, where sightseeing pirate ships offer panoramic views of the surrounding landscape.

    Hakone Travel Guide — visitor highlights

    The Hakone Ropeway glides over the active Owakudani volcanic valley, famous for its sulfur vents and the legendary kuro-tamago (black eggs).

    Hakone Travel Guide surrounding area and access

    Detailed map showing Hakone’s transport loop — the integrated circuit of train, cable car, ropeway, and cruise that connects all major attractions.

    Our taxi guide explains how to use taxis in Kanagawa, from hailing to payment.
    Hakone is one of the most accessible mountain resorts from Tokyo, with multiple train and bus options connecting the area in about 1.5 hours. The journey itself is part of the experience — especially the scenic Odakyu Romancecar ride through the mountains.

    From Tokyo

    • Odakyu Romancecar: 85 minutes from Shinjuku to Hakone-Yumoto (¥2,470, reserved seat, direct) — the most scenic and comfortable option. See our Odakyu Romancecar guide for booking tips and seat recommendations.
    • JR Shinkansen: 40 minutes to Odawara, then 15 minutes local train to Hakone-Yumoto (¥4,500, covered by JR Pass). Detailed route info in our how to get to Hakone from Tokyo guide.
    • Highway Bus: 2–2.5 hours from Shinjuku to Hakone-Yumoto (¥1,800–2,500, budget-friendly)

    Money-Saving Tickets

    The Hakone Free Pass is the best value by far — covering round-trip transport from Tokyo plus unlimited local transport in Hakone for 2 days. Read our Hakone Free Pass ultimate guide for a full cost comparison, and our Hakone Free Pass guide for a quick overview.

    Ticket Price Coverage Best For
    Hakone Free Pass (Odakyu) ¥5,140 from Shinjuku Round-trip + unlimited Hakone transport (2 days) Most visitors
    Hakone Free Pass (from Odawara) ¥4,000 Unlimited Hakone transport (2 days) JR Pass holders
    Hakone Kamakura Free Pass ¥5,140 Hakone + Kamakura/Enoshima (3 days) Multi-destination trips

    Getting Around Hakone

    Hakone’s unique appeal is its integrated transport loop that connects all major attractions. The loop can be completed in either direction and takes about 3–4 hours without stops:

    1. Hakone Tozan Railway: Switchback train from Hakone-Yumoto to Gora (40 min, scenic mountain views). See our Hakone Tozan Railway guide for the best carriage positions and photo spots.
    2. Hakone Tozan Cable Car: Funicular from Gora to Sounzan (10 min, Japan’s steepest cable car)
    3. Hakone Ropeway: Aerial cable car from Sounzan to Togendai (30 min, panoramic views over Owakudani). Our Hakone Ropeway guide covers wait times, best photo spots, and weather tips.
    4. Hakone Sightseeing Cruise: Pirate ship across Lake Ashi (30 min, iconic Mount Fuji views). Check our Hakone Pirate Ship experience for the best boarding times and deck positions.
    5. Local buses: Connect all stations and attractions within the loop

    📖 Deep dive: How to get to Hakone from Tokyo · Hakone Free Pass ultimate guide · Hakone Tozan Railway guide · Odakyu Romancecar guide · Hakone Ropeway guide · Hakone Pirate Ship experience


    ♨️ Onsen & Ryokan Guide

    Hakone is synonymous with onsen. The area has seven distinct hot spring zones («Hakone Nanayu»), each with different water qualities ranging from clear alkaline waters to sulfur-rich acidic springs. For a complete introduction, see our Hakone onsen complete guide.

    Day Trip Onsens (Under ¥2,000)

    These facilities allow non-guests to bathe without staying overnight — perfect for day-trippers:

    Facility Price Hours Access Features
    Tenzan Onsen ¥1,300 7:00–26:00 10 min bus from Hakone-Yumoto 10 indoor/outdoor baths, sauna
    Hakone Yuryo ¥2,200 10:00–21:00 15 min taxi from Hakone-Yumoto Private outdoor baths, forest views
    Hakone Kamonoyu ¥1,500 10:00–20:00 5 min bus from Gora Traditional wooden bathhouse

    For more options including hidden and less-crowded spots, see our Hakone day trip onsen and Hakone hidden hot springs guides.

    Overnight Ryokan with Private Onsen

    Category Property Price/Night Features
    Luxury Gora Kadan From ¥50,000 Former imperial villa, Michelin-starred dining
    Luxury Hakone Kowakien Ten-yu From ¥40,000 Modern luxury, multiple bath types
    Mid-range Hakone Suishoen From ¥20,000 Lake views, garden baths
    Mid-range Ryokan Kappa From ¥15,000 Traditional atmosphere, kaiseki dinner
    Budget Guesthouse Gora From ¥8,000 Social atmosphere, shared baths

    Onsen Etiquette

    1. No swimsuits — bathing nude is mandatory
    2. Wash thoroughly at shower stations before entering
    3. No towels in the bath — leave on the side or on your head
    4. Tie up long hair before entering
    5. No photography — strictly prohibited in bath areas

    For a deeper understanding of onsen culture and rules, read our Hakone onsen culture & etiquette guide. If you have tattoos, check our advice on tattoo-friendly facilities in the Hakone onsen complete guide.

    📖 Deep dive: Hakone onsen complete guide · Hakone day trip onsen · Hakone hidden hot springs · Hakone onsen culture & etiquette · What to wear in Hakone by season


    🏛 Top Attractions

    Hakone packs an extraordinary number of world-class attractions into a small area. Here are the must-see spots:

    Owakudani (Great Boiling Valley)

    Best for: Volcanic activity, black eggs, Mount Fuji views Discover Mt Fuji’s 5th Station, World Heritage Center & Owakudani volcanic valley on this scenic Hakone day trip

    • Hours: 9:00–17:00 | Admission: Free (ropeway required)
    • Access: Hakone Ropeway to Owakudani Station
    • Highlight: Active volcanic valley with sulfur vents, Famous for «kuro-tamago» (black eggs) boiled in the hot springs — legend says eating one adds 7 years to your life! The volcanic activity creates an otherworldly landscape that is one of Hakone’s most iconic experiences.

    Lake Ashi (Ashinoko)

    Best for: Scenic cruises, Mount Fuji reflection, photography Explore Mt Fuji & Hakone on a full-day trip with sukiyaki lunch, Hakone Cruise, Ropeway & Shinkansen return

    • Hours: 24/7 (cruises 9:00–17:00) | Cruise fee: ¥1,000
    • Access: Hakone-machi or Moto-Hakone
    • Highlight: A beautiful crater lake formed 3,000 years ago, Sightseeing «pirate ships» offer the best Mount Fuji photo opportunities, especially during clear winter mornings.

    Hakone Shrine

    Best for: Spiritual experience, iconic torii gate in water

    • Hours: 9:00–17:00 | Admission: Free
    • Access: 10 min walk from Moto-Hakone bus stop
    • Highlight: Historic Shinto shrine with a red torii gate standing in Lake Ashi — one of the most photographed spots in Kanagawa and a must-visit for anyone exploring the Lake Ashi area.

    Hakone Open-Air Museum

    Best for: Art, sculpture, outdoor experience, family-friendly

    • Hours: 9:00–17:00 | Admission: ¥1,600
    • Access: 2 min walk from Chokoku-no-Mori Station
    • Highlight: Japan’s first open-air museum featuring 120+ sculptures by Picasso, Henry Moore, and more in a beautiful natural setting. Includes a foot bath with mountain views — one of the best family-friendly Hakone activities.

    Pola Museum of Art

    Best for: Impressionist paintings, scenic forest location

    • Hours: 9:00–17:00 | Admission: ¥1,800
    • Access: Bus from Gora or Sengokuhara
    • Highlight: Houses one of Japan’s finest collections of Impressionist and modern art (Monet, Renoir, Picasso) set within a stunning forest-framed building. Part of our best museums in Hakone selection.

    Hakone Checkpoint (Sekisho)

    Best for: History, Edo-period artifacts, samurai-era travel

    • Hours: 9:00–17:00 | Admission: ¥500
    • Access: 15 min walk from Moto-Hakone bus stop
    • Highlight: A meticulously restored Edo-period checkpoint on the old Tokaido road, Fascinating exhibits on samurai-era travel between Edo and Kyoto. See our Hakone checkpoint history and Hakone sekisho history guide for the full story.

    📖 Deep dive: Best museums in Hakone · Hakone Ropeway guide · Hakone Pirate Ship experience · Family-friendly Hakone activities · Hakone checkpoint history · Hakone sekisho history guide


    🚡 Hakone Ropeway & Transport Loop

    The Hakone transport loop is an attraction in itself. The combination of historic railway, steepest cable car in Japan, aerial ropeway over a volcano, and pirate ship cruise is unique worldwide.

    The Complete Loop (3–4 hours)

    1. Hakone Tozan Railway (Hakone-Yumoto → Gora, 40 min): This historic switchback train climbs 453 meters through lush forest, using three switchbacks to navigate the steep terrain. Sit on the right side (direction Gora) for the best views. Full guide →

    2. Hakone Tozan Cable Car (Gora → Sounzan, 10 min): Japan’s steepest funicular with a 200-meter elevation gain. The upper section offers previews of the volcanic landscape ahead.

    3. Hakone Ropeway (Sounzan → Togendai, 30 min): The highlight of the loop. This aerial cable car crosses over Owakudani’s active volcanic valley, offering stunning panoramas of sulfur vents on clear days. On very clear days, Mount Fuji appears directly ahead. Full guide →

    4. Hakone Sightseeing Cruise (Togendai → Hakone-machi, 30 min): The famous «pirate ships» cross Lake Ashi with Mount Fuji as a backdrop. The lower deck is enclosed and heated; the upper deck offers 360-degree views but is windy. Full guide →

    Pro Tips

    • Direction matters: Going clockwise (train first, ropeway second) is more popular and has shorter morning queues at the ropeway
    • Weather check: The ropeway closes in high winds or poor visibility. Check the official website before heading out
    • Best time: Start by 8:30 AM to complete the loop comfortably and avoid the worst crowds
    • Free Pass: All transport in the loop is covered by the Hakone Free Pass

    📖 Deep dive: Hakone Ropeway guide · Hakone Tozan Railway guide · Hakone Pirate Ship experience · Hakone Free Pass ultimate guide


    🥾 Hiking & Nature

    Beyond the main attractions, Hakone offers excellent hiking trails and natural experiences that many visitors miss.

    Hiking Trails

    • Beginner — Lake Ashi Shore Walk: Flat 4 km path from Moto-Hakone to Hakone-machi (1 hour, easy). Perfect for families and casual walkers.
    • Beginner — Old Tokaido Road: Historic paved trail lined with ancient cedar trees between Moto-Hakone and Hakone-machi (40 min, flat). Part of the original Edo-period highway.
    • Intermediate — Hakone Hiking Trails: Forest trails with mountain views connecting areas like Sengokuhara and Owakudani. See our Hakone hiking trails for beginners guide for route maps and difficulty ratings.
    • Advanced — Mount Kamiyama: Challenging 4-hour trek from Gora with panoramic summit views. Requires proper hiking gear and preparation.

    Nature & Conservation

    Hakone’s unique volcanic ecosystem is home to rare alpine plants and wildlife. The area is part of the Fuji-Hakone-Izu National Park, and several conservation programs protect its natural heritage. Read about Hakone nature conservation for eco-friendly travel tips.

    Seasonal Highlights

    • Spring: Cherry blossoms along Lake Ashi, hiking season begins, fresh greenery at the Open-Air Museum
    • Summer: Lake Ashi cruises, fireworks displays, higher hiking trails open, lush green landscapes
    • Autumn: Spectacular foliage at the Open-Air Museum, along the ropeway, and at Lake Ashi (peak: early to mid-November)
    • Winter: Clearest Mount Fuji views of the year, onsen season at its best, fewer crowds

    📖 Deep dive: Hakone hiking trails for beginners · Hakone nature conservation · What to wear in Hakone by season · Hakone 2 days 1 night itinerary


    🍜 Food & Drink Guide

    Hakone’s food scene combines traditional mountain cuisine with fresh local specialties. The region is particularly known for its yuba (tofu skin), freshwater fish, and kuro-tamago (black eggs).

    Must-Try Foods

    • Yuba (Tofu Skin) — Hakone’s most famous specialty. Served fresh (raw with soy sauce and wasabi) or in hot pot dishes at local restaurants. Our Hakone yuba cuisine guide covers the best restaurants and what to order.
    • Kuro-tamago — Black eggs boiled in Owakudani’s sulfuric hot springs. Sold exclusively at Owakudani — a fun souvenir and a Hakone rite of passage.
    • Hakone soba — Buckwheat noodles with mountain vegetables. Many restaurants in the Gora area serve excellent soba with views.
    • Local sake — Brewed with Hakone’s pure spring water. Try a tasting set at any mid-range ryokan.
    • Hakone souvenirs & local specialties — From yuba-based products to local confections, our souvenirs guide covers the best places to shop.

    Cafes & lesser-known spots

    Hakone has a growing cafe culture, with many hidden cafes tucked away in the mountains — perfect for a break between sightseeing. Explore our Hakone hidden cafes guide for the best spots with mountain views and specialty coffee.

    📖 Deep dive: Hakone yuba cuisine guide · Hakone hidden cafes · Hakone souvenirs & local specialties · What to wear in Hakone by season


    🎭 Culture & History

    Hakone’s history as a crossroads on the Tokaido road gives it a unique cultural heritage that complements its natural attractions.

    The Tokaido Road & Hakone Checkpoint

    During the Edo period (1603–1867), the Tokaido highway connecting Edo (Tokyo) and Kyoto passed through Hakone. The Hakone Checkpoint (Sekisho) controlled all traffic on this vital route, inspecting travelers for weapons and preventing the movement of samurai wives (a political hostage system). The restored checkpoint offers a fascinating window into Edo-period travel. See our Hakone checkpoint history and Hakone sekisho history guide for detailed exploration.

    Onsen Culture

    Hakone’s hot spring culture dates back over 1,200 years. The seven traditional hot spring zones (Hakone Nanayu) each developed around different water sources, creating distinct bathhouse cultures. The practice of «toji» (hot spring therapy) was historically prescribed by doctors, and Hakone’s springs were known for their healing properties. Read our Hakone onsen culture guide for the complete cultural background.

    📖 Deep dive: Hakone checkpoint history · Hakone sekisho history guide · Hakone onsen culture


    🗺 Sample Itineraries

    Day Trip from Tokyo (8 hours)

    Time Activity
    7:30 AM Depart Shinjuku on Odakyu Romancecar
    9:00 AM Arrive Hakone-Yumoto, purchase Hakone Free Pass
    9:30 AM Hakone Tozan Railway to Gora
    10:30 AM Hakone Open-Air Museum (1.5 hours)
    12:00 PM Lunch in Gora area (soba or yuba)
    1:00 PM Cable car to Sounzan, then Ropeway over Owakudani
    2:00 PM Ropeway to Togendai, Pirate Ship across Lake Ashi
    3:00 PM Hakone Shrine (30 min walk from Hakone-machi)
    4:00 PM Return bus to Hakone-Yumoto
    5:30 PM Romancecar back to Shinjuku

    Budget: Approximately ¥10,000–12,000 per person (Free Pass + lunch + museum admission)

    Weekend Itinerary (2 Days, 1 Night)

    See our full Hakone 2 days 1 night itinerary for a detailed weekend plan including ryokan stay, kaiseki dinner, and optimal sightseeing sequence.

    Budget-Friendly Options

    Hakone can be expensive, but strategic planning significantly reduces costs. Read our Hakone on a budget guide for money-saving tips including: booking the Free Pass, choosing day-trip onsens under ¥2,000, and bringing packed lunches.

    📖 Deep dive: Hakone 2 days 1 night itinerary · Hakone on a budget guide · Hakone day trip onsen · Hakone crowd avoidance


    💡 Travel Tips & FAQ

    Crowd Avoidance

    Hakone is busiest on weekends, holidays, and during autumn foliage season (November). Visit on weekdays Tuesday–Thursday for the best experience. The ropeway can have 60+ minute waits on busy weekends. See our Hakone crowd avoidance guide for specific timing recommendations.

    Onsen Tips

    • Tattoos: Many onsens prohibit tattoos. Look for «tattoo-friendly» facilities or book a private bath
    • Best time: Early morning (8–10 AM) for fewer crowds at day-trip onsens
    • Hydrate: Drink water or milk after bathing — it’s a Japanese tradition
    • What to bring: Small towel (rental available), toiletries provided

    WiFi & Connectivity

    Free WiFi is available at major stations and tourist information centers. Mountain areas (Owakudani, ropeway) have limited connectivity. Consider a prepaid eSIM for reliable data. Read our Japan eSIM guide and Kanagawa WiFi spots for connectivity options.

    What to Pack

    • Comfortable walking shoes — many paths are uneven mountain terrain
    • Layers — temperature drops significantly at higher elevations (5–10°C cooler than Tokyo)
    • Rain gear — especially June–September (rainy season)
    • Small towel — for day-trip onsens (or rental available)
    • Camera — Mount Fuji views are photo opportunities not to be missed

    Frequently Asked Questions

    Q: Do I need the Hakone Free Pass?
    A: Yes — it covers round-trip transport from Tokyo plus all local transportation in Hakone (train, cable car, ropeway, bus, sightseeing cruise). It saves 20–30% compared to buying individual tickets.

    Q: Can I visit Hakone as a day trip from Tokyo?
    A: Yes, but staying overnight allows you to experience onsen properly and relax. A day trip gives you 5–6 hours in Hakone — enough for the ropeway + pirate ship loop. For a full day plan, see our day trip itinerary above.

    Q: Is Hakone accessible with a JR Pass?
    A: Yes, take the Shinkansen to Odawara Station, then transfer to the local Hakone Tozan Railway. Note that the Hakone Free Pass is a separate purchase.

    Q: When is the best time to see Mount Fuji from Hakone?
    A: Winter months (November–February) offer the clearest views — up to 70% visibility. Summer and rainy season (June–July) often have clouds obscuring the mountain. Early morning (before 10 AM) offers the best chance year-round.

    Q: What is the difference between Hakone Free Pass and Hakone Kamakura Free Pass?
    A: The regular Hakone Free Pass covers 2 days in Hakone only. The Kamakura version adds 3 days with Kamakura/Enoshima access — perfect for combining both areas in one trip.

    Whether soaking in a forest rotemburo or enjoying a modern toji retreat, Kanagawa’s hot springs offer genuine relaxation in settings that range from rustic to refined.

    Conclusion

    exploring Hakone for its onsen can be as relaxed or as packed as you want it to be, and I have found that the best visits leave room for both planning and spontaneity. During my visit to Hakone I went with a rough plan and found that leaving room to wander made the trip far more memorable. Use this guide to sort out the logistics in advance, then let the day surprise you — Kanagawa rewards travelers who stay curious.
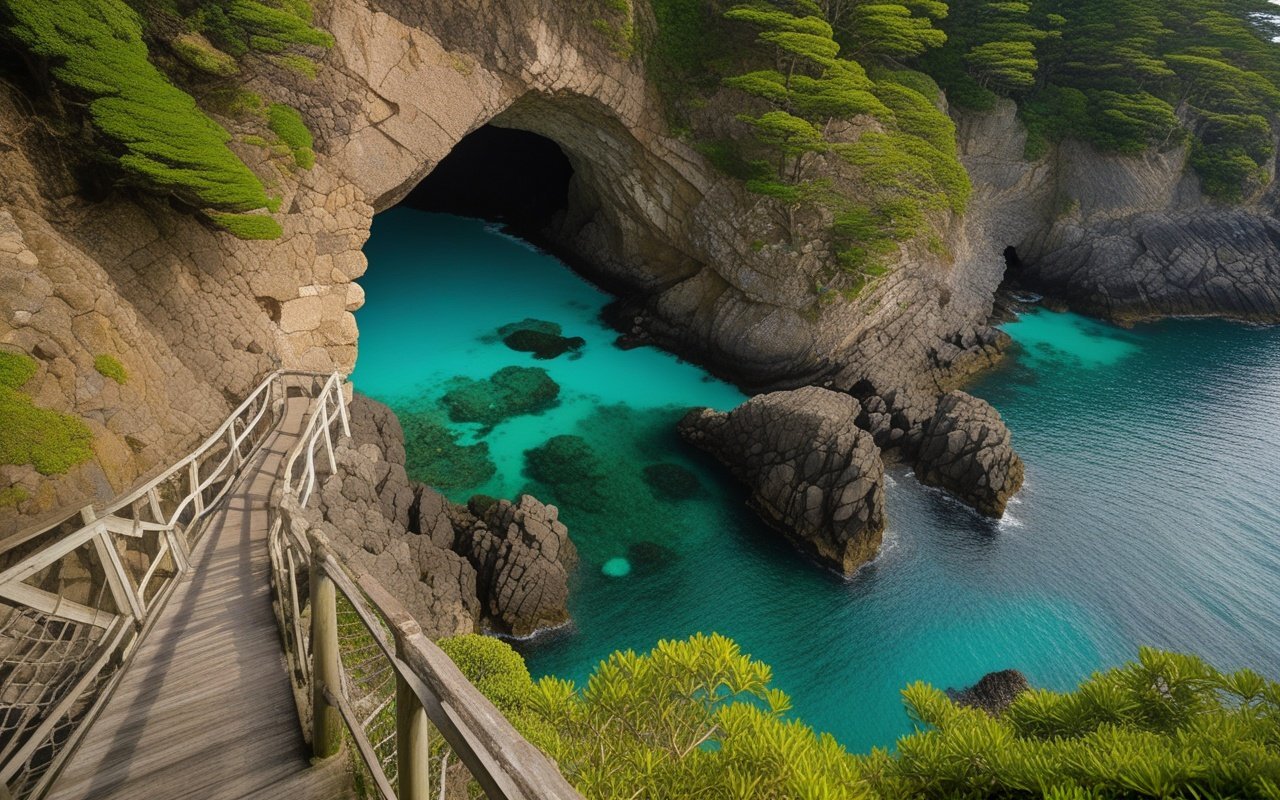
  • Kamakura Travel Guide 2026 — Ultimate Area Guide for…

    Kamakura Travel Guide 2026 — Ultimate Area Guide for…

    Overview

    Plan your perfect visit to Kamakura Travel Guide 2026 — Ultimate Area Guide for… with this comprehensive destination guide, Covering everything from must-see attractions to practical travel tips, this guide helps you make the most of your time in Kamakura. Whether you have a single day or an entire week, discover the best that this Kanagawa destination has to offer.

    📍 Getting to Kamakura

    Kamakura is one of the easiest day trips from Tokyo, with multiple train lines connecting the city in about an hour. Kamakura Travel Guide scenery and attractions

    Must-see Kanagawa destination and viewpoint

    Popular sightseeing spot in Kanagawa

    From Tokyo

    • JR Yokosuka Line: 55–60 minutes from Tokyo Station to Kamakura Station (¥1,040. no transfers)
    • JR Shonan-Shinjuku Line: 60 minutes from Shinjuku to Kamakura Station (¥1,040. direct)
    • Odakyu Line to Enoshima: 65 minutes from Shinjuku to Katase-Enoshima Station (¥650). then Enoden to Kamakura

    Money-Saving Tickets

    • Kamakura Free Pass (Odakyu): Round-trip from Shinjuku + unlimited Enoden rides — best value if arriving via Odakyu
    • JR Kamakura Pass: Unlimited JR train rides in the Kamakura area for 1 day
    • Enoden 1-day Pass: ¥800 for unlimited rides on the nostalgic Enoden tram

    📖 Deep dive: Complete Kamakura access guide · Enoden 1-day Pass guide · Tokyo day trip guide

    Getting Around Kamakura

    The city center is walkable, but you will rely on two key transport modes:

    • Enoden Tram: The iconic green tram that runs between Kamakura and Enoshima along the coast. Essential for reaching Hase (Great Buddha), Inamuragasaki, and Shonan beaches. – Local buses: Useful for temples in the hills (Kencho-ji, Engaku-ji areas) and the Kita-Kamakura district. – Bicycle rental: Flat coastal areas are bike-friendly. Electric bicycles available near Kamakura Station. > 📖 Deep dive: Enoden unlimited guide · Shonan Monorail connection · Bicycle rental guide

    ⛩️ Must-See Temples & Shrines

    Kamakura’s religious sites are the city’s main draw — and with good reason. The concentration of nationally significant temples within walking distance of each other is unmatched in Japan outside of Kyoto and Nara.

    The Big Three (Cannot Miss)

    Site Built Highlights Time Needed Admission
    Tsurugaoka Hachimangu 1063 City’s most important shrine, cherry tree-lined approach 45 min Free
    Kotoku-in (Great Buddha) 1252 13.35m bronze statue, national treasure 30 min ¥300
    Hasedera 736 Hillside temple, cave tunnels 60 min ¥400

    Zen Temples of Kita-Kamakura

    The northern district of Kita-Kamakura is home to several major Zen temples from the Kamakura period:

    • Kencho-ji (1253) — First Zen temple in Japan. National Treasure gate
    • Engaku-ji (1282) — Stunning autumn foliage, massive temple bell
    • Jochi-ji (1283) — Small, off the tourist trail

    Lesser-Known Spots

    • Meigetsu-in (Ajisai-dera) — Famous for hydrangeas in June
    • Tokei-ji — Historic nunnery, pretty bamboo grove
    • Sugimoto-dera — Oldest temple in Kamakura (founded 734)

    📖 Deep dive: Kamakura temple guide · Shrine & temple overview · Hidden temples guide · Tsurugaoka Hachimangu guide · Great Buddha guide · Great Buddha history · Samurai history


    🍜 Food & Drink Guide

    Kamakura’s food scene blends traditional Japanese flavors with modern cafe culture. The city is mainly known for its matcha (green tea) sweets, shirasu (whitebait) cuisine, and creative cafe culture.

    Cafes & Coffee

    Kamakura has one of the highest cafe densities per capita in Japan. The Komachi-dori area near the station has dozens of options, while quieter streets in the north and west offer specialty coffee shops and traditional kissaten.

    Must-Try Foods

    • Matcha soft cream and kakigori — mostly in summer. Kamakura’s matcha desserts are a highlight
    • Kamakura vegetables — Local produce from nearby farms, featured at farm-to-table restaurants
    • Shirasu donburi — Fresh whitebait over rice, a Shonan specialty
    • Kamakure-style curry and Kamakura wagashi (traditional sweets)

    📖 Deep dive: Kamakura cafe guide · Matcha cafe guide · Matcha sweets guide · Wagashi sweets guide · Farm-to-table guide · Street food guide · Kakigori guide


    🏄 Activities & things

    Beyond temples and food. Kamakura offers a wide range of activities that take advantage of its coastal location and natural surroundings.

    Beaches

    • Yuigahama Beach — Kamakura’s main beach, surfable year-round
    • Zaimokuza Beach — Quieter alternative, popular for evening walks
    • Enoshima Beach — Surfing hub with rental shops and lessons

    Hiking & Nature

    Kamakura is surrounded by forested hills with well-marked trails connecting temples. The Daibutsu Hiking Course (2.5 hours) connects Kita-Kamakura to the Great Buddha, passing through bamboo groves and offering panoramic views.

    Photos

    From sunrise at Inamuragasaki Point to the golden hour light at Yuigahama Beach, Kamakura is a photographer’s paradise. The city is mostly photogenic during hydrangea season (June) and autumn foliage (November). > 📖 Deep dive: Best beaches guide · Cycling routes · photos guide · Sunrise photos · Gorge walk · Family spots · Crowd avoidance


    🌊 Enoshima Island

    Connected to the mainland by a 600-meter bridge, Enoshima is a small island with a separate identity from Kamakura, an observation tower with Fuji views, and some of the best sunset spots on the Shonan coast. – Enoshima Shrine — Three-shrine complex dedicated to Benzaiten, goddess of music and art

    • Enoshima Sea Candle — 59.8m observation lighthouse. 360-degree views
    • Iwaya Caves — Sea caves with historical and spiritual significance
    • Samuel Cocking Garden — English-style garden with seasonal flowers

    📖 Deep dive: Enoshima aquarium guide · Enoshima cave exploration · Enoshima sunset


    🏨 Where to Stay

    Kamakura lodging ranges from traditional ryokan to modern hotels and boutique guesthouses. The best area to stay depends on your priorities:

    Area Best For Atmosphere
    Near Kamakura Station First-time visitors, central
    Yuigahama/Zaimokuza Beach lovers, coastal
    Kita-Kamakura Temple enthusiasts, nature lovers Quiet, historic
    Enoshima Ocean views, seafood Resort-like

    📖 Deep dive: Kamakura & Enoshima lodging · Hayama lodging


    📅 Seasonal Guide

    Spring (March–May)

    • Cherry blossoms at Tsurugaoka Hachimangu, and Genjiyama Park
    • Perfect weather for hiking and cycling

    Summer (June–August)

    • Hydrangeas at Meigetsu-in. Hasedera — June peak
    • Beach season July–August at Yuigahama and Enoshima
    • Summer festivals and fireworks

    Autumn (September–November)

    • Autumn foliage at Engaku-ji. Kencho-ji — November peak
    • Pleasant weather, fewer crowds than spring

    Winter (December–February)

    • Hatsumode (New Year visit) at Tsurugaoka Hachimangu
    • Winter lights at Enoshima
    • Clear winter days offer the best Mount Fuji views

    📖 Deep dive: Rainy season hydrangeas · Summer festivals · Night lights · New Year guide · Autumn foliage


    💡 Travel Tips

    Crowd Avoidance

    Kamakura is busiest on weekends, and during hydrangea season (June). Visit on weekdays if possible, arrive before 9 AM. and consider the quieter Kita-Kamakura area if you want to escape the crowds. > 📖 Deep dive: Crowd avoidance guide

    Rainy Day Options

    Kamakura has plenty of indoor attractions: temples with covered halls, the Kamakura Museum of Literature, and the many cafes of Komachi-dori. > 📖 Deep dive: Kanagawa rainy day guide

    Check out our Enoshima Rainy Day Guide guide for detailed information.

    WiFi & Connectivity

    Free public WiFi is available at Kamakura Station and major tourist info centers. For reliable connectivity throughout your visit, consider a prepaid eSIM. > 📖 Deep dive: Japan public WiFi guide · eSIM guide

    Luggage Storage

    Coin lockers are available at Kamakura Station (limited, fills by 10 AM). Several luggage storage shops near the station offer same-day storage. > 📖 Deep dive: Luggage storage guide · Coin locker guide


    Frequently Asked Questions

    Q: Is one day enough for Kamakura?
    A: Yes, one day is enough to see the main attractions (Great Buddha. But two days allows you to add Enoshima, a hike, or beach time without rushing. Q: What is the best time of year to visit?
    A: Late spring (May) and autumn (October–November) offer the best weather and lower crowds. June is peak hydrangea season but also the rainy season. Summer is beach season but very crowded. Q: How much does a Kamakura day trip cost?
    A: Budget about ¥5,000–8,000 per person including round-trip train from Tokyo (¥1,040–1,840), temple admissions (¥1,000–1,500), lunch (¥1,200–2,000), and incidentals. Q: Is Kamakura wheelchair accessible?
    A: Major attractions like Tsurugaoka Hachimangu, the Great Buddha, and Hasedera have accessible paths. However, some hillside temples (Meigetsu-in, Kencho-ji hillside areas) have steps and steep slopes. Q: Can I visit Kamakura and Enoshima in one day?
    A: Yes, but it makes for a packed day. Visit Kamakura in the morning and take the Enoden tram to Enoshima in the afternoon. Skip one of the less essential temples to make time.

    Conclusion

    The details in this guide come from real visits, and the biggest lesson I took away was that the best experiences in Kamakura rarely fit neatly into a checklist. During my visit to Kamakura I went with a rough plan and found that leaving room to wander made the trip far more memorable. Plan the essentials, keep your schedule flexible, and you will leave Kanagawa wanting to return.

  • Hayama & Miura Accommodation Guide 2026 — Coastal…

    Hayama & Miura Accommodation Guide 2026 — Coastal…

    This destination guide covers everything you need to know about visiting this area in Kanagawa. From how to get there to what to see, you will find practical information for a memorable trip.

    Hayama & Miura Accommodation Guide 2026 — Coastal Retreats on the ShShonanoast

    Overview

    Plan your perfect visit to Hayama & Miura Accommodation Guide 2026 — Coastal… with this comprehensive destination guide, Covering everything from must-see attractions to practical travel tips, this guide helps you make the most of your time in Hayama. Whether you have a single day or an entire week, discover the best that this Kanagawa destination has to offer.

    📍 Quick Overview

    • Two distinct coastal areas — Hayama’s marina-side retreats and Miura’s rugged southern coastline
    • From ¥12,000 (minshuku) to ¥40,000+ (luxury seaside) per night
    • 60–90 minutes from Tokyo — the perfect weekend escape from the capital
    • Best for: Couples seeking romance, nature lovers, artists, photographers, sailing enthusiasts
    • Perfect base for exploring the Shonan Coast, Jogashima Island, and the Miura Peninsula’s hiking trails

    Introduction: The Shonan Coast’s Best-Kept Secrets

    While Kamakura and EnKamakuraraw the crowds, the southern Shonan Coast — particularly Hayama and Miura — remains remarkably peaceful. Hayama has long been a summer retreat for Tokyo’s elite (the Imperial Family’s villa is here), while Miura’s rugged coastline offers some of Kanagawa’s most dramatic scenery. Yet both areas remain under the radar for international visitors.

    Hayama & Miura Accommodation Guide scenery and attractions

    Staying overnight here is the secret to experiencing the Shonan Coast at its best. You’ll watch the sunrise paint Sagami Bay in shades of gold and pink, walk empty beaches in the early morning, and dine at restaurants that serve fish caught just hours earlier — experiences day-trippers simply cannot have.

    Why Stay Overnight:

    • Sunrise over Sagami Bay — the eastern coastline offers spectacular morning light
    • Empty beaches — the crowds don’t arrive until 11:00 AM
    • Dinner at local seafood restaurants — the evening catch at Miura’s harborside eateries
    • Stargazing along the coast — minimal light pollution compared to Yokohama or Kamakura
    • Weekend farmers markets — Hayama’s Sunday market is a local institution

    1. Hayama — Elegance & Coastal Sophistication

    Best for: Couples, romantics, artists, sailors, food lovers

    Hayama & Miura Accommodation — detailed view

    Aspect Detail
    Vibe Refined, coastal, relaxed elegance
    Access 30 min bus from Zushi Station (JR Yokosuka Line)
    Price Range ¥15,000–¥40,000/night
    Best For Romantic escapes, couples, luxury seekers

    Hayama is often called the “Hamptons of Japan” — a stretch of coastline where Tokyo’s wealthy maintain vacation homes alongside exclusive restaurants, art galleries, and a world-class marina. The atmosphere is sophisticated but relaxed: think linen trousers and sun hats rather than evening gowns and tuxedos. The Imperial Family’s villa is located here, and the area’s restrained elegance reflects this connection.

    Luxury Seaside

    Hayama Hotel Otowa no Mori

    Price: From ¥35,000/night (double)
    Rooms: 42
    Features: Forest garden, private onsen baths, kaiseki dining, art gallery
    Access: 10 min taxi from Zushi Station
    Best For: Romantic escapes, special occasions, nature immersion

    Nestled in a forested hillside overlooking Sagami Bay, Otowa no Mori is Hayama’s most exclusive accommodation. The hotel is designed around the concept of shinrin-yoku (forest bathing) — floor-to-ceiling windows bring the surrounding woodland into every room, and the private onsen baths use natural spring water. The kaiseki dinner is a multi-course journey through Shonan’s seasonal ingredients, with an emphasis on locally caught seafood and Hayama-grown vegetables.

    The garden is a work of art in itself — designed by a renowned landscape architect, it features meandering paths, a koi pond, and viewing platforms that capture the ocean in the distance. Afternoon tea here (¥4,500) is available to non-guests and is worth the trip alone.

    Book Hayama Hotel Otowa no Mori on Klook for exclusive rates and availability → Check prices and book here

    Why book on Klook: Otowa no Mori is a popular choice for weekend getaways and books out weeks in advance. Klook often has last-minute availability when direct booking sites show full occupancy.

    Mid-Range Boutique

    Hayama Inn the Sea

    Price: From ¥18,000/night (double)
    Rooms: 12
    Features: Ocean-view rooms, bicycle rental, restaurant
    Access: 5 min walk from Hayama-Minato bus stop
    Best For: Couples, cyclists, surfers

    A boutique inn with a relaxed, beachy atmosphere. Each room has a different design theme, but all feature ocean views and private balconies. The ground-floor café serves excellent coffee and homemade pastries, and the restaurant offers a seafood-focused dinner menu at reasonable prices (¥4,000–6,000 for a full course). Bicycle rental is available — the ride along the Hayama coastline to Morito Beach is one of the most scenic in Kanagawa.

    Budget-Friendly

    Hayama Guesthouse Umi

    Price: From ¥5,500/night (dorm), ¥12,000 (private)
    Rooms: 3 dorm rooms + 2 private rooms
    Features: Shared kitchen, social atmosphere, surfboard storage
    Access: 8 min walk from Hayama-Minato bus stop
    Best For: Budget travelers, solo adventurers, surfers

    A friendly guesthouse popular with the surfing community. The private rooms are simple but spotless, and the common room is genuinely social — expect to share travel stories over evening tea. Surfboard storage is available for ¥500/night. The guesthouse also offers towel rental and has a small convenience store within a 2-minute walk.

    ⚠️ Hayama Watchpoints

    • Dining reservations: Hayama’s best restaurants require reservations 1–2 weeks in advance, especially on weekends. Ask your hotel to book for you
    • Limited nightlife: Hayama is quiet after 9:00 PM. If you want evening entertainment, stay in Yokosuka or Kamakura instead
    • Bus schedules: Buses from Zushi Station to Hayama run every 20–30 minutes but stop around 9:00 PM. Check the last bus time
    • Seasonal rates: July–August rates at Otowa no Mori can be 50% higher than the off-season

    2. Southern Miura Coast — Rugged Beauty & Seclusion

    Best for: Nature lovers, hikers, solitude seekers, photographers

    Aspect Detail
    Vibe Untamed, dramatic, peaceful
    Access 40–50 min bus from Yokosuka-Chuo Station
    Price Range ¥12,000–¥25,000/night
    Best For Hiking, photography, digital detox

    The southern Miura coast is completely different from Hayama’s refined elegance. This is raw, untamed coastline — dramatic sea cliffs, hidden coves where fishermen mend their nets, and shrines perched on rocky outcrops. Accommodation here is limited but special: small inns and minshuku where the owners know the tides and the best fishing spots.

    Coastal Retreat

    Zekkei Seaside Nahama

    Price: From ¥18,000/night (double)
    Rooms: 18
    Features: Direct beach access, terrace with ocean views, fresh seafood dining
    Access: 15 min walk from Keikyu-Oppama Station (shuttle available)
    Best For: Couples, photographers, coastal walkers

    Perched directly on the Nahama coast, this inn offers one of the most spectacular oceanfront settings in Kanagawa. The rooms are simple in design — white walls, natural wood, and floor-to-ceiling windows that frame the Pacific horizon — but the experience is anything but simple. Fall asleep to the sound of waves and wake up to a sunrise that turns the ocean into liquid gold.

    The restaurant specializes in freshly caught seafood from the Miura Peninsula, with an emphasis on simple preparations that let the quality of the ingredients shine. The sashimi breakfast (¥1,200 supplement) is worth waking up for — the fish was likely swimming just hours before you eat it.

    Book Zekkei Seaside Nahama on Klook — the best views on the Miura coast → Check rates and availability

    ⚠️ Southern Miura Watchpoints

    • Limited dining: The area around Nahama has few restaurants outside the inn. Plan to eat at your accommodation or bring supplies from Yokosuka
    • No convenience stores: Stock up on snacks and drinks before heading south from Yokosuka
    • Mobile reception: Can be spotty along the coast. Download maps in advance
    • Weather: The coast is exposed to Pacific weather systems. Check conditions before hiking

    📊 Quick Comparison Table

    Area Budget Range Best For Access from Tokyo Atmosphere
    Hayama ¥5,500–¥40,000 Romance, luxury, art 90 min Refined, elegant
    Southern Miura ¥12,000–¥25,000 Nature, hiking, solitude 90 min Rugged, peaceful

    💡 Booking Tips & Strategies

    Seasonal Pricing Calendar

    Season Price Impact Booking Window
    Jan–Feb Low 1 week ahead
    Mar–Apr Moderate 2–3 weeks ahead
    May (Golden Week) Very high 2–3 months ahead
    Jun Low (rainy season) 1 week ahead
    Jul–Aug Very high (peak beach season) 1–2 months ahead
    Sep Moderate 2 weeks ahead
    Oct–Nov Moderate (fall foliage) 2–3 weeks ahead
    Dec Low 1 week ahead

    How to Choose

    Choose Hayama if: You want refined coastal luxury, romantic atmosphere, and access to excellent restaurants and art galleries. Otowa no Mori is unbeatable for a special occasion.

    Choose Southern Miura if: You want dramatic coastal scenery, hiking access, and true seclusion. Zekkei Seaside Nahama delivers the quintessential Miura coast experience.

    🚗 Access from Major Hubs

    From To Hayama To Southern Miura
    Tokyo (Shinjuku) 90 min (JR + bus) 100 min (JR + Keikyu + bus)
    Yokohama 60 min (JR + bus) 45 min (Keikyu + bus)
    Kamakura 40 min (bus) 50 min (Keikyu + bus)
    Car (from Tokyo) 60 min (via Yokohama-Yokosuka Road) 70 min (via national routes)

    Car Rental Recommendation

    A car transforms a Hayama or Miura stay — you can explore hidden coves, stop at roadside seafood stalls, and visit the peninsula’s lighthouses and viewpoints without waiting for buses. Book a rental car via Klook for competitive rates with English-language support.


    🏨 Sample Itineraries by Travel Style

    Romantic Weekend Escape (2 nights, ¥50,000–80,000 total)

    Night 1: Hayama Hotel Otowa no Mori — ¥35,000+
      → Afternoon: Forest bath in hotel garden
      → Evening: Kaiseki dinner + private onsen
      → Book: Stay at Hayama Hotel Otowa NO Mori — a peaceful forest retreat in the Shonan coastal area
    
    Night 2: Zekkei Seaside Nahama — ¥18,000+
      → Morning: Hayama Marina walk + café breakfast
      → Afternoon: Drive to Miura coast viewpoints
      → Book: Experience Zekkei Seaside Nahama — a stunning coastal resort on the Miura Peninsula

    Nature & Hiking Weekend (2 nights, ¥36,000–50,000 total)

    Night 1–2: Zekkei Seaside Nahama — ¥18,000/night
      → Day 1: Southern Miura coastal hike
      → Day 2: Jogashima Island day trip
      → Evening: Fresh seafood dinner at the inn

    Budget-Friendly Beach Break (2 nights, ¥24,000–35,000 total)

    Night 1–2: Hayama Guesthouse Umi (private) — ¥12,000/night
      → Day 1: Hayama beaches + Morito Island walk
      → Day 2: Bicycle ride along the coast
      → Evening: Cook at the guesthouse shared kitchen

    🔗 Related Articles


    Frequently Asked Questions

    Q: Is Hayama beach suitable for swimming?

    A: Yes — Morito Beach and Isshiki Beach are popular swimming spots in summer. Both have lifeguards during July–August. Otowa no Mori and other hotels can provide beach access information.

    Q: Can I visit the Imperial Villa in Hayama?

    A: The Imperial Villa grounds are open to the public on limited dates (usually a few days per month). Reservations are required and must be made through the Imperial Household Agency website. Your hotel concierge can help with the booking process.

    Q: Do I need a car to explore Hayama and Miura?

    A: Not strictly necessary, but highly recommended. Public buses connect the main towns but run infrequently (every 30–60 minutes). A car gives you the freedom to explore hidden spots at your own pace.

    Q: Which is better for a romantic getaway — Hayama or Miura?

    A: Hayama for classic romance (luxury hotels, fine dining, sunset walks). Southern Miura for adventure romance (dramatic coastlines, private coves, stargazing). Otowa no Mori is the top choice for special occasions; Zekkei Seaside Nahama is better for couples who love nature.

    Q: What’s the best time of year to visit?

    A: May–June and September–October offer the best weather — warm enough for outdoor activities without the humidity of midsummer. July–August is beach season but crowded and expensive. Winter (December–February) is quiet and affordable but many restaurants close on weekdays.


    Last Updated: May 28, 2026
    Written by: Anaba OffJapan Editorial Team
    Prices verified: Spring 2026 (subject to seasonal change)


    Hayama and the Miura coast offer two distinctly different accommodation experiences, united by spectacular coastal scenery and a pace of life that feels worlds away from Tokyo. Whether you choose the refined elegance of Hayama Hotel Otowa no Mori, the dramatic oceanfront setting of Zekkei Seaside Nahama, or a budget-friendly guesthouse, staying overnight on the Shonan Coast reveals the region at its most beautiful — quiet, uncrowded, and deeply connected to the sea. Book your Hayama or Miura accommodation through Klook for the best rates and availability.


    Conclusion

    The details in this guide come from real visits, and the biggest lesson I took away was that the best experiences in the Miura Peninsula rarely fit neatly into a checklist. During my visit to the Miura Peninsula I went with a rough plan and found that leaving room to wander made the trip far more memorable. Plan the essentials, keep your schedule flexible, and you will leave Kanagawa wanting to return.

  • Narita Express N’EX Complete Guide: Round-Trip from 2026

    Narita Express N’EX Complete Guide: Round-Trip from 2026

    Narita Express N’EX Complete Guide: Round-Trip from Narita Airport to Tokyo, Shinagawa, Shibuya & Yokohama

    Overview

    Introduction

    The Narita Express N’EX is JR East’s premier airport limited express, offering direct connections from Narita Airport to major Tokyo hubs.

    The train features comfortable 2×2 seating with generous legroom, power outlets, and dedicated luggage storage — ideal for travelers with suitcases.

    N’EX trains run every 30 minutes during peak hours, serving both Terminal 1 and Terminal 2·3 at Narita Airport with direct services to central Tokyo.

    Narita Express N'EX Complete Guide: Round surrounding area and access

    Narita Express N'EX Complete Guide: Round scenery and attractions

    Narita Express N'EX Complete Guide: Round detailed view and features

    Narita Express N'EX Complete Guide: Round — visitor highlights

    The N’EX is one of the few airport trains offering direct service to Yokohama Station, eliminating the need for transfers at Tokyo Station.

    The Narita Express (N’EX) is JR East’s premier limited express train connecting Narita Airport to major stations across the greater Tokyo Area. Whether you’re heading to Tokyo Station, Shinagawa, Shibuya, Shinjuku, or even Yokohama, the N’EX offers a comfortable, reliable, and efficient transfer from the airport.

    This guide covers everything you need to know — from fares and schedules to seat types and the best way to book your round-trip ticket. What particularly impressed me during my visit was how strongly the local character remains preserved.

    Why Choose the Narita Express?

    The N’EX stands out among airport transfer options for several reasons:

    Feature N’EX Keisei Skyliner Airport Limousine Bus Taxi
    Tokyo Station ~53 min ~60 min (via Nippori) ~65 min ~60 min
    Shinjuku ~80 min ~75 min (via Nippori) ~75 min ~70 min
    Yokohama ~90 min Transfer required ~90 min ~80 min
    Frequency Every 30 min Every 20-40 min Every 15-30 min On-demand
    Luggage space ✅ Dedicated ✅ Dedicated ❌ Limited ✅ Trunk
    Guaranteed seat ✅ Reserved ✅ Reserved ❌ First-come ✅ N/A
    Wi-Fi ✅ Free ✅ Free ❌ Varies Free
    Power outlets ✅ Most cars ✅ Some cars

    Book your N’EX Round-Trip Ticket on Klook →


    Routes & Destinations

    The N’EX serves two main airport terminals at Narita (Terminal 1 and Terminal 2·3) and connects to the following stations:

    Direct Service to Central Tokyo

    Destination Approx. Time from Terminal 1 Notes
    Tokyo Station 53 min Main hub, direct connection to Shinkansen
    Shinagawa 64 min Gateway to Shinkansen (Osaka, Kyoto)
    Shibuya 75 min Direct to Shibuya Scramble, Shibuya Sky
    Shinjuku 80 min Direct to west side, easy transfer to Chuo Line
    Ikebukuro 68 min Direct access via Yamanote connection

    Direct Service to Yokohama

    The N’EX also runs directly to Yokohama — one of the few airport trains that does so without a transfer:

    Destination Approx. Time from Terminal 1
    Yokohama Station 90 min
    Musashi-Kosugi 80 min

    Tip: If you’re staying in Yokohama for the first part of your trip, the direct N’EX service eliminates the hassle of changing trains at Tokyo Station. This alone saves 20-30 minutes compared to other transfer options.


    Fares & Tickets

    N’EX Tokyo Round-Trip Ticket (最お得)

    For most travelers visiting the Tokyo area, the N’EX Round-Trip Ticket offers the best value:

    Ticket Type Adult Child (6-11)
    N’EX Round-Trip (Tokyo area) ¥5,070 ¥2,530
    One-way to Tokyo (standard fare) ¥3,070 ¥1,530
    One-way to Yokohama (standard fare) ¥4,390 ¥2,190

    The round-trip ticket is valid for 14 days and covers travel from Narita Airport to any station within the N’EX Tokyo Round-Trip zone (Tokyo, Shinagawa, Shibuya, Shinjuku, Ikebukuro, and others).

    Savings: The round-trip ticket saves you approximately ¥1,070 compared to buying two one-way tickets. Plus, it includes a reserved seat guarantee on both journeys — essential during peak season.

    Get your N’EX Round-Trip Ticket here →

    IC Card (Suica / Pasmo)

    You can also use an IC card to board the N’EX, but you’ll need to purchase a limited express supplement ticket separately from the ticket machine. The fare + supplement is the same as the standard fare.

    Japan Rail Pass

    The N’EX is fully covered by the Japan Rail Pass. If you plan to travel beyond Tokyo (e.g., Kyoto, Osaka, Hiroshima), the JR Pass offers extraordinary value.


    Schedule & Frequency

    The N’EX operates from early morning to late evening:

    Direction First Train Last Train Frequency
    Narita → Tokyo ~6:15 AM ~9:30 PM Every 30 min daytime
    Tokyo → Narita ~5:45 AM ~7:50 PM Every 30 min daytime

    Most trains run every 30 minutes during peak hours and every 60 minutes during off-peak periods.

    Peak Hours

    The N’EX gets busy during:

    • Morning (7:00-9:00): Outbound from Tokyo to Narita (departures)
    • Afternoon (13:00-15:00): Arrivals from Narita to Tokyo
    • Evening (17:00-19:00): Outbound from Tokyo

    Recommendation: Book the round-trip ticket in advance during cherry blossom season (late March-April) and Golden Week (late April-early May) to secure your seat.


    Onboard Experience

    Seats & Comfort

    The N’EX features comfortable 2×2 seating with generous legroom — significantly more spacious than a standard commuter train. Each seat comes with:

    Reclining seat with ample legroom
    Tray table (great for working or snacking)
    Power outlet (100V AC) at every seat pair
    Overhead luggage rack + dedicated luggage space at car ends
    Free Wi-Fi (JR-EAST FREE Wi-Fi)
    Reading light
    Coat hook and storage pocket

    Luggage

    Large suitcases (up to 160cm total dimensions) can be stored in the dedicated luggage areas at the end of each car. Unlike some other airport trains, there’s no reservation requirement for luggage space on the N’EX.

    Food & Drink

    There’s no food service on the N’EX, but you can bring your own food and drinks onboard. Consider picking up an ekiben (station bento box) at Narita Airport’s extensive food court before boarding.


    How to Book

    Option 1: Book Online in Advance (Recommended)

    The easiest way is to book your N’EX round-trip ticket online before you arrive:

    Book N’EX Round-Trip Ticket on Klook →

    Benefits of booking online:

    • Guaranteed seat — No risk of sold-out trains
    • Skip the line — Go straight to the ticket machine with your voucher
    • Best price — Official JR fare, no markup
    • 14-day validity — Flexibility for your return journey
    • Instant confirmation — Get your QR code immediately

    Option 2: Purchase at the Airport

    You can buy tickets at JR East ticket offices (Midori-no-Madoguchi) at Narita Airport:

    • Terminal 1: JR East Ticket Office (B1F, near the JR gate)
    • Terminal 2·3: JR East Ticket Office (B1F, follow signs)

    Option 3: Suica + Supplement

    If you have an IC card, you can board directly but must purchase a limited express supplement ticket from the ticket machine before boarding.


    Tips for a Smooth Journey

    🚆 Boarding the Train

    1. Arrive at the platform 5-10 minutes before departure
    2. Check the car number on your ticket — each car stops at a specific position
    3. Store large luggage in the designated areas
    4. Find your seat — seats are numbered clearly (Row A is window, Row D is aisle)
    5. Enjoy the ride — the train departs punctually

    🔄 Return Journey

    1. Your round-trip ticket is valid for 14 days
    2. Reserve your return seat at any JR East ticket office or ticket machine
    3. Allow at least 2.5-3 hours between your flight departure and the N’EX arrival at Narita
    4. The last N’EX to Narita departs Tokyo around 7:50 PM — plan accordingly!

    🎒 Recommended Items

    Item Why
    Wi-Fi rental N’EX has free Wi-Fi, but coverage is better with a pocket Wi-Fi
    Snacks/drink No onboard service — bring your own
    Power bank Power outlets are available, but a backup is always helpful
    IC Card For onward travel from your destination station

    📱 Useful Apps

    • JR East App: Real-time train information and platform numbers
    • Google Maps: Route planning and real-time transit data
    • Klook App: Access your booking QR code instantly

    Connecting from N’EX to Other Transport

    To Shinkansen (Bullet Train)

    Destination Transfer at Total time
    Kyoto/Osaka Tokyo Station +2h15m
    Nagoya Tokyo Station +1h40m
    Sendai Tokyo Station +1h30m
    Kanazawa Tokyo Station +2h30m

    The Yamanote Line from Shinagawa or Tokyo Station connects to the Shinkansen platforms easily.

    To Local Transit

    From station Lines available
    Tokyo Yamanote, Keihin-Tohoku, Chuo, Sobu, Marunouchi Subway
    Shinagawa Yamanote, Keihin-Tohoku, Tokaido Main, Asakusa Subway
    Shibuya Yamanote, Saikyo, Shonan-Shinjuku, several subway lines
    Shinjuku Yamanote, Chuo, Saikyo, Odakyu, Keio, several subway lines
    Yokohama Keihin-Tohoku, Yokohama Subway, Minatomirai Line

    N’EX vs. Other Airport Transfers

    Transfer Time to Tokyo Cost Best For
    N’EX 53 min ¥3,070 one-way Travelers with luggage, comfort seekers
    Keisei Skyliner 36 min to Nippori ¥2,570 one-way Speed to Ueno/Asakusa/Northern Tokyo
    Airport Limousine Bus 65-120 min ¥3,200 one-way Direct to hotels, late arrivals
    Taxi 60-80 min ¥20,000+ Groups of 3+, late-night arrivals
    Keisei Access Express 65 min to Nippori ¥1,330 one-way Budget travelers

    Bottom line: If you’re heading to Shinagawa, Shibuya, Shinjuku, or Yokohama — or if comfort and guaranteed seating matter to you — the N’EX is the clear winner. For speed to Ueno or Asakusa, choose the Skyliner. For budget, the Access Express is unbeatable.


    The Anaba Take

    After years of traveling to and from Narita Airport, the N’EX remains our go-to recommendation for travelers heading to Shibuya, Shinjuku, or Yokohama. The combination of guaranteed seating, generous luggage space, and stress-free direct service to these hubs makes it worth the premium over the local train options.

    Pro tip: Book your round-trip ticket online before you arrive. The QR code exchange at Narita Airport takes under 2 minutes, and you’ll have peace of mind knowing your seat is reserved both ways — especially valuable if you’re arriving on a late-afternoon flight or departing during peak season. Secure your N’EX Round-Trip Ticket →

    Frequently Asked Questions

    Q: Is the Narita Express the best option for first-time visitors arriving at Narita?
    A: For travelers heading to Shinagawa, Shibuya, Shinjuku, or Yokohama, yes — the N’EX offers the most stress-free experience with guaranteed seating, luggage space, and direct service. For those going to Ueno or Asakusa, the Keisei Skyliner is faster and cheaper. Book the round-trip ticket online before arrival to skip the ticket line.

    Q: How much luggage can I bring on the N’EX?
    A: The N’EX has dedicated luggage areas at each car end for suitcases up to 160cm total dimensions. No advance reservation is needed for luggage space — first-come, first-served, During peak seasons (Golden Week, cherry blossom), arrive early to secure luggage space. Carry-on bags fit in the overhead rack.

    Q: What happens if I miss my N’EX train?
    A: If you have a reserved seat ticket, go to any JR East ticket office (Midori-no-Madoguchi) to exchange it for the next available train free of charge, subject to seat availability. N’EX trains run every 30 minutes during peak times. Non-reserved round-trip tickets are valid on any N’EX within the 14-day validity period.

    Q: Can I use my Suica/Pasmo IC card on the N’EX?
    A: Yes, you can use an IC card for the base fare, but you must also purchase a limited express supplement ticket from the ticket machine before boarding. The total cost equals the standard fare. For most travelers, the round-trip ticket (¥5,070) offers better value and includes seat reservation.

    Q: Is the N’EX accessible with a wheelchair or stroller?
    A: Yes, the N’EX is fully wheelchair accessible. Wheelchair-accessible seating is available in car 4 (Tokyo-bound) or car 8 (Narita-bound). Station staff at Narita Airport will assist with boarding if requested. Strollers can be folded and stored in the luggage area. Elevators are available at all N’EX-served stations. . .

    With a little preparation and these insider tips, you can focus on what matters most: immersing yourself in the beauty and culture of Kanagawa.

    Conclusion

    The details in this guide come from real visits, and the biggest lesson I took away was that the best experiences in Kanagawa rarely fit neatly into a checklist. During my visit I went with a rough plan and found that leaving room to wander made the trip far more memorable. Plan the essentials, keep your schedule flexible, and you will leave Kanagawa wanting to return.